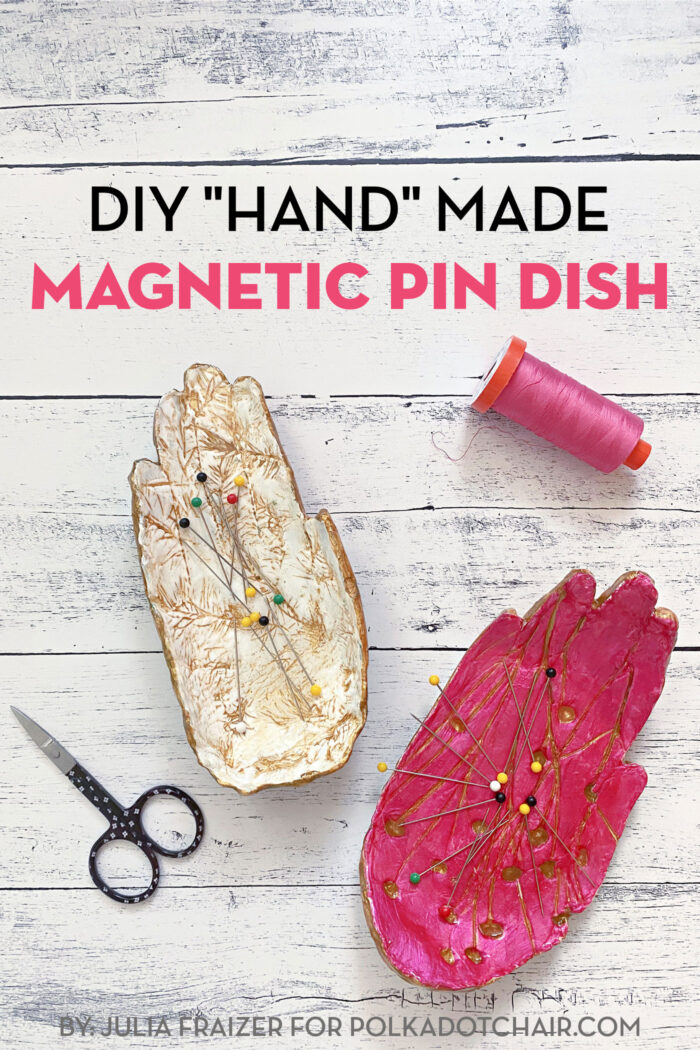
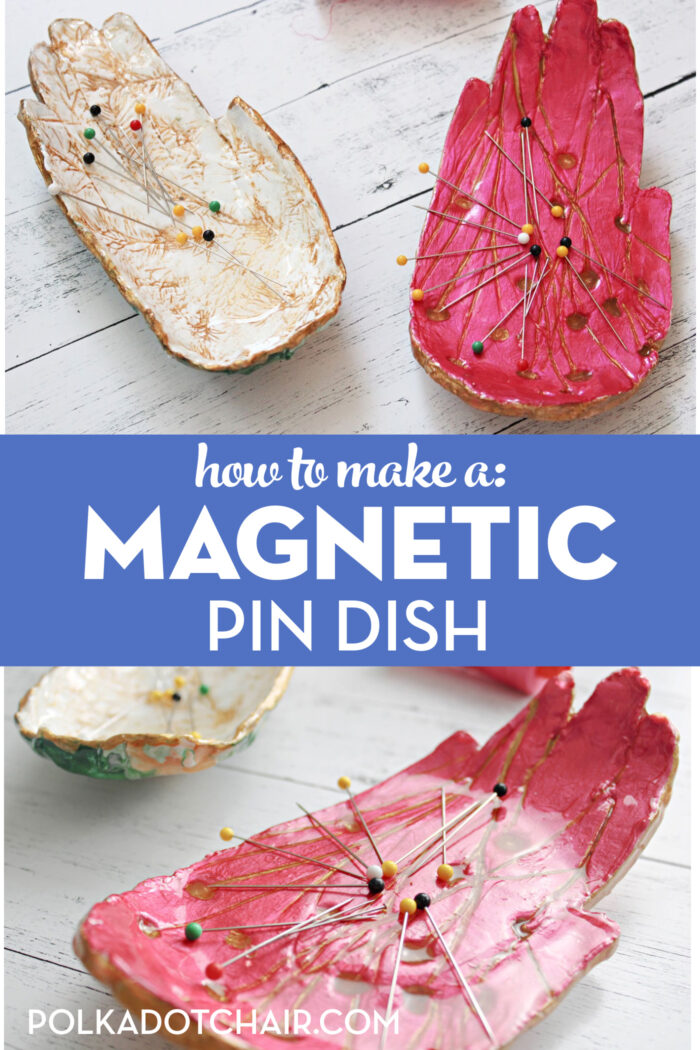
DIY Hand Made Magnetic Pin Dish
Learn how to make a magnetic pin cushion using our free tutorial. In this tutorial. You’ll learn how to create a DIY magnetic pin dish using air-dry clay! Customize your dish using botanical imprints in the clay or paint pouring!
Hello friends! It’s Julia from Bayhill Studio. I’m excited to bring a handmade, little bit quirky, one-of-a-kind project to you today that will make the perfect unforgettable gift for any seamstress in your life.
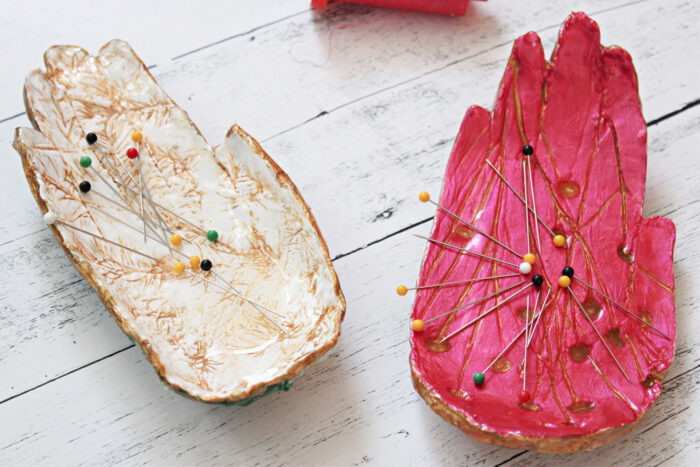
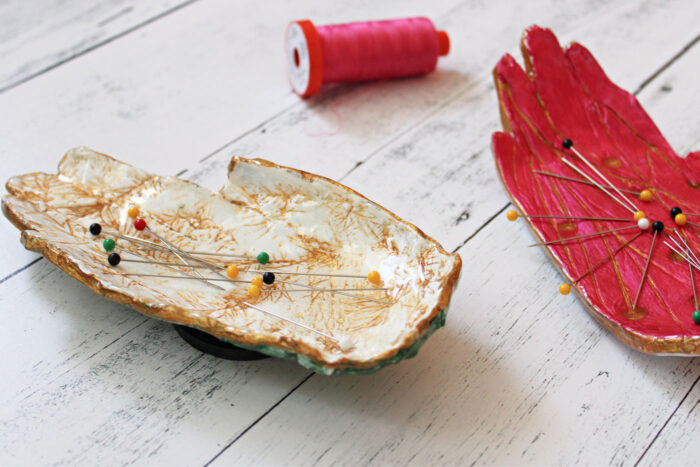
These little “Hand” Made Magnetic Pin Dishes are a handy and decorative way to contain loose pins while you are sewing. I made two dishes – one using my hand, and the other using my daughter’s hand. These would be so adorable to make using the hands of children or grandchildren, don’t you think?
You can customize each dish with unique designs using simple household objects like the tines of a fork, buttons, or even plants like I used in my dishes.
To make a “Hand” Made Magnetic Ring Dish, you will need:
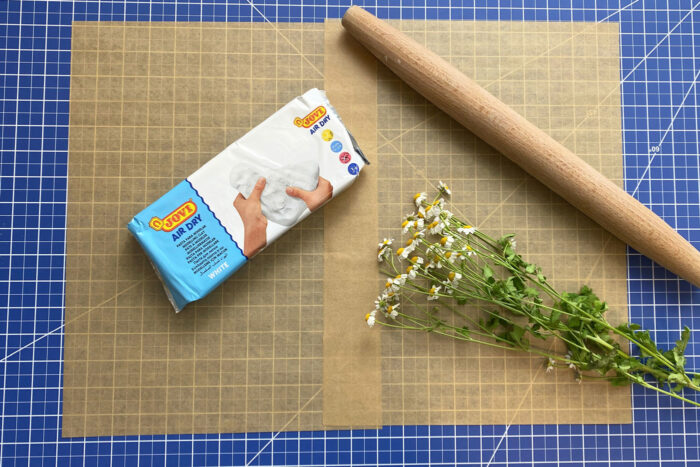
Project Supplies
- Air Dry Clay
- 2” x ½” Ceramic Magnet
- Rolling Pin
- Resin (optional)
- Acrylic Paints
- Hot glue gun (or strong adhesive like E6000)
Project Instructions
Step One: Roll out and Imprint the Clay
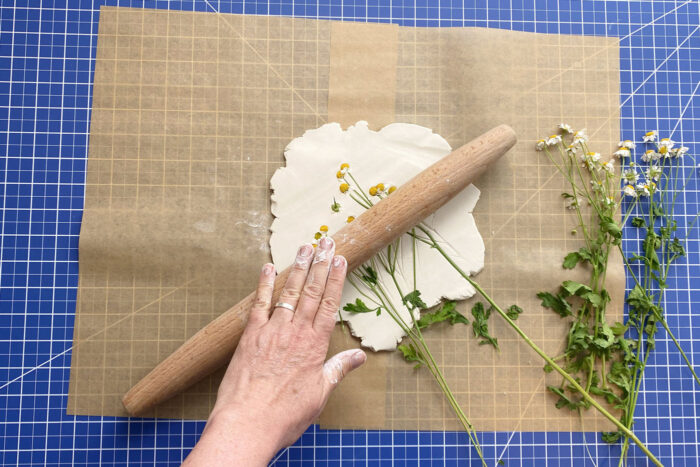
Begin by rolling out a piece of clay so it is approximately ¼” thick and a little larger than the person’s hand you will be using as the template. If you are using plants as part of your design, now is the time to arrange them on the clay.
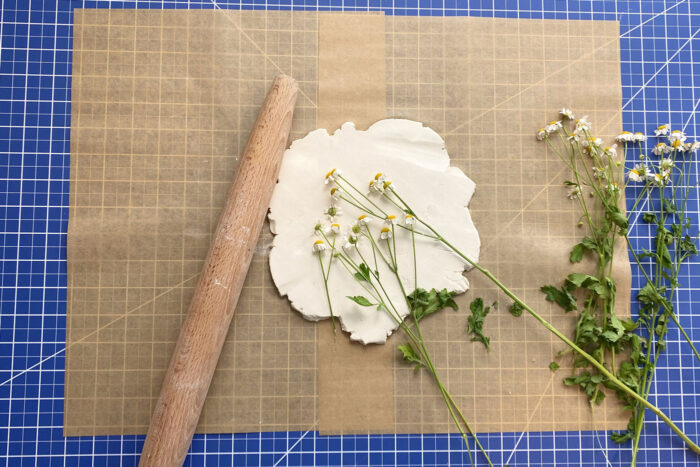
Use the rolling pin to gently press the plants into the clay. Here I am using chamomile flowers.
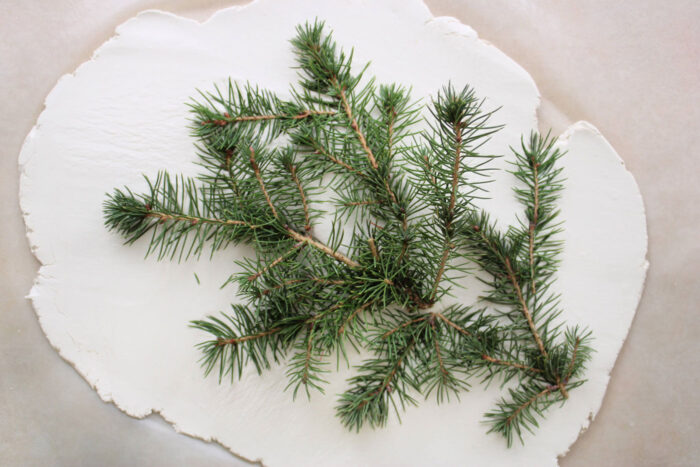
For my second dish, I opted to use pine branches.
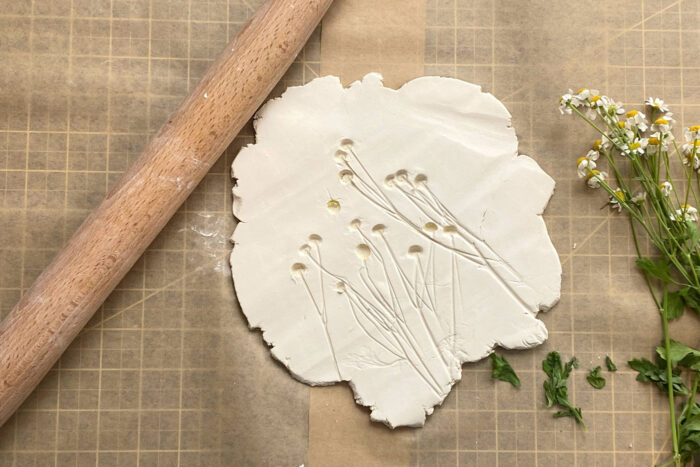
Carefully remove the plants.
Step Two: Trace the Shape
Place the person’s hand on the clay and cut out the shape, using a butter knife or sharp tool.
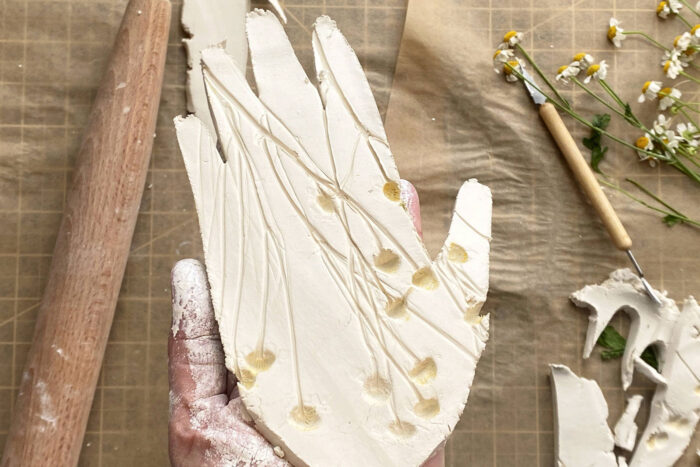
Shape the hand however you like. For this first hand, I shaped it over a bowl so that only the fingers and back of the palm curved upward. The center part remained flat.
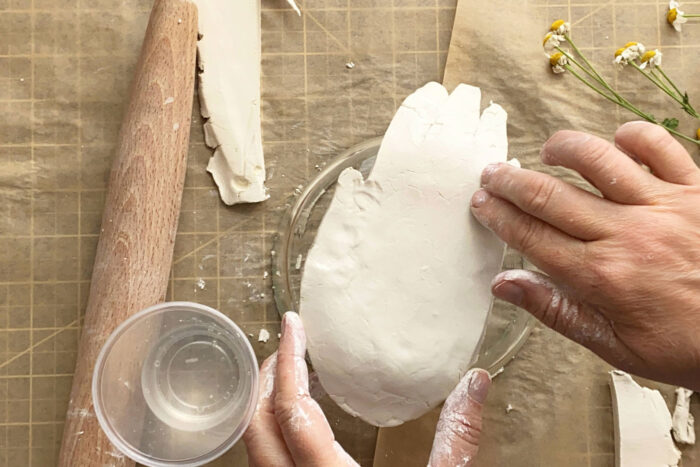
Use water to smooth out creases on the back of the clay, but this is optional as the back won’t be seen.
To make a bowl shape, use a small narrow object like a basket. I wanted to create more of a bowl, curving the thumb and pinky fingers upward. The loose weave of the basket made it the perfect spot to let the dish dry.
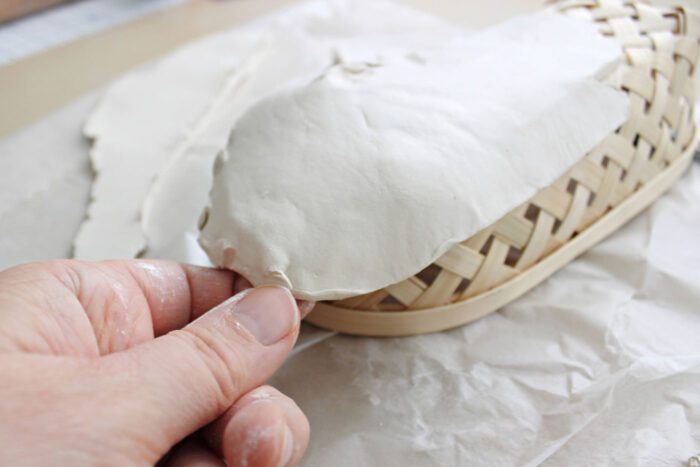
You’ll want to let the air dry clay dish completely dry — this takes anywhere from 24-36 hours.
Step Three: Paint
Next, you’re going to paint the dish any way you like. I painted mine several times before settling on a color combination I liked.
I have been having fun experimenting with acrylic pouring lately, so I decided to try it out on my Pin Dishes. After trial and error, I found this will only work on the back of the dish, and that it’s best to start with the pour on the back, and when the paint dries, go ahead and paint the front of the dish.

To do the acrylic pour on the back, you’ll want to water down your acrylic paints until they are very fluid-like heavy cream consistency. I started by laying down a generous amount of white paint.
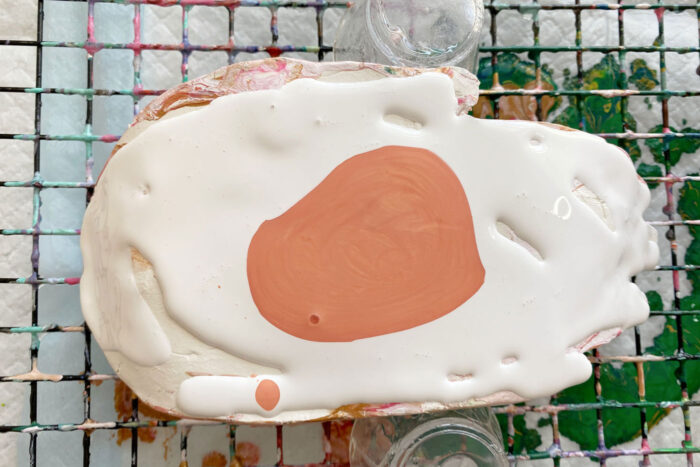
Next, I added a layer of pearly orange.
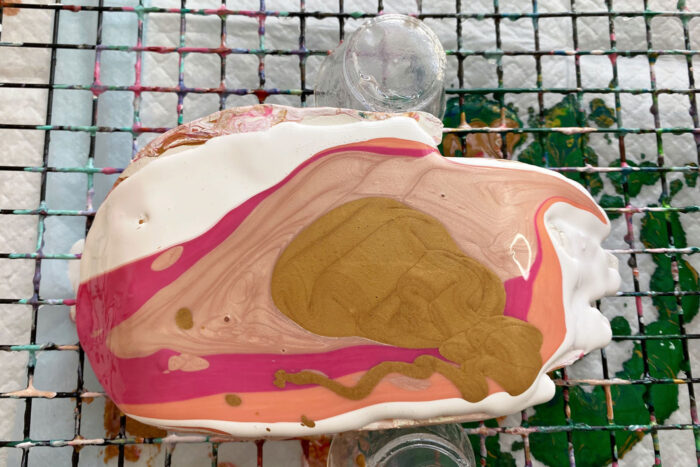
I followed the orange with a layer of hot pink, then a pearly light pink, and finally a layer of gold. Once you have the paints layered on the surface, simply tip the surface side to side and back and forth until the paint covers the entire surface, and the extra paint drops off the sides.
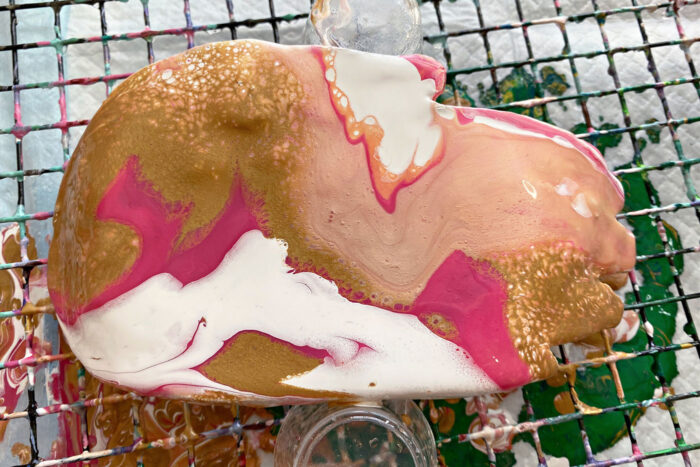
Here is my finished result.
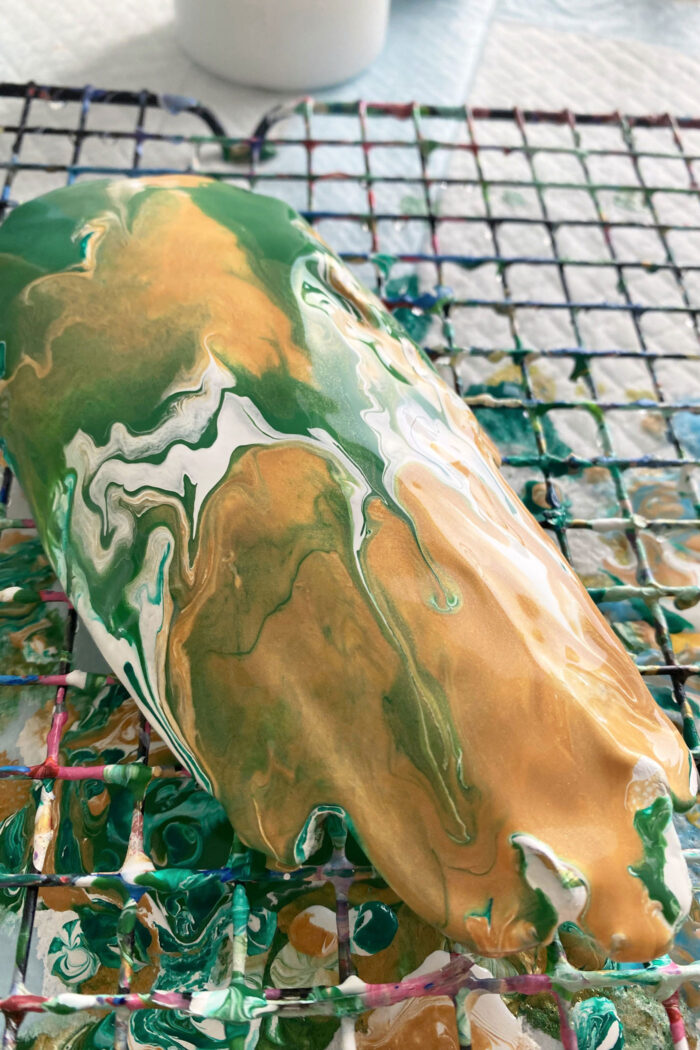
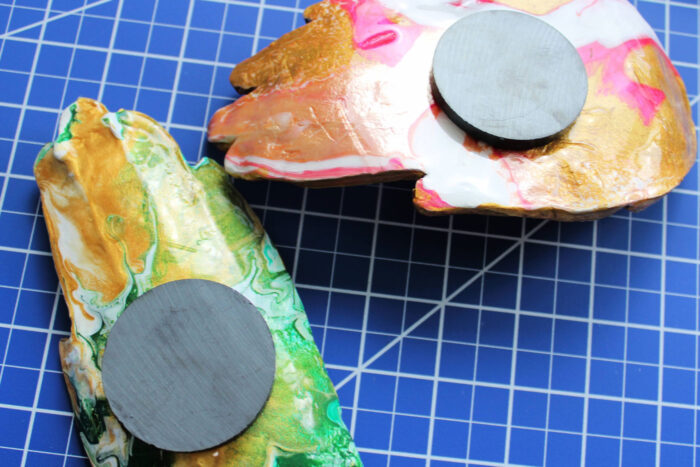
And here is my second dish. I couldn’t stop myself from having some fun with the paints, but keep in mind that the dish’s back will hardly be visible, so if you want to keep it simple, just paint it one solid color.
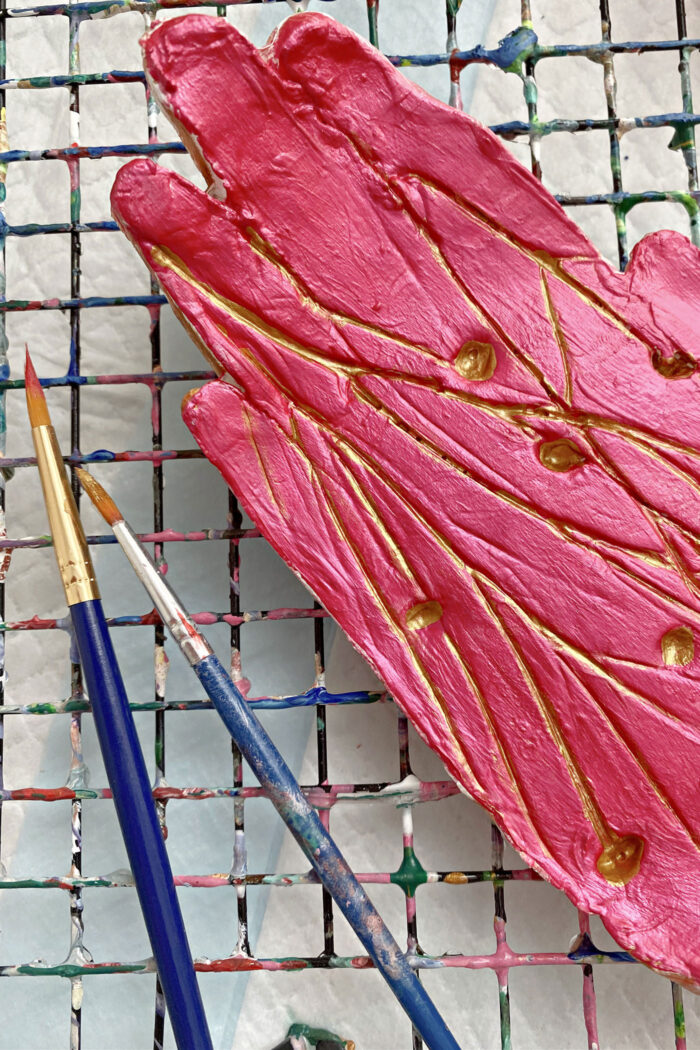
To recreate my chamomile dish, paint the front of the hand with two layers of pearly hot pink. After that dries, paint the stems and blossoms in gold.
For the front of the pine needle dish, I started by painting it green, but I didn’t like how it looked. I finally painted over it using basic white paint. After I let the white paint dry, I painted a layer of gold, then quickly rubbed off the gold with a paper towel. The gold that made its way into the pine needle imprint remained and left a cool design.
I finished off both dishes with a layer of resin. The resin creates a hard, durable finish, and fills the indentations left by the plants or other design tools you used on your clay.
Finishing
If you don’t want to use resin, just spray it with a clear varnish. If you are using resin, only apply the resin to one side at a time (trust me, I know from experience). Start by applying resin to the top of the dish and let it completely dry. After it has dried, you can apply the resin to the back of the dish.
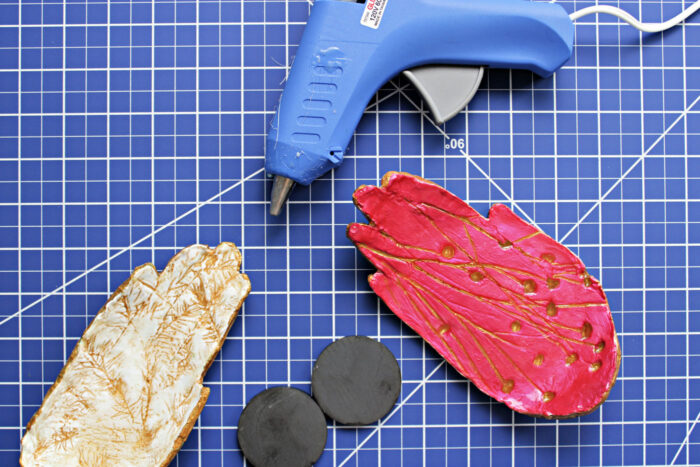
After the dishes have dried, it’s time to add the magnets! Grab a hot glue gun and glue the magnet to the back of the dish. You can also use a strong adhesive like E6000.
And that’s all there is to it. Such a fun, customized, and useful gift idea!
Be sure to follow me on Instagram @bayhillstudio and on YouTube for more creative content and project ideas!
About the Maker
Julia Frazier is the founder of Bayhill Studio. Julia designs quilts and projects geared toward beginner quilters and crafters. You’ll usually find her at her sewing machine or hiking in the nearby mountains. Follow Julia on Instagram @bayhillstudio, and subscribe to her YouTube channel for new and exciting projects and tutorials. Be sure to check out her Bayhill Studio website for a growing list of tutorials and patterns.
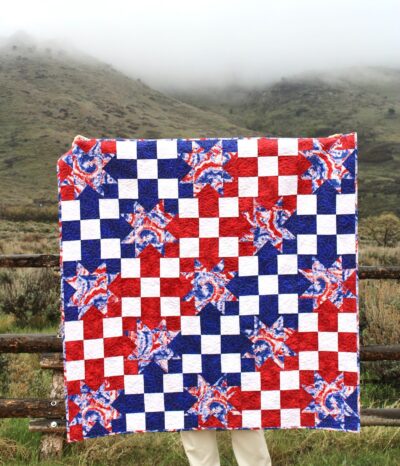
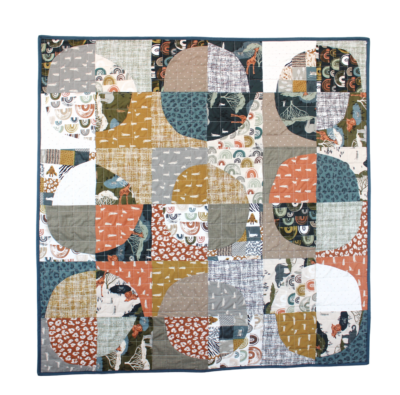
Also by Julia:
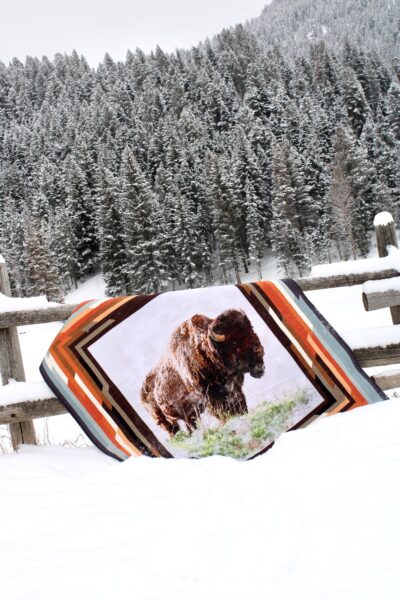
You May Also Like:

You do not specify the magnets. Where are the size you used available?
Really cute idea.
Thanks for sharing this creative pin holder, magnetic too!!!