How to Make a Fascinator Perfect for the Derby!
Get yourself Derby-ready with a colorful and creative fascinator hat. Learn how to make a Fascinator with our step-by-step, easy-to-follow tutorial.
I’ve been running a DIY blog for over 12 years and can’t believe it has taken me this long to write a post teaching you how to make your own fascinator.
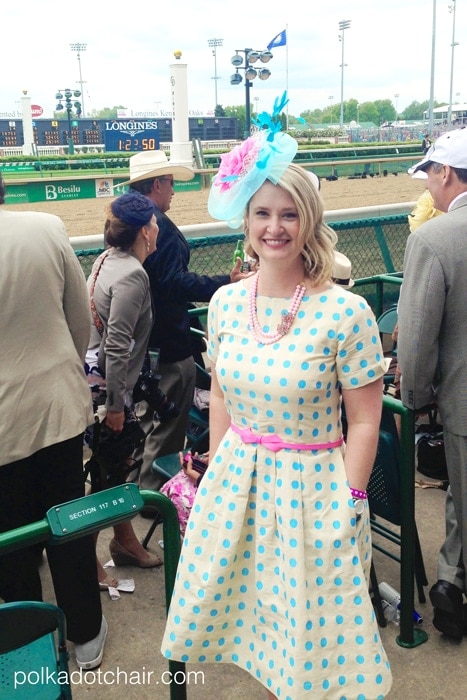
If you’ve been a long-time reader, then you know that I love all things Kentucky Derby and try to attend at least one Derby event each year! I adore dressing up and think picking out your Derby or Oaks outfit is almost more fun than actually going to the race (notice, I did say “almost”). Even if I don’t attend an event, I love to dress up for at-home Derby Parties!
I’ve made quite a few fascinators over the years and thought that today I’d walk you through the steps to create your own fascinator!
If you’re a “royal watcher,” you can also use this tutorial to make a fun fascinator to wear while watching the next royal wedding or coronation from home!
Before I start, let me say that Millinery is an art. Some very talented Makers create beautiful Derby hats and fascinators. I am not claiming to be one of them. I’m simply going to walk you thru the steps to create your own Derby Fascinator if you choose to make one yourself.
Fascinator Supplies
What do you need to create a Fascinator? There are a few things that you need and a lot of things that are fun to add. You can pick and choose from this list the things you’d like to add to your fascinator.
- Headband or Fascinator Base (can be felt or synthetic material)
- Silk Flowers
- Feathers
- Hot Glue Gun
- Wire Cutters
- Large Needle
- Heavy Duty Thread
- Flexible Horsehair Braid Fabric
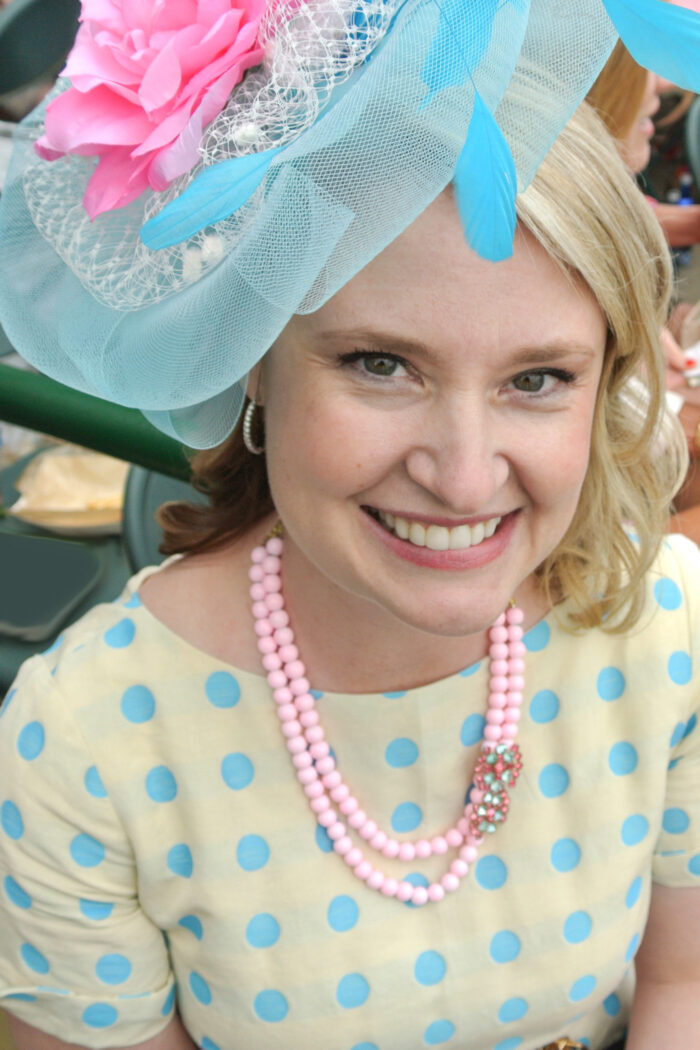
- Bird Cage Netting
- Ribbons
- Sharp Scissors
If you want to make a fascinator for kids to wear to a derby party, be sure to check out our paper plate or coffee filter hat tutorial.
What to Use for the Base of Your DIY Fascinator
When I first started making fascinators, it was hard to find the “base” commercially. Most of the time, you could only buy them if you were in the trade.
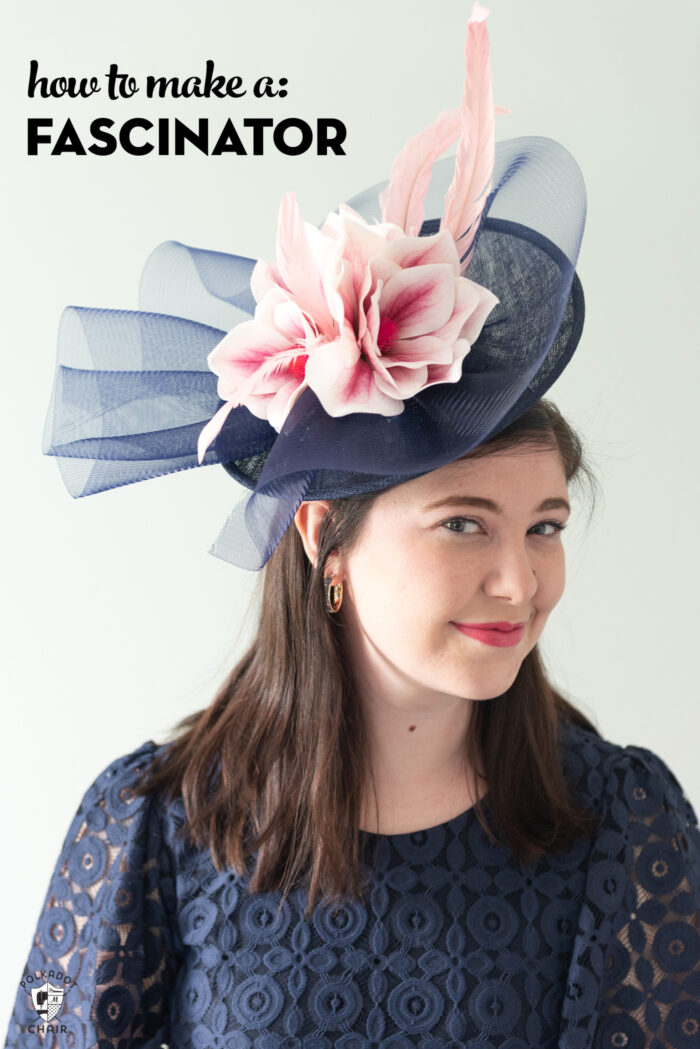
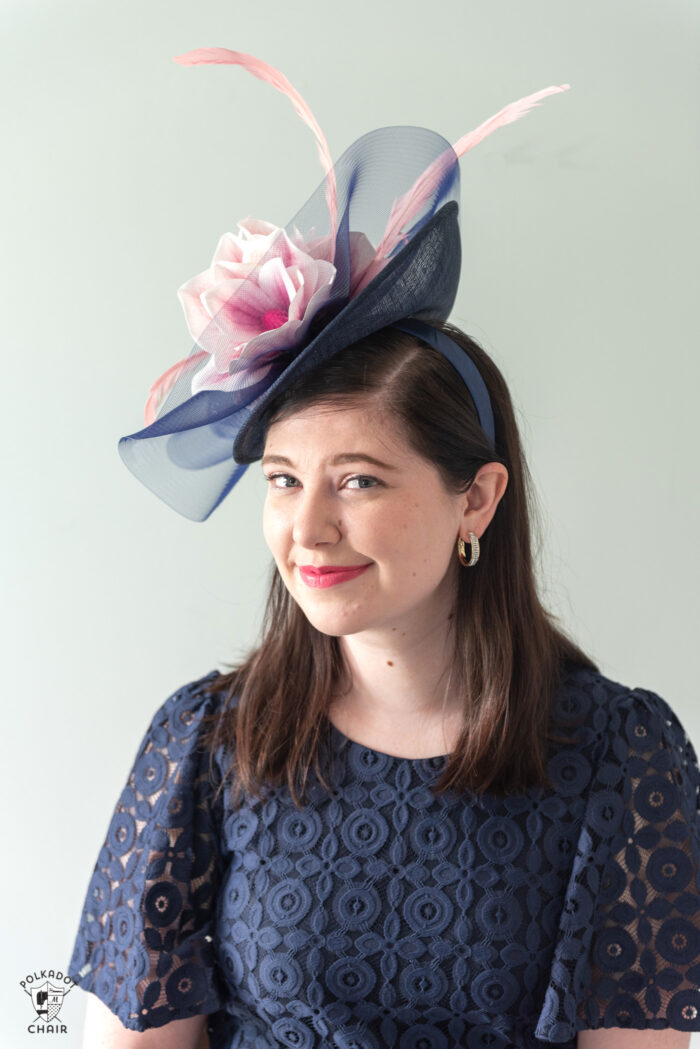
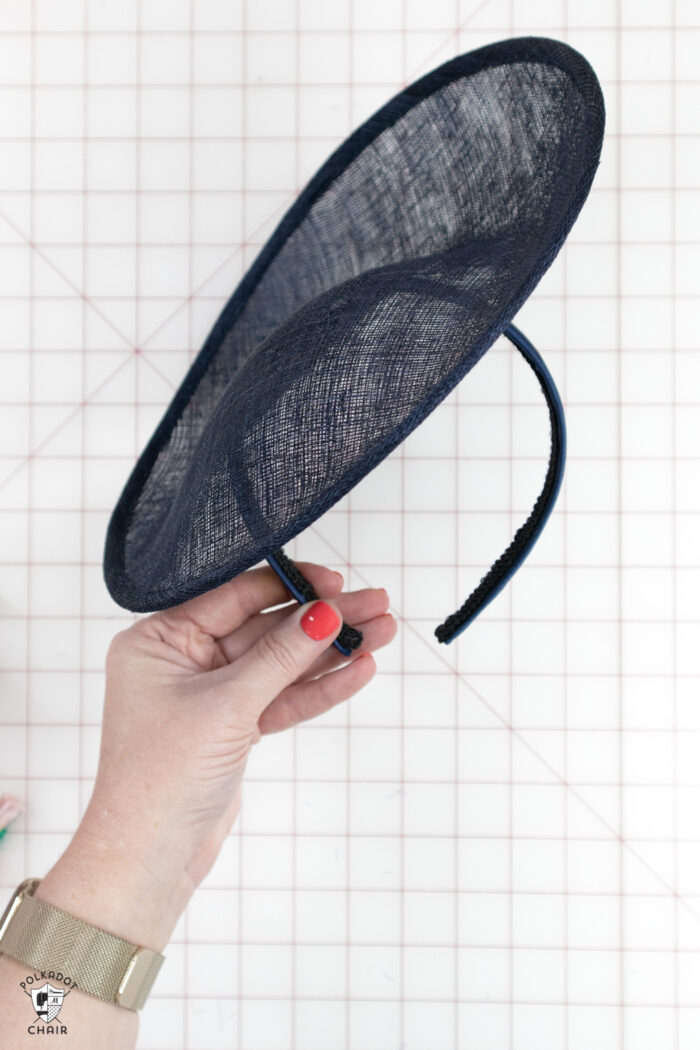
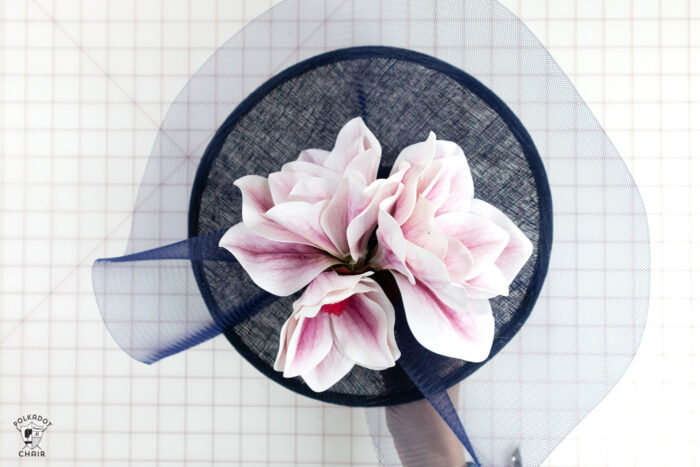
Now they are readily available. I recommend using a Saucer Base. The navy example in our photos is built on this type of base.
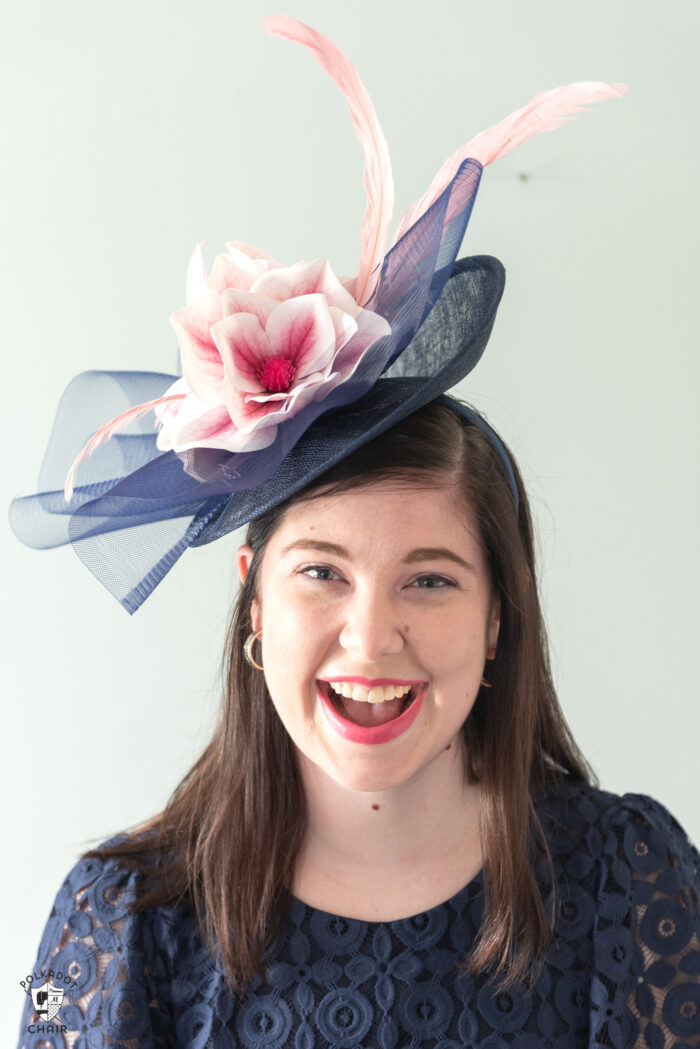
You can also use a plastic headband. This fascinator is attached to a headband, not a base. The base is created using a combination of the horsehair braid and birdcage netting.
You can also make your own base by creating a felt base with a circle of felt. Cut out the felt and adhere it to the headband; you can hide the stitches and glue on the underside of the fascinator.
How to Make a Fascinator
Step One: Base
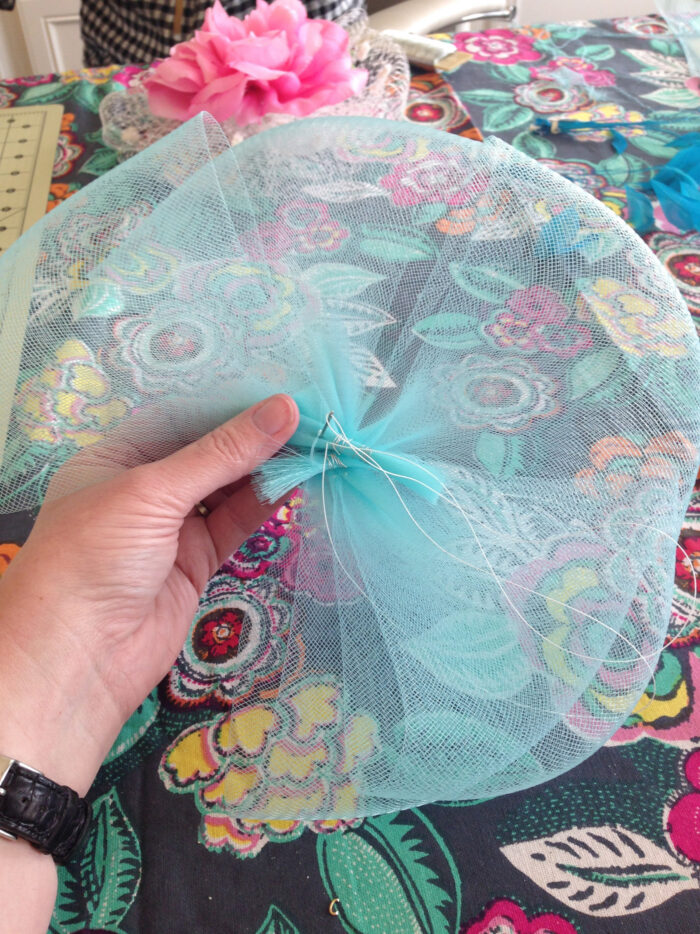
My favorite material to use for fascinators is a flexible horsehair braid. It looks like a really dense tulle but is stretchy. It comes in different widths. For example, today, I’m using a wider horsehair braid.
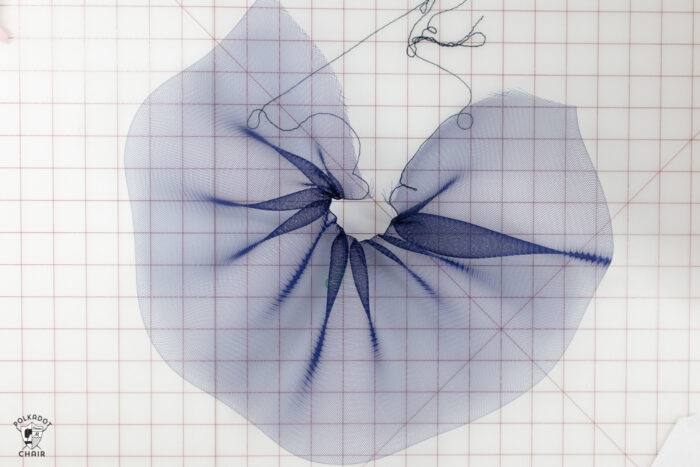
The horsehair braid I purchased has a string on one side. You can pull up on the string to gather the tulle into a circle. If yours doesn’t have this, use a needle and a bit of heavy-duty thread to gather it up.
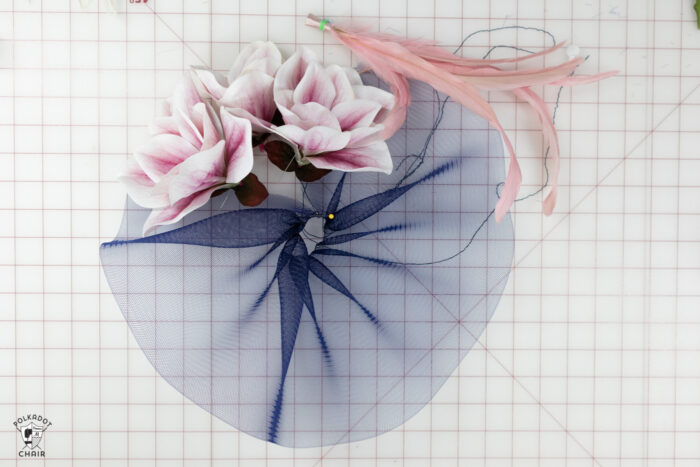
Gather up the horsehair braid into a circle. Make sure you save the leftover. You’ll use it later to embellish the hat.
Glue the circle to the center of the saucer on your fascinator. Let it dry. Just use a dot of hot glue to secure it to the center.
Tip: You can purchase a styrofoam head at a craft store inexpensively. It will be helpful when decorating your fascinator since you can use it as a stand as you work.
Step Two: Flowers
Remove the silk flowers you are using from their stems. Cut them as close to the flower base as you can, being careful not to dismantle the flower in the process.
Decide on an arrangement that you like. I prefer to pin the flowers on first, to see what looks good. Then glue afterward.
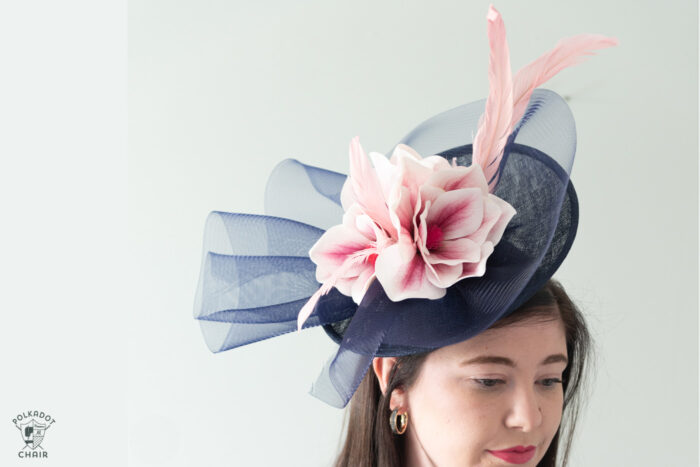
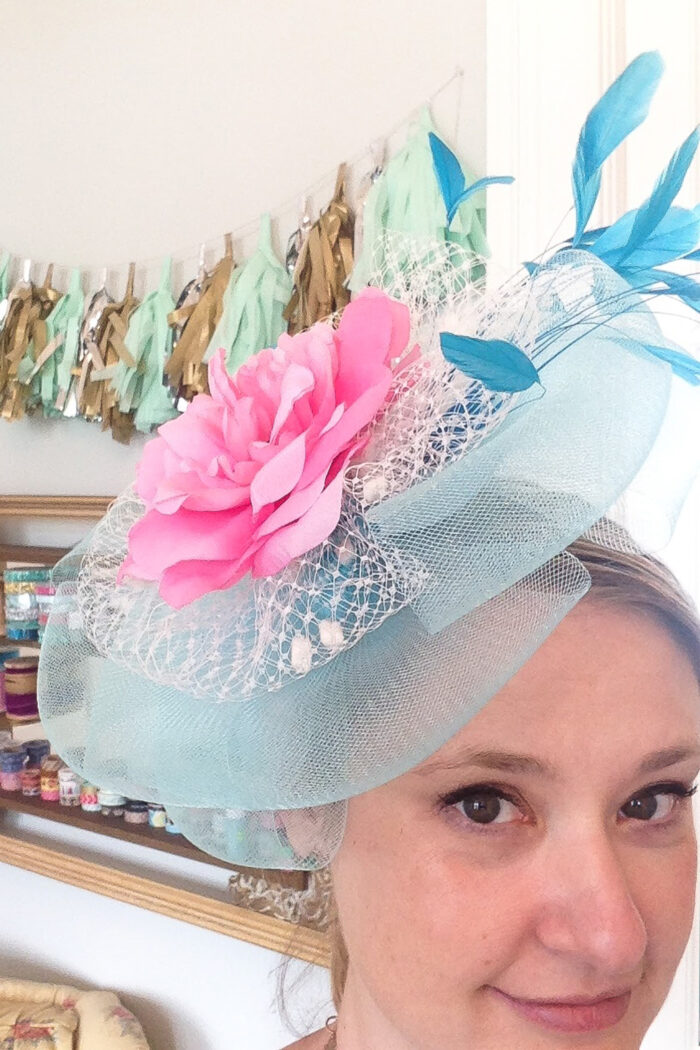
For my fascinator, I used 3 silk flowers arranged in a triangle. Remember that your fascinator will be viewed from all sides, and it needs to also look good in the back.
Glue the flowers to the base. If any of them are particularly heavy or don’t seem to stick with the hot glue, use a bit of heavy-duty needle and thread to sew them to the base.
Step Three: Embellish
The last thing you need to do is embellish with feathers or other accessories. You can add a bit of birdcage veil coming down over your eyes—a trio of feathers or many other things.
I added an extra piece of gathered horsehair braid to the bottom of my hat (where the seams in the gathered piece of horsehair braid meet) and 3 pink feathers.
You can also embellish your fascinator with glittery buttons or antique or vintage brooches. It will help to add a bit of sparkle to your fascinator.
How to Wear a Fascinator
Keep in mind that if you’re going to be wearing the fascinator all day, it needs to be comfortable.
If it’s really big or heavy, you’ll want to clip it to your hair with some large hair clips, barrettes, or bobby pins (hide them in your hairstyle). I have not ever noticed that I needed to secure a fascinator in place. Most of the time, they stay in place on their own.
As you’re making yours, be sure to secure all the layers well with hot glue. You don’t want it to fall apart halfway through the day!
Most of the time, fascinators are worn to the side tilting towards the front of your head. I like mine to tilt a bit and cover part of my forehead.
How thick is the horsehair braid you used in the example you made?
I view something genuinely interesting about your site so I bookmarked .