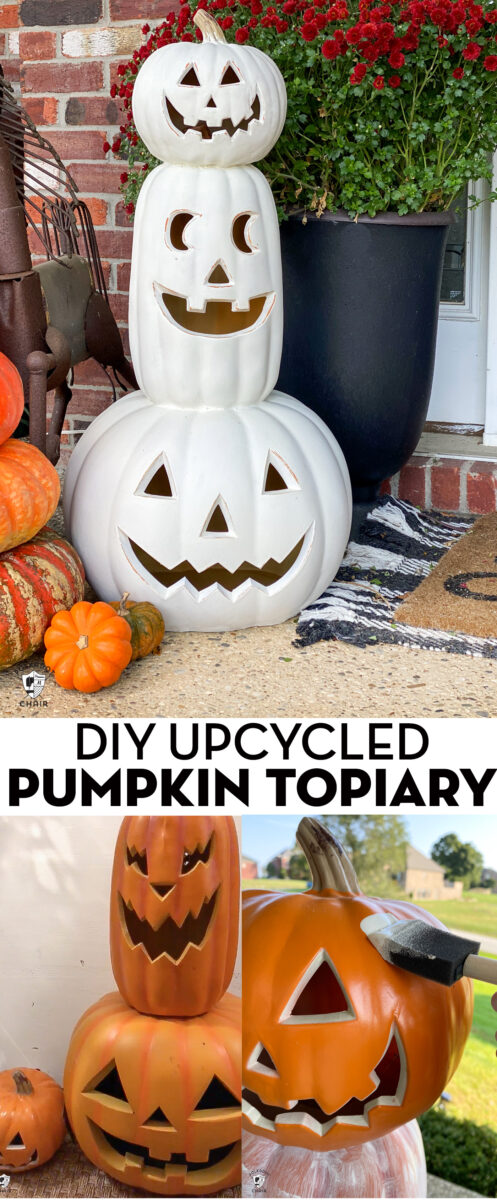
DIY Stacked Pumpkin Topiary with Upcycled Plastic Pumpkins
Tired of the same old fall & Halloween decorations? Use a bit of creativity to spice things up with a DIY stacked pumpkin topiary using upcycled plastic pumpkins. Learn how to make and paint one to match your decor with our free tutorial.
Fall is my favorite season, and I’m always looking for new fall decorations to DIY. If Halloween is not your thing, you can recreate this look using foam craft pumpkins as a Thanksgiving decoration.
A couple of years ago, I was getting my Halloween decorations out of storage and began arranging and plugging in the pre-lit pumpkins on my front porch. I started to feel like they looked like a mess and were a bit disorganized.
I felt like I had a bunch of small pumpkins, and they really didn’t stand out very much on our porch when you saw them from the street.

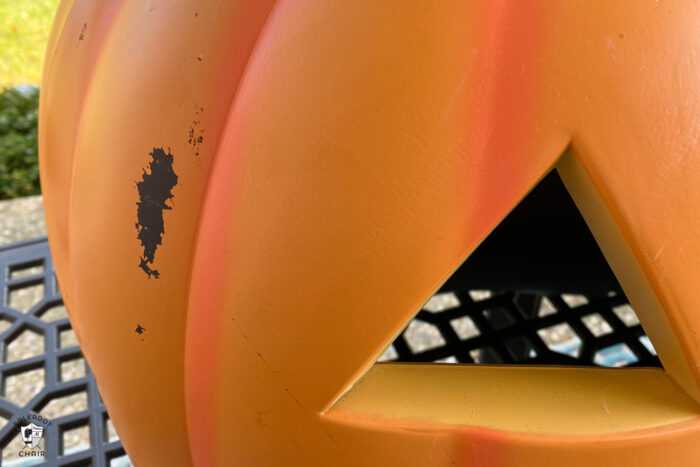
Many of the pumpkins also had scuff marks and parts where the paint was peeling off. In general, they were looking a bit too forlorn, and I wanted something a bit more elegant to greet trick-or-treaters at our front door.
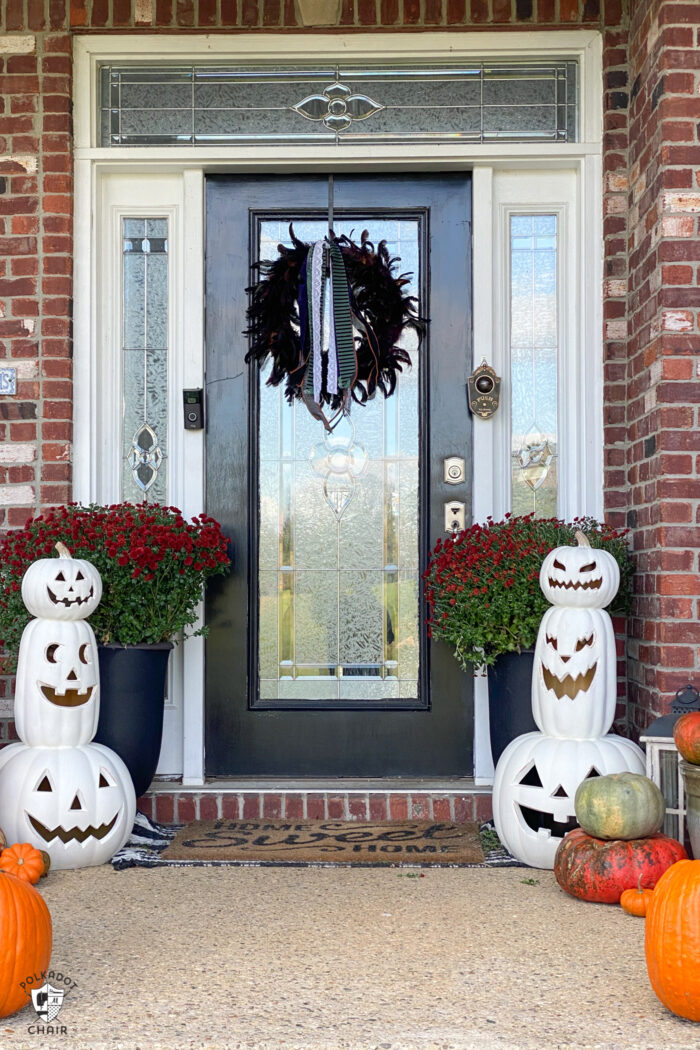
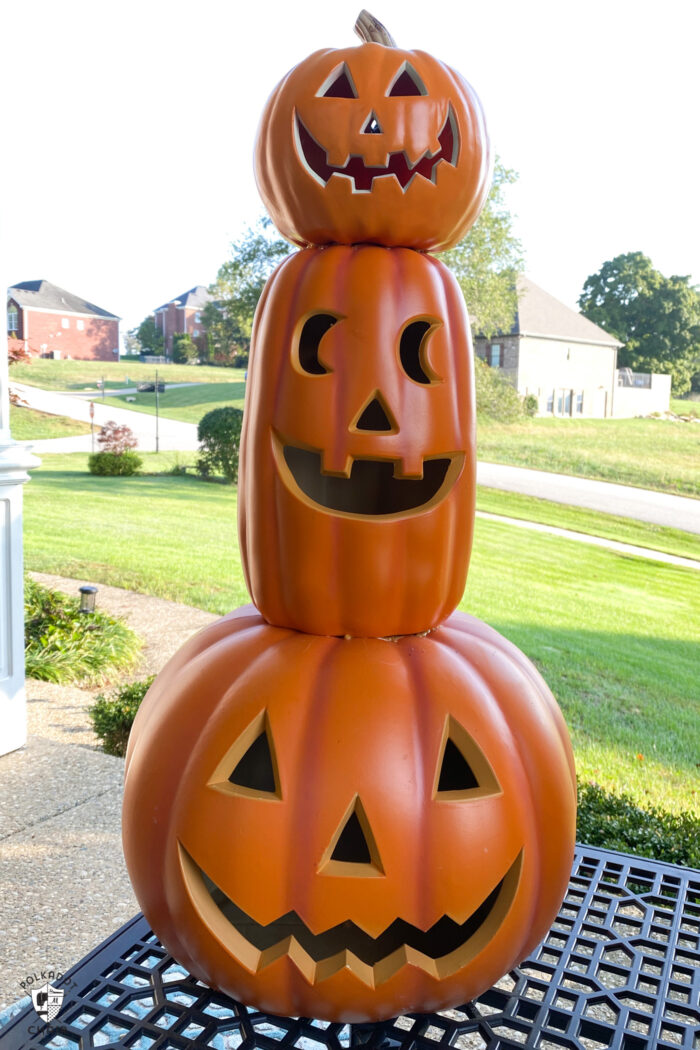
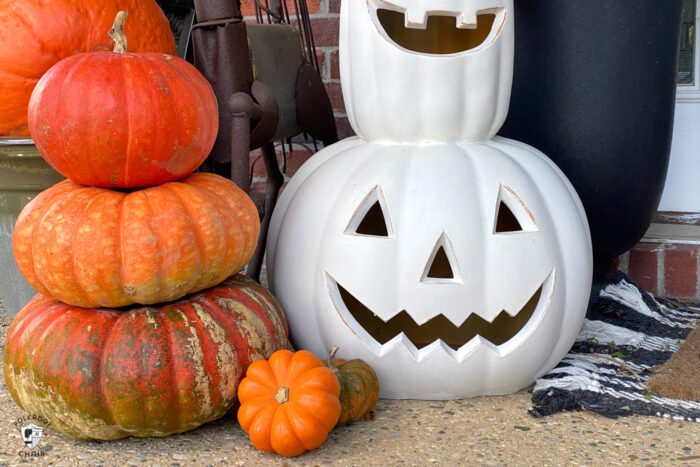
I decided that instead of placing all of the pumpkins on the porch next to each other I would create a stack with them instead. I gathered enough pumpkins for 2 stacks of 3 pumpkins each.
How to Easily Make a Stacked Pumpkin Topiary
The pumpkins are stacked by cutting a hole in the bottom of the top pumpkin and the middle pumpkin and gluing them to the pumpkin below over the stem.
Where can I find pumpkins for a DIY Pumpkin Topiary?
The pumpkins I used in this project came from my storage room! After YEARS of collecting light-up plastic carved jack-o-lanterns, I decided to try something “new” and create a topiary with old pumpkins.
If you need to purchase pumpkins to make a topiary, I recommend Michaels, the Dollar Store, Target, Walmart & Amazon.
How do you keep a stacked pumpkin together?
I could keep my pumpkin stack together using a combination of Gorilla Glue & painters caulk.
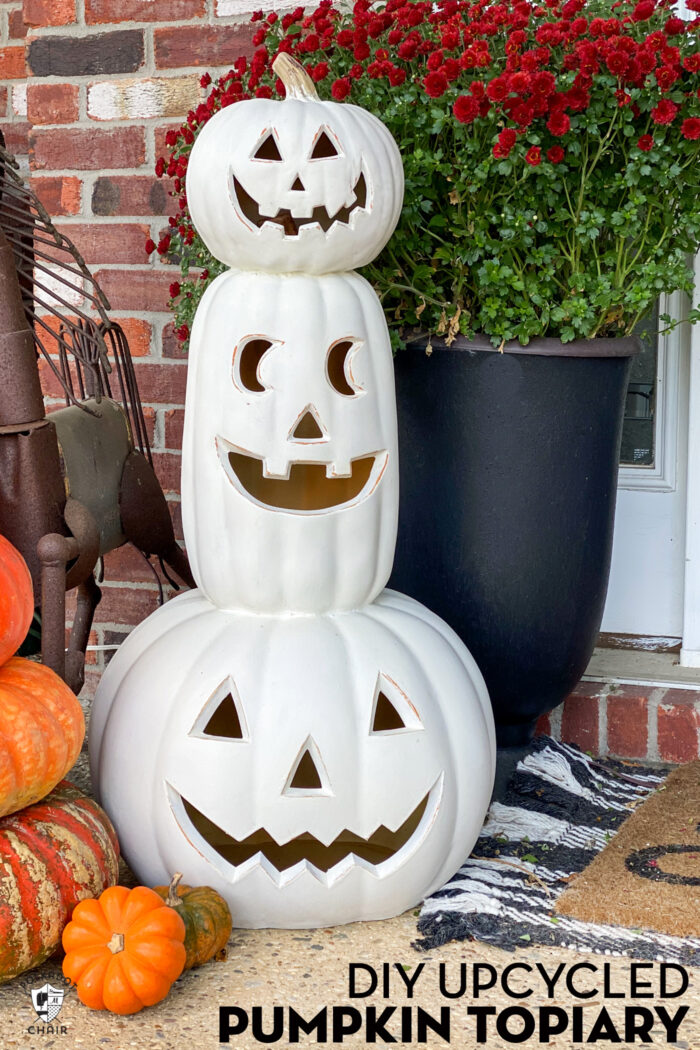
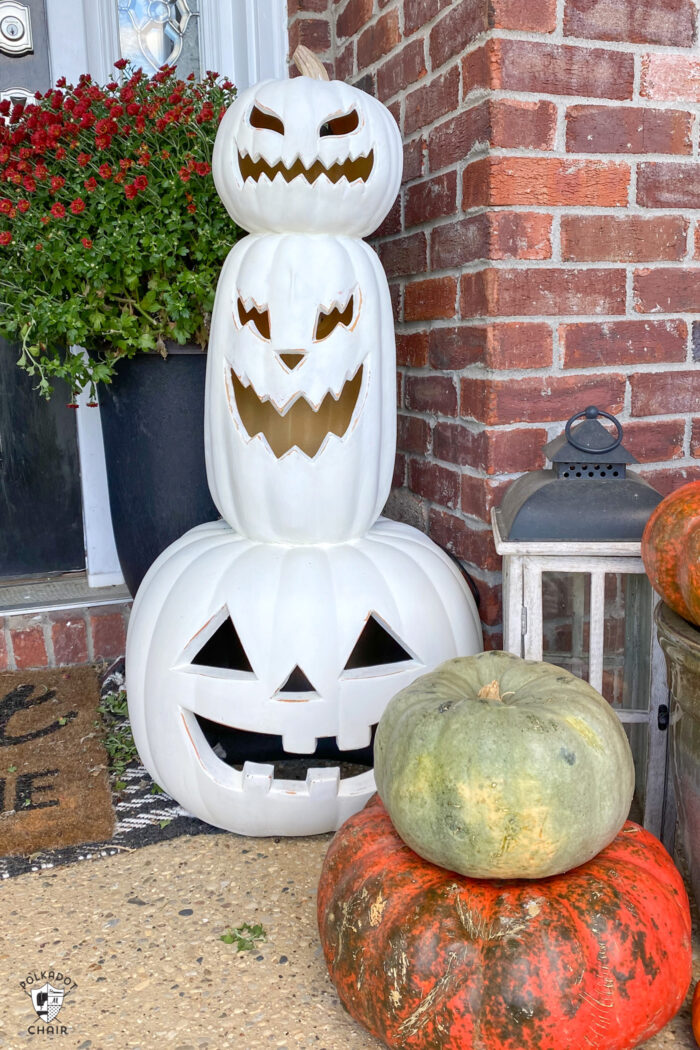
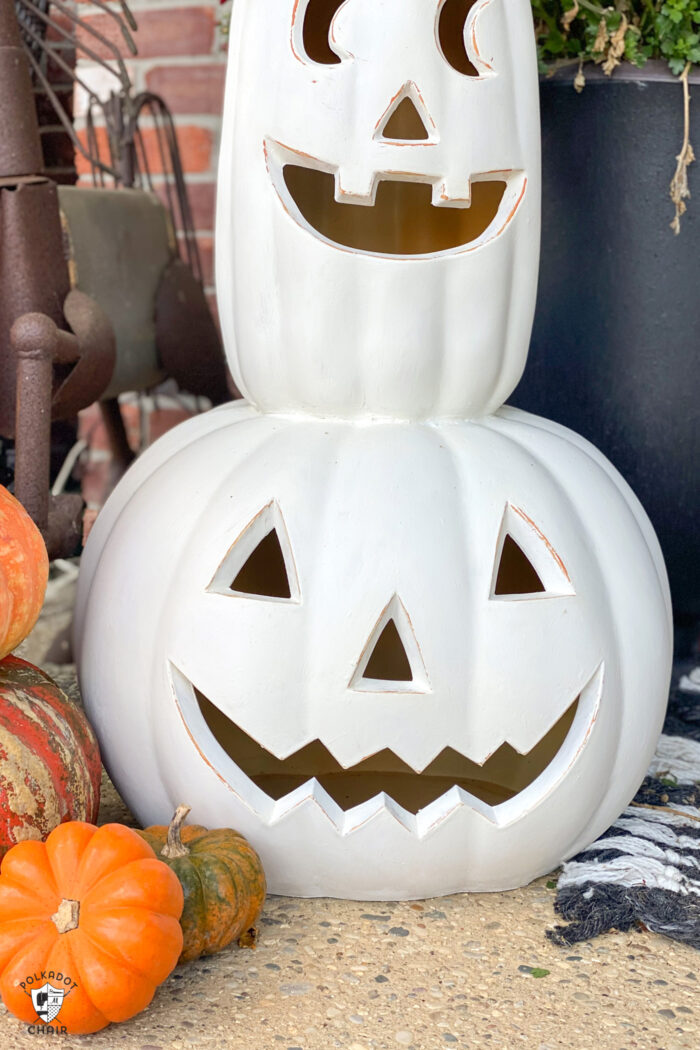
About the 3-tier Pumpkin Topiary
This topiary is 3 pumpkins tall and is made from various pre-cut plastic jack-o-lanterns that have been purchased over the years.
To give the pumpkins a consistent look, I glued them together, then painted and distressed them using chalk paint. I painted my pumpkins antique white, but you can paint them any traditional fall colors.
DIY Jack o Lantern Topiary Supplies
- 2-4 Plastic Jack o Lanterns with lights that attach in the back.
- Gorilla Glue
- Sharp Industrial Strength Scissors
- Chalk Paint
- Sand Paper
- Chalk Paint Sealer
- Painters Caulk
DIY Pumpkin Topiary Instructions
Step One: Create the Stack
Begin by deciding what order you want your pumpkins to stack and how many pumpkins you want in the stack. I recommend using the largest pumpkin the bottom pumpkin. If your pumpkins are a bit small or wobbly, you can also try placing them in a planter or a pot when you’re finished. You may want to purchase one if you don’t have a large pumpkin to use as the base.
For this project to work, you must use plastic pumpkins with a light attachment in the back. A few of my pumpkins have a light attachment in the bottom. You can use those if you want, but you’ll need to find another way to light the pumpkins.

Using sharp scissors (or a craft knife), cut a small hole in the bottom of the middle and top pumpkins. It just needs to be large enough to fit the pumpkin stem below it. You can also use a utility knife, but I prefer to work with heavy-duty scissors.
TIP: If you’re having difficulty cutting the base of the pumpkins, try using a Dremel tool.
When I first created this project, I tried to attach the pumpkins with hot glue, but it did not stick to the plastic. It just peeled off.

I used Gorilla Glue instead, and it stuck the pumpkins together very well.
Step Two: Paint
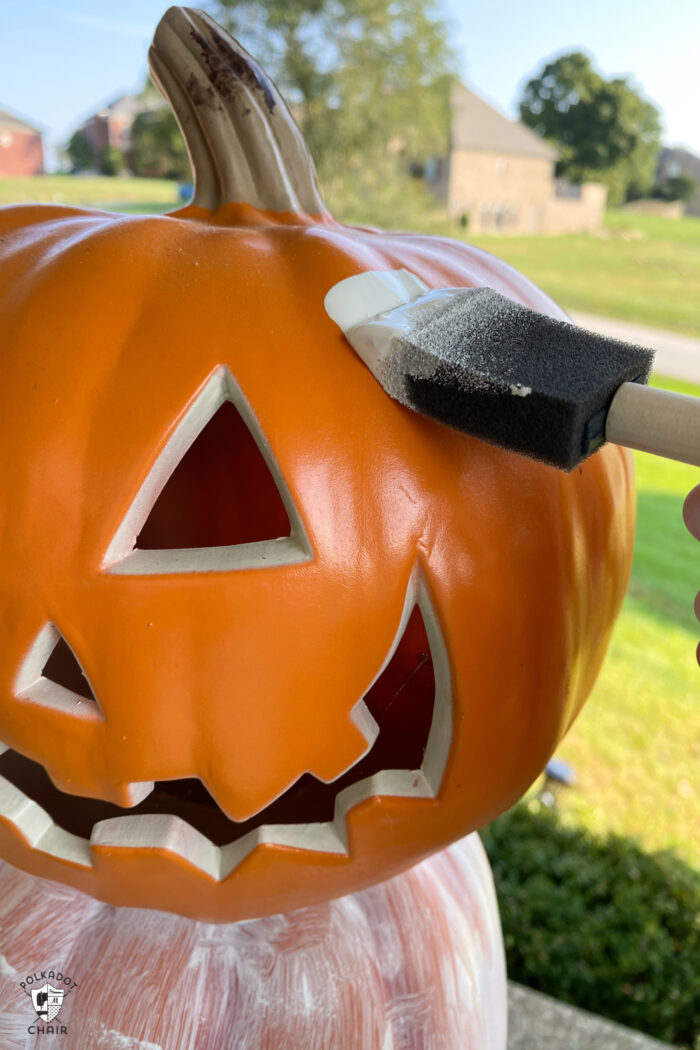
Using chalk paint, paint the stack of pumpkins. You will probably need 3 coats of chalk paint.

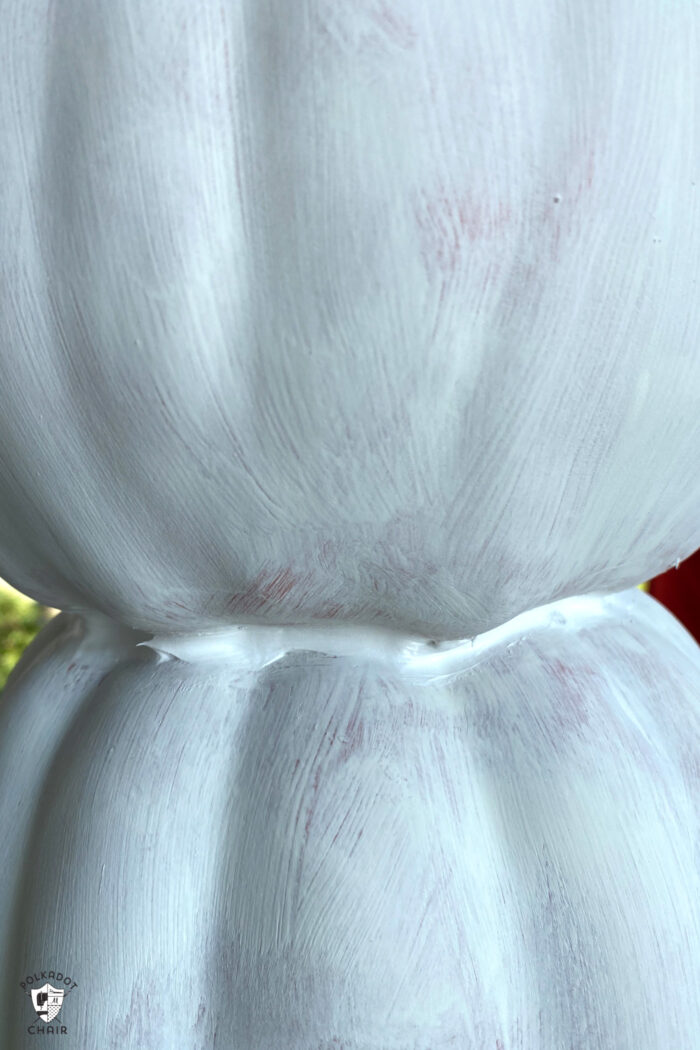
Before you add the last coat of paint, fill in the gaps between the pumpkins with a bit of the painter’s caulk. Then, paint over the caulking.
If desired, sand the paint’s edges around the pumpkins’ eyes and mouth. I love the distressed look since it makes the pumpkins look slightly like wood or stone.
After the paint has dried, seal the paint with chalk paint wax or varnish.
You May Also Like:

I love the pumpkin topiary idea!!