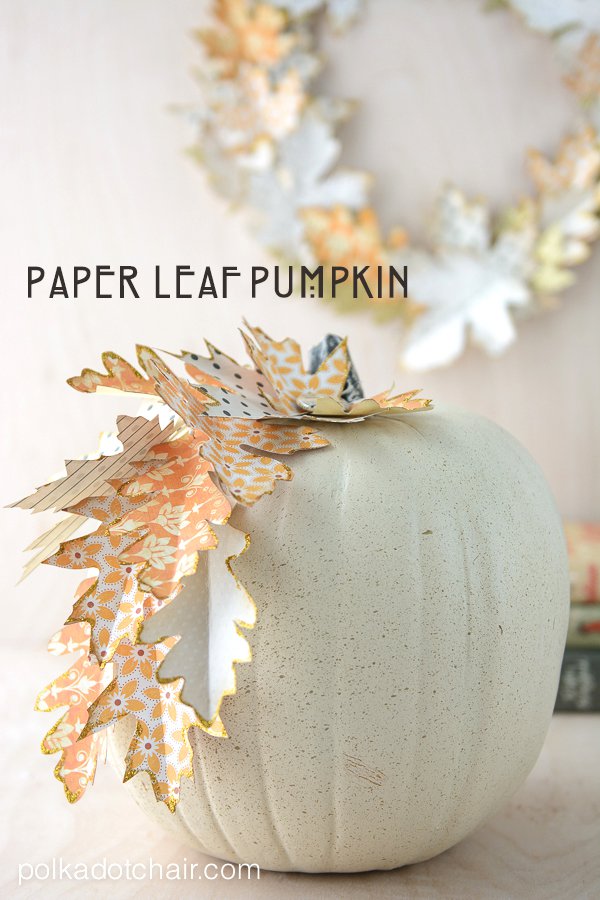
Cute Pumpkin Crafts! Create a Paper Leaf Pumpkin
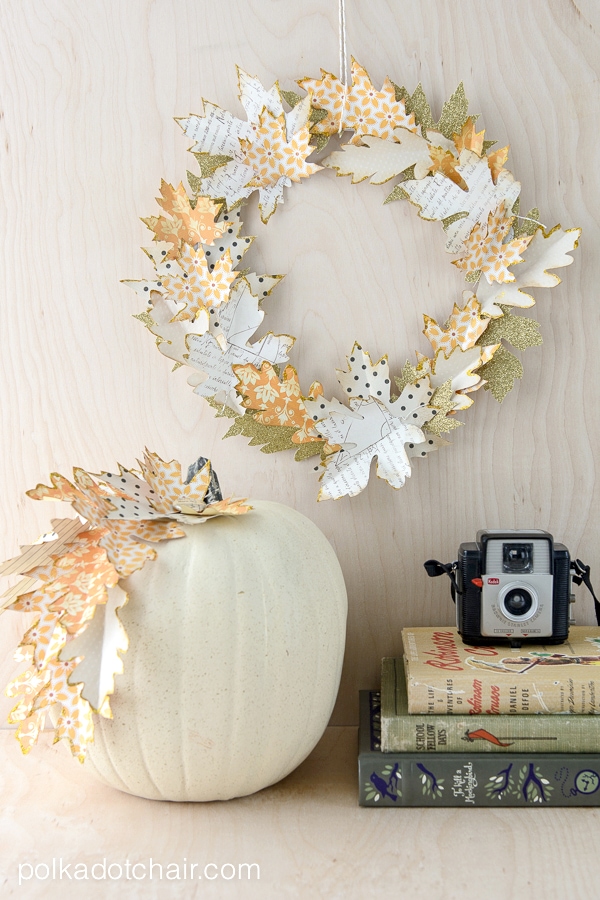
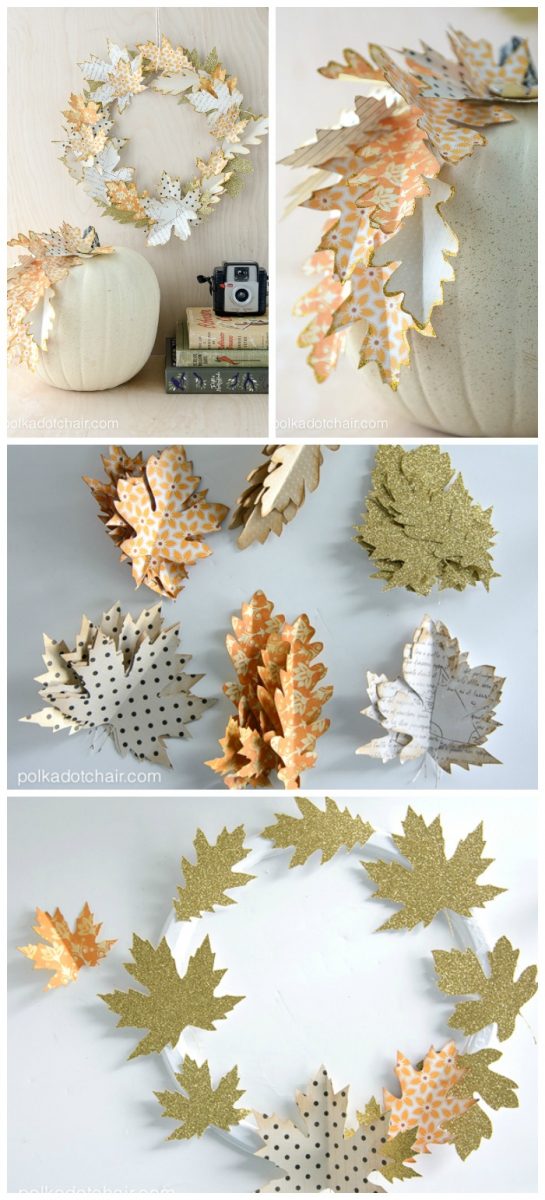
Today I’m going to share with you some cute pumpkin craft ideas! We are going to dress up a simple white pumpkin with paper leaves to make a fun Fall Pumpkin to add to your Fall or Thanksgiving Decor! If you like this post then you may also like this Autumn Paper Leaf Wreath Tutorial.
I love to dive into a big DIY project or craft on a quiet weekend. Sometimes, however, I don’t have an entire weekend to devote to crafting and I want a quick fix craft project.
Since I ADORE decorating with pumpkins for Halloween, I’ve been researching pumpkin crafts on Pinterest lately and thought that instead of just searching Pinterest for a project that I should just make one instead. You know, walk away from the computer and MAKE something.
Paper Leaf Pumpkin Crafts How-To:
These paper leaf pumpkins are quick to make, especially if you have a Cricut machine. If you don’t have a Cricut, then you can just cut the leaves out by hand. It won’t take too long since you don’t need too many leaves per pumpkin.
Okay, are you ready to craft?
To Decorate your Pumpkin you’ll need:
5-6 sheets of printed scrapbook paper
Straight Pins
Ivory Faux Pumpkin
Distress Ink Pad, Vintage Photo![]() & Sponge
& Sponge
American Crafts Glitter Cardstock, 12 by 12-Inch, Gold (15 sheets per pack)![]()
Cricut Machine- Explore or Later, (you can also cut the leaves out by hand if you’d prefer)
Hot Glue Gun
First UP! Cut out the Leaves:
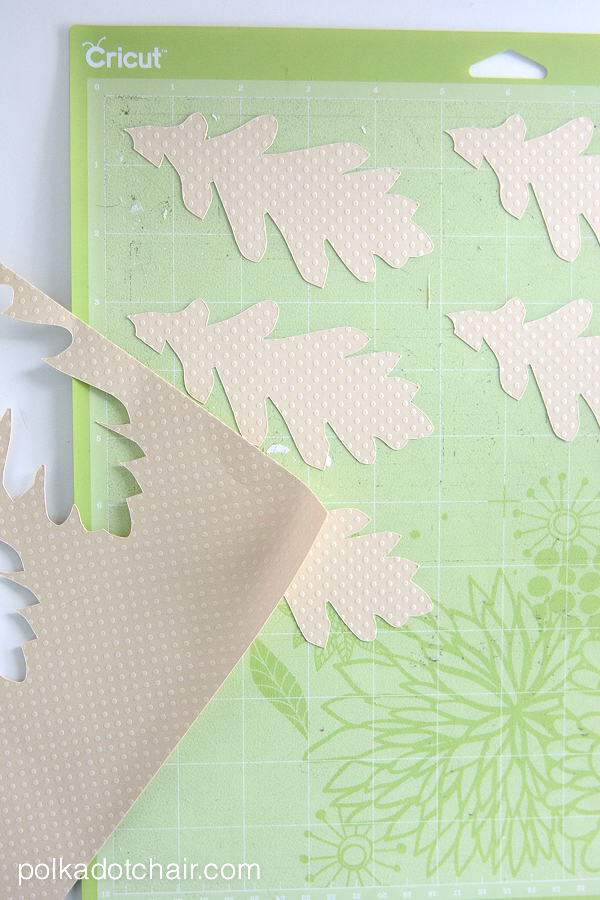
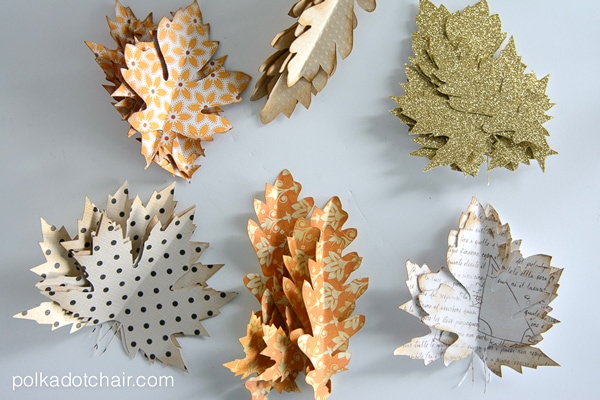
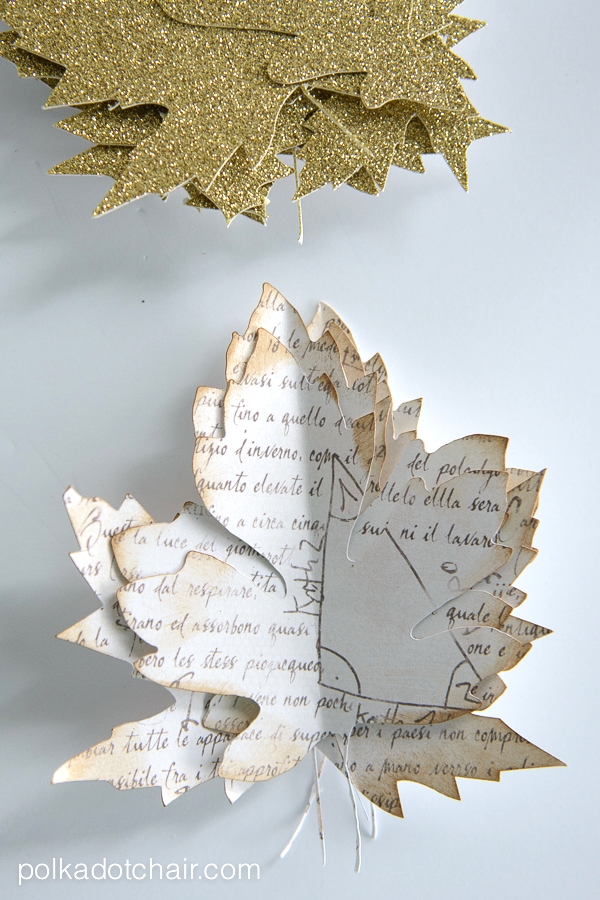
First of all, cut out several leaf shapes from the various sheets of cardstock. I ended up cutting out 6 sheets of cardstock and 5 different leaves in different sizes. Also, I cut out one sheet of glitter cardstock with 6 different leaves on it. I had enough leaves to make the wreath and decorate my pumpkin. You only need 4-5 leaves for one pumpkin.
The glitter cardstock is thicker than normal cardstock, so make sure that you adjust your cut settings on your Cricut before you cut.
For my leaf template, I just typed “leaf” into Cricut Design space and chose the leaf shapes that I liked the best.
Step Two: Add Dimension with Distress Ink
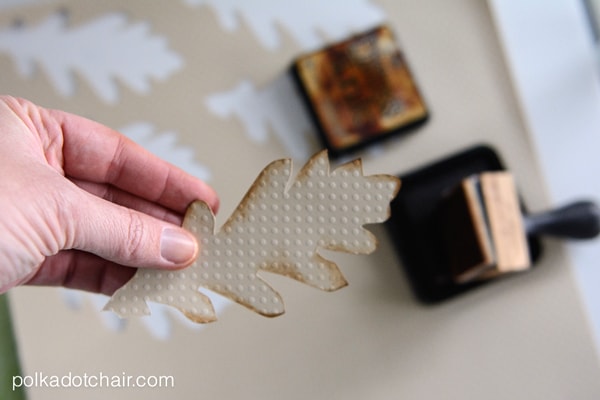
Next using your distress ink and sponge, lightly ink the edges of all of the leaves. It doesn’t seem like much, but it will add a lot to your finished project.
Fold the leaves in half and score. Don’t fold the glitter cardstock leaves, they will be too thick.
Step Three: Decorate the Pumpkin
To decorate the pumpkin, just attach the leaves to one side of the pumpkin using small straight pins. Start at the top and work your way down.
At the top of my pumpkin, I added a little badge to cover up where the leaves started.
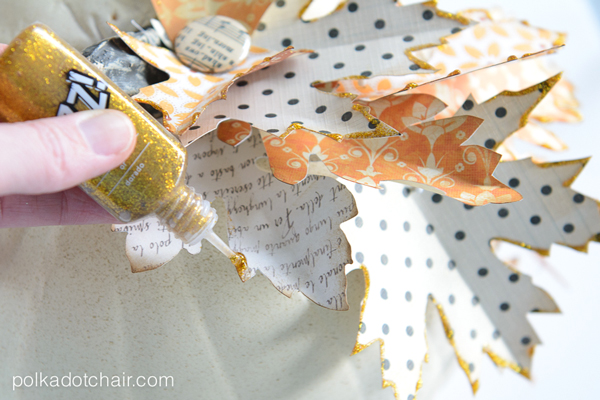
Step Five: Bling it Out with Glitter!
To finish up, apply glitter glue to the edges of the leaves. Let it dry, it takes longer to dry than you think it will.
More Autumn Crafts:
DIY Grateful Gold Leaf Wood Sign