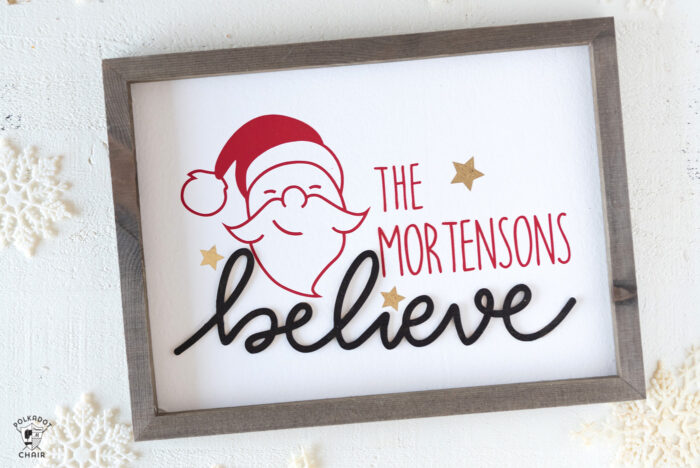
DIY Personalized Wood Christmas Sign; A Cricut Project

Who’s ready to start making Christmas crafts? I have partnered with Cricut to bring you guys some fun gift ideas for Christmas that are both handmade and personalized. Today I’m going to be showing you how to make this DIY Wood Christmas Sign.

I work as a Brand Ambassador for Cricut. This is sponsored content.
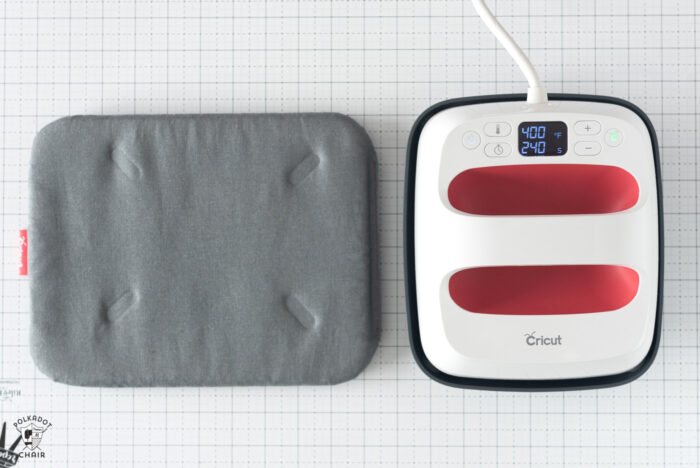
One of the things I love most about my Cricut Machine is the ability to personalize my projects. I love to use it to add names to my sewing projects (like my Reading Pillow) and monogram all. the. things.
I’ve begun to brainstorm a few handmade Christmas gifts for the Holidays this year. I try to plan my gift-giving with a combination of handmade and purchased gifts. I used to try for all handmade but I’ve learned that is just not realistic. (It took me a few years of completely wearing myself out in December to figure that one out).
I want to show you how you can take a few simple images in Cricut Design space and turn them into something totally unique and personal.
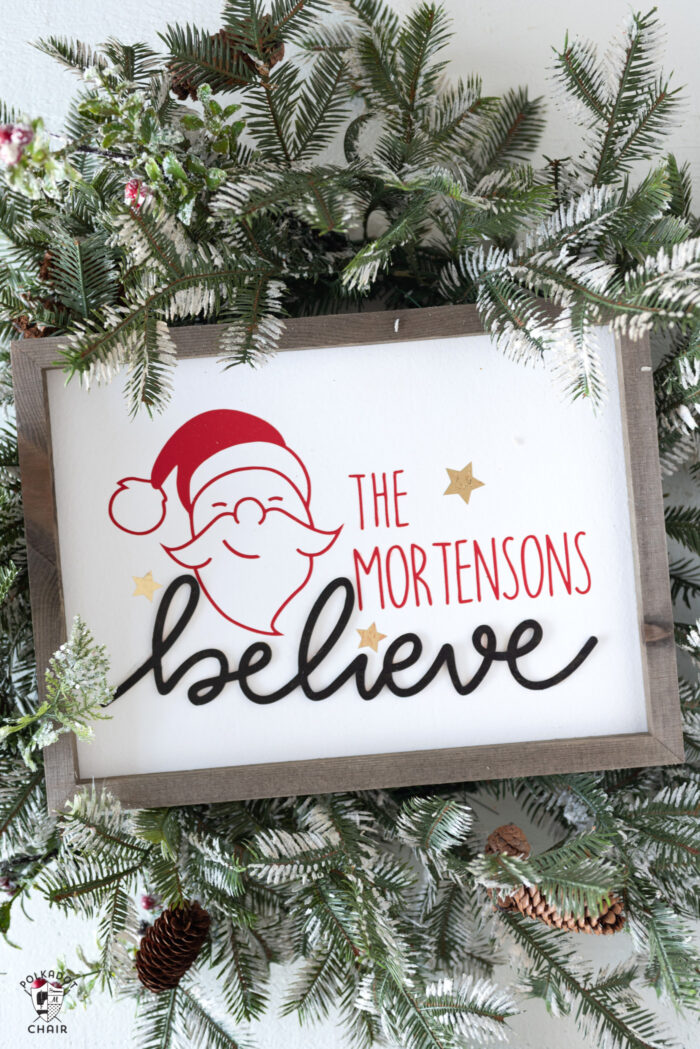
This “Beleive” wood Christmas sign is made using a combination of iron-on vinyl and wood. Yep, you can cut wood with your Cricut Maker and I’ll share with you how I did it.
Did you know that you can use iron-on vinyl on wood? It’s easy and I think yields better results than using regular vinyl.
I have set up a file in Cricut Design Space to share with you. That way you can make the sign yourself and personalize it how you want it. All you have to do is change the name on the sign.
Christmas Craft Idea: How to DIY a Wood Christmas Sign
Let’s talk about how to make one!

Supplies for Wood Christmas Sign
12″ x 16″ wood frame with white painted insert (this is the one I used)
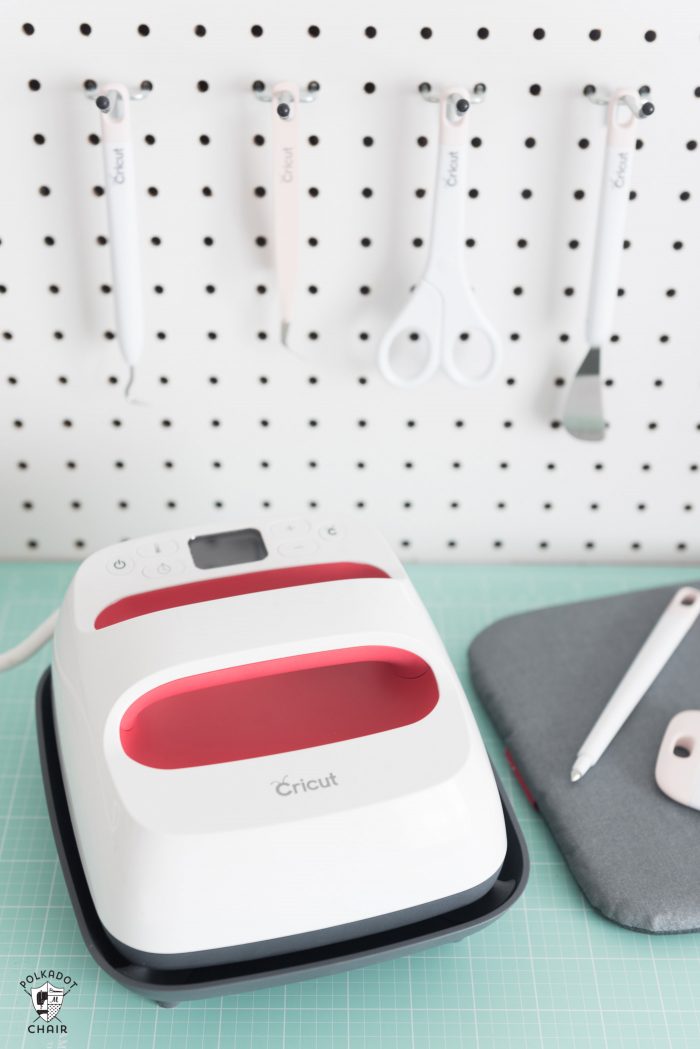
Cricut Maker 3 (you can get great deals on machine bundles on Cricut.com)
Knife Blade Attachment for Cricut Maker
Strong Grip 12″ x 24″ Cricut Mat
Silicone Non-Stick Pressing Mat – Cricut Iron On Protective Sheet
Red Iron-On Vinyl
Gold Iron-On Vinyl
1/16″ Basswood
Painters Tape
Black Paint
Hot Glue Gun & Glue
Step One: Design your Christmas Sign
Hop on over to Cricut Design Space and open the file I’ve created for you.
Where it says “Mortenson” change the text to whatever you’d like. You will probably have to resize the text to fit the name you type in.
Let’s cut out “Believe” from wood first since that’s the most time-consuming part of the project.
Also, if necessary, resize the design to fit your wood frame.
How to Cut Wood with a Cricut Maker
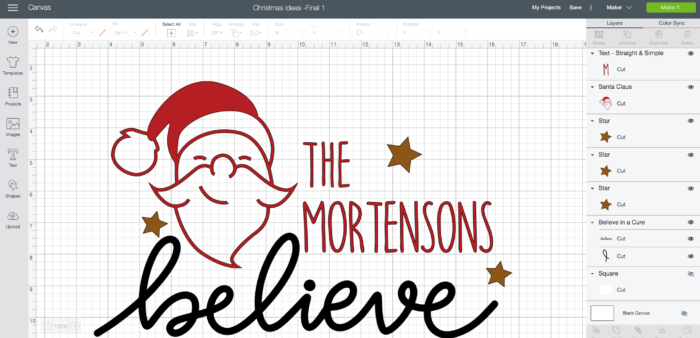
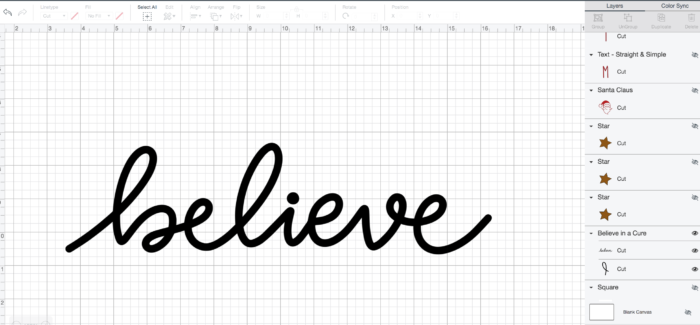
I prefer to work on one image at a time in Design Space. I recommend hiding the other layers of the image and only show “believe”. To do this, simply click the eyeball icon on the right hand side of the window. It will hide/show different layers of your project.
When you only have “believe” showing in Design Space, click Make It.
Next, click “mirror”. It is not necessary to mirror the image when cutting wood, however, I found that if parts of the image were knicked or not perfect it was more likely to happen on the top. If you mirror the image, then the top of the wood becomes the bottom of the finished project and you can hide an imperfection easily.
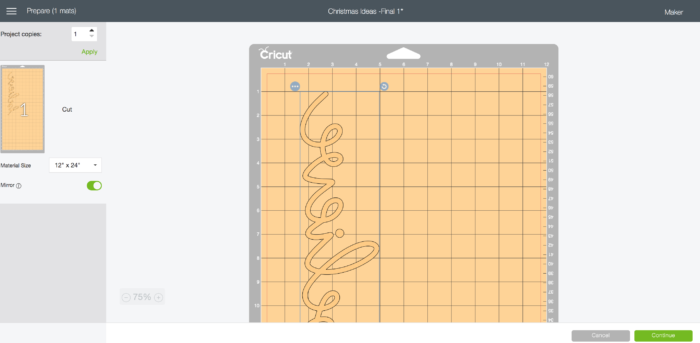
Move the word on the grid of the mat in Design Space so that it is 1″ down and 1 1/2″ in from the outside edge.
Step Two: Prepare your Mat
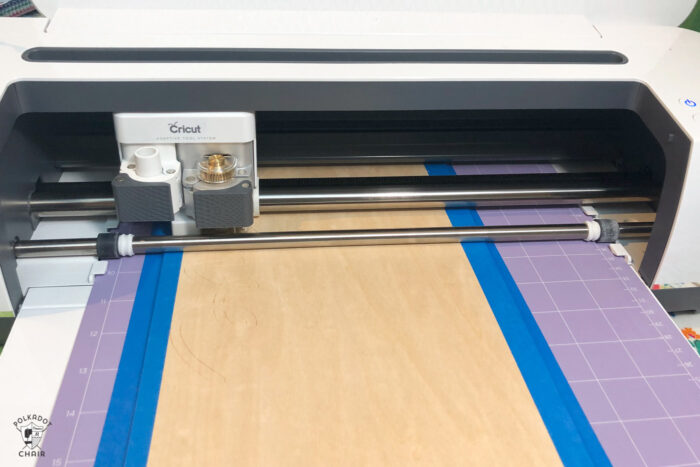
Tape your wood to your Strong Grip mat. You want to place the wood piece 3/4″ in from the side of the mat. Tape it around all 4 sides and make sure your wood has adhered well to the strong grip mat.
In Design Space under materials select “Basswood 1/16”.
Move the Star wheels (the white “washers” on the silver bars in the photo above), out to the very edges of the bar.
Follow the directions on the screen and load the mat into the machine. The star wheels should not be on top of the wood.
Click the Cricut button.
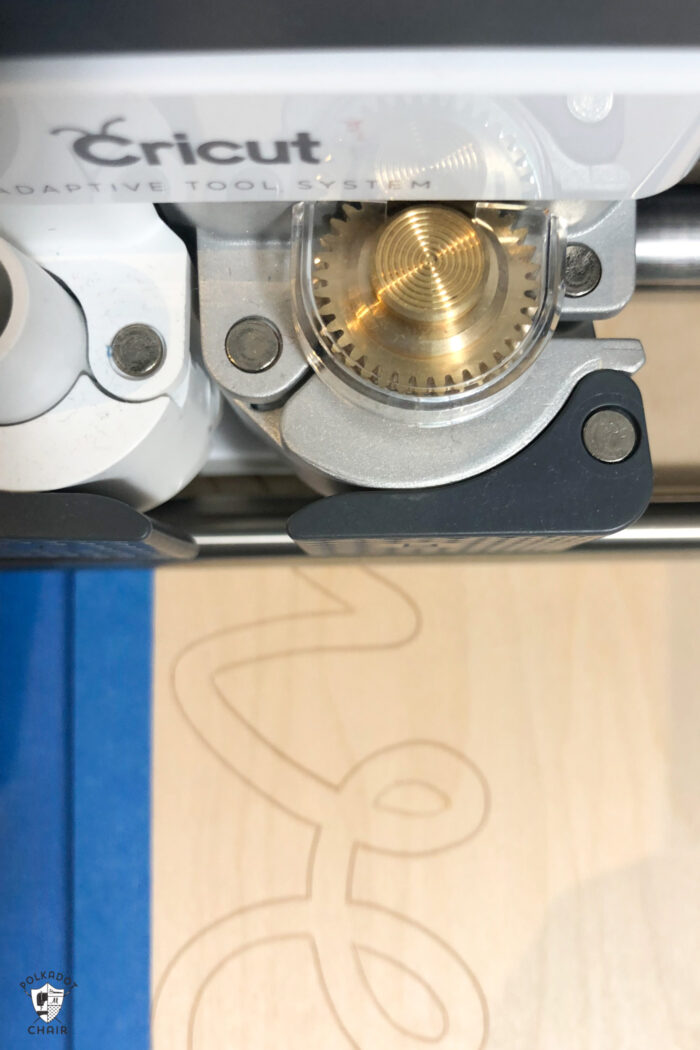
Wait for it to cut. It is going to take a while. The machine makes several passes depending on your material and the image you are cutting. Mine took 16 passes. Keep an eye on it.
Next, remove the mat from the machine when the cut is finished.
Remove the Image from the Mat:
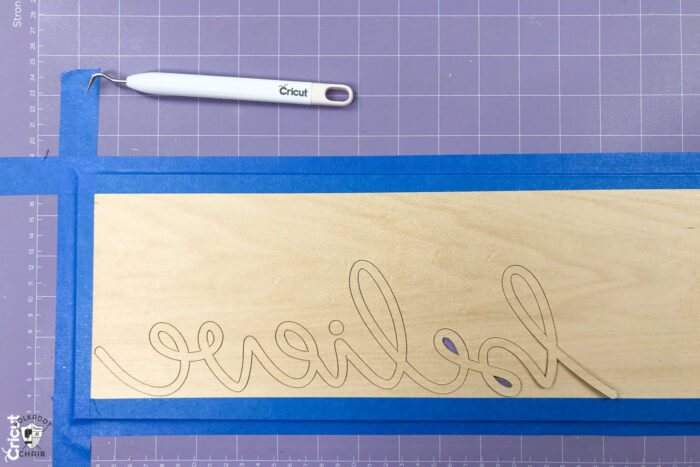
I found it better to remove the excess wood from the mat first, then take off the cut out piece. It can be fragile and you don’t want to wiggle it too much.
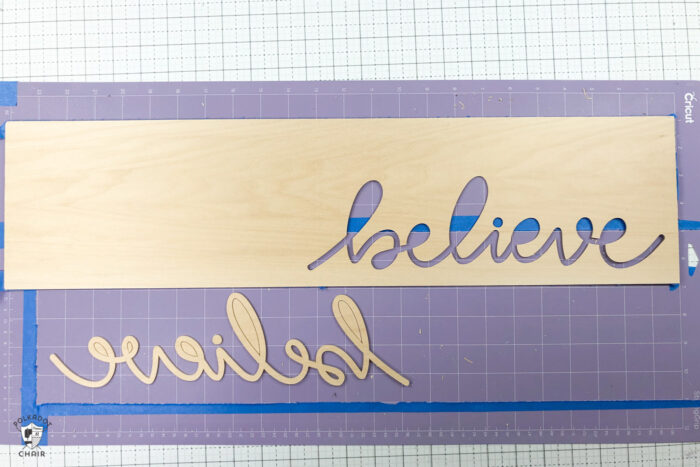
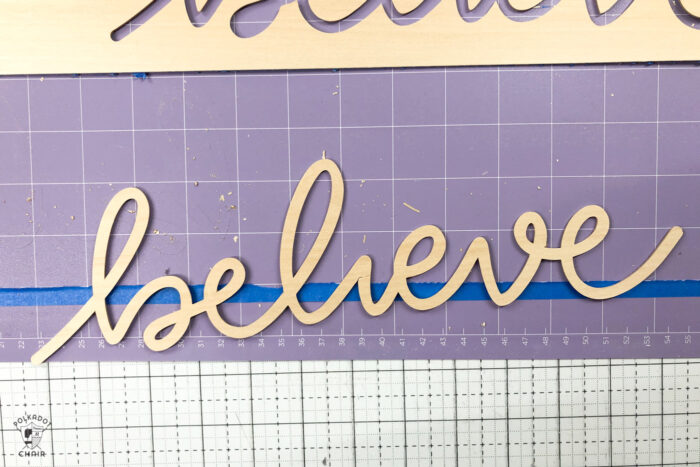
Paint it with black paint.
A few Tips for Cutting Wood with the Cricut Maker
1- Use a new blade. Wood is one of the hardest materials for the Maker to cut and a fresh sharp blade will help you to get a clean cut. My first attempt failed, but that was because I was using a blade that was older. Like, really old maybe even a year.
2- Make sure you buy the right wood. You need to double-check the type and thickness. I got my wood at the craft store. The machine can cut wood that is 1/16″ or 3/32″ thick. It can cut Basswood or Balsa Wood. I would not recommend balsa wood for a more intricate project like this one, it’s too soft.
3- Check and ensure your material is stuck to your mat well. The machine uses a lot of pressure and you don’t want your material to shift as the machine is cutting.
4- If pieces of wood pop out before the cut is done (like the center of an O) remove it with tweezers so it does not get stuck in the machine. You can click the pause button if you need to do this.
5- Do not cut very intricate shapes or very small shapes. Cricut recommends cutting shapes with curves larger than 3/4″.
Step Three: Cut out the Iron-On
Return to your project in design space and hide the “believe” and show the words, Santa and star. Send them to the machine and cut from the iron on vinyl.
Weed the images and using the Cricut EasyPress adhere it to the wood in the desired location. Use the Cricut Heat Guide found HERE for the settings for the EasyPress.
I recommend using a silicone pressing sheet to protect the wood from the heat press. Place the cut-out image on the wood, then place the pressing sheet over the image.
Adhere with the EasyPress.
Finish this step by adding the gold stars. Again, use the pressing sheet to protect the wood and the already adhered iron-on vinyl.

Step Four: Add the Wood Cut-Out
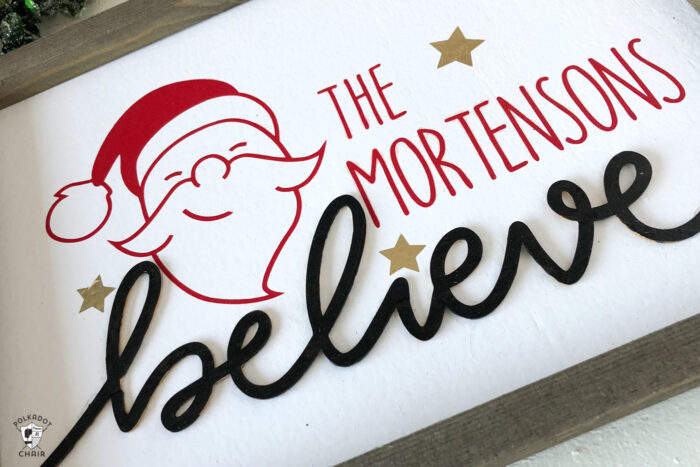
The last thing you need to do is to glue the cut out “believe” onto the sign. Just use a bit of hot glue.
That’s it! Now gift away!
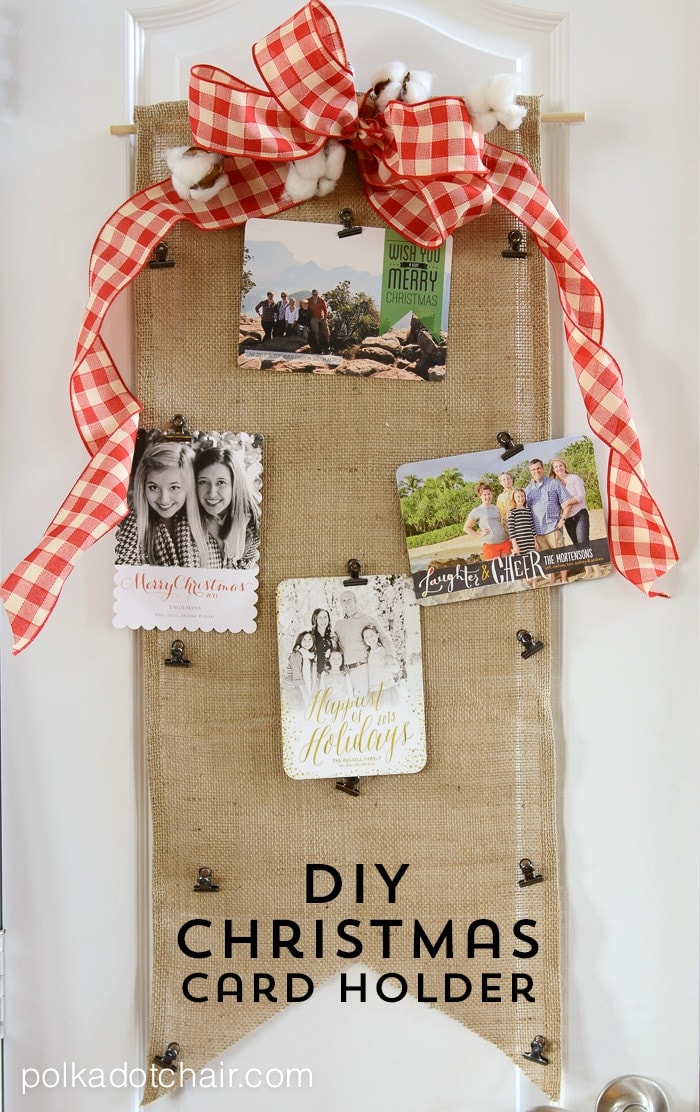
More Christmas Craft Projects that You Might Like:
Merry Christmas Embroidery Hoop Pattern
DIY Christmas Stocking Advent Calendar
Peace on Earth Christmas Canvas Banner made with a Cricut Maker

This is a sponsored conversation written by me on behalf of Cricut. The opinions and text are all mine.