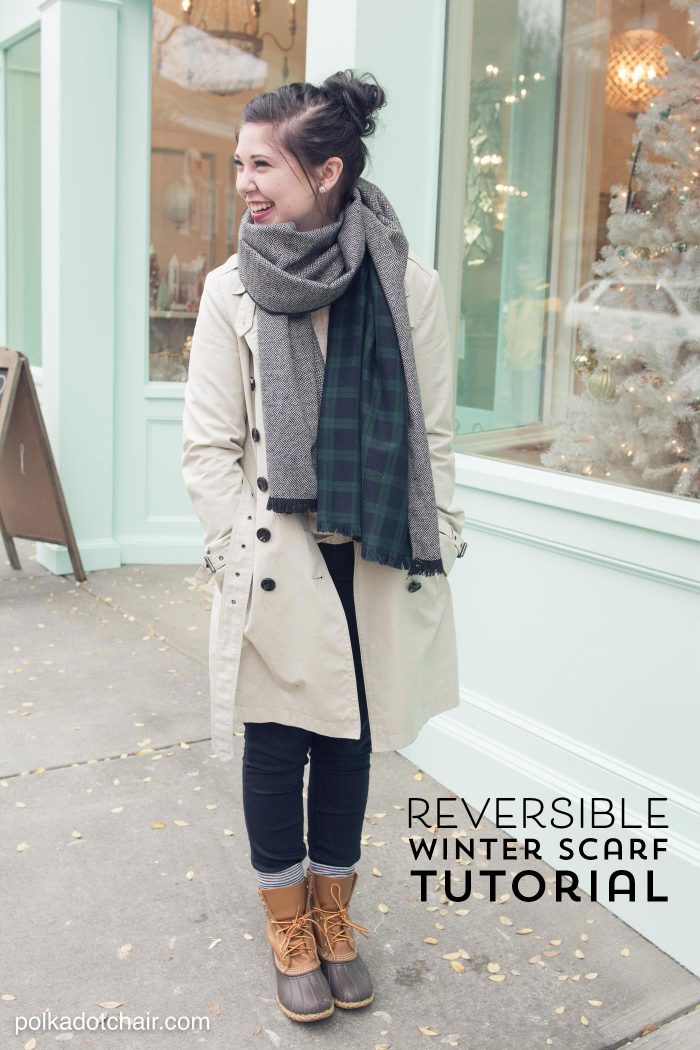
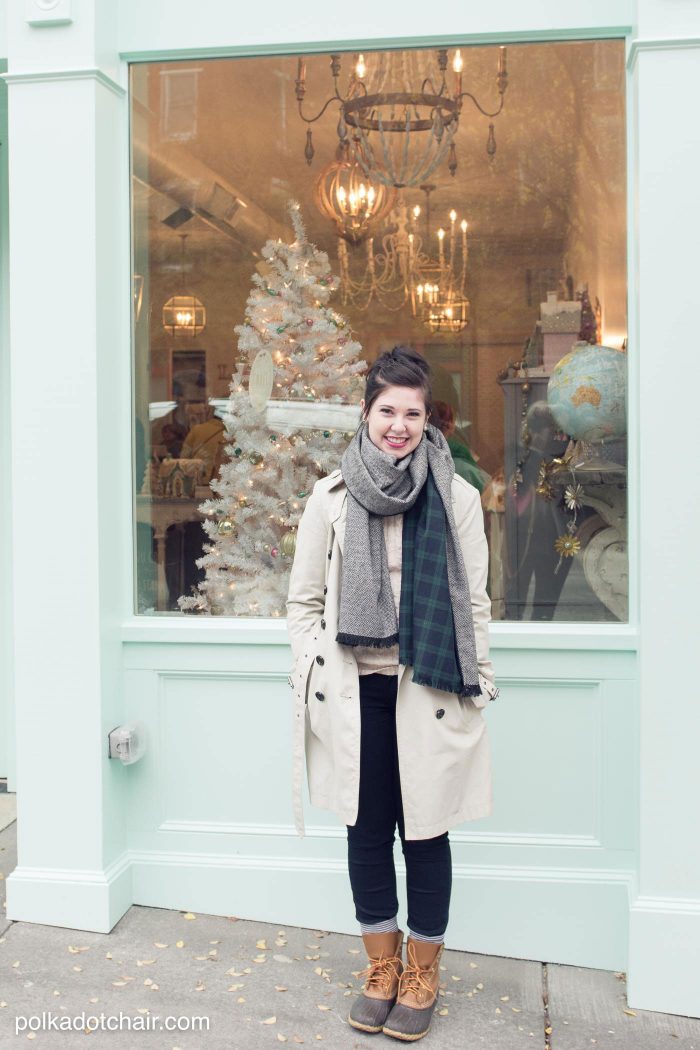
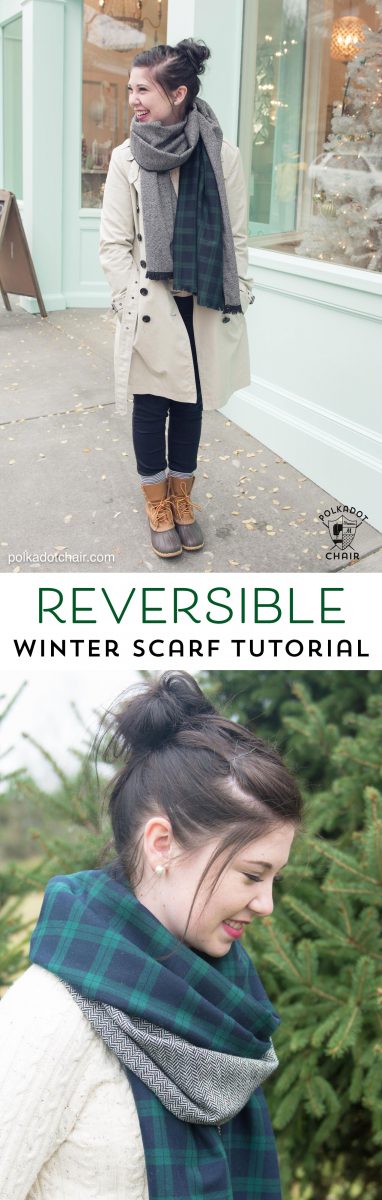
DIY Winter Scarf Tutorial
This week the weather seems to have turned from Fall to Winter. There is a definite chill in the air and I feel like snow is not far away. In my ongoing effort to stay warm during the winter, I’ve begun collecting sweaters, scarves, and gloves. If there’s a cold nip in the air where you are too, then you may like DIY Winter Scarf Tutorial. It would make a great handmade gift for someone this Christmas. If you’re looking for more scarf sewing tutorials then you may want to also check out this DIY snap up infinity scarf tutorial.
Well over twenty years ago I hopped onto a plane, and set foot for the very first time in the state of Kentucky. I was engaged at the time and my “husband to be” was anxious to show me around his old stomping grounds. One of the places I visited on that trip was Shaker Village. It was one of the reasons that I fell in love with Kentucky almost instantly. In the years since that first trip, we have visited Shaker Village on an annual basis.
DIY Scarf Inspiration:
This past October we took a trip down there and met up with some of our extended family for a ghost walk and dinner at their farm to table restaurant. That weekend my niece was wearing a cute reversible plaid scarf. I asked her who made it and she wasn’t sure she said she picked it up at a small boutique. Inspired by that scarf I decided to try to make a similar one for myself.
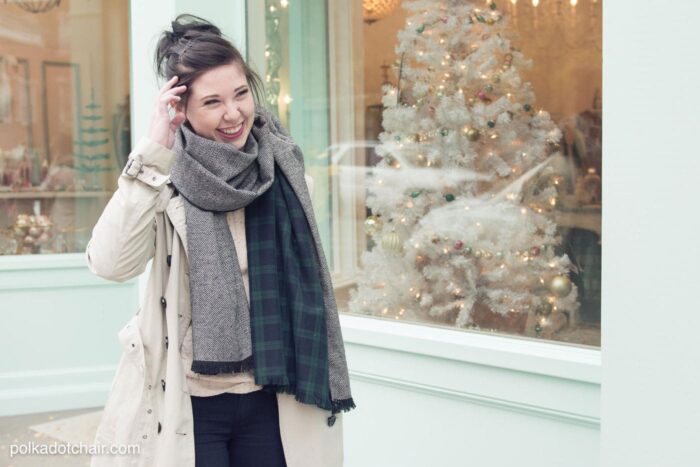
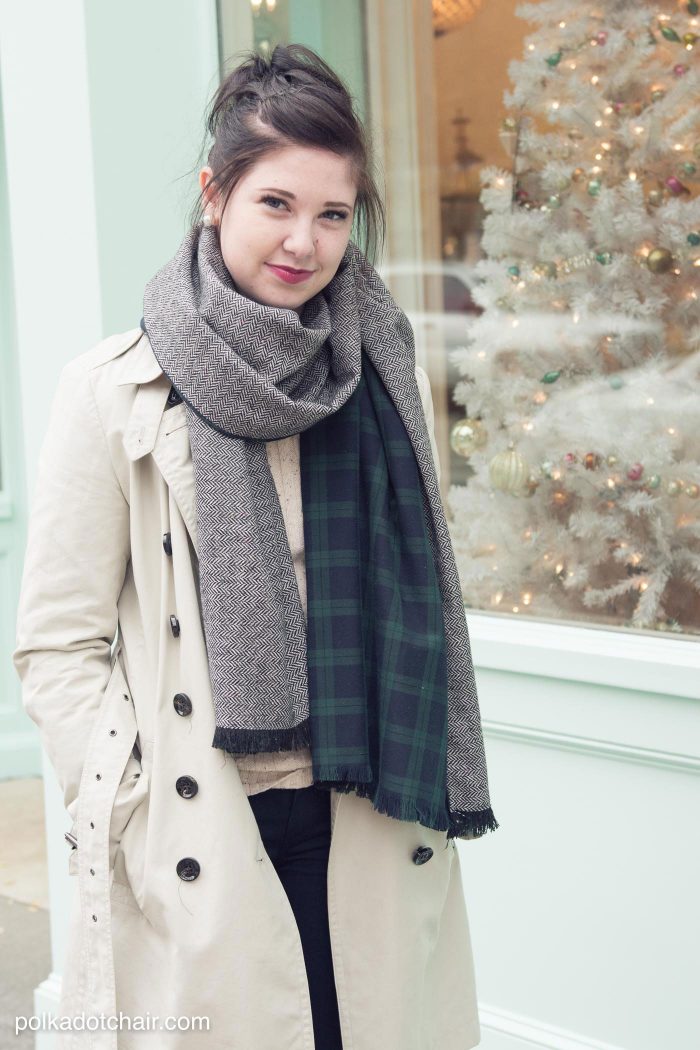
Do you guys recognize the gorgeous girl in these photos? It’s my oldest daughter whom I sent away to college as a “little girl” a few years ago and seems to now to have grown into a beautiful young woman. She was home for Thanksgiving break and not only was I excited to spend time with her, but I was also excited to once again have a second model for my blog projects :). When she got off the plane she asked me what we had planned for the week and as I rattled off my “list” I mentioned that I needed her help to photograph a project. She just giggled and remarked that times have not actually changed all that much.
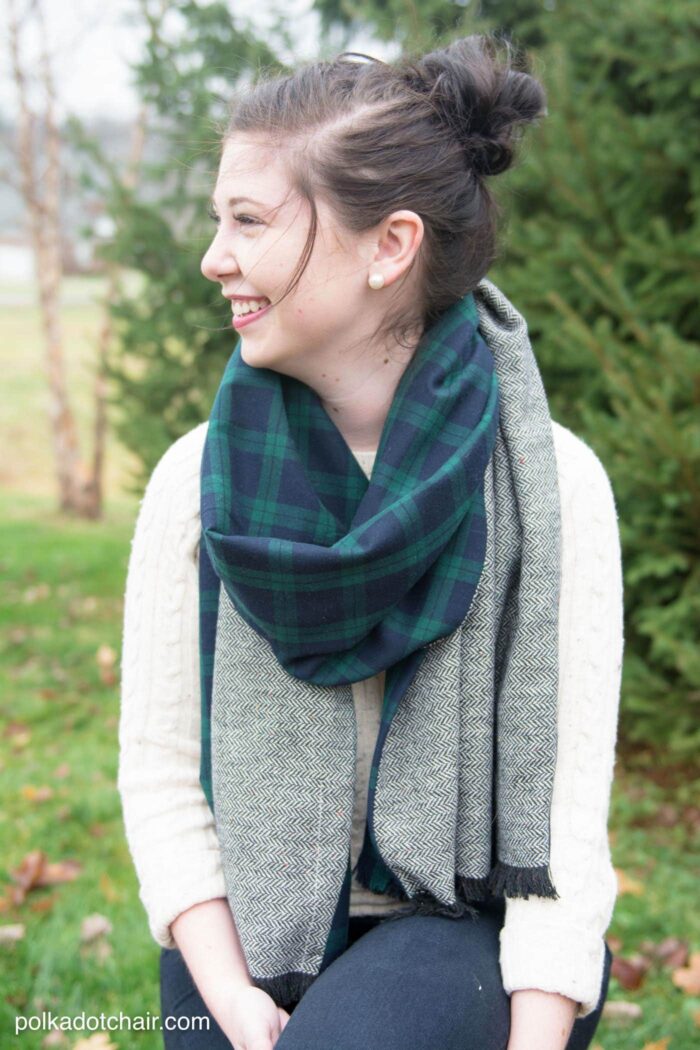
About the Wool Scarf:
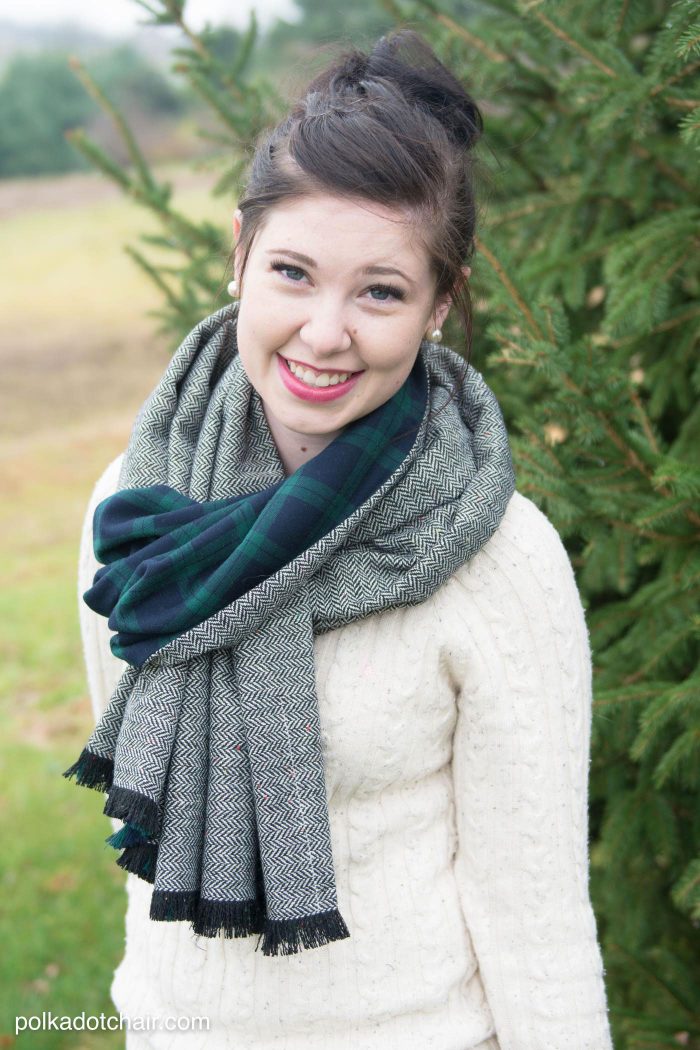
This scarf is crazy easy to make, you only need to sew four straight lines. I’m going to teach you how to make a scarf, and let me tell you, you can totally do this. The fabric is from JoAnn and can be found in the suitings section of the store. You want to make sure you purchase a woven wool blend. The fabric has to be woven in order to get the fringe detail at the ends.
The scarf is also pretty oversized. It’s bigger than the one my niece had and I love how the longer one gives you lots of fabric to wrap yourself up in.
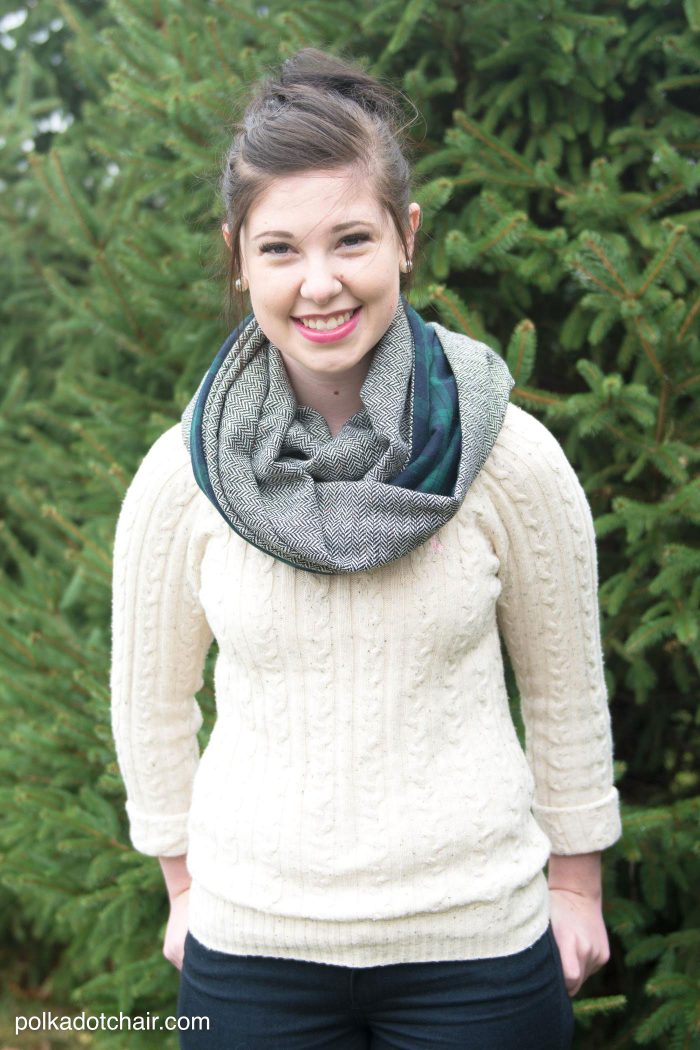
It can also be worn in the same style as an infinity scarf. Just drape it around your neck and loosely tie the ends together in the back.
How to Make a Scarf out of Wool:
Okay now let’s make one!
Oversized Wool Scarf Tutorial Supplies:
- 1 1/4″ yard of woven wool (wool blend) suiting fabric
- 1 1/4″ yard of a second print of woven wool (wool blend) suiting fabric
- Iron
- Matching thread
If you want to make two scarves you can save a bit when you buy the fabric. 1 scarf requires 1 1/4″ yards of each fabric and two scarves will take just shy of 2 yards of each fabric.
Lay your fabric out so that the selvage edges are even. Cut a 22″ strip of fabric from selvage to selvage. Trim this piece of fabric so that it becomes 22″ x 55″ (it’s probably 58″ wide)
Cut a second strip of 22″ wide fabric. Cut the fabric again so that it’s 22″ x 25″ – if you’re making a second scarf save the leftover piece for that.
Repeat with the 2nd fabric print. Note if you’re sewing with a plaid do your best to match the plaids when cutting out your pieces.
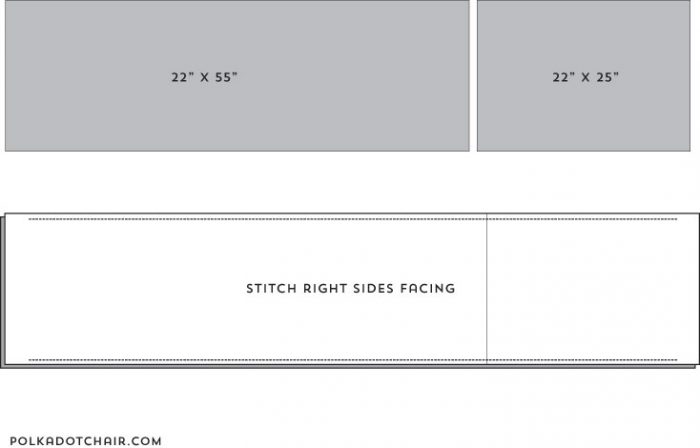
Stitch the 22″ x 55″ and 22 ” x 25″ pieces of fabric together along the 22″ inch sides with a 1/2″ seam allowance. Press seam open.
Repeat for the 2nd fabric print.
Lay the two sewn pieces right sides together. I would recommend NOT matching up the seams you just stitched it the fabric, have them staggered.
Pin the two pieces together very well. If you have a walking foot on your machine I would use it, if not you’ll still be okay.
Stitch the two pieces together along the long sides. Stop stitching 2″ from the end of both sides. Make sure you back-stitch.
(refer to diagram above)
Press the seams you just stitched open.
Turn the scarf right side out. Press.

Finishing:
To get the fringe effect on the ends you’re going to pull threads out of the fabric. The scarf is woven, meaning there are threads running horizontally and vertically across the fabric. Use a seam ripper and pull out a few of the threads that run horizontally. Keep repeating this process a few threads at a time until you reach the point in the scarf that your seams stopped. The seam you stitched down the sides of the scarf will keep the fabric from unraveling anymore past that point. I actually quite enjoyed this step, something about unraveling fabric was quite satisfying, kinda like popping bubble wrap.
That’s it you’re done!! See easy, you can make a bunch as gifts in no time flat.

Do you have a tutorial for a hidden pocket for phone or wallet?
If I understand instructions correctly, finished length is 80 inches–sorry I was a little confused at first
I benefit from reading through your web sites. Thank you so much!
I like this site – its so usefull and helpfull
Hi Melissa,
Your daughter is gorgeous. I love this scarf and I always like to wear a heavier scarf in the cold weather. You are specific about it being a woven wool blend. I have been looking a poly wool blend plaids and solids. If the description doesn’t say woven, how will I know it will fray?
\
When you’re at the store check the cut edge. If the fabric will fray it will work. You can use a poly/wool blend or a 100% polyester fabric, just check that the ends will fray.
Suiting for a scarf: genius. I made it it’s brilliant. Thank you for sharing the idea!
Thank you so much for this tutorial, I love this scarf. However I am confused, you say the short ends are left open, don’t they ravel? I may even have some suiting type fabric in my packed sewing closet, I will take a look at those edges to check this out.
By the way your daughter is just beautiful.
Merry Christmas!
Yes, they ravel, but that gives you the fringe look at the ends… The ravel will stop where the stitching on the side stops.
Hi there! This scarf looks great. I’m a bit confused why you sew the 22 x 55 and 22 x 25 pieces together? Why not just use one long piece of fabric?
I’m also having a hard time finding a woven wool blend at my JoAnns. If I don’t use that, does it just mean I lose the fringe?
Thanks!
Yes, you could just use a 22x80piece of fabric but you’d have to buy almost 3 yards of fabric to get a piece that long, so its more cost efficient to sew the two pieces together.
Did you look in the suiting section of JoAnn, yes you could use flannel, you’d just lose the fringe.
so adorable! looks like something you would buy at madewell!
Thanks! I love that store!
Fabulous post! I do have a question about the fabric choice….will flannel shirting material work? Looking on JoAnn’s Fabric website as we don’t have one close to us 🙁 If not, I’ll look at our local fabric store to see if they can help. Thank you !
Is the short fringed side of the scarf ever sewn?
I love this project! Your daughter is stunning!
No the short edge is not sewn. Thank you!!
cute! cute! still plugging away at my infinity scarves…
I’m a huge scarf lover, and I LOVE THIS! I’m going to Joann’s right away and get the stuff to make this Thanks so much for sharing this with us!! Your daughter is beautiful, a perfect model. Aren’t daughters fabulous? 🙂
Yes, I would totally agree with that statement!