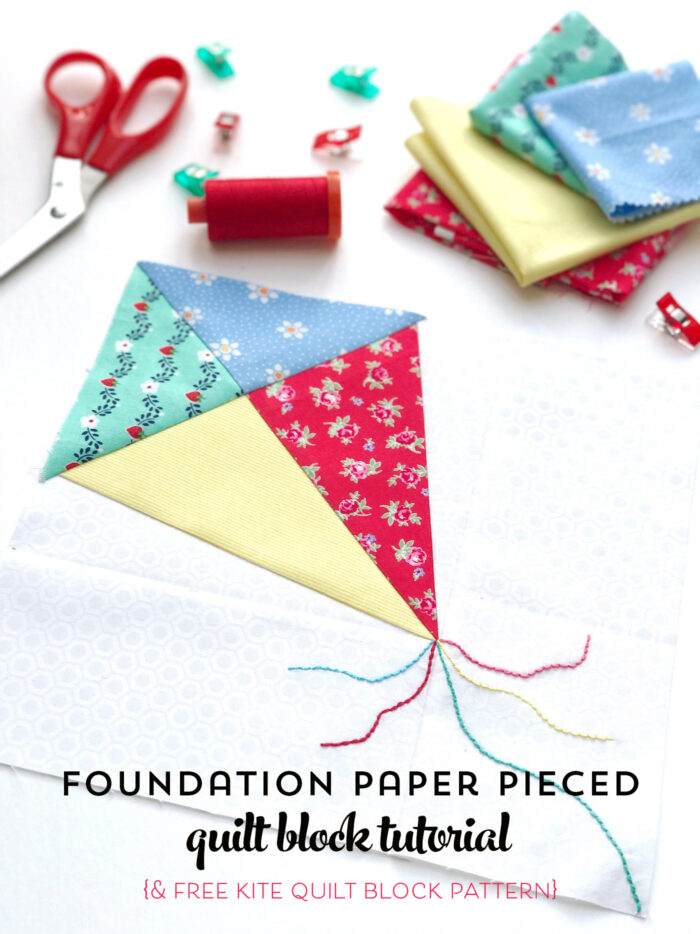
Foundation Paper Piecing Tutorial for Beginners with Free Kite Paper Piecing Pattern
Sarah Ashford is with us today, sharing a foundation paper piecing tutorial designed just for beginners! If you’ve never pieced foundation paper before, then you might like to give today’s tutorial a try! Foundation Paper Piecing is a quilting skill that I wanted to learn, so I asked Sarah to write a tutorial geared just for beginners. She has included a free pattern for a kite quilt block with her tutorial.
While I was in high school, I was lucky enough to take a series of sewing classes. One of the class units covered quilting, and I made my first quilt while I was a senior in high school.
After that, I didn’t make another quilt for YEARS. Other than that high school class, I am mostly a self-taught quilter. What I know I’ve learned from books, online tutorials, and lots of trial and error. Recently I decided that I’d like to learn how to foundation paper piece.
What is Paper Piecing?
I knew that today’s contributor, Sarah, was a pro at paper piecing and asked her (quite selfishly) if she’d consider writing a beginner paper piecing tutorial for this month’s project. I was so excited when she agreed! If you’re not aware, foundation paper piecing is a method that uses patterns printed on paper to piece quilt blocks.
You actually sew on the paper and the fabric at the same time. You can achieve more accurate and intricate quilt block patterns using this technique.
Beginners Guide to Foundation Paper Piecing
Sarah sent me the tutorial last week, and I spent the weekend trying it out. I have to admit that I was stumped at first, it took one or two tries to get it right, but soon it “clicked” and I was able to stitch up 4 quilt blocks quickly!

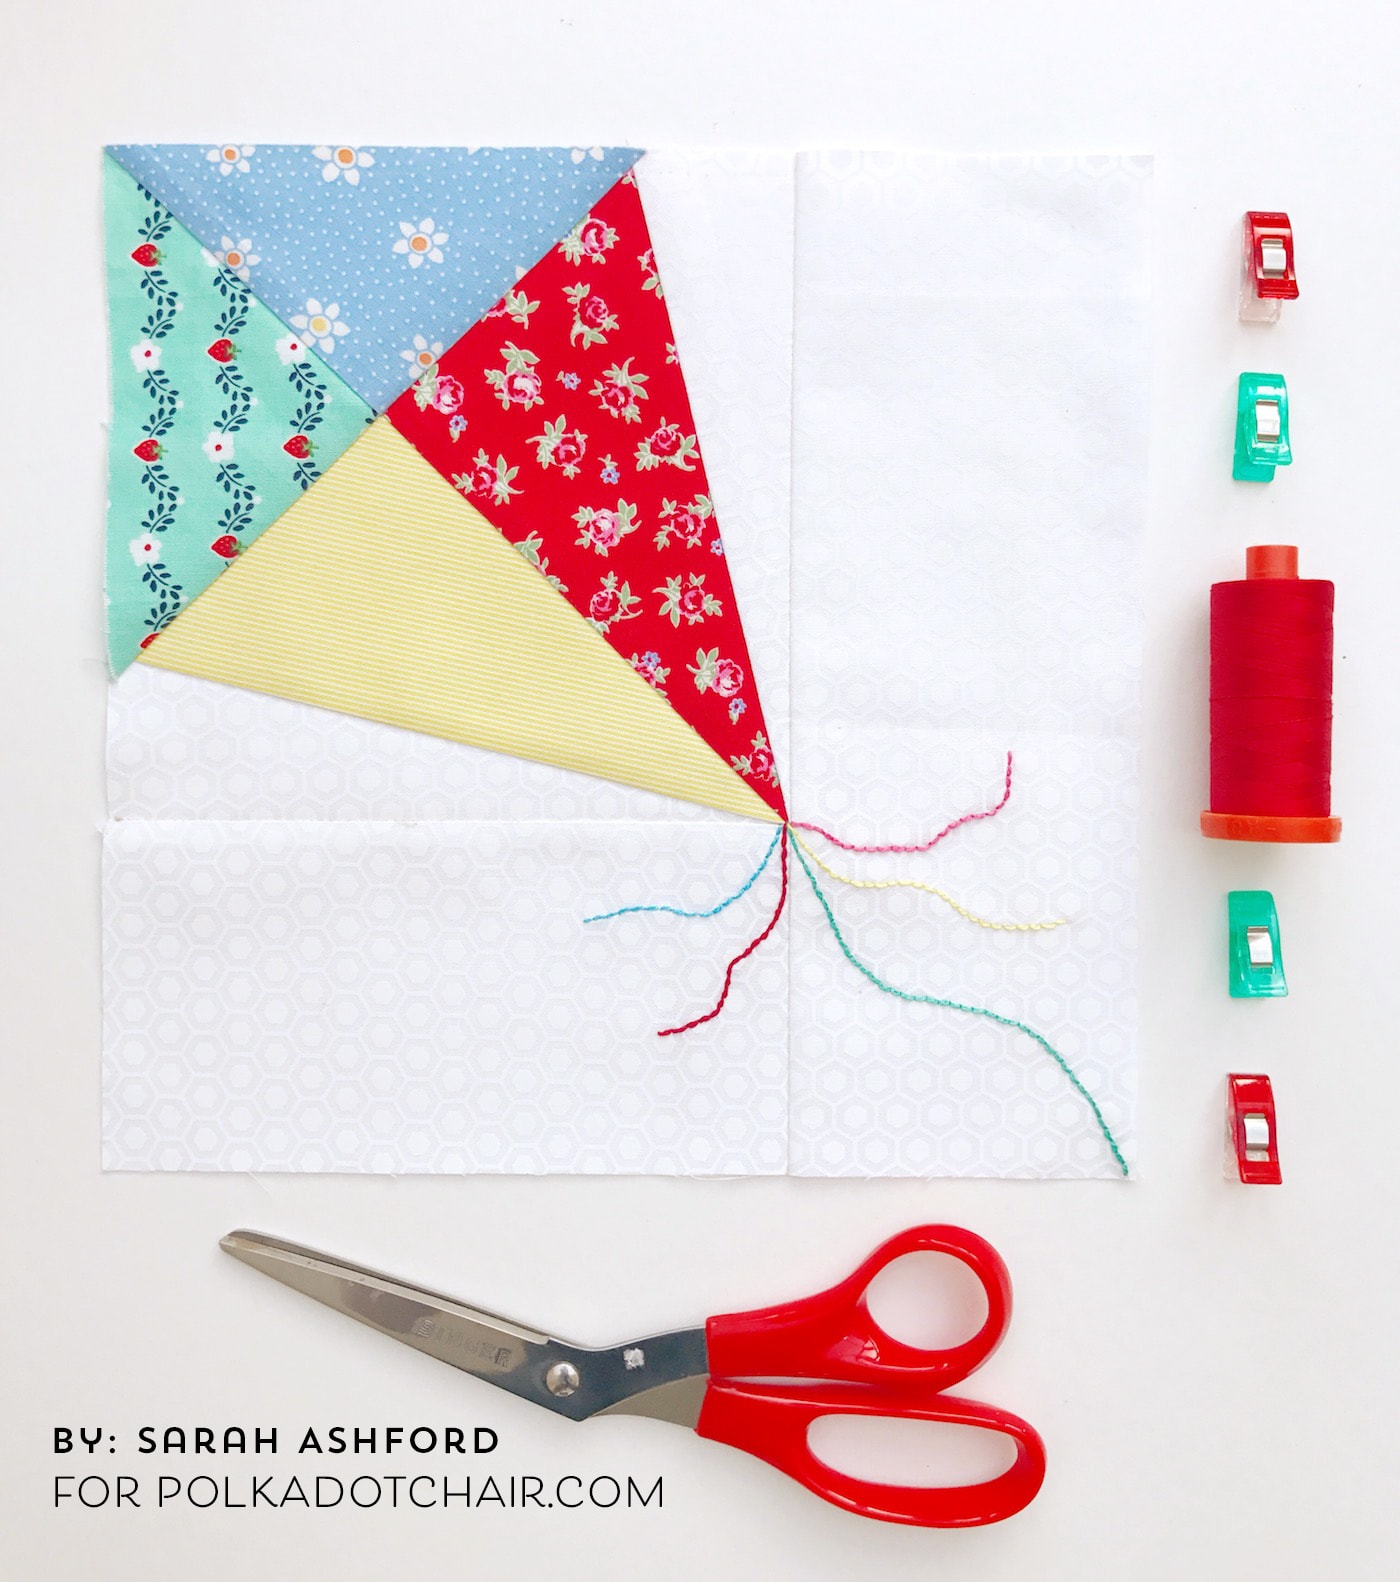
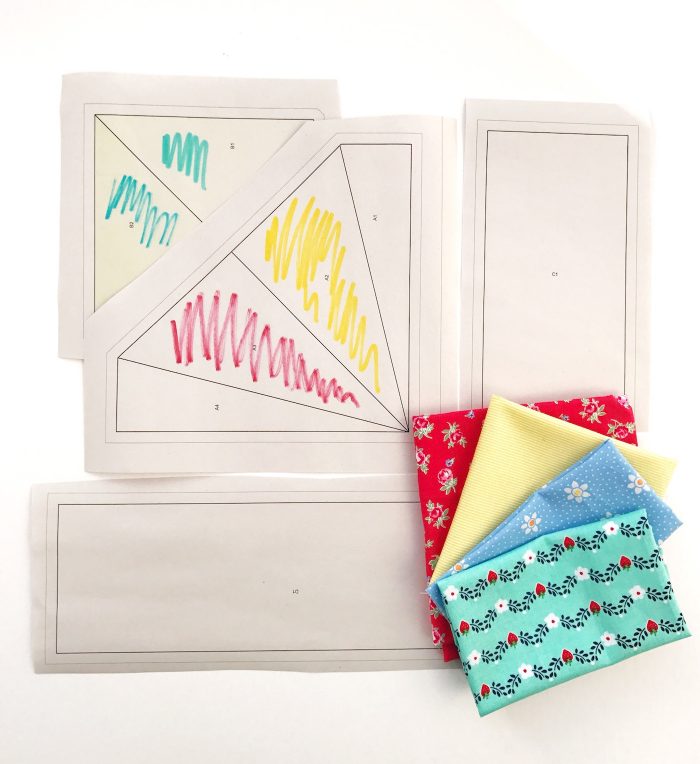
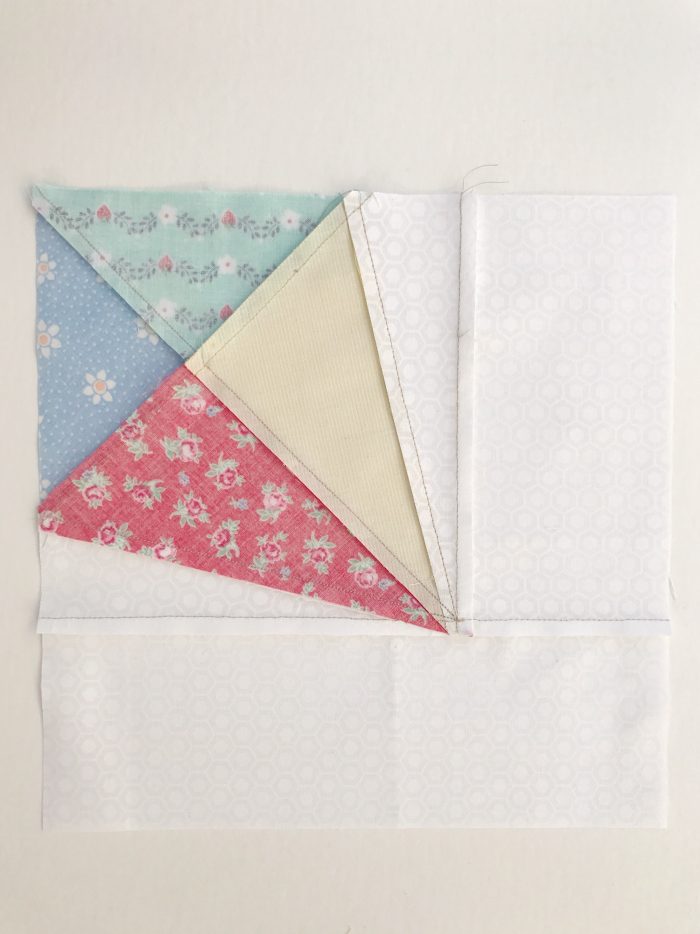
Here, you can see my four blocks! I stitched them up using a bit of Derby Day fabric and plan to turn this into a mini quilt. Wouldn’t this kite quilt block also make an adorable baby quilt?
As Sarah mentions in her tutorial, the technique is a little counter-intuitive. Just be patient with yourself and give it a try!
Hi! Sarah here. I’ve been busy designing lots of foundation paper pieced patterns recently so I thought it would be fun to write a little tutorial on how to foundation paper piece. (FPP)
Tutorial for Paper Pieced Kite Quilt Block
As with many things in life, there’s more than one way to do things, and with FPP, there are different ways to piece your blocks.
I wanted to share with you the way I do it, which is the way I learned several years ago and is the way that makes the most sense to me, as, believe me, the technique can seem a little counter-intuitive and confusing to start with!
Basically, I trim each section of the block first before adding the next block and trimming again. Another way of doing it is by oversizing both blocks and then trimming them after you’ve sewn them together.
Either way, the results are the same…perfect seams, matching points, and a lovely crisp look to your patchwork! Once you get the hang of it, you’ll love it.
How to Get the FPP Pattern
Fill out this form, and we will email you the Kite FPP.
I’ve designed this super simple Kite block to show you step by step. You will need:
Supplies
- Foundation pattern – fill out the form above.
- Foundation paper (optional) or regular printer paper
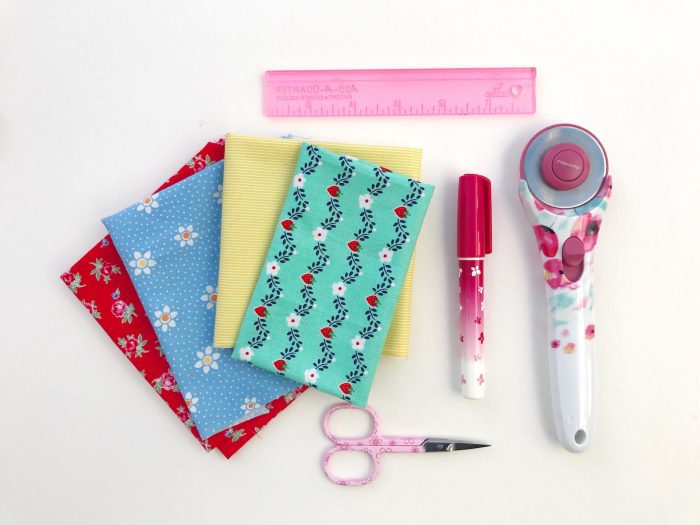
- Fabric scraps larger than the sections of the block
- Colored pens
- Rotary cutter
- Add a Quarter Ruler (optional) or regular acrylic ruler
- Postcard
- Sewline pen
- Embroidery scissors
- Sewing Machine
- Iron
- Cutting Mat
- Other regular sewing supplies
A few notes before we get started
- I really like to use foundation paper piecing paper, as it’s thinner and makes it much easier to remove the papers when you’ve finished your block. But if you don’t have it, regular printer paper is fine.
- When you stitch through the paper, use a short stitch length. This makes it easier to remove the papers later.
- I also love my ‘Add a Quarter’ ruler, which has a grove on it that sits beautifully against the paper and the fabric, allowing me to cut my 1/4” seam more accurately each time. But you can use a regular ruler. You have to take care that it doesn’t slip as you will be placing it on top of the paper and the fabric.
- A postcard or thick piece of paper is really handy for folding back the paper accurately. I learned this way and wouldn’t be without it!
- I’ve recently discovered the marvel that is the Sewline Glue pen for starting off Foundation Paper Piecing. It’s such a good idea as it allows you to lightly stick the fabric to the paper without creating bulk by using pins. But this is optional, and you can use a pin to secure your first piece in place. If you do, try to avoid glass head pins, and use a pin with a small head so that everything lies a flat as possible. All will make sense in a minute!
Instructions
Step One:
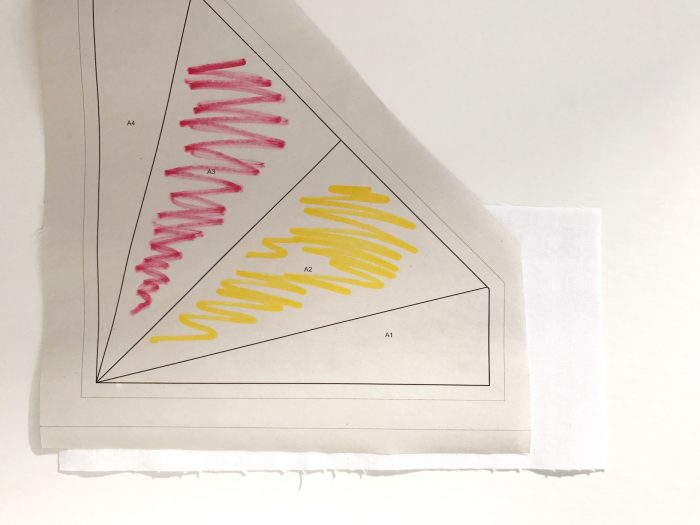
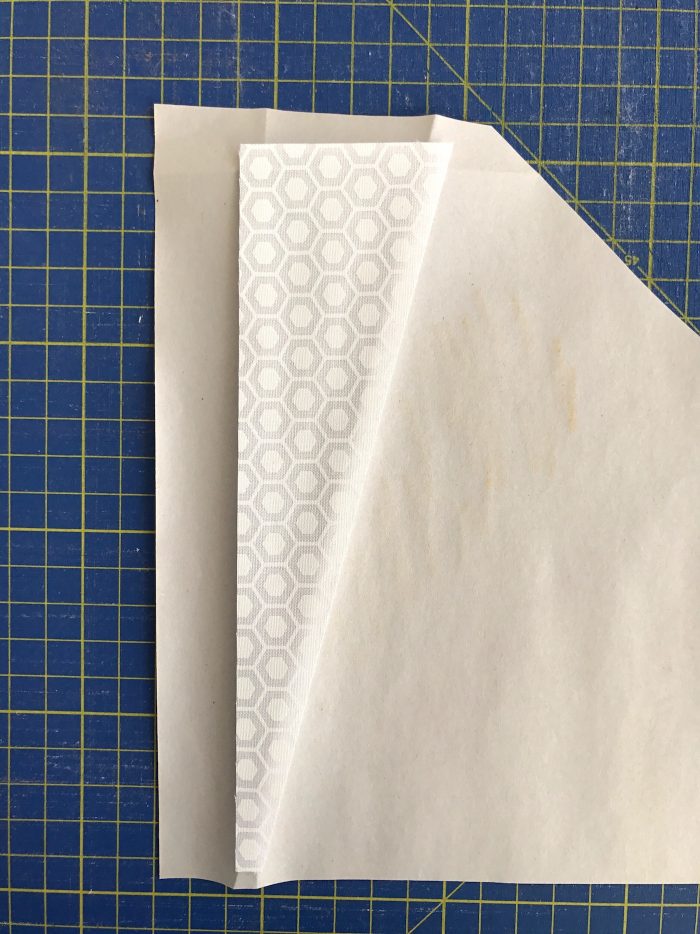
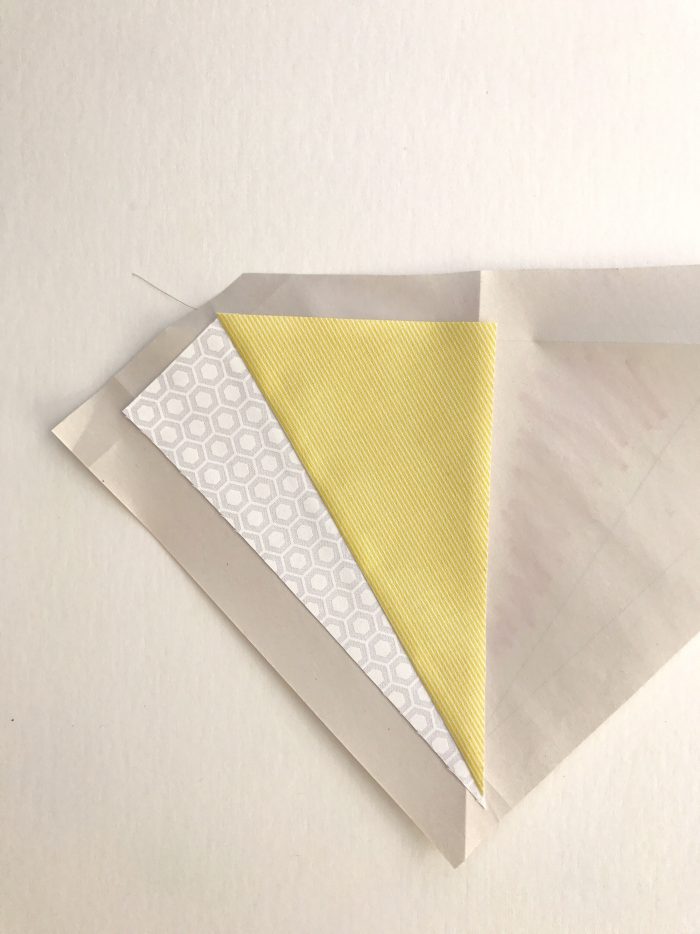
Once you’ve printed off your pattern, cut out each section, making sure to keep the 1/4” seam all around. Start with the section labeled block A1, A2, A3, etc, then move on to B1, B2, B3, etc., as this will be the order in which you are going to piece the block.
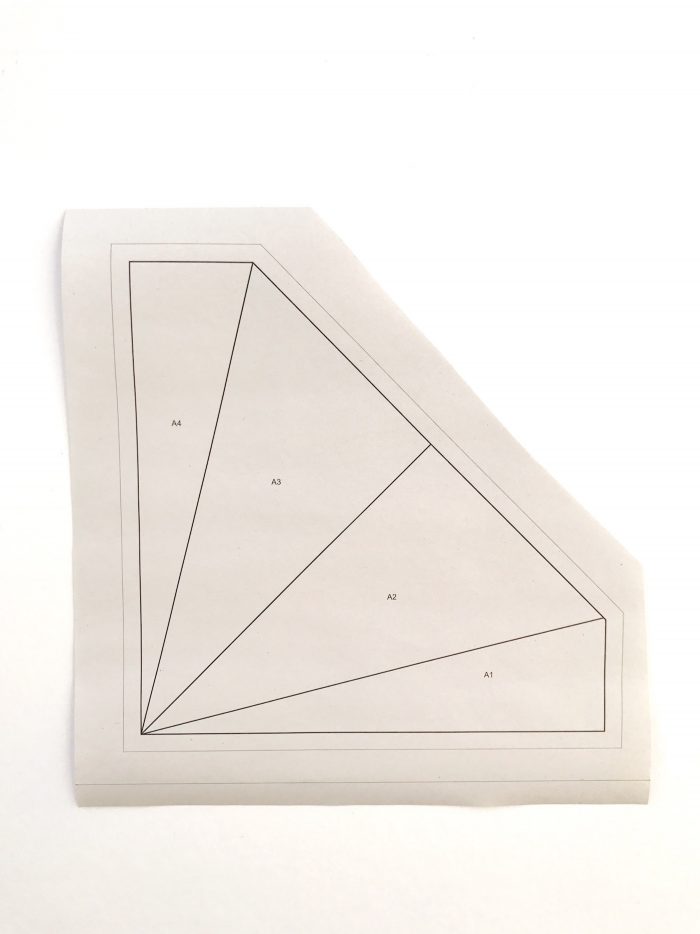
I find it useful to lay out the block in the order that it’s going to appear and to roughly color each section according to what color I want it to be. This makes it much easier when it comes to piecing, as you can instantly select the right fabric for the right section.
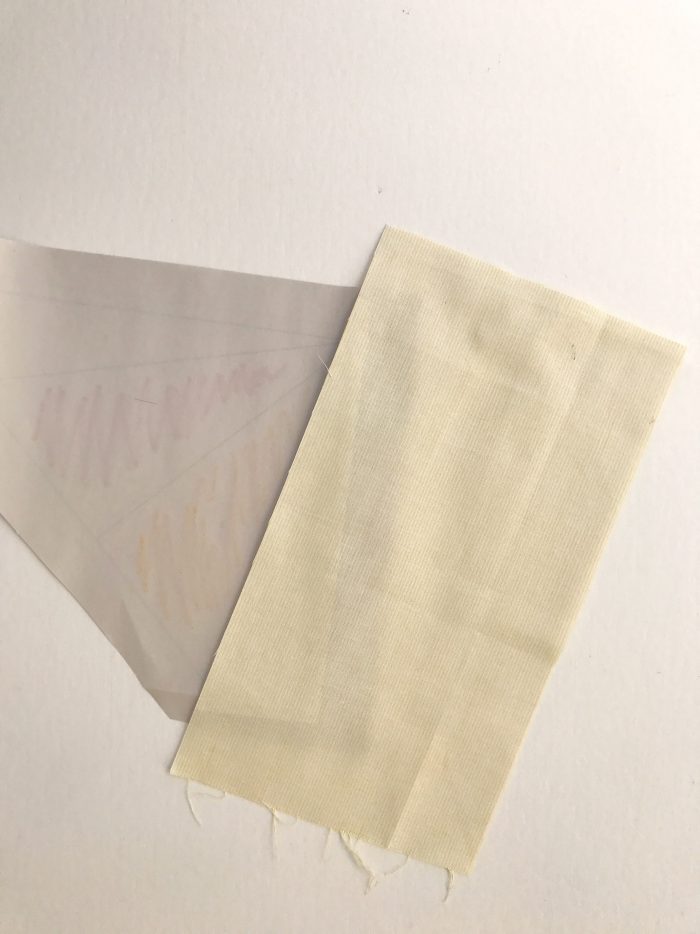
Starting with section A1, take a piece of fabric that is larger than this section. Using the Sewline pen, place a small amount of glue on the REVERSE side of the pattern on section A1, and stick the fabric so that the right side is up. Your block is going to be created on the back of your pattern. (This is where it can get confusing at first, so please take your time!)
Next, you will trim the fabric to the size of the A1 section BUT with a ¼ inch seam all around. Take your postcard, fold back the first line, and create a nice crisp seam.
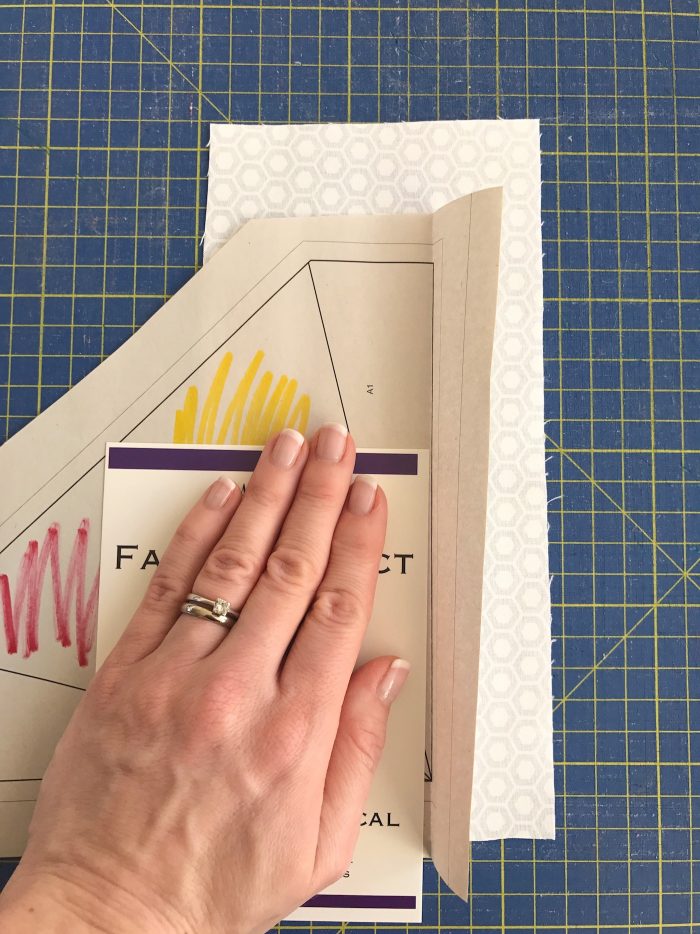
Now, using your ruler, trim a quarter-inch seam. Do this for all the sides of section A1.
Section A1 is now the correct size with an accurate 1/4” seam all the way around. Clever huh!
Step Two:
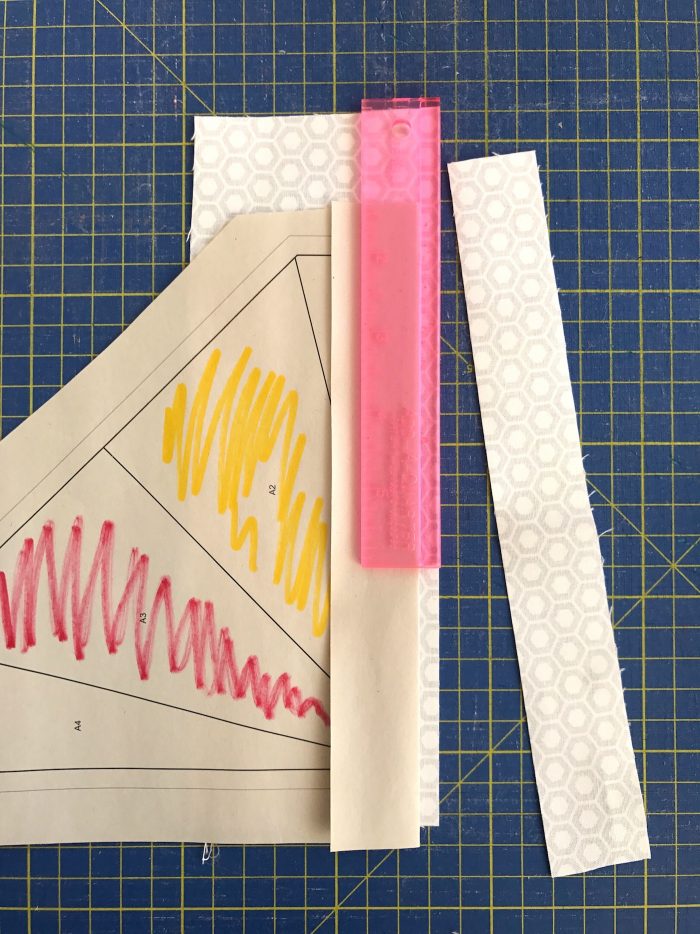
Now moving on to section A2. This piece of fabric needs to be bigger than the size of the section. Always go quite a bit bigger as it’s very frustrating if you find it’s not big enough when you’ve sewn it as unpicking tiny stitches through paper is a pain.
(Yes I speak from experience!) The best way to ensure this is to hold it up to the light to check the fabric covers the whole section and a 1/4” seam allowance.
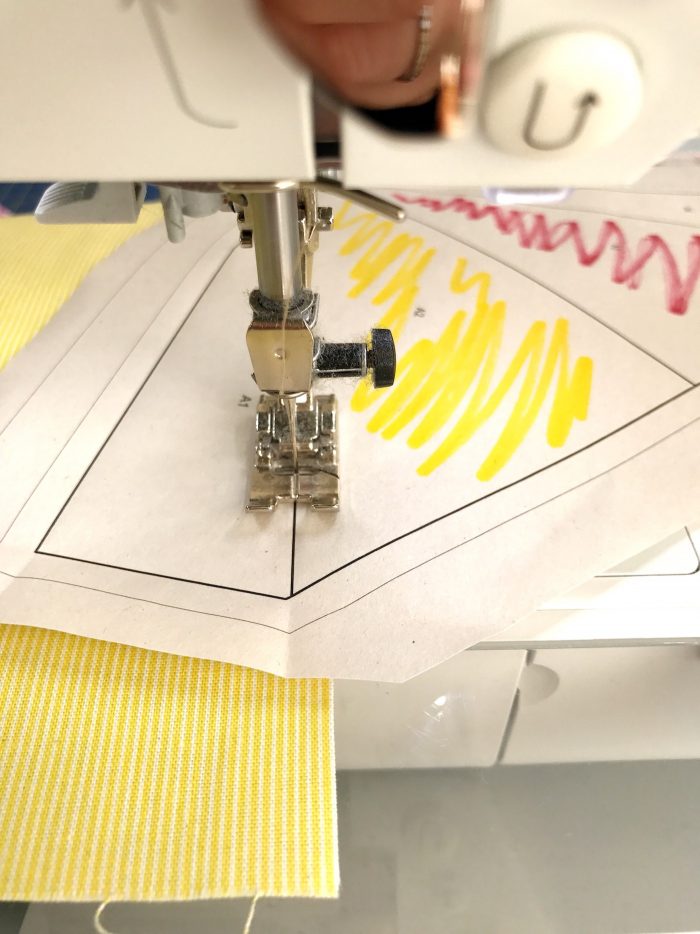
Use a rotary cutter to create a straight line down one side and line it up with the A1 section, RIGHT sides together. (This is the bit where you can completely overlap the sections and trim afterward.)
Turn the pattern right side up and stitch down the line between sections A1 and A2, remembering to use a short stitch length.
Flip the paper over and iron section A2 into position.
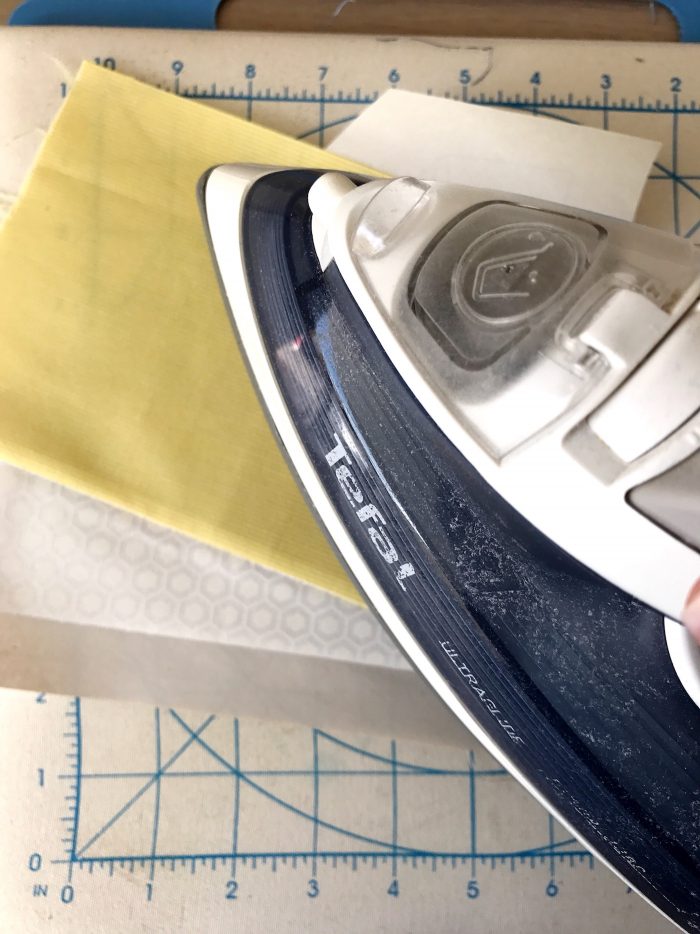
Flip back to the pattern side and repeat by using your postcard. Add a quarter ruler to cut out section A2.
That’s your first two sections accurately sewn together! Now repeat the same steps for A3.
Step Three:
Quick recap:
Cut your section larger than necessary. Cut a straight line down one side. Place the right sides together with section A2. Flip over and stitch on the line using a short stitch length. Flip and iron into position. Flip and trim your 1/4” seams.
Keep going till you have completed all of section A.
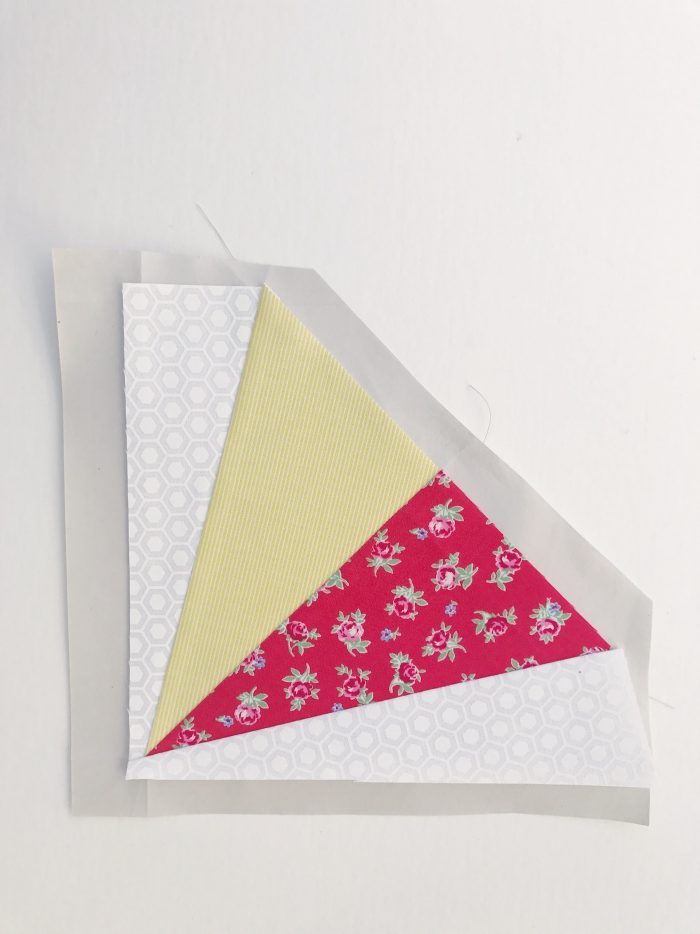
Look how perfect, accurate and crisp it is!
Repeat the same process for section B. In this Kite pattern, sections C and D aren’t pieced, so that keeps things simple!
Step Four:
The next job is to join the blocks together, just the usual way you would sew blocks together, pinning right sides together and using a 1/4” seam. You can use a regular stitch length for this bit.
I like to tear away a little bit of the paper where you’re going to stitch the blocks together so that you can match up the seams accurately. I leave most of the paper in at this stage as it helps maintain the stability of the blocks.
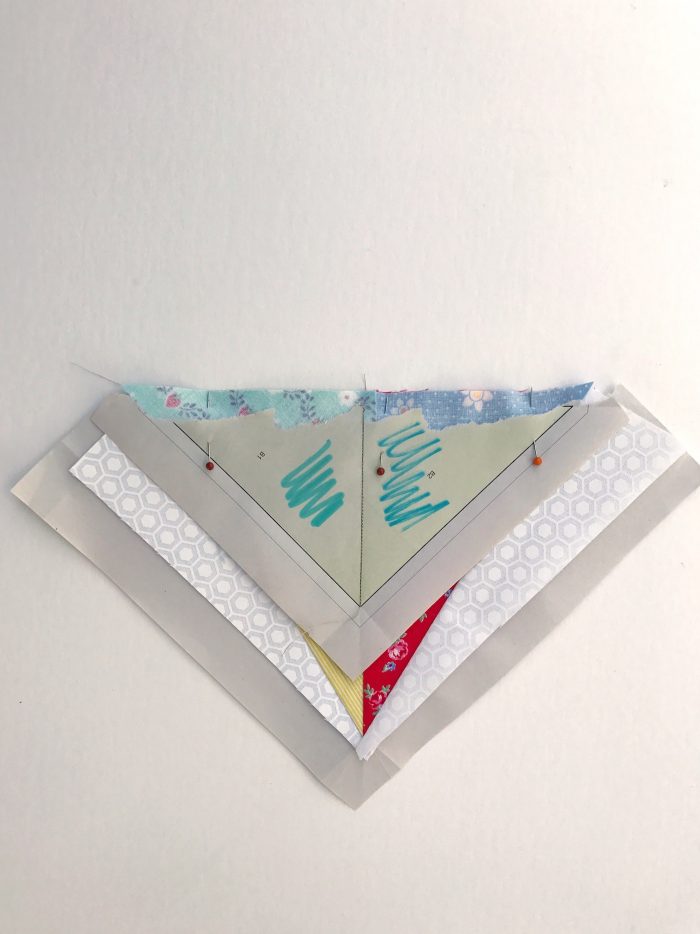
Stitch all the blocks together, and then you can carefully remove the papers by tearing them away. It should come away easily, but if you have any bits that are tricky to get out, you can use a pair of tweezers to get them out.
Look how perfectly pieced your block looks!
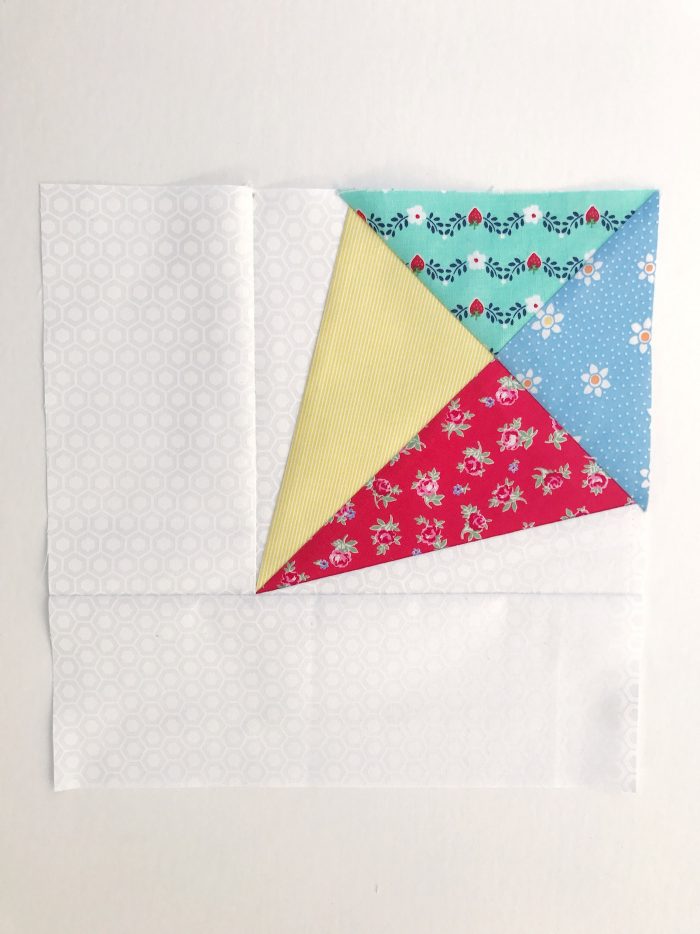
And even the back is perfect!
Now all I need to do for my kite block is add some ribbon tails with a bit of hand embroidery 🙂

Happy Foundation Paper Piecing! You may find it tricky at first, but persevere to get the hang of it, and you will have beautiful, accurate results every time!
About the Maker:

Sarah Ashford is a British Quilter and embroiderer and founder of the GreatBritishQuilter challenge on Instagram. Sarah regularly contributes projects to magazines and loves to spread the joy of quilting everywhere she goes. Follow her on Instagram at @sarahashfordstudio, and be sure to check out her beautiful sewing room decals in her Etsy shop www.etsy.com/shop/sarahashfordstudio


Hi, it says “fill out this form” but then I never saw a form or anything g clickable. Help!
Try refreshing your page. It’s a large box with a spot to enter your email.
I would like to ask two questions before making this block. What is the size of the finished block, please? The section with the kite itself looks square, but the complete finished block looks rectangular. Are Sections C and D meant to be border pieces? Thank you very much for the pattern and tutorial.
Do you have a machine needle preference for this technique?
I don’t change my needle for this technique.
How do you know how much fabric to purchase? What size does the block end up being?
This would be a lot of fun to use similar color scraps to make large kites! I am always looking for simple blocks to use some of the scrap stash I have. Thanks for sharing.
Your darling four kite sample has pictured “kite tails” at the base. Those were added after? Or eliminated for ease of use?
I agree this would be an adorable baby quilt. In fact I hope to try. I have been very curious to understand how paper piecing works, your tutorial is very clear and understandable. Please excuse me if this is a stupid question, I am a beginner. Doesn’t paper piecing take longer because you cannot cut out several pieces at a time? It also seems to create waste.
Thanks,
Lisa
Do you have a link to print the Instructions for the Paper Pieced Kite Pattern? Thanks! Suzy
You can print the templates with the PDF that you download. You just read the instructions off the page.
They look so adorable!! Will try making some of these during the week, thanks for the idea!