Free Winter Themed Hand Embroidery Pattern
Looking for a fun project to help you while away the long winter days? Sarah Ashford is back with us again today sharing a free Winter Hand Embroidery pattern. It’s the perfect project to curl up by the fire with on a cold winter afternoon!
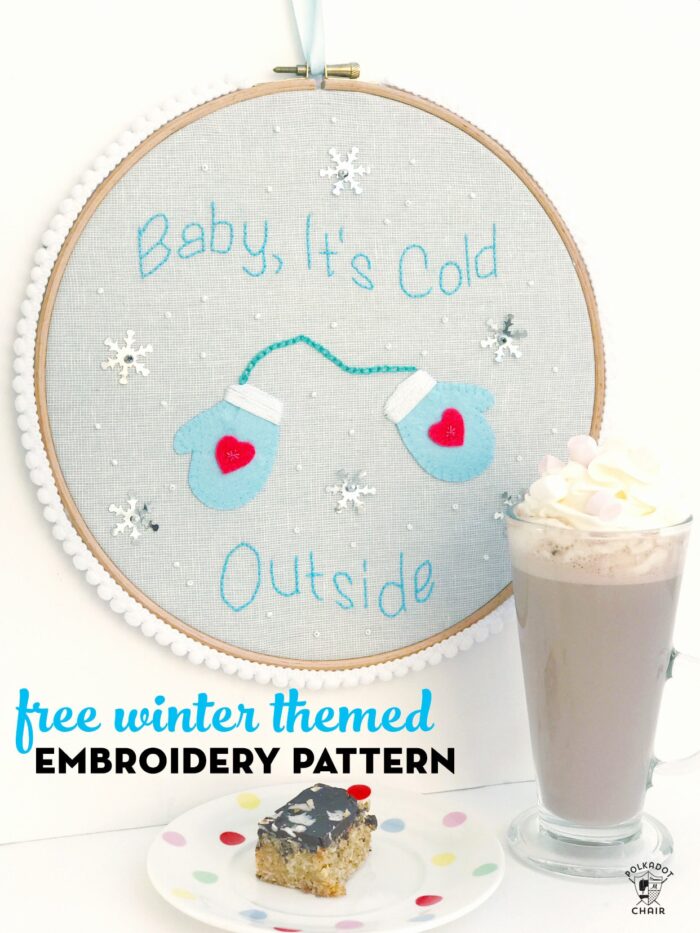
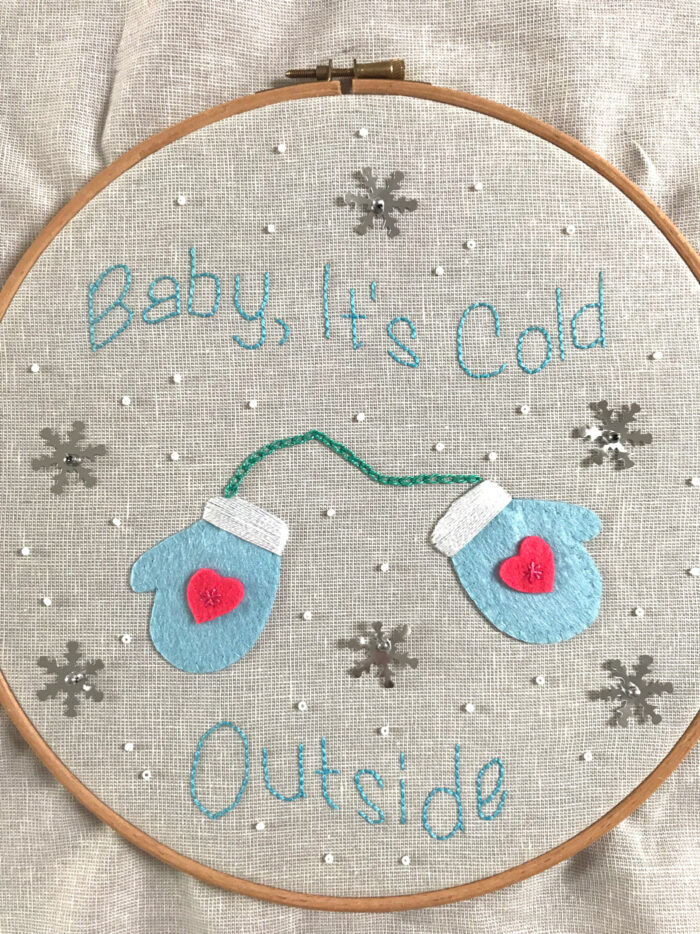
The Christmas festivities are over, and here in the Northern Hemisphere, the bitter chill of winter has firmly set in. Whether we’ll see snow remains to be seen, but any trips outdoors most certainly require thick coats, woolly hats, and a warm pair of gloves! So inspired by the depths of winter, and with Christmas tunes still echoing around in my head, I’ve designed an embroidery that has captured both the fun and essence of winter…I hope you like it!
For the Embroidery Hoop Pattern You Will Need:
Linen fabric, approx 15” square
Embroidery hoop
Mechanical pencil
Lightbox (optional)
Embroidery thread – blue and turquoise
Felt – light blue and coral pink
Silver foil snowflakes (approx 1” in diameter)
Silver beads
Small white seed beads
Lightweight interfacing approx 14” square
Glue gun
60cm Ribbon
PDF templates – on the Sewing Templates Download Page
Usual sewing supplies (needle, scissors, rotary cutter, cutting mat etc.)
To Make:
Step One: Trace the Embroidery Pattern
Print out the templates and place behind the linen in the center. With the mechanical pencil and using a light box, (holding up to the window) trace on the ‘Baby, It’s Cold’ wording. Place the hoop loosely on top and use this as a guide to get the positioning correct for the ‘Outside’ wording. The gap needs to be big enough for the mittens to fit but be mindful that it’s not too close to the bottom of the hoop.
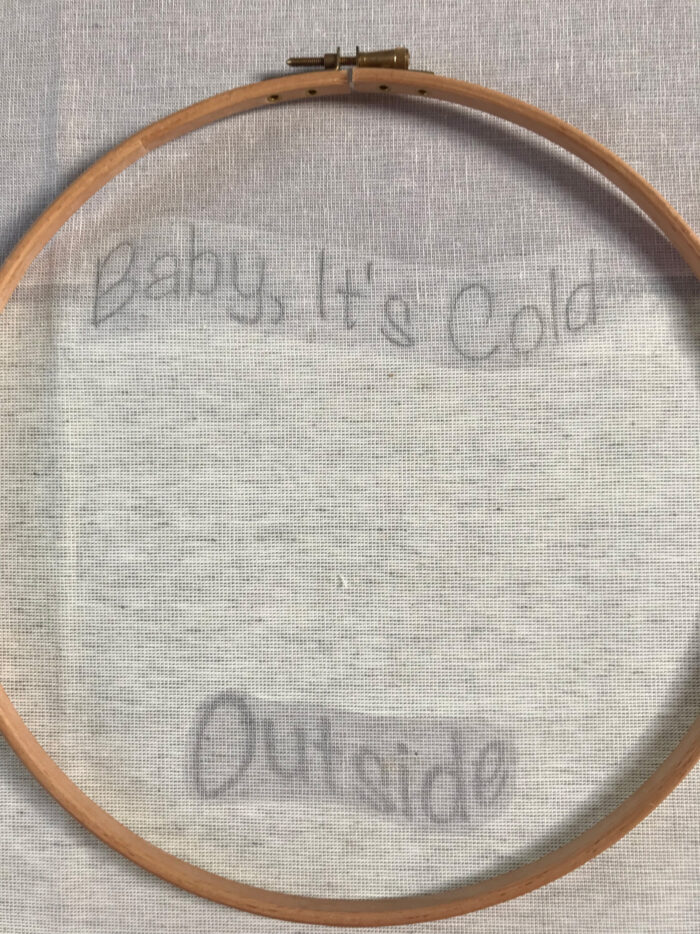
Put the linen in the hoop and ensure it’s tight.
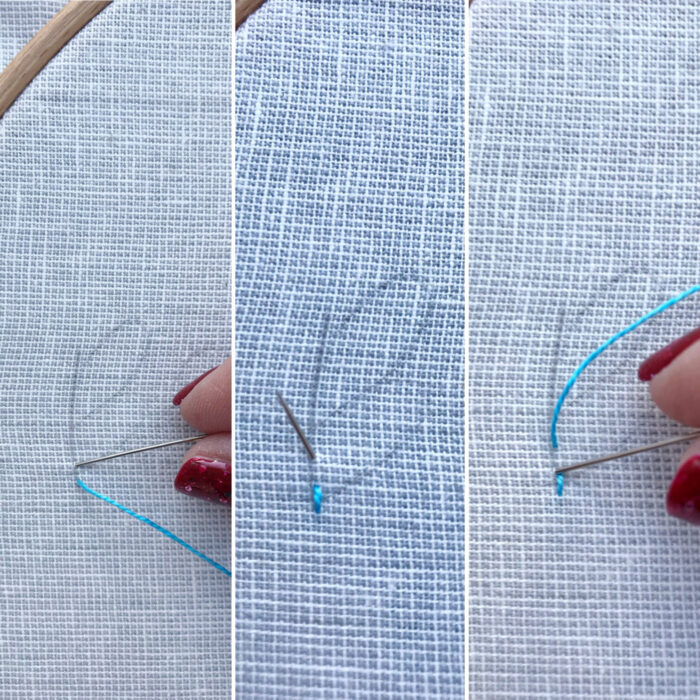
Step Two: How to Backstitch
Work a backstitch over the lines to form the letters. To do this, bring your needle up from the back at the start of the letter ‘B’ and go down about 3mm. Come up again about 3mm ahead. Go down at the same point where your first stitch finished. Now go ahead again and come up 3mm. Go down where your last stitch finished. And repeat.
Once you’ve completed backstitch for all the wording, take the linen out of the hoop and press.
TOP TIP: If you’re working on the project over a period of time, always take the fabric out of the hoop when you are not working on it, to avoid permanent creases.
Step Three: Felt Applique and How to do a Blanket Stitch
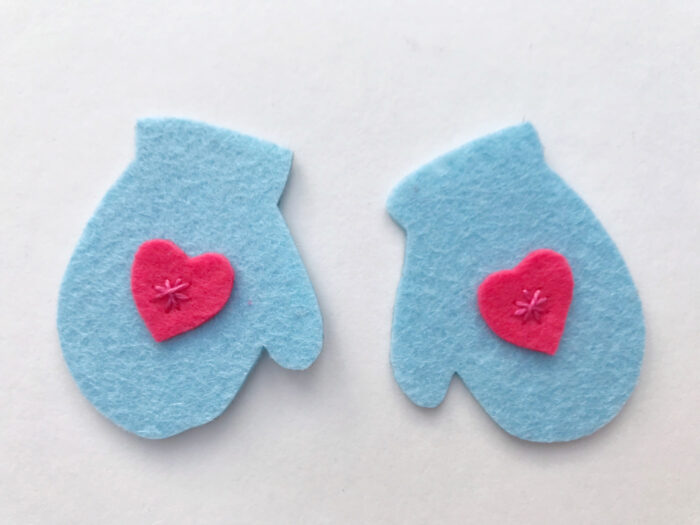
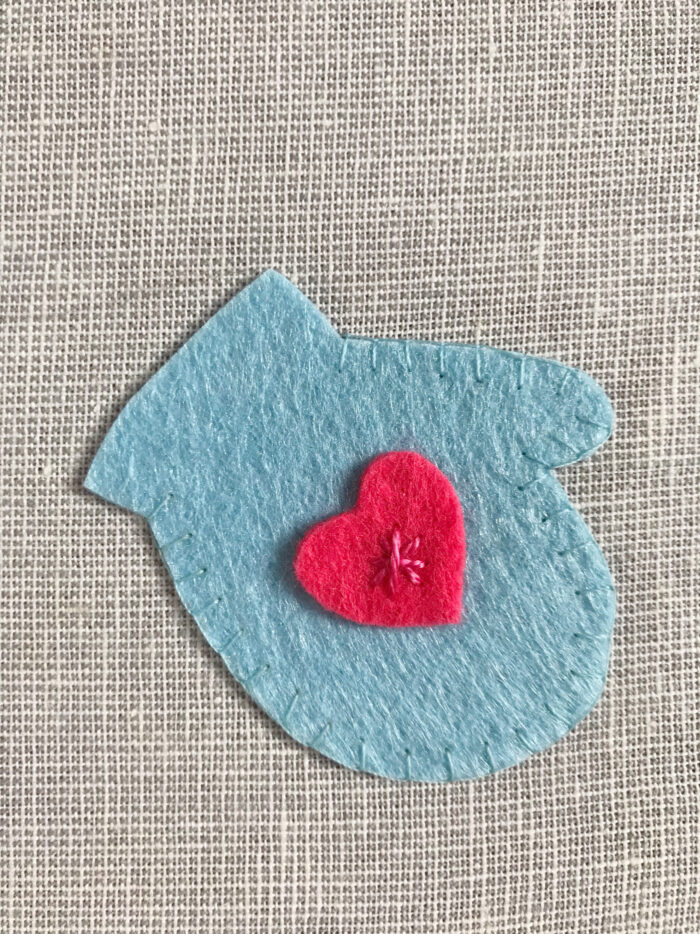
Cut out the mitten and heart templates. Draw around the mitten template twice on blue fabric, flipping it for the second mitten. Draw around the heart template on the coral felt twice. Cut out all the shapes.
Place the hearts on top of the mittens. Using a pink or red embroidery thread, stitch a star on the center of each heart, making sure you go through the heart and the mitten shapes. This is how the heart attaches to the mitten.
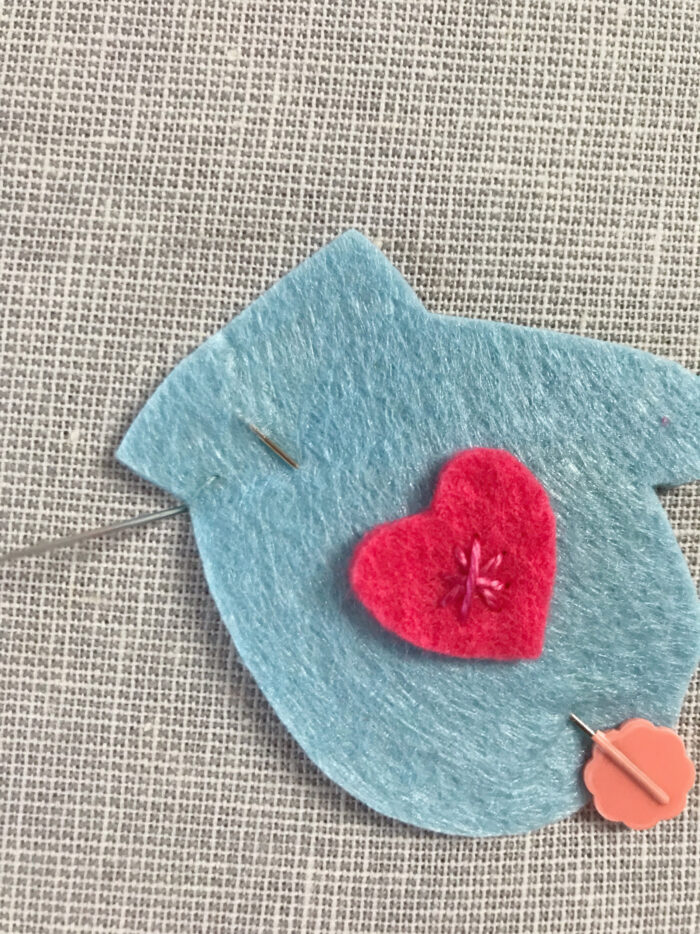
Put the embroidery back in the hoop in the final position that you want it to be in and tighten up.
Pin the mittens in place between the text at a jaunty angle, but not too close together, as you’re going to be embroidering the ‘string’ that attaches them together shortly.
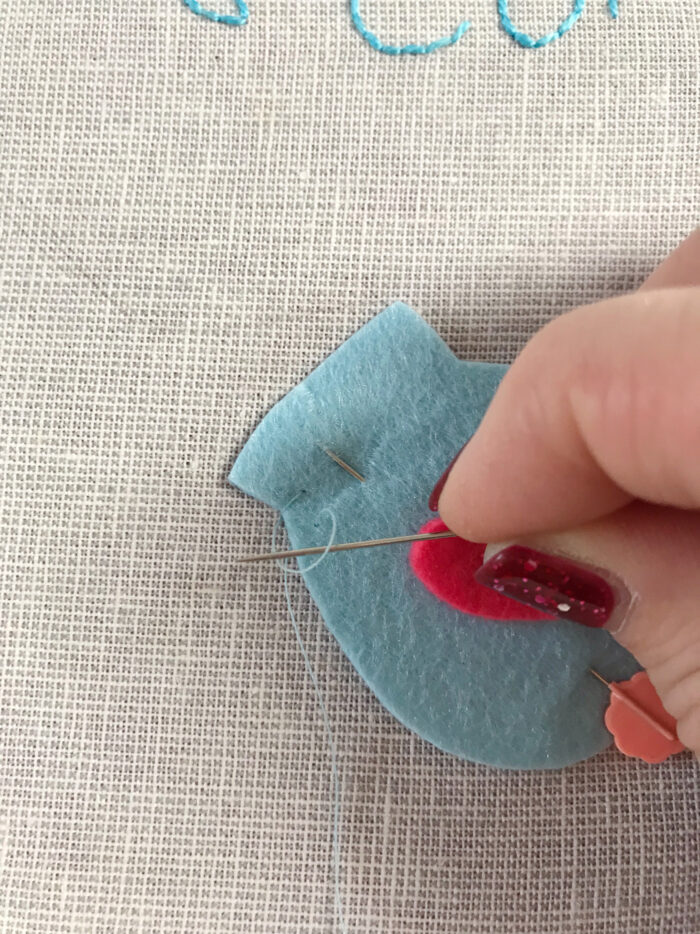
We’re going to blanket stitch around the mittens using regular quilting cotton. Take a length of thread and put a knot in the end. Come up from the back at the edge of the mitten, below the cuff. Go down into the mitten by about 3mm and then back up at the original starting place. Now take your needle down 3mm along and into the mitten and partially through, creating a loop. Come up at the side of the mitten, taking your needle through the loop, to create a ‘spine’ of thread down the edge of the mitten.
Step Four: Other Embroidery Stitches
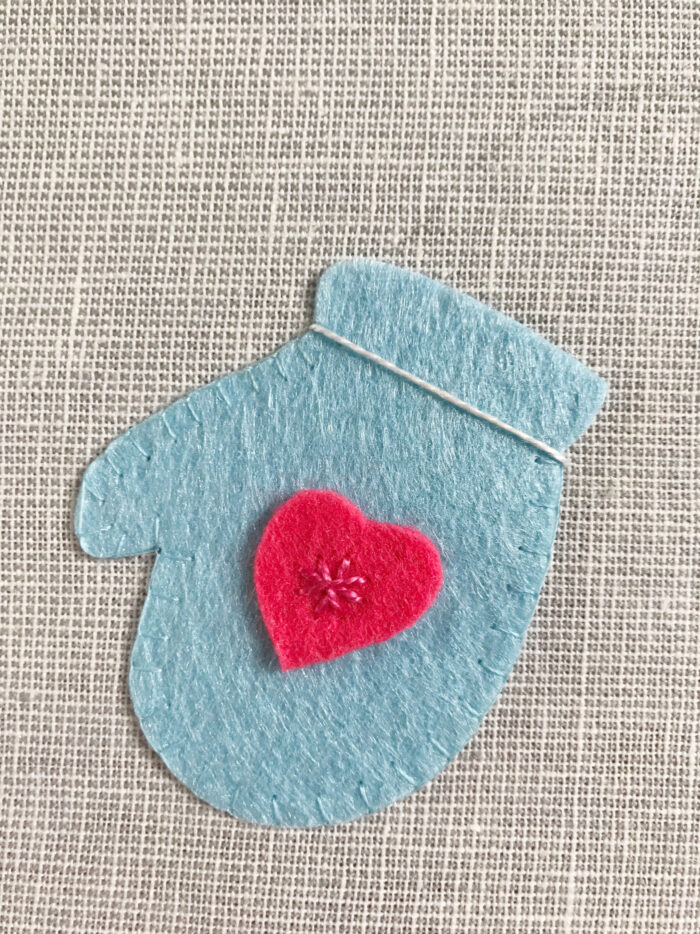
To create the white furry cuffs, take an embroidery thread and tie a knot in the end. Come up at the edge of the cuff and extend the thread all the way to the other end of the cuff.
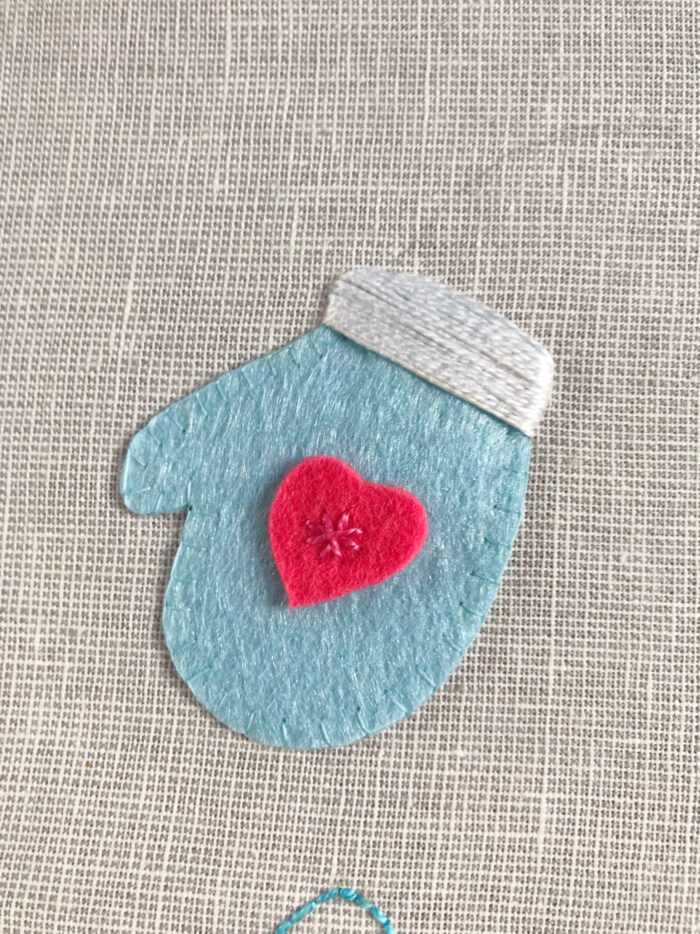
Repeat for the other mitten.
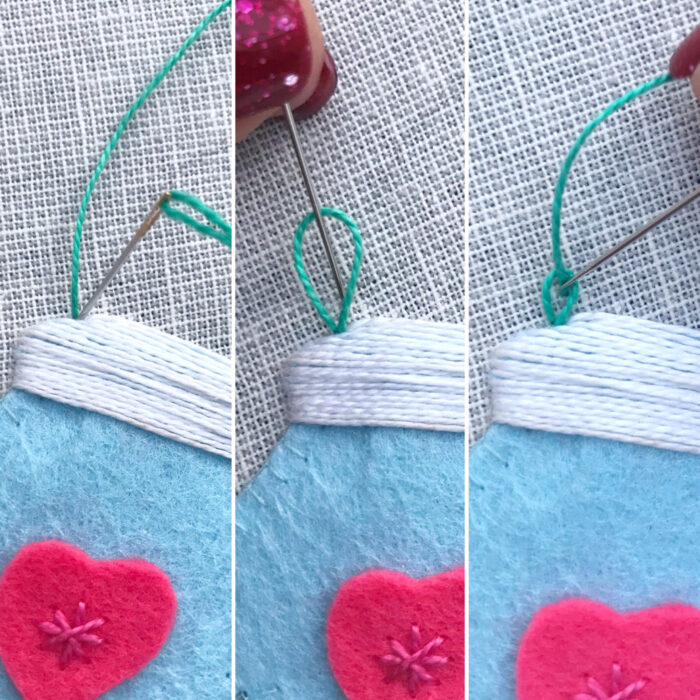
Now draw a wavy pencil line from the top left side of the left mitten to the right side of the right mitten. This is going to be the string that holds the mittens together. We are going to use a small chain stitch for the string.
Come up at the beginning of the mitten and take your needle back down where you first came up, creating a small loop. Bring your needle back up about 0.5cm ahead, inside the loop. Pull the thread through to create your first loop. Repeat.
Step Five: Embellishments
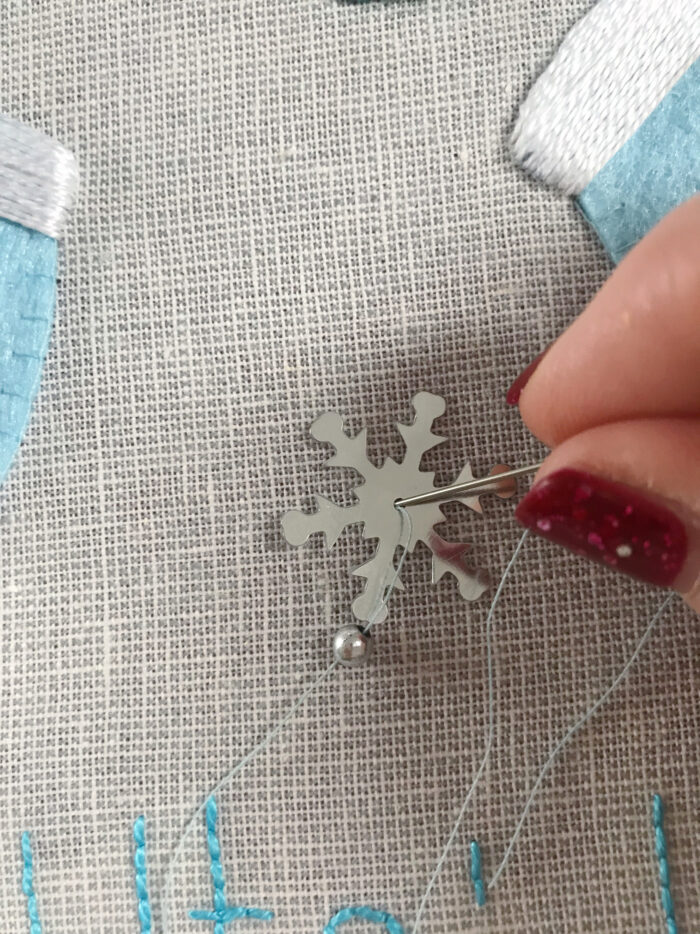
Next, we are going to attach the snowflakes and snow. I’ve used 6 snowflakes but you can use as many as you like! Using a cotton thread with a knot on the end, come up from the back and through the hole of the snowflake. Thread a bead onto the thread and come back down through the fabric to hold the snowflake in place. Tie off and repeat for the remaining snowflakes.
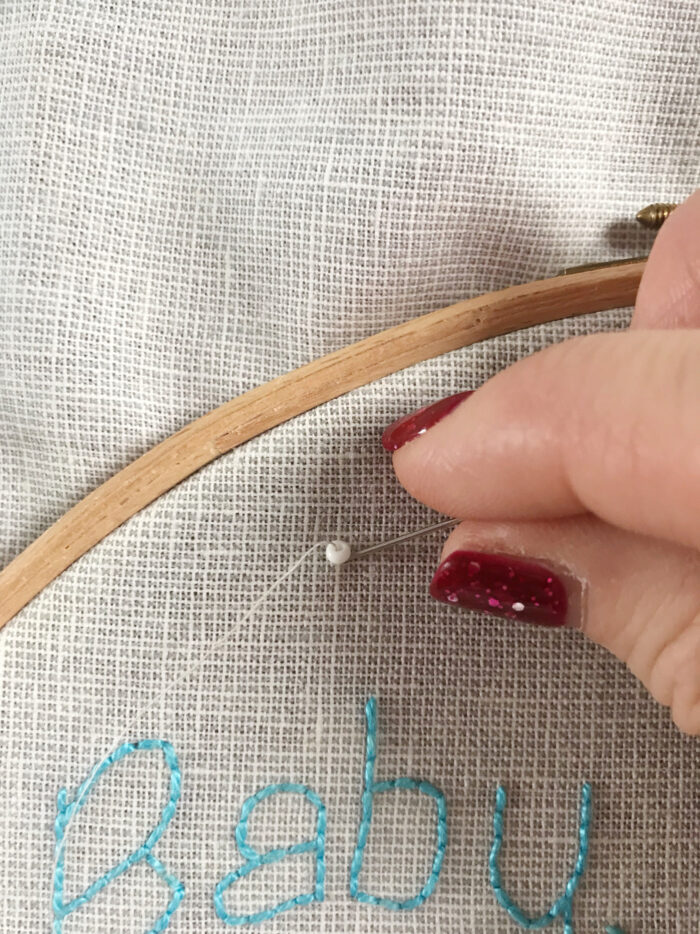
To add the ‘snow’, take the white seed beads and a long cotton thread. We are going to be stretching across the back from one position to the next rather than finishing off each time so it’s useful to have a longer thread. Put a knot on the end and bring the needle up from the back. Thread the bead onto the needle and take back down near to where you first came up. Then move to the next position, randomly stitching ‘snow’ beads all over the background of your embroidery.
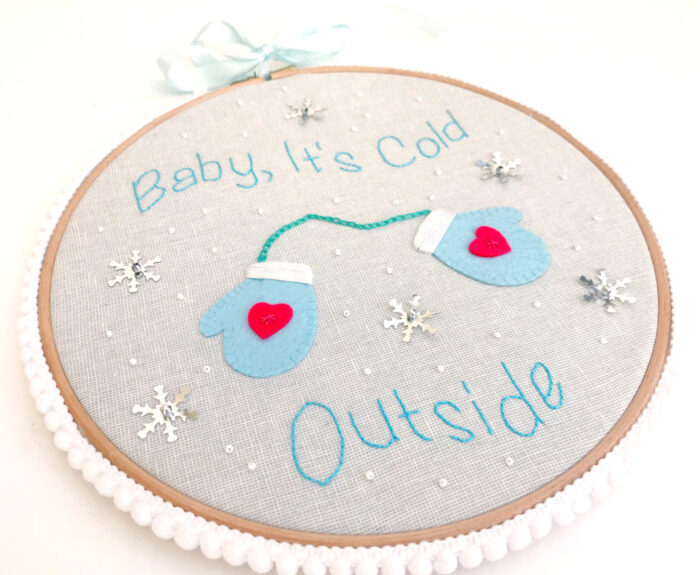
Step 6: Finishing
That’s your embroidery complete. Now to create a professional finish and to add a final pom pom flourish!
Carefully remove the embroidery from the hoop and lightly press on the reverse. Fuse the lightweight interfacing to the back of the embroidery following the manufacturer’s instructions. Return the embroidery to the hoop, carefully ensuring that it’s central. Tighten the hoop and ensure that the embroidery is taut.
To trim the excess fabric, take a sharp pair of fabric scissors. Very carefully cut away the excess, going very slowly around the hoop.
Finally, we need to add the pom pom trim around the hoop. Measure the circumference of the hoop from the right of the screw top all the way around to the left of the screw top and cut the pom pom trim to this length. Use a glue gun to carefully apply glue and stick the pom pom trim around the edge. I found it’s best to do about 15cm at a time otherwise the glue dries quickly and the pom pom trim won’t stick.
Finally, thread the ribbon through the screw top, tie a pretty bow and find a place to hang your beautiful finished embroidery.
About the Maker:

Sarah Ashford is a British Quilter and embroiderer and founder of the GreatBritishQuilter challenge on Instagram. Sarah regularly contributes projects to magazines and loves to spread the joy of quilting everywhere she goes. Follow her on Instagram at @sarahashfordstudio and be sure to check out her beautiful sewing room decals in her Etsy shop www.etsy.com/shop/