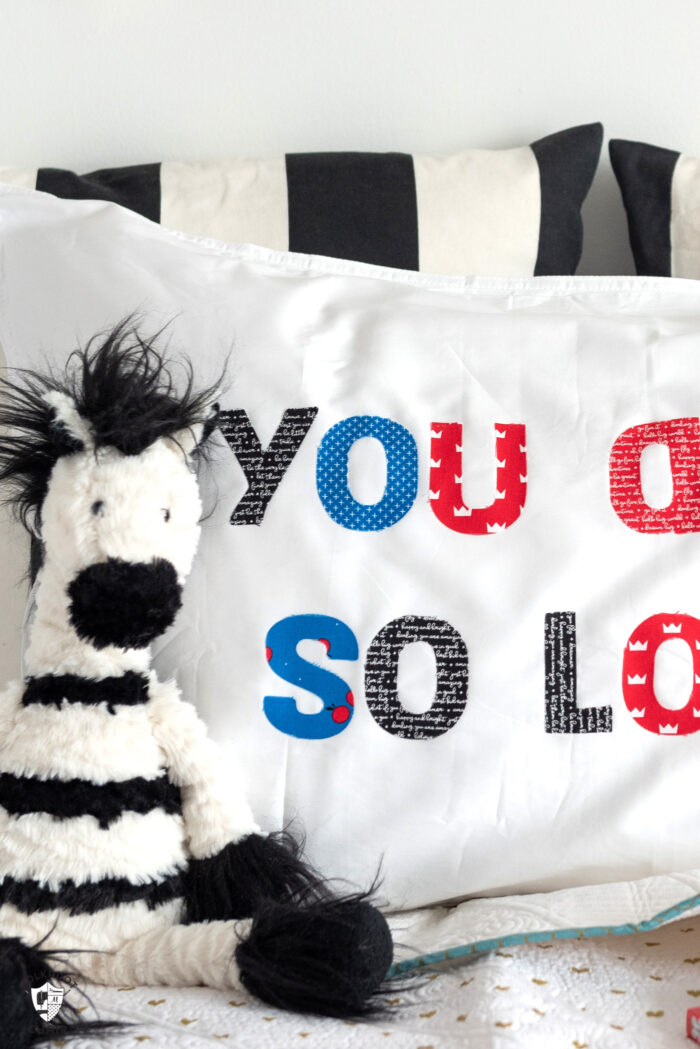
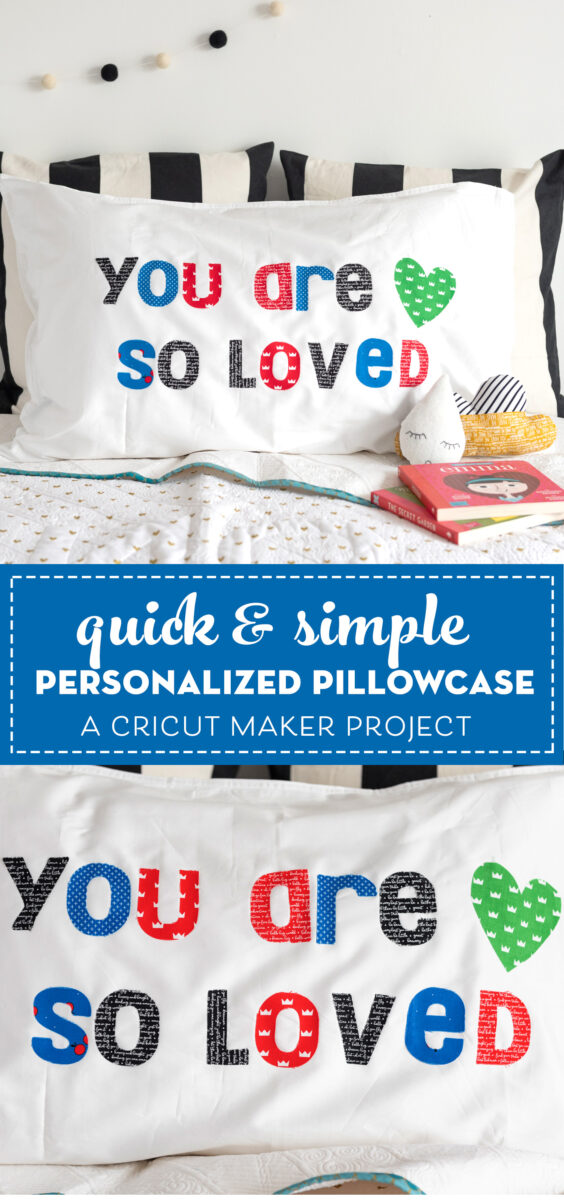
Simple DIY Personalized Pillowcase; a Cricut Maker Project
Learn how to cut fabric with your Cricut Maker while making this cute DIY Personalized Pillowcase project! It’s crazy easy to make and is a fun no-sew project for your Cricut machine! I work as a Brand Ambassador for Cricut. This is sponsored content.
Last week I shared answers to some of the most frequently asked questions I get about the Cricut Maker Rotary Blade attachment. Today, I thought I’d share a fun project with you that is the perfect way to show off what the rotary blade can do.
Some of my favorite things to cut out with the Cricut rotary blade are fabric letters. I love to add them to pillows, quilts, blankets, and other gifts. It’s such a fun way to personalize something simple to turn into a unique gift.
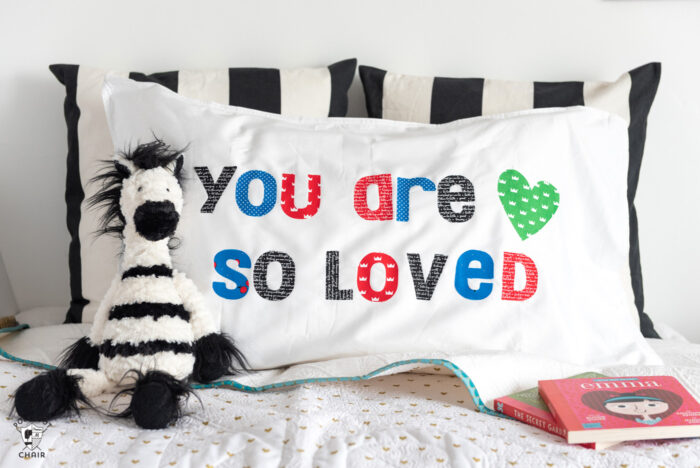
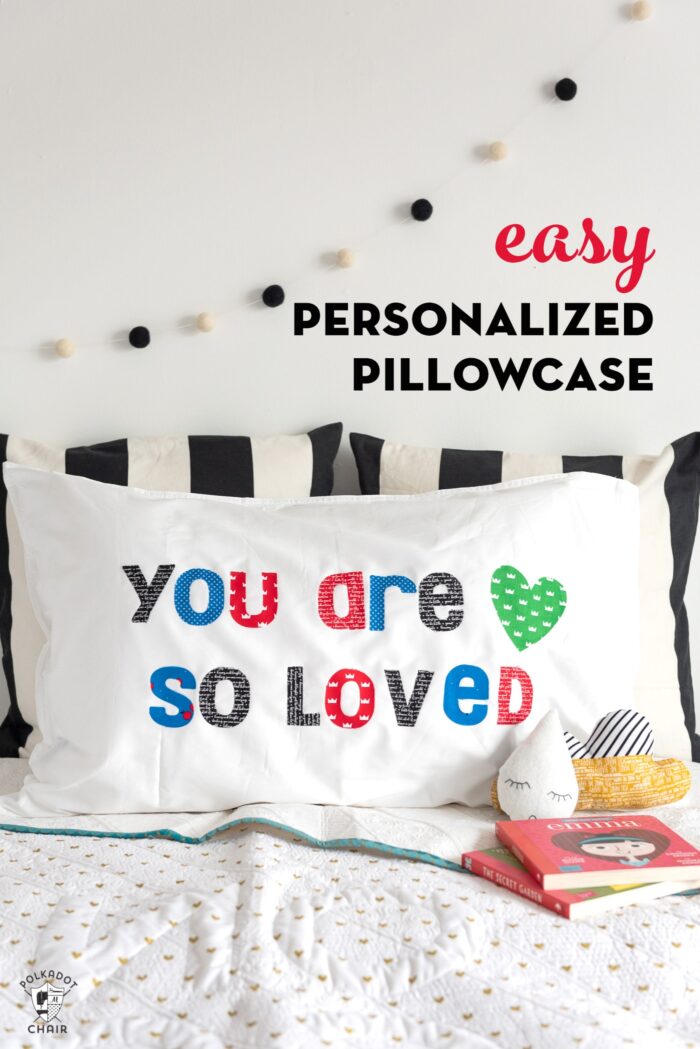
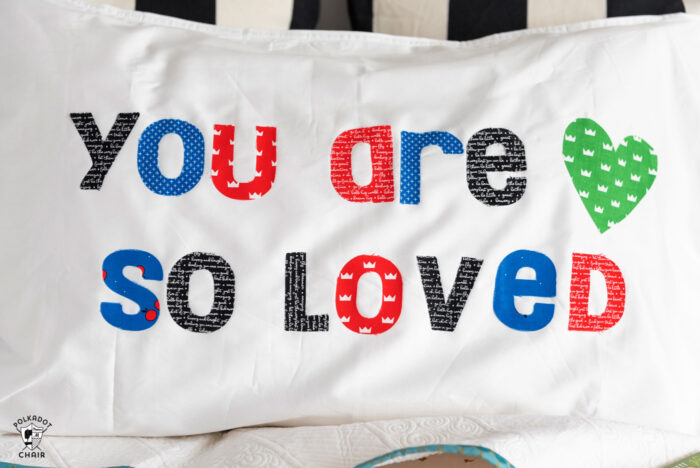
This personalized pillowcase is super scrappy and is made using 5″ squares of fabric (sometimes called charm squares). Since I used a pre-made pillowcase for this project, the 5″ squares, and a Cricut machine, I didn’t have to CUT OR SEW anything to do this project. How’s that for fast?
I chose to put “you are so loved” on the front of my pillowcase (yes it’s inspired by Harry Potter *wink*). You can change it to add any phrase or name to the pillowcase that you’d like.
A few ideas include:
- Live Laugh Love
- Good Vibes Only
- A Dream is Wish your Heart Makes
- Follow your Dreams
- Sweet Dreams
I decided a few weeks ago that in 2019 I would FINALLY start getting some videos made to upload to my long-neglected YouTube channel. I’m starting with this pillowcase project since it’s such a simple tutorial and it gives you a great sense of what the Maker machine can do.
If you get a moment, go ahead and subscribe to my YouTube channel. There is only ONE lonely video on there now, but I hope it won’t stay that way for long. I’ve got a fun mix of video content planned for the channel, everything from crafty videos, to quilt block tutorials and travel journals. Hopefully, there will even a few fun surprises.
Okay, are you ready to make something?
Personalized Pillowcase Tutorial for the Cricut Maker Machine
Supplies
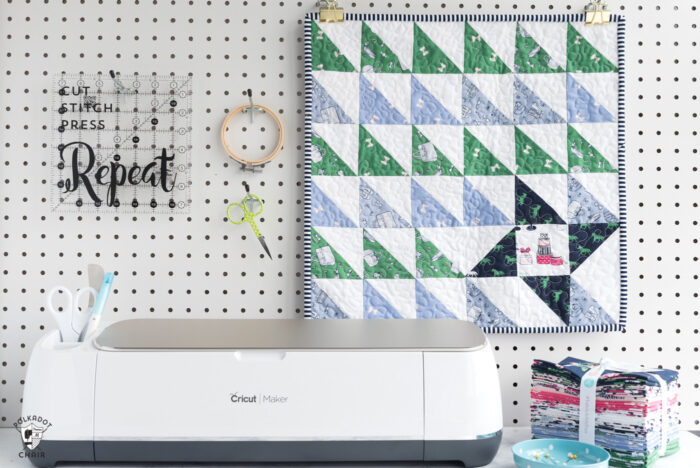
- Cricut Maker 3 (you can get great deals on machine bundles on Cricut.com)
- Cricut EasyPress (I like the large size the best): Make sure you get the EasyPress mat as well.
- Cricut Weeding Tools: (I use the small hook tool ALL the time, making weeding vinyl so much easier).
- Cricut Maker Machine with Rotary Blade Attachment
- Fabric Cutting Mat for Cricut
- 5″ Stacker of Pre-Cut Fabric – I used Let Them Be Little
- Heat N Bond Fusible Spray Adhesive
- Cricut EasyPress
- EasyPress Mat
- Parchment Paper
Step One: Set up your file in Design Space
If you click HERE you can get access to my file in the Cricut Design space. I used all Cricut images and fonts for the project (they aren’t my designs, they are Cricut’s).
If you would like your personalized pillowcase to say something different, just change the text. You can also change the font if you’d like. Just make sure you choose a thick, blocky font so it will show up well on your pillowcase.
Send your file to the Cricut Machine.
BEFORE you cut, we need to do a few things. Since we are “cheating” on this project by using 5″ squares of fabric we need to lay out our letters on the mat so that they cut INSIDE the 5″ squares.
To do this, you’ll need to split your letters between two different Cricut mats.
Note: You’ll need to go in and UNATTACH the letters from each other in the Group in Design Space before you click MAKE IT. This will allow you to move the letters around on the mat individually.
In Cricut Designs space, after you click MAKE IT, the mat screen will appear.
Click on the letter you’d like to move, click on the 3 dots in the top corner and click “MOVE TO ANOTHER MAT”. When prompted add a new mat.
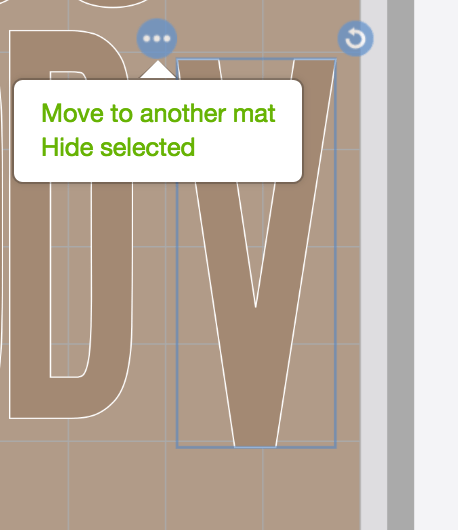
Then move the letter onto that mat.
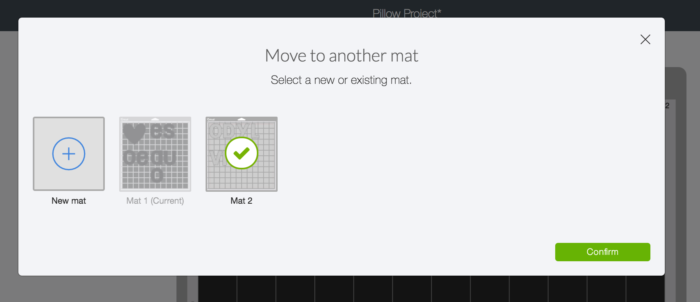
Keep moving letters until you have a heart and 6-7 letters on your first mat and no more than 8 letters on your second mat. (If you’re spelling something long you may need a 3rd mat).
Now, on your first mat, just drag the letters so that they are within the 5″x5″ squares. Since there is a grid on the screen that is the same as the grid on the cutting mat this step is pretty easy.
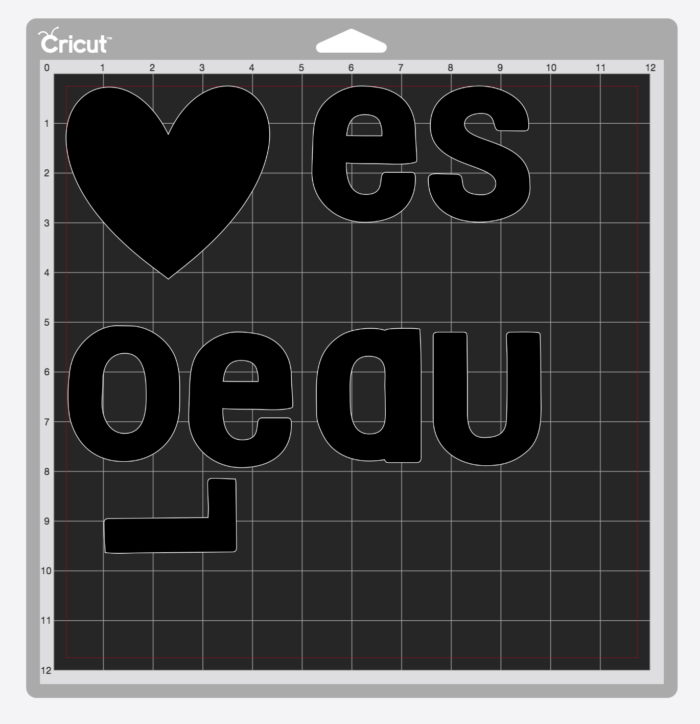
Once you’ve got the letters for your personalized pillowcase where you want them, proceed with the cut.
For the rest of the steps I have a HOW-TO video to share with you:
A Few Tips
The spray I used is by Thermoweb. You spray the adhesive onto the back of the letters then wait for it to dry. When it’s dry it turns into a fusible. Make sure you follow the directions on the bottle before you begin.
The adhesive in the bottle is permanent. You don’t need to sew the letters on, but you can if you want.
Since the adhesive “catches” a bit of the side of the fabric letters it will help seal them so they do not fray (or at least do not fray much).
If you don’t have an EasyPress you can use an iron without steam to set the letters. I love using the EasyPress for fusible applique though since it gives such a nice even heat and the fused items tend to stick the first time!
To create your personalized pillowcase, you can also cut out fabric that has been fused to the fusible webbing BEFORE cutting. I just thought that the spray would be quicker than cutting sheets of fusible webbing and ironing it onto fabric (and it was!).
If you have any questions about the process be sure to leave them in the comments section!
More fun Cricut Maker Projects:
How to Make Disney Purses with the Cricut Maker
Free Tutorial to Make Leather Travel Jewelry Roll
This is a sponsored conversation written by me on behalf of Cricut. The opinions and text are all mine.

Hi Melissa
Great project! If I want to use fusible web on the wrong side of the fabric, do I peal off the paper before applying to the cricut cutting mat? Do I cut with the paper backing it without?
Thanks
Gloria
I prefer to peel the paper off first. Sometimes it will slip as the machine cuts so it’s easier to pull it off before you add it to the mat.
Thanks for sharing 🙂 I just got a Cricut Maker, if using Fusible webbing on the back of fabric should I use another blade instead of the rotary?
I prefer the rotary blade for fabric with fusible webbing. I’d only use the fused fabric blade if you don’t have a Maker machine that can’t take the rotary blade or are cutting something very small.