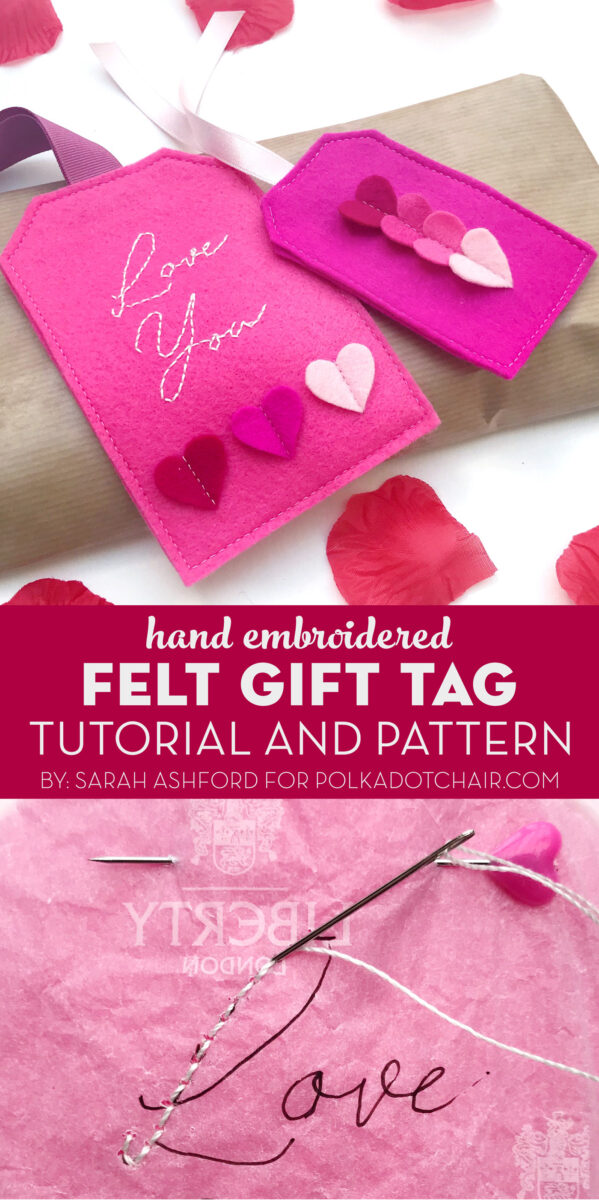
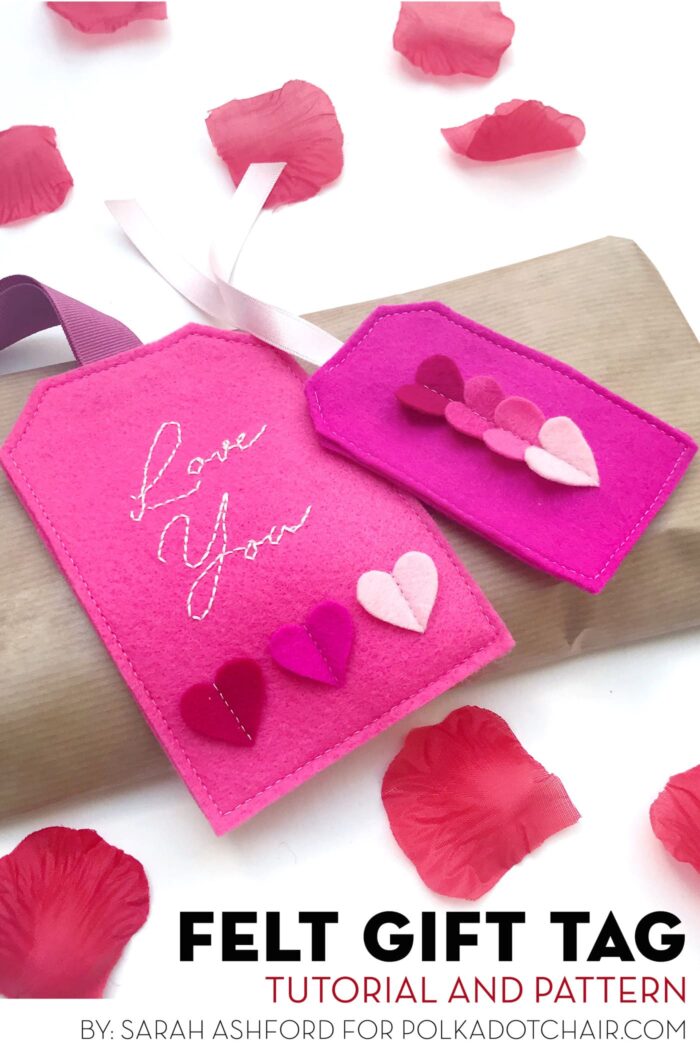
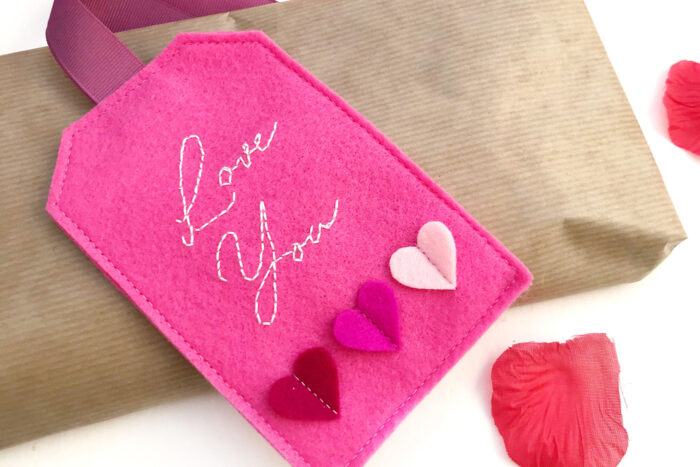
Hand Embroidered Felt Gift Tag Tutorial
Sarah Ashford is back with us today sharing a tutorial for adorable hand-embroidered felt gift tags. These little gift tags make great last-minute Valentine’s Day gifts. They would also be adorable at any time of the year stitched up in different colors. How cute would they be made from bright colors for a Birthday Gift!?
Love is in the air once more as Valentine’s Day is nearly upon us. I thought it would be fun to add a hand made touch to my Valentine’s gifts (which mostly consist of chocolate – a way to a man’s heart and all that!), so I’ve made some love themed gift tags.
I’m trying to embrace more eco-friendly packaging for gifts, and so these gift tags are the perfect accompaniment to brighten up recyclable brown paper!
DIY Felt Gift Tag Tutorial & Pattern
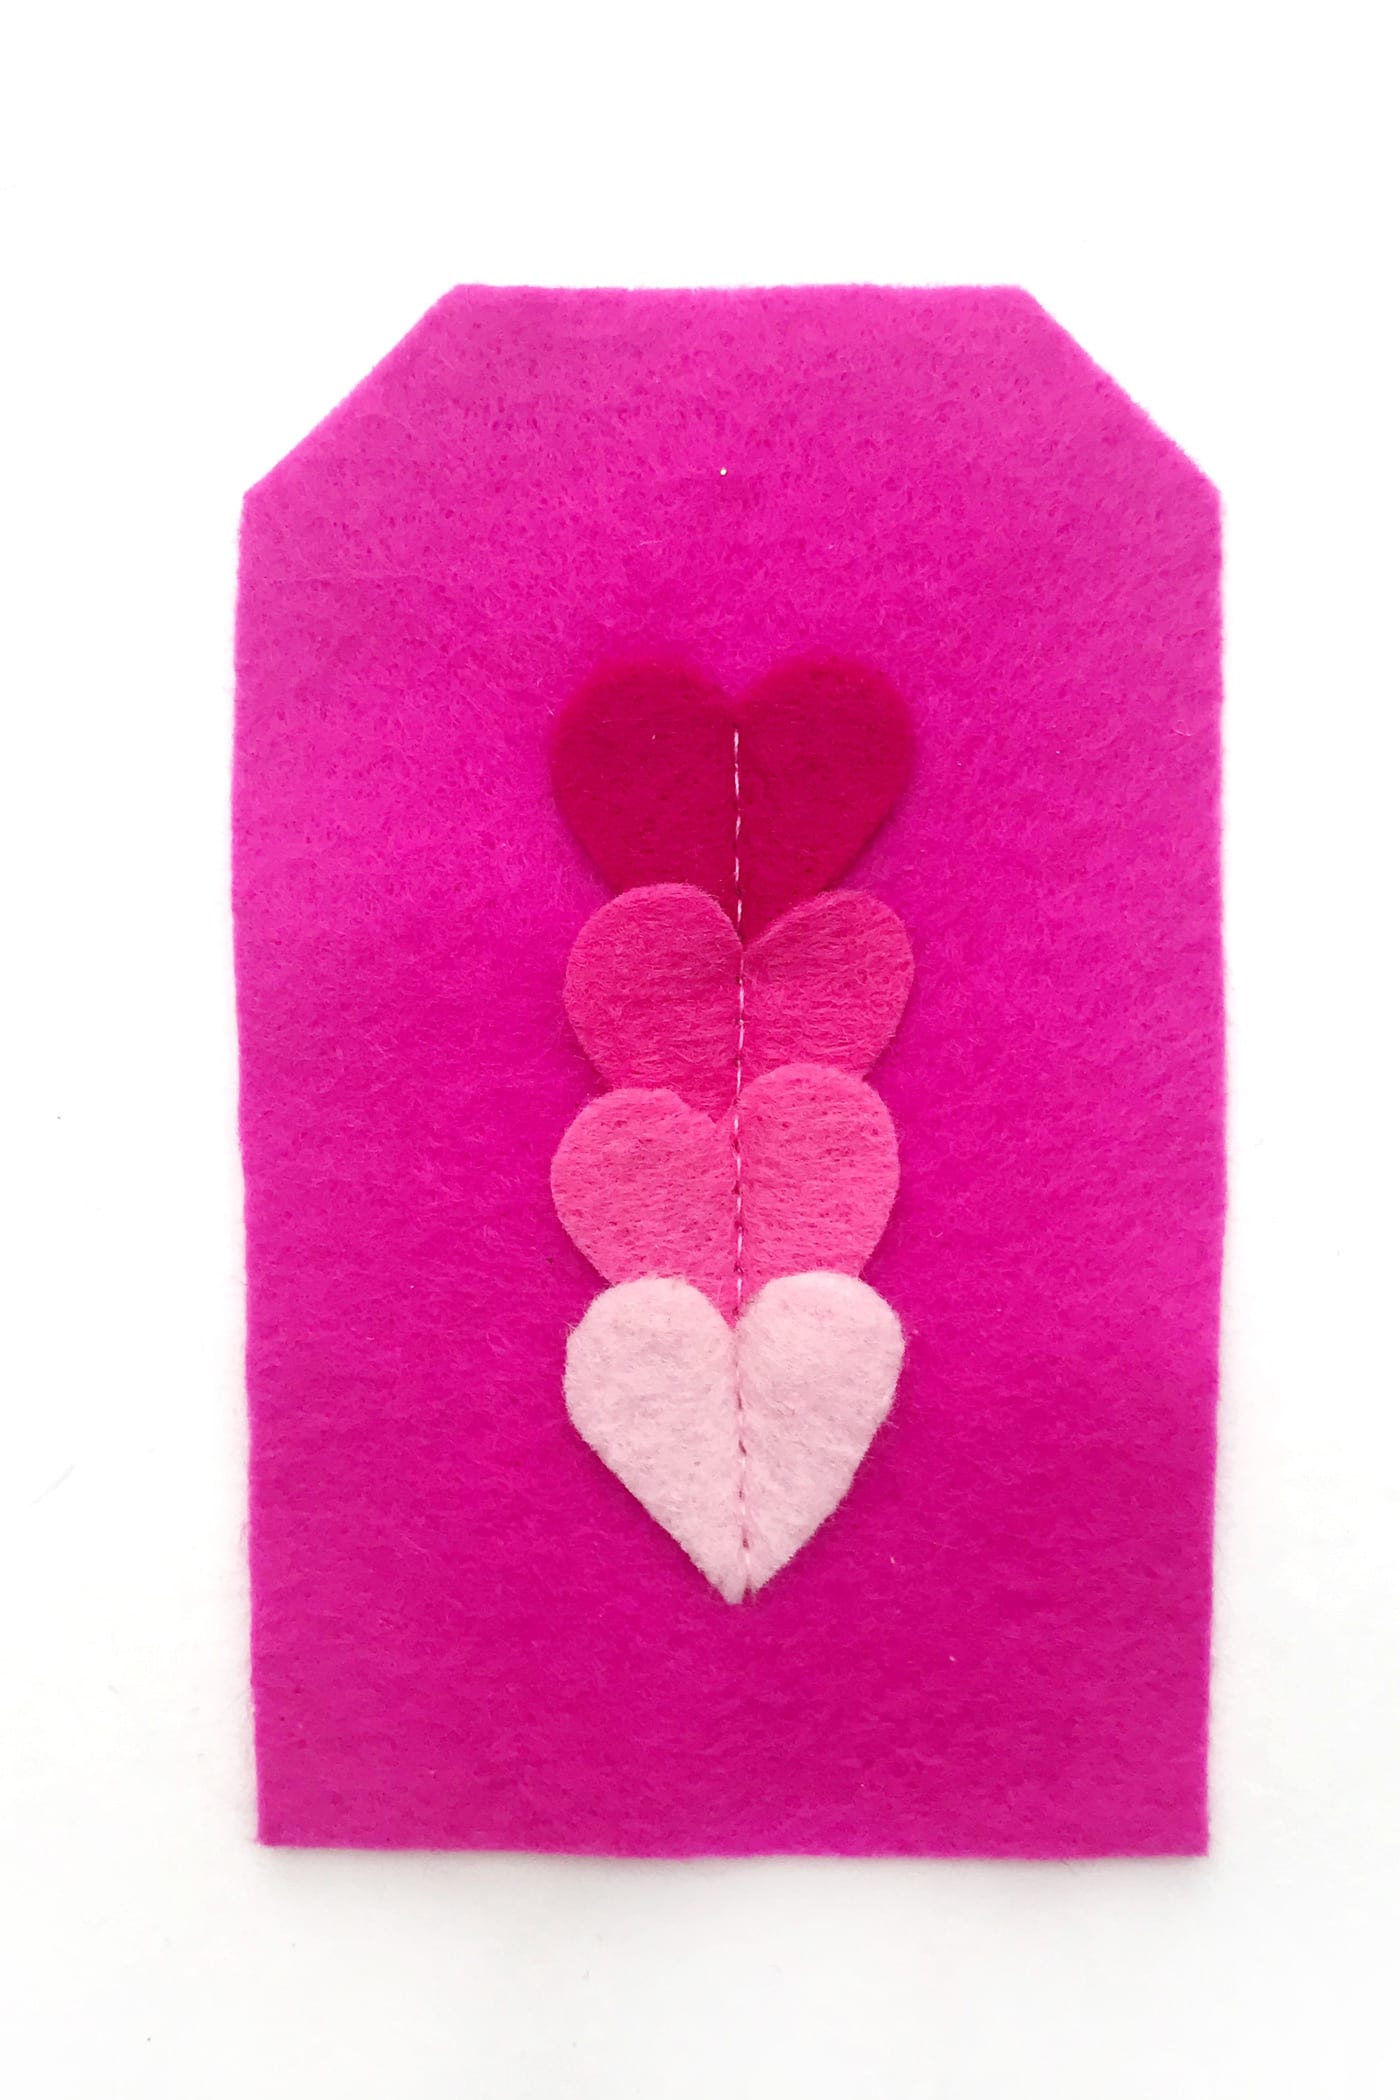
I’ve created 2 designs; the large embroidered tag, and the smaller ‘in a hurry’ quick heart tag, so you can choose which one is best for the love of your life, or why not make both.
I hope you’ll be inspired to make them, and the best thing is you can use them year on year. They could even double up as birthday gift tags for the ones you love.
Supplies to Make the DIY Felt Gift Tags:
You will Need:
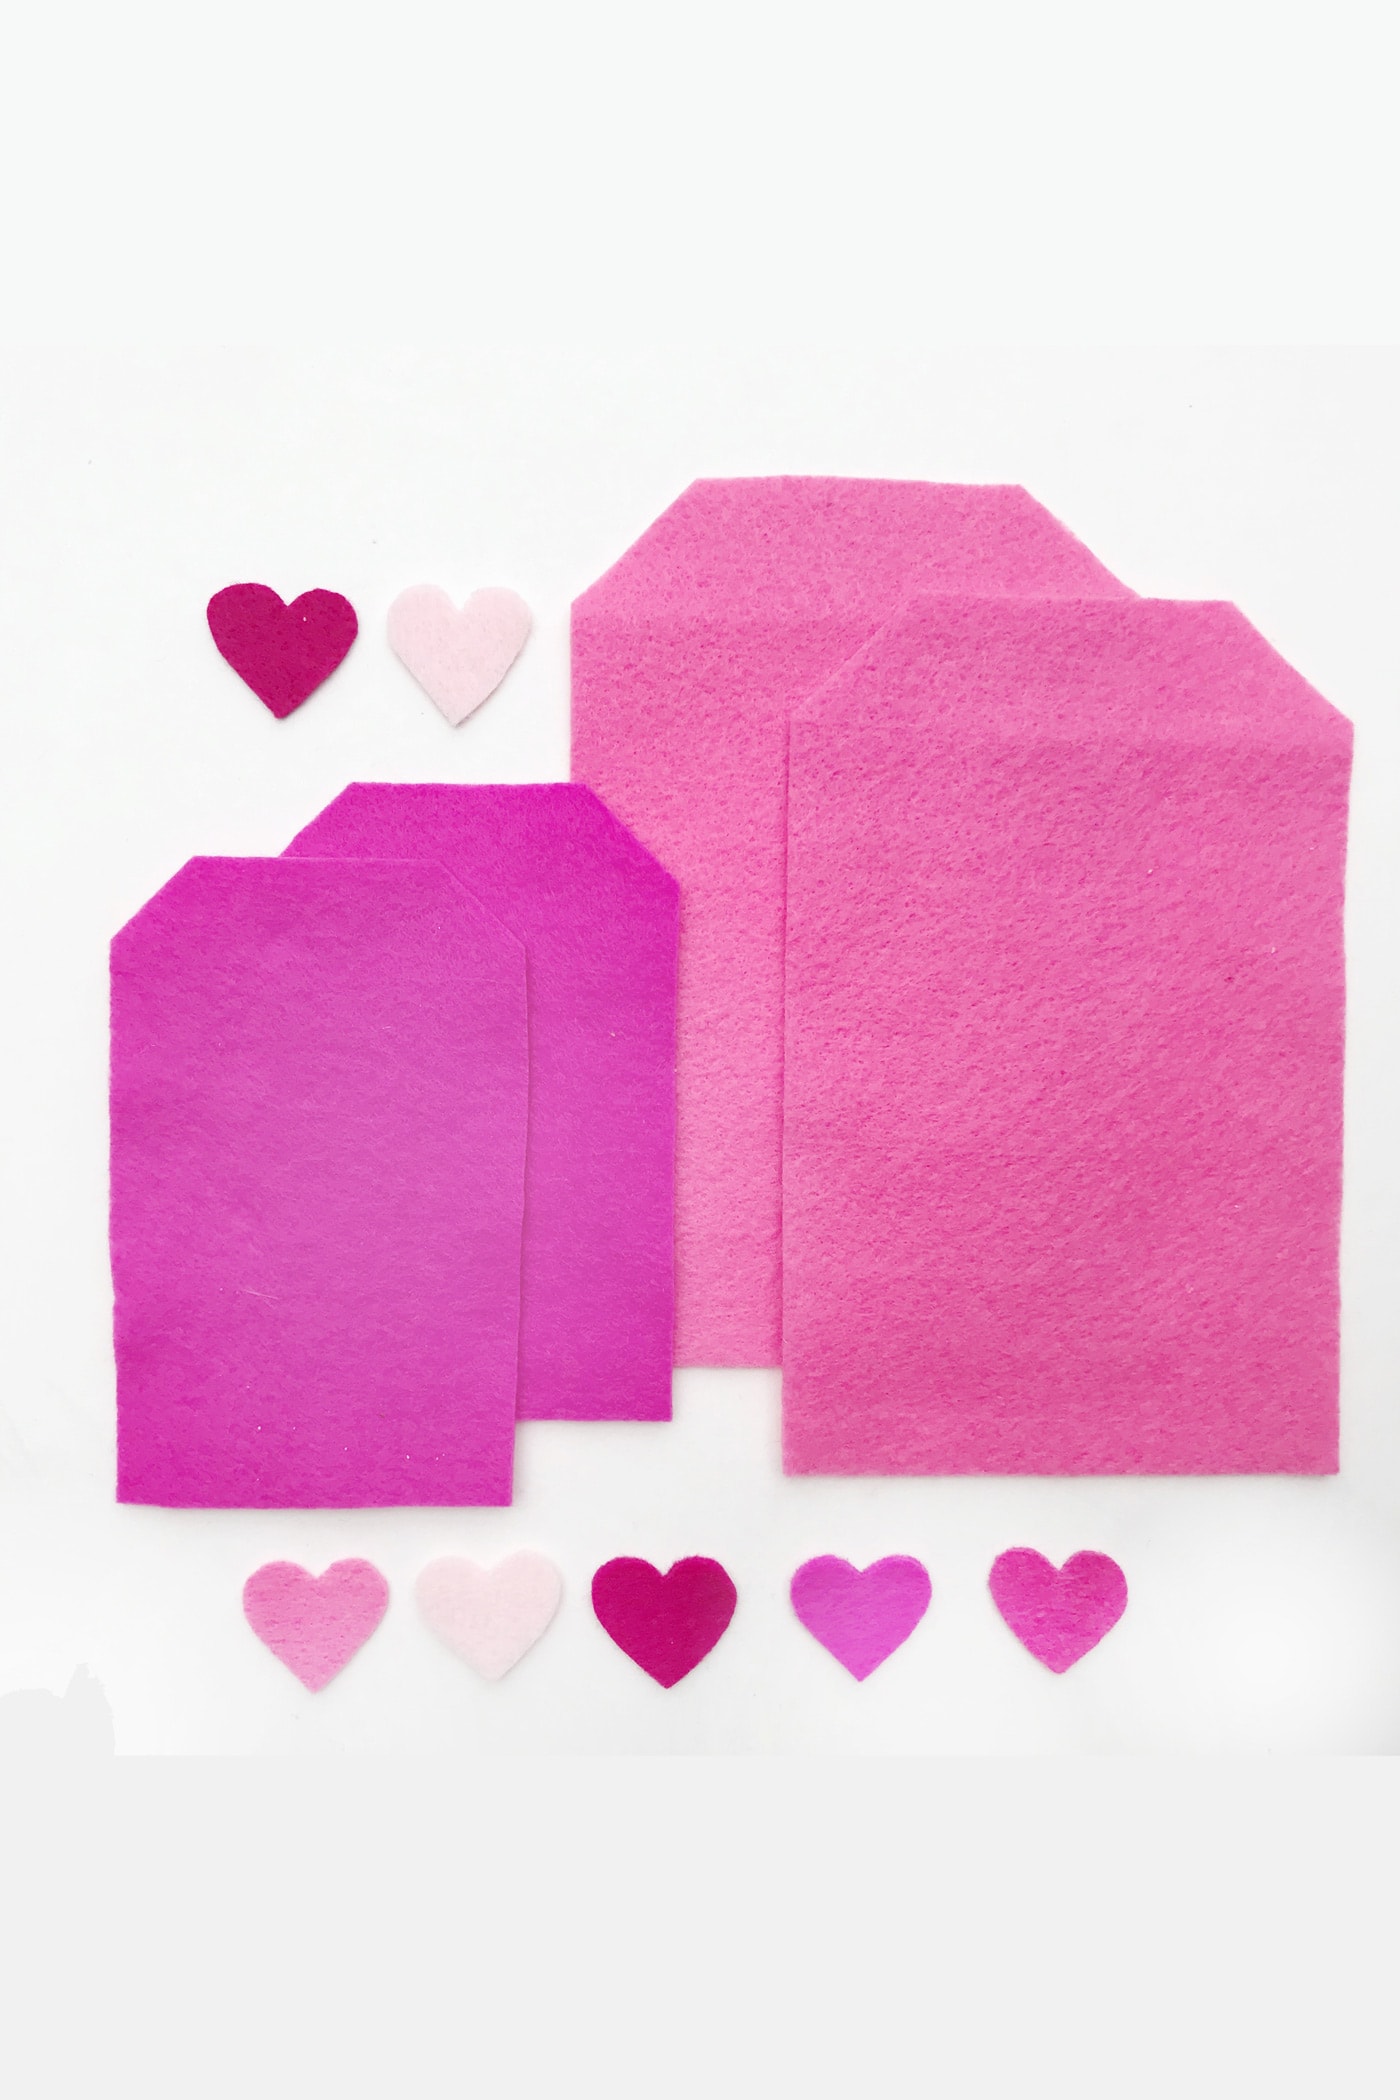
- Large tag – 10” felt square
- Small tag – 8” felt square
- Assorted shades of pink felt for hearts
- Embroidery thread (I like to use Aurifil 12 weight)
- Scrap of Tissue paper
- Hera marker
- Ribbon – 24” for the large tag, 10” for the small tag
- Pencil
- Usual sewing supplies (Sewing machine, rotary cutter, ruler, etc.)
- Templates (Click here to download)

How to Get the Printable Pattern Pieces. You can get a copy of the pattern pieces used in this project in our Template Library. Access to the library is for our Newsletter subscribers, and subscriptions are free. Please visit this page and follow the instructions to get the pattern pieces. PLEASE READ the instructions on that page. NOTE: The PDF only contains the pattern piece; you still need to read this tutorial to complete your project.
Time needed: 30 minutes
Felt Gift Tag Tutorial
- Print the Template and Cut out your Shapes
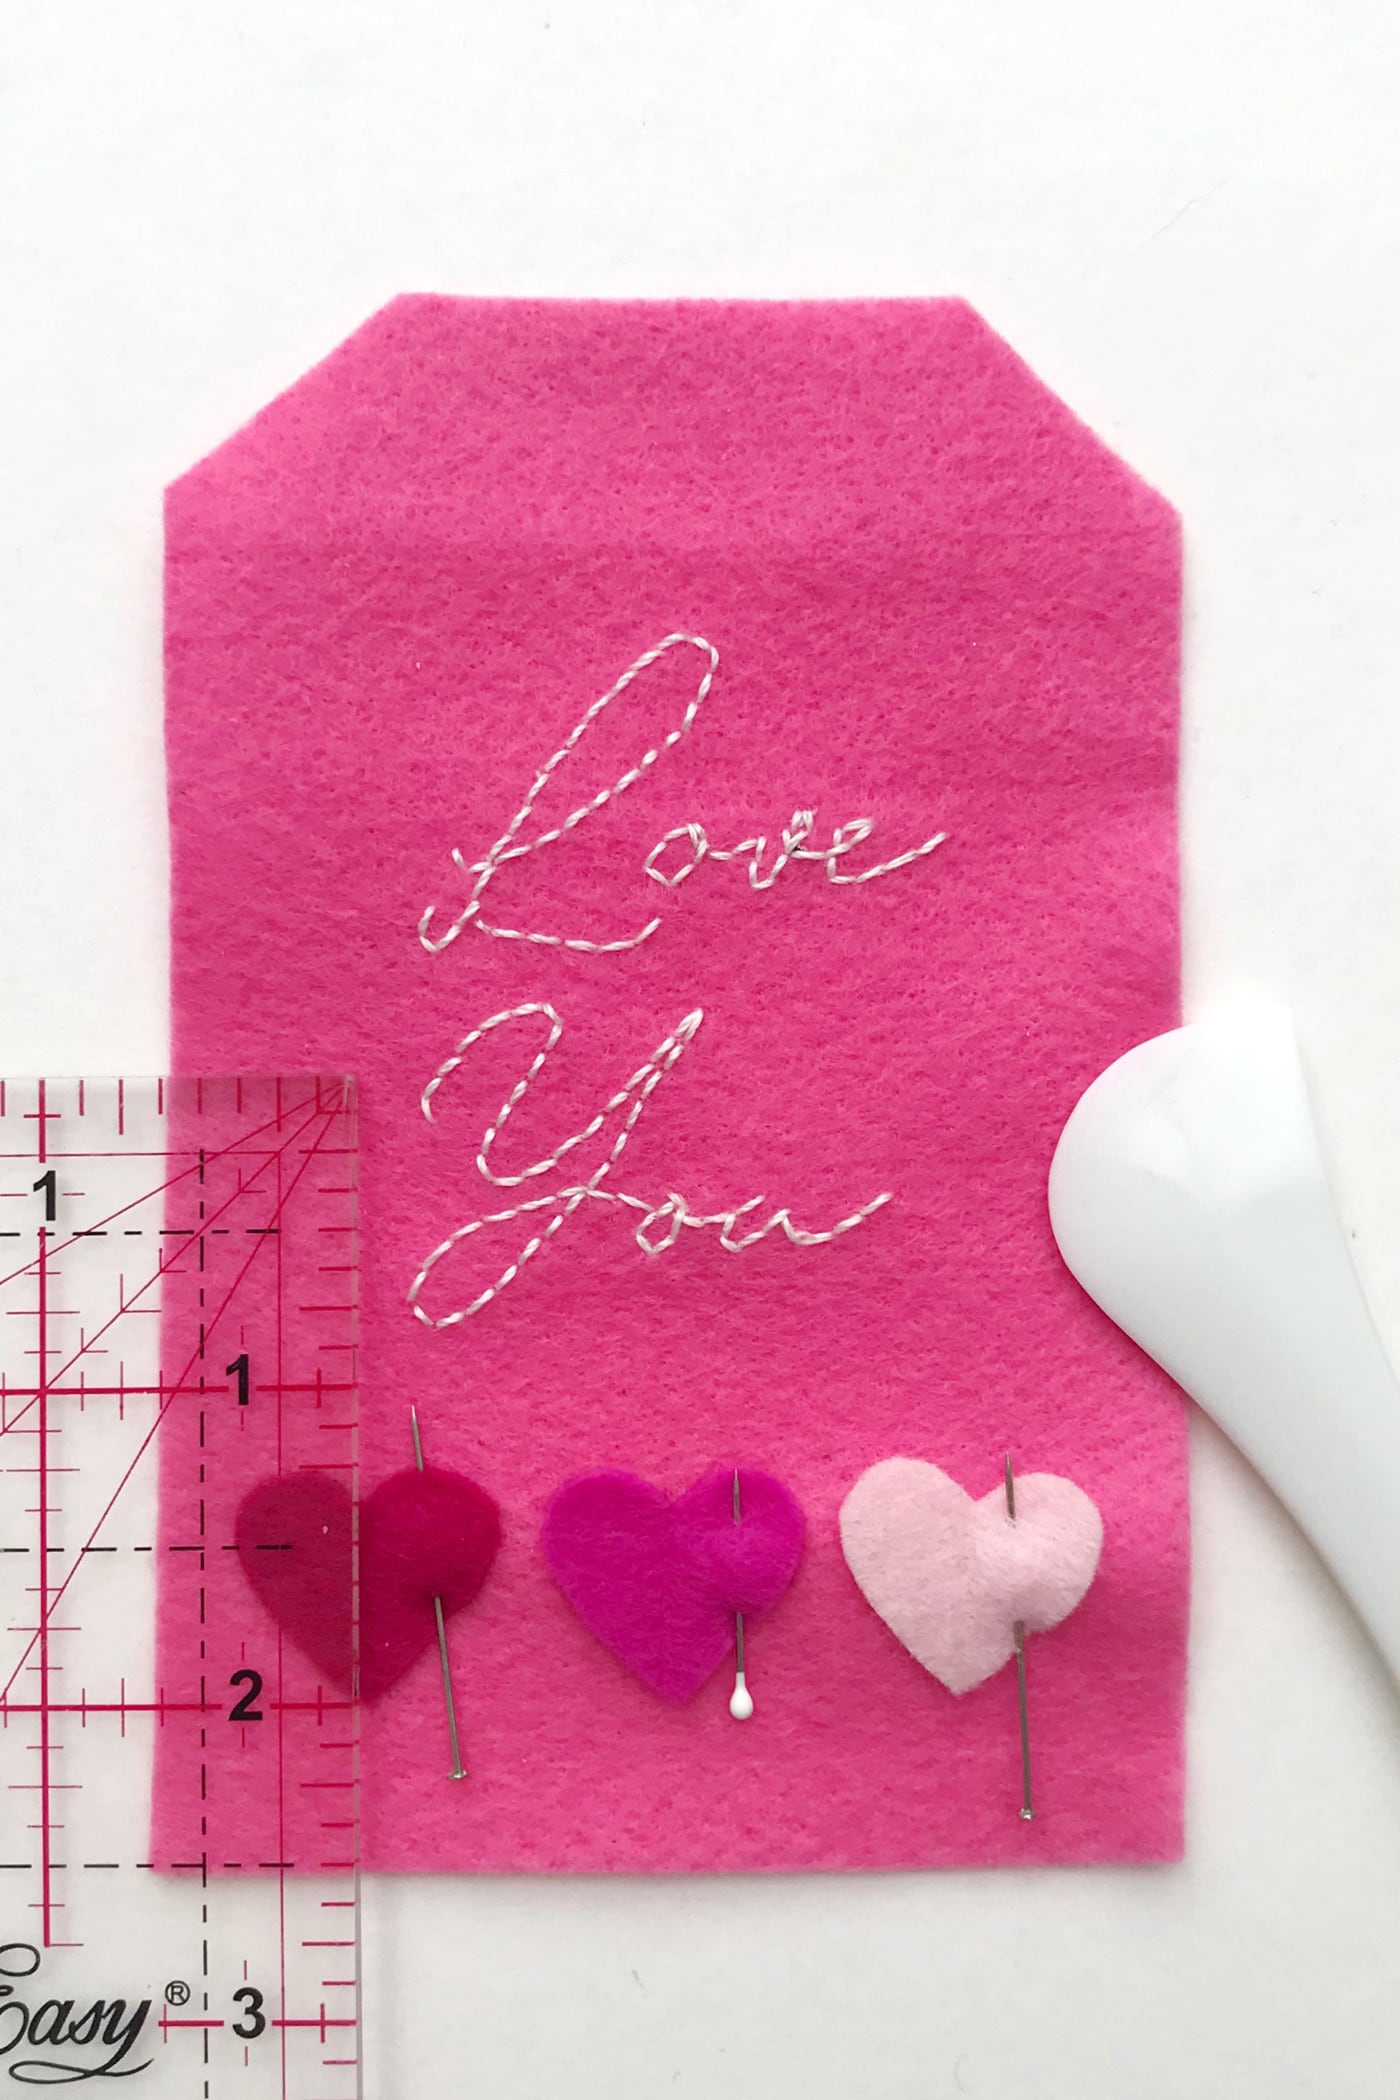
To make both tags, print off the templates and cut out. Cut out 2 large tags, 2 small tags, and 7 hearts from the felt in colors of your choice. I’ve gone pink-tastic, but you can use whatever colors you choose!
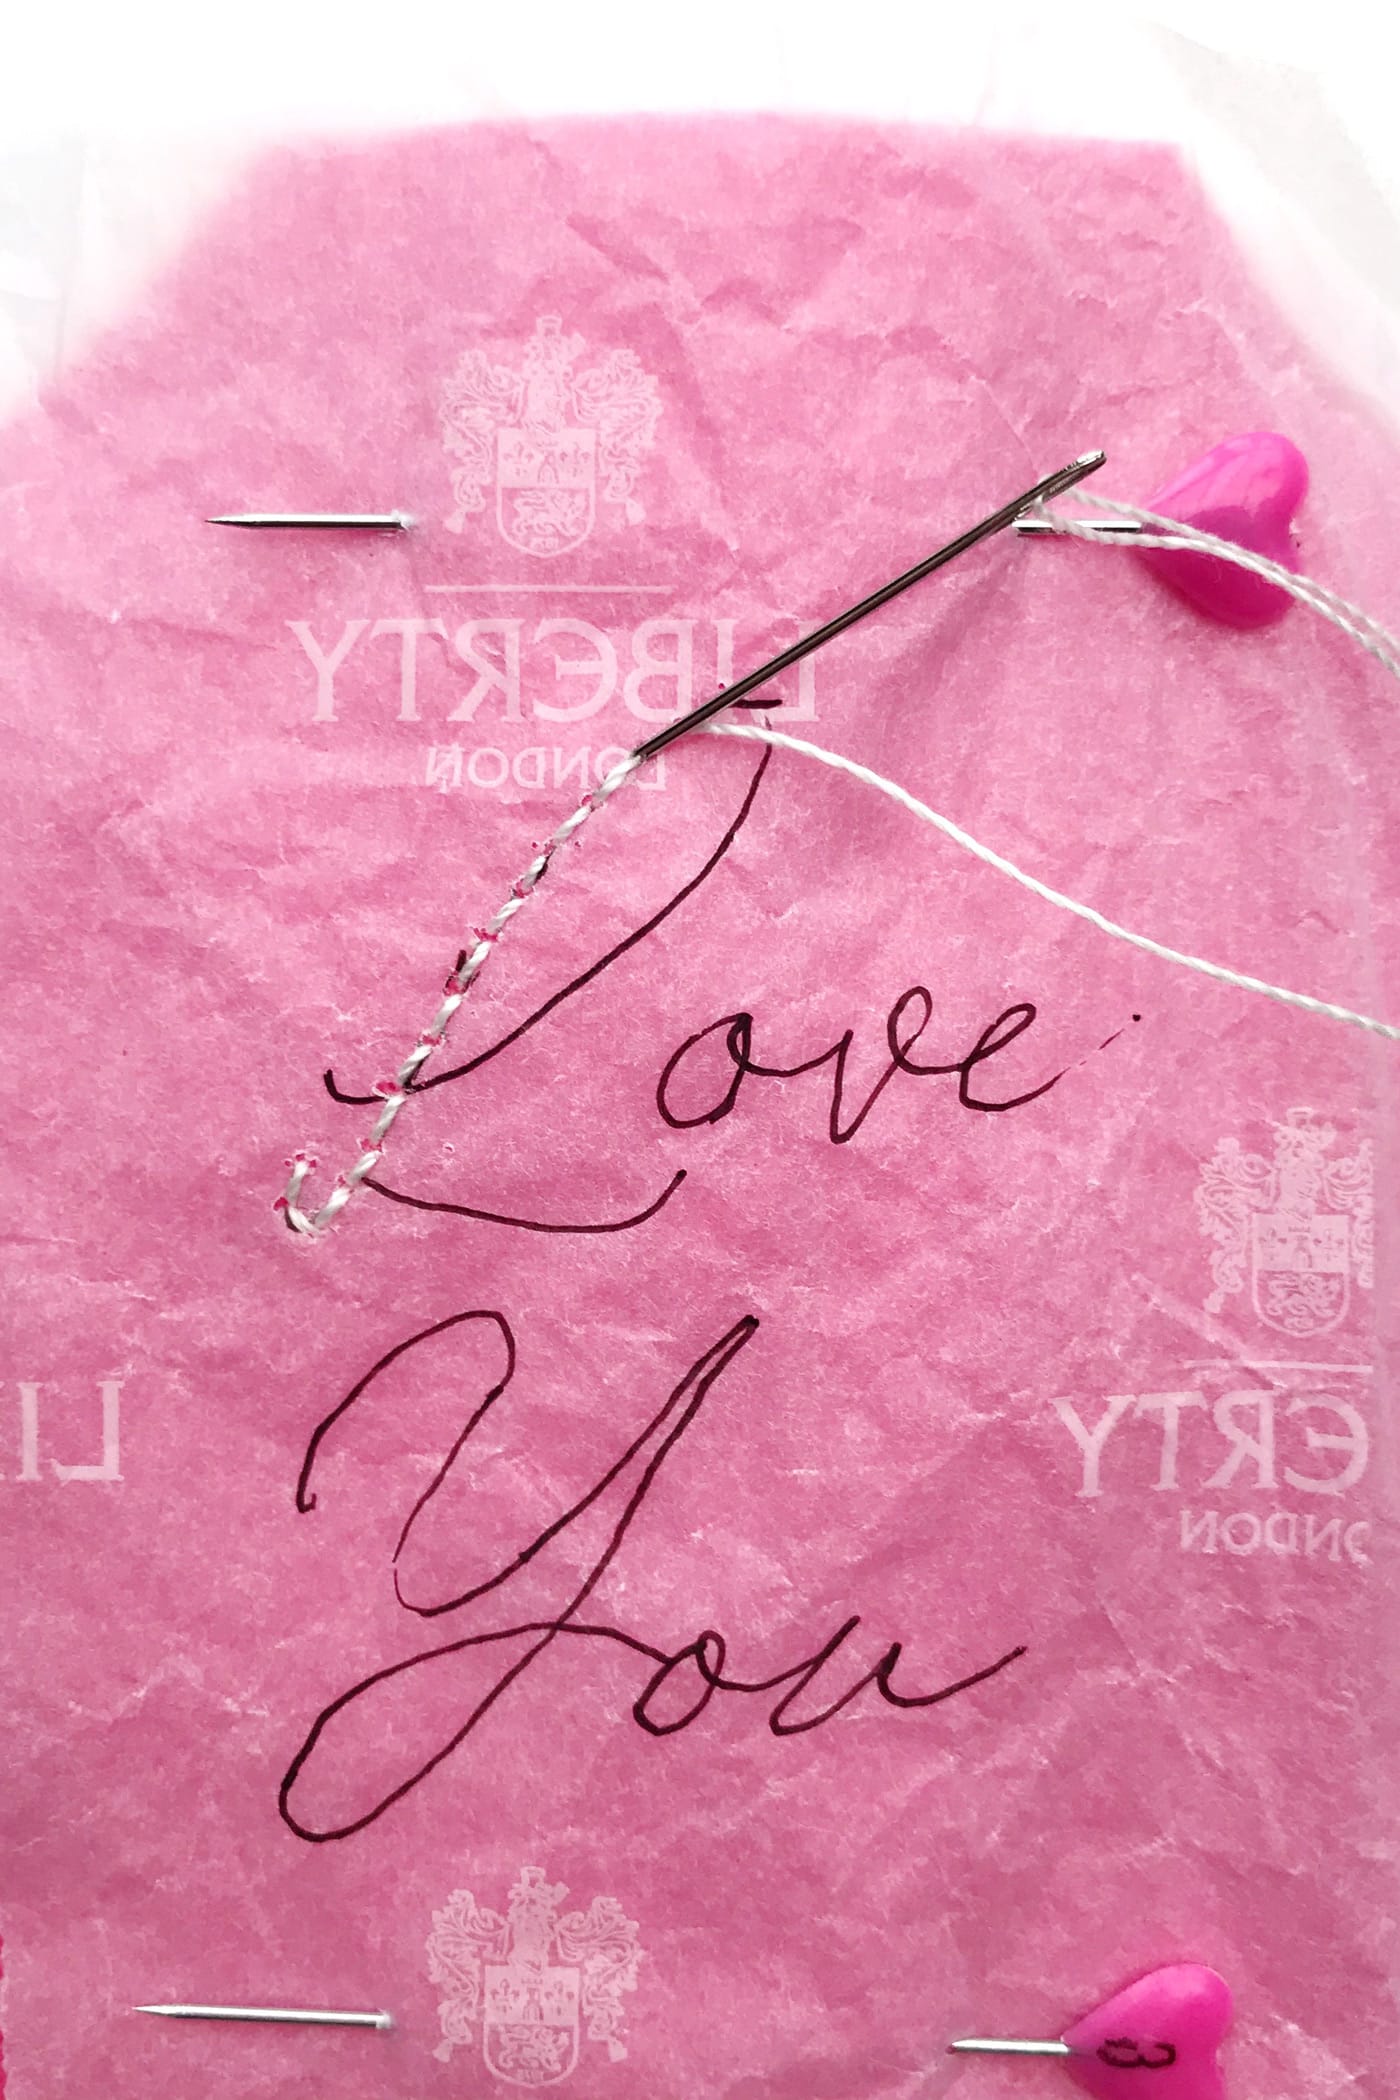
- Trace the Lettering onto Tissue Paper
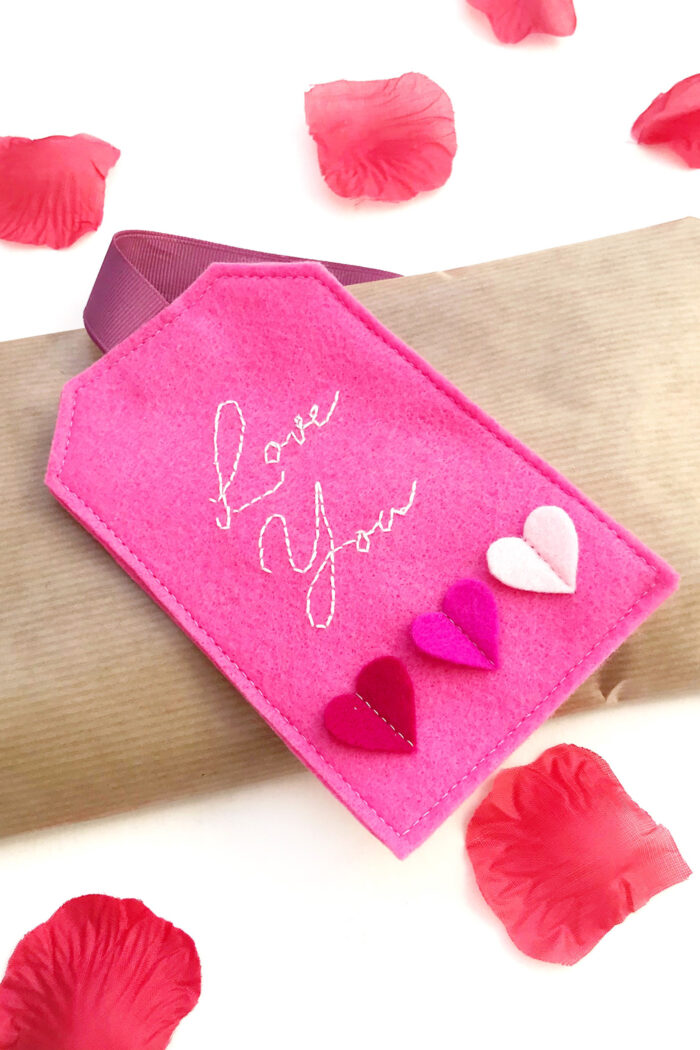
Trace the lettering on to the tissue paper and then pin the tissue paper to the large tag centrally, ensuring there is enough room for the hearts below.
- Add Hand Embroidery
Take an embroidery thread and tie a knot in the end. Come up from the back and use a backstitch to embroider over the letters, pulling firmly but not too tight.
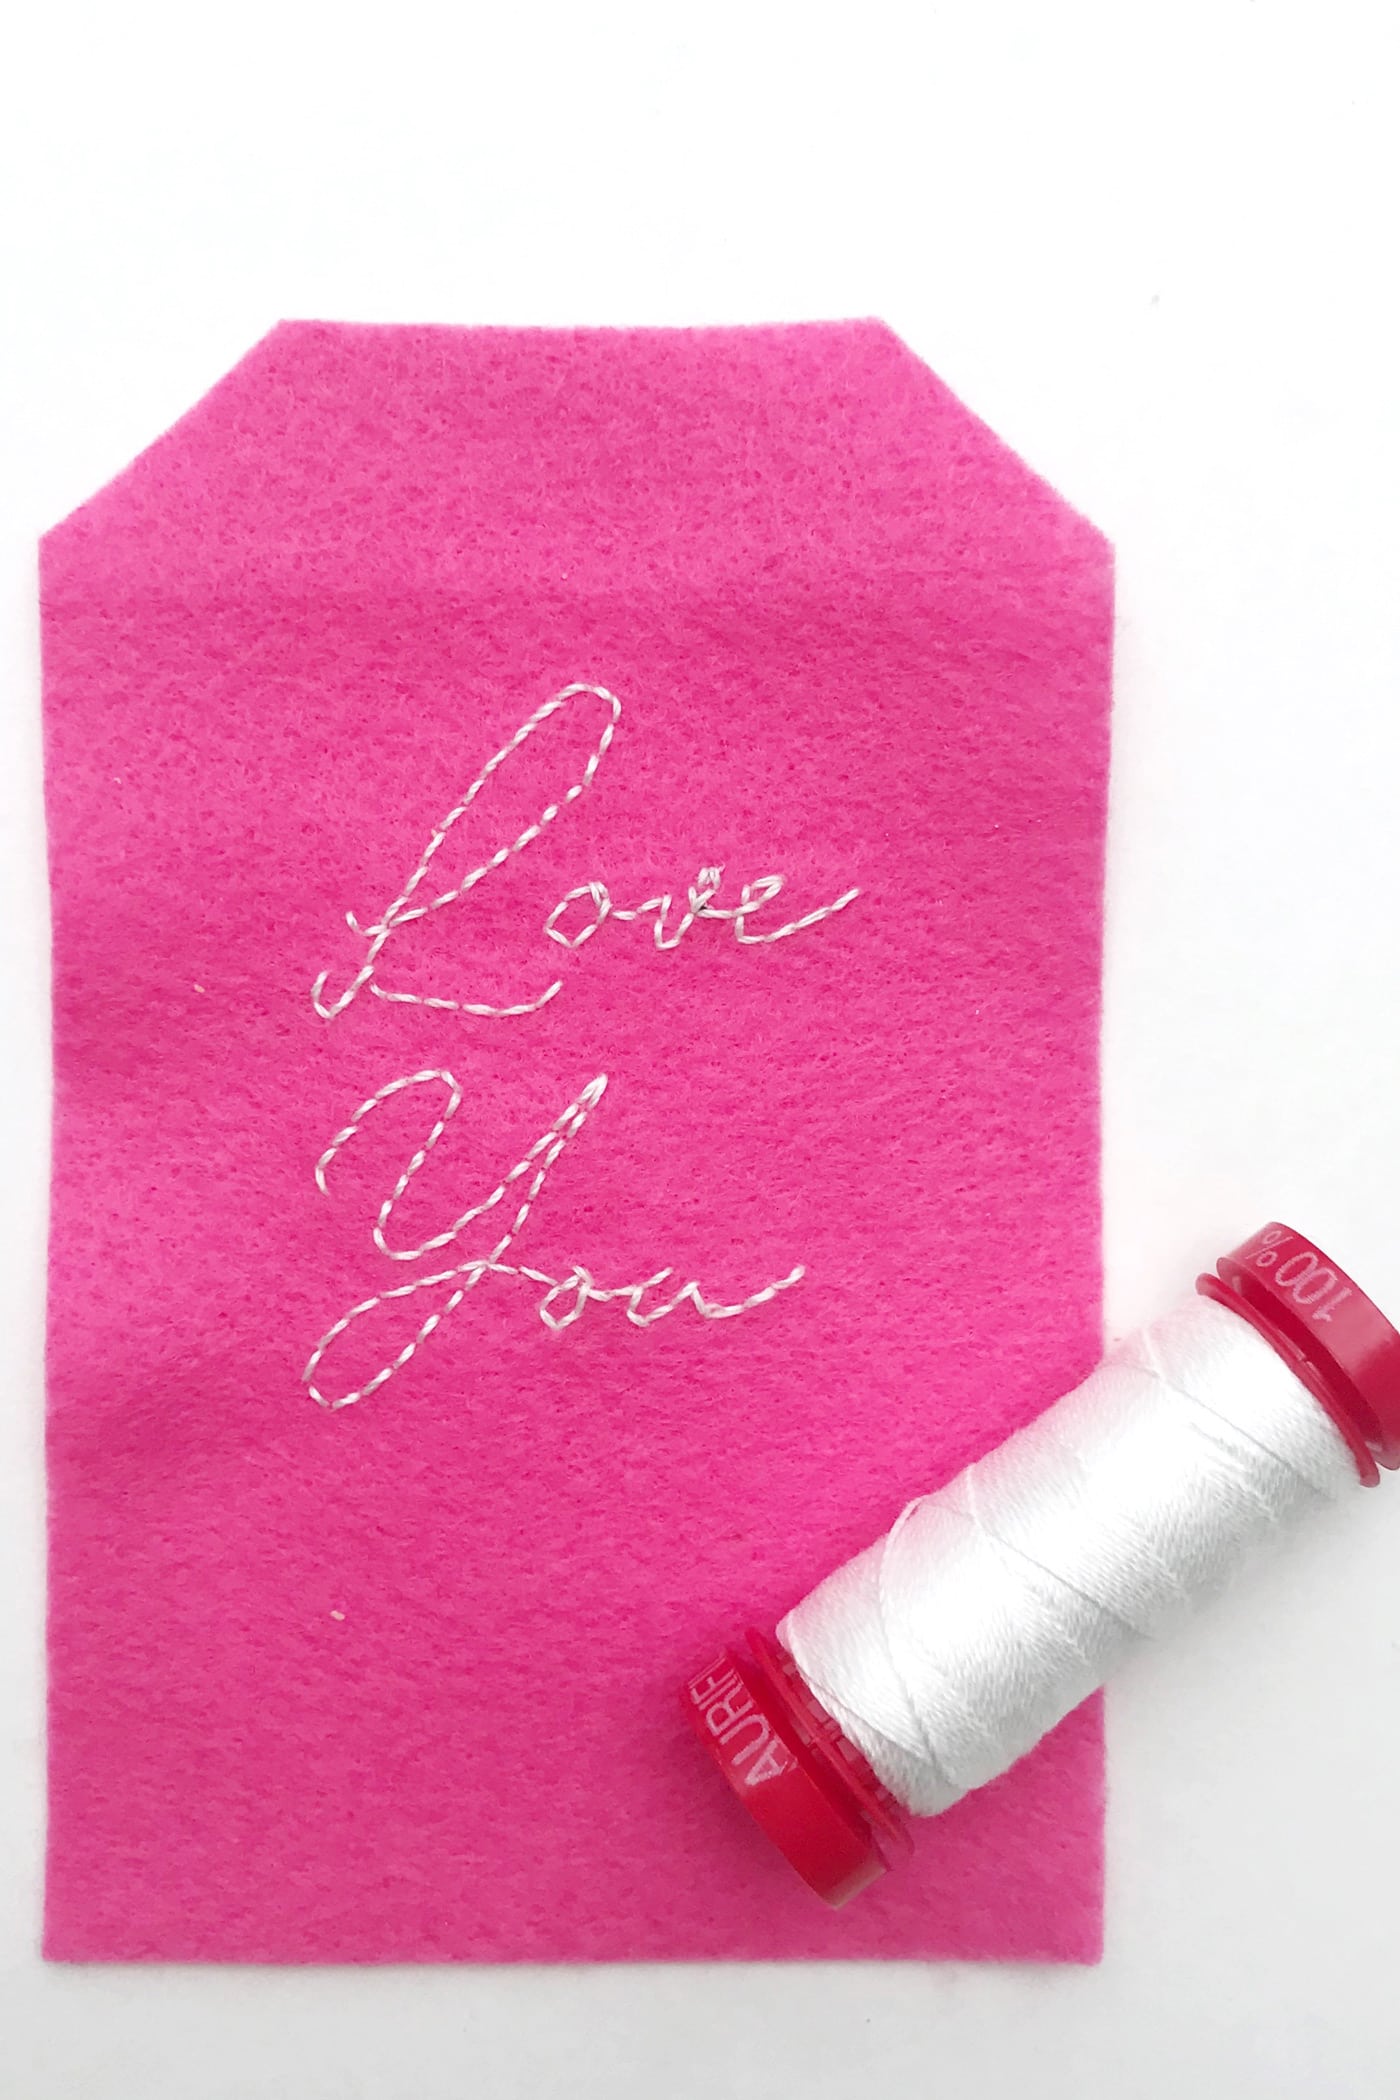
- Remove Tissue Paper
Once you’ve completed all the lettering, tie off and gently remove the tissue paper, being careful not to pull the stitches.
- TOP TIP:
Use tweezers to get the small bits of paper out from underneath the stitching.
- Add the Cut out Hearts
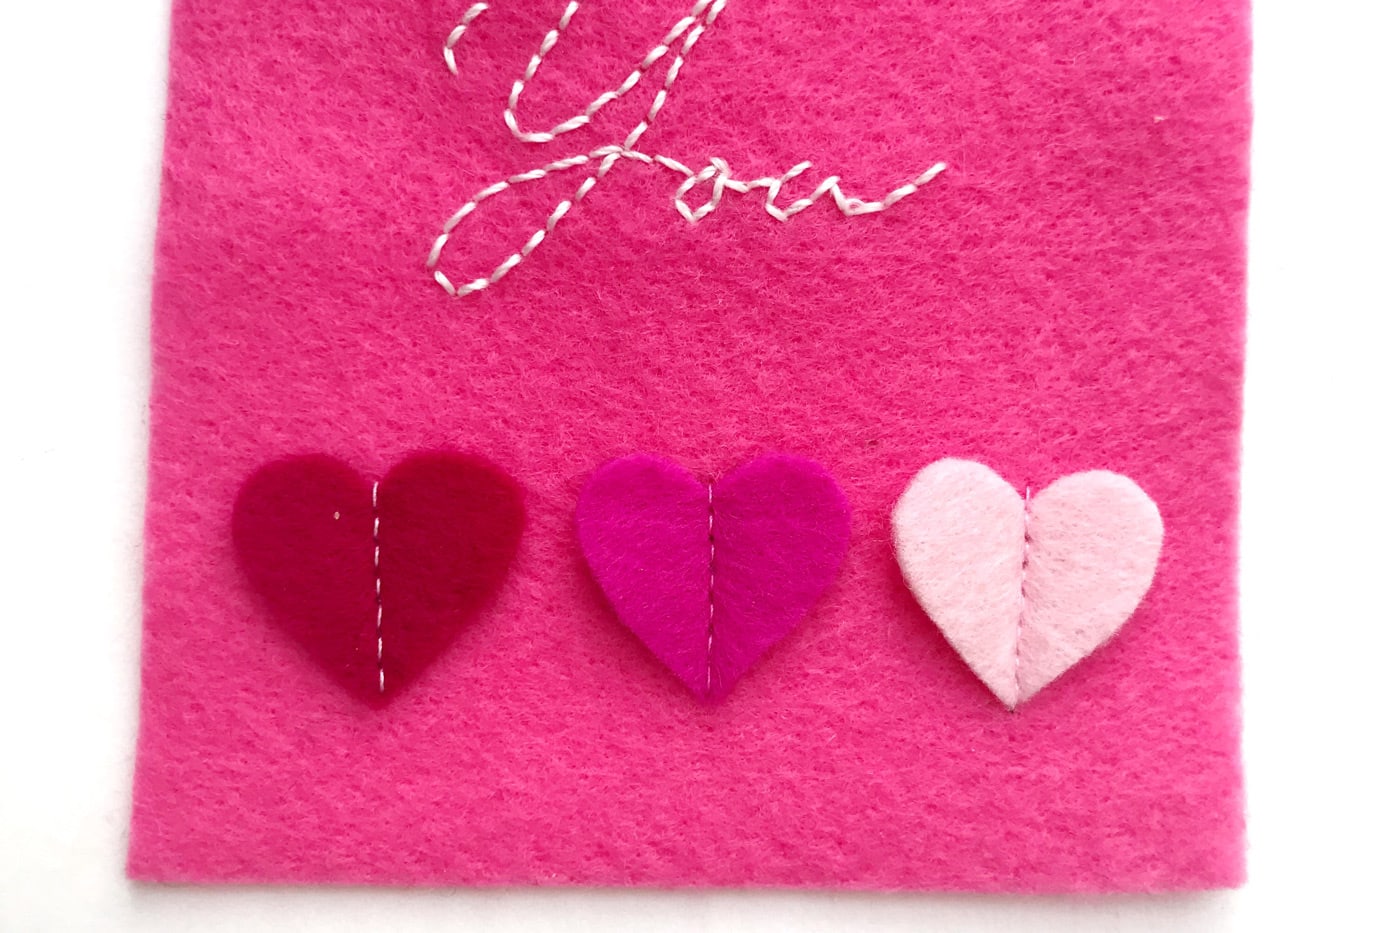
Now take 3 of the small hearts and position them beneath the embroidery in a row. Use small pins to secure them in place. Use a hera marker to draw a line down the center of each heart as a guide for stitching.
- Stitch the Hearts in Place
Stitch down the line for each heart, leaving tails at the beginnings and ends. Tie off at the top and bottom of each heart

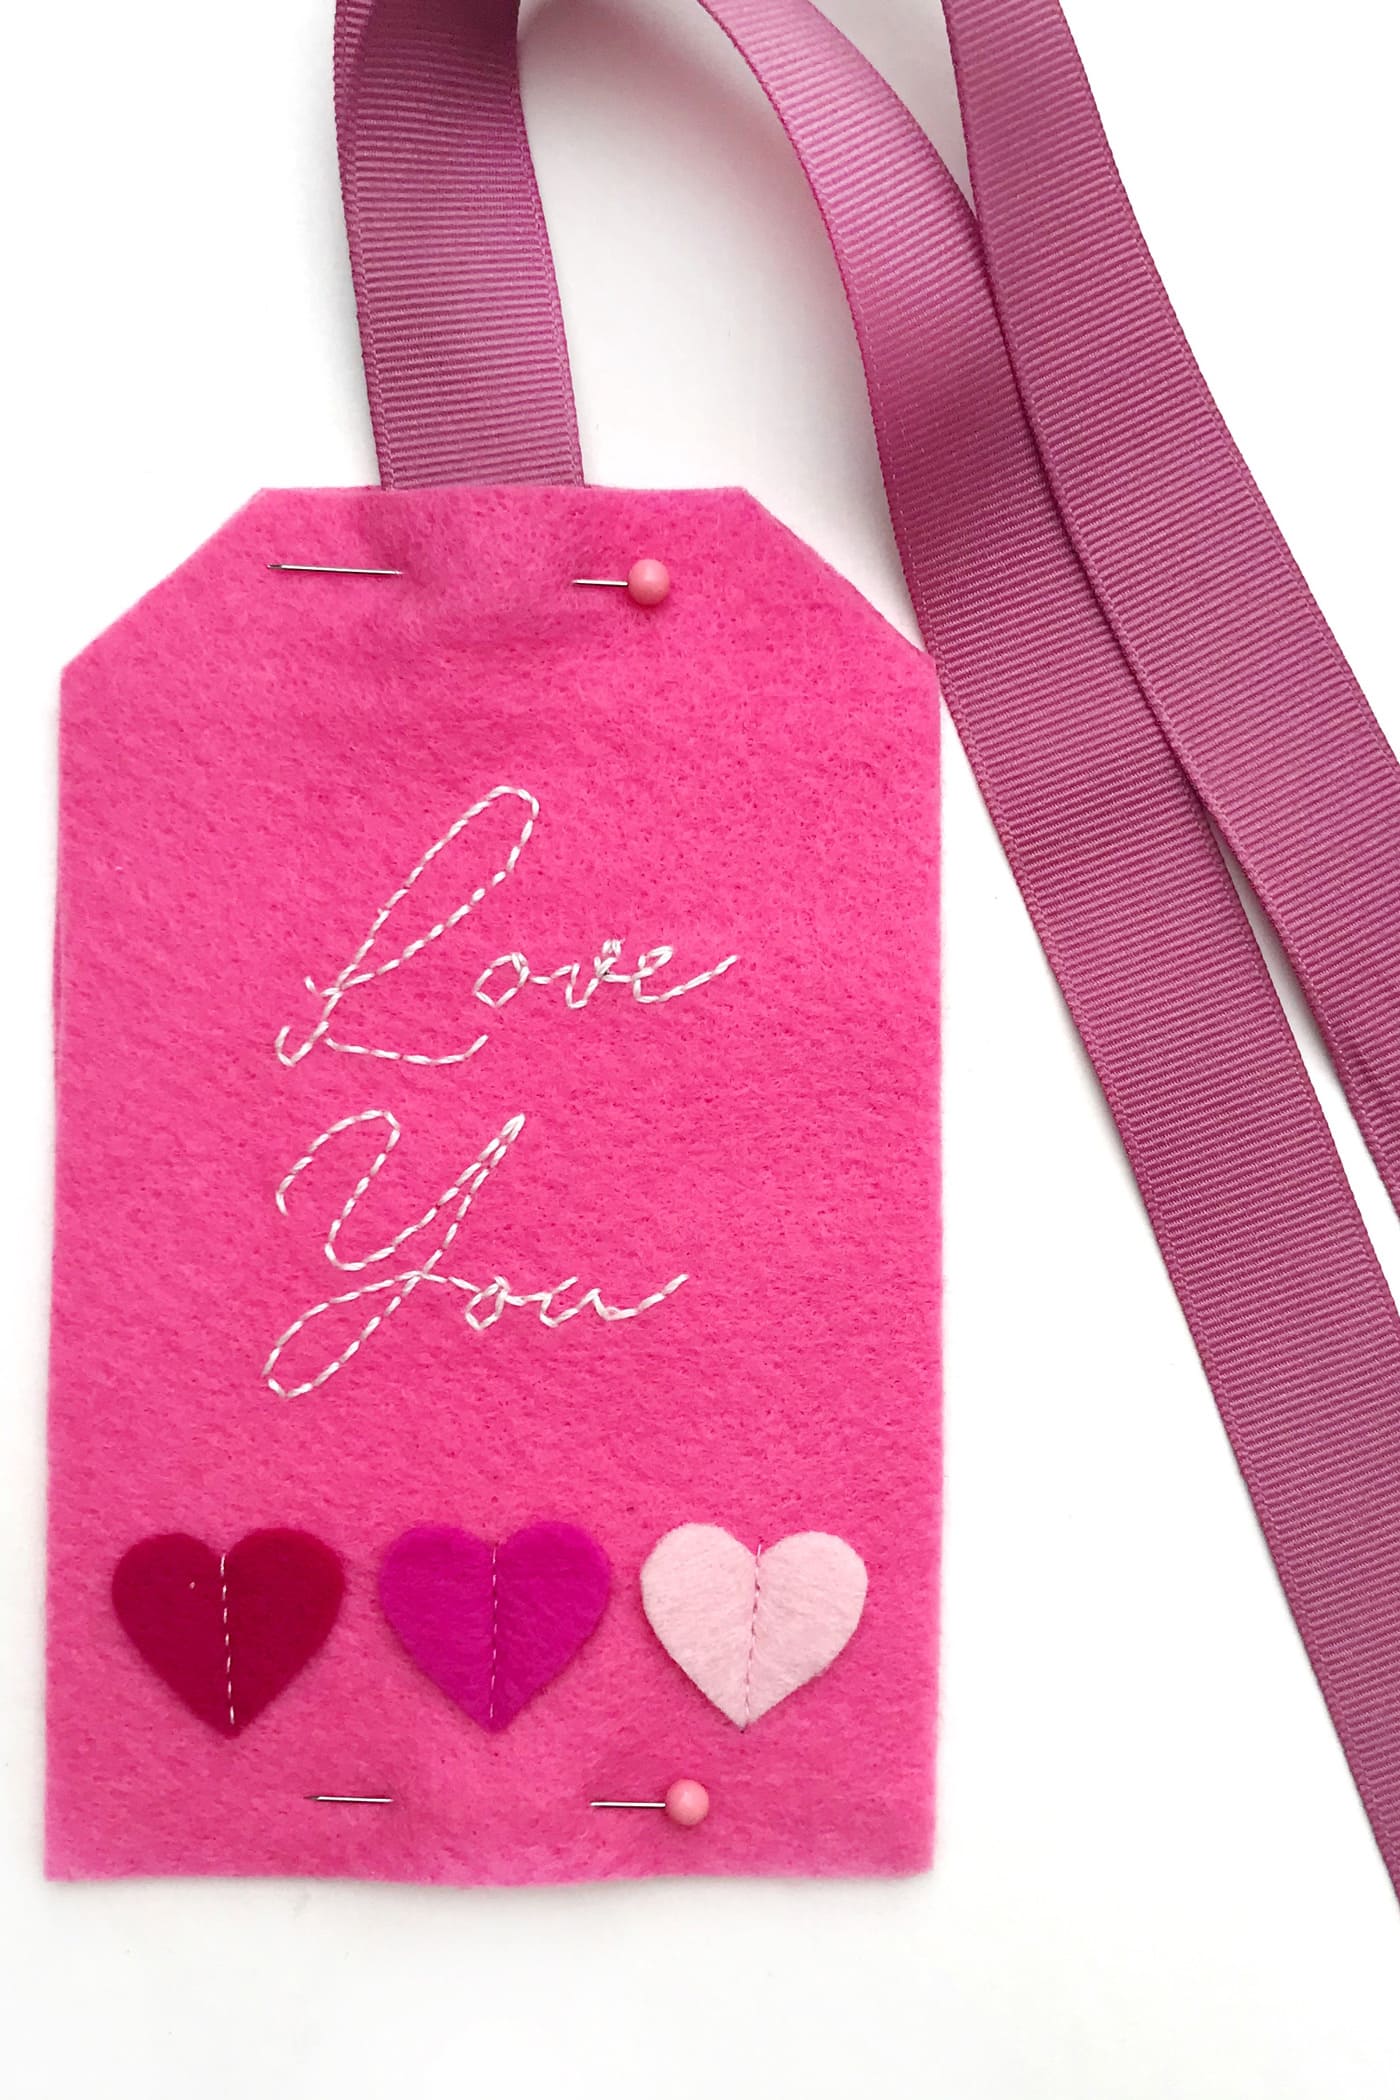
- Add the Ribbon
Now take the back piece of the tag and place it behind the top of the tag. Take the ribbon and fold in half. Insert the fold into the top of the tag about ½ in and pin in place.
- Stitch Tag Front to Back
Stitch all the way around with an 1/8th in seam to hold the two pieces together and to secure the ribbon.
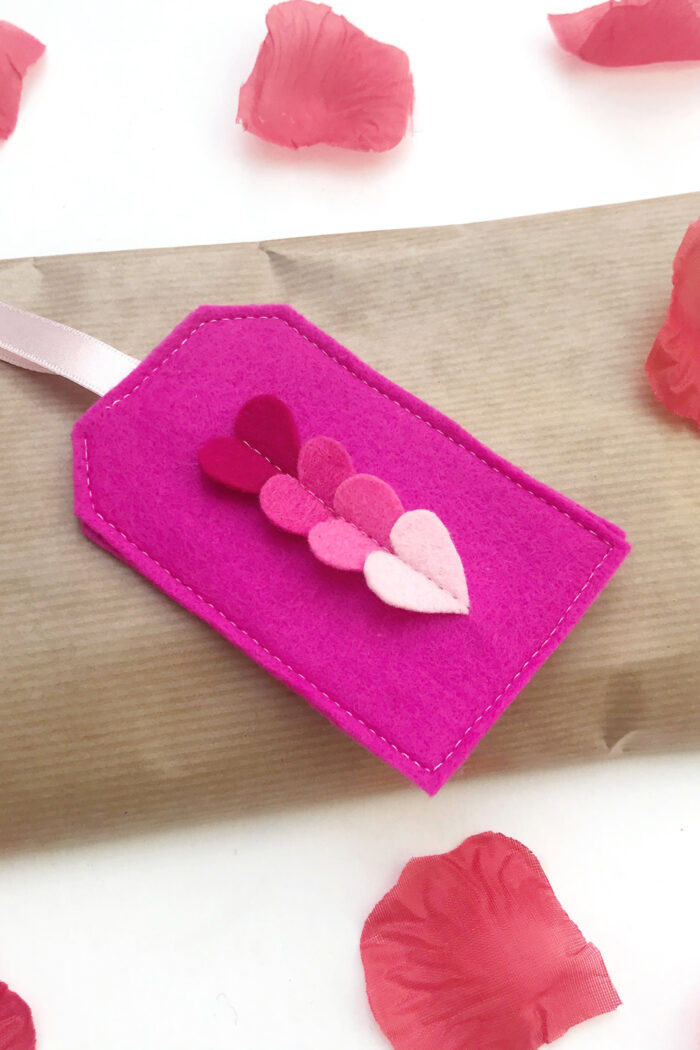
Lift the heart ‘wings’ up so that they have a lovely 3D effect. Tie to your gift for an extra handmade touch to Valentine’s day! - Smaller Tag Directions
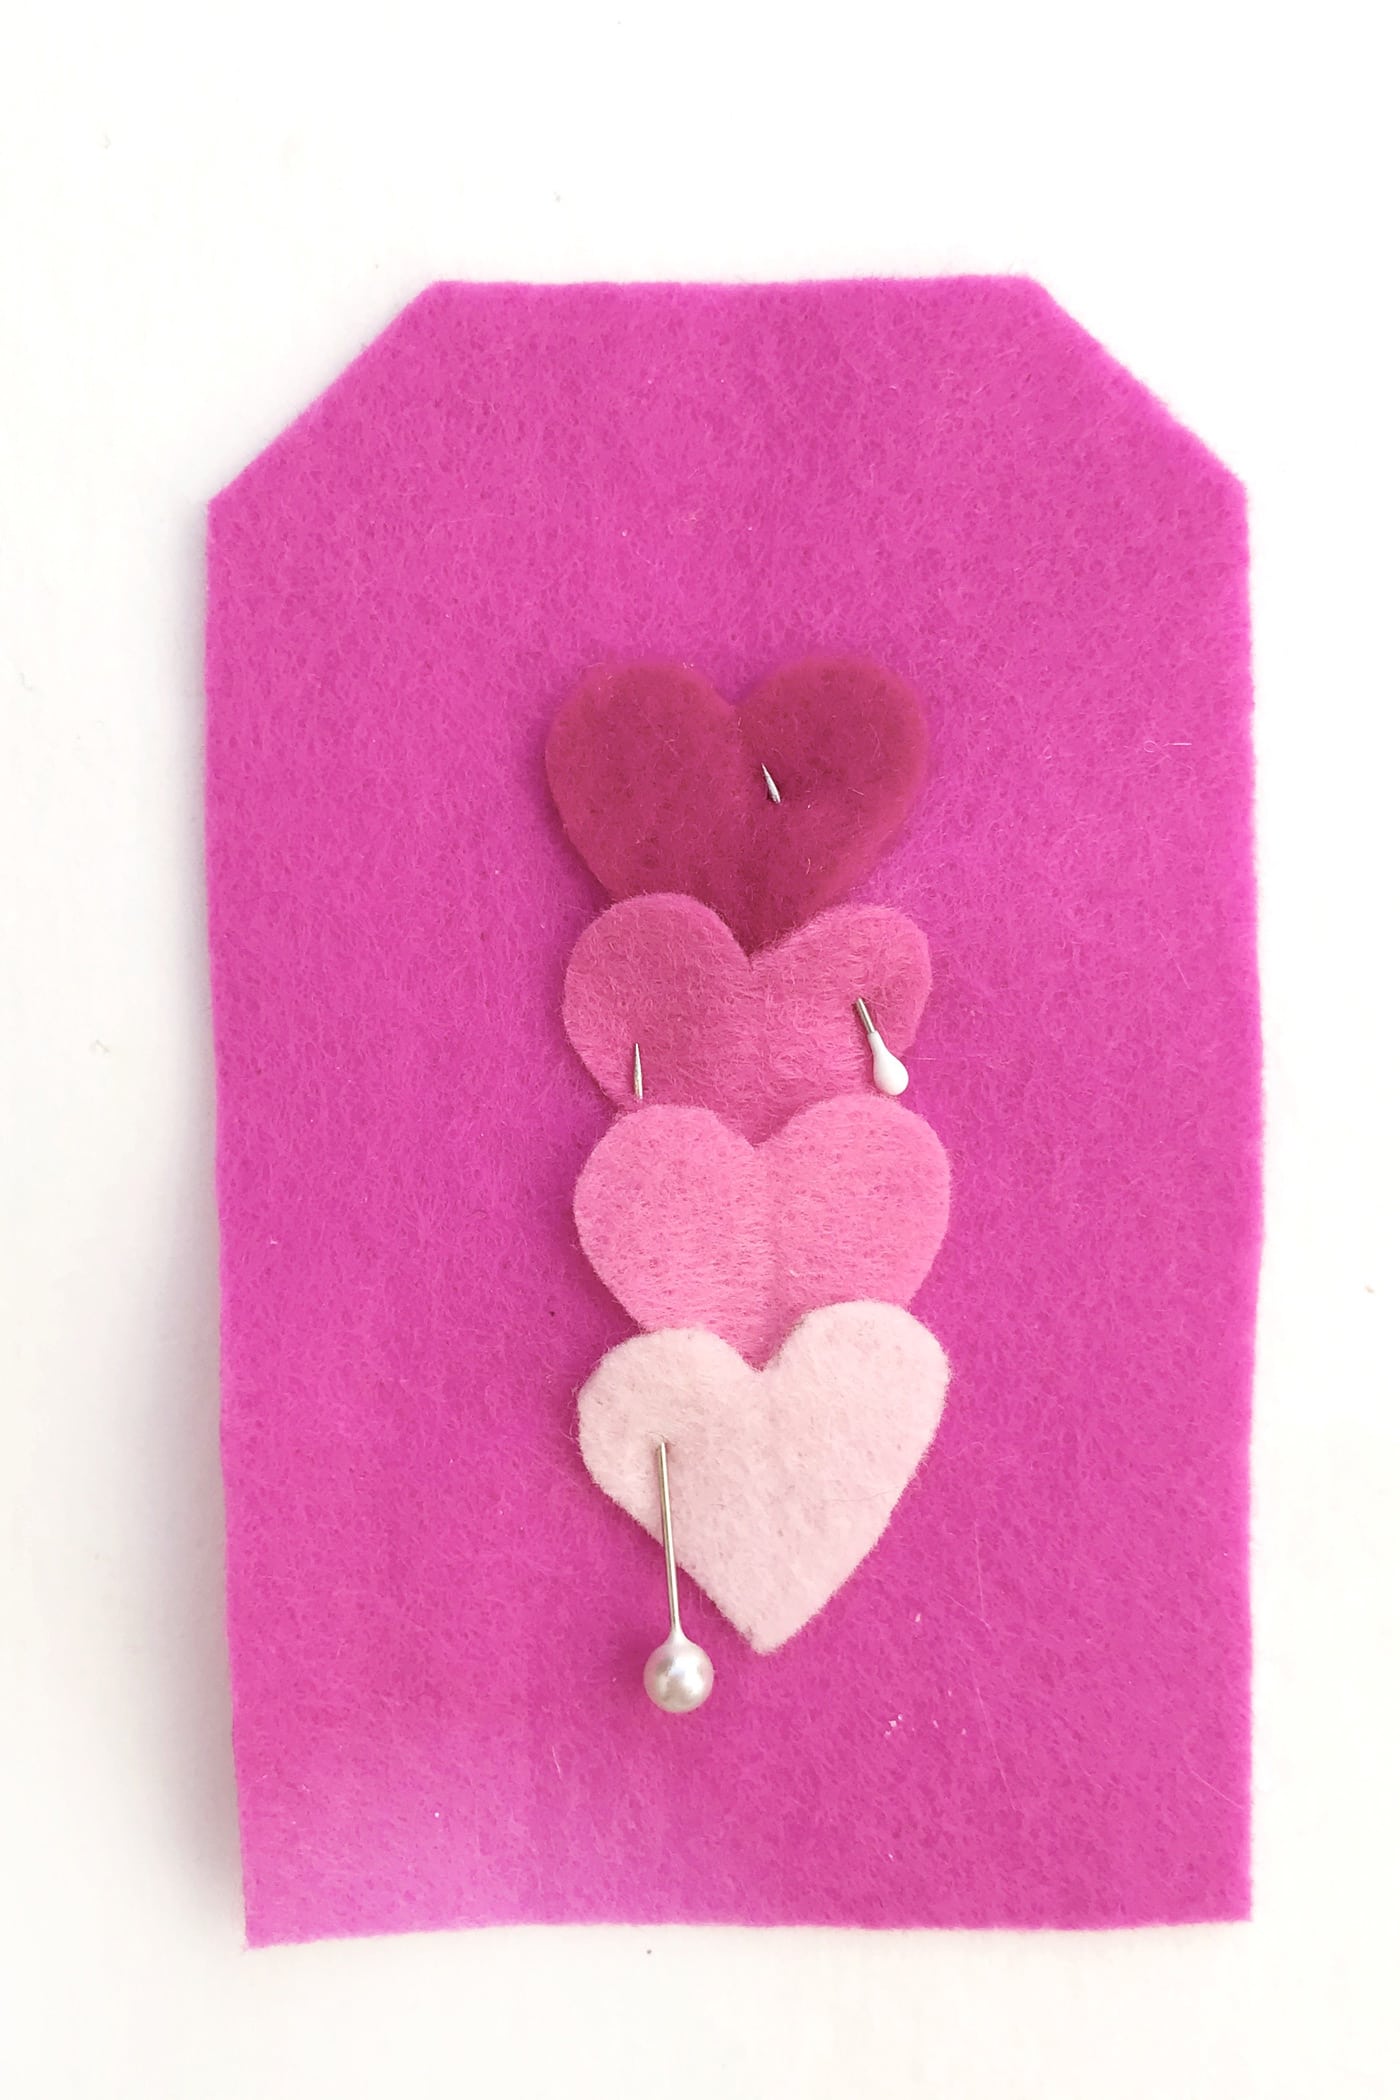
To make the smaller tag, simply pin the 4 pink hearts to the tag aligning them on top of one another.
- Add the Hearts
Use a hera maker to mark a straight line down the middle of the hearts. Stitch along the line, leaving tails at the beginning and end. Tie off at the top and bottom.
- Finishing Steps
As before, take the back tag and place it wrong sides facing. Take the ribbon and fold it in half. Insert the fold into the top of the tag at about ½ in and pin in place.
Stitch all the way around with an 1/8th in seam to old the two pieces together and to secure the ribbon.
And there you have it, a quick and easy way to add a handmade touch to your gift, that can be used year after year!
Have a wonderful Valentine’s Day,
Sarah x
About Sarah Ashford:

Sarah Ashford is a British Quilter and embroiderer and founder of the GreatBritishQuilter challenge on Instagram. Sarah regularly contributes projects to magazines and loves to spread the joy of quilting everywhere she goes. Follow her on Instagram at @sarahashfordstudio and be sure to check out her beautiful sewing room decals in her Etsy shop www.etsy.com/shop/sarahashfordstudio
More DIY Valentine Day Gift Ideas:
40+ Simple Handmade Gift Ideas
Sweetheart Zip Pouch Sewing Tutorial