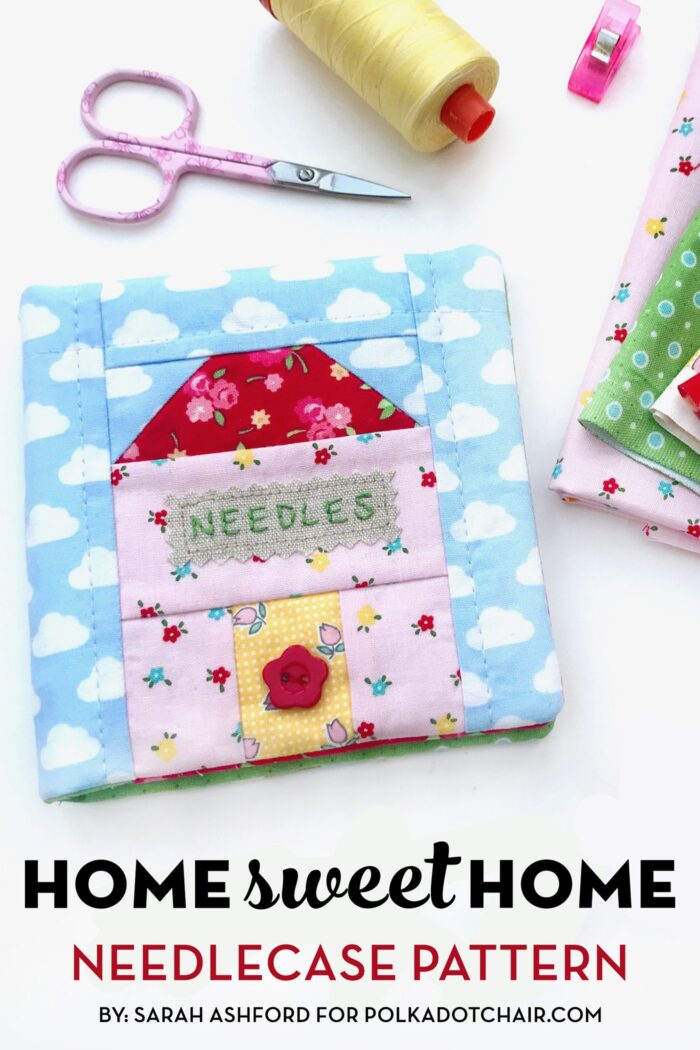
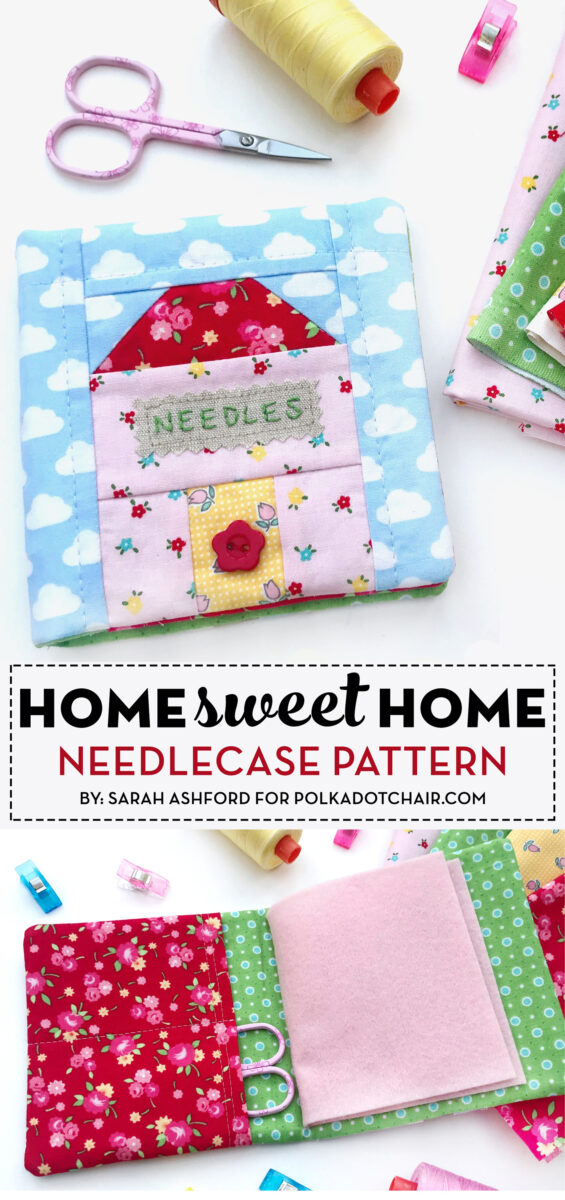
Home Sweet Home Needlecase Pattern
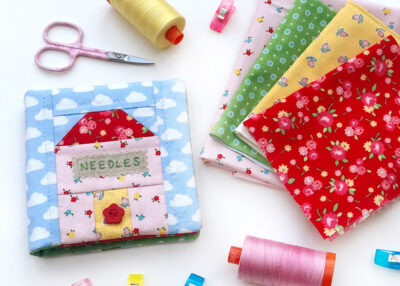
Sarah Ashford is generously sharing a free pattern for an adorable needle case with everyone today! The pattern is called “Home Sweet Home”, and I love that she was inspired by her love of home.
I don’t know about you but I’m always losing my hand sewing needles. I need to make one of these needle books for myself. It would be perfect to tote around the house with me when I’m hand sewing or binding a quilt.
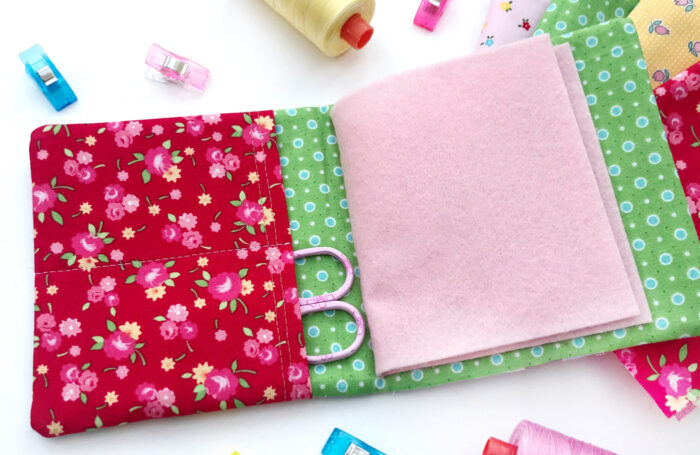
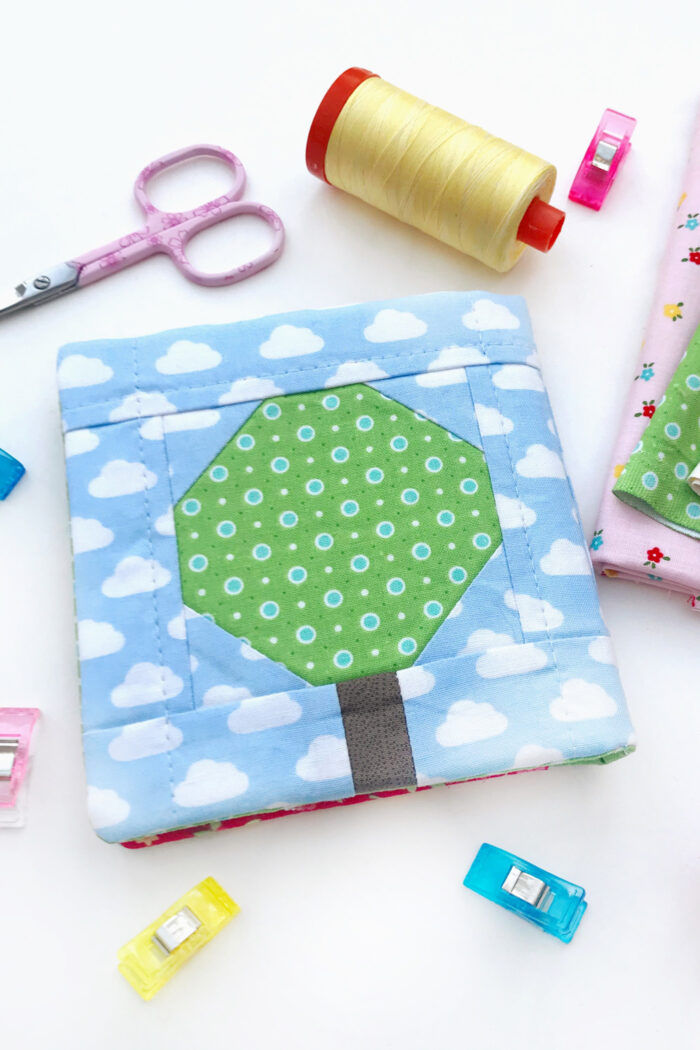
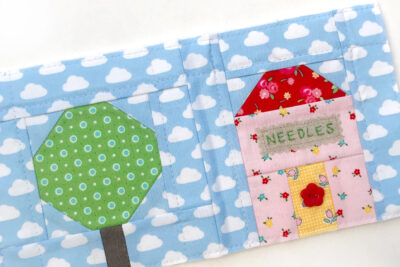
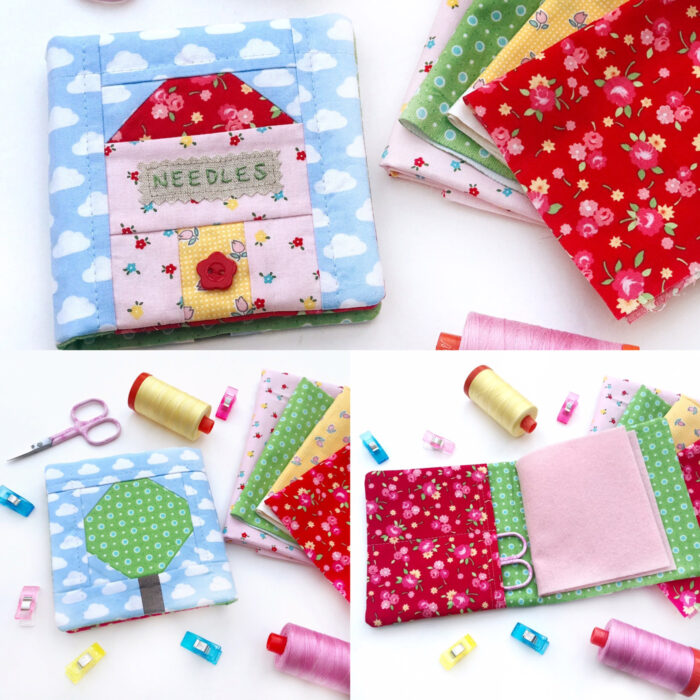
Across the world we are all staying home right now, so it gave me the idea to stitch up a cute little house block. But I wanted it to be something useful, so I added a tree, a bit of embroidery, a button, and turned it into a needle case! It even has a handy little pocket to keep your scissors.
There’s quite a bit of tiny piecing with this pattern, so read the cutting instructions carefully and take your time at the sewing machine for maximum accuracy.
Home Sweet Needle Case Pattern
supplies
Cutting Guide for House Block. Cut from Fabric
- 3 pieces 2" x 1 1/2" for H1, H2 & H3
- 1 piece 3 1/2" x 2" for H4
- 1 piece 3 ½ ” 1 ½ ” for H5
- 2 pieces 1 ½ ” square for H6 & H7
- 1 piece 3 ½ ” x 1 ½ ” for H8
- 2 pieces 5 ½ ” x 1 ½ ” for H9 & H10
Cutting for Guide for Tree Block. Cut from Fabric
- 1 piece 1 ½” x 1” for T1
- 2 pieces 2 ¾ ” x 1 ½ ” for T2 & T3
- 1 piece 3 ½ ” x 3 ½ ” for T4
- 4 pieces 1 ½ ” square for T5, T6, T7 & T8
- 2 pieces 3 ½” x 1 ½” for T9, T10
- 1 piece 5 ½” x 1 ½” for T11
Additional Materials
- 1 piece 10 ½” x 5 ½” fabric for inside lining
- 1 piece 8 ½ ” x 5 ½ ” fabric pocket fabric
- 1 piece 5” x 10” Medium Weight Interfacing
- 1 piece 12” x 7” Batting
- 1 piece linen approximately 3in square
- 1 skein Embroidery Thread I use 12wt Auriful
- 1 piece 8” x 4 ½” Felt
- 1 Decorative button
Instructions
- TOP TIP: It can be tricky to sew tiny pieces on the machine, as it can have a tendency to 'eat up' the fabric when you start stitching. Using a 'leader' (a scrap piece of fabric) to stitch into first can really help with avoiding this. Stitch in the middle of the leader to the edge, then 'feed' the tiny pieces through and it should avoid any 'chewing up' issues!

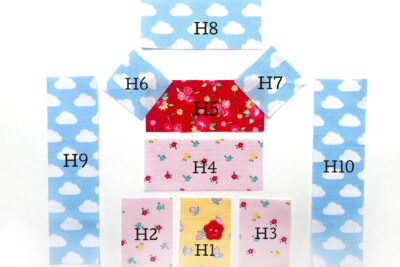
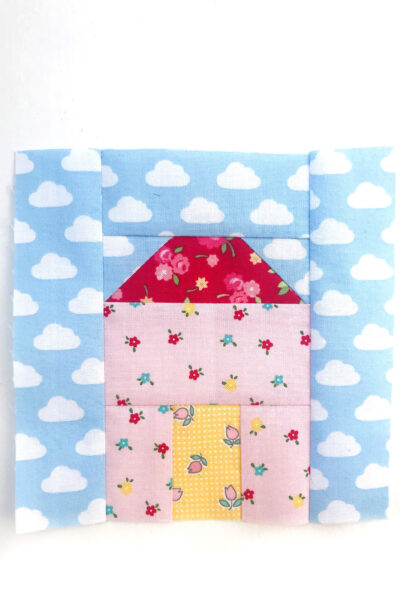
House Block Construction:
- Stitch H1, H2 and H3 as shown to join the door and the house walls.
- Add the rest of the house wall (H4) above.
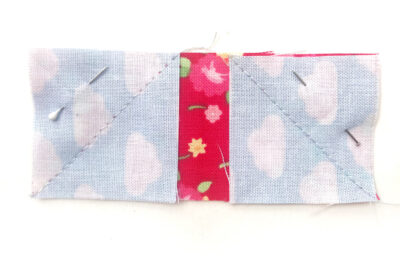
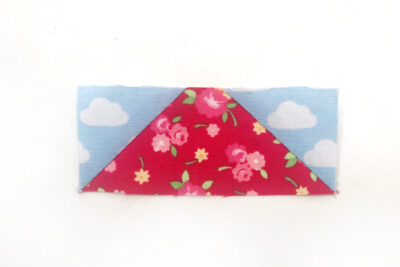
- Next, take the 2 1 ½” squares (H6 and H7) and draw a line diagonally on the reverse. Pin each square to the corner of the roof (H5) right sides down, with the line going from bottom left to top right. Stitch along the straight line. (If you are using directional prints here, like I am, just take care with orientation to ensure that when it's opened out the print is the right way up.)
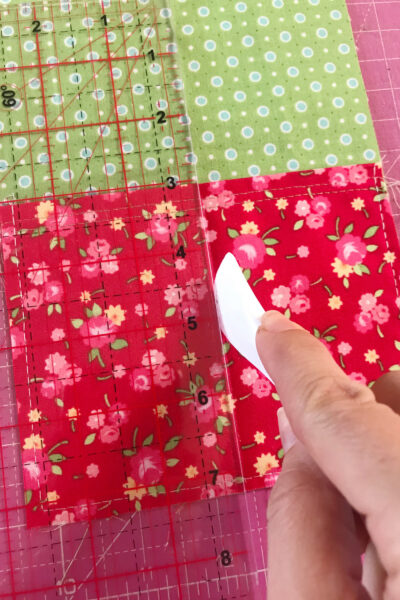
- Trim a 1/4” seam from the sewn line on each side, open out and press.
- Stitch this section to the house and add the top sky section (H8) then add the left and right sky sections (H9 and H10) to complete the house block.

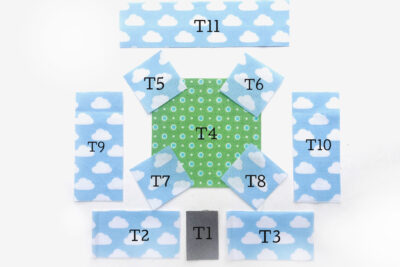
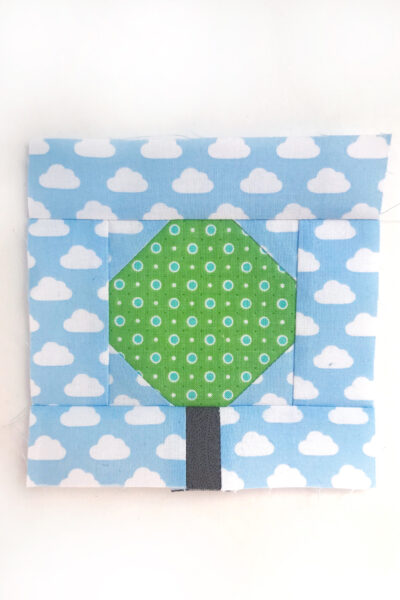
Tree Block Construction:
- Refer to image as neccessary for block layout.
- Stitch a T2 and T3 section to the tree trunk (T1).
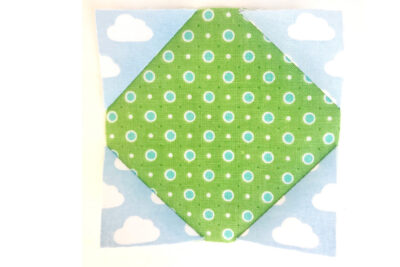
- Stitch the sky corners (T5, T6, T7 and T8) to the tree (T4) in the same way that you stitched the sky to the roof in the house block. Trim the excess to a ¼” seam, open out and press.
- Stitch the sky sections T9 and T10 to the tree. Then stitch the tree trunk section to the tree.
- Finally, add the top T11 sky section to complete the block.
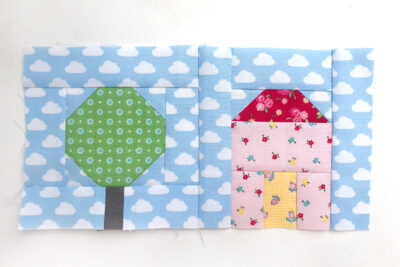
- Join the house and tree block together with the house on the right.
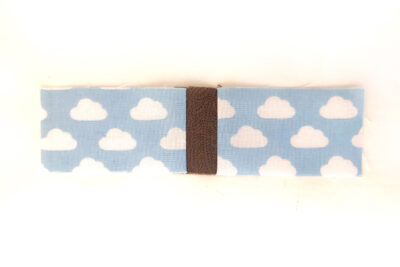
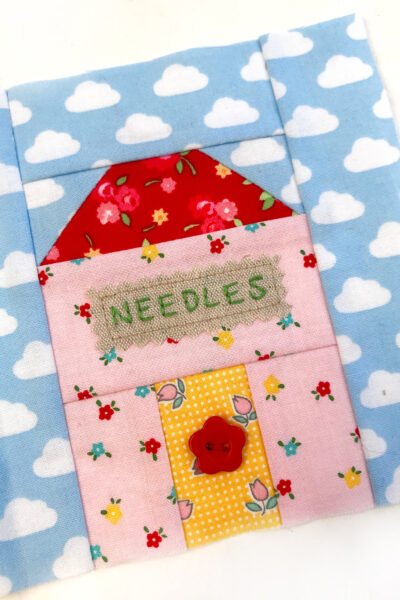
- If you have a button for the doorbell stitch it in place. And if you choose, appliqué on some embroidery saying 'Needles' (or whatever wording you choose) onto a piece of linen. I wrote mine freehand and stitched a backstitch over it. I then pinned it in position on the needlecase and stitched using a straight stitch all the way around the edge.
Case Assembly:
- Interface the panel with your medium weight interfacing and adhere to the batting using your preferred method. Personally I love spray baste as it negates the need for pins. Quilt however you choose. I've used straight lines 1/4” from the seam lines and kept it very simple. Trim the excess batting.
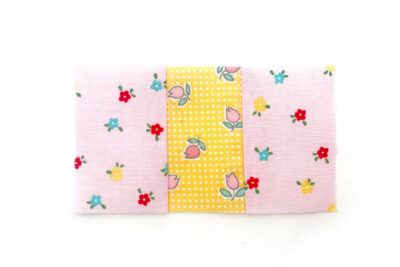
- Take the pocket fabric, fold in half length ways and top stitch a double row of stitches. Baste in place right sides up on the left hand side with the lining fabric. Use a long stitch length for this and a 1/8” seam.
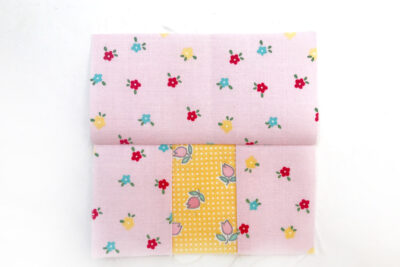
- Use a hera marker to mark a line horizontally down the middle of the pocket at 2.75”. Topstitch down this line, and tie the threads off at the back to create 2 pockets.
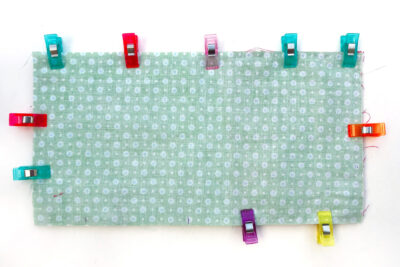
- Take the outside panel and lay right sides up with the house on the right. Place the inside panel right sides down with the pocket on the right. Hold in place with binding clips and leave a 3” gap for turning.
- Stitch all the way around using a 1/4” seam and clip the corners. Turn right sides out and press. Close the gap with a small slip stitch. Press flat. Now we need to insert the felt where the needles go. Fold the case to find the centre and fold the felt to find the centre and match up the creases. Stitch a horizontal line down, leaving tails of thread at the beginning and end. Pull through to the inside of the case and pull through and tie off to finish.
- And there you have it, a super cute tiny pieced needle case. Never be lost for a needle again!


About the Designer:

Sarah Ashford is a British Quilter and embroiderer and founder of the GreatBritishQuilter challenge on Instagram. Sarah regularly contributes projects to magazines and loves to spread the joy of quilting everywhere she goes. Follow her on Instagram at @sarahashfordstudio and be sure to check out her beautiful sewing room decals in her Etsy shop www.etsy.com/shop/sarahashfordstudio
A few other Free Quilted Project Patterns that you may enjoy:
How to Make a Quilted Pillow with Half Square Triangles
How to Make a Mug Rug using the Quilt as you Go Method
Simple Patchwork Pencil Case Sewing Pattern
Square in Square Quilted Placemat Pattern

Do the templates for the front cover include sewing margin or do you have to add them on ? Thank you Janice.
They include the seam allowance
Is this ever cute, Melissa! Thank you for the PDF pattern. I have never made a Needle Book yet, but I just might have to try this one :)!