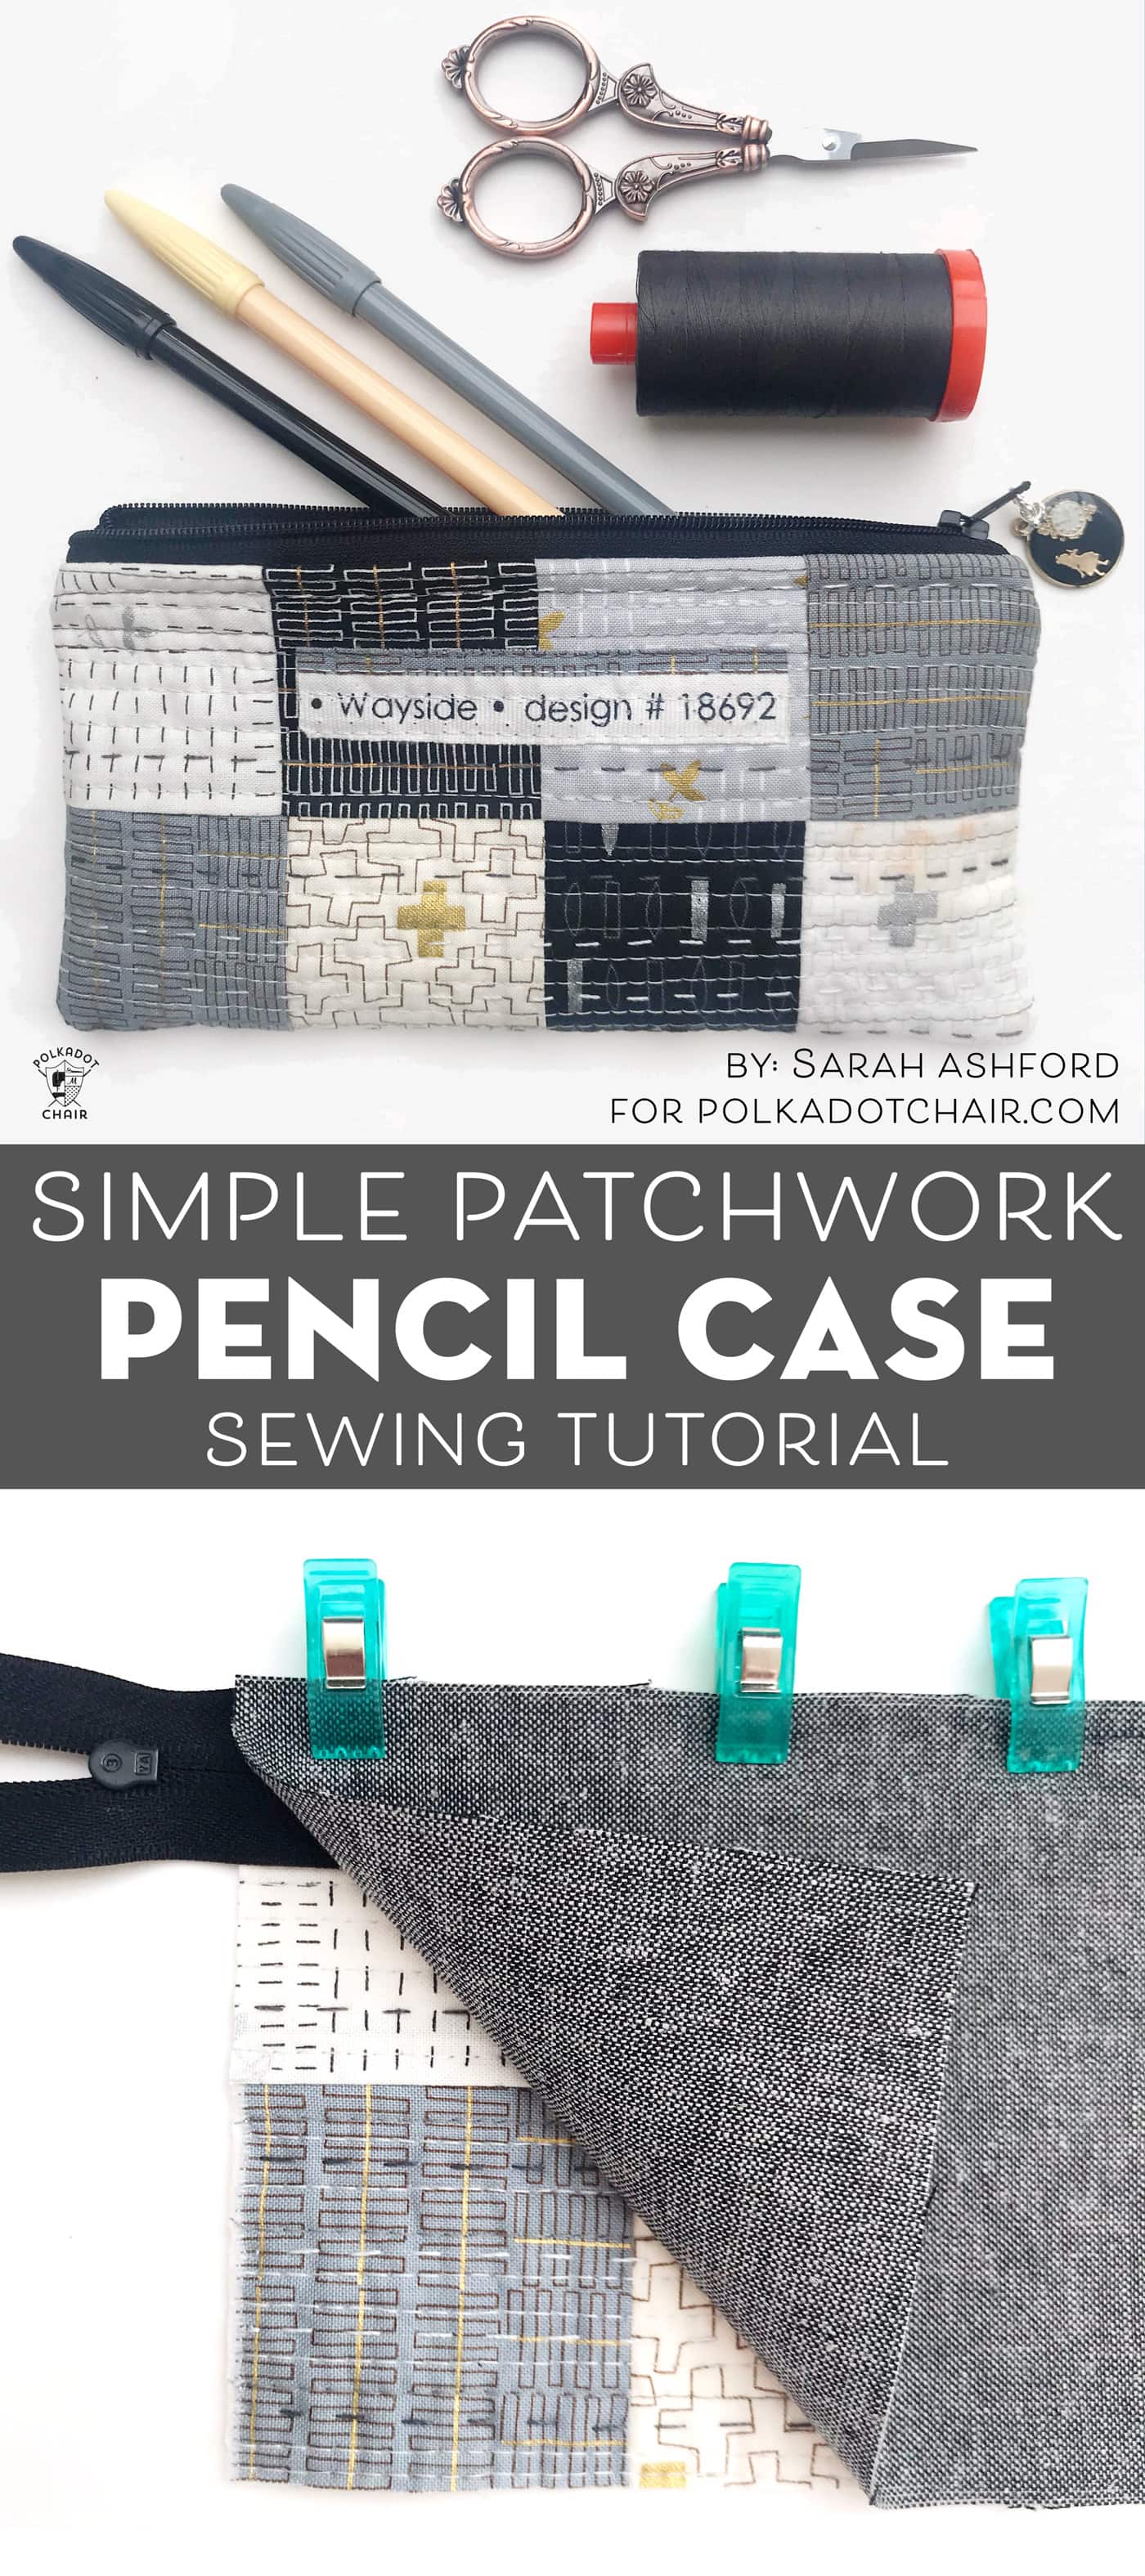
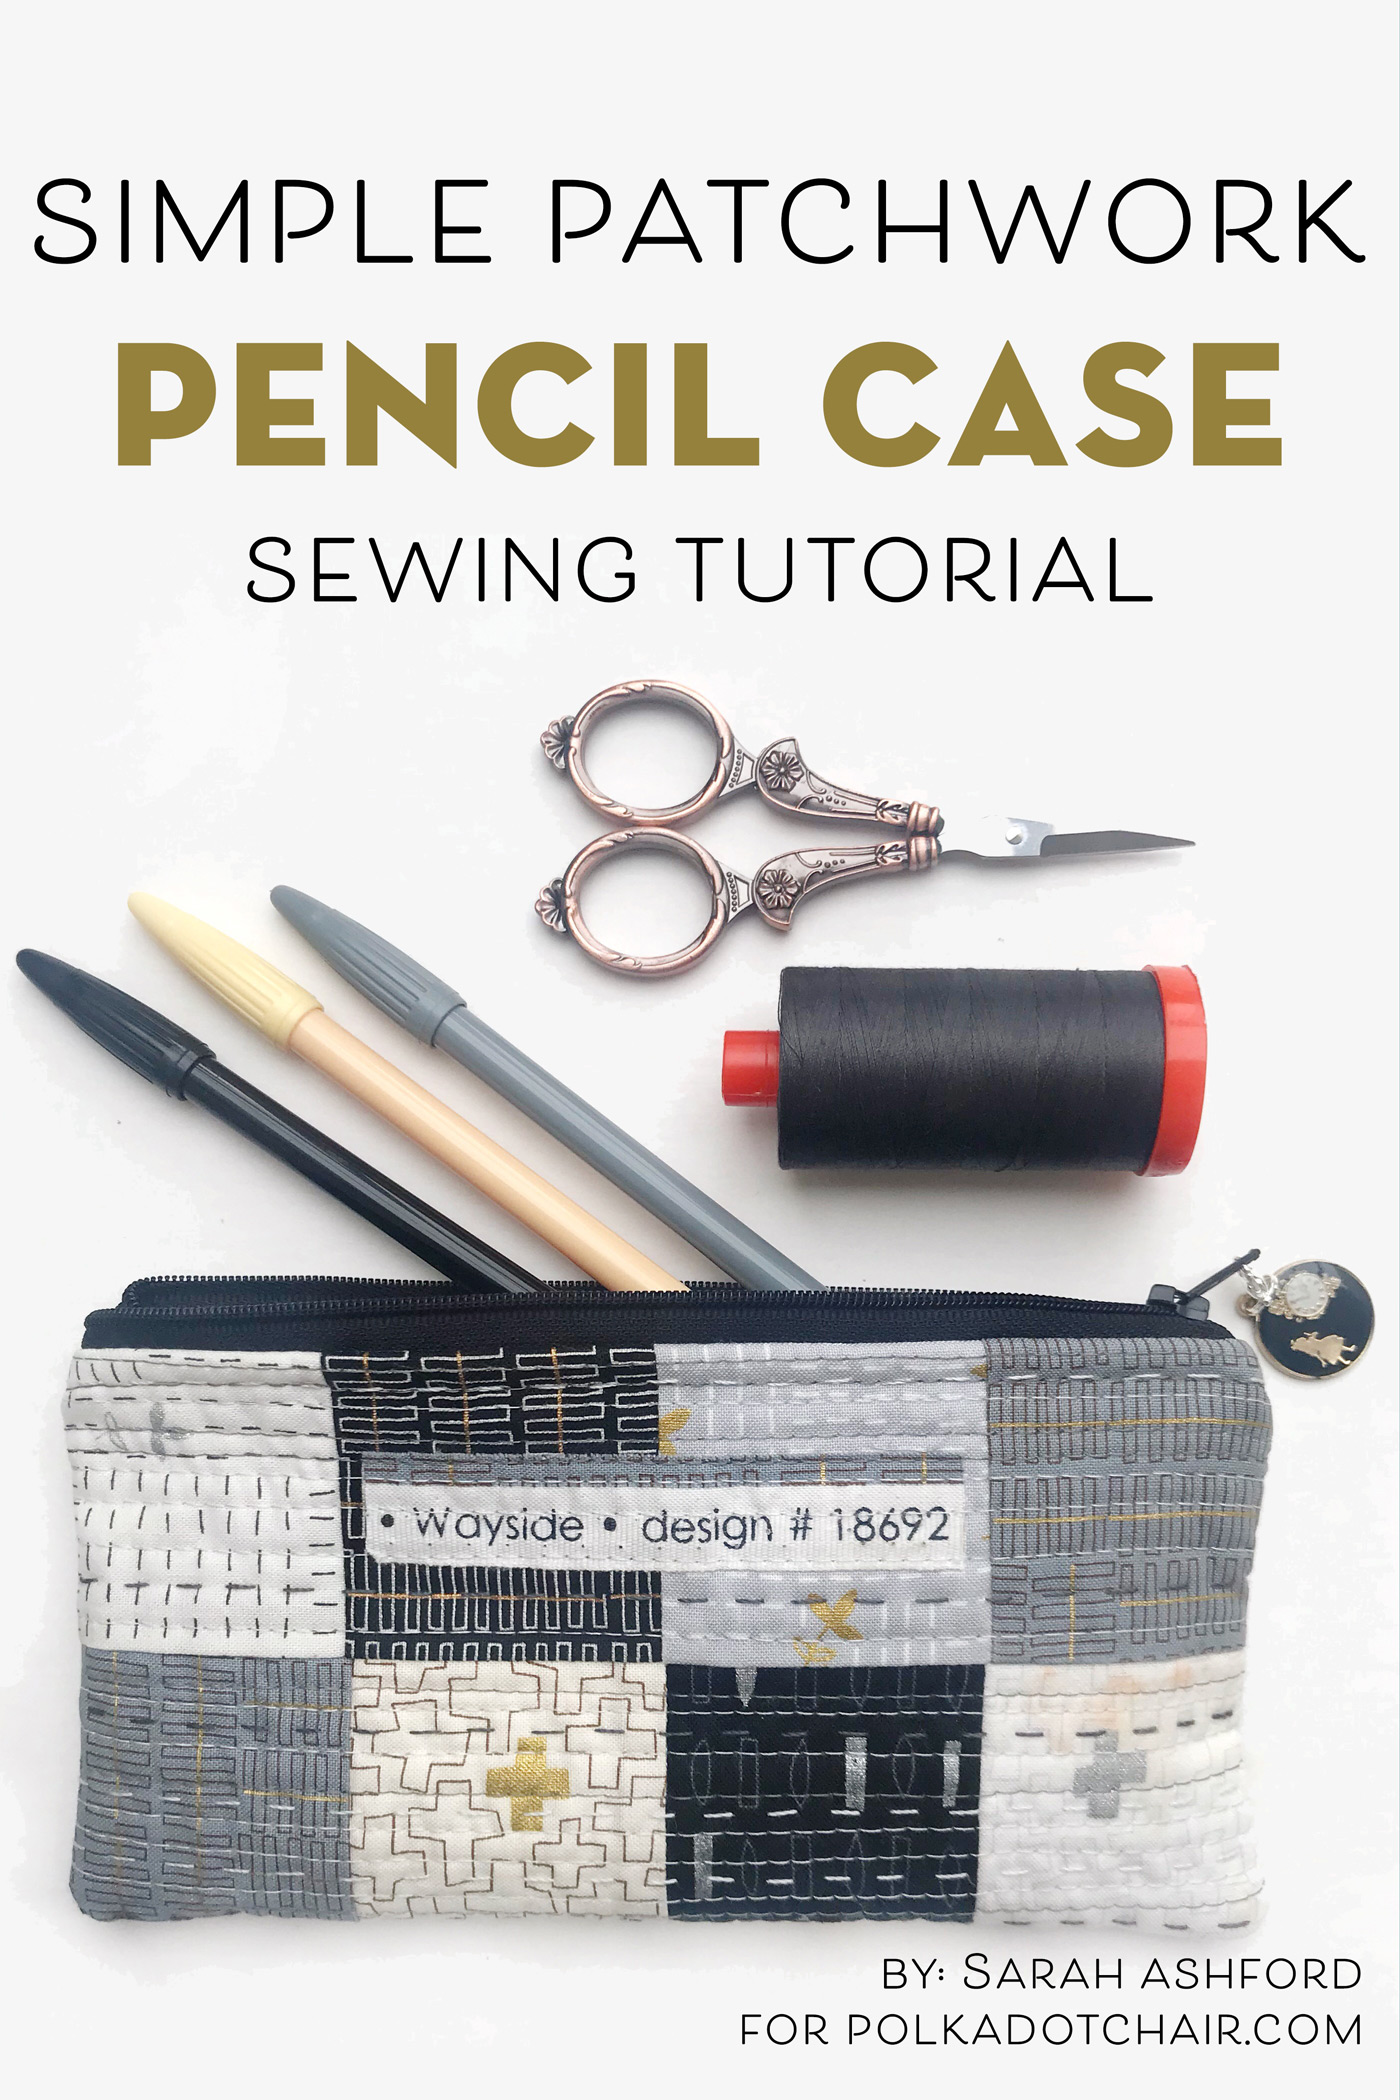
Simple Patchwork Quilted Pencil Case Tutorial
Learn how to make a Simple Quilted Patchwork Pencil case with this excellent sewing tutorial by Sarah Ashford! These cute little pencil pouches are quick to stitch up and make wonderful gifts!
Sometimes, we want to stitch up a project or quick gift that’s not too complicated and not too time-consuming but looks great, is practical, and has that handmade touch.
I thought I’d design a simple patchwork pencil case with the added touch of some appliqué, machine quilting, and hand quilting, too…which can be included or not depending on your time.
Sometimes I like simple, and sometimes I like all the techniques, so I’ve used them all! But you can make it as quilted and adorned with appliqué as little or as much as you like.
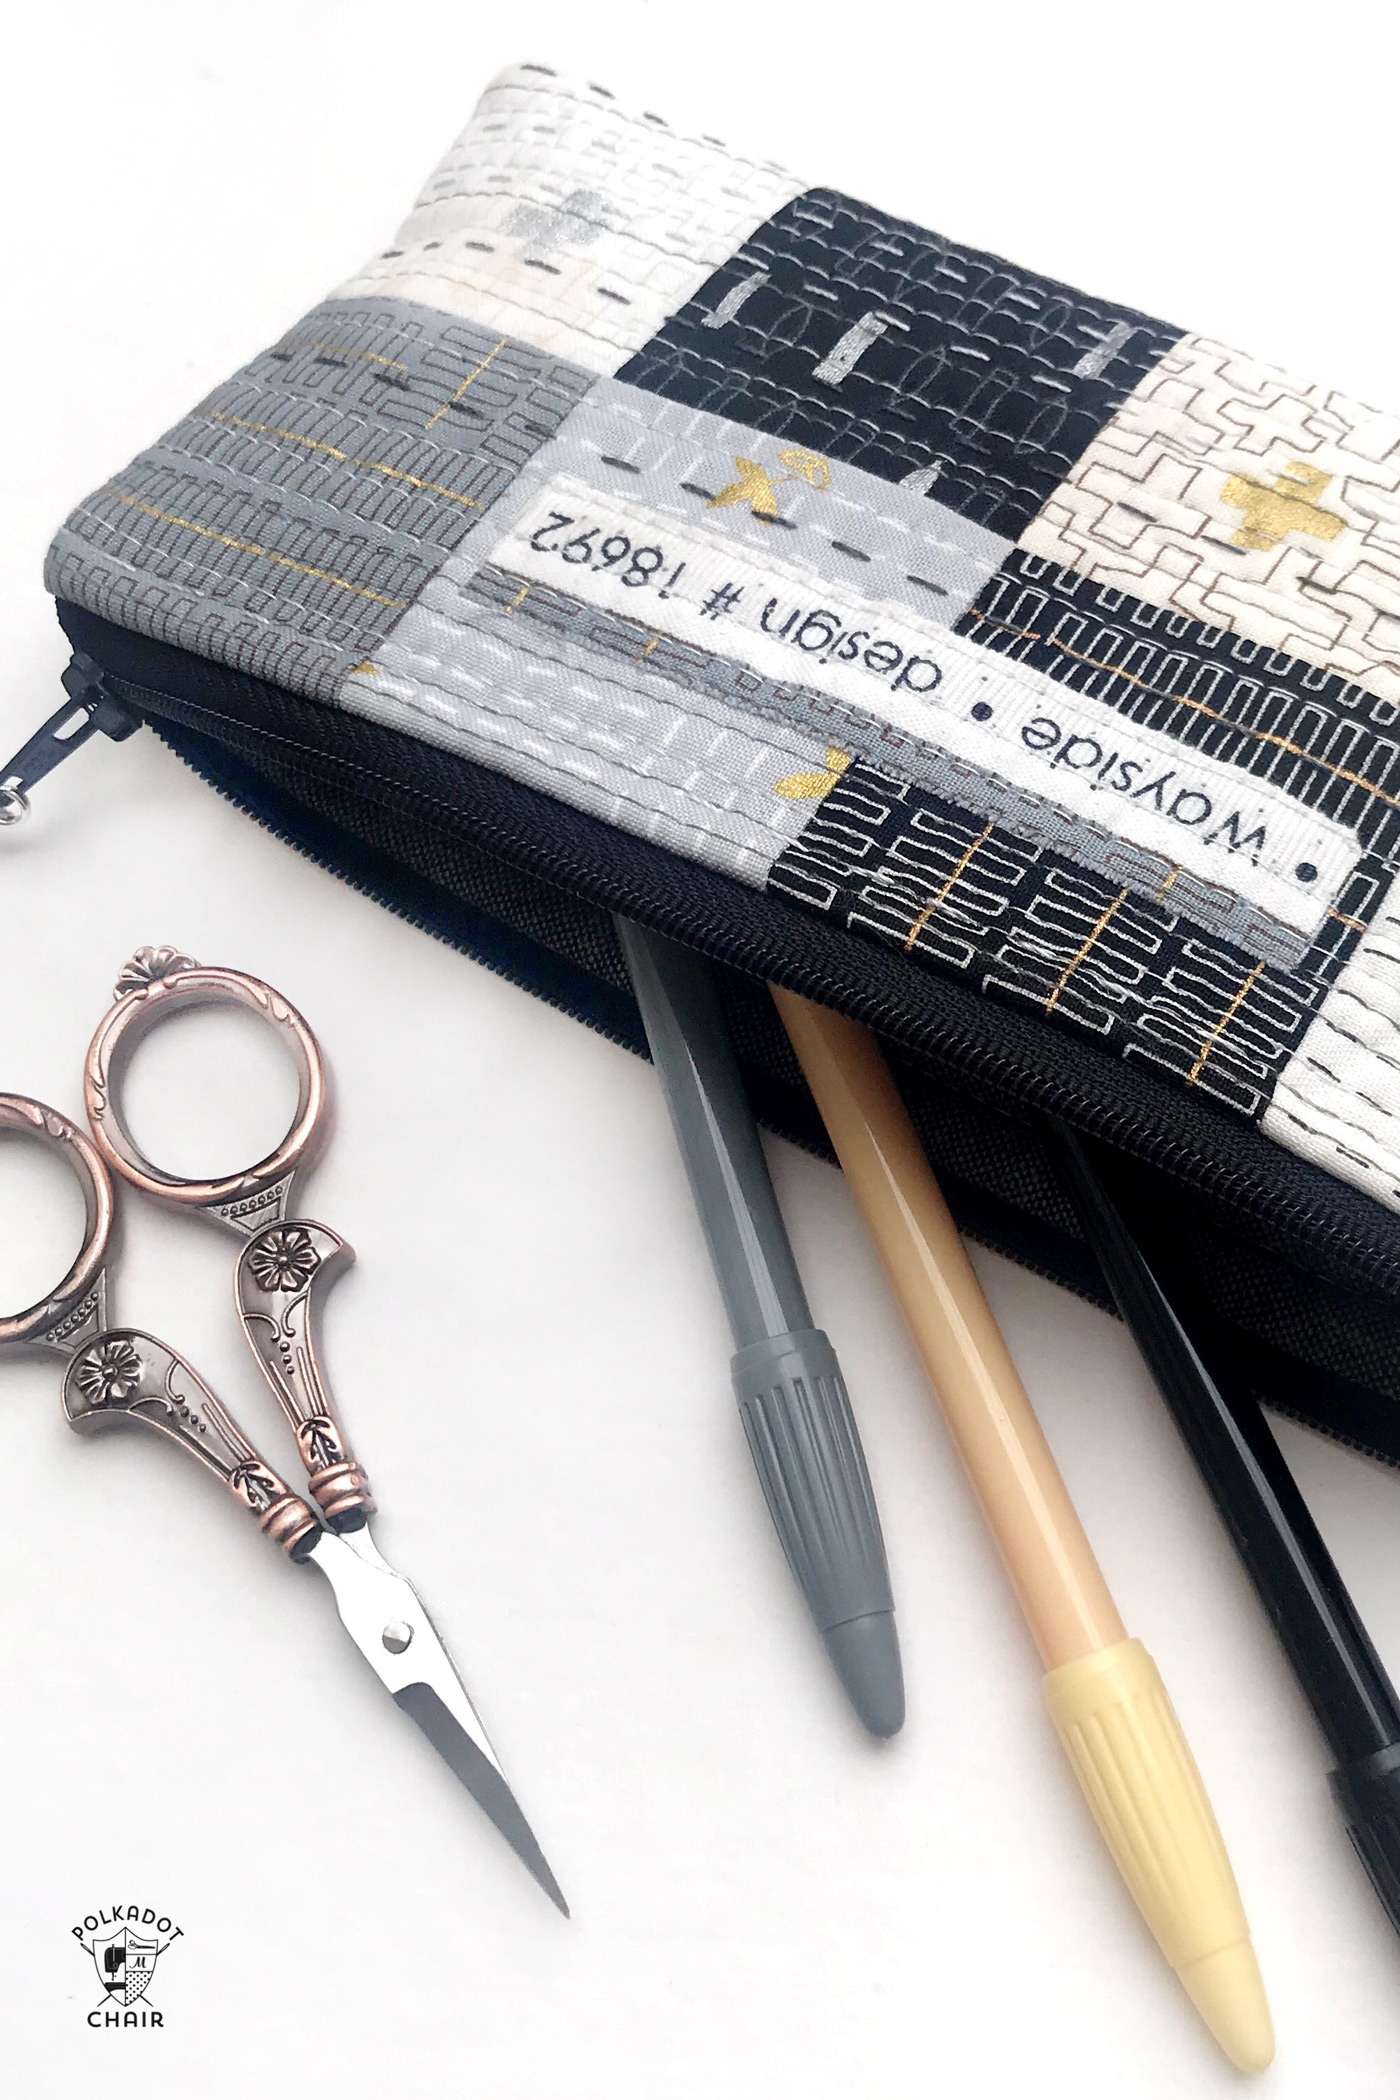
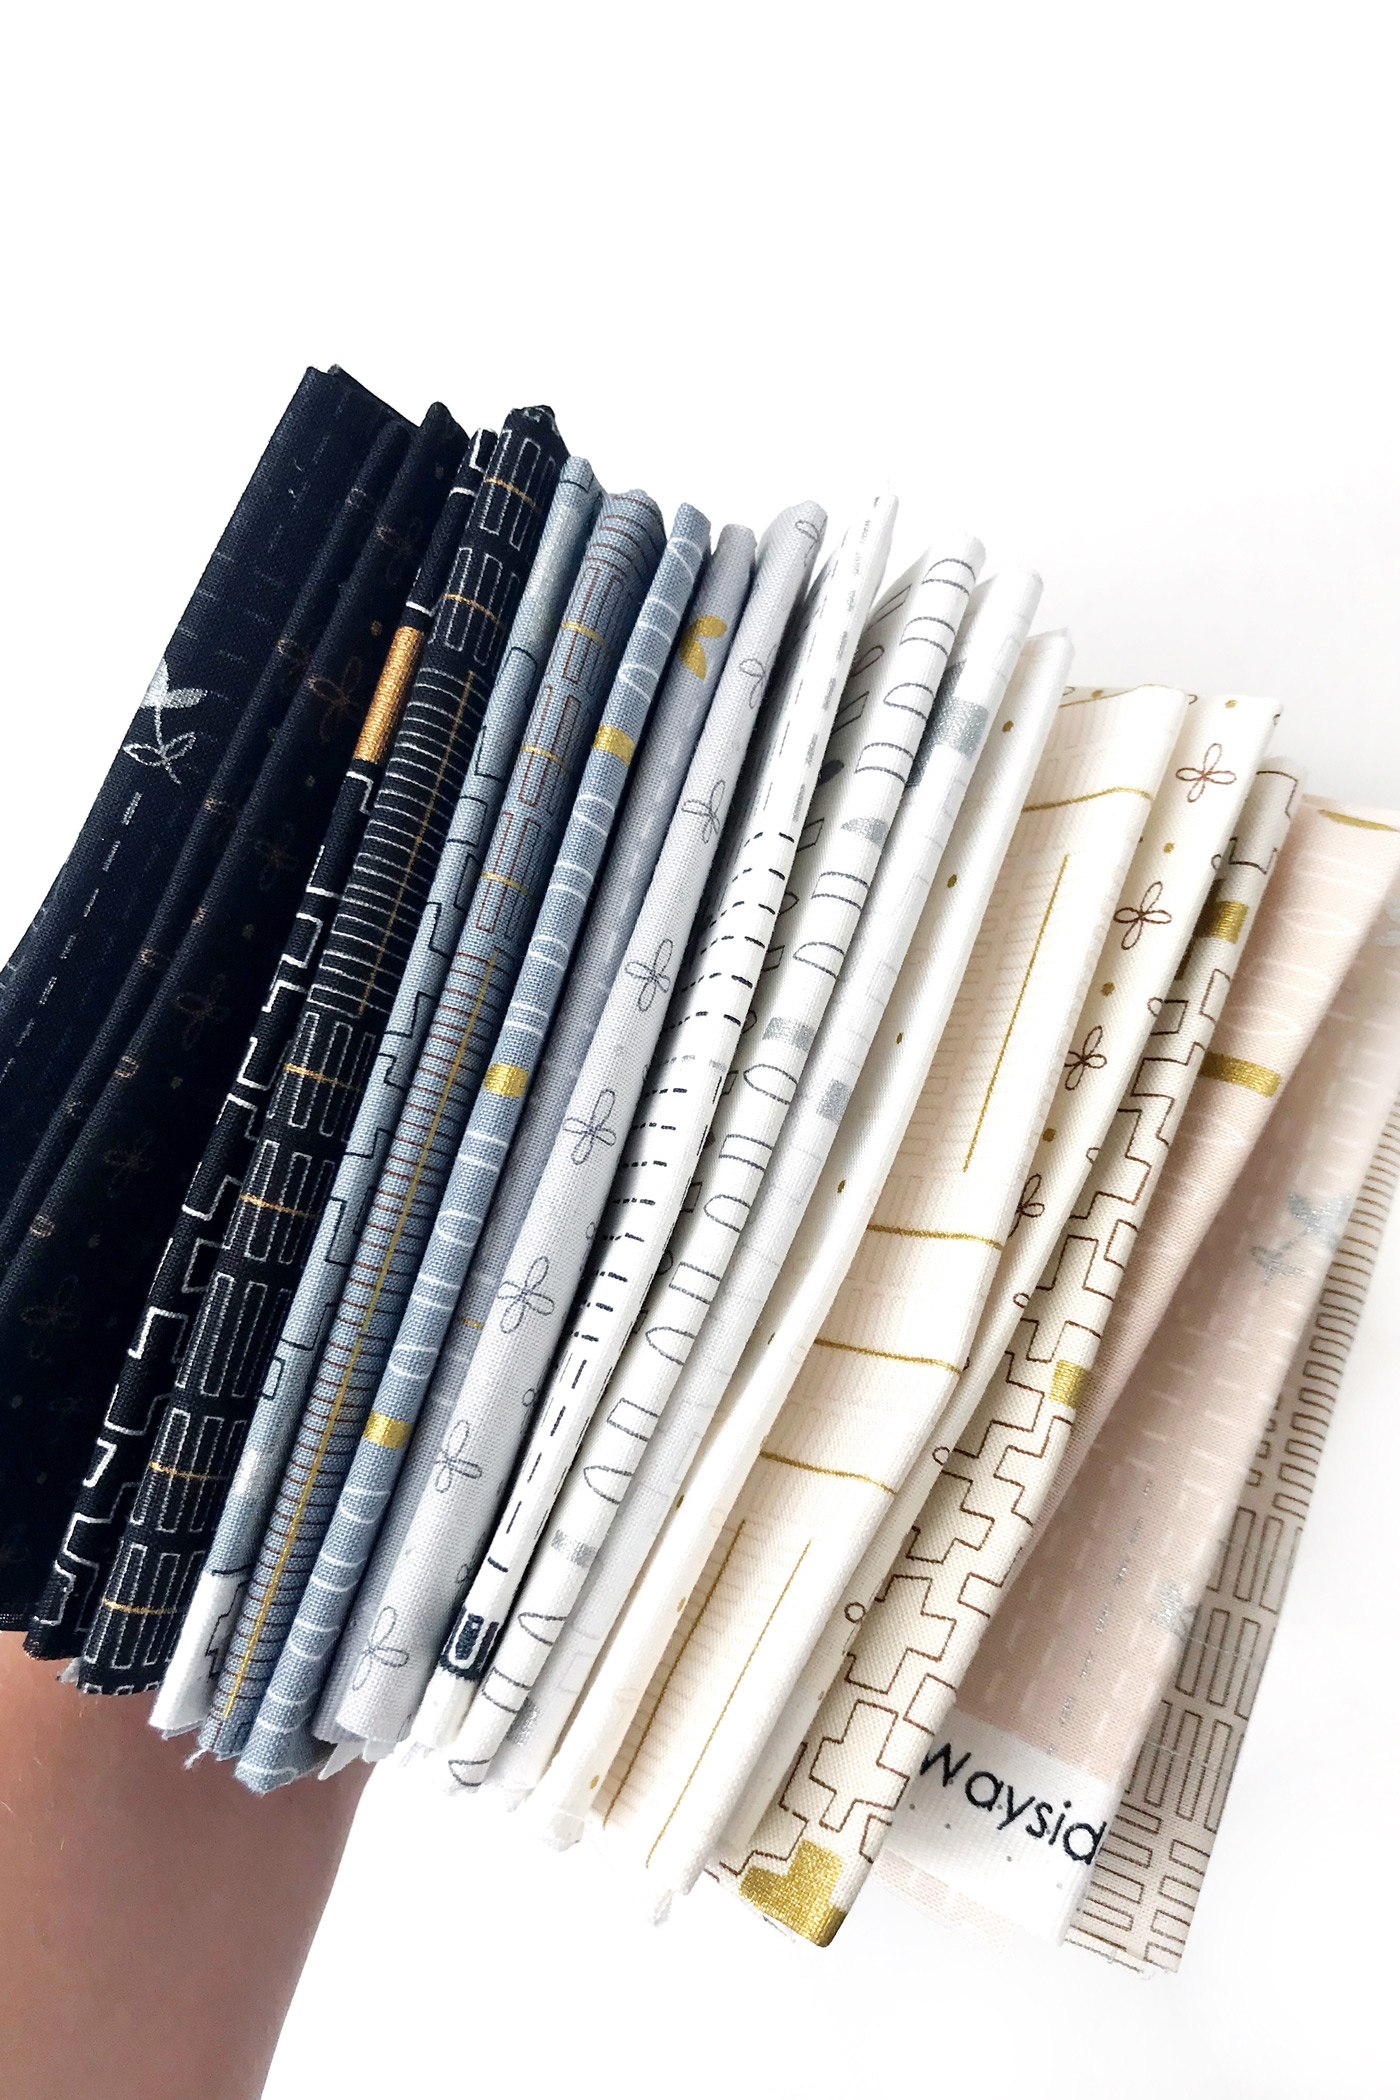
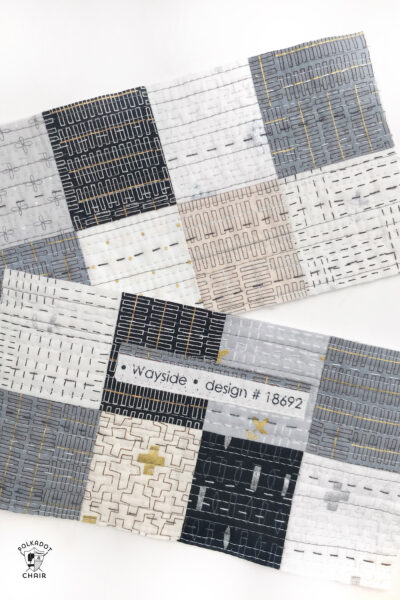
My friend Karen Lewis has just released this stunning fabric collection, so I thought it an excellent opportunity to have a play. With chic blacks and greys and a hint of metallic, it makes for a sophisticated project, ideal for anyone!
You’ll be able to whip one of these up in no time, and you could always make two at once 🙂
Simple Patchwork Pencil Case Sewing Tutorial
Equipment
- Spray Baste Opitional
- Hand quilting thread I like to use 12-weight Aurifil
supplies
- 16 pieces 2 1/2” squares
- 2 pieces lining 8” x 4”
- 2 pieces batting 10” x 6”
- 10" Zipper
Instructions
Design your Case
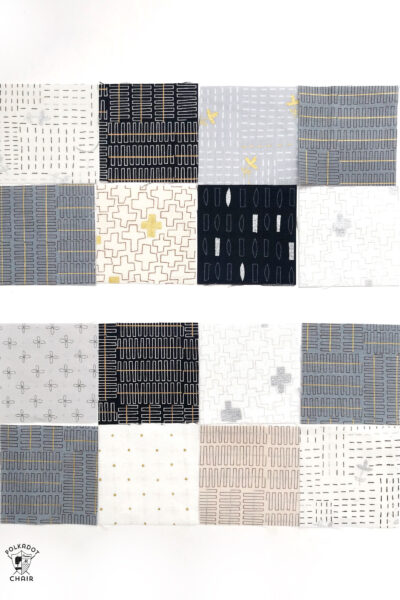
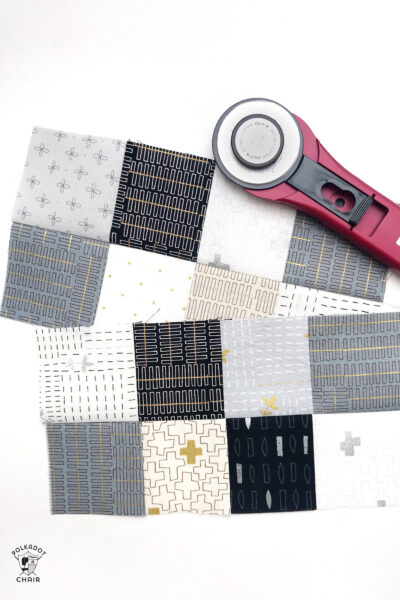
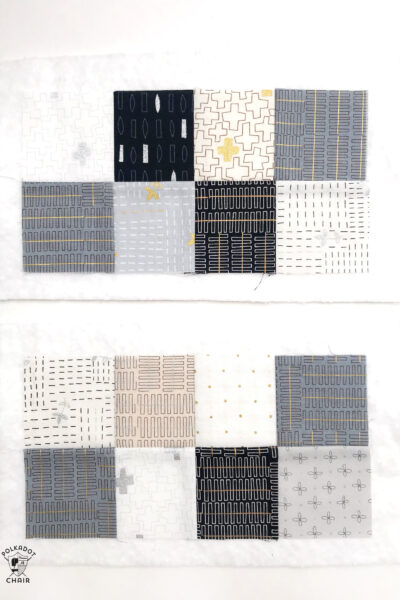
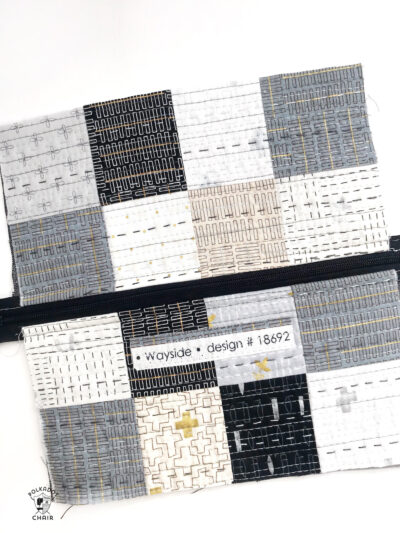
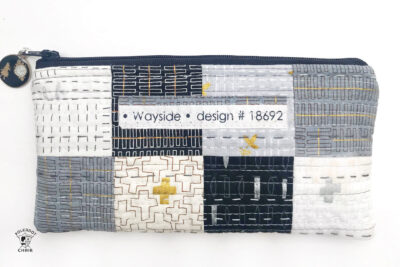
- First, you need to have a plan. Work out the layout for the front and back of your pencil case. I spent ages getting the right balance of colors and designs! You will need two rows of four squares for each side of the pencil case.
- TOP TIP: Take a photo of this layout to refer to. It’s very easy to get the squares in a muddle when you move to the sewing machine, so this will help you keep all the fabrics in the correct layout.

Assemble the Case Outside
- Stitch the top row of each side together and press the seams to the right. Stitch the bottom rows together and press the rows to the left.
- Now, join the top and bottom row together to nest the seams. Do this for each side to complete the outer panel of the pencil case.
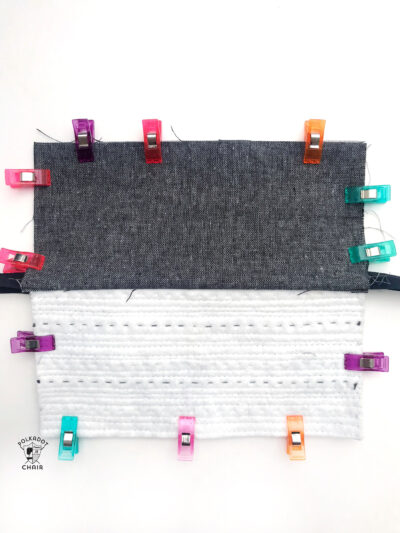
Add Batting
- Now, baste them to some batting. I like to spray baste, but you could easily use fusible fleece or basting pins.
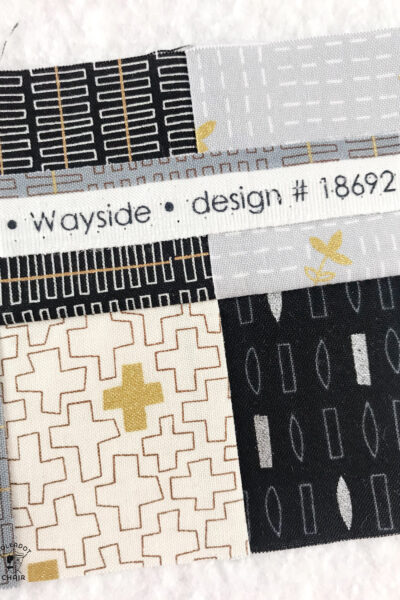
Add a bit of Selvage
- I also decided to add a little selvage detail to my pencil case – I love a selvage in a project! I’ve just spray-basted it to adhere it, but it will get ‘sewn in’ when it’s quilting over it.
Quilting
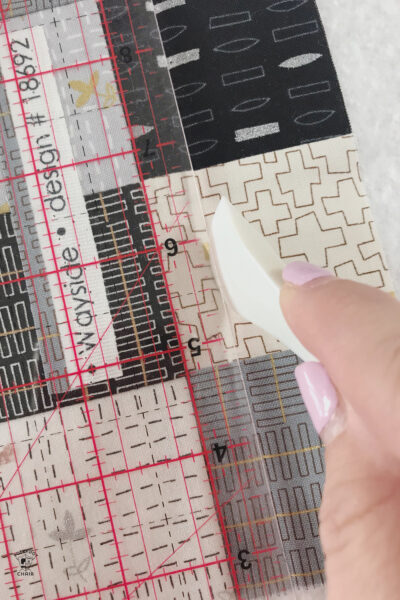
- Next for the quilting. I used matchstick quilting, which was organic, varying the distance between the lines each time. I used a hera marker to mark the first line, then stitched at different intervals to create the organic effect. I ensured I had quilted lines very close to the top and bottom of the selvage to help ‘seal’ it in and prevent fraying.
- Quilting Tips:
- For the matchstick quilting, I used light grey and charcoal threads and added some hand-quilted stitches. Once the quilting is complete, trim the batting.
Assemble the Case
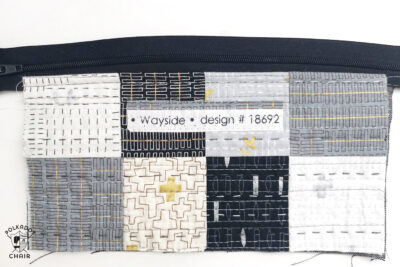
- Now, we’re going to turn our panels into a pencil case. Take the quilted front panel and place the right sides up. Place the zipper right side down, aligning along the top edge and with the zipper on the left. Place the lining piece on the right side down on top. Use binding clips to hold the layers together and stitch across the top edge close to the zip. A zipper foot is helpful for this step.

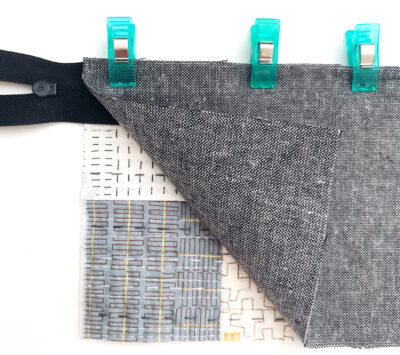
Top Stitch the Edge of the Zipper
- Press and fold the lining so that it’s the wrong side facing the wrong side of the front panel. Topstitch in place.

Stitch the Other Side of the Zipper
- Next, layer up as follows: place the back quilted panel right side up. Place the quilted panel with the attached zip right side down, and place the second lining piece right side down on top.

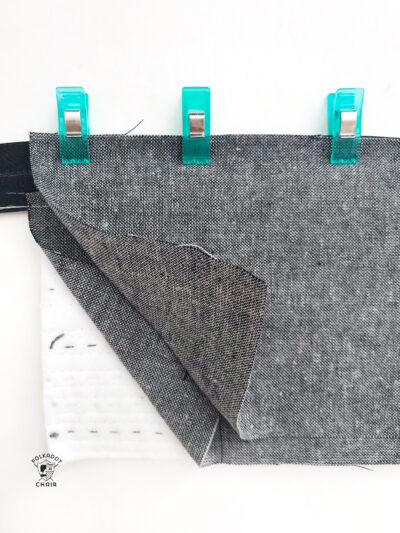
Top Stitch Again
- Use binding clips to hold in place, and stitch across the top edge. Open out and topstitch in place as before.
Final Assembly
- Now for the final part. Undo the zip almost halfway. This is very important!
- Take the lining sections and place the them right sides together, and the outer panels and place the them right sides together. Clip in place all the way around, leaving a gap for turning in the lining.
Finishing
- Stitch all the way around, reinforcing the seams over the zip and at the beginning and end of the gap. Clip the corners and trim the zip on both sides. Turn out through the gap in the lining.
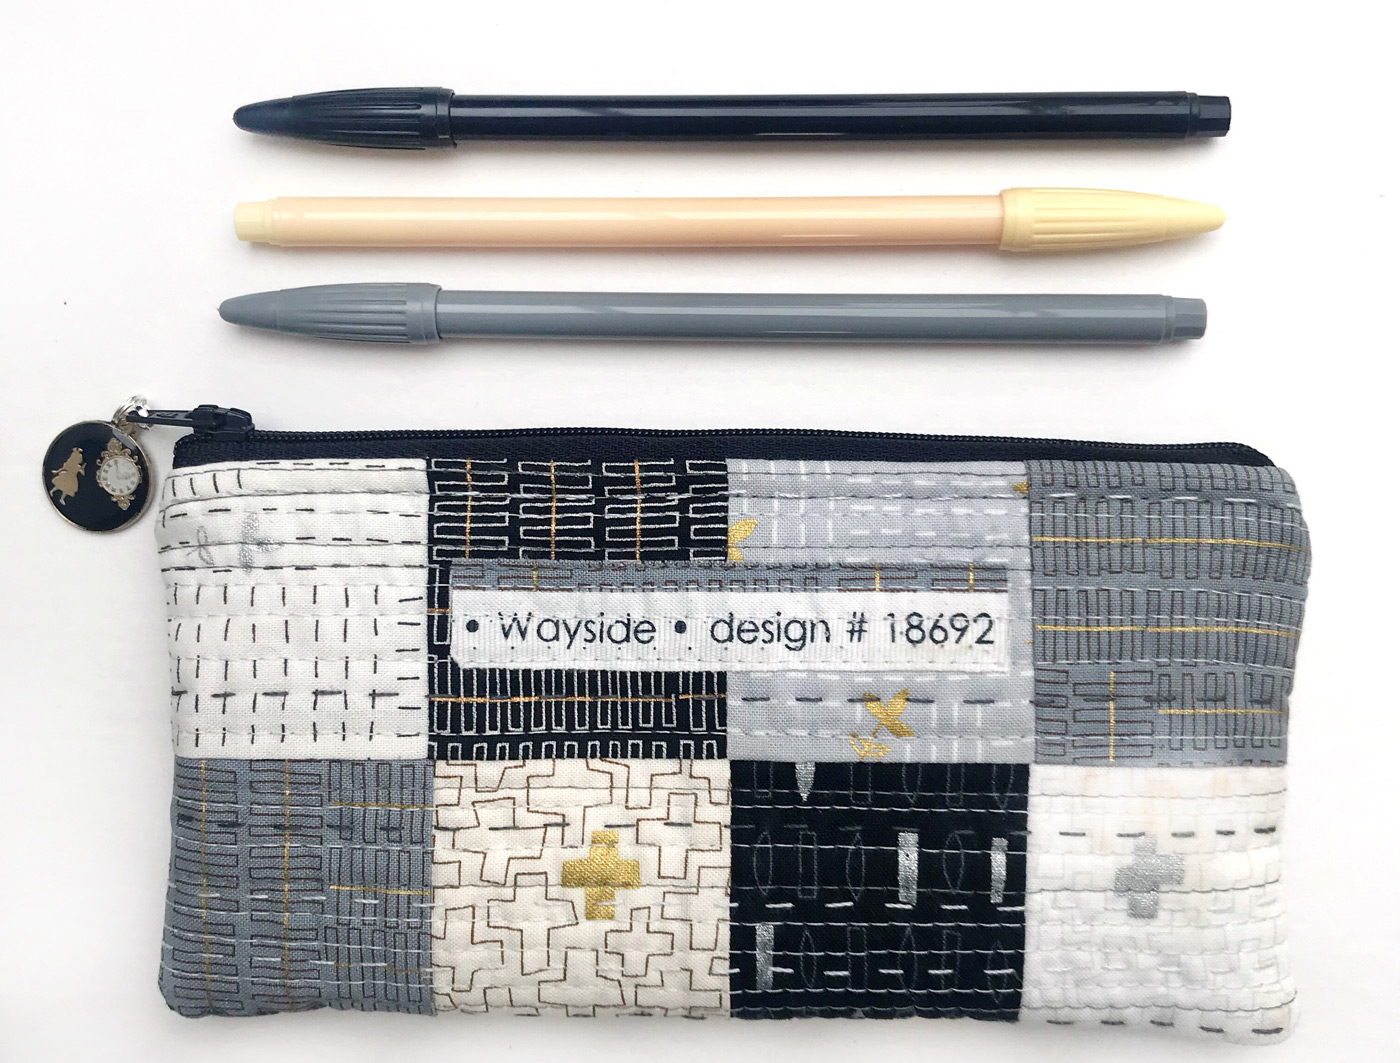
- Stitch the gap in the lining closed by hand using a small ladder stitch, and you’re done! Fill your pencil case with stationery items, sewing supplies, makeup….or wrap it up and give it to someone special.

Sarah Ashford is a British Quilter and embroiderer and founder of the GreatBritishQuilter challenge on Instagram. Sarah regularly contributes projects to magazines and loves to spread the joy of quilting everywhere she goes. Follow her on Instagram at @sarahashfordstudio and be sure to check out her beautiful sewing room decals in her Etsy shop www.etsy.com/shop/sarahashfordstudio
Be Sure Also to Check out these Small Patchwork Projects:
Patchwork Quilted Table Runner