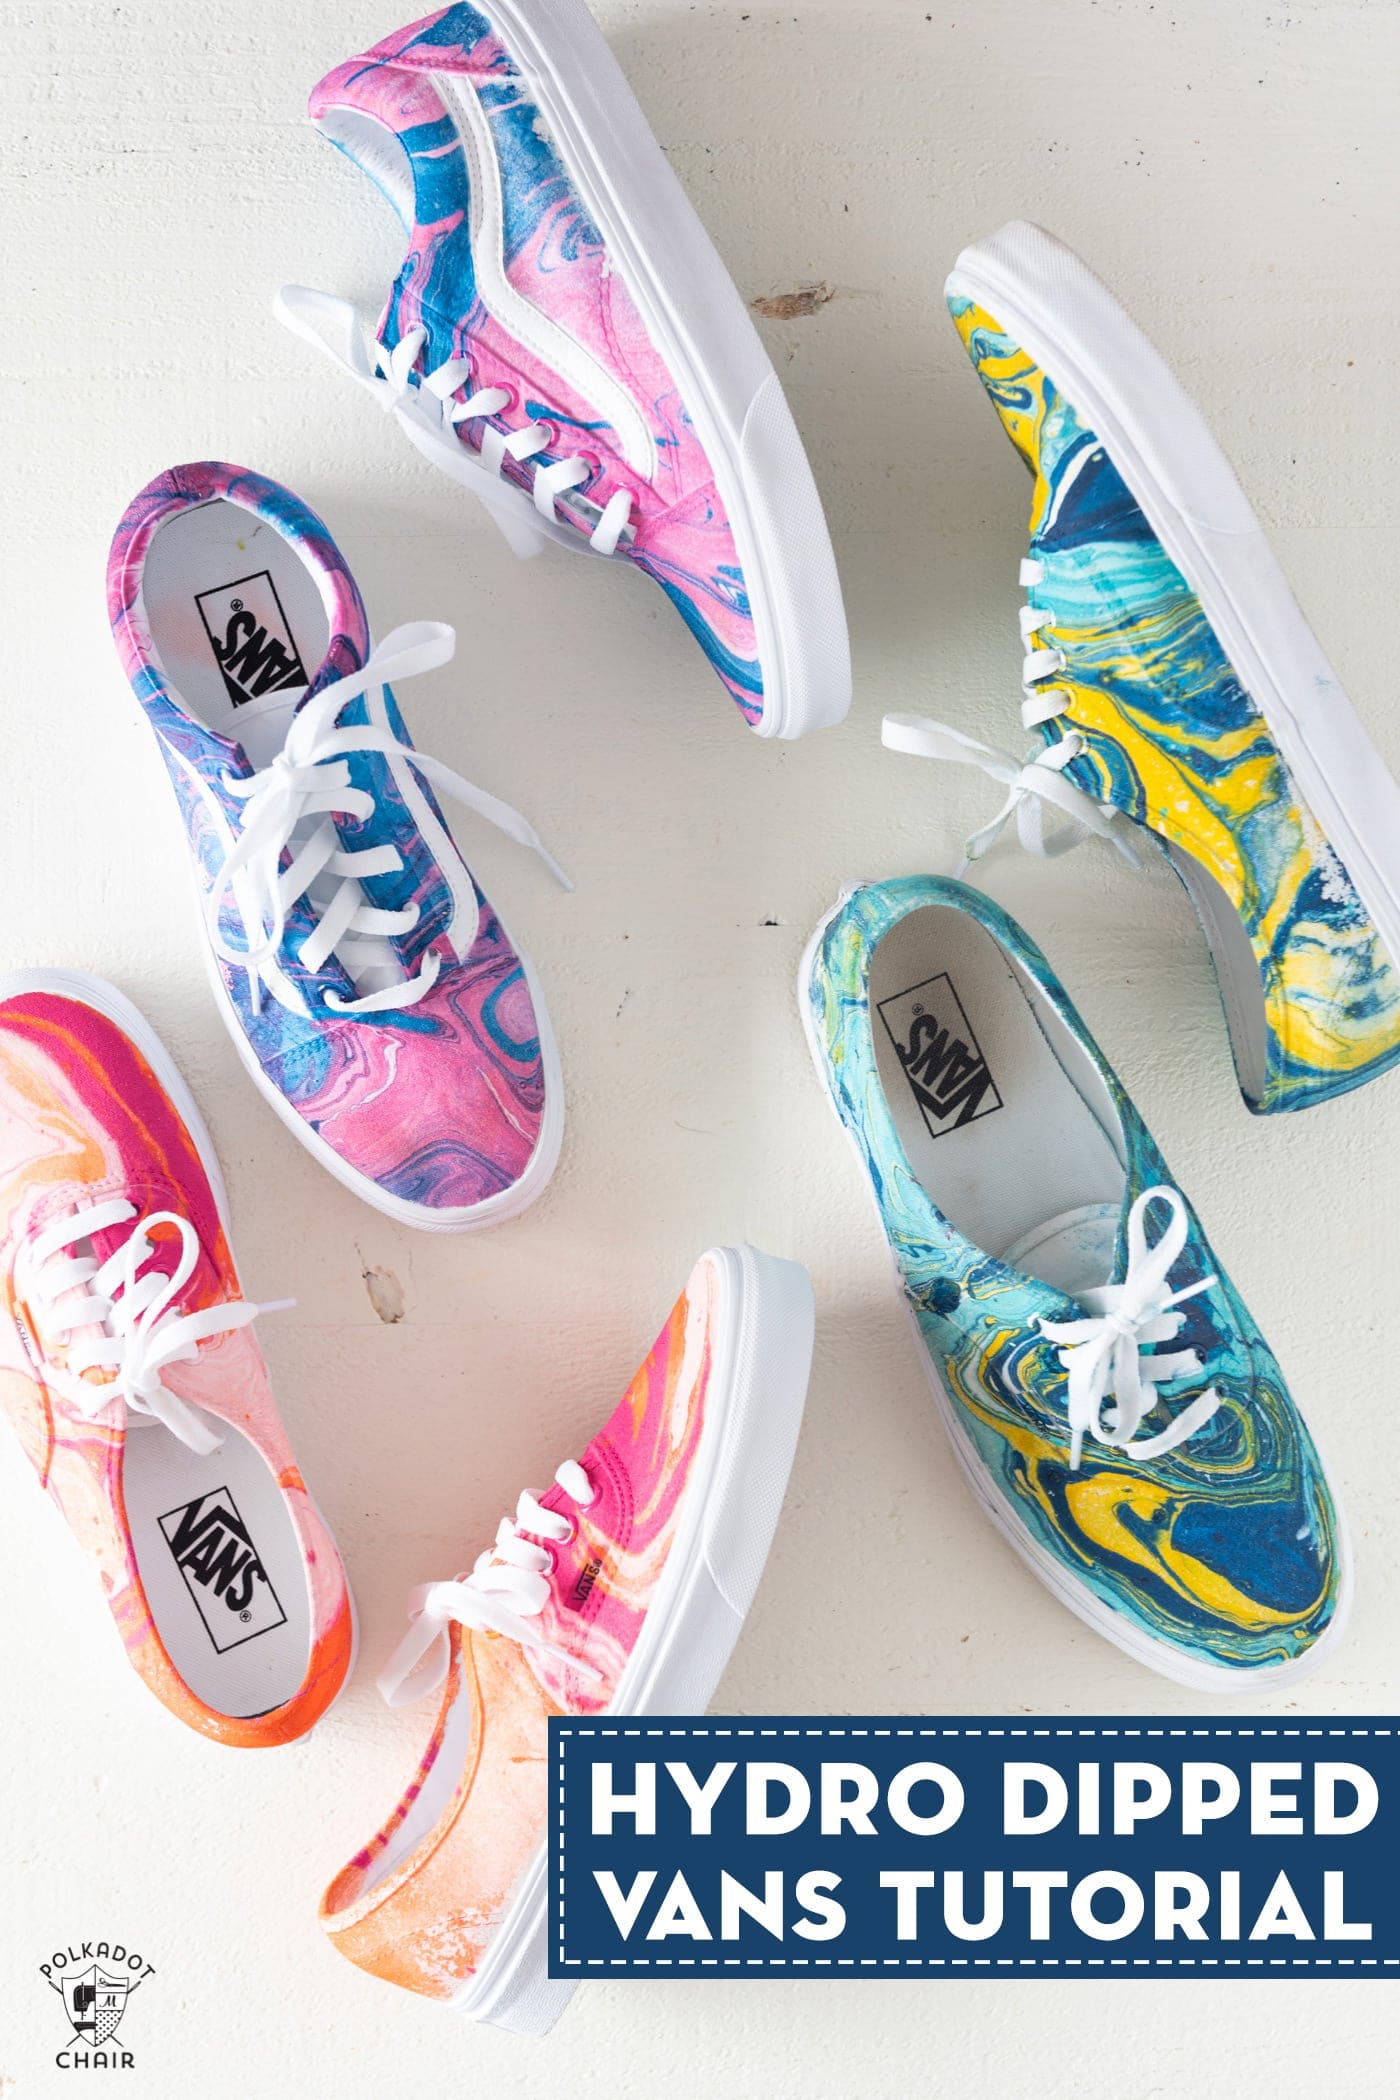
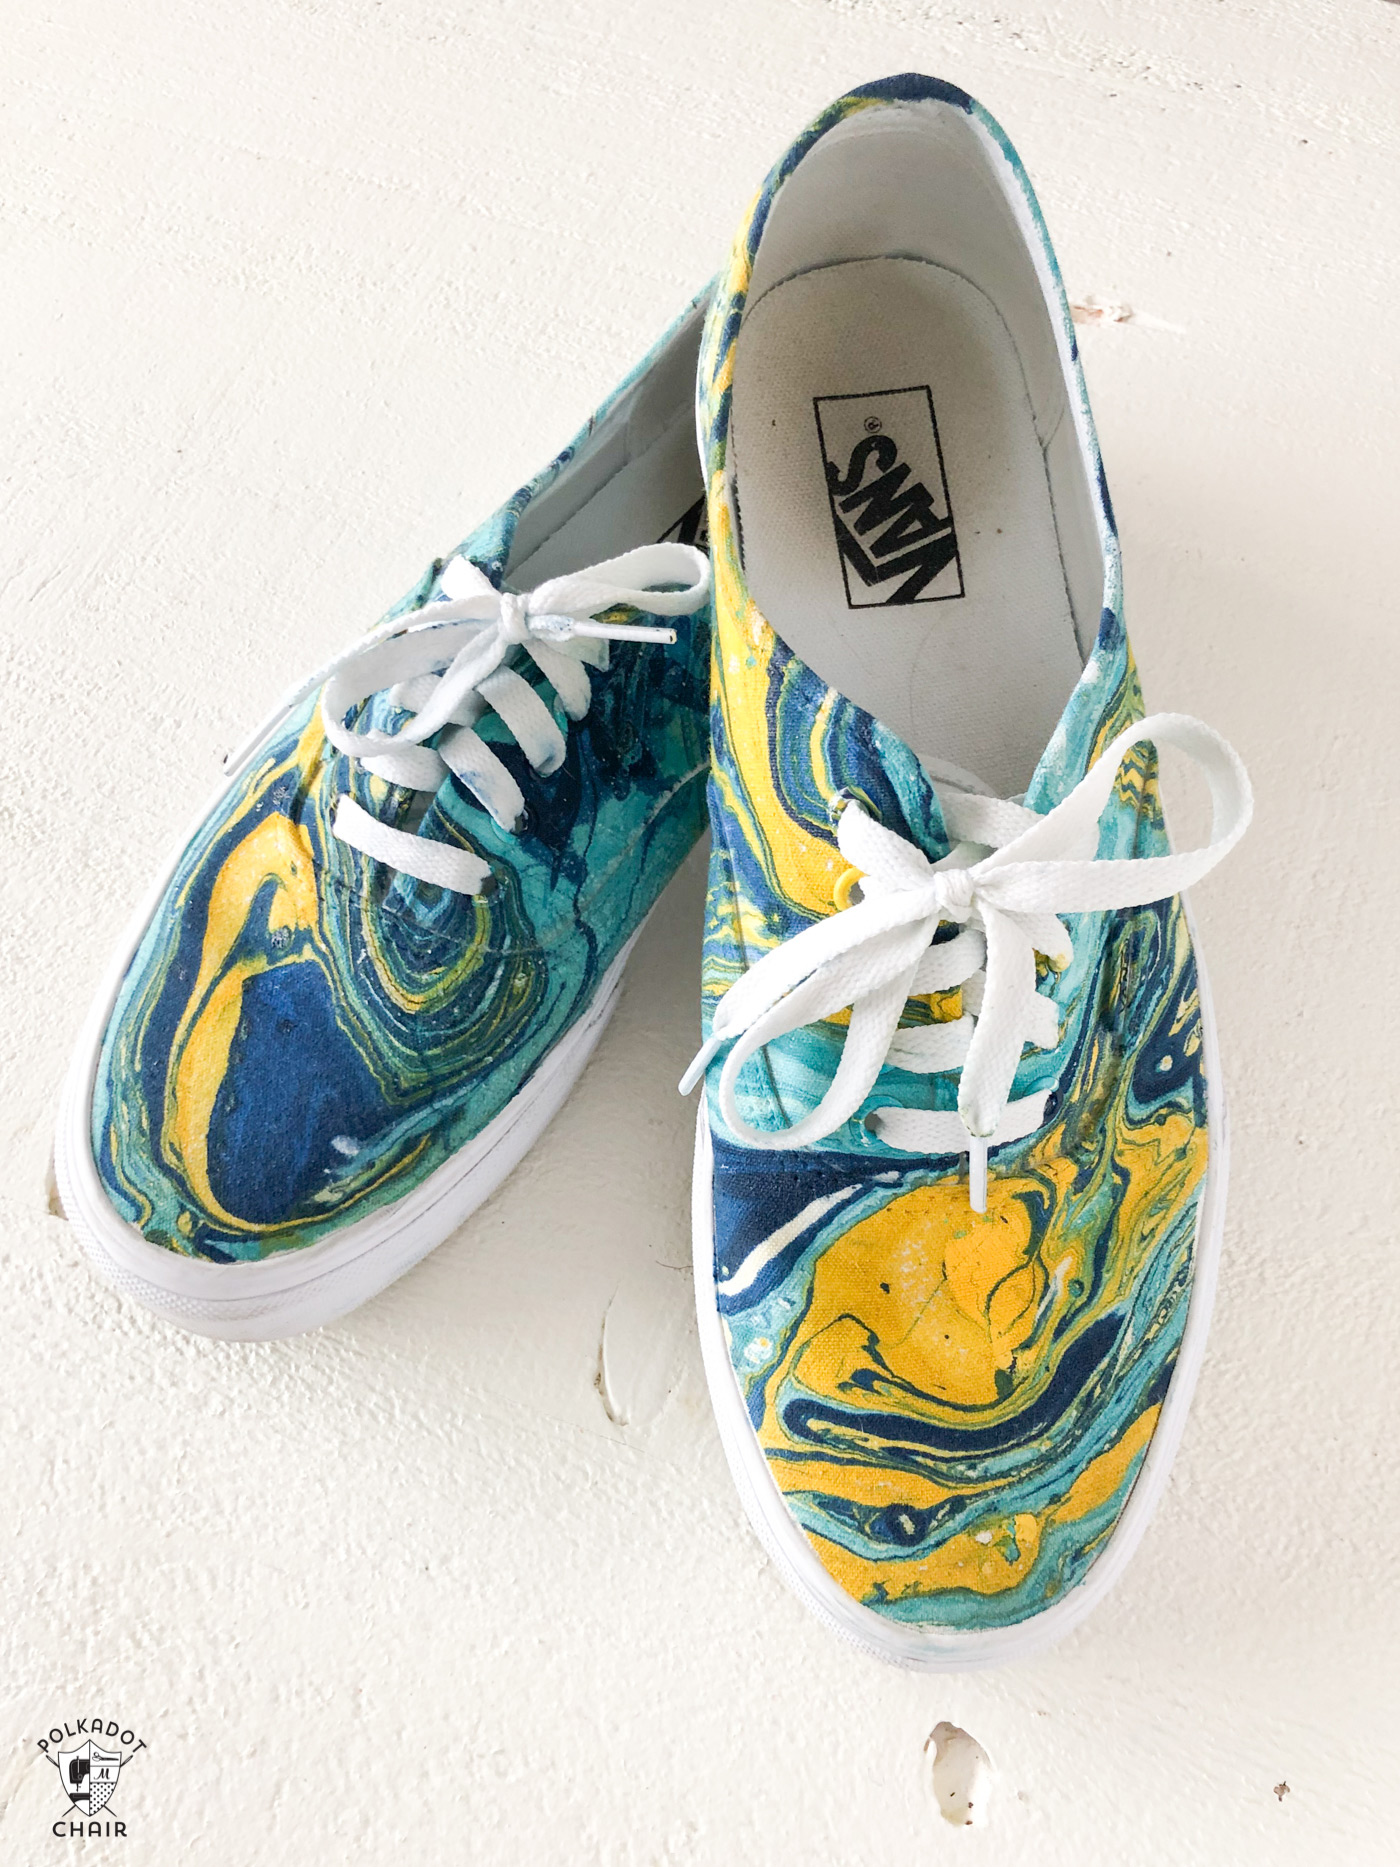
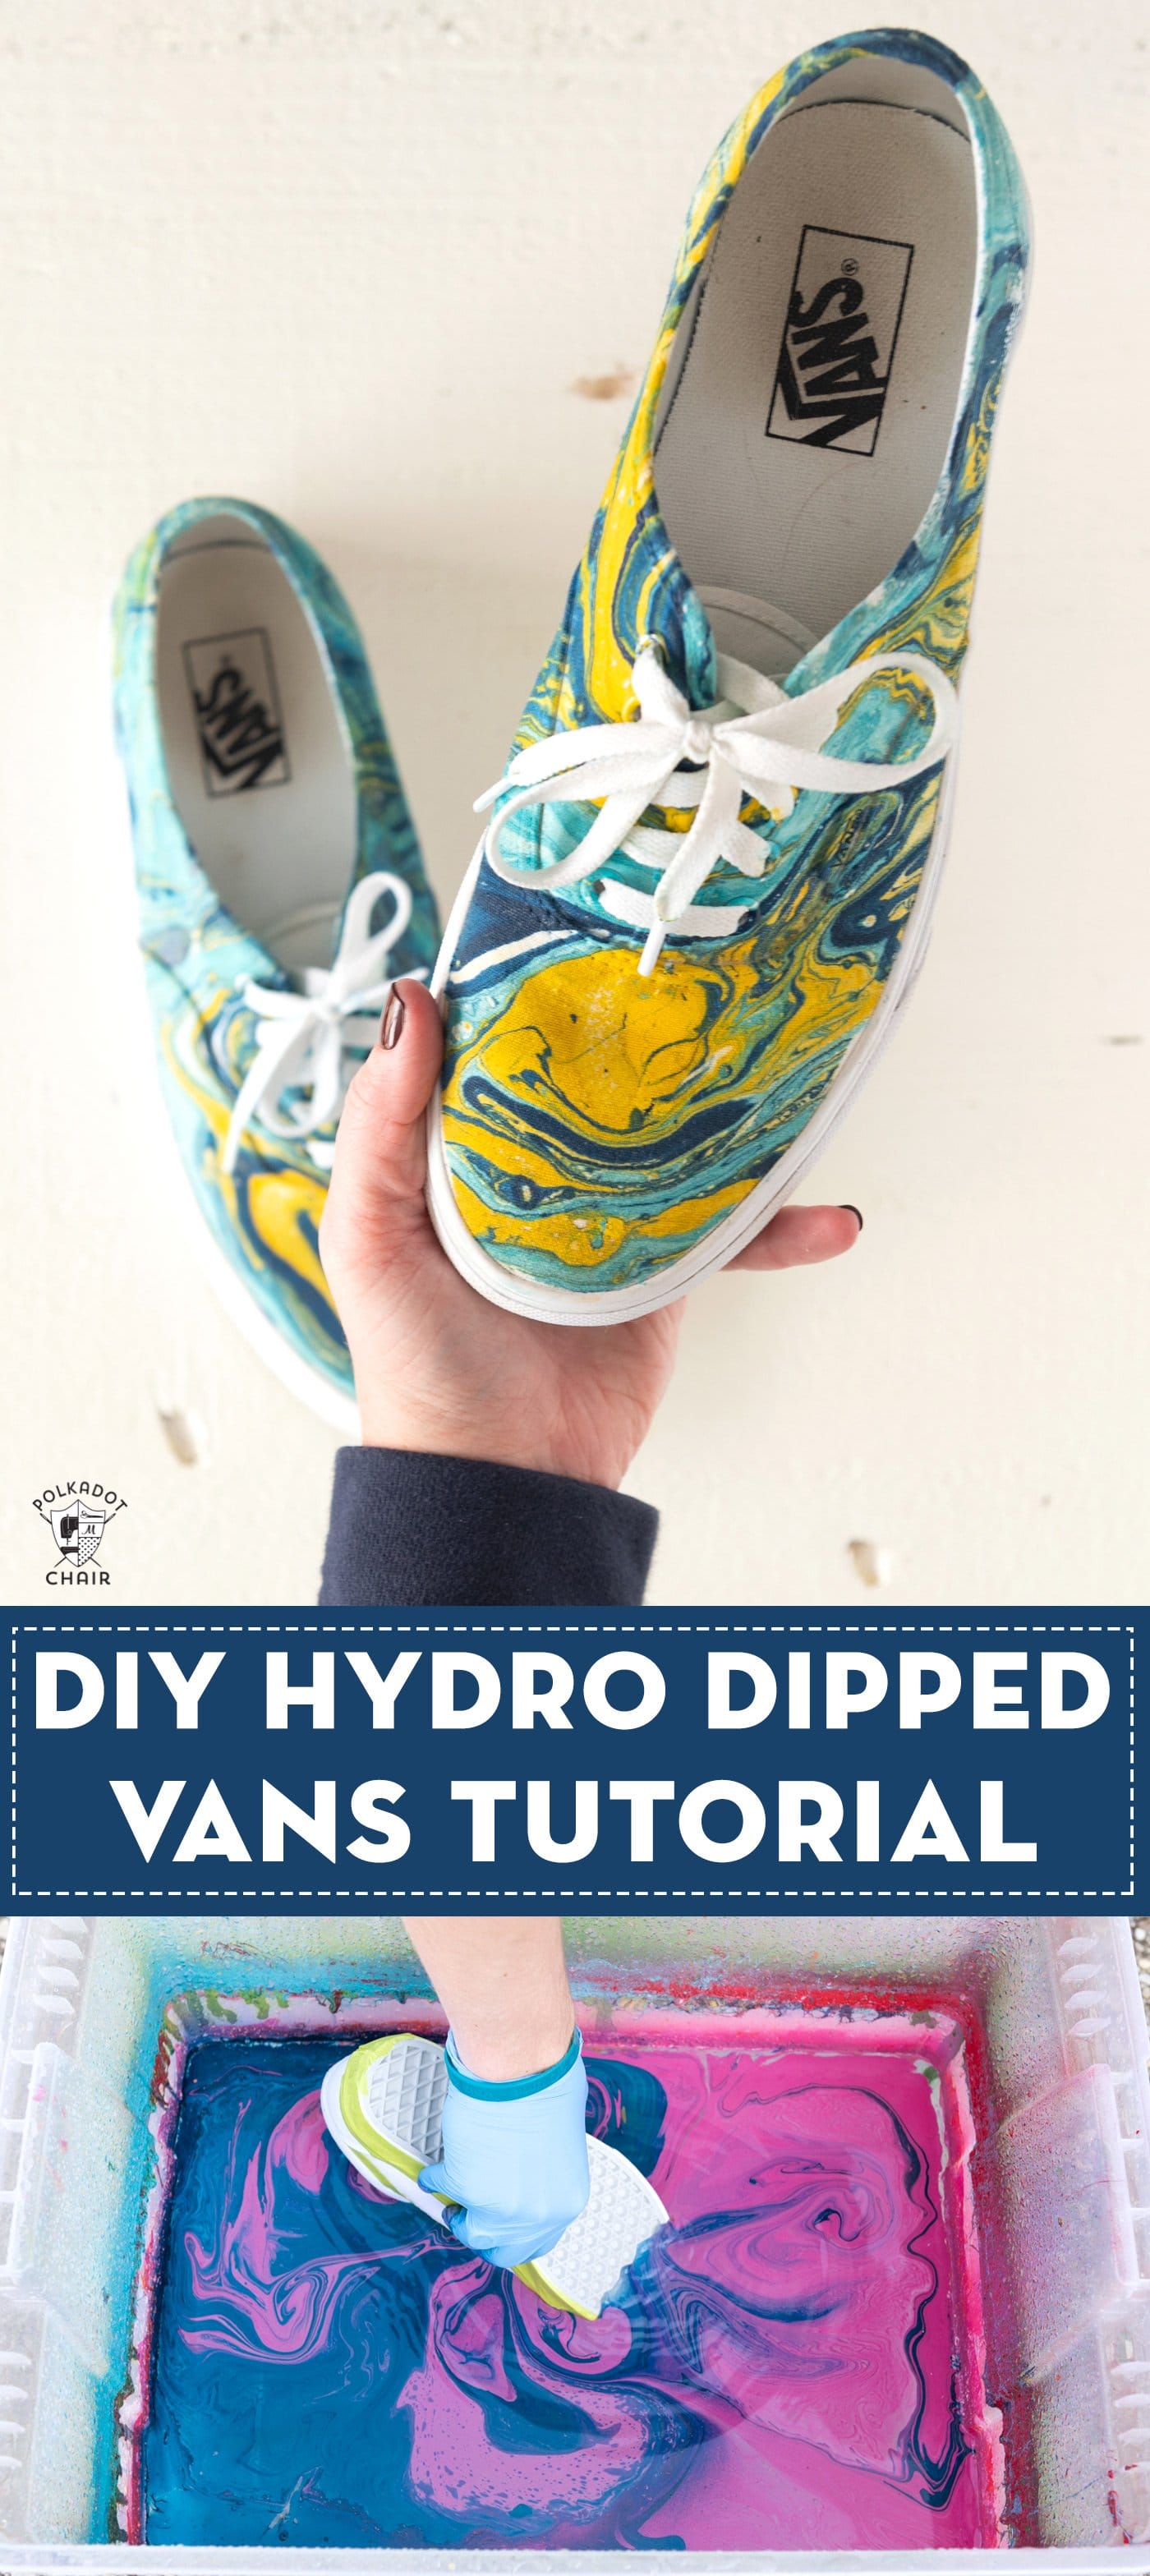
How to Hydro Dip Vans to Create Unique Custom Shoes
Learn how to customize your shoes in a fun way with this video and tutorial teaching you how to hydro dip vans. Hydro dipping is a cool way to customize a pair of vans or other shoes.
My youngest kids graduated high school last year (I have twins. That’s why that’s plural :). They had most of the summer at home before they left for college and a church mission.
About halfway through the summer, they started to find themselves a bit “bored” and started looking for some fun things to do to pass the time until they left home (they both had full-time jobs at the time).

They tried tie-dying shirts, making videos, and creating “cool” stuff for their future dorm rooms. It seemed every night I came home to a different craft project on the kitchen table.
About our Hydro Dipped Vans Tutorial
One night my son had his friends over, and I noticed a lot of “commotion.” I followed them outside to see what they were up to and discovered they were dipping vans shoes in spray paint. I thought it seemed like a cool idea and decided to film it for Instagram. I shared it on my stories, and my DM’s blew up! So many questions.
A few months later, my son agreed to let me film him dipping another pair of vans. Today I’m going to share with you how he did it.
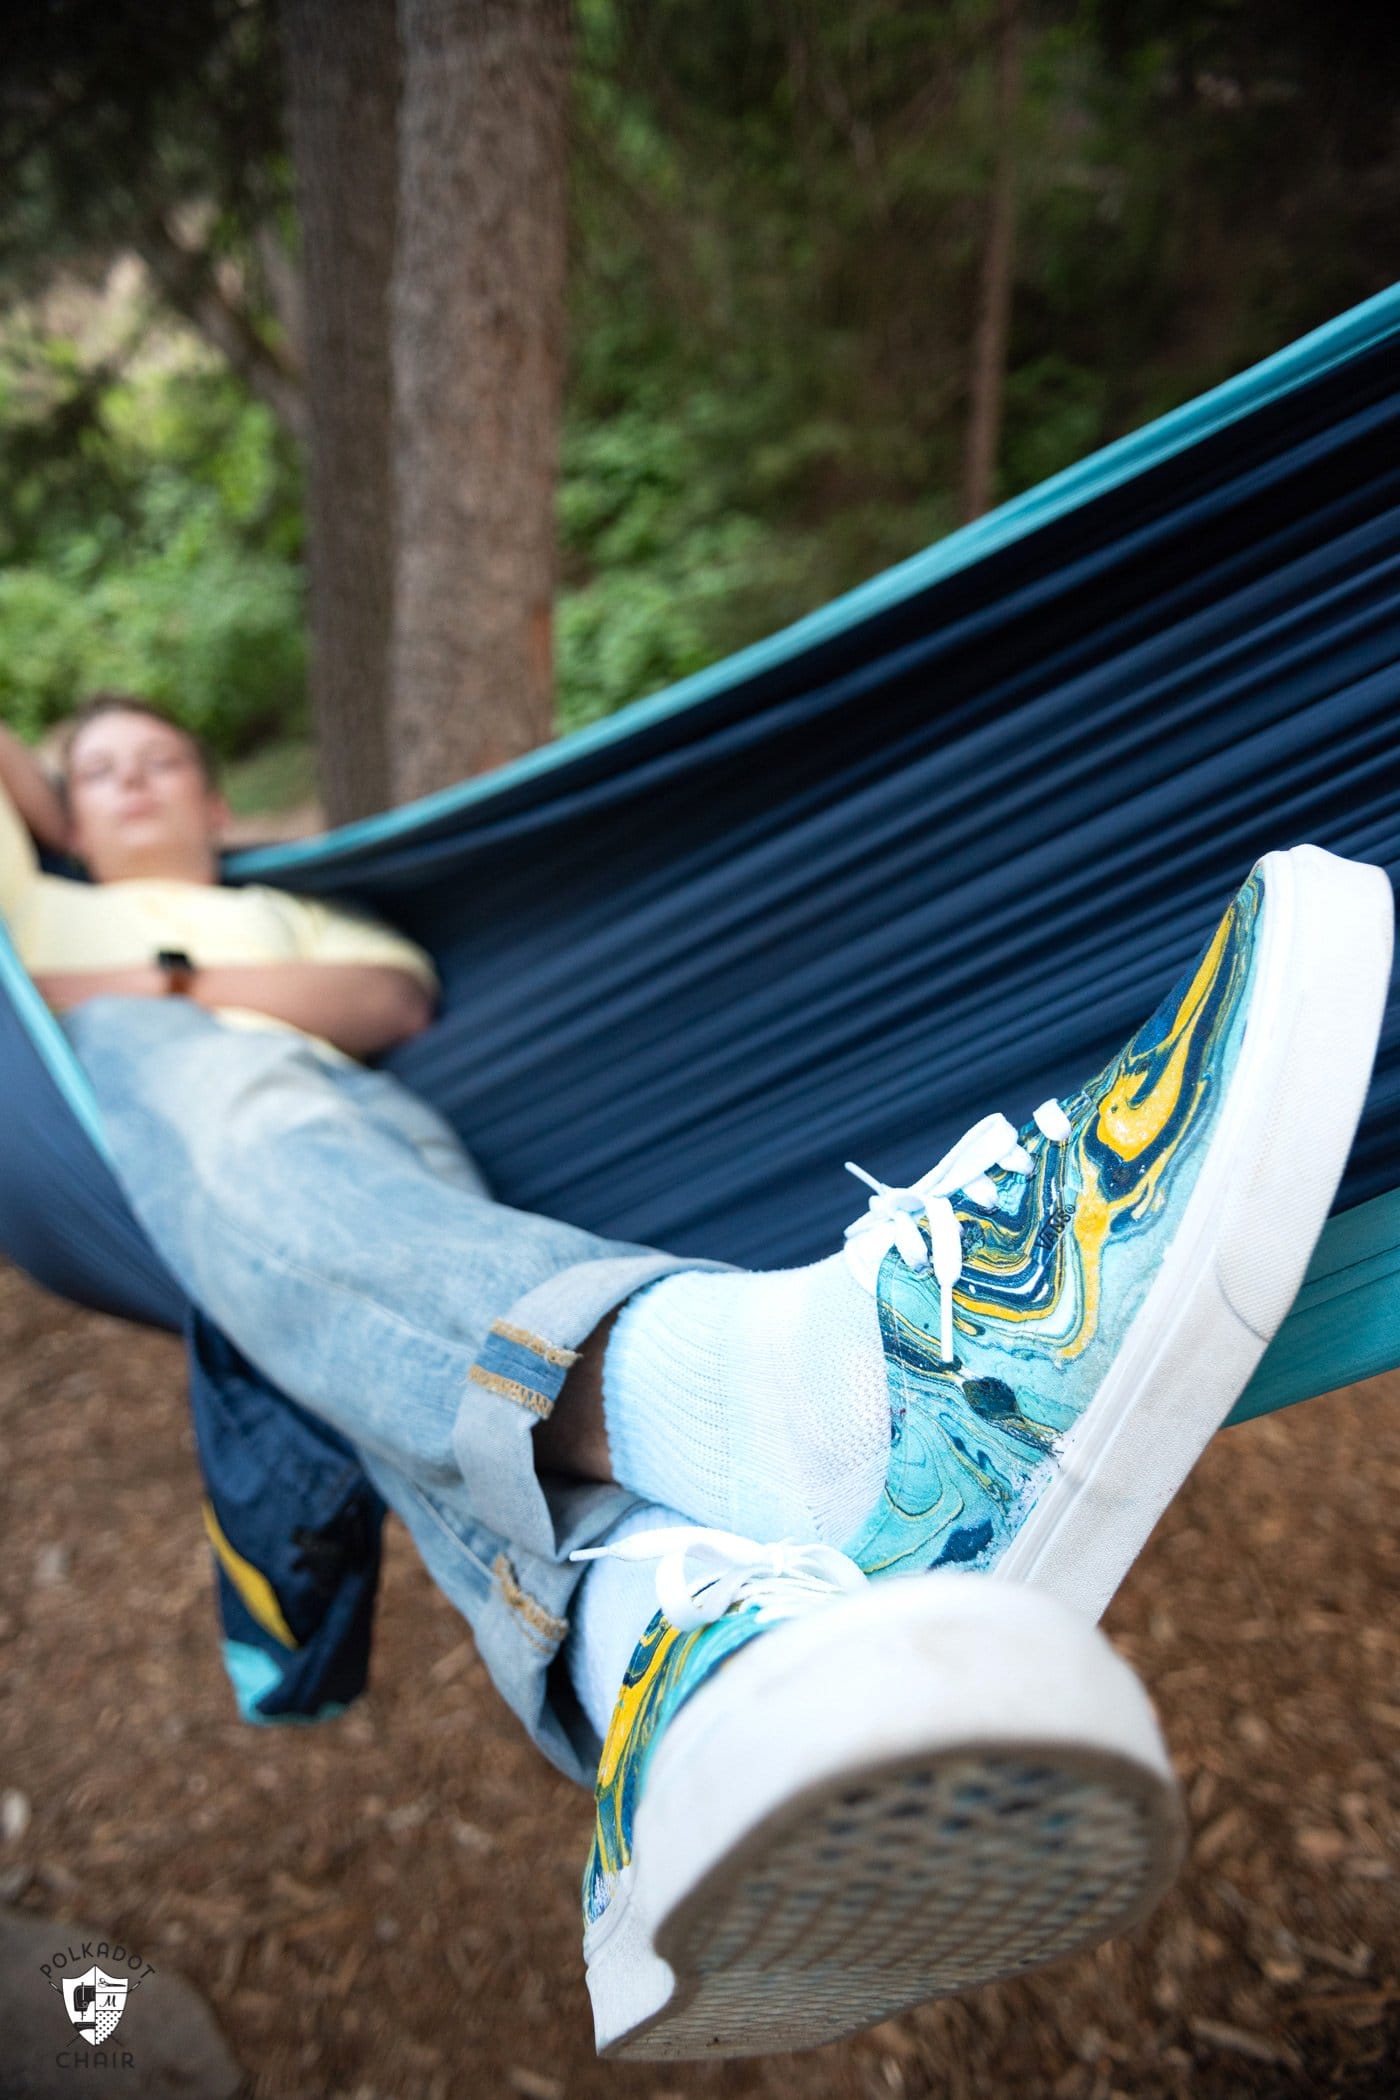
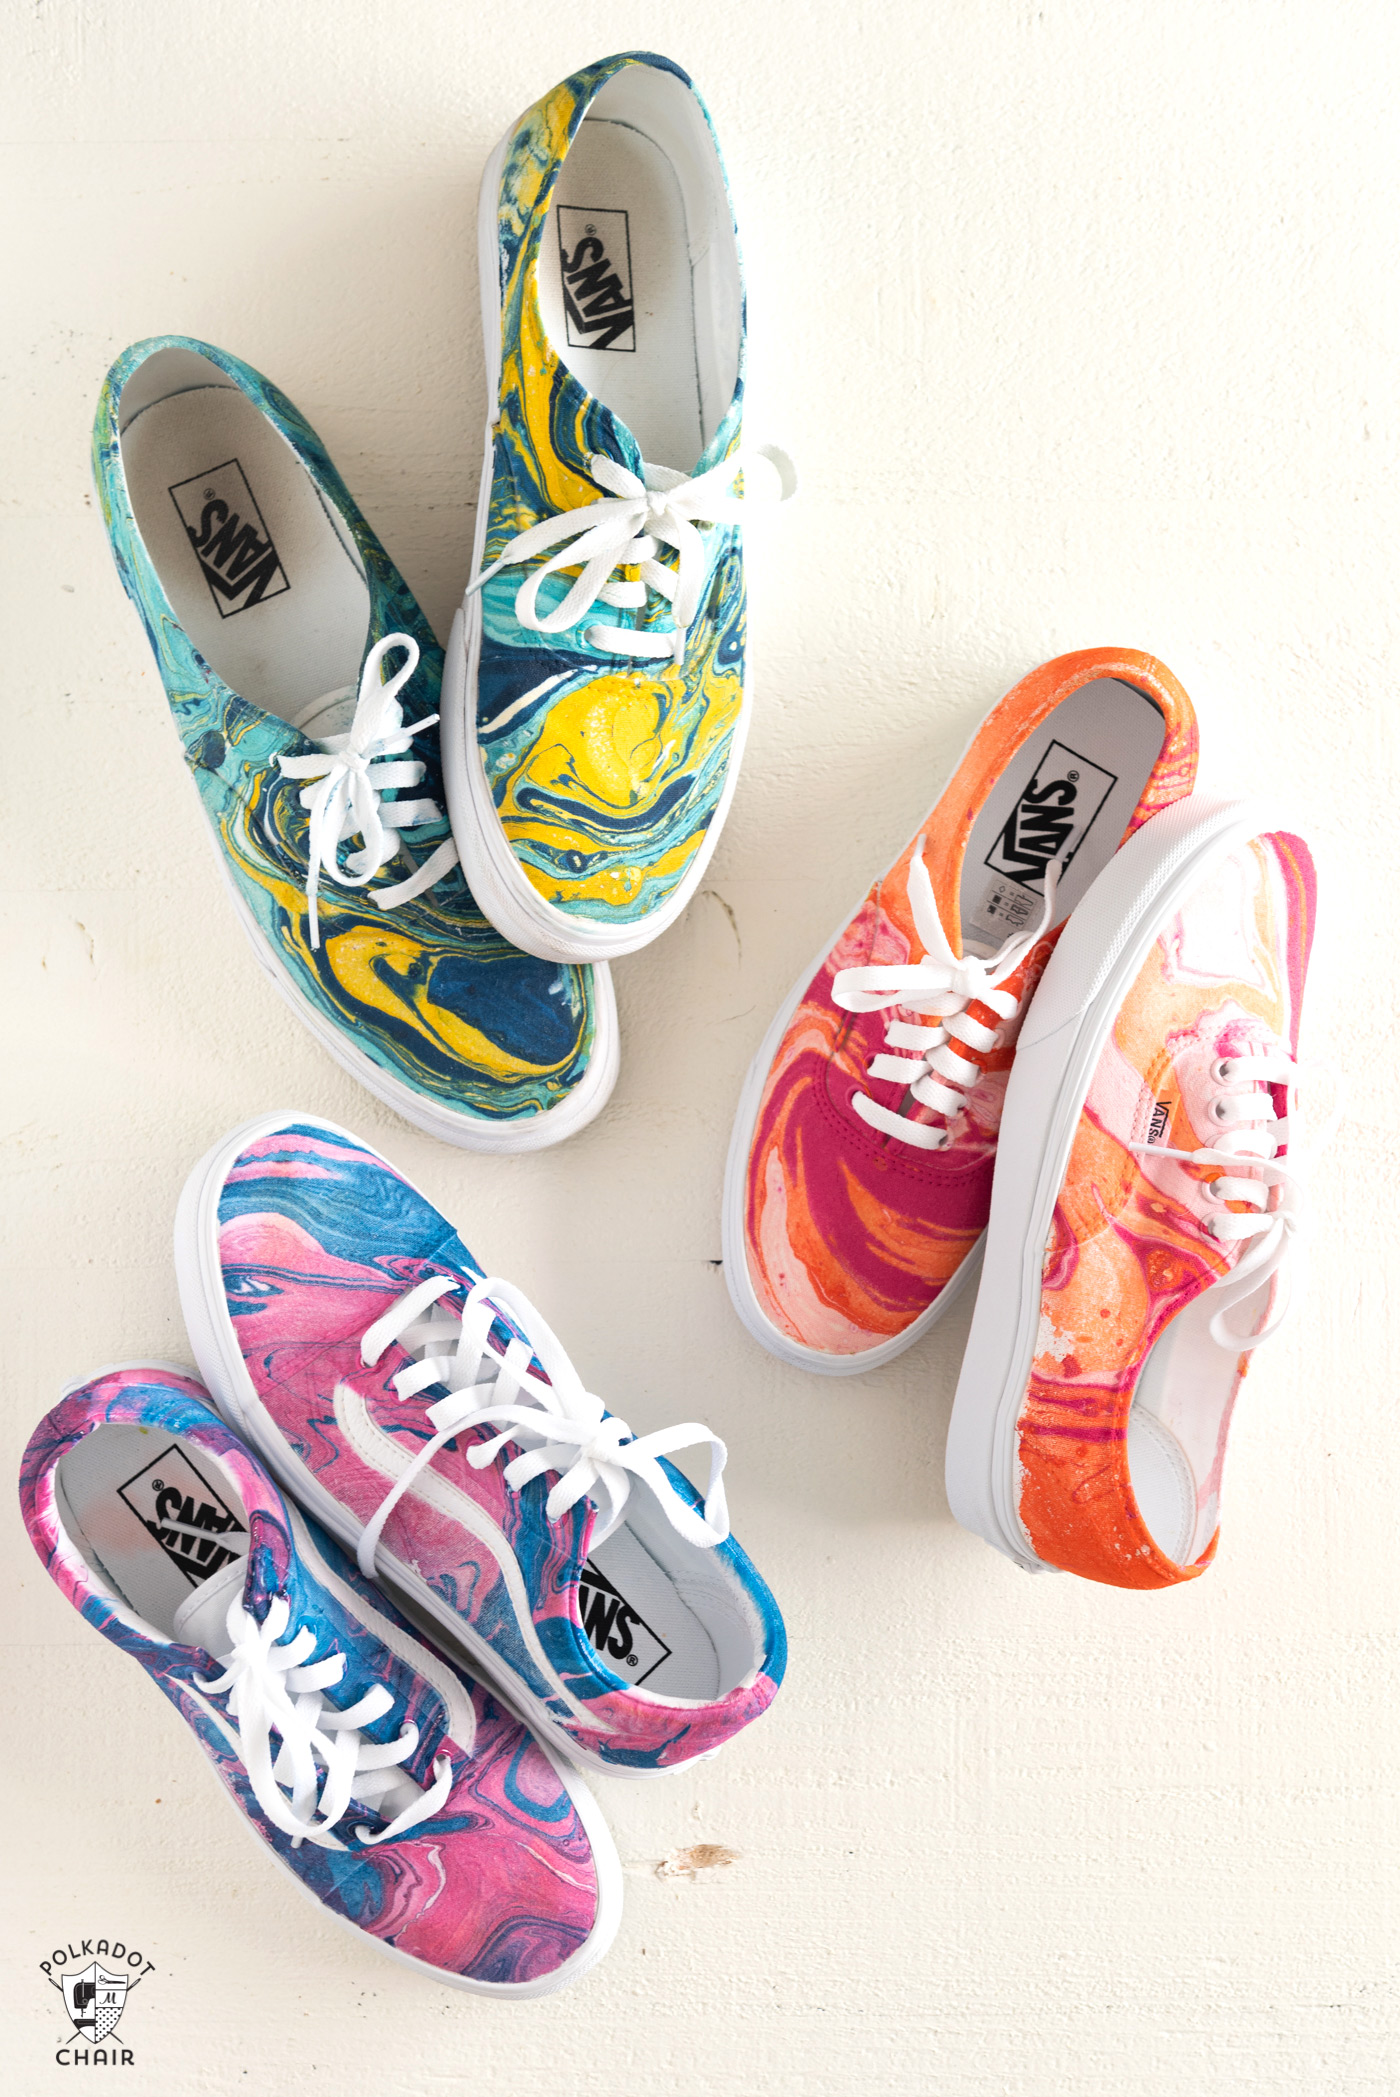
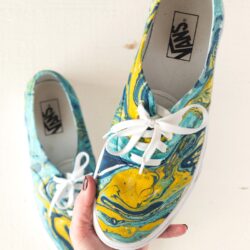
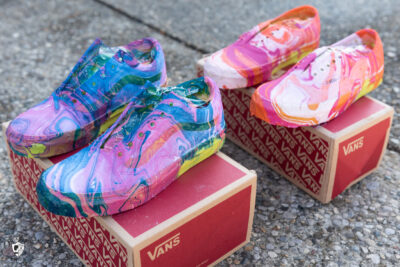
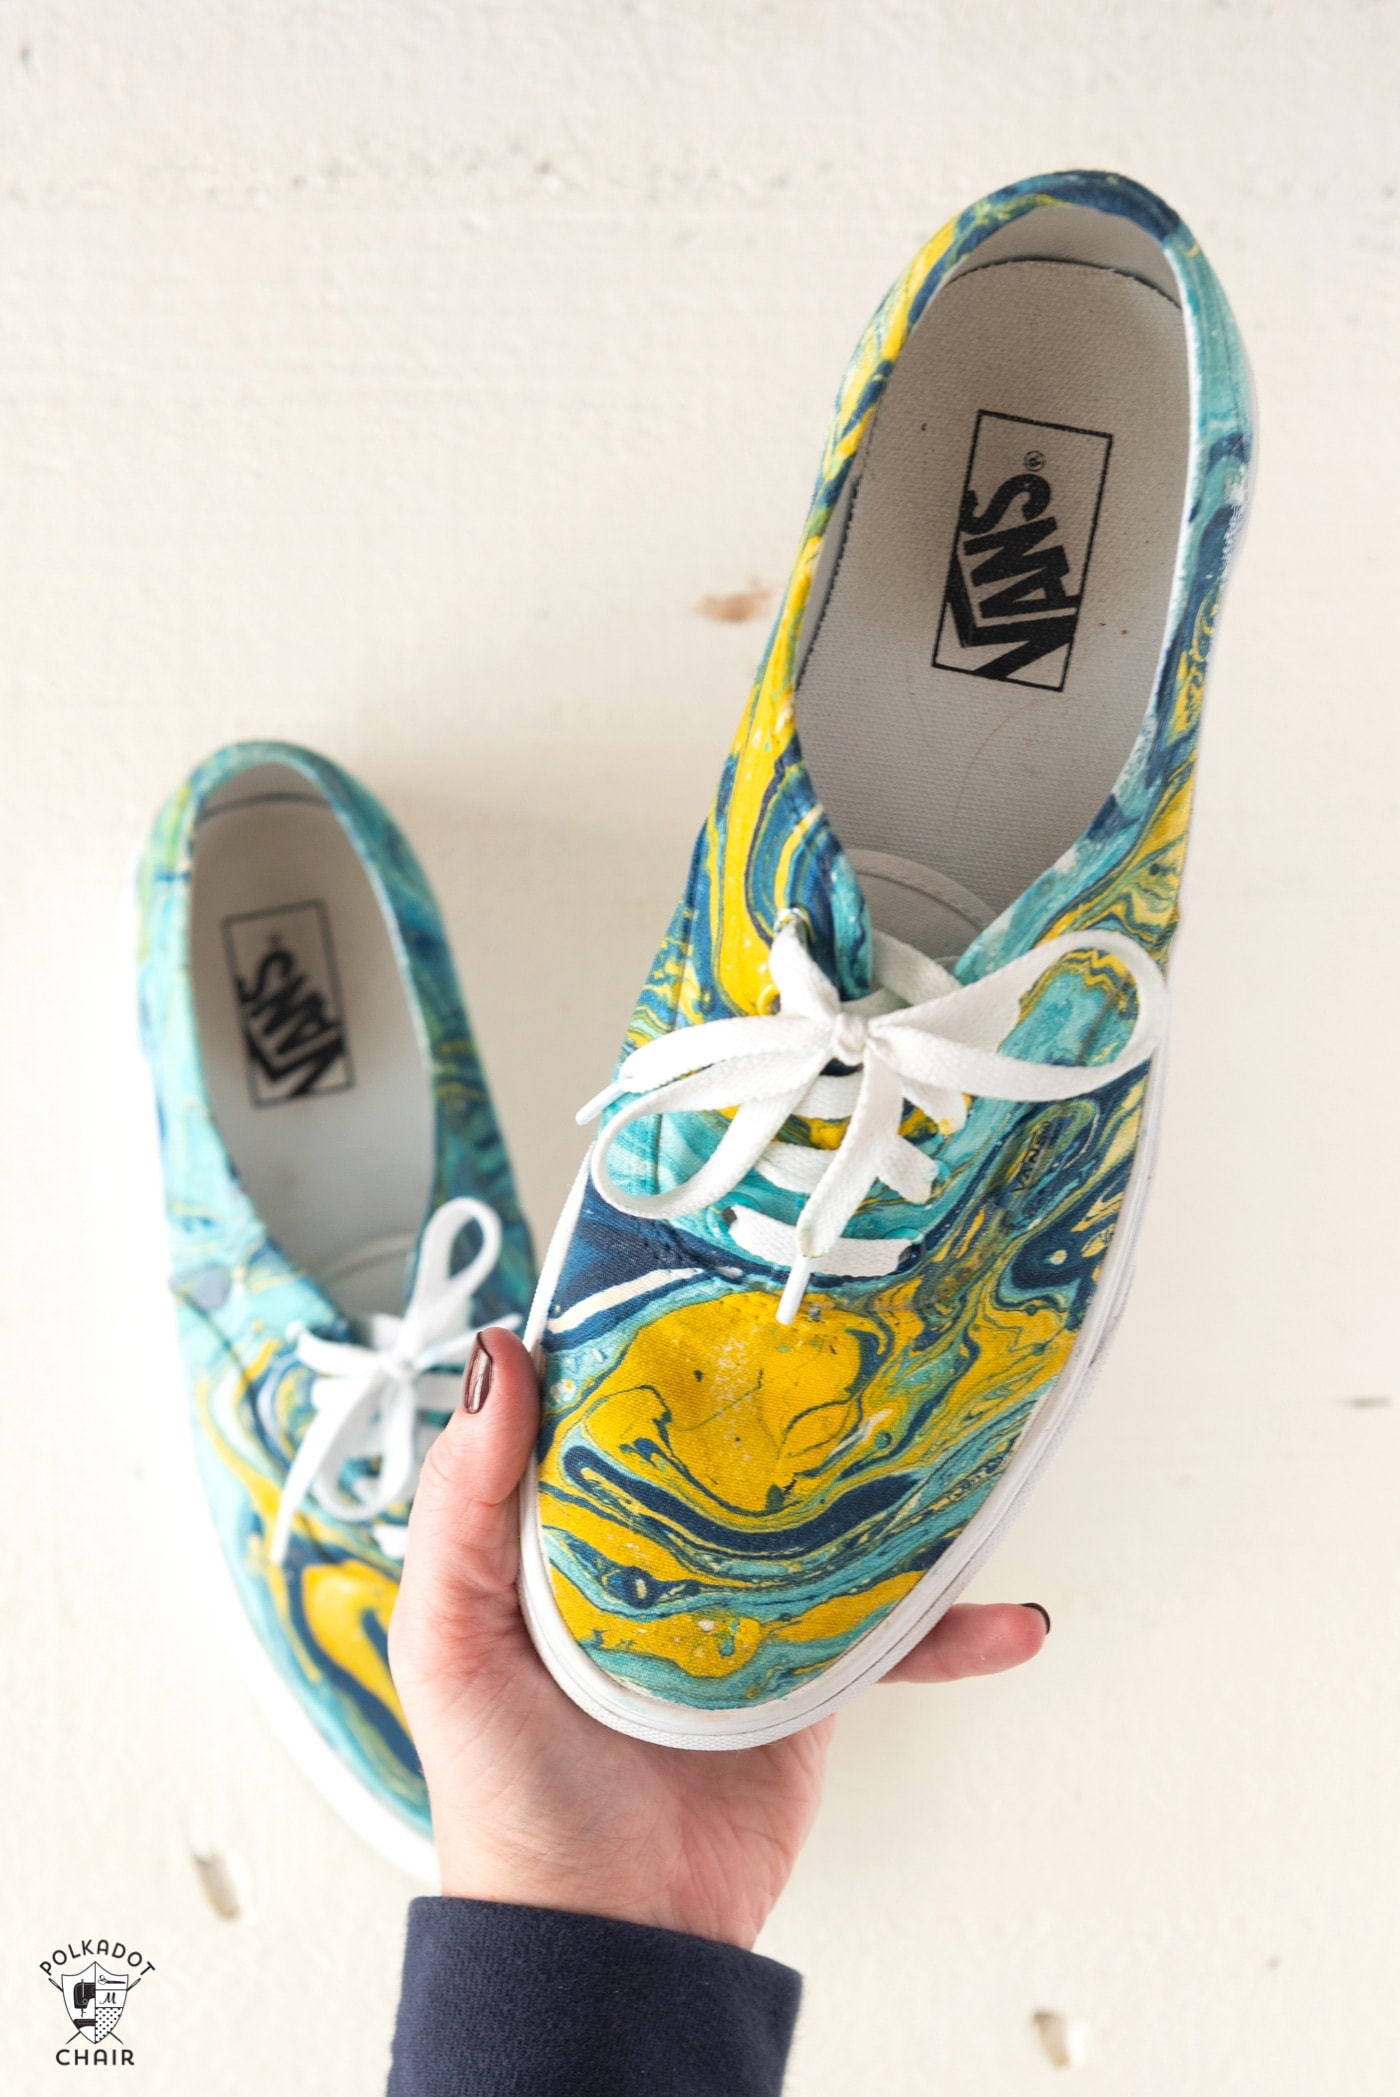
The blue and yellow shoes in the photo above are my son’s shoes. This photo was taken after he wore them for 6 months. You can see the durability of this process.
I can’t take too much credit for this. He “organized” it all. Hydro-dipping shoes is not a “new” thing; I know that. This is how he did it. We’ve dipped almost 10 pairs of shoes at this point and have a lot of tips and tricks to share with you if you are a beginner at hydrographic dipping.
There is also a video of this whole process! You can find it on YouTube or in the instructions for this post.
I know many of you guys here are moms with older kids and teens; I also know it can be a challenge to think of projects to do with them. I hope this helps you out a bit in that department!
DIY Hydro Dipped Vans
Equipment
- Old Plastic Tub
- Gloves
- Face Mask
supplies
- 1 pair Vans Can use other fabric shoes; white are recommeneded
- 3 cans Rustoleum Spray Paint choose colors that are quite different from each other
- Painters Tape
- Plastic Shopping Bags can also use newsprint paper, but this is a great way to reuse old shopping bags
- Stir Stick Use a metal or silicone stir stick. Do not use a wood stir stick, the paint will stick to it and ruin the swirl.
Instructions
Prep
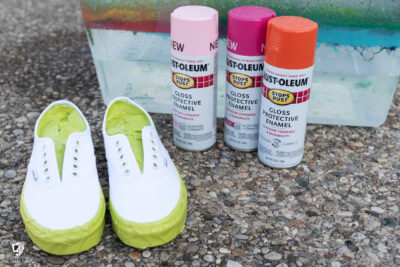
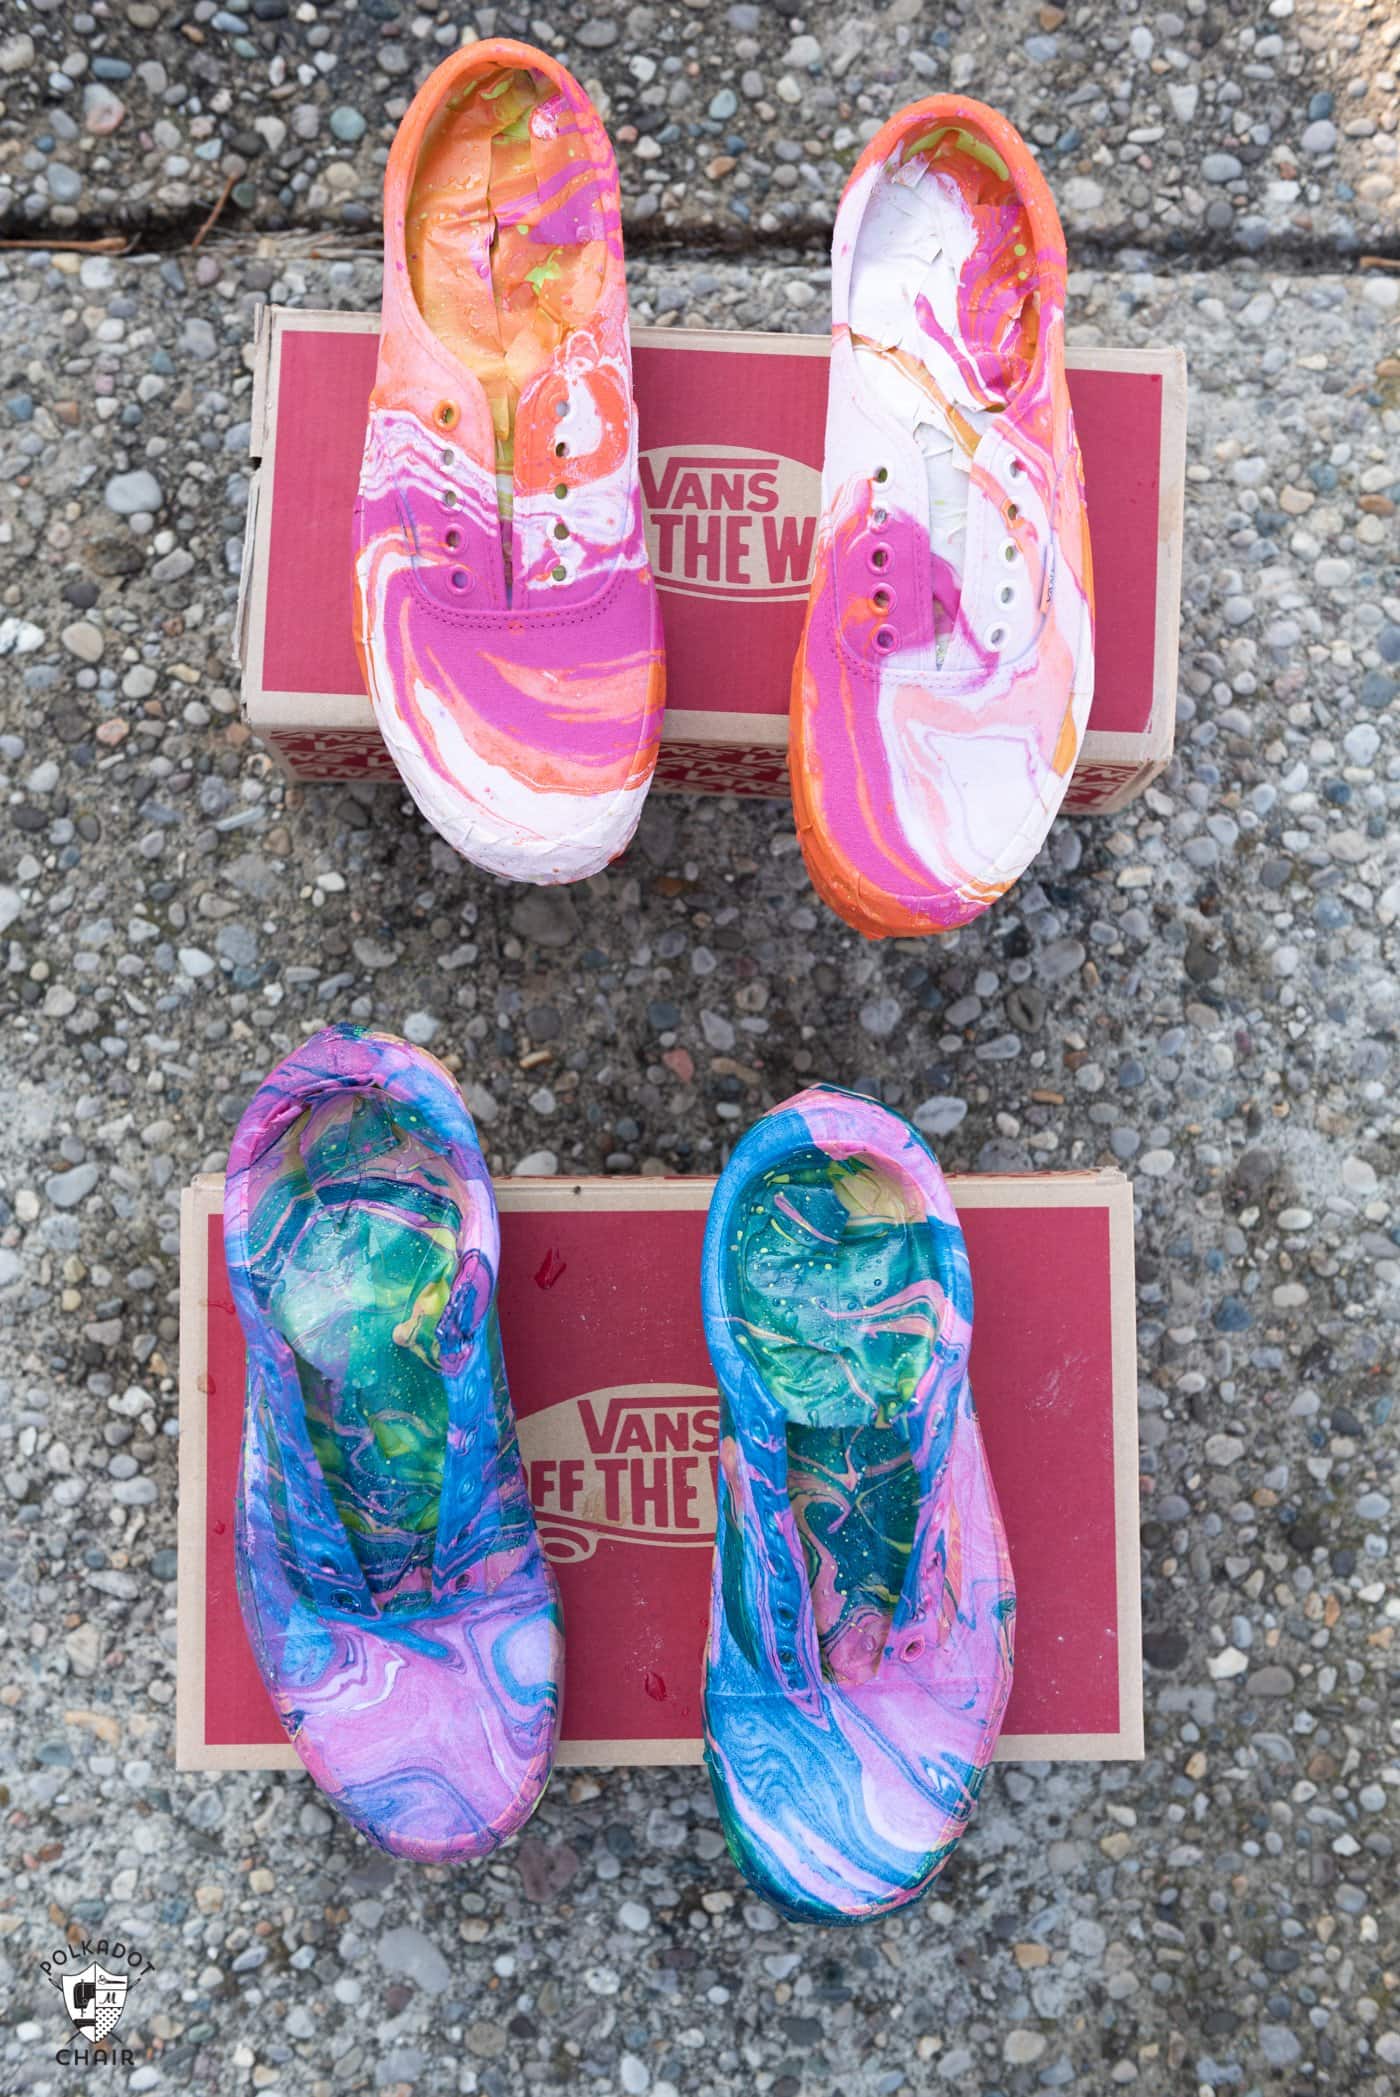
- Before you begin, remove the laces from your shoes. Stuff the shoes with old plastic bags or newsprint.
- Using painter's tape, tape off the tongue of the shoe and all of the exposed plastic parts of the shoe. We did not tape off the sole; if you don't want the soles discolored, tape them off as well.

Dipping Instructions
- First, make sure you read all of the instructions and precautions on the spray paint bottle. Make sure you are working outside in a well-ventilated area. Follow the directions on the spray paint bottle for safety.
- We found that when it was too cold outside that the paint "congealed" too quickly and did not yield a great dip. I would not recommend this project if it is under 50 degrees outside.
- Fill a tub halfway up with water.
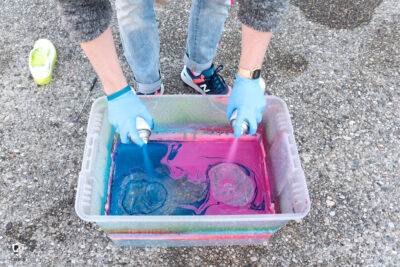
- Spray the paint into the tub. It will "float" on top of the water.
- We found it best to spray each color of paint in a separate area of the tub rather than on top of each other.
- We also found that 3 colors of spray paint worked better than 2. If you want 2 color shoes, I'd recommend adding white paint to your color scheme.
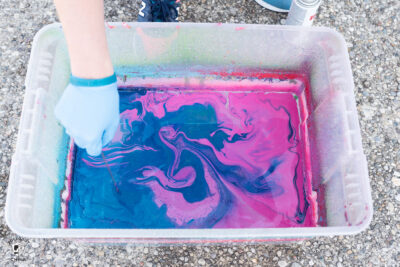
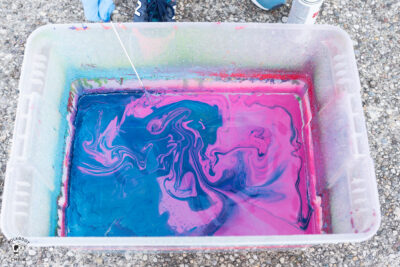
- Using a stir stick, swirl the paint in the water until a cool pattern forms.
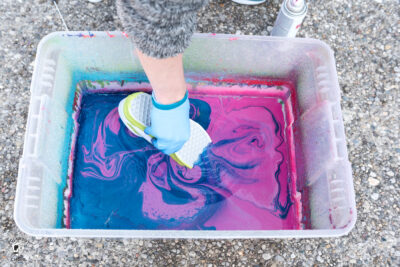
- Holding the shoe by the sole, dip it into the water, and then pull it out.
- You want to dip slowly and smoothly and remove the shoe slowly as well to allow the paint time to adhere. Do not leave the shoe in the water. Put it straight in, then straight out.
Finishing
- Lay the shoe on a shoe box or other box and allow to dry overnight. Do not remove the paint until the outside of the shoe is dry.
- The inside of the shoe will take a day or two to dry out all the way. You can stuff the shoes with plain newsprint to facilitate the drying process.

Notes
Top Tips:
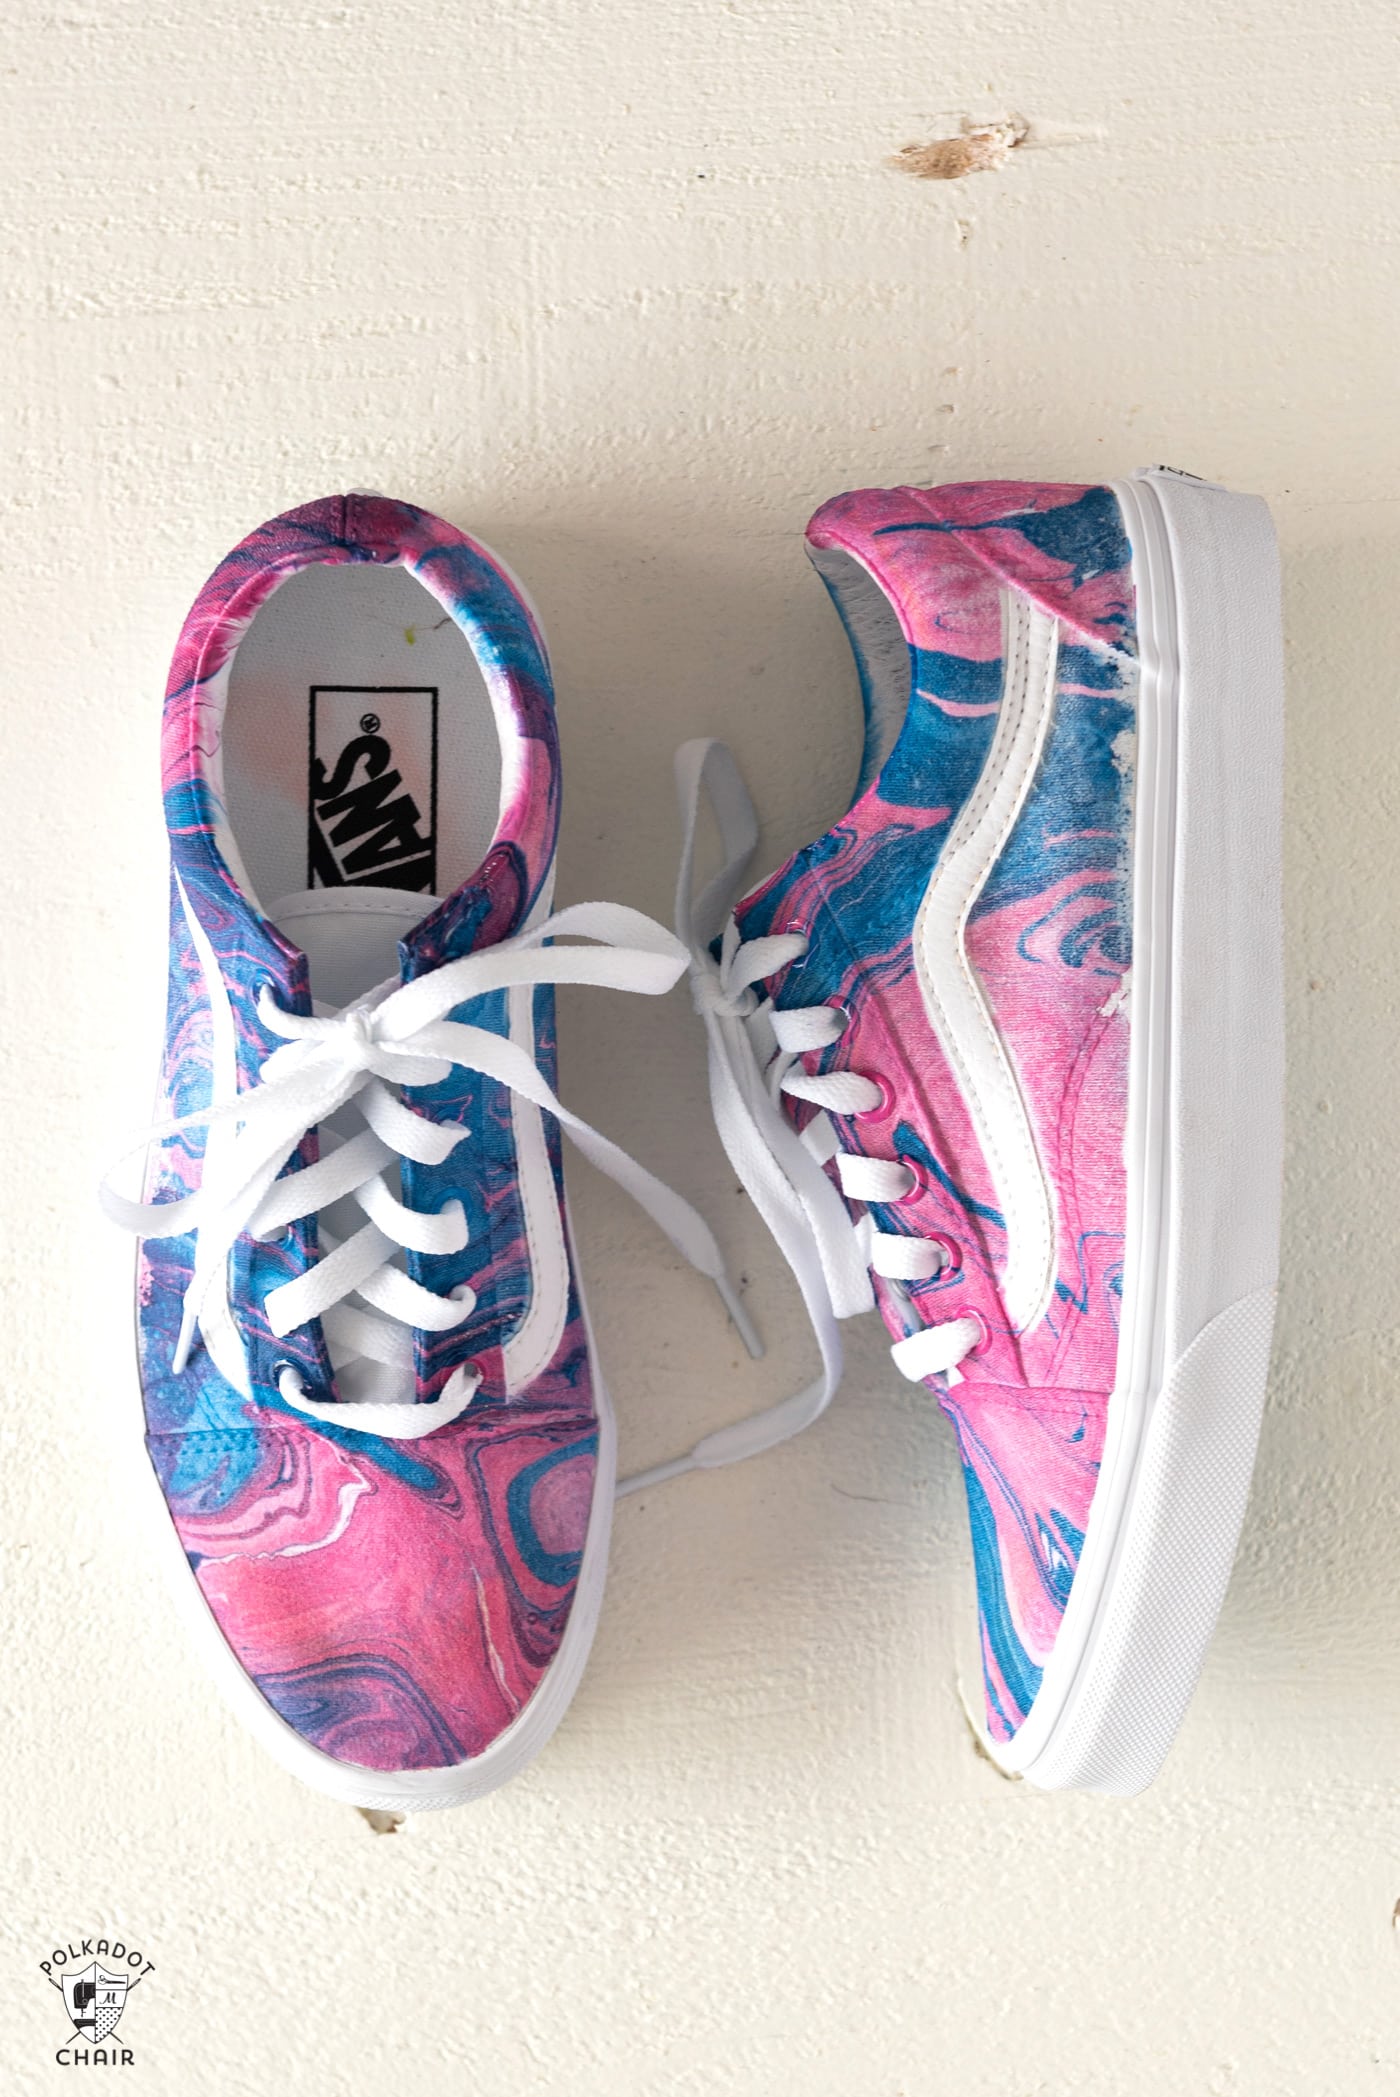
Use a craft knife to cut the painter’s tape so that it covers only the plastic parts of the shoe. Make sure it is not too cold outside; the paint will not adhere if the water is cold, it will just harden the paint. You may need to leave the water outside in the sun a bit to let it warm up if it is too cold. We did not seal the shoes with anything afterward. My son wore his all summer, and they held up great. Choose colors that are very different from each other for the best result. Don’t be afraid of bright colors.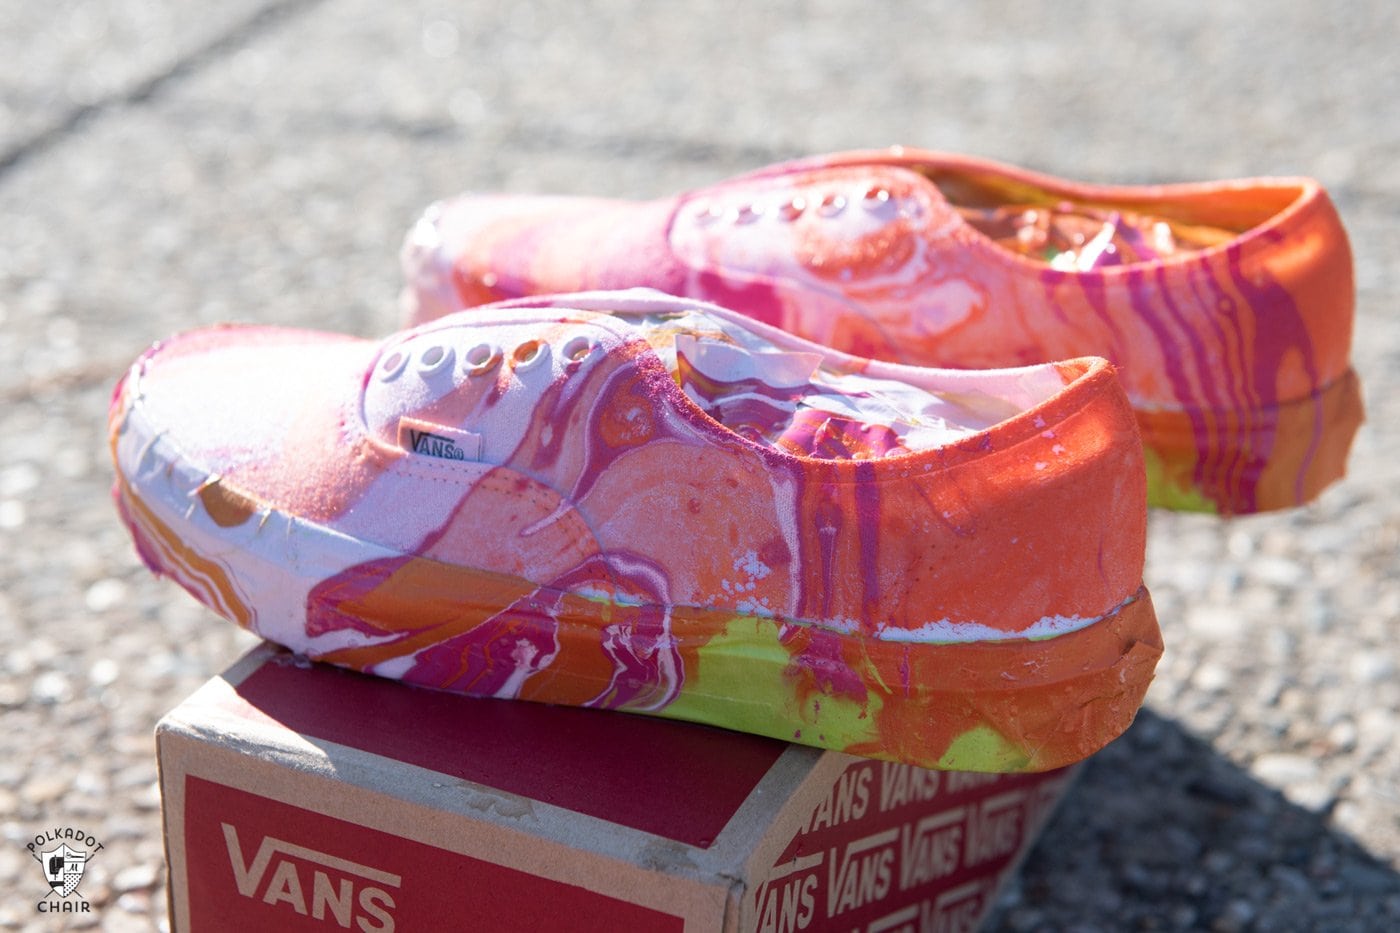
Hydro Dip Vans; Tips & FAQ’s
A few things to note. My kids are over 18 and bought the spray paint themselves. They were also able to manage most of the project themselves for that reason. If your kids are younger, use common sense and don’t let them do it by themselves. Also, make sure you read all of the directions on the can of spray paint and use all necessary safety precautions.
How well did the shoes hold up? Did you have to seal them afterward?
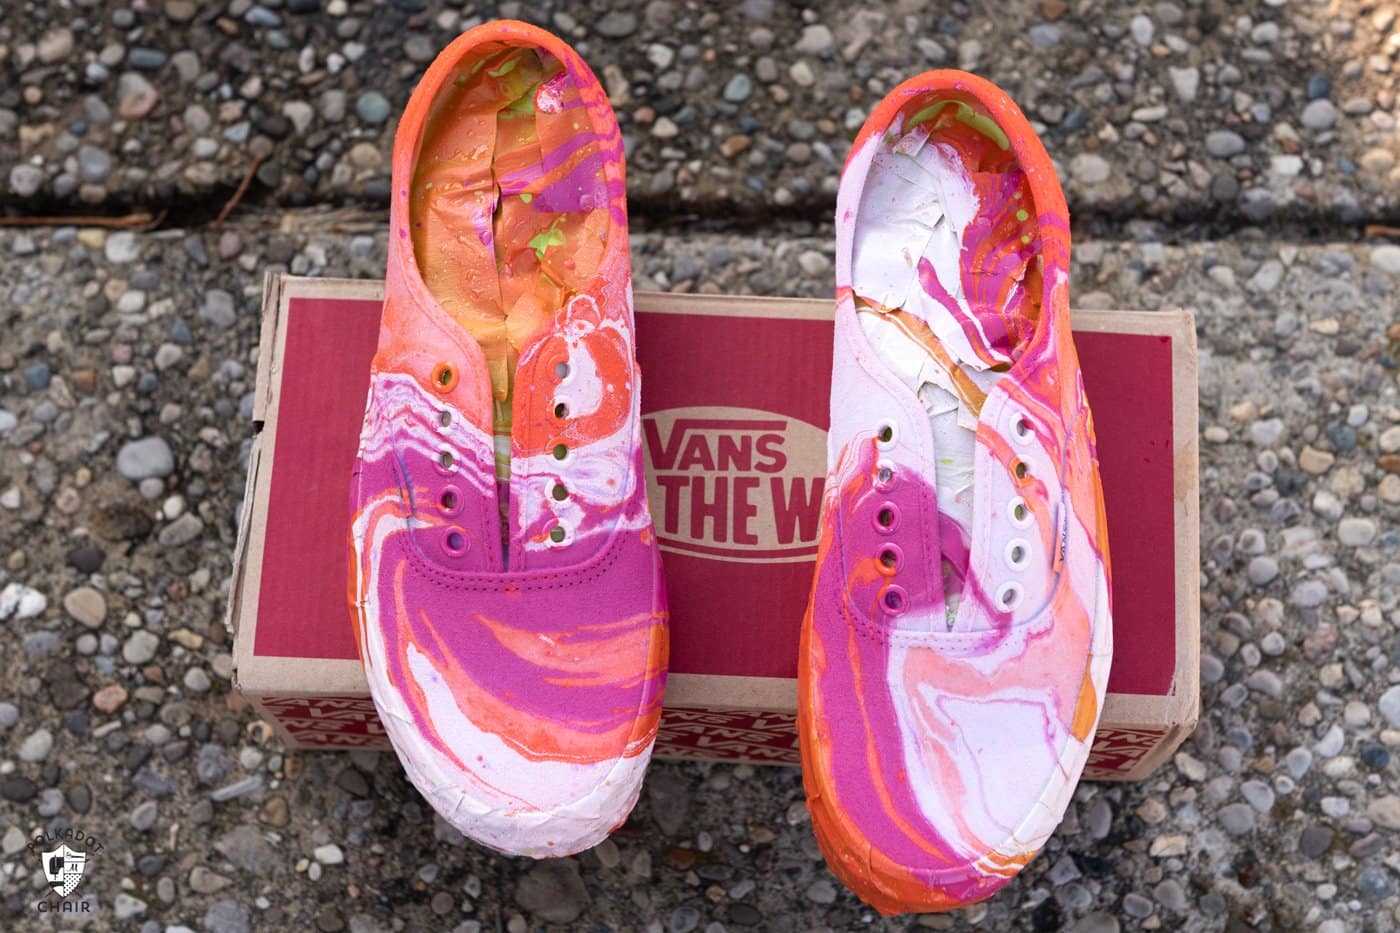
We did not use a primer or seal them with a clear coat afterward. Don’t rinse them after you dip them, wait for the paint to dry. They held up very well. My son wore his almost daily all summer and looked great by the end of the summer. The photo of him in the hammock is after wearing them for several months.
Do you have to use Vans?
No. You can use any other white shoes. However, we have not tested it on other brands. If the shoes are fabric and white, I guess that it would work. Note that these shoes are only dipped on the canvas portion of the shoe and not the rubber outsole. To ensure that only the parts of the shoe you want to paint on them are dipped make sure to put the sticky side of the painter’s tape along the rubber outsole.
Does the type of paint matter?
We have only ever tried this with spray paint. But in order for it to work the paint needs to float on the surface of the water so it forms a sort of slimy residue on top. Spray paint works great for this because it is not heavy and you can apply it in thin layers so it floats. We did not try this with any sort of ink.
What Spray Paint Did you Use?
We used Rustoleum Gloss Protective Enamel. We bought it at Lowes. I have not tried other brands, but I would guess they would work as well; you’d have to try it! Pro-tip use vivid colors of spray paint to achieve a more vibrant result.
If you miss a spot can you double dip?
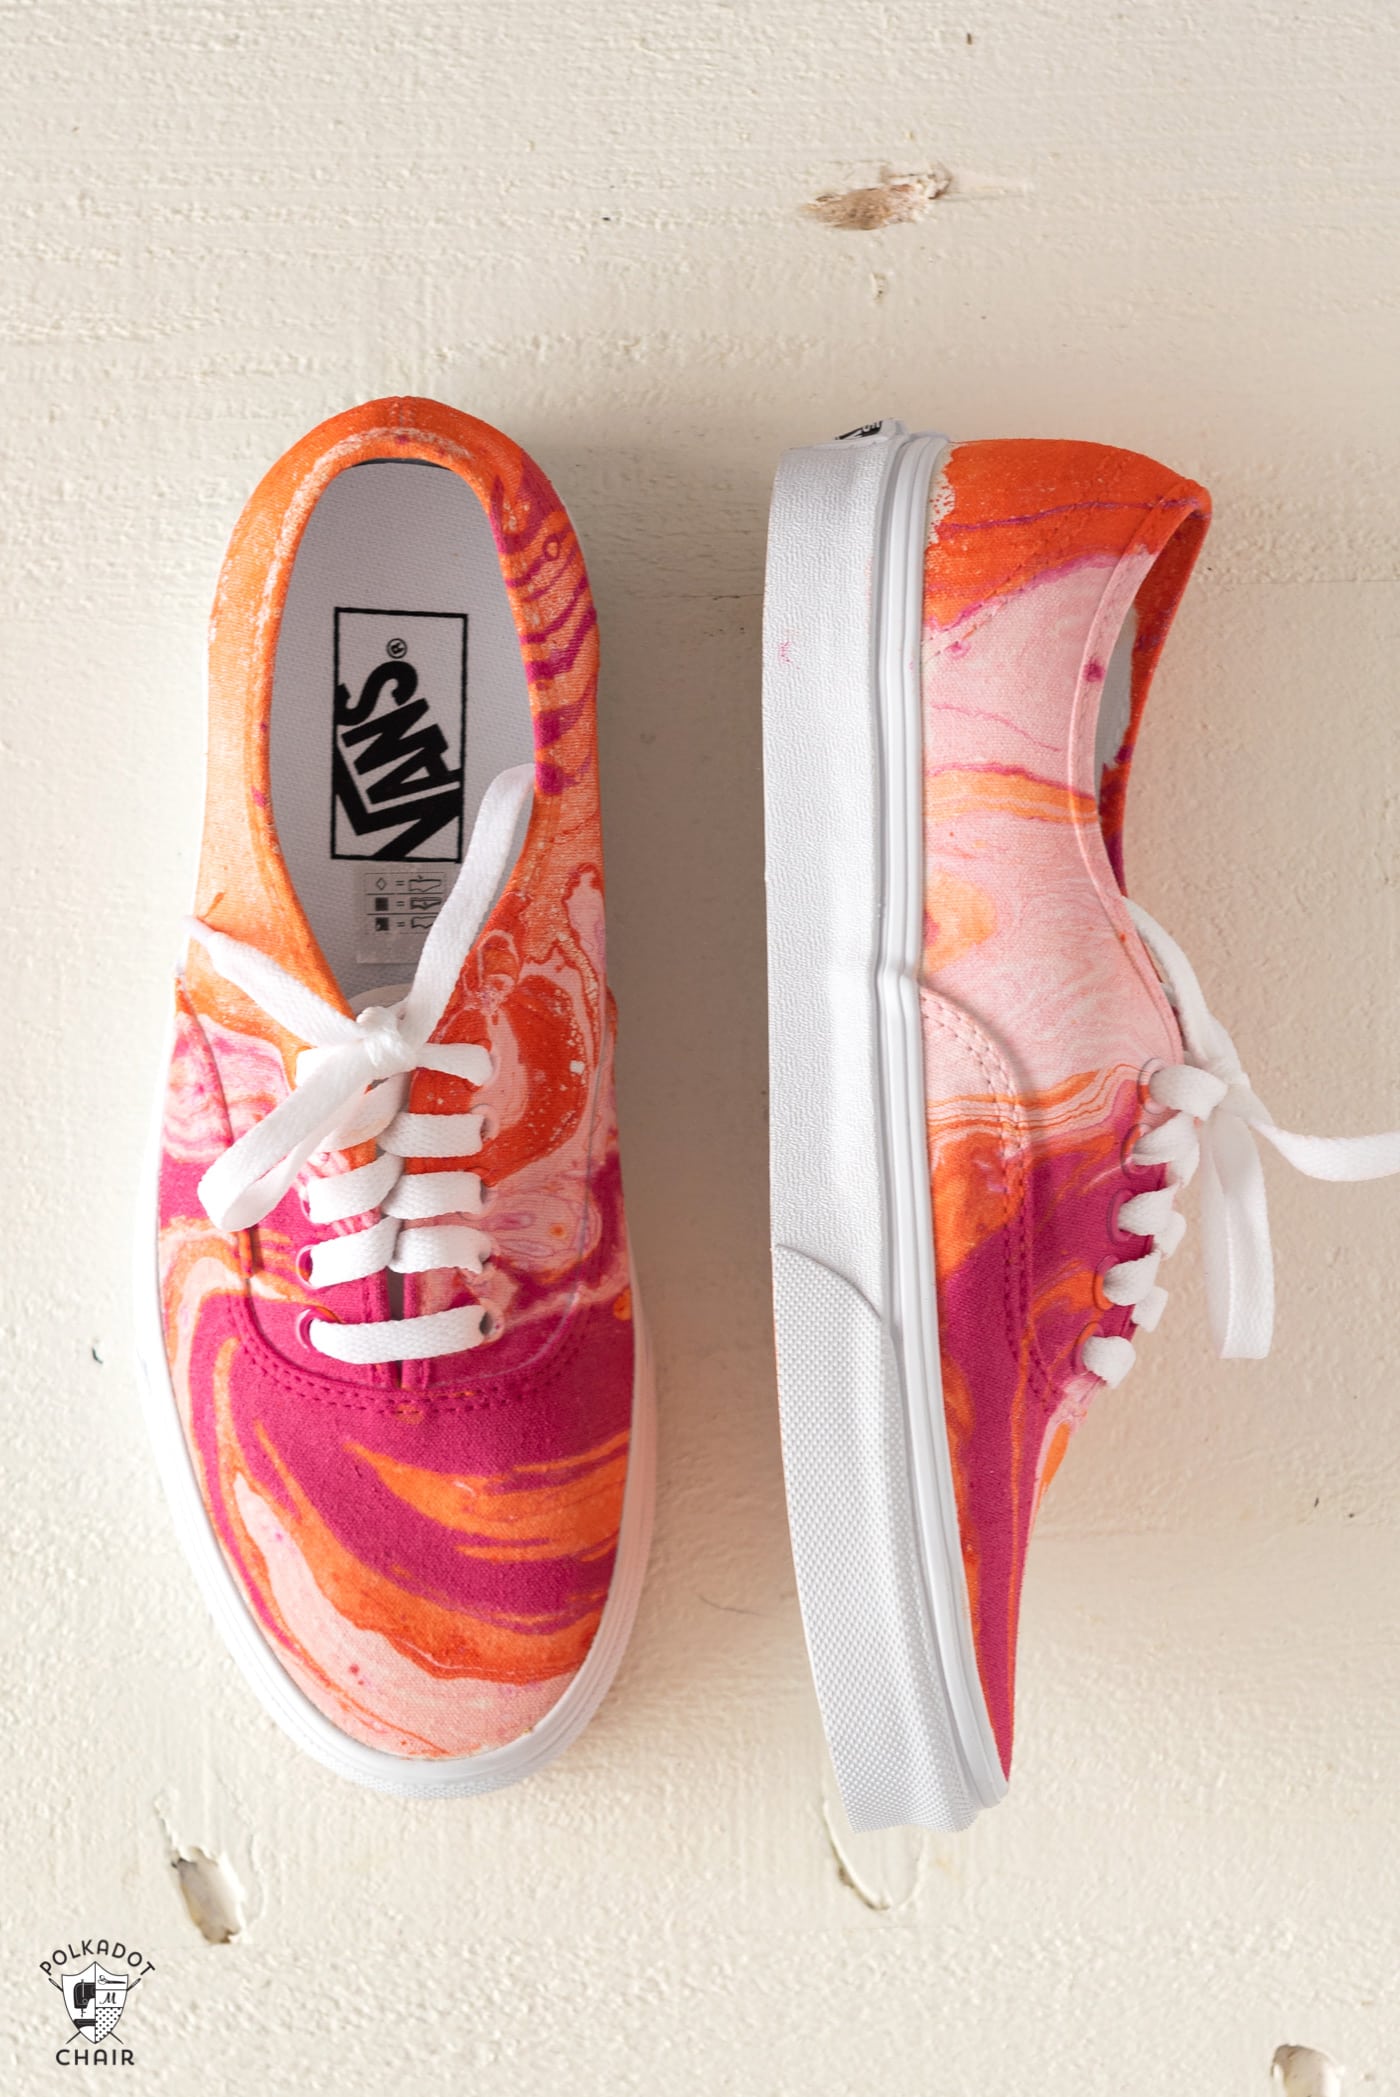
Yes, and no. On one pair of shoes that my son made with his friends, they dipped again. It didn’t look great. On the pink and orange shoes, we made for this video; we had to dip the heel twice because it was still white. It worked great, and you’d never know it was dipped twice. I would try to only do the dipping process once, so watch the angles you are dipping the shoes at. If you do have to double-dip try to only double-dip part of the object you are hydro dipping to prevent any large mistakes.
How much paint should you spray in the tub?
We found out that you need a lot of paint! More than you think you do. Make sure the surface of the water is covered. Also, work fast since the paint starts to stick to the sides of the tub if you wait too long.
Do you have to change the water between dips?
No, use your swirl stick and let the paint stick to the sides of the tub. It will start to build up. When the water is clear, you can spray and dip again. Your tub will always have paint in it. Use an old tub or bucket.
How is this different than hydrographics?
Hydrographic printing or water transfer printing is a similar process of dipping three-dimensional surfaces into the water to transfer an image onto the object. The big difference here is that instead of printing an image or complex patterns (like camouflage, wood grain, or carbon fiber) we are creating the print ourselves through marbling spray paint. if you are interested in the immersion printing hydrographic film you can buy a hydro-dip kit online (like this one) there are several different hydro graphics to choose from.
Can you dip things other than shoes?
Yes, but we only tried it on shoes. I would imagine the same process would work for any number of three-dimensional objects. It might take a little experimenting on your part though. Some other objects that would be fun to hydro-dip are:
More Custom Shoe Projects to Try:
Customizing Converse with Fabric

I can’t wait to try this!
Looks Rad!! I’m gonna give it a shot.
Hi! Does the finish of the spray paint matter? i.e. satin, gloss, matte
I think gloss or satin is best
This is amazing, I never knew Rustoleum paint would work for dipping shoes. Does is leech when it gets wet, like onto socks? Thanks for the ideas, great guide.
What do you do to stop the paint getting inside the shoes during dipping?
If you look at the step out photos, we fill them with tape and paper.
How did you dispose of the paint water after you finished?
All of the paint stuck to the plastic bin when we were done, so the water was clear. We just emptied it in the yard.
Did the shoes hold up to washing them either by hand or in the washing machine?
We have not needed to wash them. Any spots we just remove with a damp cloth. My son has worn his for a year and it has not been a problem.
Do the shoes need to be brand new for this to work? We tried it with shoes that have already been worn and dirty and the paint did not adhere to the canvas of the Vans.
We have only done it with new shoes. So my guess is yes
My son and daughter are so excited to make these shoes! Thank you for the tutorial. Do you remember the names of the colors your son used to paint his shoes?