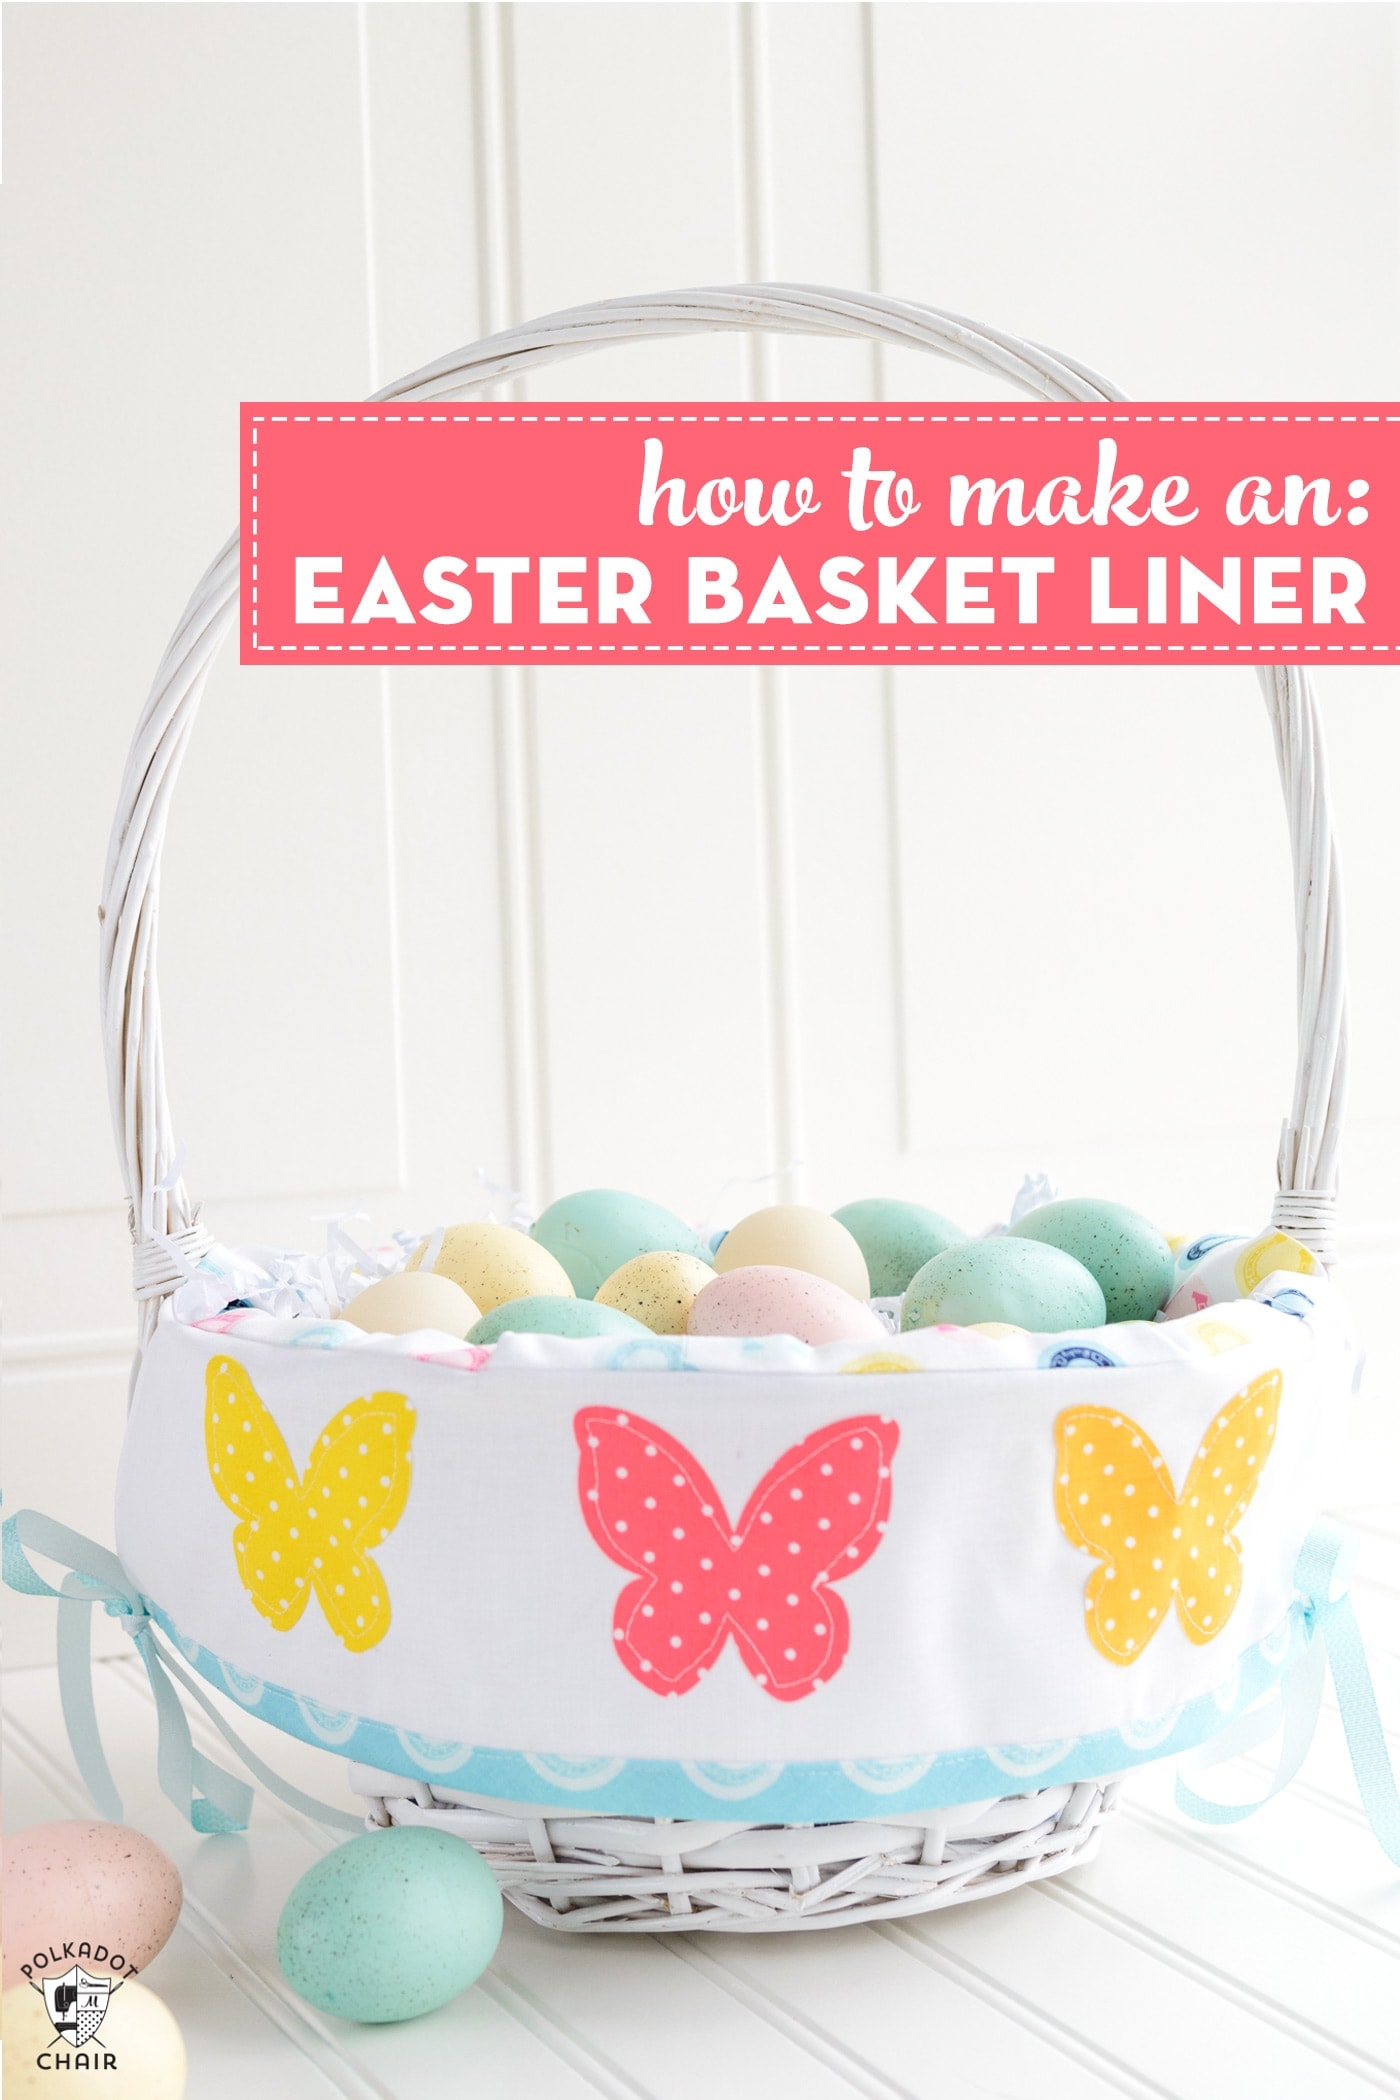
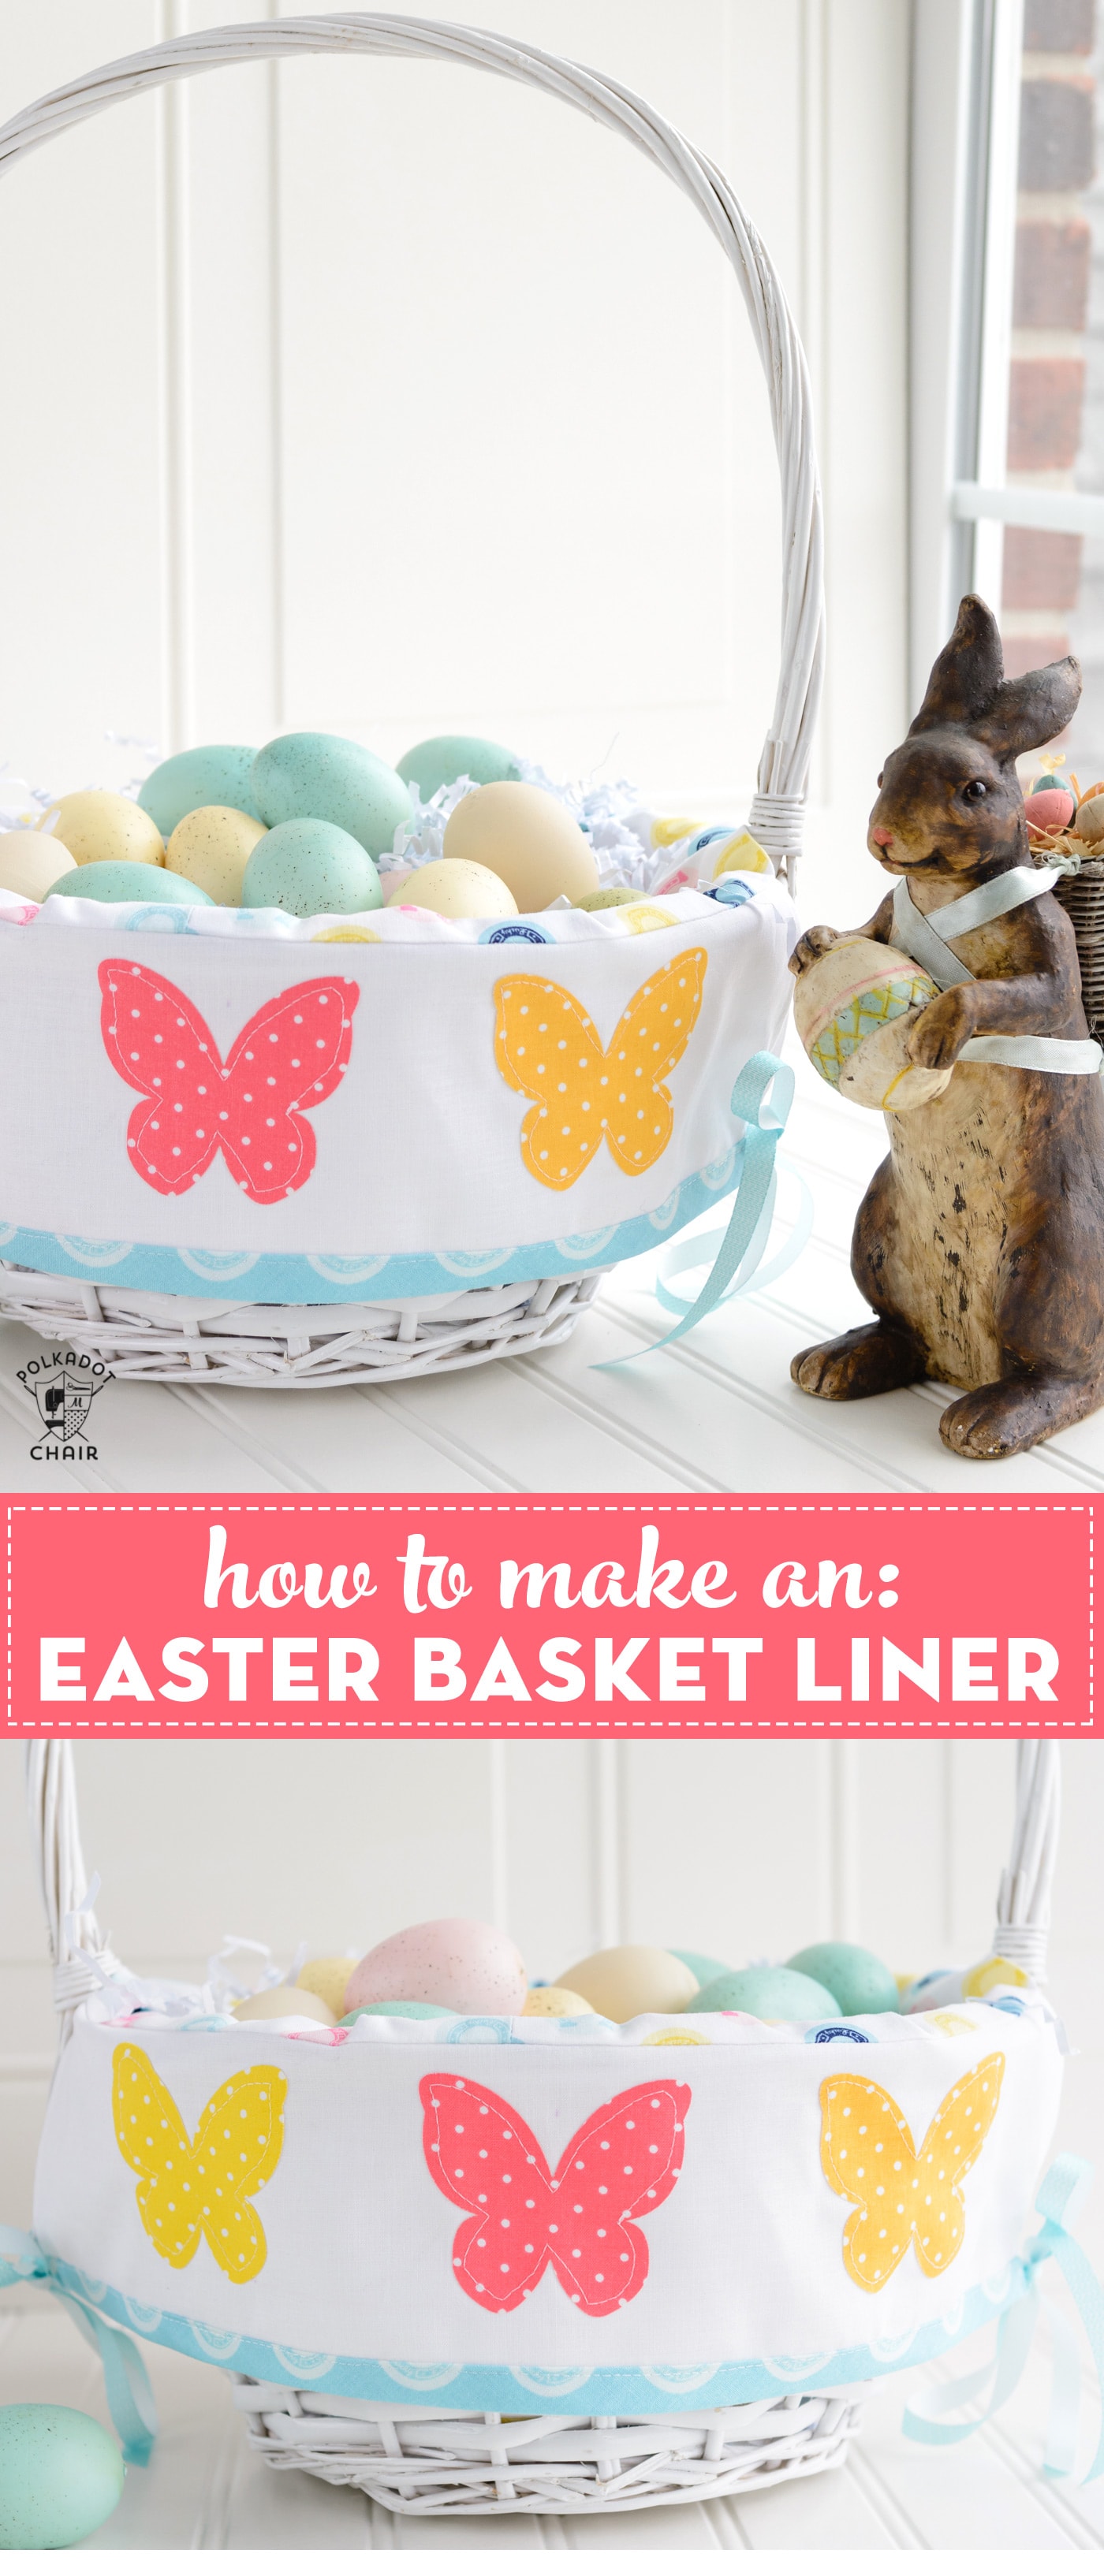
How to Make a Basket Liner
Today, I will share how to make a custom Easter Basket Liner. There are always so many cute Easter baskets in the stores during the Spring, but many of them don’t have a fabric liner. I love the look of a fabric liner for an Easter basket and have made quite a few. Today, I thought I’d tell you how I do it.
As you know, Easter baskets come in all sizes and shapes, so it’s not possible for me to provide you with a pattern that will fit all of the basket types out there. Instead, I’m going to teach you how to make a liner that will fit the basket that you have. Don’t worry; it’s very easy once you break down the steps.
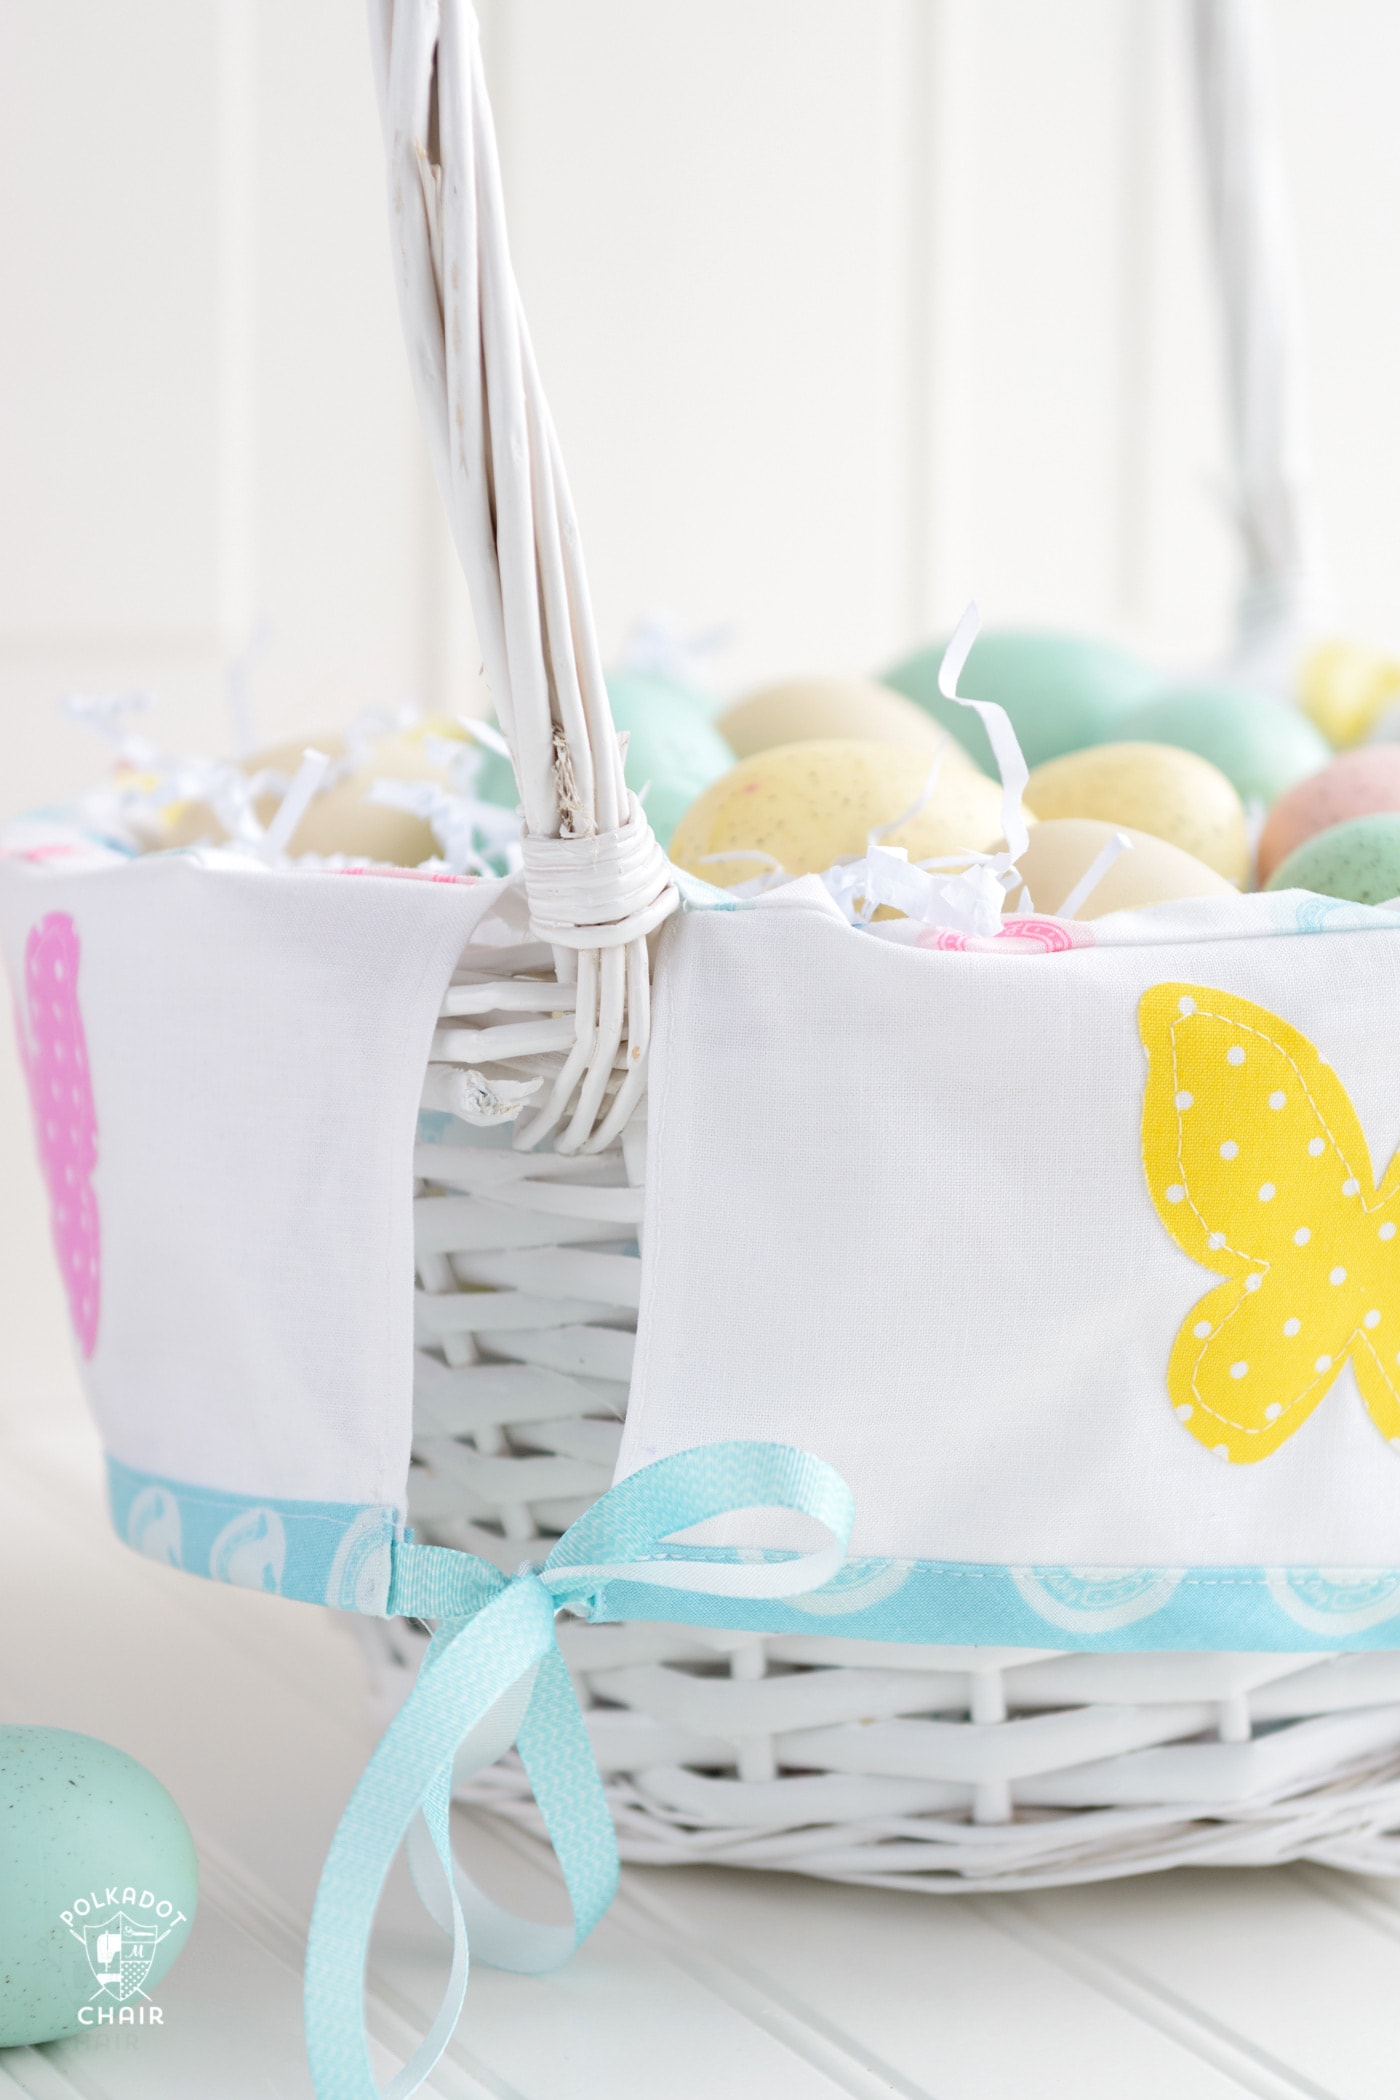
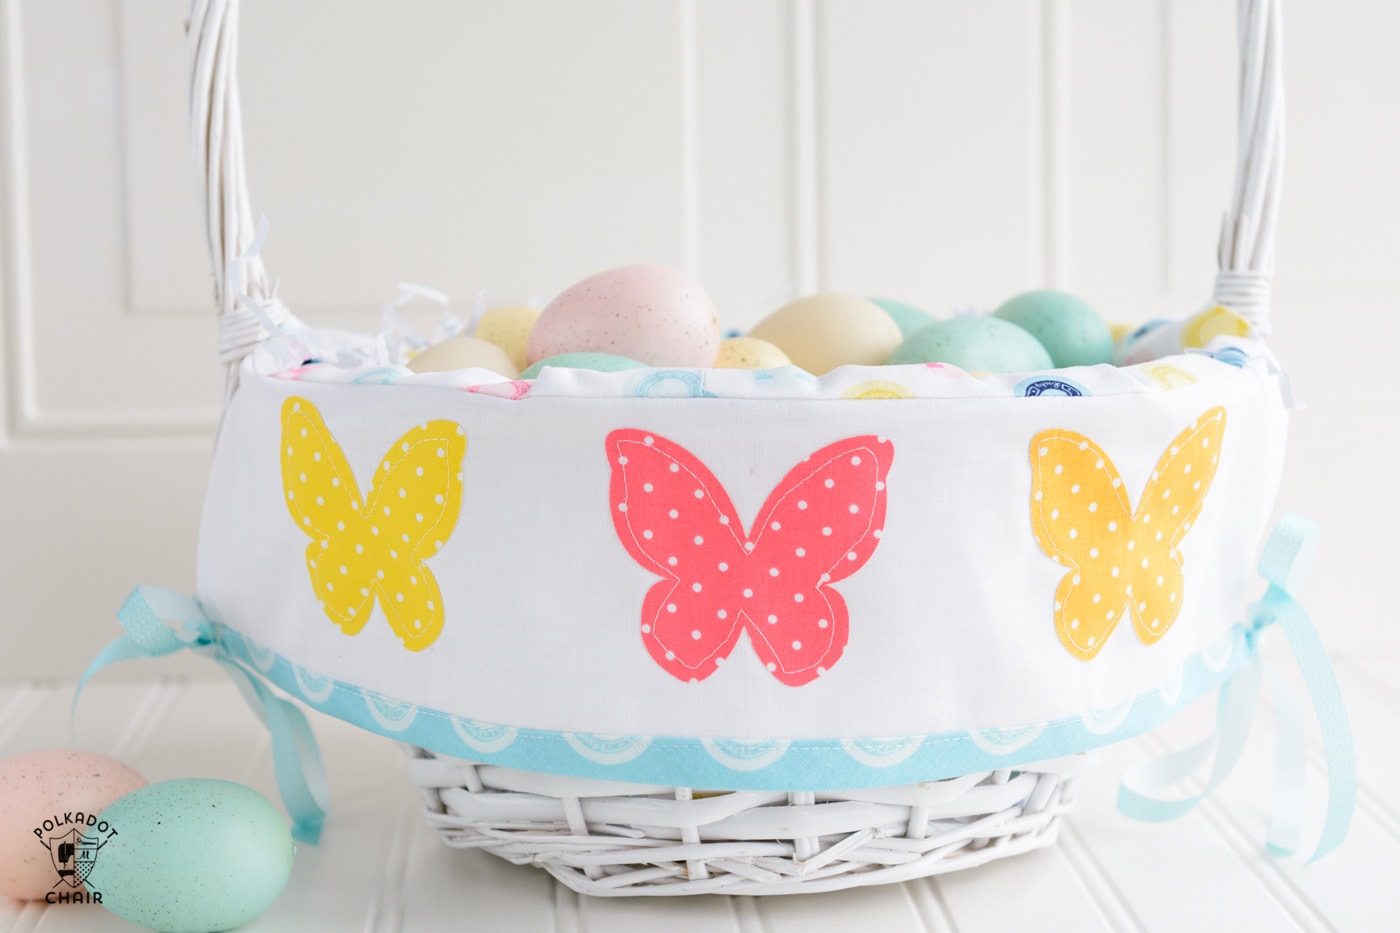
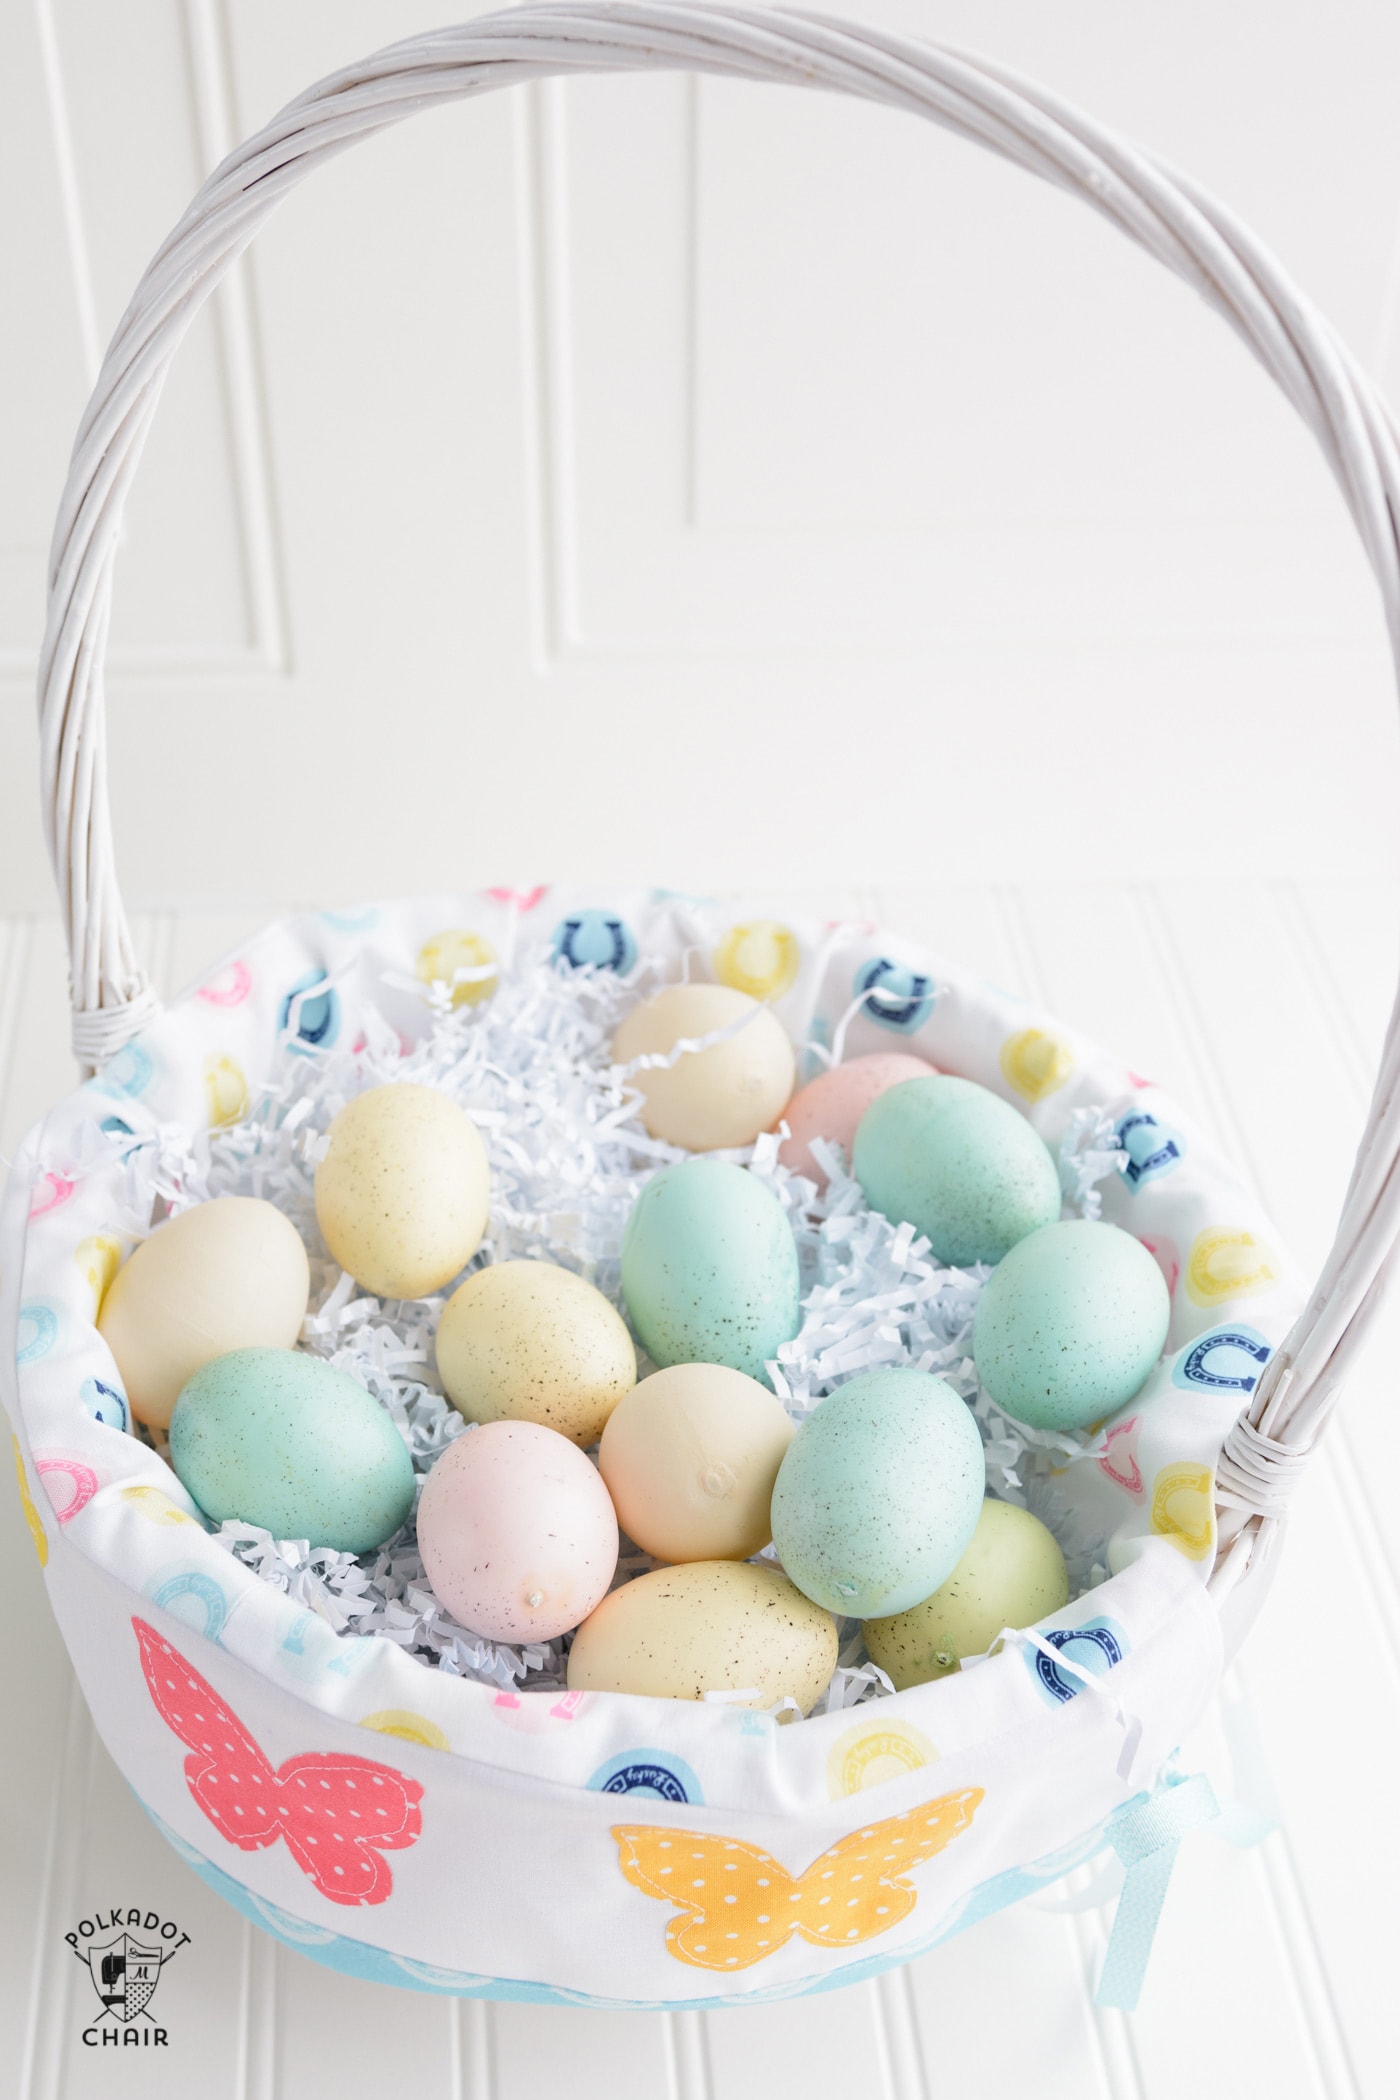
This basket liner fits inside the Easter basket. It has a flap that extends over the edge of the basket and ties on the side with ribbon.
How to Sew a Basket Liner Perfect for an Easter Basket
Now let’s talk about how to make an Easter Basket Liner.
How to Make a Basket Liner
Equipment
- Tape Measure
- Fabric Safe Marking Pen
supplies
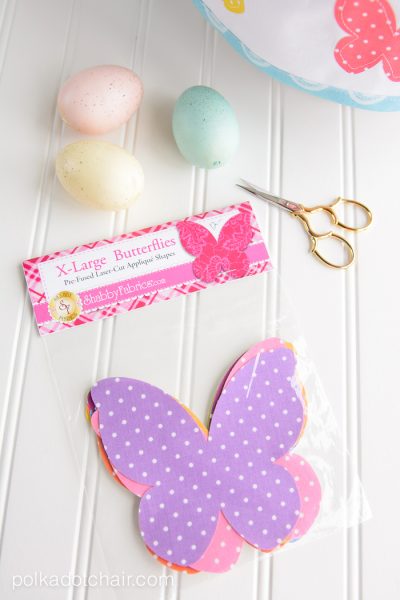
- 1 set Applique Shapes if desired – mine were purchased from Shabby Fabrics.
- 1/2 yard Print Fabric you’ll need more for a large basket
- 1/4 – 1/2 yard White Fabric or whatever fabric you’d like to use for the part of the liner that hangs over the side of the basket.
- Packaged Double Fold Bias Tape 1/2″ wide while folded OR a 2″ wide fabric cut on the bias and a 1″ double-fold bias tape tool to make your bias tape.
- 2 yards 1/4″ wide ribbon
Instructions
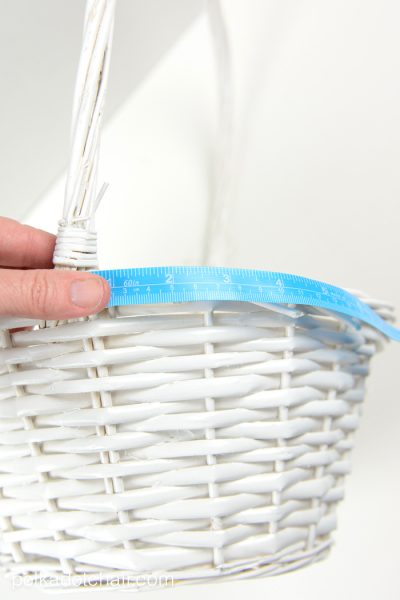
Step One: Measure your Easter Basket
- Since Easter baskets come in all shapes and sizes, you will need to measure the circumference of the outside of the top of your basket. This will allow you to make a custom liner that will fit your basket.

- For example, my basket was 38″ around.
- Note this number; we will call it “Measurement A.”
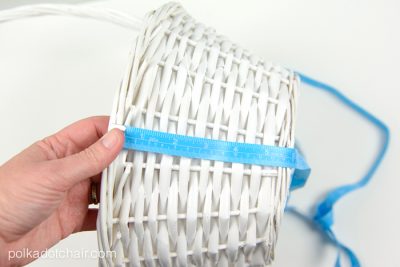
- Next, measure the height of your basket (not including the handle).

- We will call this “Measurement B.”
- Lastly, measure the circle’s DIAMETER on the bottom inside of the basket. The diameter is the width of the circle. We will call this “Measurement C.”
- Next up, let’s make our bias.
- You’ll need enough bias to go around your basket (Measurement A).
- Cut bias strips to this length plus about 6″ – 8″ so you have a bit extra.
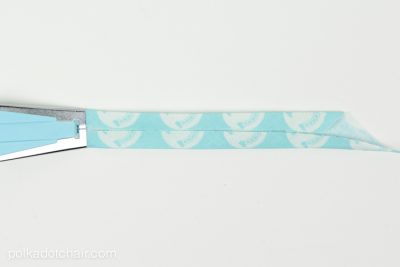
How to Make Your Bias Tape
- For the bias, you can make a strip of continuous bias tape if you like, but you don’t need nearly that much for this project. Instead, I recommend cutting your fabric on the bias (at a 45-degree angle to the selvage) in 2″ strips and sewing them together until you have enough. It will probably only take 2-3 strips sewn together to get enough for your project.
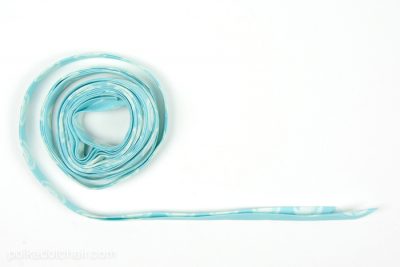
- Next, feed your bias tape through the double-fold bias tape maker (this is my bias tape maker). As you pull the fabric through, press it into place with your iron.
- Roll it up and set it aside (I made WAY more than needed).
Step Two: Cut Out your Fabric
- Cut from the print fabric cut for the liner bottom piece:
- One circle that is 1″ wider than the bottom of your basket. For example, if your basket diameter was 6″ cut your circle with a 7″ diameter.
- Cut from the print fabric for the liner side piece:
- One piece that is “Measurement A” + 1″ by “Measurement B” + 1″
- From the white fabric cut for the liner flap piece:
- 2 pieces of fabric that are 4 1/2″ wide by “Measurement A” divided by 2 + 1″
- Now, it’s time to start sewing. All seams are 1/2″
Step Three: Sew the Liner
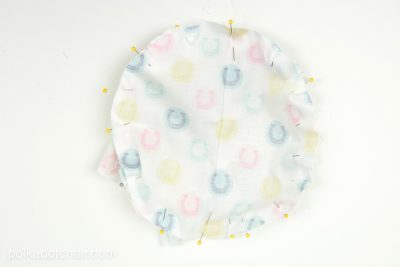
- Sew your liner side piece together along the short sides. Press the seam open.
- Run two rows of gathering stitches along the bottom of the sewn piece. Pull up on the gathering strings and gather until the fabric fits around your cut circle piece. Pin in place.
- Stitch in place.
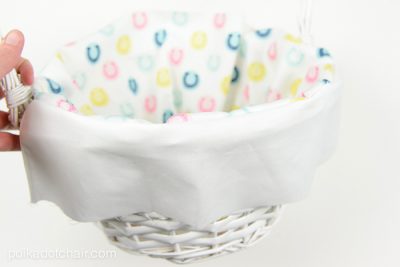
- Fit this piece into your basket, and make sure it fits. Then, mark the locations of the handles on the bag side piece. I used pins and then later replaced the pins with marks with a fabric-safe pen.
- Pin the flap pieces to the basket side pieces so that the flap piece fits between the marks you made on the basket (noting the handle placement). Your flap pieces will probably be larger than the distance between the marks. Cut the flap piece so that it fits between the marks and you have enough fabric for a 1/4″ rolled hem.
- Sew a small rolled hem on the short side of each flap piece. Pin to the basket side piece, with the right sides facing, and stitch in place.

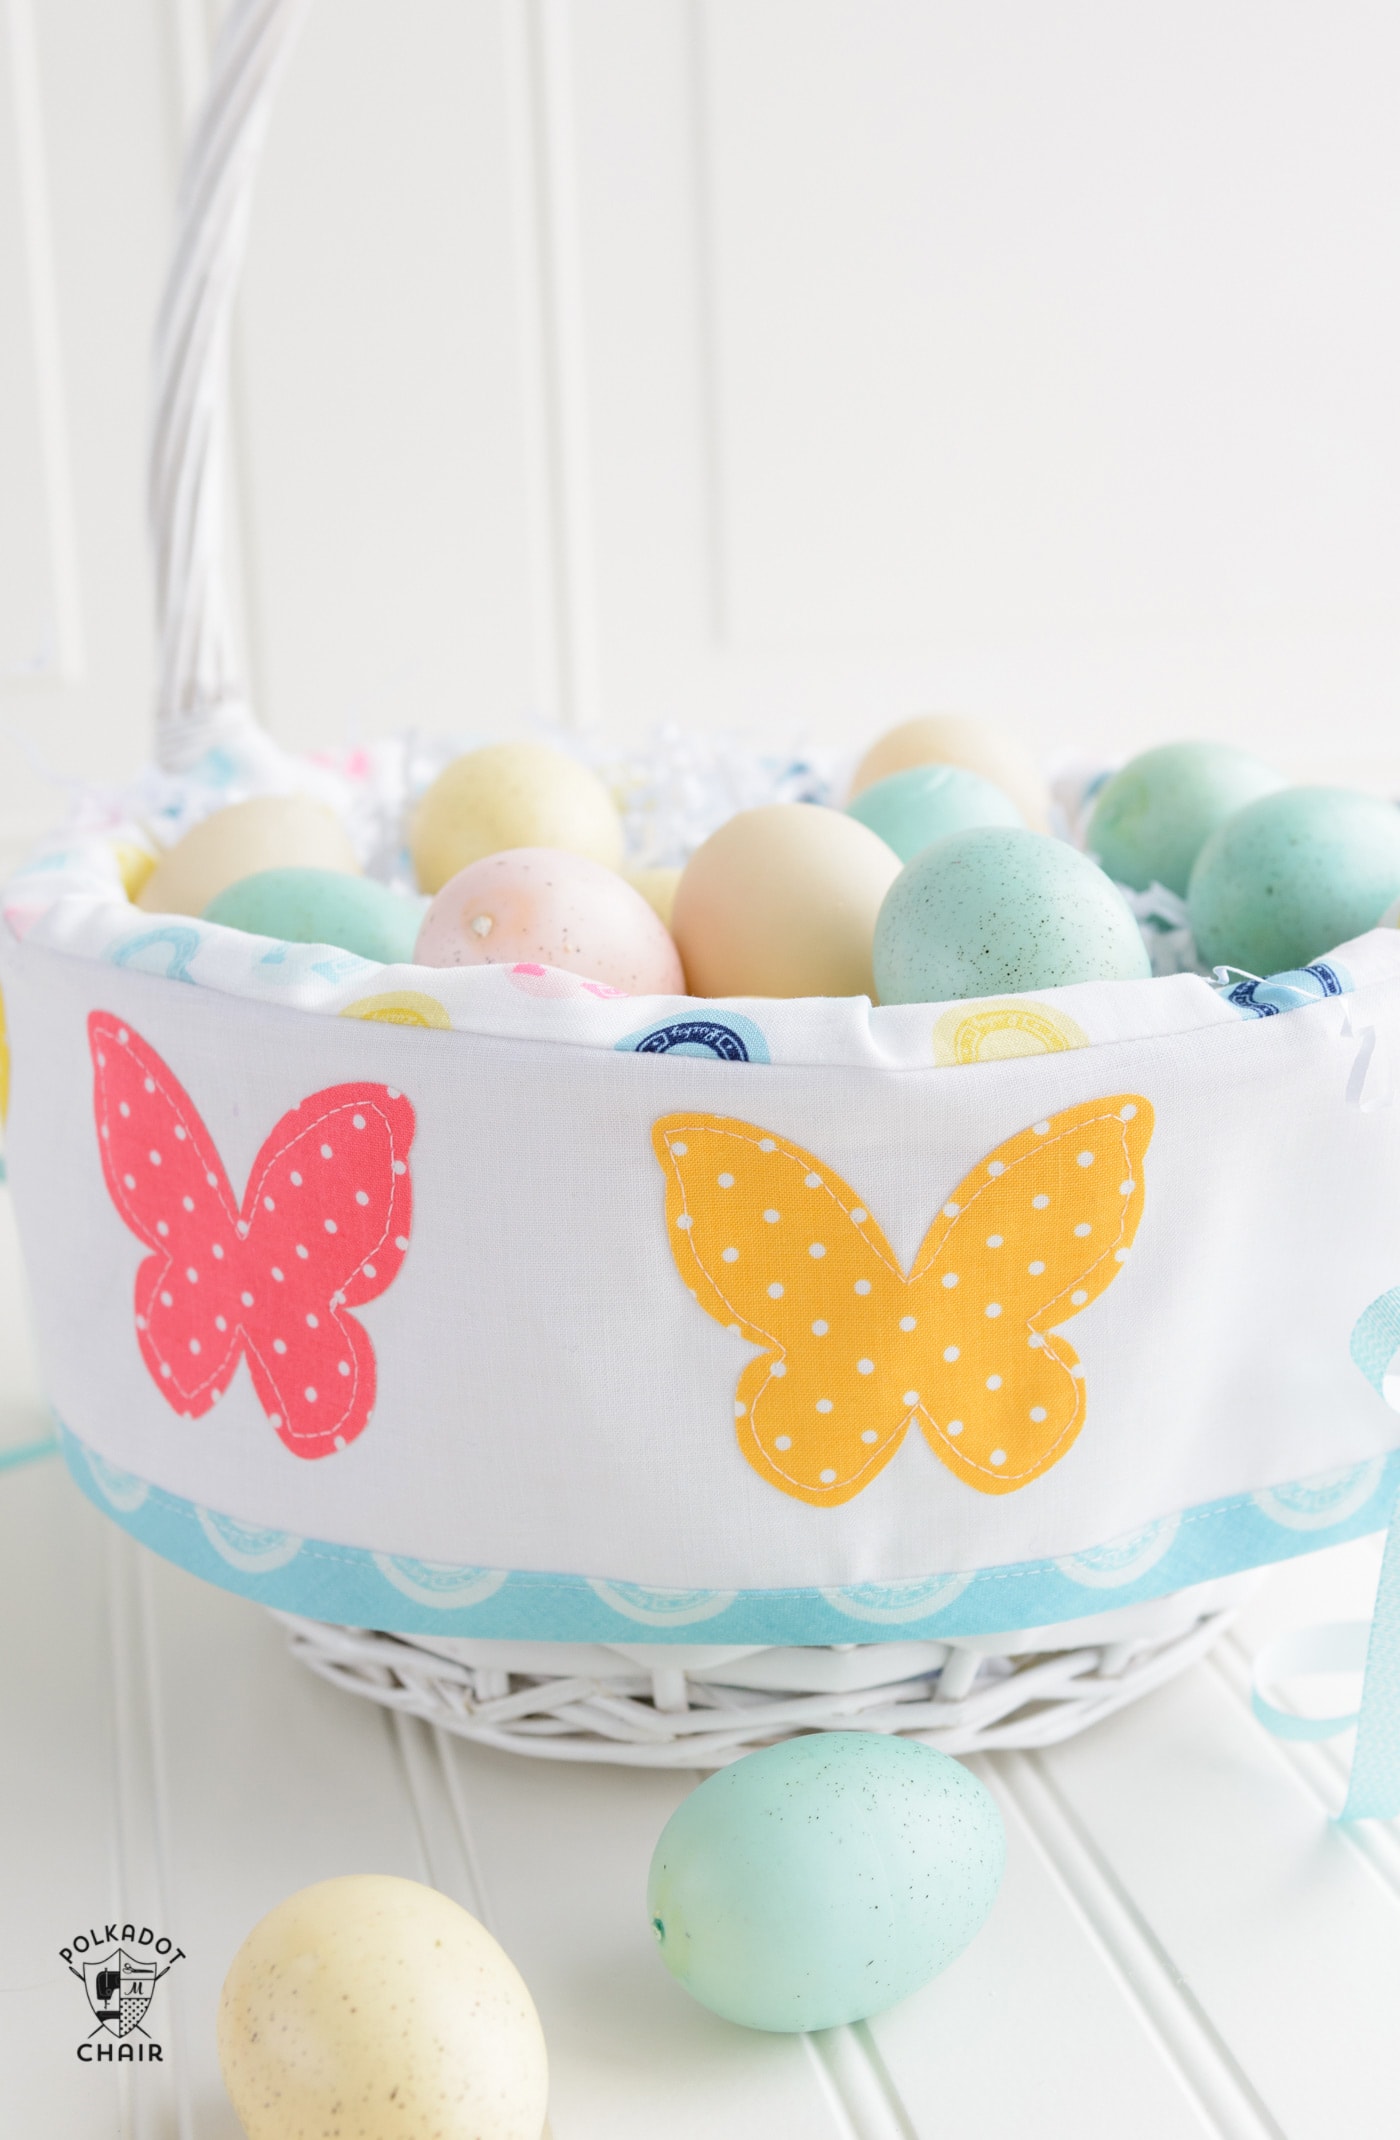
Step Four: Add the Appliques
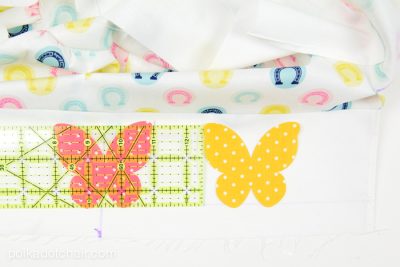
- Next, draw a line 1″ up from the bottom of the flap piece. Find the center of the flap and mark it. Place the first butterfly along the 1″ line and directly in the center of the flap. Then, place the other two butterflies on the flap, both an equal distance from the center butterfly (the exact measurement will depend on the size of your basket).
- Peel off the paper-backed liner from the butterfly and iron it onto the flap (there are exact directions on the package for fusing the butterfly into the fabric).
- Repeat for the other flap.

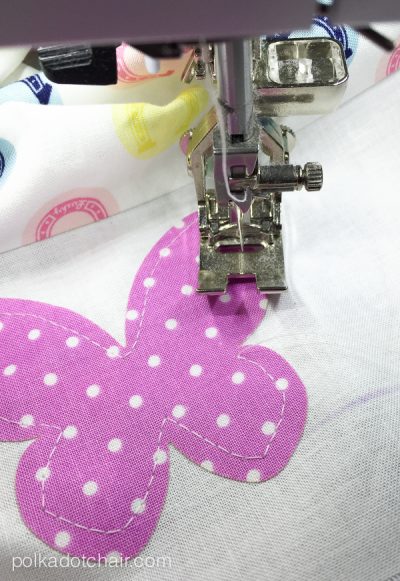
- Next, stitch around the diameter of the butterfly. Here are a few tips. If your machine has the option, set it to stop with the needle down. Also, pivot frequently and go slowly.
- Repeat for all six butterflies.

Step Five: Finishing
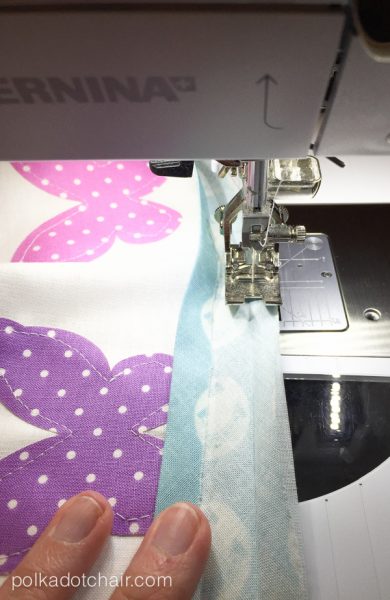
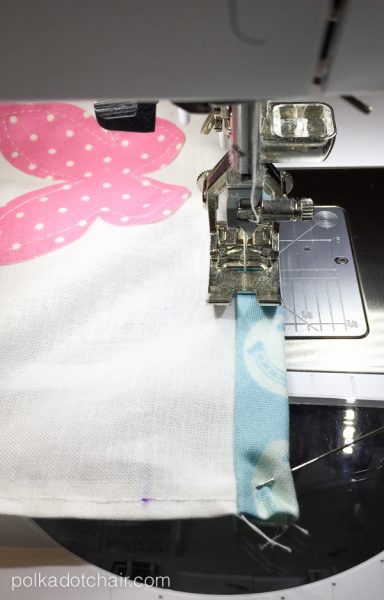
- Next, open up your double-fold bias tape and pin it to the edge of the flap raw edges. Turn under the start of the bias tape by 1/4″. Stitch in place by stitching just outside the fold line. When you reach the end, turn the bias under 1/4″ again and continue stitching.

- Refold the bias tape and stitch it in place on the right side of the flap piece.
- Next, feed the 1/4″ ribbon into the ends of the bias tape and stitch it in place.
How to Personalize a Basket Liner
- The flap portion of the liner seemed to be the perfect spot to add an extra little ‘somethin’. I was sent a couple of packages of pre-cut applique shapes by Shabby Fabrics and thought they would be cute to use on an Easter Basket.
- The shapes are laser cut (so you know they are precise) and come pre-packaged. There are a lot of different shapes to pick from, and they come in many other fabrics.
- You can also buy letters! It would make it super easy to add your child’s name to one side of the basket. It would be easy to create a personalized Easter basket liner, even if you don’t have an embroidery sewing machine.
- That is it!!!
This post was originally published in 2015 and has been updated and improved.
More Easter & Spring Sewing Projects
40+ Cute Things to Make for Easter
How to Make a Mini Fabric Easter Basket
I think there is a step missing, do you put a hem at top of fabric b4 adding flaps? The edge of top will be unfinished between handles. Am I missing something?
Just fold it under a scant 1/4″ and sew a tiny hem
You attempt to love them and they repeatedly are rude, disrespectful, and hurtfulAnd they are aware of what they are doing and do not wish to change?Divorce in my opinion of biblical scripture is not an option for loving one’s wife/husband is a commandHow is this reconciled? Does God reconcile this or is it because the person chose their spouse this is the situation that they will have to deal with?I think often about Hosea and GomerWhat is scripture regarding this manner?
Cute liner, love the butterflies. 24Tangent@gmail.com
Wonderful website. Lots of helpful info here.
I am sending it to several pals ans also sharing in delicious.
Annd naturally, thank you for your sweat!
Hi from Haberdashery Fun. Wanted to stop by and leave a comment – Love your Easter basket liner – Marni
So, so cute! Thanks for sharing.
So glad you like it!
This is adorable. Thanks for sharing!
Thanks Sarah!
That is so cute!
Simple and sweet! thank you for the tutorial
I love how you adorned a simple basket.
Thanks!
Pretty!! And works for any basket, Easter or not. I’ve got a Craft Gossip post that links to your tutorial here:
http://sewing.craftgossip.com/tutorial-easter-basket-liner/2015/03/22/
–Anne
Thank you Anne, I really appreciate it.
Thank you for the tutorial. I love the liners and I have some baskets that need one.
What a gorgeous idea for Easter! Simple and yet so effective! Now just have to find a basket!
Thanks Louise 🙂
I also love baskets with liners– luckily I had found some already lined a few years ago, but now I know how to update them when the time comes! Thanks!
This is so adorable! Thanks so much for sharing this!