• Skip to primary navigation
  • Skip to main content
  • Skip to primary sidebar

The Polka Dot Chair logo

  • SEWING
    • Free Sewing Patterns
    • Bag Patterns
    • Costumes
    • Apparel
    • Learn to Sew
    • Beginner Friendly
    • Embroidery Projects
    • Tips & Techniques
    • All Sewing
  • QUILTING
    • Quilt Blocks
    • Learn to Quilt
    • Free Patterns
    • Quilt Patterns
    • All Quilting
  • CRAFTS
    • Disney
    • Cricut
    • Printables
    • All Crafts
  • HOLIDAYS
    • Seasonal Projects
    • Valentine’s Day
    • Easter
    • 4th of July
    • Halloween
    • Thanksgiving
    • Christmas
    • All Holidays
  • TUTORIALS
  • ABOUT
    • About Me
    • My Fabric Collections
    • Published Books
    • Press
    • FAQ’s
    • Contact
  • SUBSCRIBE
  • SHOP
menu icon
go to homepage
  • SHOP
  • TUTORIALS
  • SEWING
  • QUILTING
  • SUBSCRIBE
  • CRAFTS
  • HOLIDAY PROJECTS
  • ABOUT
    • Published Books
    • My Fabric Collections
  • CONTACT
    • Facebook
    • Instagram
    • Pinterest
    • YouTube
  • subscribe
    search icon
    Homepage link
    • SHOP
    • TUTORIALS
    • SEWING
    • QUILTING
    • SUBSCRIBE
    • CRAFTS
    • HOLIDAY PROJECTS
    • ABOUT
      • Published Books
      • My Fabric Collections
    • CONTACT
    • Facebook
    • Instagram
    • Pinterest
    • YouTube
  • ×

    Home » Quilts » Free Patterns

    Sunshine & Stars Quilt Block – Just For Fun Quilt Along

    Updated: Jan 6, 2020 by Melissa Mortenson · This post may contain affiliate links · This blog generates income via ads · 5 Comments

    Today I’m excited to share with you the 3rd block in our Just for Fun Quilt Along. This block is called Sunshine and Stars. If you’re new here, welcome! You can jump right into the quilt along.

    Sunshine and Stars Quilt block being held up

    Happy May! Are you guys reading for the next block in our Quilt Along? If you’re new here, I’m hosting a year long free Quilt Along. You will make one block a month for 12 months and at the end of the year have a completed quilt top.

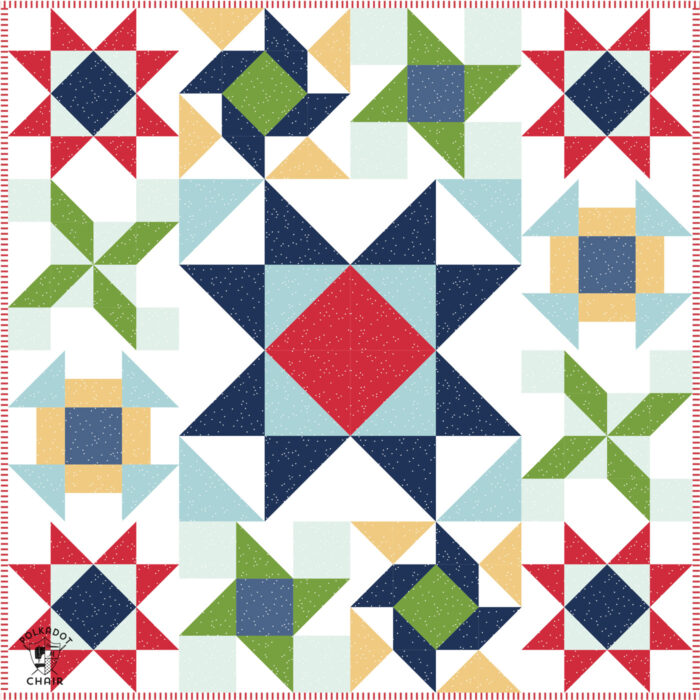
    The quilt is actually broken down into 6 blocks. You need to make at least two of each block, so you can make one block a month if you want to work it that way. Or you can just make them all when they are posted every other month. Whatever works!

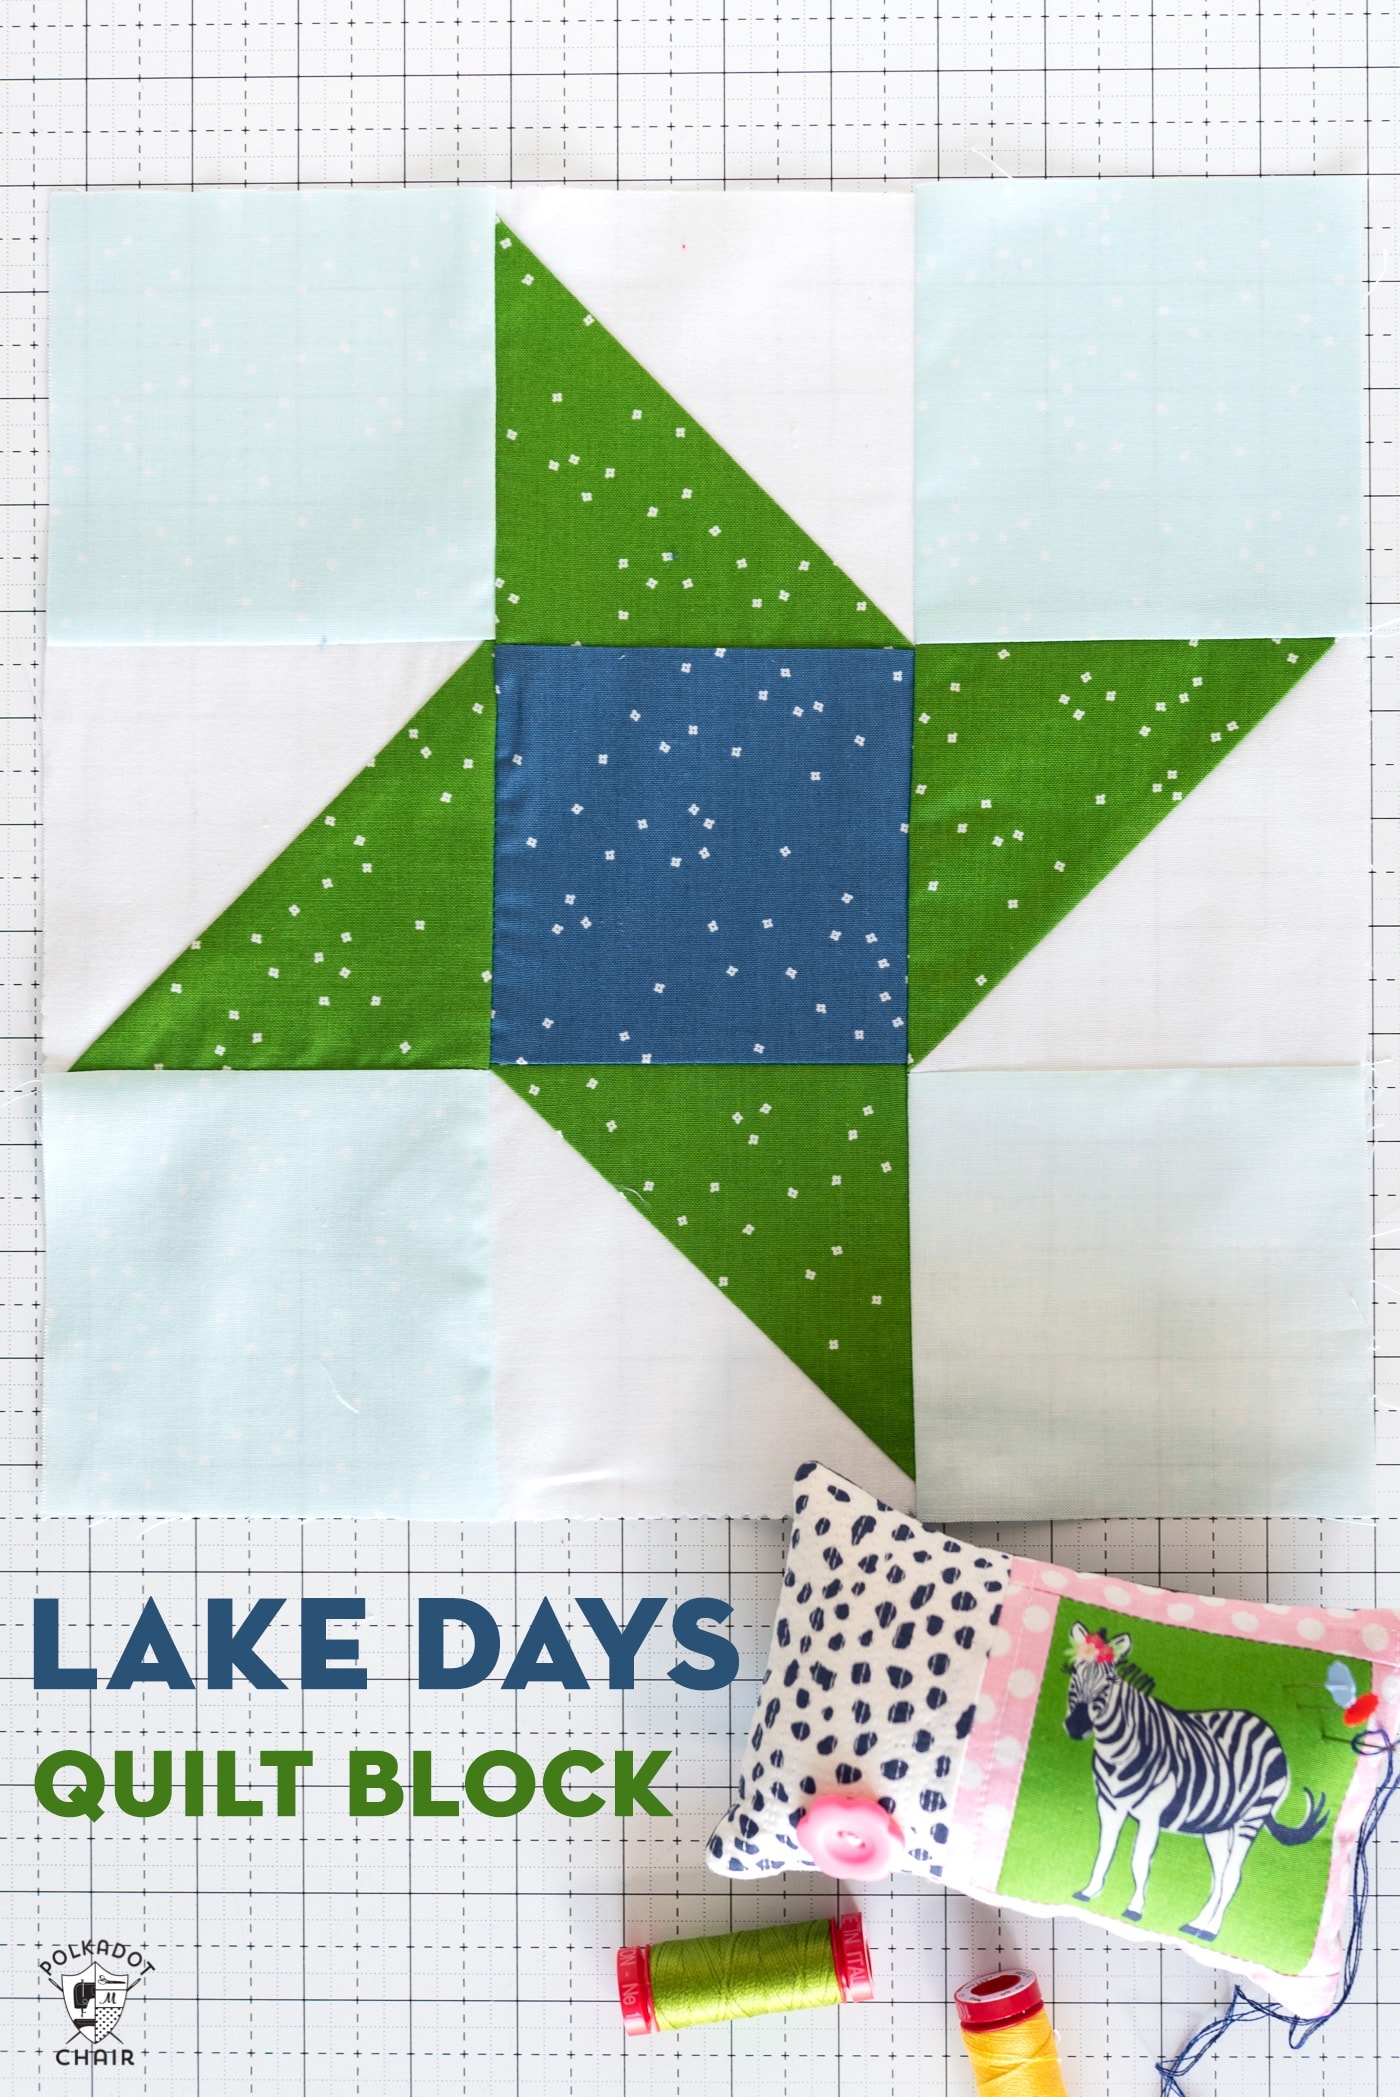
    I don’t know why but for some reason I had the hardest time naming this months block. The inspiration behind the quilt along was things that I like that are “Just for Fun” hence the name. The first month was called Under the Stars inspired by a night sky. The second quilt block was called Lake Days inspired by my love of “lake life”. This block I had SOO many names running around my head and I couldn’t pick one.

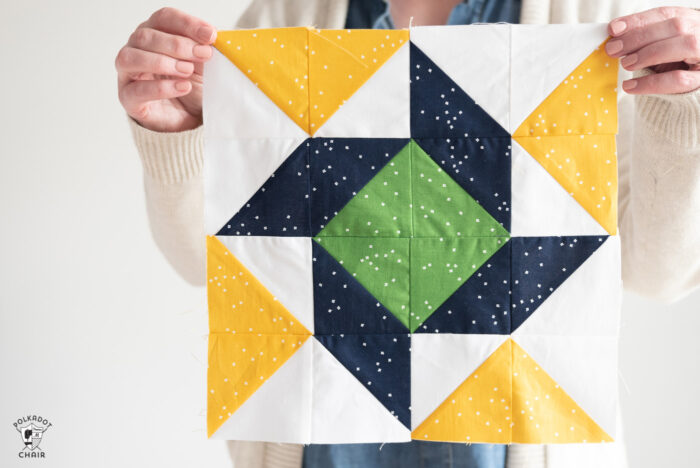
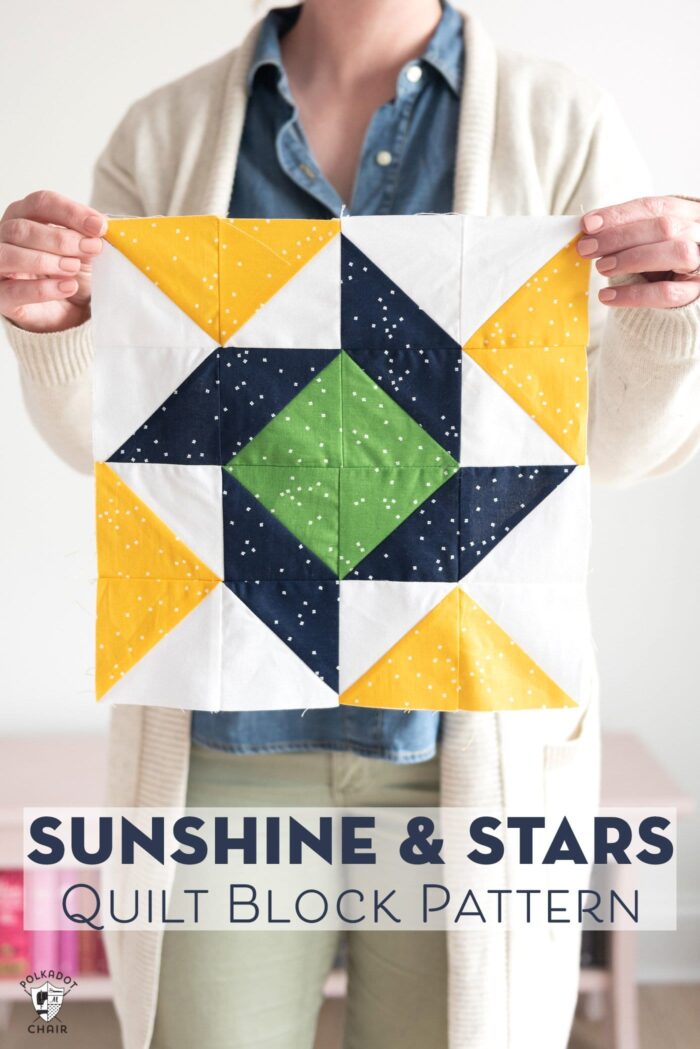
    I finally settled on Sunshine & Stars because the center of the block reminds me of a beach umbrella and the yellow of the block, sunshine. Plus that navy with the speckles totally looks like a starry night sky!

    UPDATE:

    Now that the Quilt Along is over, you can purchase a PDF with all of the Quilt Block in ONE document. It includes all of the blocks shared in the series in an “easy to print” format.

    • All of the Blocks in the Just for Fun Quilt Along:
    • Block One: Under the Stars
    • Block Two: Lake Days
    • Block 3: Sunshine & Stars
    • Block 4: Salt and Sand
    • Block 5: Bike Ride
    • Block 6: Road Trip

    How do I sign up for the Blocks?

    You don’t need to sign up for this quilt along! Just pop into the blog on the dates the blocks are posted (listed on this printable sheet).  If you want I’d LOVE for you to sign up for my weekly newsletter. Then you’ll be sure never to miss a post! (Plus we have lots of fun quilt projects here all year)

    [optin-monster-shortcode id=”vrbmhxkz5qwzgg51″]

    Join our Quilting Facebook Group

    Love to Quilt? Please join us in our Quilt Fun Facebook Group!

    Ready to make a block? Let’s go!

    If you’re brand new to quilting, here are a few tips to keep in mind:

    1- Be careful as you cut to keep your measurements precise.

    2- Double check your seam allowance on your sewing machine. You want it to be ¼″ exactly. I recommend marking that spot on your machine with a bit of washi tape so you don’t forget where it is.

    3- When you press your blocks, make sure you press up and down, not side to side. You don’t want to distort your blocks.

    Also check out: 3 Tips for Beginning Quilters & How to Make a Quilt from start to finish.

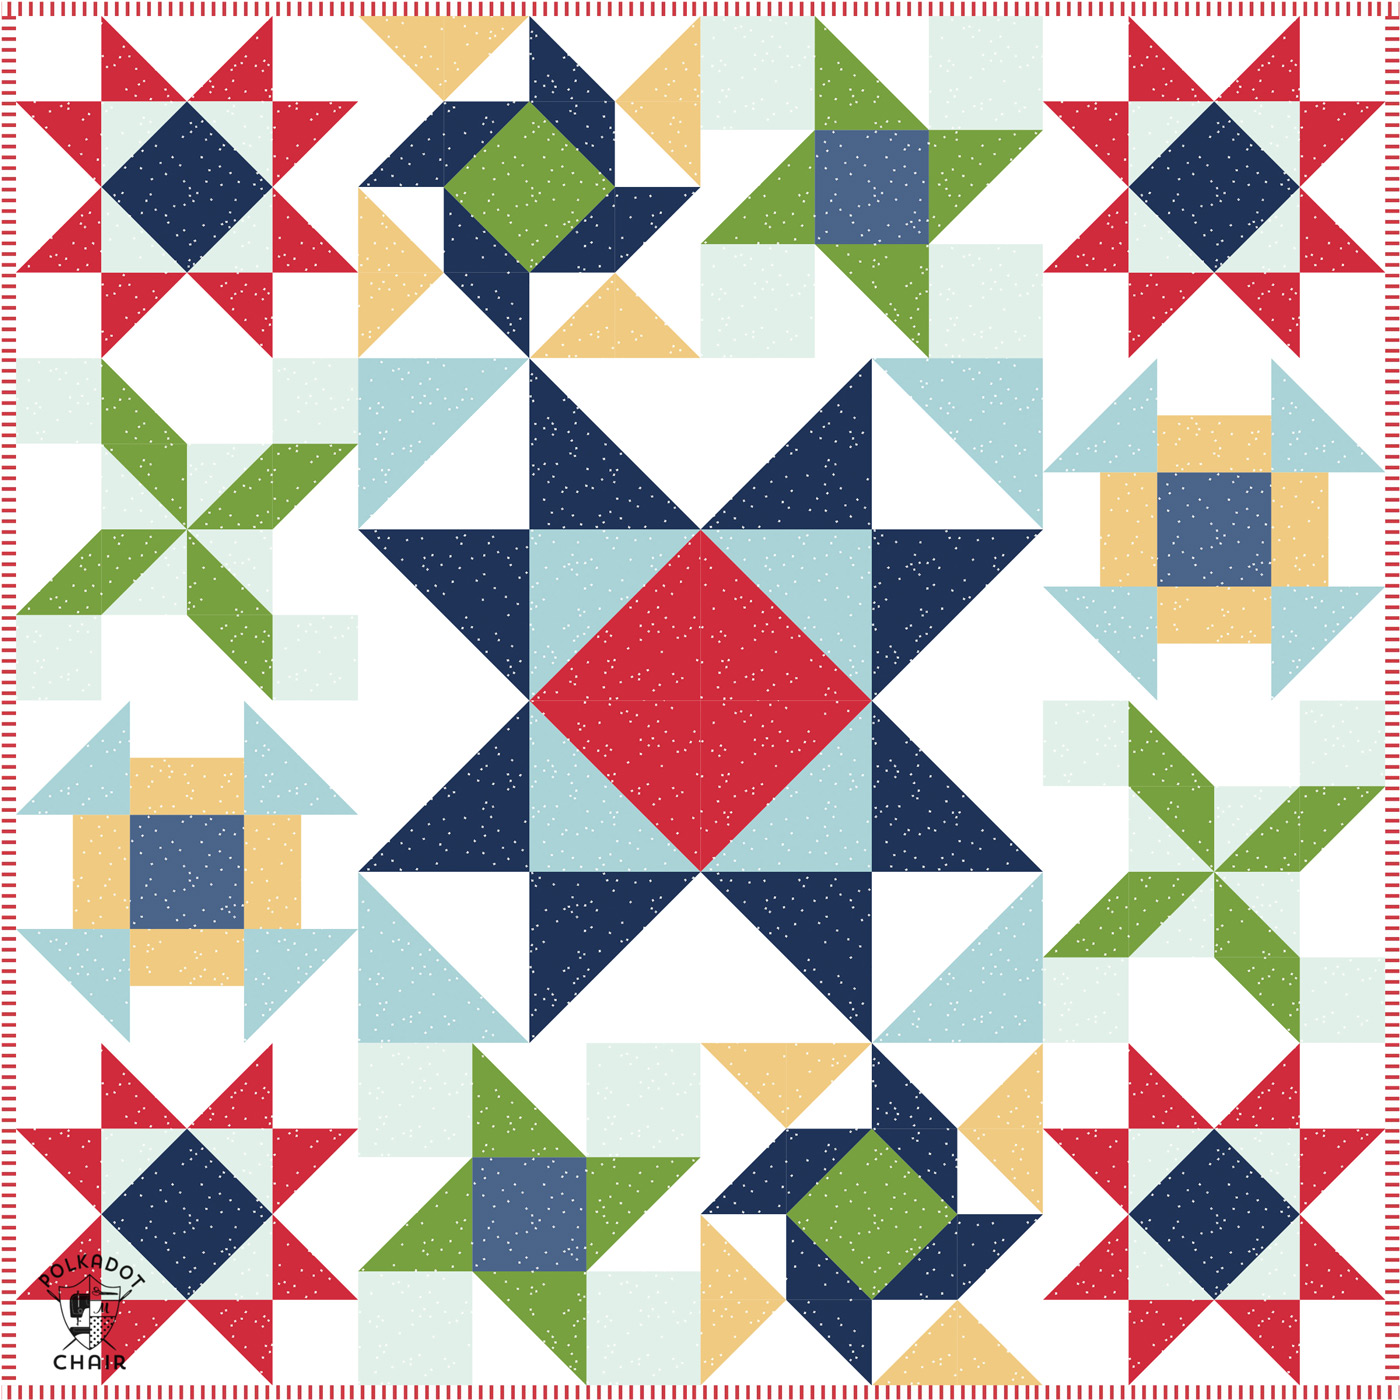
    As a reminder, here is what the layout of the completed quilt will look like.

    Star Quilt Block of the Month

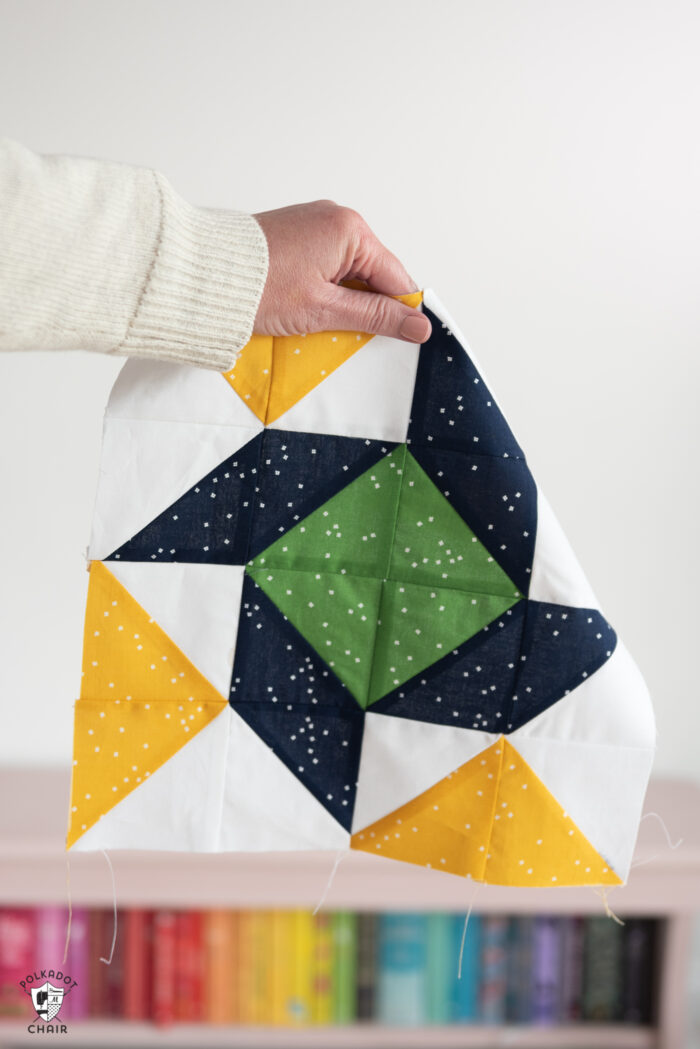
    Sunshine & Stars Quilt Block Pattern:

    You need to make TWO Sunshine & Stars Quilt blocks for the quilt. The directions are for ONE block. So DOUBLE this if you’re making both blocks for your quilt.

    The fabric featured in the quilt is the Blossom Basic by Riley Blake Designs.

    Cutting Directions per Block:

    • 4 pieces from Navy fabric, 4″ x 4″
    • 2 pieces from Green (color is called Holly) fabric, 4″ x 4″
    • 4 pieces from Yellow (color is called Honey) fabric, 4″ x 4″
    • 6 pieces from White fabric, 4″ x 4″

    Assembly Steps:

    Time needed: 1 hour.

    To Make the Summer Pinwheel Quilt Block:

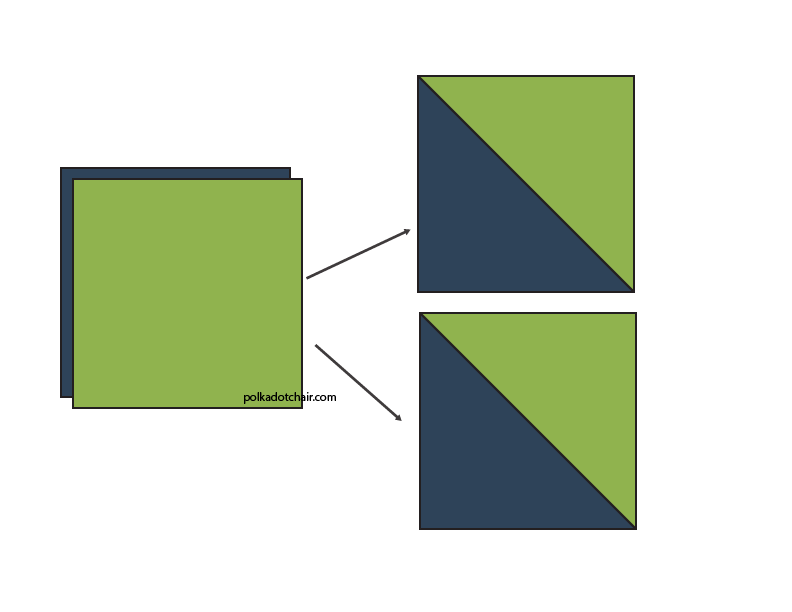
    1. Create the Half Square Triangles

      Using your squares of fabric, you need to create 16 Half Square Triangles. If you’re not familiar with the process you can click here to see a full Half Square Triangle (HST) tutorial.

      You need to create:
      4 Navy/Green HST
      4 Navy/White HST’s
      8 Yellow/White HST’s
      To make the Navy and Green HST’s layer one green square and one navy square as shown below.
      The steps are the same for the other color combinations.
      how to make a half square triangle

    2. Square up and Trim your HST’s

      After you have created your HST’s you need to square them up and trim them to 3 ½″ x 3 ½″. I like to use a Bloc-Loc ruler for this step.

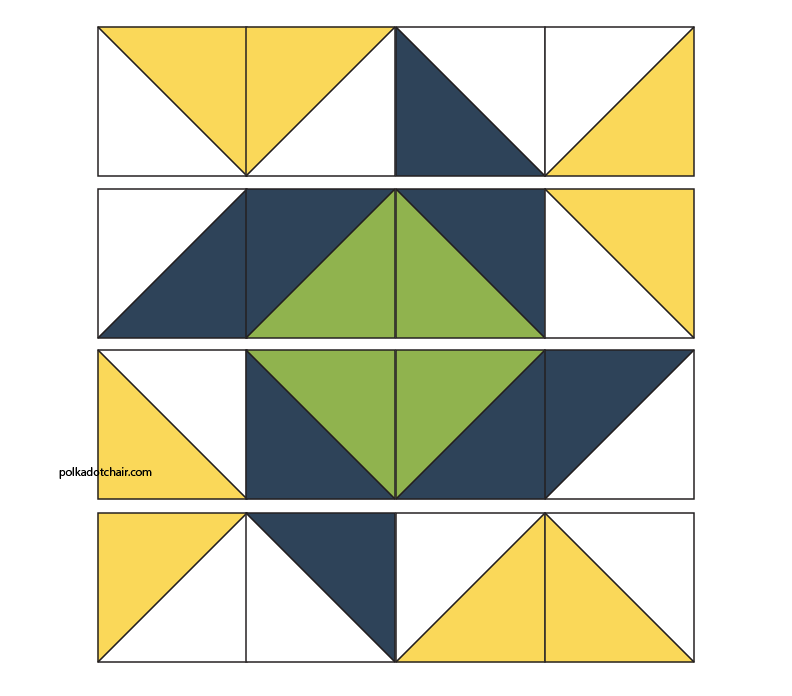
    3. Stitch Together by Rows

      Arrange the sewn HST’s as shown in the diagram. Stitch them together by rows. Stitch row 1, then row 2, etc.
      Assembled Summer pinwheel quilt block layout

    4. Sew the Block Together

      After you’ve sewn your rows, stitch the rows together to make a block. Stitch the bottom of row 1 to the top of row 2 and so on, until you’ve created the entire block.

    5. Repeat

      The Just for Fun Quilt features two Summer Pinwheel quilt blocks.

      You’ll need to repeat steps 1-4 to create a second quilt block.

      Star Quilt Block of the Month

    More Quilting Articles that you Might Like:

    Tips for Finishing a Quilt

    Quilt Block Construction Tips

    How to Make a Quilt from Start to Finish

    More Projects You May Enjoy

    • English Bloom Mug Rug; an EPP Project
    • 15+ Quilted Table Runner Patterns Perfect for Spring
    • First Edition; Book Quilt Block Mug Rug Pattern
    • 25 Free Patchwork Quilted Pillow Patterns

    • Share
    • Email

    About Author

    Melissa Mortenson

    Melissa Mortenson is a blogger, designer, and content creator. She is the Polka Dot Chair blog founder and has been sharing fresh and creative ideas with readers since 2008. She is the author of “Project Teen, Handmade Gifts your Teen will Actually Love.” Her work and designs have been featured on HuffPost, TODAY, Pioneer Woman, HGTV, BuzzFeed, Better Homes & Gardens, and many other established publications. Her first fabric line, “Derby Style,” debuted in January 2015 through Riley Blake Designs.  Additional fabric collections have followed it in subsequent years. A mom of 3, she considers herself lucky to be living in Kentucky.

    Reader Interactions

    Comments

    1. Mary Richardson says

      May 24, 2019 at 8:37 am

      I think it needs to be 6 white squares instead of 4 for each block…

      Reply
      • Melissa Mortenson says

        May 24, 2019 at 9:34 am

        You are right, thanks for the catch! I was using a stack of pre cut white squares when I made the block. I’ll get the illustration changed.

        Reply
    2. Colleen says

      June 06, 2019 at 5:41 pm

      Hi I just came upon your quilt along. Is there anyway I can start now? If so where are the first few blocks?

      Thanks
      Very excited Colleen

      Reply
      • Melissa Mortenson says

        June 07, 2019 at 9:51 am

        Yes, just click where it says “To see all of the blocks shared to date CLICK HERE”

        Reply
    3. Diane says

      July 28, 2022 at 9:26 pm

      What is the finished block size?

      Reply

    Leave a Reply Cancel reply

    Your email address will not be published. Required fields are marked *

    This site uses Akismet to reduce spam. Learn how your comment data is processed.

    Primary Sidebar

    Hello! It’s nice to meet you.

    I’m Melissa. I like to design things, like fabric, printables, and projects.

    I’m also a Mom and a Maker. I am like most of you, just trying to do my best every day. Some days I succeed, many days I fail.  I find joy in creating, if you do too, then I hope that you find something here bring a little “happy” to your life.  Find out more about me here.

    COPYRIGHT POLICY

    All my images and text are copyrighted. You may NOT use any images from this site in any kind of Video (this includes YouTube). If you would like to feature my work, you may use ONE (1) NON-COLLAGED image and must “follow” link back to my original blog post. You may NOT edit, crop, or change my images in any way without written permission. You MAY NOT print out or copy and distribute any text, images or patterns from this site. All patterns, content, instructions, and templates are for personal use ONLY! Thank you! Violators will be reported.

    Footer

    ↑ back to top

    About

    • Privacy Policy
    • Disclaimers
    • About Melissa
    • Instagram
    • Facebook
    • YouTube
    • Pinterest

    Newsletter

    • Sign Up! for emails and updates

    Contact

    • Contact
    • FAQ
    • Press
    • Published Books
    • Fabric Collections

    Welcome to the Polka Dot Chair! Here you’ll find easy, step-by-step, sewing, quilting, and crafting projects. We design projects for Makers of all skill levels. Beginners are welcome!

    DISCLAIMER:

    While every effort has been made to ensure the accuracy of the content on this website, the information is made available without warranty of any kind. The Polka Dot Chair accepts no responsibility or liability, whether direct or indirect, as to the currency or accuracy of the information, nor any consequence of its uses. This website is not intended to substitute the advice of a professional.

    Copyright © 2022 Polka Dot Chair

    [ Placeholder content for popup link ] WordPress Download Manager - Best Download Management Plugin