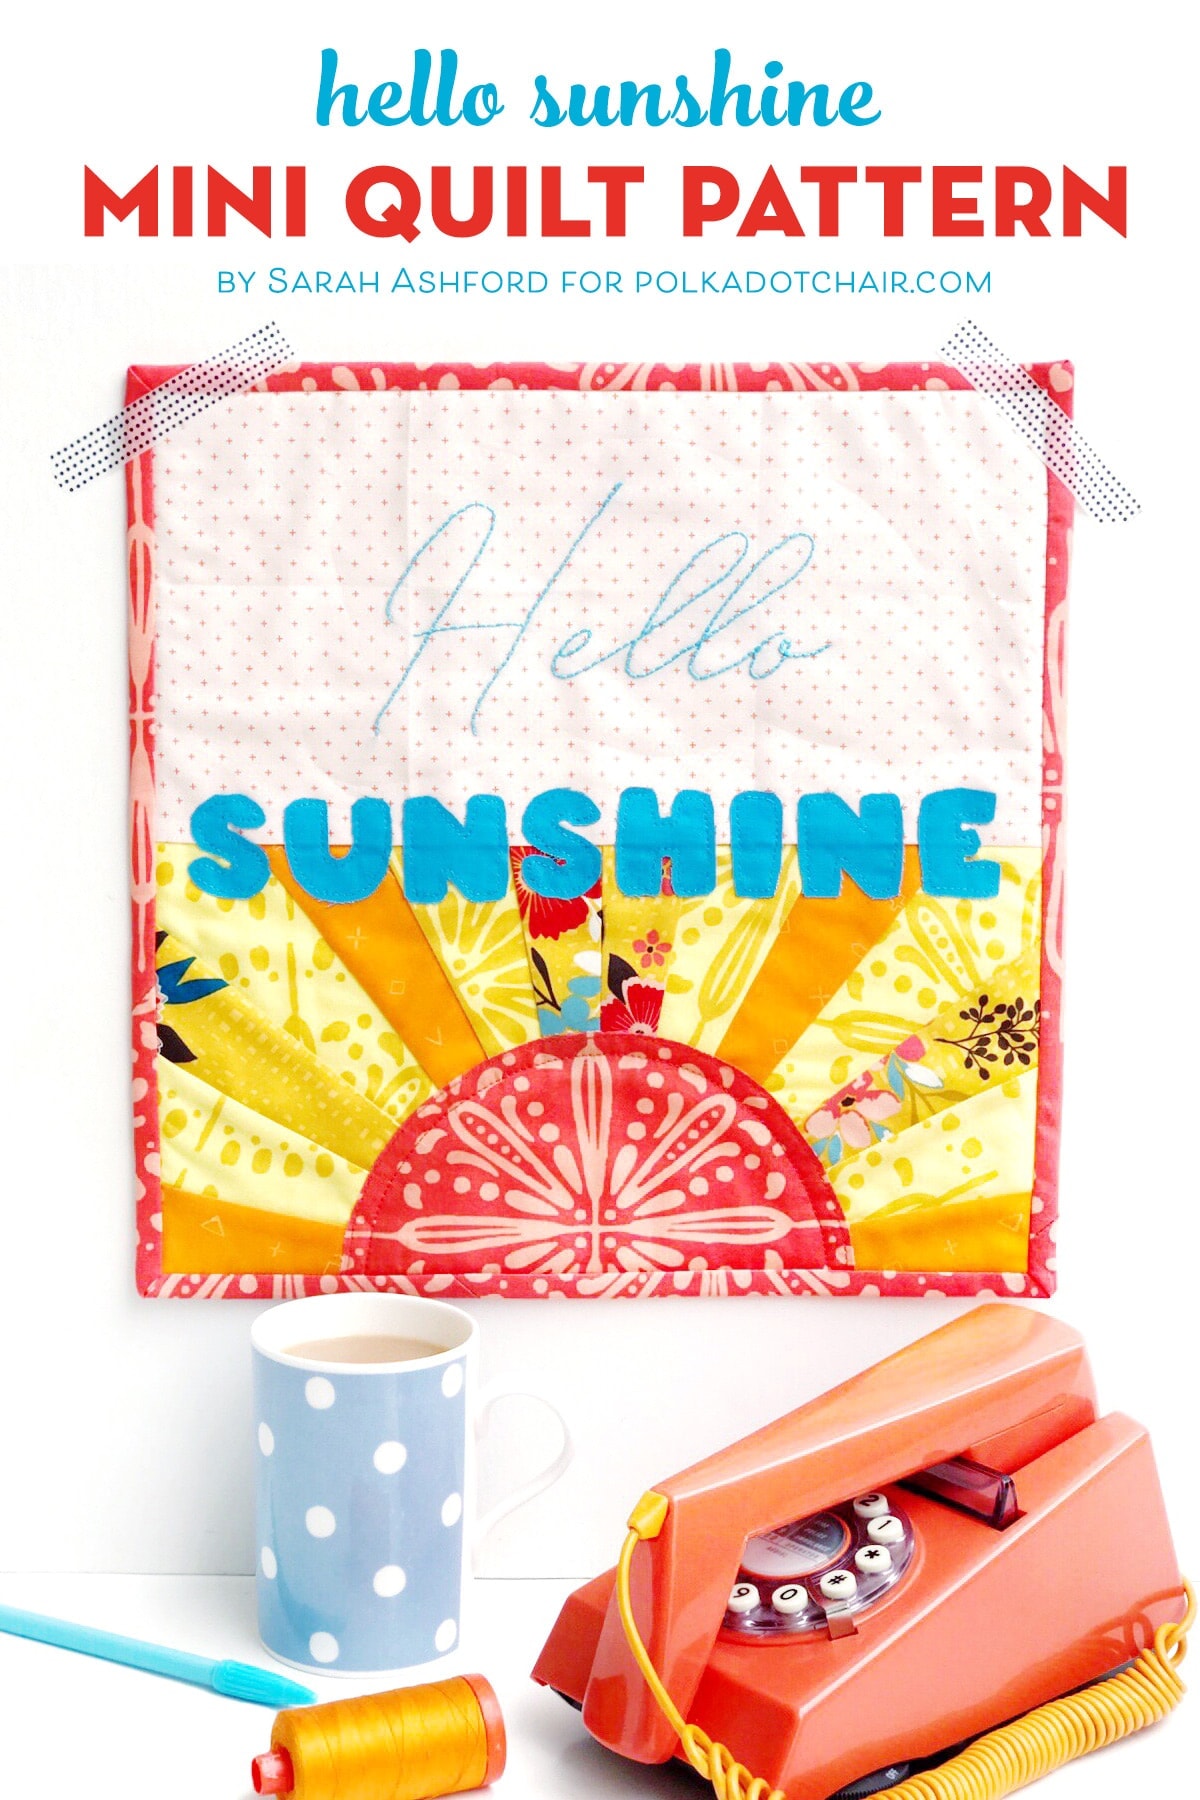
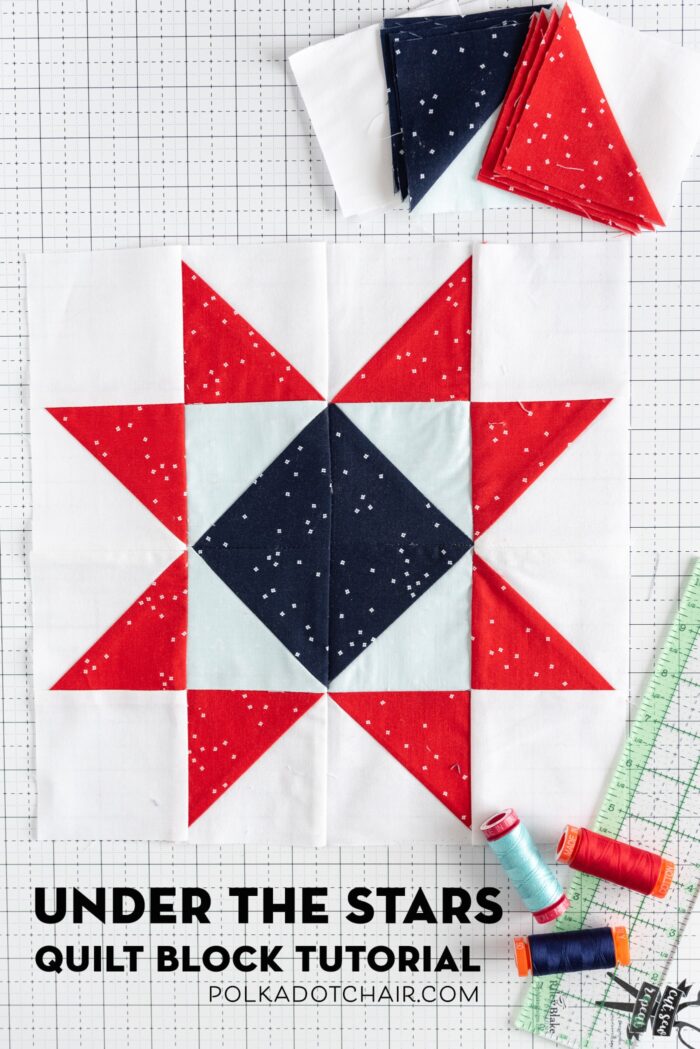
Under the Stars Quilt Block Pattern – Just for Fun Quilt Along
I’m so excited to start our Block of the Month series! The quilt pattern is called, Just for Fun, and the first block in the series is called Under the Stars. It is inspired by my love of summer evening outdoors! Keep reading to find out how to make the block, to see all the posts in this series, you can CLICK HERE.
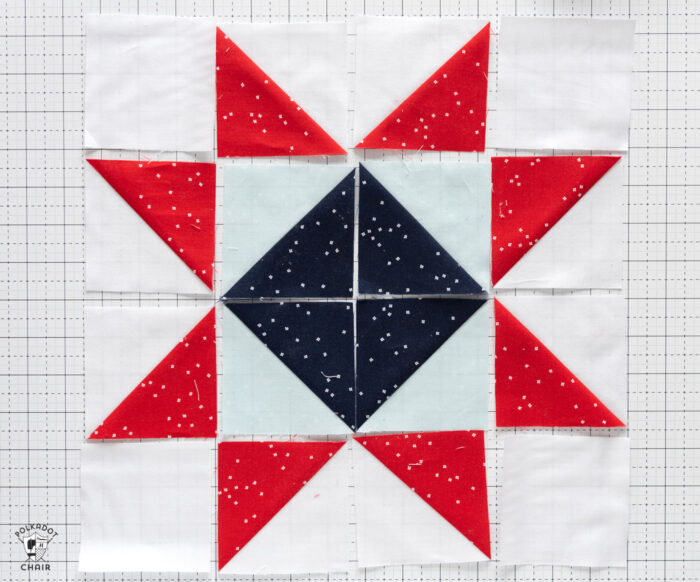
I’m so glad that you are here, I hope you are excited to make this quilt block. As a reminder here is what the finished quilt will look like.
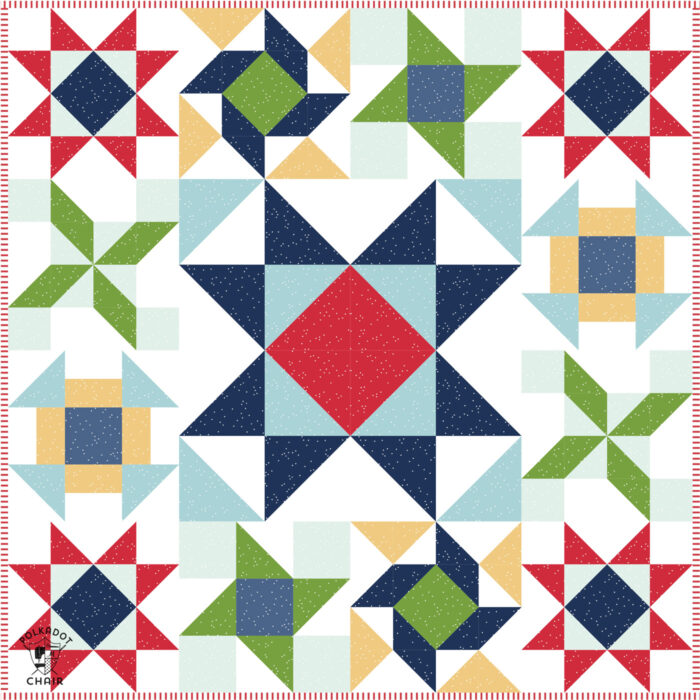
If you’ve jumped in mid-project, to “sum up” the Just for Fun quilt is a quilt block of the month program being hosted by me (Melissa Mortenson) online at the Polka Dot Chair. There are 6 different blocks in the quilt, and I will post one quilt block tutorial every other month this year, the Under the Stars Quilt Block is the first block in the series.
UPDATE:
Now that the Quilt Along is over, you can purchase a PDF with all of the Quilt Block in ONE document. It includes all of the blocks shared in the series in an “easy to print” format.
The Just for Fun quilt features four Under the Stars Quilt Blocks, you can choose to make all four blocks this month, or save some of the blocks for the months that there is not a new quilt block tutorial posted. It’s up to you. I do think it’s easier to make a few quilt blocks at a time since you’re already cutting the fabric.
Under the Stars Quilt Block Pattern:
Cut for one Block:
As a reminder, there are 4 Under the Stars Blocks in the quilt.
From White Fabric:
4 pieces 3 1/2” x 3 1/2”
4 pieces 4” x 4”
From Navy Fabric:
2 pieces 4” x 4”
From Bleached Denim Fabric:
2 pieces 4” x 4”
From Red Fabric:
4 pieces 4” x 4”.
Step One Create the Half Square Triangles:
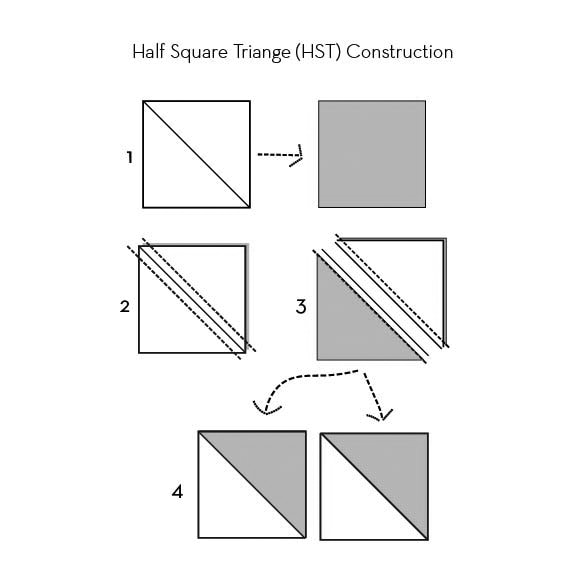
If you need more help creating Half Square Triangles (referred to as HST’s) you can see THIS post complete with lots of photos to help you with all of the steps.
Red & White HST’s:
Using the 4” x 4” white pieces and the 4” x 4” red pieces create 8 half square triangles that are Red & White. You will need 4 white squares and 4 red squares.
After you’ve sewn your blocks, trim and square the pieces to 3 1/2” x 3 1/2”
Bleached Denim & Navy HST’s:
Using the 4” x 4” Navy fabric pieces and the 4” x 4” Bleached Denim Fabric pieces, create 4 Half Square Triangles that are Navy & Bleached Denim. You’ll need 2 Navy squares and 2 Bleached Denim squares to do this.
After you’ve sewn your blocks, trim and square to 3 1/2” x 3 1/2”
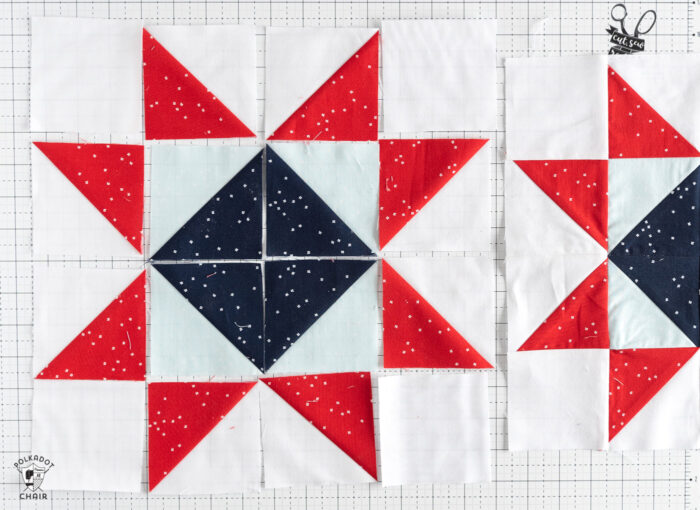
Step Two: Assemble the Block
There are a few different ways to assemble this block. I think it’s the easiest to stitch it together by rows.
I’ve laid out the rows of the block for you above. As you stitch the rows together press the seams to one side. I prefer to press the seams of the odd rows to the left and the even rows to the right. This allows the seams to nest nicely with each other as they are sewn together.
After your block is sewn it should measure 12 1/2″ x 12 1/2″, making it a 12″ finished quilt block.
Love to Quilt? Please join us in our Quilt Fun Facebook Group!
If you’re new to quilting you might want to check out these posts to help you a bit with the construction of the quilt blocks: