
Large Hexagon Quilt Tutorial
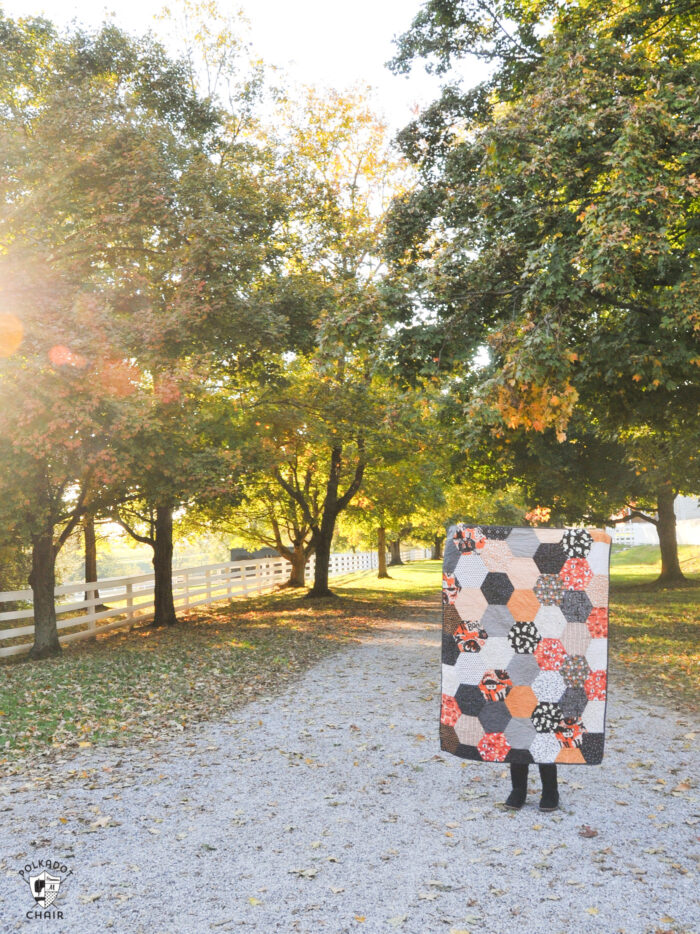
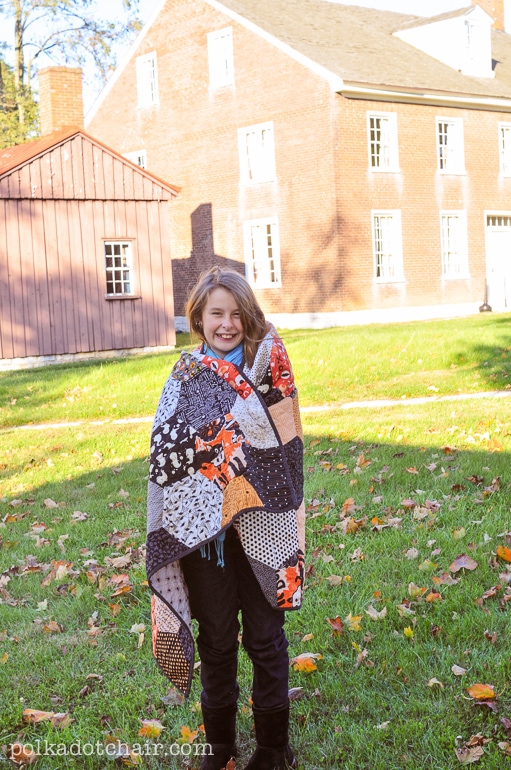
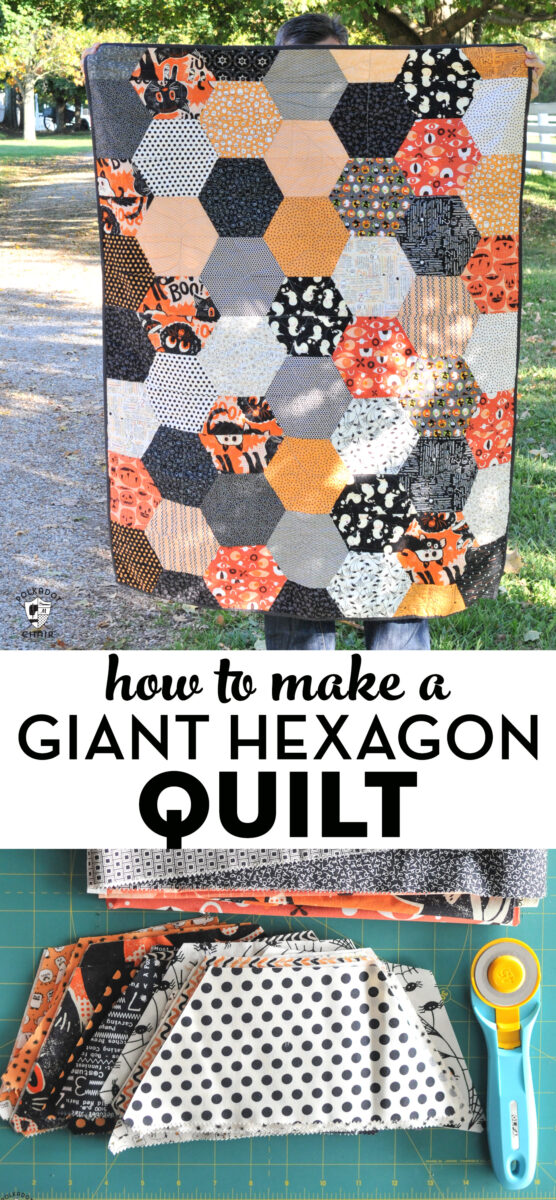
Hi there! I’m so excited today to share the tutorial for this Large Hexagon Quilt with you. I was able to whip this Halloween Quilt up very quickly using half hexagon quilt pieces, this free Hexagon Quilt Pattern, and a bunch of Halloween fabric fat quarters.
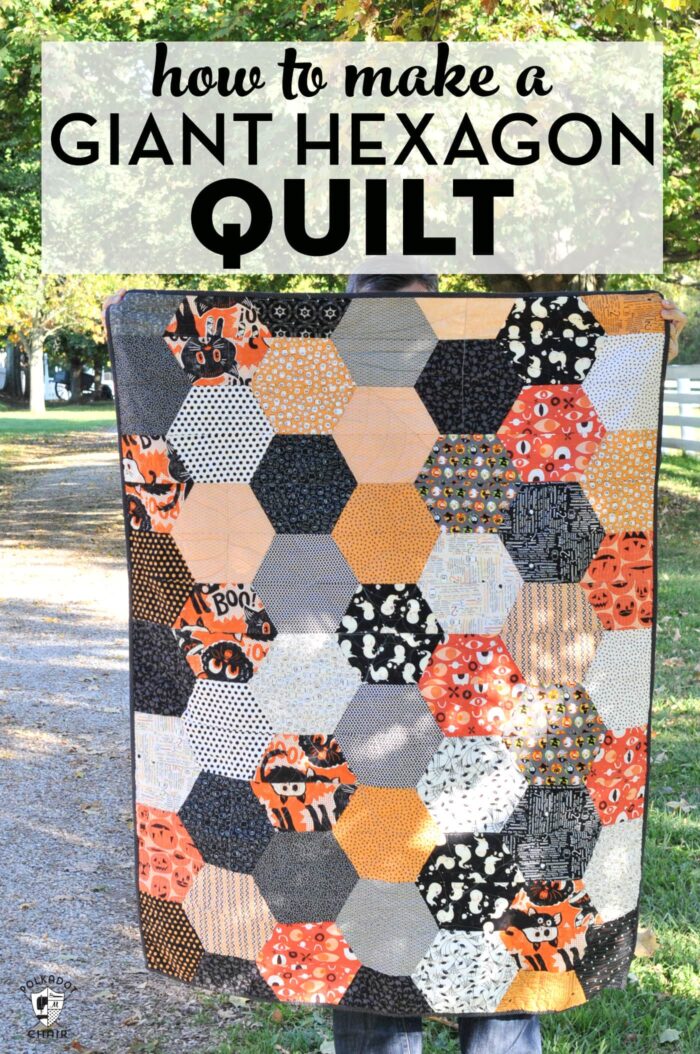
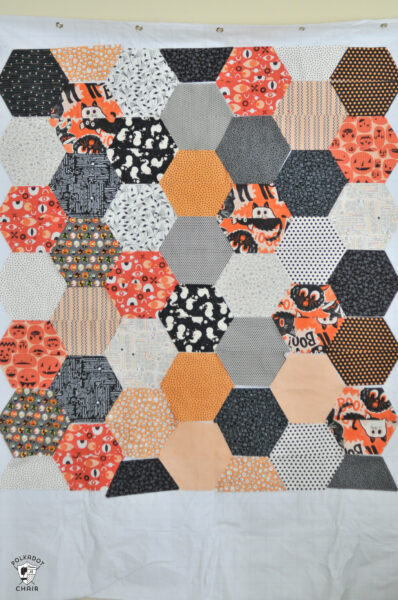
This large hexagon Halloween quilt comprises an extremely random selection from my Halloween fabric stash.
I decided to stick to blacks, oranges, and whites, trying to vary the scale of the prints for interest. I think that all large-scale prints would have been a bit overwhelming for this quilt size.
However, I think the large hexagon shape lends itself well to both large and novelty prints. It’s a great quilt to make if you’re looking to use up a lot of fabric scraps.
You could easily use this Large Hexagon Quilt pattern to make a quilt for any season or occasion. It does not have to be a Halloween quilt. This pattern would also make a great baby quilt!
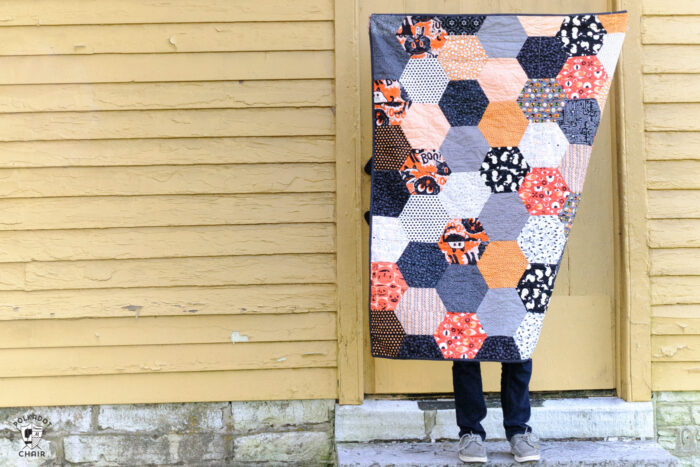
Why This Quilt is Constructed with Half Hexagon Pieces
Usually, when you piece hexagons together for a quilt, you have a difficult to sew “Y” seam. To avoid having to sew Y seams, I used a special half hexagon quilt ruler when I cut out my quilt.
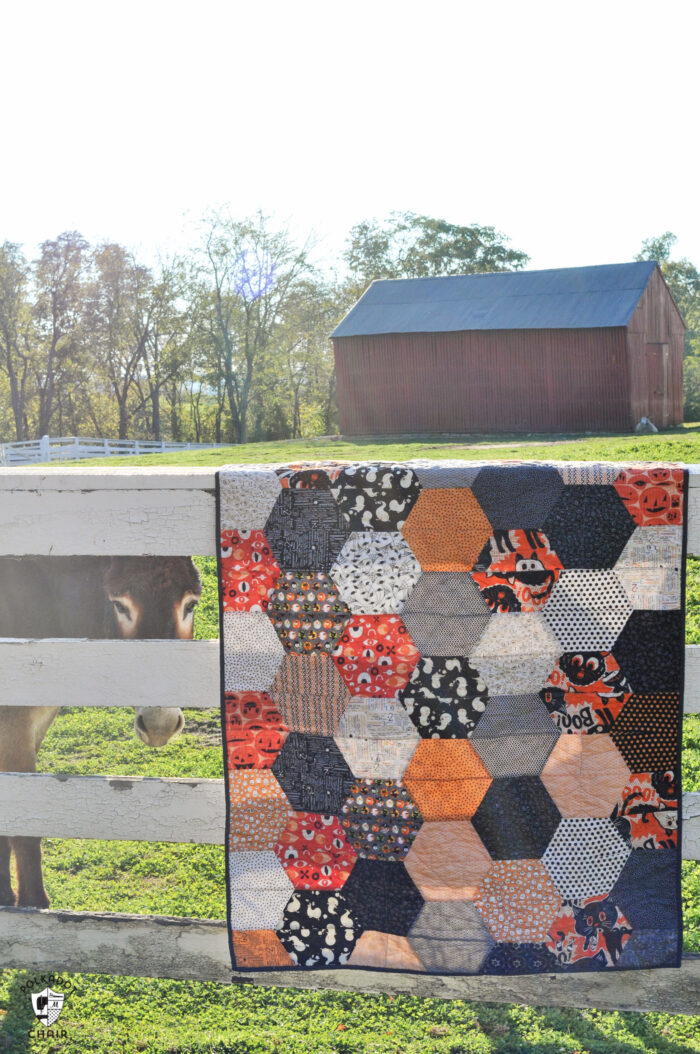
By cutting the hexagon in half you can avoid this by sewing 1/2 hexagon shapes together in rows, thus avoiding Y seams.
Just know that you have to plan ahead to get the look you want.
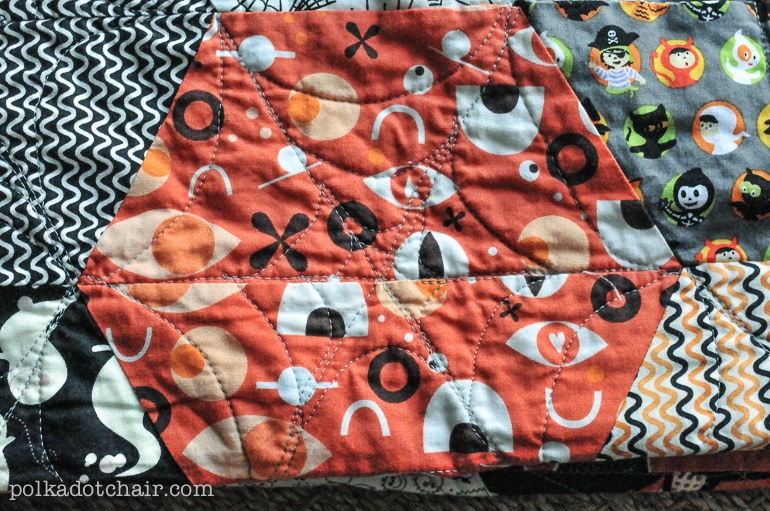
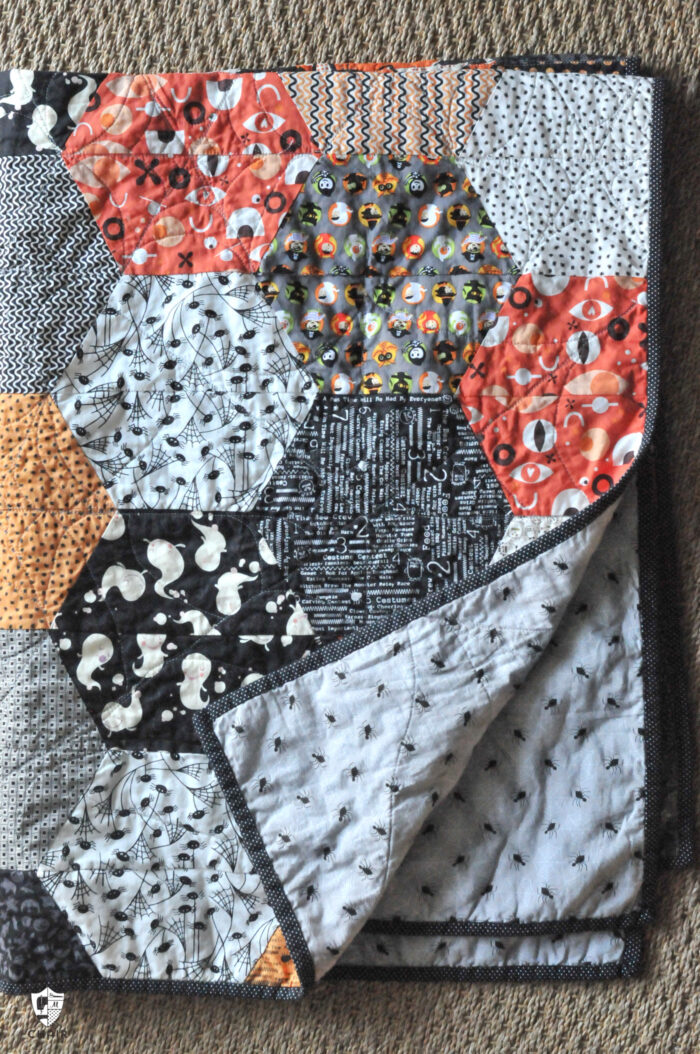
To finish the quilt I decided to free-motion quilt spiderwebs onto the quilt. I couldn’t bring myself to quilt a spider web in every hexagon (although that would have been cool), so I chose to quilt 5 large spiderwebs and then fill in a few of the hexagons with their own web.
The photos of the finished quilt were taken at Shaker Village in Kentucky. It is one of my favorite places to visit in Autumn.
How to Cut out the Half Hexagons
This post is a few years old. I’ve gone through and updated it extensively. You now have 3 different options to cut out the hexagons for your quilt. I’ll briefly discuss each of them.
Option 1: Use a Quilt Ruler
You can use a half hexagon quilt ruler to cut out the pieces for this quilt. I’ve linked to one in the instructions. The ruler I used is 9″ wide and sized to fit on a 10″ piece of fabric. This makes this quilt particularly easy to make since you can use a pre-cut stack of fabric.
Option 2: Paper Template
If you choose this option, you’ll need to get the PDF of the template then print it out and cut it out. You can cut the template from template plastic so that it will hold up better as you complete your quilt. You can find the information to get printable under this post’s “How to Get the Hexagon” section.
Option 3: Cricut SVG File
In my opinion, the easiest way to cut out this quilt is with a Cricut Maker and a pre-cut 10″ stack of fabric. Get the SVG file in our Cricut Library. Upload it to Cricut Design space, then insert it into your project twice.
What is a Cricut? A Cricut Machine is an electronic cutting machine. It hooks up to your computer via USB or Bluetooth and cuts images you send to it, much like a printer. It just cuts instead of prints. It can cut vinyl, paper, fabric, and much more. The images are all digital; you can upload your own images or buy images in the Cricut Design space individually. You can read my full review of the Cricut Maker Machine HERE.
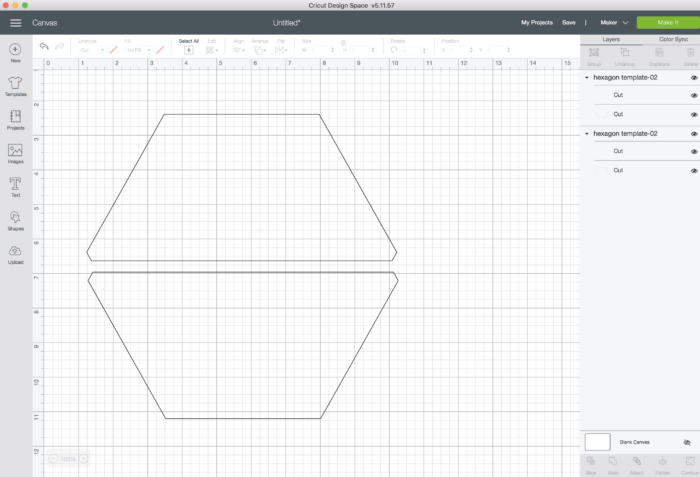
Flip the pieces so they are on top of each other. One right side up and one upside down. Select both pieces, then ATTACH in Design Space.
When you select “Make it,” double-check that the entire cut will fit on the 10″ piece of fabric (you can see a grid on the preview screen), and use your mouse to move the design if necessary.
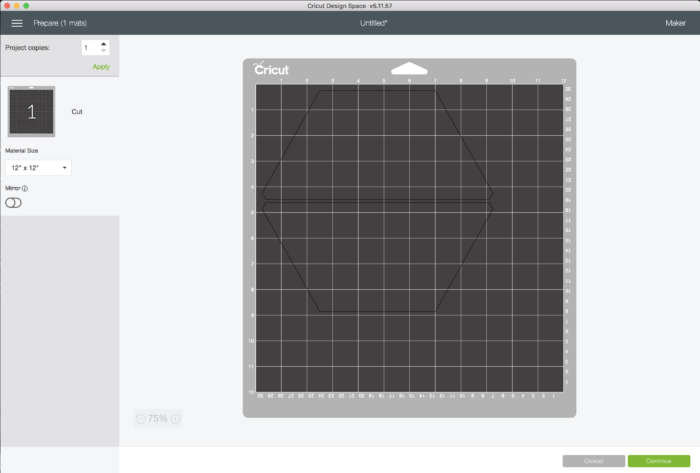
Then select Continue and keep cutting until you are done. If you tell the machine to make 53 copies, it will prompt you to insert a new mat. It will go very quickly. To see more about cutting fabric with a Cricut Maker, you can check out our detailed tutorial.
How to Get the Hexagon Templates
Fill out this form, and we will email you BOTH the Printable Half Hexagon Template and an SVG File that can be used with a Cricut Machine.
Large Hexagon Quilt Pattern
Instructions
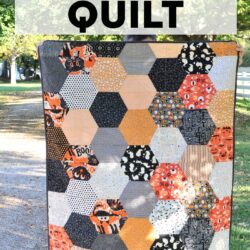
Giant Hexagon Quilt Pattern
Equipment
supplies
Half Hexagon Template; Choose 1 Option
- Half Hexie ruler that is 9" Wide OR You can also use the paper template linked below on our site.
- Paper Template for Half Hexie Ruler Obtain for free using the form on this page.
- Half Hexagon SVG File for Cricut Maker Machines Obtain for free using the form on this page. Make sure template is 9" tall when imported into Cricut Design Space.
Fabric
- Option 1: Buy a 10″ stacker of fabric. You can cut 1 completed hexagon from each 10″ piece of fabric. You will need 53 10″ pieces for this quilt as shown. Most pre-cut stacks come with 42 pieces, you will need a few additional pieces of fabric to complete the quilt.
- Option 2: Various Fabric Prints- enough to cut 53 10” squares. You could, in theory, get 2 full hexagons from one fat quarter. Which means you need a MINIMUM of 27 Fat Quarters.
- 3 Yards Fabric for backing
- Batting I prefer 100% cotton.
- 1/2 Yard Binding Fabric Assumes binding cut to 2 1/2" wide.
Instructions
Cutting:
- Cut 106 half hexagons from your prints in groups of 2. Which works out to be 53 sets. (remember that the hexagon is cut in half, and you will sew it back together).
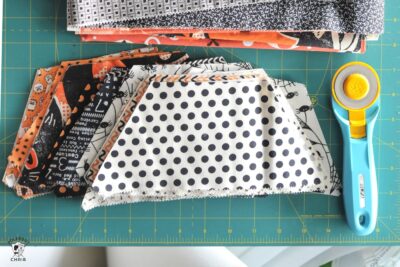
- A note about fabric direction: I chose not to try to match the direction of the prints on my half hexagons. As I was cutting out my fabrics I didn’t try to match the “repeat”. You can spend a bit of extra time when cutting if you wish to match the pattern of the fabric on the pieces. Just be sure to account for the 1/4" seam allowance. Remember as you sew the pieces together that one half-hexagon is right side up and one is upside down, so flip your template when you cut the second piece so all of the fabric is facing the same direction when sewn.
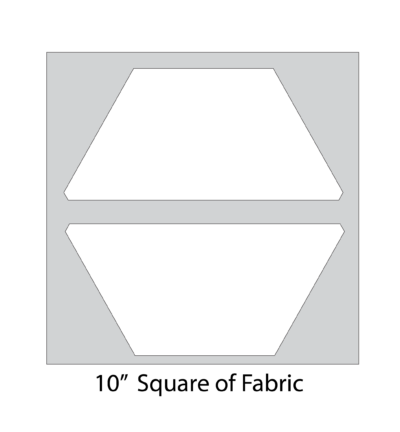
- You can cut the way you think is easiest. If you want to first cut 53 10” squares then cut your hexagons from that you can. If you are not concerned about fabric direction, you can fold the 10" piece of fabric in half and cut out both pieces at the same time. This is what I did.
- TIP: A spinning cutting mat and it made quick work of cutting out the shapes.
Layout the Cut Pieces:
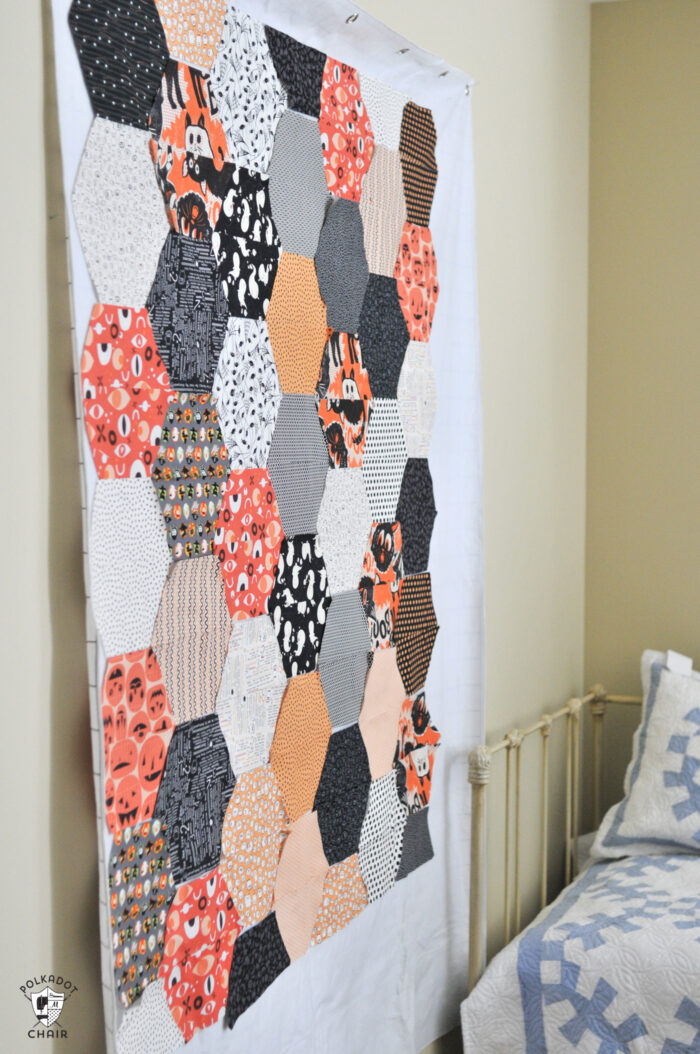
- You’ll need to pre-plan your layout before you start sewing. Layout your half hexagons so that you have 7 half hexagons across by 15 half hexagons down.Make sure that your prints match up to create the full hexagon when sewn together. I used a design wall for this (linked above). If you don't have a design wall, just layout the pieces on the floor.
Sew the Half Hexagons Together:
- Start sewing the 1/2 hexagon shapes together by row, along the short edges. Making sure to keep them in the exact same order as when you laid them out.
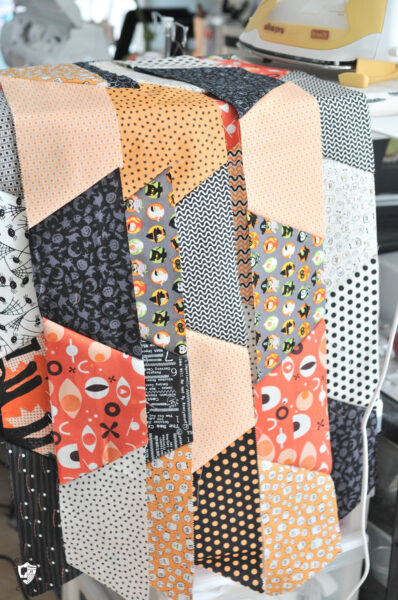
- Use a 1/4” seam allowance. I always label my rows with a water-soluble pen, so I know what order they go back together.
- Now press the seams to one side. Press the seams on the odd # rows to the right and the seams on the even # rows to the left.
- Sew your rows together.
Finishing:
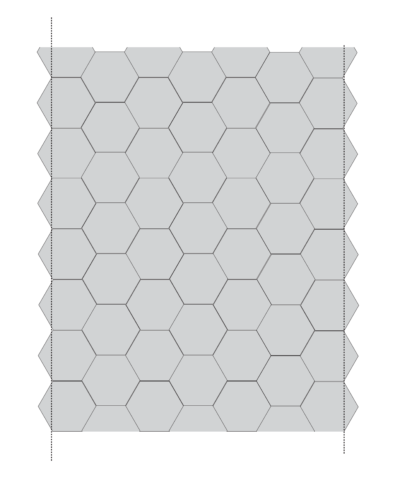
- Use a quilt ruler to cut the extra parts of the hexagons off the edges so that you have a clean edge when you are done.
- Quilt & Bind as Desired
Notes
You May Also Like:
A Tour of Shaker Village in Kentucky
Halloween Haberdashery Witches Hat Quilt Pattern
Free Mini Quilt Pattern; Dresden Plate Mini Quilt
Tic Tac Cat; Witch Hat & Cat Halloween Quilt Pattern
Excited about making this quilt for a bee lover. Can you send me the 9” half hexagon pattern?
Many thanks,
Can I please have the 9” pattern.
Can I please have an 9″ and a 10″ pattern please for the hexie
Sorry, we only have the one available in the download on this page.
Can I get the paper hexi ruler template please
Just fill out the form on this page and it will be emailed to you!
Hi There,
I’m interested in the 9” large hexagon pdf. I can’t find the form to fill out on the site. Could you please advise me where to get it?
Thanks in advance
Just fill out the form on this page and we will email it to you
Hi! I love this pattern and I think I’m going to attempt this as quilt #3 (I’m quite the beginner)! Do you happen to know how many yards I would need for the hexagons, opposed to the 53 10″ squares? I would love to try this, but would probably prefer buying the fabric by the yard. Thank you!!!!
There are 36″ in a yard and most yardage is 42″ wide. Which gives you about twelve 10″ squares per 30″ of fabric. So I’d figure it out that way, you’ll need at least 150″ of fabric yardage, you can divide that up as you like from varying prints.
I cannot find the 9” half hexagon pattern that supposed to be linked to the pattern?
Fill out the form on the page and it will be emailed to you.
How many different fabric colours/fabrics do you recommend? I am new to quilting and I have 3 main prints and then want to mix in some solids or find a few more prints
Thanks
Hi! For a project like this, I’d say at least 5 but you could do as many 12. Keep the colors all similar. Have a mix of geometric prints and more organic prints. I think this would be a good project to create with a fat quarter pack of fabric.
Thank you for the pattern! I wanted to make a quilt for a friend’s wedding and showed her a few patterns to figure out what she liked and she said hexagons. Have just finished making the quilt and thought I’d reach out to say thanks. I’m a beginner quilter but found your instructions easy to follow and your template worked well for me.
I’m so happy it worked out for you! Thank you!
Hi, I’m a beginner quilter so I apologize if this is a silly question. Are you supposed to trim the points on the half hexagons before sewing them into rows? I see a few pictures have the points cut off and I’m just trying to figure that out. Thank you for the help and for sharing the pattern!
Yes, you cut them off. It shows in the diagram in the tutorial where to cut them.
Hi Aja! I see this was back in April, but I hope this helps. I am also a beginner, and I just watched a video on this topic. In the video, the woman said to make sure you clip those corners/points you are talking about otherwise, when you sew the half hexis into rows, you’ll get a bunch of little “bunny ears” that you’ll have to trim. So, to answer your question, yes, trim those little points 🙂
I’m curious, where did you find a video? Were they referencing my tutorial specifically?
Thanks for sharing this pattern! Easy to follow and my throw turned out great!
Aug 24, 2020
I was unable to access/print the Hexie template.
Please HELP!!!
I need to know specifically what problem you are having to be able to help you download it. I have double-checked and the download link is working.
Love this modern take on this pattern! So fun. My Grandmother started a hexie, passed it unfinished to my Mom and now to me still unfinished – and I lived to tell the story but this looks SOOOO much more fun! And perfect for the Halloween fabric. Thanksso much
Your quilt turned out beautiful, but I m really commenting on the beautiful venue to take photos Have been to Shaker Village several times and love this step back in time Great food too Thank you for taking me back again💐
Someone posted a picture on FB of their quilt made from this pattern and now I must make one! How did you do the edges? On the design board they aren’t even, but in the finished quilt they are. Did you sew all the rows together and then trim the edges to make them even/straight?
You just use a ruler to trim the edges when you’re done. So you have a straight line all the way around. If you look at my finished quilt you will see half pieces on the edges.
I’m so excited to see a way to have hexxies without the y seam. Thank you SO much for sharing. Don’t know why I never thought to cut them in half 🙂
I love the fabric and I’m trying to finish my granny’s quilt. I know it’s a little dated since this was post in 2013, but may I know where did you get them? Thanks in advance!
It’s a mix of a lot of old fabric that I had in my stash already. It’s not from one particular line.
Hi, thank you for this idea and I love the colours! Silly question maybe and hoping you see it, did you trim the length of the quilt to make the binding? Like did you trim the sides where the batting would obviously stick out of the top pattern? Hope my question makes sense.
The binding was sewn on as a separate piece of fabric. Does that make sense?
I love this quilt and am making one as my first quilt ever! But I’m wondering about the edge pieces because the way your pieces are pinned on the wall means the edge isn’t straight but then your finished quilt has a straight edge. did you sew all the half hexagons together and then trim the edge ones? Or is it better to cut out quarter hexagons for the edge? Thank you