• Skip to primary navigation
  • Skip to main content
  • Skip to primary sidebar

The Polka Dot Chair logo

  • SEWING
    • Free Sewing Patterns
    • Bag Patterns
    • Costumes
    • Apparel
    • Learn to Sew
    • Beginner Friendly
    • Embroidery Projects
    • Tips & Techniques
    • All Sewing
  • QUILTING
    • Quilt Blocks
    • Learn to Quilt
    • Free Patterns
    • Quilt Patterns
    • All Quilting
  • CRAFTS
    • Disney
    • Cricut
    • Printables
    • All Crafts
  • HOLIDAYS
    • Seasonal Projects
    • Valentine’s Day
    • Easter
    • 4th of July
    • Halloween
    • Thanksgiving
    • Christmas
    • All Holidays
  • TUTORIALS
  • ABOUT
    • About Me
    • My Fabric Collections
    • Published Books
    • Press
    • FAQ’s
    • Contact
  • SUBSCRIBE
  • SHOP
menu icon
go to homepage
  • SHOP
  • TUTORIALS
  • SEWING
  • QUILTING
  • SUBSCRIBE
  • CRAFTS
  • HOLIDAY PROJECTS
  • ABOUT
    • Published Books
    • My Fabric Collections
  • CONTACT
    • Facebook
    • Instagram
    • YouTube
  • subscribe
    search icon
    Homepage link
    • SHOP
    • TUTORIALS
    • SEWING
    • QUILTING
    • SUBSCRIBE
    • CRAFTS
    • HOLIDAY PROJECTS
    • ABOUT
      • Published Books
      • My Fabric Collections
    • CONTACT
    • Facebook
    • Instagram
    • YouTube
  • ×

    Home » Sewing

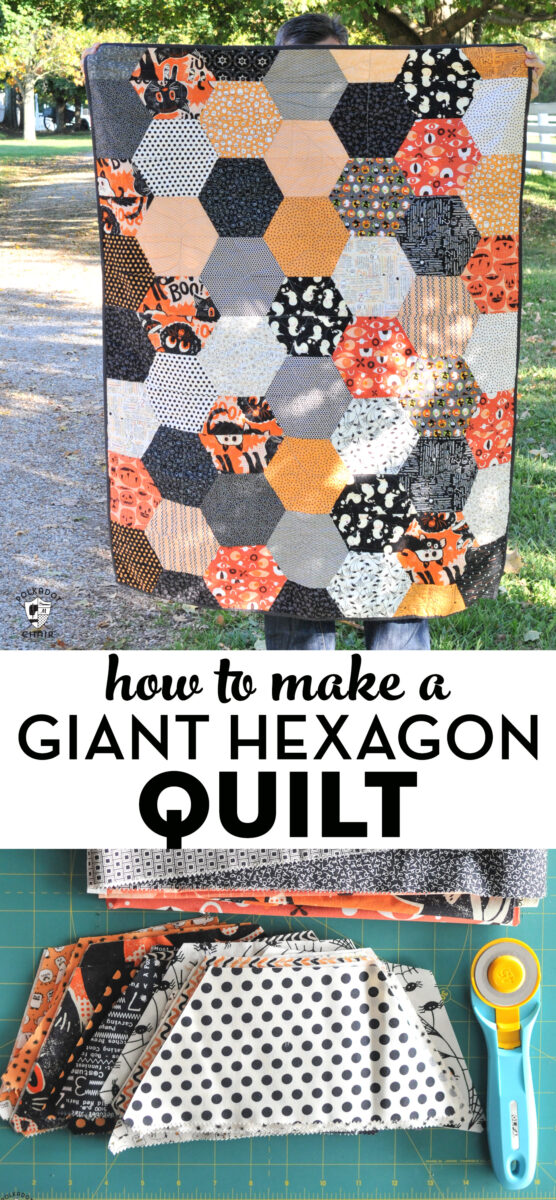
    Large Hexagon Quilt Tutorial

    Updated: May 17, 2022 by Melissa Mortenson · This post may contain affiliate links · This blog generates income via ads · 75 Comments

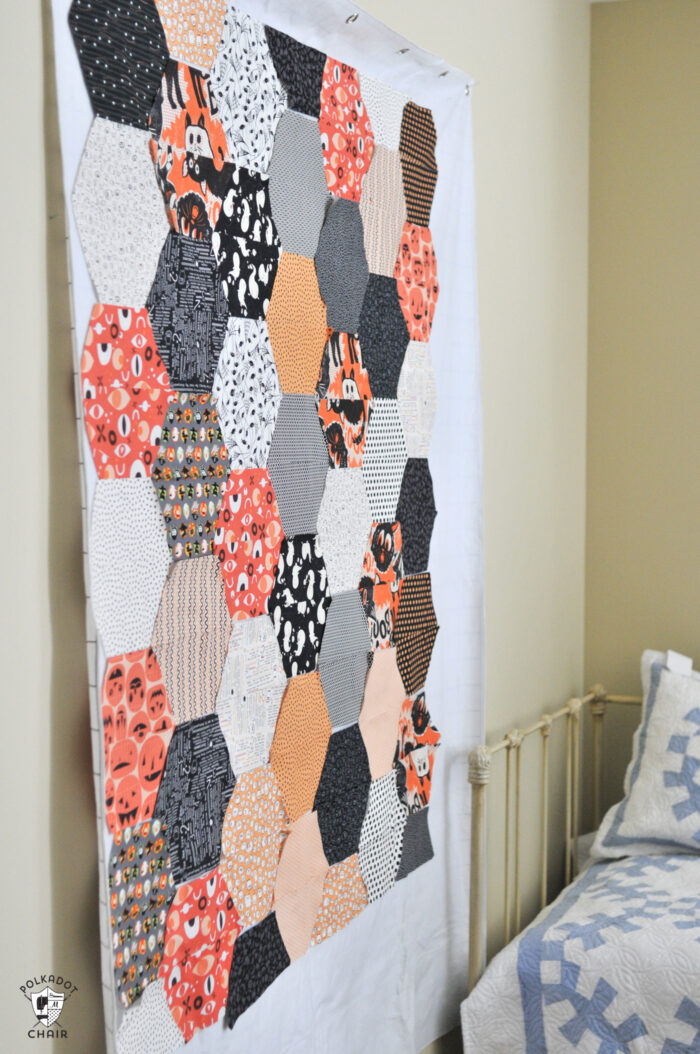
    Hi there! I’m so excited today to share the tutorial for this Large Hexagon Quilt with you. I was able to whip this Halloween Quilt up very quickly using half hexagon quilt pieces, this free Hexagon Quilt Pattern, and a bunch of Halloween fabric fat quarters. 

    sewn hexagon quilt being held by person outdoors

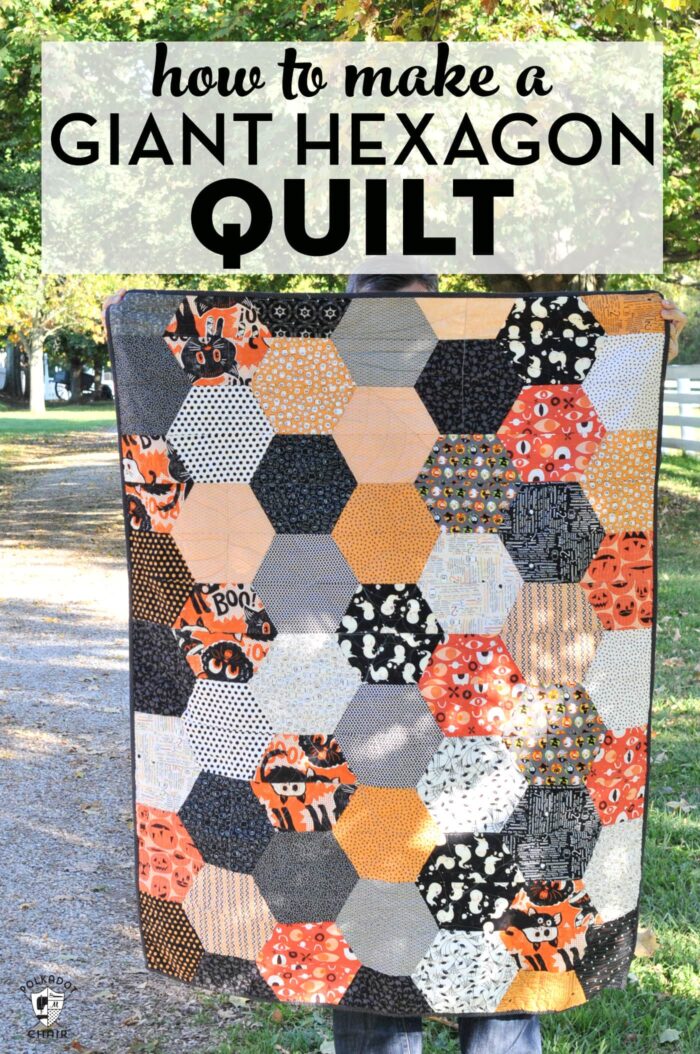
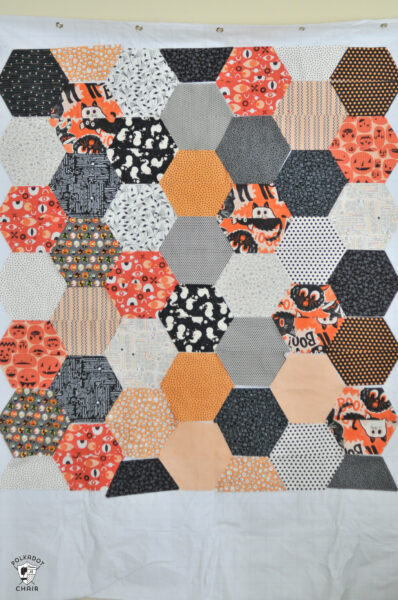
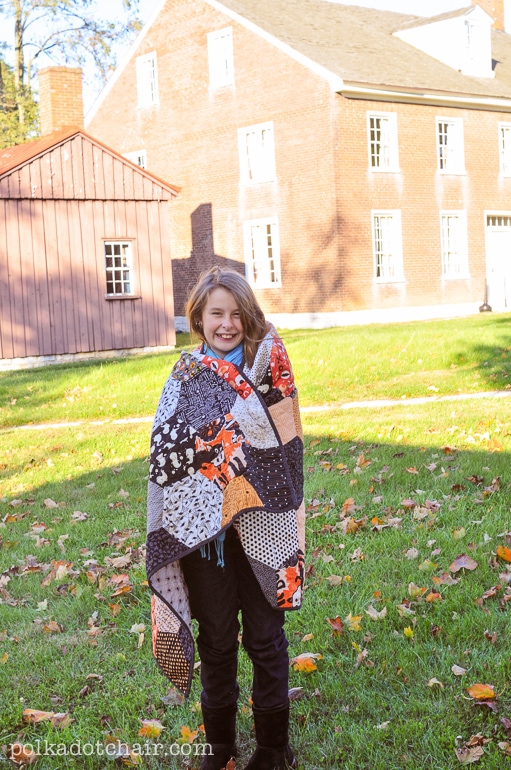
    This large hexagon Halloween quilt comprises an extremely random selection from my Halloween fabric stash.

    Table of Contents
    • Why This Quilt is Constructed with Half Hexagon Pieces
    • How to Cut out the Half Hexagons
    • How to Get the Hexagon Templates
    • Large Hexagon Quilt Pattern

    I decided to stick to blacks, oranges, and whites, trying to vary the scale of the prints for interest.   I think that all large-scale prints would have been a bit overwhelming for this quilt size.

    However, I think the large hexagon shape lends itself well to both large and novelty prints. It’s a great quilt to make if you’re looking to use up a lot of fabric scraps.

    You could easily use this Large Hexagon Quilt pattern to make a quilt for any season or occasion. It does not have to be a Halloween quilt. This pattern would also make a great baby quilt!

    sewn hexagon quilt being held by person outdoors

    Why This Quilt is Constructed with Half Hexagon Pieces

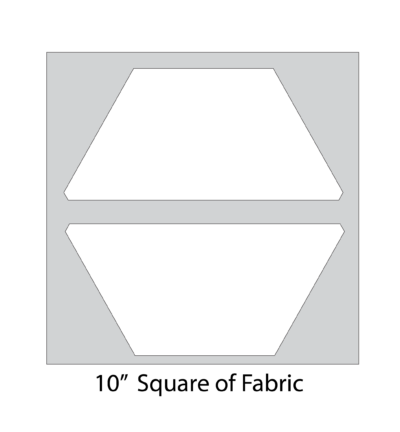
    Usually, when you piece hexagons together for a quilt, you have a difficult to sew “Y” seam.  To avoid having to sew Y seams, I used a special half hexagon quilt ruler when I cut out my quilt.

    close up of large hexagon quilt with orange, ivory and gray blocks

    By cutting the hexagon in half you can avoid this by sewing ½ hexagon shapes together in rows, thus avoiding Y seams.

    Just know that you have to plan ahead to get the look you want.

    Cute Halloween Quilt

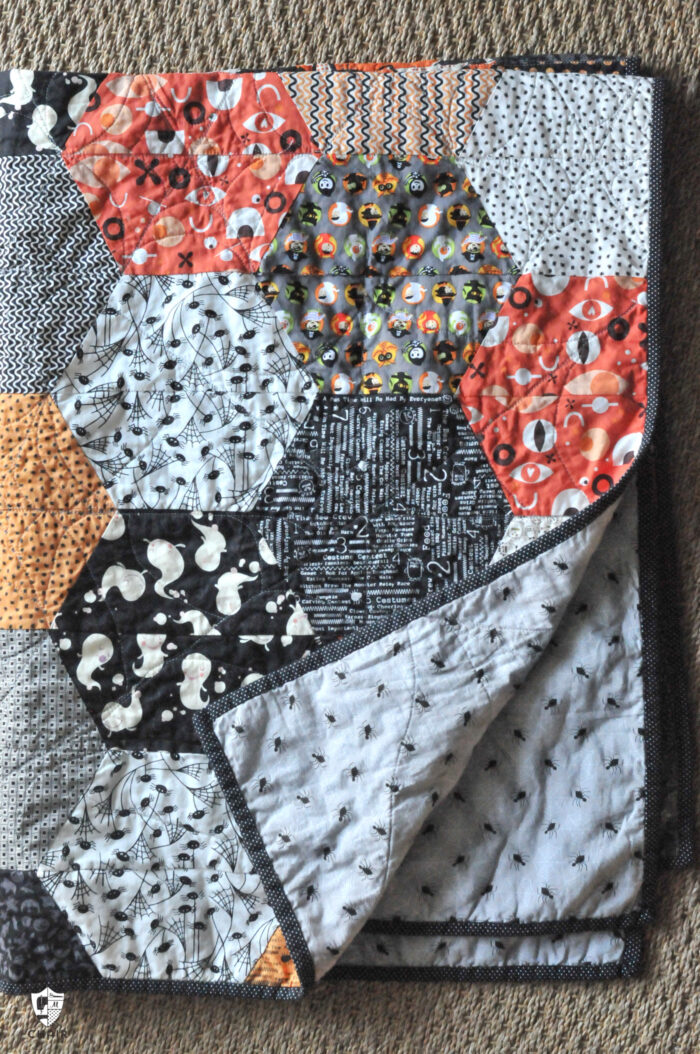
    To finish the quilt I decided to free-motion quilt spiderwebs onto the quilt. I couldn’t bring myself to quilt a spider web in every hexagon (although that would have been cool), so I chose to quilt 5 large spiderwebs and then fill in a few of the hexagons with their own web.

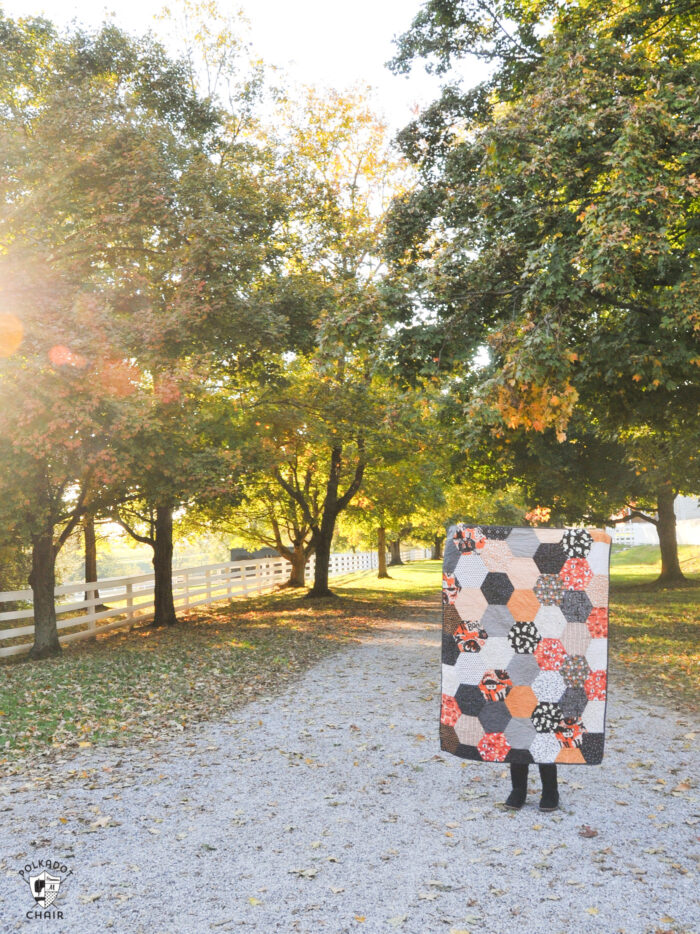
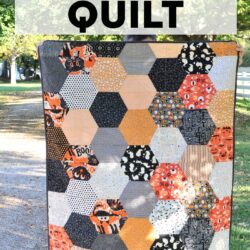
    The photos of the finished quilt were taken at Shaker Village in Kentucky. It is one of my favorite places to visit in Autumn.

    sewn hexagon quilt being held by person outdoors

    How to Cut out the Half Hexagons

    This post is a few years old. I’ve gone through and updated it extensively. You now have 3 different options to cut out the hexagons for your quilt. I’ll briefly discuss each of them.

    Option 1: Use a Quilt Ruler

    You can use a quilt ruler to cut out the pieces for this quilt. I’ve linked to one in the instructions. The ruler I used is 9″ wide and sized to fit on a 10″ piece of fabric. This makes this quilt particularly easy to make since you can use a pre-cut stack of fabric.

    Option 2: Paper Template

    If you choose this option you’ll need to get the PDF of the template then print it out and cut it out. You can cut the template from template plastic so that it will hold up better as you complete your quilt. You can find the information to get printable under this post’s “How to Get the Hexagon” section.

    Option 3: Cricut SVG File

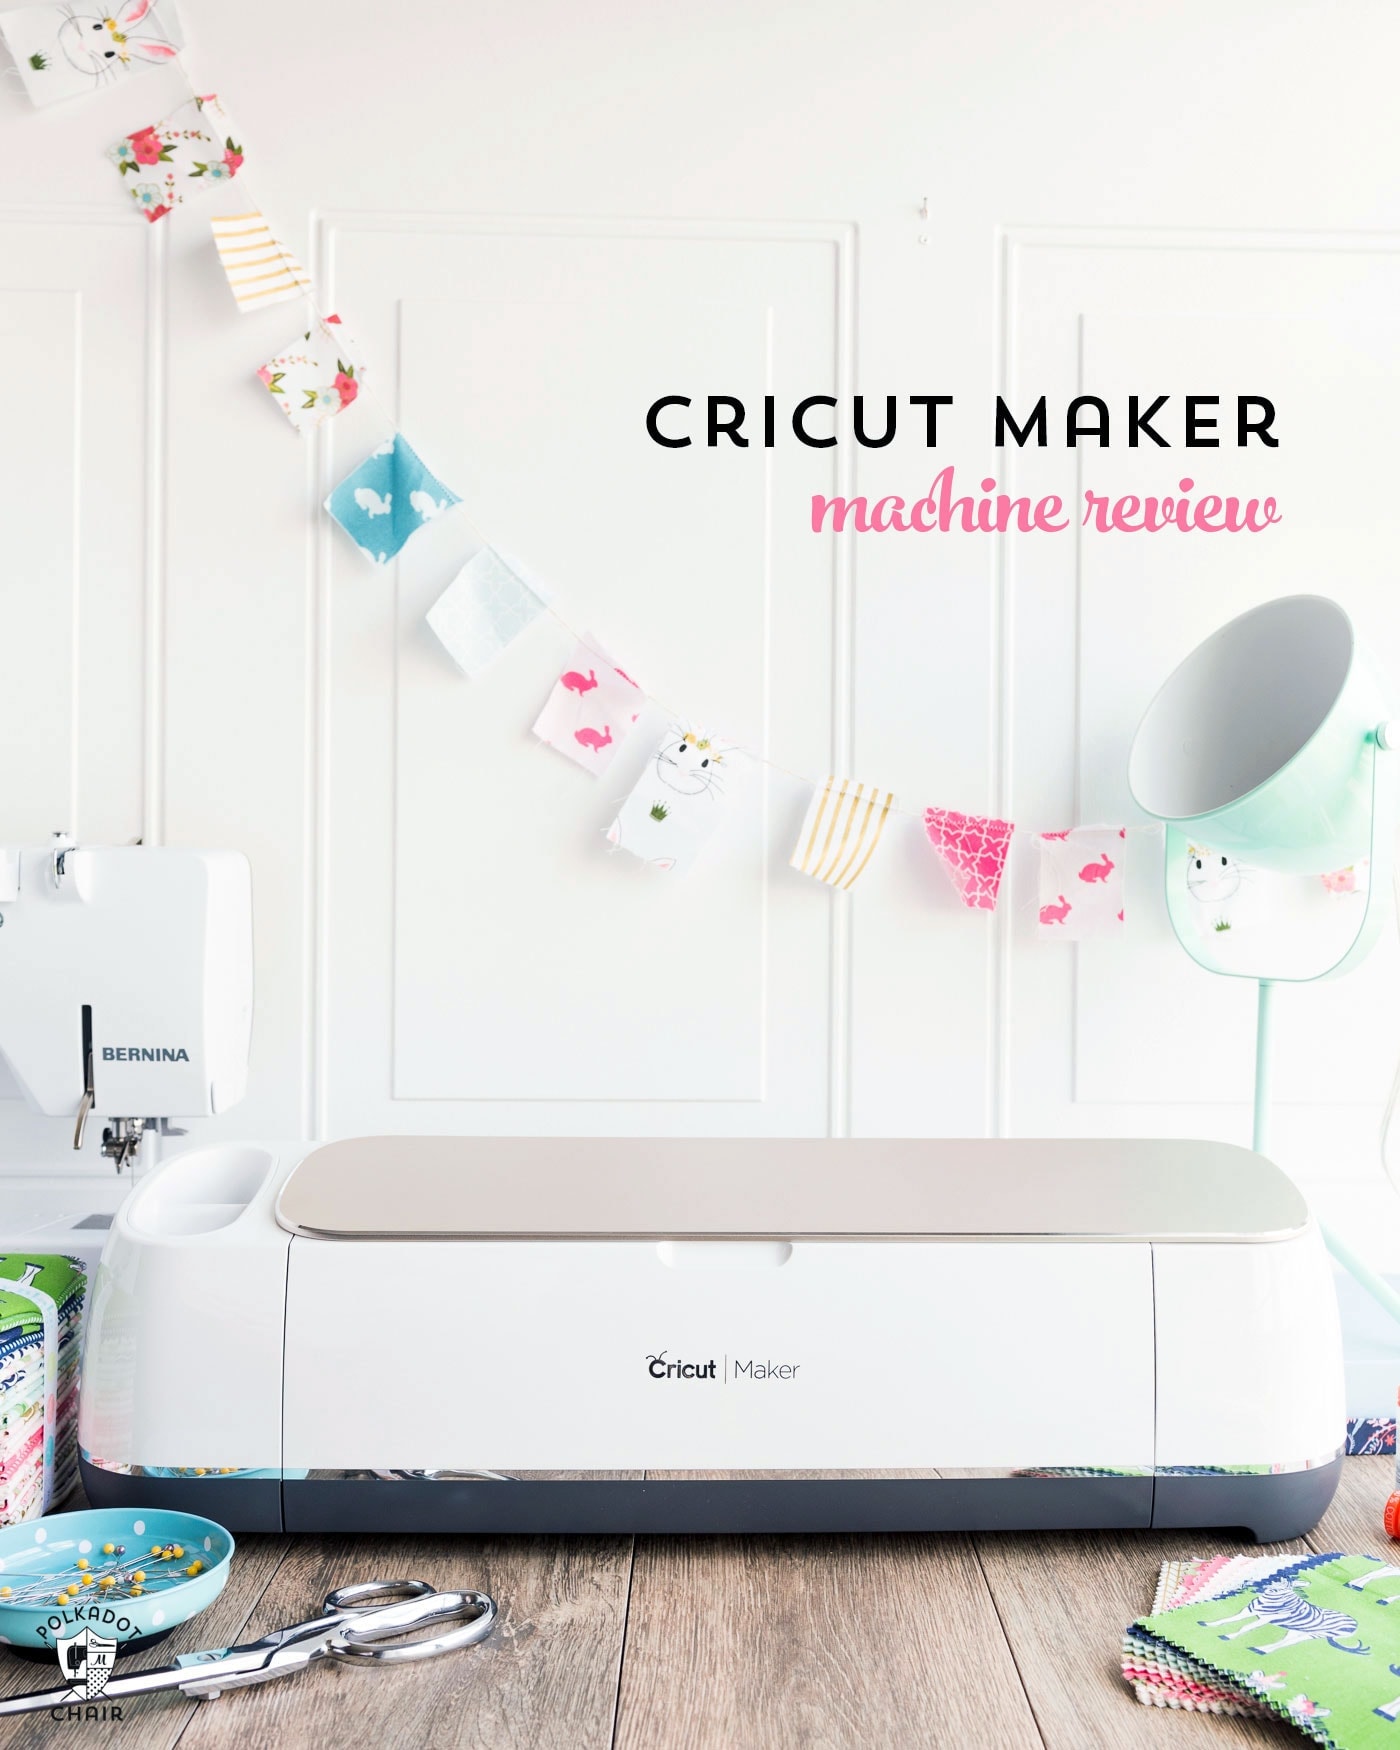
    In my opinion, the easiest way to cut out this quilt is with a Cricut Maker and a pre-cut 10″ stack of fabric. Get the SVG file in our Cricut Library. Upload it to Cricut Design space, then insert it into your project twice.

    What is a Cricut? A Cricut Machine is an electronic cutting machine. It hooks up to your computer via USB or Bluetooth and cuts images you send to it, much like a printer. It just cuts instead of prints. It can cut vinyl, paper, fabric, and much more. The images are all digital; you can upload your own images or buy images in the Cricut Design space individually. You can read my full review of the Cricut Maker Machine HERE.
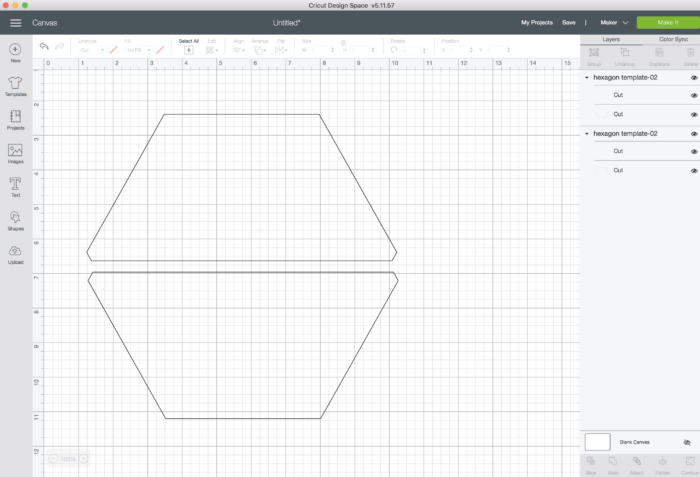
    Flip the pieces, so they are on top of each other. One right side up and one upside down. Select both pieces, then ATTACH in Design Space.

    When you select “Make it,” double-check that the entire cut will fit on the 10″ piece of fabric (you can see a grid on the preview screen), and use your mouse to move the design if necessary.
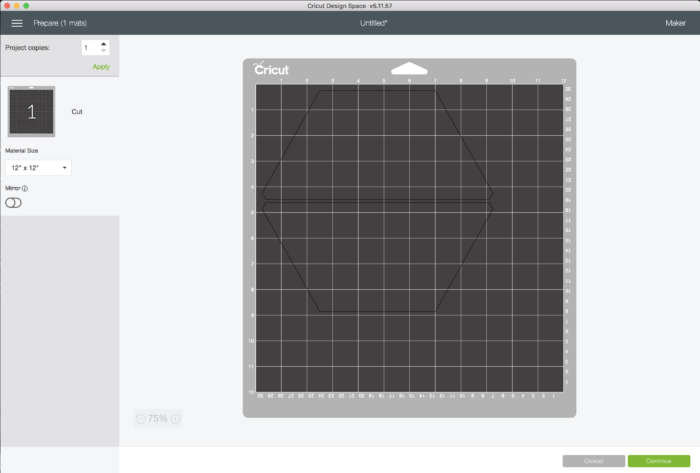
    Then select continue and keep cutting until you are done. If you tell the machine to make 53 copies, it will keep prompting you to insert a new mat. It will go very quickly. To see more about cutting fabric with a Cricut Maker, you can check out our detailed tutorial.

    How to Get the Hexagon Templates

    Fill out this form and we will email you BOTH the Printable Half Hexagon Template and an SVG File that can be used with a Cricut Machine.

    Large Hexagon Quilt Pattern

    sewn hexagon quilt being held by person outdoors

    Giant Hexagon Quilt Pattern

    Melissa Mortenson
    Create a giant Hexagon quilt with our free pattern. This pattern uses half hexagon quilt pieces so there are no "Y" seams to piece.
    Quilt Size: The quilt is approx 40″ wide by 56″ tall.
    4.57 from 23 votes
    Pin It! Share by Email Share on Facebook
    Prep Time 1 hr
    Active Time 3 hrs
    Total Time 4 hrs

    Equipment

    • Sewing Machine
    • Basic Sewing Tools
    • Rotary Cutter
    • Cutting Mat
    • Design Wall

    supplies

    Half Hexagon Template; Choose 1 Option

    • Half Hexie ruler that is 9" Wide OR You can also use the paper template linked below on our site.
    • Paper Template for Half Hexie Ruler Obtain for free using the form on this page.
    • Half Hexagon SVG File for Cricut Maker Machines Obtain for free using the form on this page. Make sure template is 9" tall when imported into Cricut Design Space.

    Fabric

    • Option 1: Buy a 10″ stacker of fabric. You can cut 1 completed hexagon from each 10″ piece of fabric. You will need 53 10″ pieces for this quilt as shown. Most pre-cut stacks come with 42 pieces, you will need a few additional pieces of fabric to complete the quilt.
    • Option 2: Various Fabric Prints- enough to cut 53 10” squares. You could, in theory, get 2 full hexagons from one fat quarter. Which means you need a MINIMUM of 27 Fat Quarters.
    • 3 Yards Fabric for backing
    • Batting I prefer 100% cotton.
    • ½ Yard Binding Fabric Assumes binding cut to 2 ½" wide.

    Instructions
     

    Cutting:

    • Cut 106 half hexagons from your prints in groups of 2. Which works out to be 53 sets. (remember that the hexagon is cut in half and you will sew it back together).
      cut half hexagon pieces on green cutting mat
    • A note about fabric direction:
      I chose not to try to match the direction of the prints on my half hexagons. As I was cutting out my fabrics I didn’t try to match the “repeat”. You can spend a bit of extra time when cutting if you wish to match the pattern of the fabric on the pieces. Just be sure to account for the ¼" seam allowance.
      Remember as you sew the pieces together that one half-hexagon is right side up and one is upside down, so flip your template when you cut the second piece so all of the fabric is facing the same direction when sewn.
    • You can cut the way you think is easiest. If you want to first cut 53 10” squares then cut your hexagons from that you can.
      If you are not concerned about fabric direction, you can fold the 10" piece of fabric in half and cut out both pieces at the same time. This is what I did.
    • TIP: A spinning cutting mat and it made quick work of cutting out the shapes.

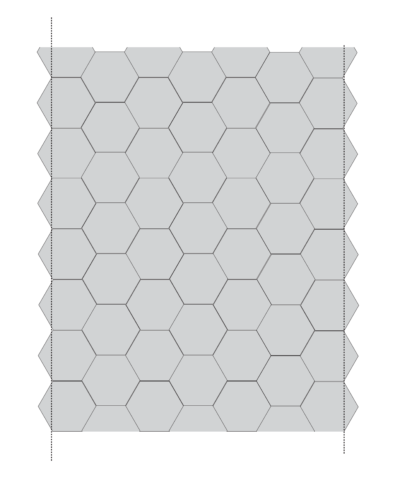
    Layout the Cut Pieces:

    • You’ll need to pre-plan your layout before you start sewing. Layout your half hexagons so that you have 7 half hexagons across by 15 half hexagons down.
      Make sure that your prints match up to create the full hexagon when sewn together. I used a design wall for this (linked above). If you don't have a design wall, just layout the pieces on the floor.
      layout for half hexagons on white design wall

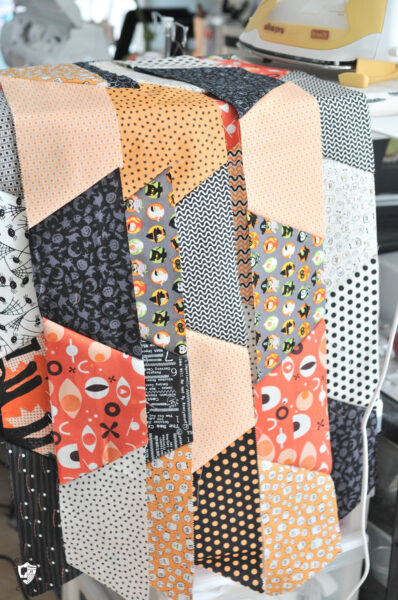
    Sew the Half Hexagons Together:

    • Start sewing the ½ hexagon shapes together by row, along the short edges. Making sure to keep them in the exact same order as when you laid them out.
      sewn hexagon pieces laid out in rows on ironing board
    • Use a ¼” seam allowance. I always label my rows with a water-soluble pen, so I know what order they go back together.
    • Now press the seams to one side. Press the seams on the odd # rows to the right and the seams on the even # rows to the left.
    • Sew your rows together.

    Finishing:

    • Use a quilt ruler to cut the extra parts of the hexagons off the edges so that you have a clean edge when you are done.
    • Quilt & Bind as Desired

    Notes

    My quilt is scrappy. I used a bunch of leftover Halloween fabrics to complete it. I’ve included options if you want to buy yardage for this quilt.
    Quilt Size: The quilt is about” 40″ wide by 60″ tall. Since it is made from Hexagons the math is a bit harder to calculate on a finished size than a quilt made from rectangles. If you want the quilt larger, you can use the Hexagon Calculator found here.  Again, hexagon quilt math is a bit complicated. If you use the calculator the hexagon diameter used in this tutorial is 9″. 
    PRINT
    Tried this tutorial?Let us know how it was!
    close up of large hexagon quilt with orange, ivory and gray blocks
    Shaker-Village-11

    You May Also Like:

    A Tour of Shaker Village in Kentucky

    Halloween Haberdashery Witches Hat Quilt Pattern

    Free Mini Quilt Pattern; Dresden Plate Mini Quilt

    Tic Tac Cat; Witch Hat & Cat Halloween Quilt Pattern

    collage image of hexagon quilt, text and cut out quilt pieces

    More Projects You May Enjoy

    • Thread Weights Used In Machine Quilting Explained
    • New! All Ears Pouch Pattern & Sew Along
    • Sewing Machine Needles Explained & Printable Guide
    • Color Combination Ideas for your Next Quilt or Sewing Project

    • Share
    • Email

    About Author

    Melissa Mortenson

    Melissa Mortenson is a blogger, designer, and content creator. She is the Polka Dot Chair blog founder and has been sharing fresh and creative ideas with readers since 2008. She is the author of “Project Teen, Handmade Gifts your Teen will Actually Love.” Her work and designs have been featured on HuffPost, TODAY, Pioneer Woman, HGTV, BuzzFeed, Better Homes & Gardens, and many other established publications. Her first fabric line, “Derby Style,” debuted in January 2015 through Riley Blake Designs.  Additional fabric collections have followed it in subsequent years. A mom of 3, she considers herself lucky to be living in Kentucky.

    Reader Interactions

    Comments

    1. Stacia says

      October 28, 2013 at 7:55 pm

      This quilt is absolutely delightful!

      Your comment about the donkey takes me back to my wedding. I decided to hang this awesome triangle bunting that i had made on the fence behind where the ceremony was going to take place. I was taking pre-wedding pictures with my bridesmaids when I look over and all the groomsmen (not groom) are running to the fence to get the triangles away from the goats. I thought it was hilarious, and all we had to do (thankfully) was move the triangles up a little higher. 🙂

      Reply
      • Terri Paulson-Sasaki says

        October 29, 2013 at 7:56 am

        This is adorable. I want to make one for Halloween and one for Christmas out of my grinch material. Do you know where online I can find the ruler? Thanks

        Terrri

        Reply
        • Melissa Mortenson says

          October 29, 2013 at 7:17 pm

          I think Christmas would be adorable! I saw the Grinch fabric last week at my local store– looks so cute!

          Reply
    2. Teresa Block says

      October 29, 2013 at 11:30 am

      Ha! I love the walking quilt….

      Reply
      • Melissa Mortenson says

        October 29, 2013 at 7:17 pm

        Yes, I need a bigger quilt or a shorter model 🙂

        Reply
    3. Anastasia says

      October 29, 2013 at 7:22 pm

      I am in love with that quilt! It is amazing and looks so cozy. I think my favorite thing is how subtle it is. From the first photo, I had no idea it was a Halloween theme. Then you get close up and see all the Halloweeny goodness!

      Reply
      • Melissa Mortenson says

        November 03, 2013 at 7:20 pm

        Yes, I think it’s a pattern that would work great for any holiday fabrics.

        Reply
    4. Embroiderymad says

      October 30, 2013 at 7:08 am

      Beautiful quilt, next time I make hexagons it will be large ones and not 1inch ones.

      Reply
    5. Lurel says

      October 31, 2013 at 5:40 pm

      Super cute! And much easier than piecing actual hexagons together. Ain’t nobody got time for that!

      Reply
    6. Haylee says

      November 28, 2013 at 4:22 pm

      What is the finished size of the quilt? How much batting would I need to get, like a twin or queen?

      Reply
      • Melissa Mortenson says

        December 04, 2013 at 1:05 pm

        A twin would be more than enough- it’s about 43 x 55 finished.

        Reply
    7. Cindy Lanahan says

      January 18, 2014 at 8:03 am

      This is sew fabulous and fun!!!! Going to start mine today!

      Reply
    8. Alli Ford says

      July 07, 2014 at 2:42 am

      Hello, I was so inspired by your quilt i am now starting my own!!! But I would really like to make mine to fit my queen size bed. Do you have an estimated guess of how many full hexagons i would need for something that size? Currently i am just going to town cutting my half hexies and trying to lay them out as i go to see the size. Please please let me know what you think! Thank you in advance for your help!

      -Alli

      Reply
      • Ashley says

        October 23, 2014 at 4:31 pm

        Did you figure out how many hexagons you needed for a queen size quilt?
        Thanks!

        Reply
        • Melissa Mortenson says

          October 27, 2014 at 12:15 pm

          No,
          I’m sorry, I’m not sure how to do that- I made the quilt a year ago and my memory is just not good enough to figure it out. I’d google “Lori Holt Hexagon Ruler, Queen Size” and see what you come up with.

          Reply
      • Nicole says

        November 18, 2018 at 4:38 pm

        So I made this in a queen size and it came to 10 half hexagons wide and 18 rows long. Hope that makes sense

        Reply
        • Melissa Mortenson says

          November 19, 2018 at 11:54 am

          Thanks for the info! I know a lot of people will appreciate it.

          Reply
    9. Tracy says

      September 19, 2014 at 11:33 am

      I love this quilt! It would be awesome in Christmas fabrics as well! I want to add, that in nature, spiderwebs are never perfect, so your are just as they should be!

      Reply
    10. Brandi says

      October 23, 2014 at 6:02 pm

      What is the length of half hexie? I can’t find one up in Canada.

      Reply
      • Tami Wolfe says

        June 10, 2015 at 7:54 pm

        Missouri Star Quilt company online store sells the half hexie template.

        Reply
    11. Jenn says

      August 02, 2015 at 9:14 am

      I am curious about your “design wall”. What did you use to make it?
      I do love this quilt too! 🙂

      Reply
      • Melissa Mortenson says

        August 02, 2015 at 7:08 pm

        You can buy a design wall at the craft store. It’s in the quilt section and is pretty much a plastic backed piece of flannel. You can also make one by covering large panels with quilters flannel

        Reply
    12. Lisa Myerson says

      September 16, 2015 at 10:16 am

      Hi! Love your quilt! If I wanted to add a narrow border (@2″), around this – what would those measurements be and how would I do that? I also wondered if this hexie half cutter can be purchased at a fabric store like Joanne’s?

      Reply
      • Melissa Mortenson says

        September 21, 2015 at 1:43 pm

        I have not seen or tried the hexie cutter or that system before but I think the principal is the same. Yes, I think you could add a border… I don’t know what size to tell you to cut the fabric, it will depend on the finished size – especially if you end up using another hexagon size than I did.

        Reply
    13. maryann says

      April 22, 2016 at 10:13 am

      I can understand not wanting to match them as 53 would have been time consuming but what if you had folded the fabric and used the fold for the large end of the ruler? I don’t have the half hexi yet but have been thinking about getting it.

      Reply
      • SewBadJuJu says

        August 23, 2016 at 10:20 am

        Yes, placing the ruler on the fold! So smart! I’m going to do that! Thank you!

        Reply
        • SewBadJuJu says

          August 23, 2016 at 10:34 am

          But then that would have given you the Y seam! (using the ruler on the fold) I got it! Still on my first cup of coffee this morning! 🙂

          Reply
    14. SewBadJuJu says

      August 23, 2016 at 10:18 am

      I love love love this Halloween quilt! Isn’t it crazy to have posted this 3 years ago and it’s still being discovered! Your blog is beautiful, I can’t wait to read more! Back to this quilt, I’ve never used a hexagon ruler before but now I’ll need to! I love the beautiful scenery too! So nicely done! Halloween is just around the corner I better jump on making this! Thanks again!!

      Reply
      • Melissa Mortenson says

        August 25, 2016 at 4:53 pm

        Have fun!

        Reply
    15. Sandra says

      February 06, 2017 at 10:14 am

      Hi! I’m thinking about using my dad’s old sweatshirts in this pattern. Would you still use half hex and sew them together or make a full hex and sew together? I’ve never quilted but was about the thick material and a line down the middle looking ok.

      Reply
    16. Lil Wilson says

      September 24, 2017 at 7:52 pm

      I have an Accuquilt die in the hexagon shape. If I used this whole hexagon shape to cut out the shapes and then cut them in half, would they end up the right size? Do you lose any size by going with the half cut?

      Reply
    17. Stefanie says

      October 08, 2017 at 10:49 pm

      Did you use a batting in this quilt? If so what kind? Thank you!

      Reply
    18. Anne Thompson says

      January 23, 2018 at 4:09 pm

      Thank you so much for this tutorial! Super helpful for this newbie sewist…and the quilt is super cute!!

      Reply
    19. Caitlin says

      September 08, 2018 at 11:31 am

      I love this quilt and am making one as my first quilt ever! But I’m wondering about the edge pieces because the way your pieces are pinned on the wall means the edge isn’t straight but then your finished quilt has a straight edge. did you sew all the half hexagons together and then trim the edge ones? Or is it better to cut out quarter hexagons for the edge? Thank you

      Reply
    20. Jaime Dickason says

      April 01, 2019 at 5:47 pm

      Hi, thank you for this idea and I love the colours! Silly question maybe and hoping you see it, did you trim the length of the quilt to make the binding? Like did you trim the sides where the batting would obviously stick out of the top pattern? Hope my question makes sense.

      Reply
      • Melissa Mortenson says

        April 06, 2019 at 10:12 pm

        The binding was sewn on as a separate piece of fabric. Does that make sense?

        Reply
    21. Mex says

      September 01, 2019 at 8:03 am

      I love the fabric and I’m trying to finish my granny’s quilt. I know it’s a little dated since this was post in 2013, but may I know where did you get them? Thanks in advance!

      Reply
      • Melissa Mortenson says

        September 05, 2019 at 8:17 pm

        It’s a mix of a lot of old fabric that I had in my stash already. It’s not from one particular line.

        Reply
    22. Pearl Clark says

      November 27, 2019 at 2:26 pm

      I’m so excited to see a way to have hexxies without the y seam. Thank you SO much for sharing. Don’t know why I never thought to cut them in half 🙂

      Reply
    23. Denise says

      August 17, 2020 at 8:11 am

      Someone posted a picture on FB of their quilt made from this pattern and now I must make one! How did you do the edges? On the design board they aren’t even, but in the finished quilt they are. Did you sew all the rows together and then trim the edges to make them even/straight?

      Reply
      • Melissa Mortenson says

        August 19, 2020 at 1:14 pm

        You just use a ruler to trim the edges when you’re done. So you have a straight line all the way around. If you look at my finished quilt you will see half pieces on the edges.

        Reply
    24. Linda Knox says

      August 21, 2020 at 9:18 am

      Your quilt turned out beautiful, but I m really commenting on the beautiful venue to take photos Have been to Shaker Village several times and love this step back in time Great food too Thank you for taking me back again💐

      Reply
    25. Joan says

      August 24, 2020 at 12:58 am

      Love this modern take on this pattern! So fun. My Grandmother started a hexie, passed it unfinished to my Mom and now to me still unfinished – and I lived to tell the story but this looks SOOOO much more fun! And perfect for the Halloween fabric. Thanksso much

      Reply
    26. Brenda Matthews says

      August 24, 2020 at 11:52 am

      Aug 24, 2020

      I was unable to access/print the Hexie template.
      Please HELP!!!

      Reply
      • Melissa Mortenson says

        August 25, 2020 at 9:31 pm

        I need to know specifically what problem you are having to be able to help you download it. I have double-checked and the download link is working.

        Reply
    27. Jamie says

      September 03, 2020 at 9:12 pm

      Thanks for sharing this pattern! Easy to follow and my throw turned out great!

      Reply
    28. Aja Holmes says

      April 12, 2021 at 7:06 am

      Hi, I’m a beginner quilter so I apologize if this is a silly question. Are you supposed to trim the points on the half hexagons before sewing them into rows? I see a few pictures have the points cut off and I’m just trying to figure that out. Thank you for the help and for sharing the pattern!

      Reply
      • Melissa Mortenson says

        April 16, 2021 at 3:28 pm

        Yes, you cut them off. It shows in the diagram in the tutorial where to cut them.

        Reply
      • Jenna Hines says

        November 27, 2021 at 2:09 pm

        Hi Aja! I see this was back in April, but I hope this helps. I am also a beginner, and I just watched a video on this topic. In the video, the woman said to make sure you clip those corners/points you are talking about otherwise, when you sew the half hexis into rows, you’ll get a bunch of little “bunny ears” that you’ll have to trim. So, to answer your question, yes, trim those little points 🙂

        Reply
        • Melissa Mortenson says

          November 28, 2021 at 5:33 pm

          I’m curious, where did you find a video? Were they referencing my tutorial specifically?

          Reply
    29. Nicole C. says

      May 23, 2021 at 2:47 pm

      Thank you for the pattern! I wanted to make a quilt for a friend’s wedding and showed her a few patterns to figure out what she liked and she said hexagons. Have just finished making the quilt and thought I’d reach out to say thanks. I’m a beginner quilter but found your instructions easy to follow and your template worked well for me.

      Reply
      • Melissa Mortenson says

        May 24, 2021 at 2:28 pm

        I’m so happy it worked out for you! Thank you!

        Reply
    30. Laura says

      July 14, 2021 at 5:08 pm

      How many different fabric colours/fabrics do you recommend? I am new to quilting and I have 3 main prints and then want to mix in some solids or find a few more prints

      Thanks

      Reply
      • Melissa Mortenson says

        July 14, 2021 at 5:11 pm

        Hi! For a project like this, I’d say at least 5 but you could do as many 12. Keep the colors all similar. Have a mix of geometric prints and more organic prints. I think this would be a good project to create with a fat quarter pack of fabric.

        Reply
    31. Devona says

      April 25, 2022 at 6:49 pm

      I cannot find the 9” half hexagon pattern that supposed to be linked to the pattern?

      Reply
      • Melissa Mortenson says

        April 26, 2022 at 9:34 pm

        Fill out the form on the page and it will be emailed to you.

        Reply
    32. Lindsay says

      August 29, 2022 at 11:05 am

      Hi! I love this pattern and I think I’m going to attempt this as quilt #3 (I’m quite the beginner)! Do you happen to know how many yards I would need for the hexagons, opposed to the 53 10″ squares? I would love to try this, but would probably prefer buying the fabric by the yard. Thank you!!!!

      Reply
      • Melissa Mortenson says

        September 08, 2022 at 2:56 pm

        There are 36″ in a yard and most yardage is 42″ wide. Which gives you about twelve 10″ squares per 30″ of fabric. So I’d figure it out that way, you’ll need at least 150″ of fabric yardage, you can divide that up as you like from varying prints.

        Reply
    33. Tara Quinton says

      October 19, 2022 at 3:19 pm

      Hi There,
      I’m interested in the 9” large hexagon pdf. I can’t find the form to fill out on the site. Could you please advise me where to get it?
      Thanks in advance

      Reply
      • Melissa Mortenson says

        October 21, 2022 at 10:07 am

        Just fill out the form on this page and we will email it to you

        Reply
    34. Melissa Rodgers says

      January 20, 2023 at 10:29 pm

      Can I get the paper hexi ruler template please

      Reply
      • Melissa Mortenson says

        January 23, 2023 at 10:03 pm

        Just fill out the form on this page and it will be emailed to you!

        Reply
    35. Mariana says

      January 22, 2023 at 1:32 am

      Can I please have the 9” pattern.

      Reply
      • Christina Tisdale says

        January 25, 2023 at 3:52 pm

        Can I please have an 9″ and a 10″ pattern please for the hexie

        Reply
        • Melissa Mortenson says

          January 27, 2023 at 10:42 am

          Sorry, we only have the one available in the download on this page.

          Reply

    Leave a Reply Cancel reply

    Your email address will not be published. Required fields are marked *

    This site uses Akismet to reduce spam. Learn how your comment data is processed.

    Primary Sidebar

    Hello! It’s nice to meet you.

    I’m Melissa. I like to design things, like fabric, printables, and projects.

    I’m also a Mom and a Maker. I am like most of you, just trying to do my best every day. Some days I succeed, many days I fail.  I find joy in creating, if you do too, then I hope that you find something here bring a little “happy” to your life.  Find out more about me here.

    COPYRIGHT POLICY

    All my images and text are copyrighted. You may NOT use any images from this site in any kind of Video (this includes YouTube). If you would like to feature my work, you may use ONE (1) NON-COLLAGED image and must “follow” link back to my original blog post. You may NOT edit, crop, or change my images in any way without written permission. You MAY NOT print out or copy and distribute any text, images or patterns from this site. All patterns, content, instructions, and templates are for personal use ONLY! Thank you! Violators will be reported.

    Footer

    ↑ back to top

    About

    • Privacy Policy
    • Disclaimers
    • About Melissa
    • Instagram
    • Facebook
    • YouTube
    • Pinterest

    Newsletter

    • Sign Up! for emails and updates

    Contact

    • Contact
    • FAQ
    • Press
    • Published Books
    • Fabric Collections

    Welcome to the Polka Dot Chair! Here you’ll find easy, step-by-step, sewing, quilting, and crafting projects. We design projects for Makers of all skill levels. Beginners are welcome!

    DISCLAIMER:

    While every effort has been made to ensure the accuracy of the content on this website, the information is made available without warranty of any kind. The Polka Dot Chair accepts no responsibility or liability, whether direct or indirect, as to the currency or accuracy of the information, nor any consequence of its uses. This website is not intended to substitute the advice of a professional.

    Copyright © 2022 Polka Dot Chair

    [ Placeholder content for popup link ] WordPress Download Manager - Best Download Management Plugin