Sewing Lesson: How to add Leather Straps to a Handbag
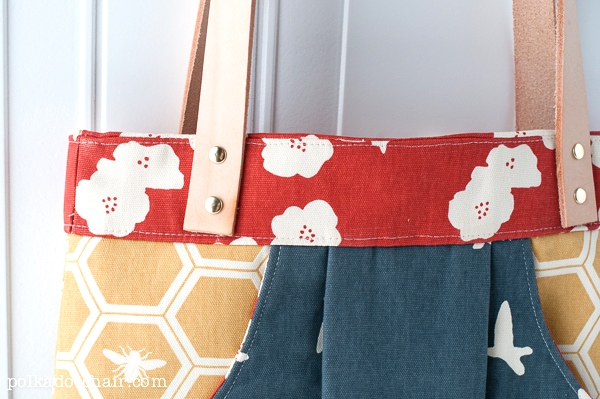
When sewing your own handbag, you have several options for handles. Most handbag patterns feature sewn handles, but if you’d like a more professional finish, you can also use purchased leather handles. Let me show you how to add leather straps to an existing handbag pattern.
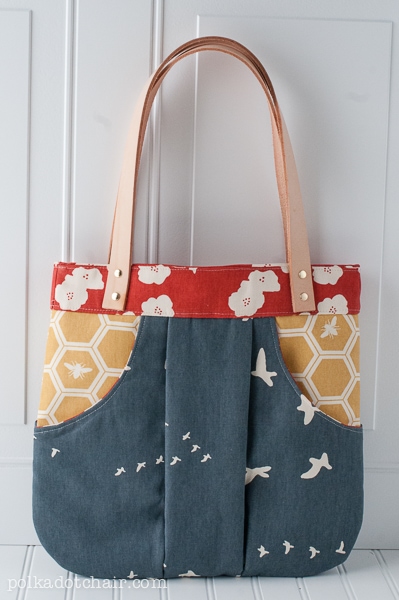
I designed my March Bag pattern a couple of years ago, and I think that it’s still one of my favorites.
The bag pattern gives you three handle options for your tote bag. A purchased leather handle, a purchased bamboo handle, or sewn handles. I want to give you one more option for bag handles as well.
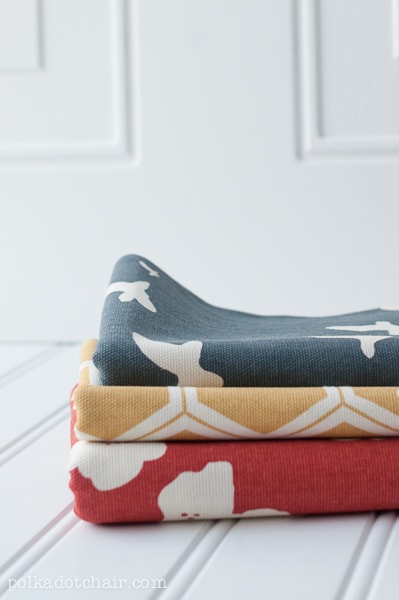
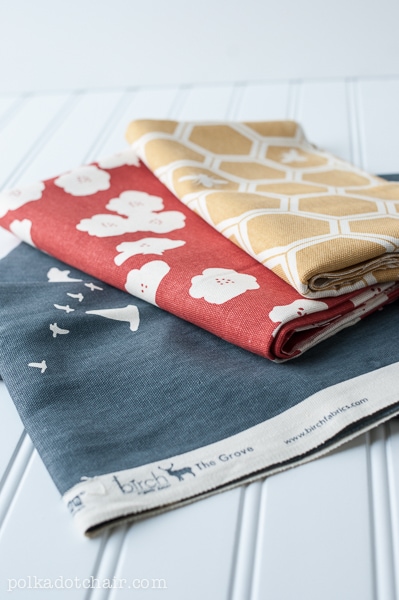
The bag in this project is created from a lightweight canvas. It’s heavier than normal quilting cotton, but not as heavy as upholstery canvas.
It has a gorgeous drape and texture. The weight of it is perfect for handbags.
Normally, when I make handbags, I make the handles. This time, I was feeling a bit lazy and wondered if I couldn’t just use leather instead.

So I took a little trip to a local leather store and found these great belt blanks. They are long strips of leather intended for stamping belts/bracelets, etc. One of them was only $8, and I was able to get both handles out of it!!
Attaching the handles to the bag was easy. You just need a few tools, and if you’re a scrapbooker like me, you probably already have them.
Let me just say, I know there is a LOT more I could do with those leather handles, including sealing, stamping, and finishing the edges. I didn’t do any of those things; the idea was just a simple handle. The leather will change color over time and with use, but I actually like that.

Sewing Lesson: How to add Leather Straps to a Handbag
supplies
- Leather strap long enough to make two handles look in the belt section of the leather store, I purchased belt blanks
- Awl or Cropeadile to punch holes in the leather
- Rivets the same size as the width of your leather strap – can be hammer set or screw together.
- Scraps of plastic canvas
Instructions
Step One: Reinforce the Fabric
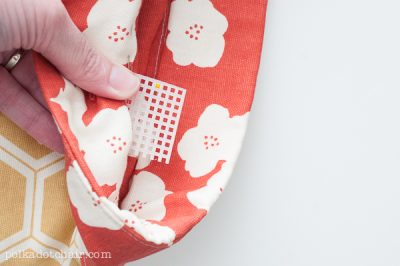
- The first thing you’re going to need to do is to reinforce the point that the handles attach to the purse. To do this, I use plastic canvas. If you are sewing the March Bag pattern, you will want to complete the entire bag, omitting the handles. You will skip the last step of hand stitching down the bag band lining.

- After you have marked where you want the handles to go on the bag, slip the plastic canvas into the bag band lining and pin it in place (It’s not sewn down yet, so you can do this easily).
Step Two: Prep the Leather
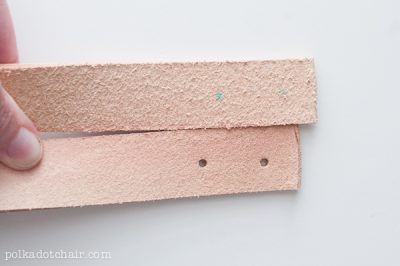
- After you have cut your leather to the desired length (buy some scissors at the leather store to cut the straps; don’t ruin your good sewing scissors), punch two holes at the ends of the straps—one at 1/2” up from the bottom and one 1” above that.
- To punch holes in the leather, I used my Crop-a-Dile (see, scrapbook supplies!). If you don’t have one of those, you can get an inexpensive awl at the leather store to punch the holes.
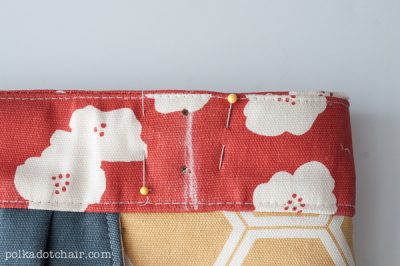
Step Three: Punch Holes in Handbag
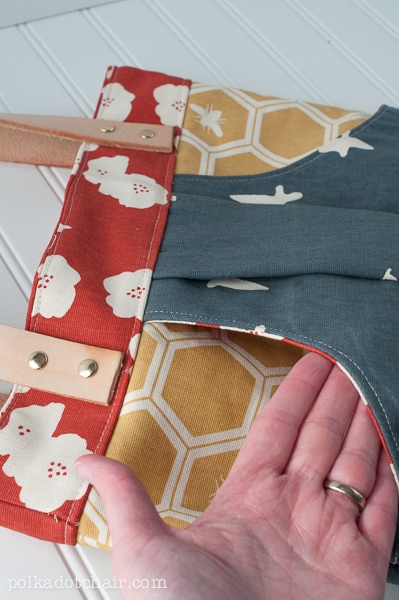
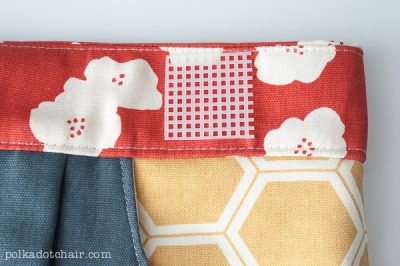
- Use the crocodile again and punch two holes in your handbag. You’ll punch through all the layers of fabric and the plastic canvas.
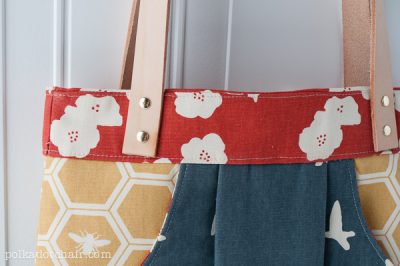
- Line up the holes on the handbag with those on the straps, then insert a rivet. Using a hammer and the instructions on the package, set your rivets.
- If you do not want to set your rivets with a hammer, you can also purchase screw-in rivets. Personally, I prefer the screw-together rivets as they are more sturdy and easier to install.
- That’s it! So easy, right? This is the first time I’ve used leather, and I’m very excited to learn more about working with it. I’ll be sure to share with you what I find out as I go.

How do I get your patterns? Thank you
visit https://shop.polkadotchair.com you can find them all there!
Hi Melissa, love your tutorial of the leather handles. I made some tote bags, but never used leather hadles. It does look nice on bags. Thanks! As for the plastic canvas, where do u get them? Thanks!
You might also try Chicago screws if having trouble with the rivets. Similar but removable if needed at a later date. They come in all kinds of tykes and made for applications like purses!
I’ve never heard of those before, I’m going to give that a try. Thank you so much for the tip!
I am regular reader, how are you everybody? This piece of writing posted at this site is really pleasant.
I like this kind of handmade handbags. I think this is very difficult to do but I want to try this.
Excellent blog! Do you have any hinnts for aspirring writers?
I’m hoping to stzrt myy own site soon but I’m a little lost on everything.
Would you propose starting with a free platform like WordPress or go for a
paid option? There are so many options out there that I’m completely overwhelmed ..
Any recommendations? Cheers!
I’m a newbie, so please pardon my ignorance. My question is do you prewash your fabrics when you make your totes?
No,
I only prewash knits- but it’s a personal preference.
This is fab! I just tried the leather strap thing for the first time and had some trouble with the rivets. I was only able to find 5/16″ at Michael’s, so I used those. I’m thinking I may just need to have my husband help me hammer them together, but I had the hardest time getting them to set. Is there a size you would recommend? Any particular sources? I have several belts I bought on clearance and am dying to make more! 🙂
Hey Elena!
I used the rivet set at Joann’s but I noticed at the leather store that they had a bunch. That’s where I went to get the belt for the handles… The guy that worked at my store was very helpful… I’d maybe ask them what the recommend. One thing I noticed is to use a smaller hammer instead of a big one, I don’t think it takes a lot of force to set them.
So nice to meet you at the Sewing Summit!
Thanks for the great idea of the leather handles. I have been wanting to add leather handles to some of my bags but I never thought of using my Cropadile to punch holes in both! I will have to try it.