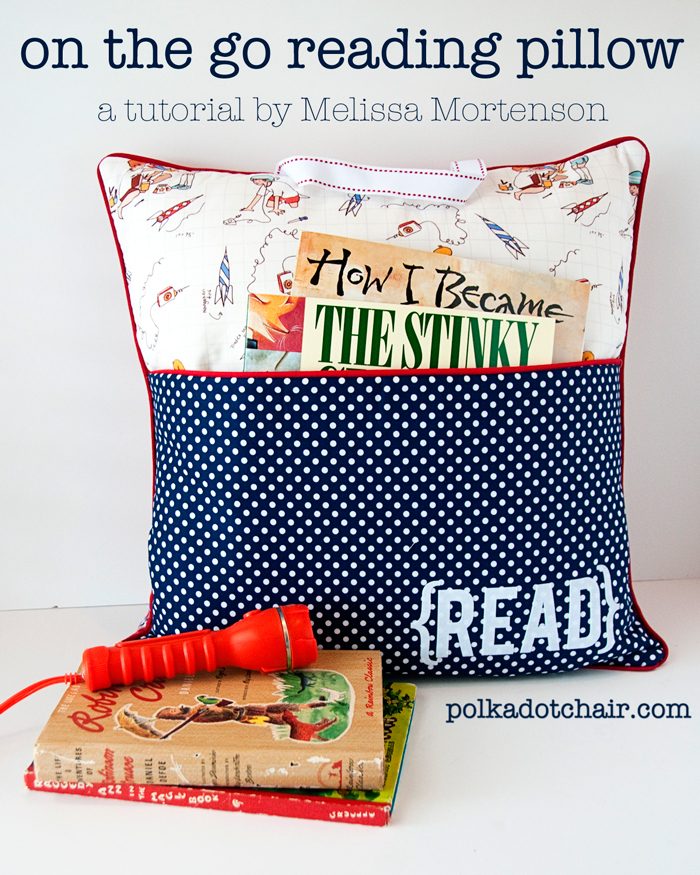
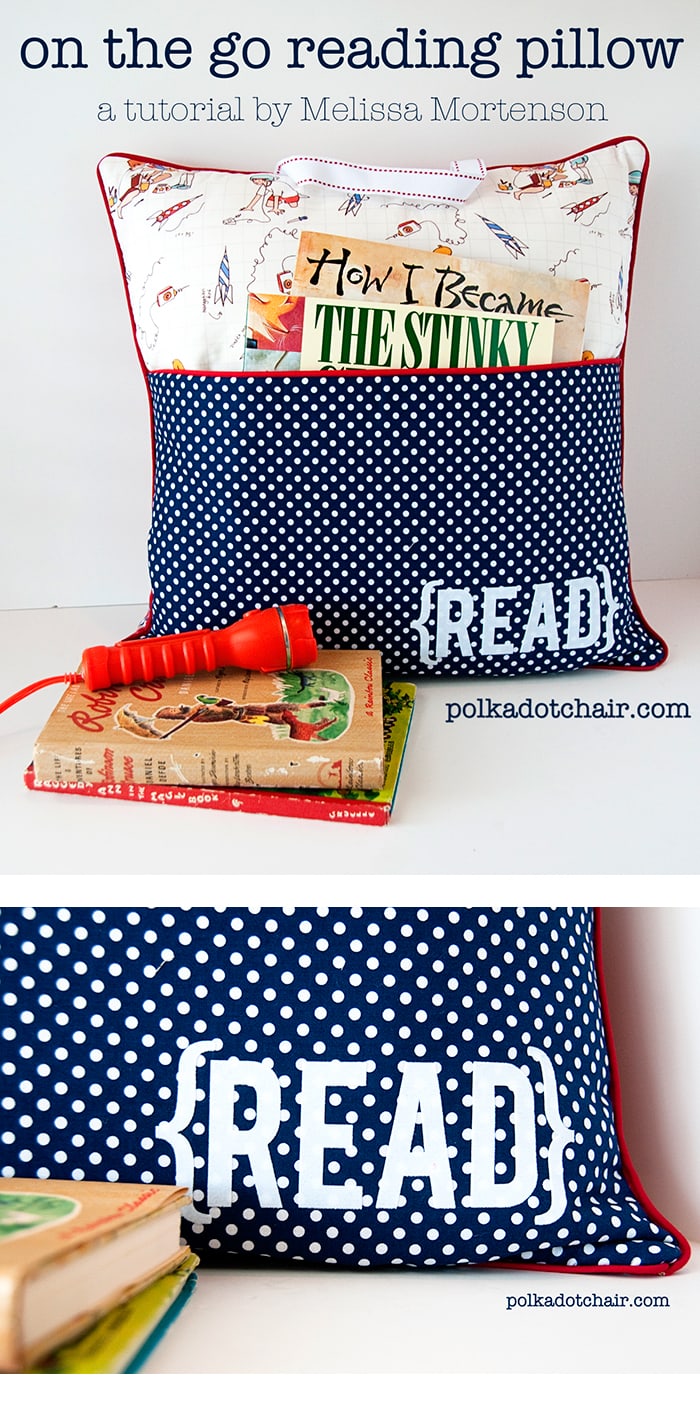
Pocket Reading Pillow Sewing Pattern
The ORIGINAL Reading Pillow Sewing Pattern!
Today I’m going to share with you one of my very favorite sewing tutorials of all time. The tutorial for this On The Go Pocket Reading Pillow first appeared on this blog way back in 2011, way before many of you were readers. If you like this project you may also enjoy this Pocket Pillow Sewing Project and this Giant Pillow Cover Sewing Tutorial.
Summer is right around the corner and I don’t know about you, but the thought of keeping my kids entertained is starting to give me cold sweats. It’s a sad day when the least offensive thing you can think for them to do is sit and watch tv all day.
If you’re also worried about keeping kids entertained for the summer, why not stitch them up a special reading pillow? They can tote their books and treasures around with them in the yard, the car or wherever else their adventures may take them this summer.
You can now purchase a PRINTABLE PDF Copy of this pattern in 2 sizes.
You can also order a printed copy which will be mailed to you. This version includes two different sizes of pillows.
Free Pocket Pillow Sewing Pattern:
This project is a revamp of some pillows I made for my nephews a few Christmases ago. I did them quick (like in an hour) and always thought that I could have done a better job. Regardless my sister says that her boys took them to bed every night and kept all kinds of treasures in the pocket. I gifted the pillows with a flashlight because there is something charming about a little kid staying up late to read at night.
Here’s how to make the pillow:
Supplies for Pocket Pillow:
- 3 Fat Quarters (the measurements leave little to no waste of these fat quarters, so if you are nervous about your cutting abilities buy 4 so you have an extra just in case). – Fabric is by Sarah Jane
- 2 yards 1″ wide ribbon
- Fusible Fleece
- 1 package piping
- Flocked Heat Transfer Material I cut mine out of fuzzy fusible vinyl with my Silhouette machine... you can also use a Cricut
- OR USE these pre-cut iron on letters
- 18″ pillow form
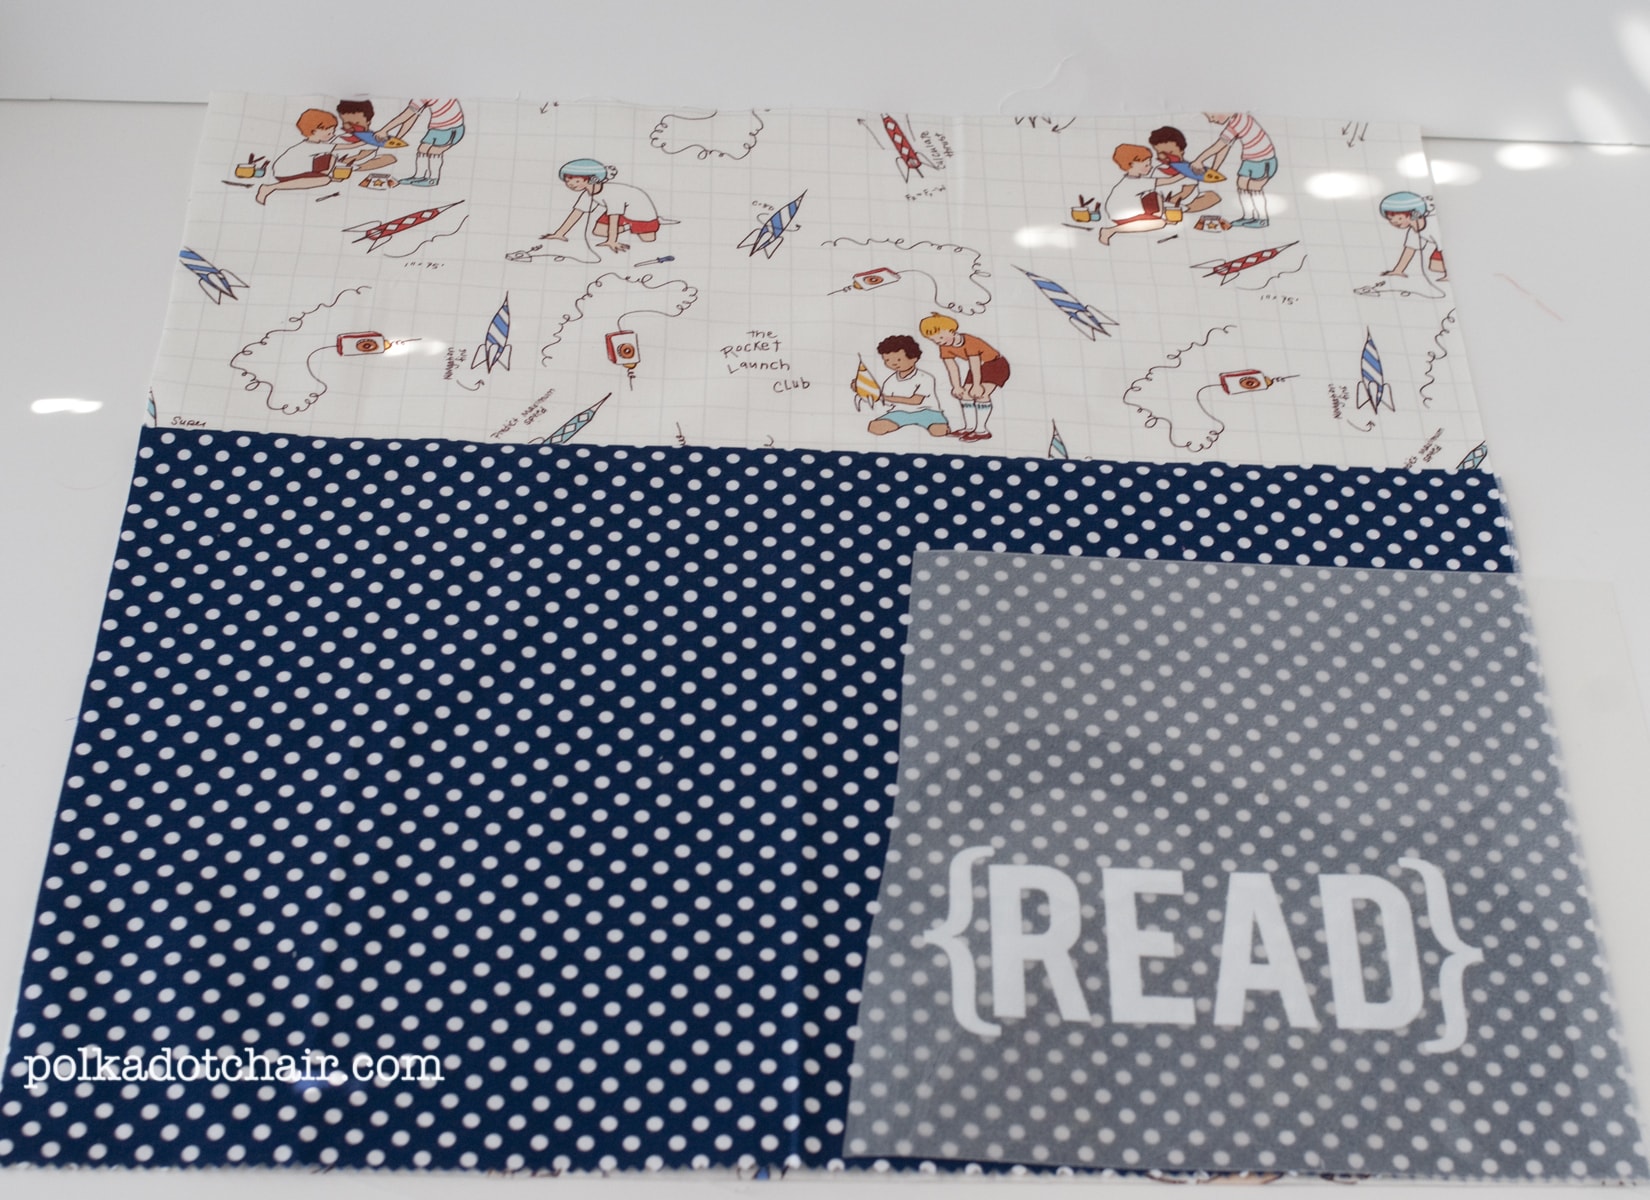
Step One, Cutting the Fabric:
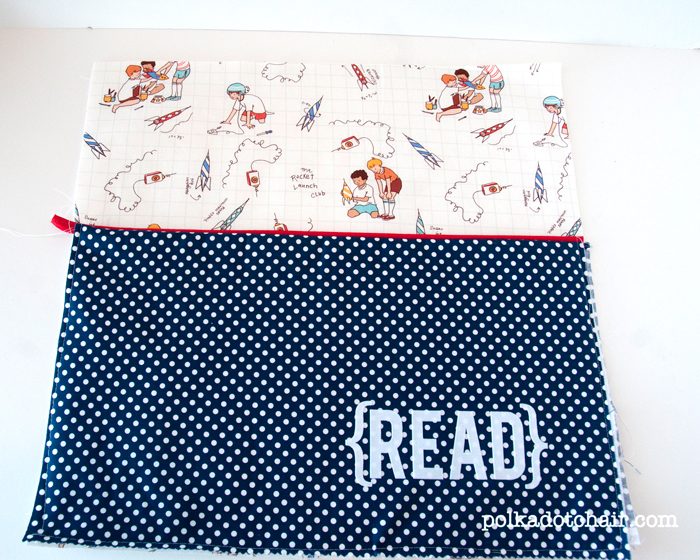
Cut one Fat Quarter to 18″x 18″ for the pillow front, then cut the scrap from this piece to 2 1/2″ x 18″ for pillow back.
Also, cut one Fat Quarter (the navy blue dot for the pocket) into 2 pieces each 18″ x 11″.
Cut another Fat Quarter for the back into 2 pieces each 18″ x 9″.
Interfacing:
Attach fusible fleece to the back of the Pillow Front piece (18×18) and the pocket front piece (11×18)
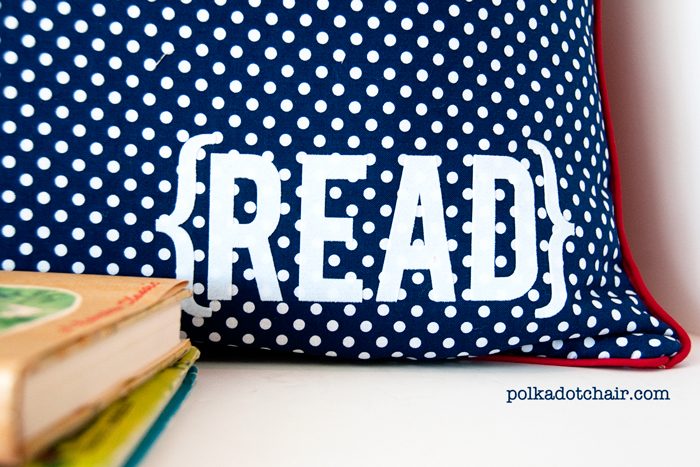
Iron “READ” onto the front pocket piece. To create the READ I used my Cricut machine. You can also embroider it on the pillow front if you have an embroidery machine, or use Iron on letters that you can buy at the craft store.
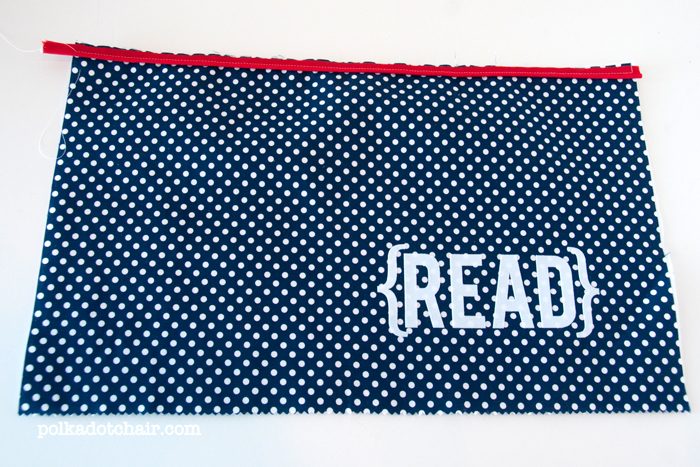
Attach the Piping:
Using a piping foot attach 1 piece of piping to the top of the pillow. The raw edge of the piping will match up with the raw edge of the pocket piece.
Assemble the Pillow:
Place pocket lining piece (your 2nd 11×18 piece) right sides together with your pocket front piece. Stitch along the top seam, along the same stitching line you just used to attach your piping. This will ensure that your piping looks good on the outside of your pillow.
Turn pillow pocket piece right side out and press.
Pin pocket piece to Pillow front piece. Baste pocket to pillow front. Set aside.
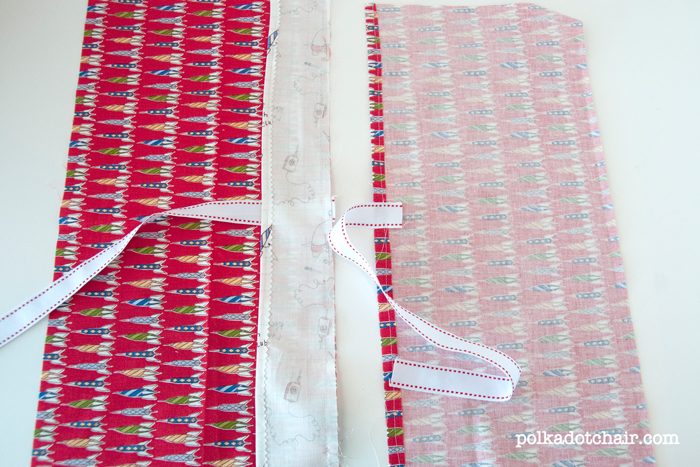
To create the Pillow Back:
Place about 12″ of ribbon in the center of one of your pillow back pieces along the 18″ edge. Stitch in place.
Take your scrap piece from your pillow front and sew it to this same edge of the pillow back piece. (as shown in the photo above) Turn under edge 1/4″ and hem.
Take your 2nd 9″x18″ pillow back piece and turn under the seam 1/4″ and sew in place. Sew another piece of ribbon to the center of this piece.
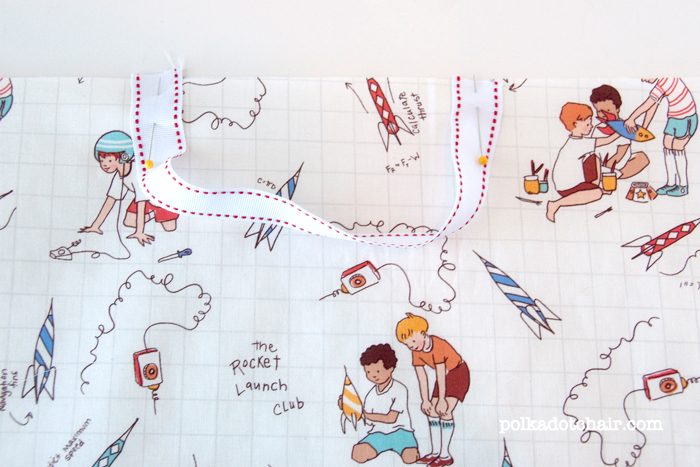
Attach a piece of ribbon about 10″ long to your pillow front at the top. Each end should be 3″ from the center of the pillow.
To add piping to the pillow front (you can skip this step if you’d like):
Using your piping foot attach piping to the edge of the pillow front. The raw edge of the piping flush with the raw edge of the pillow front.
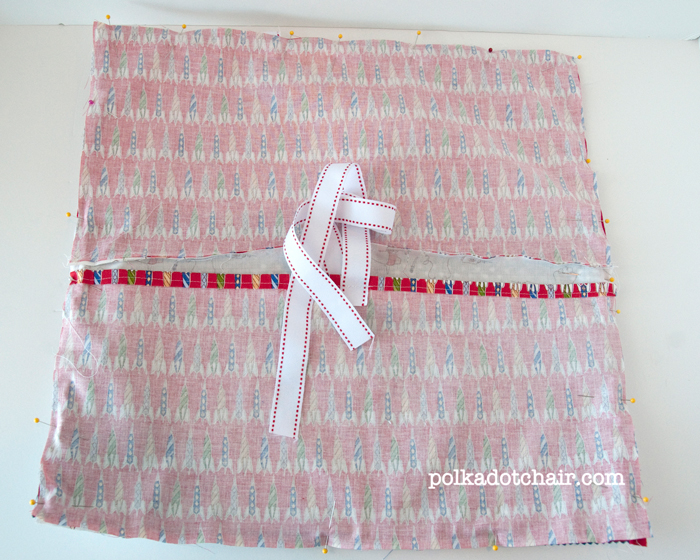
Pin the 2 pillow back pieces to pillow front piece. The ribbons should be matching in the center and the piece with the extra piece sewn onto it should be on top (the photo is wrong, learned that one the hard way *wink*).
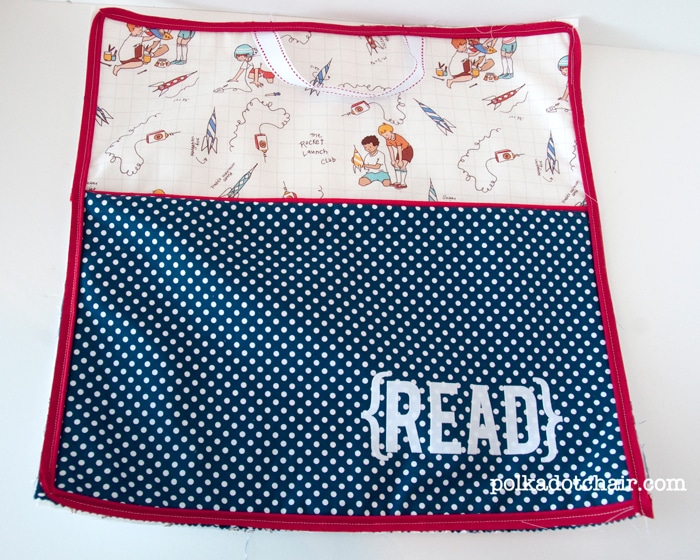
Using your piping foot sew pillow front to the pillow back along the same stitching line you used to attach your piping.
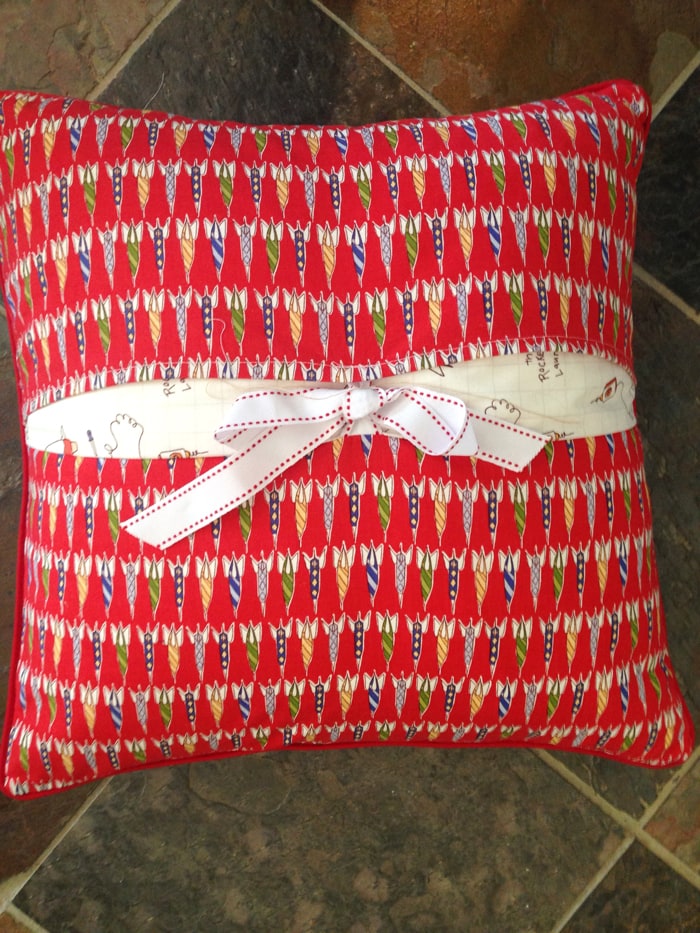
Clip corners, turn right side out and you’re done!
If you would prefer to add a zippered back to your Reading Pillow, just CLICK here to follow this tutorial.


My husbands mother just passed away. Often people making grieving teddy bears out of their loved ones old clothes, but we are going to make one of these for each sibling out of grandmas clothes instead. We will fill them with books grandma loved and children’s books that have a plot that are as sassy as she was. Thank you for sharing this gift!!
Such a sweet idea!
Hi Melissa – I love this project!! I’m gathering materials to make these for Christmas- what kind of piping do you use and where can I buy it? Looking online I’m finding the kind you cover with your own fabric. Thank you.
Where it says to
Attach a piece of ribbon about 10″ long to your pillow front at the top. Each end should be 3″ in from the side of the pillow
That is wrong. Pillow is 18” across so if you come in 3” on each side w a 10” ribbon; even if you stretch the ribbon straight across 10” of ribbon + 3” + 3” is only 16”. That leaves no room to make a handle as shown in your picture. I came in 6” on either side and made the handle 6” across (outside edge of ribbon pieces).
Wasn’t sure if you realized this. Using a 12” piece of ribbon would also work if you come in 3” on either side
I love this pattern though. The pillows are turning out so cute and it’s very easy to put together and sew. Thank you for sharing.
It is 3″ from the center of the pillow not from the sides.
This is sooooo cute! i want to try to make some for xmas! I’m wondering if the back can be made as an envelope so that you wouldn’t need to tie the ribbons [i am worried i won’t get the ribbons in the right place!]
thanks for this fun idea!
How do I get the pillow pattern with pockets?