
How to Preserve Your Handwritten Family Recipe Cards
Learn how to preserve handwritten family recipes in a simple recipe book, with tips for organizing recipe cards, making digital copies, and saving the stories behind your favorite dishes.
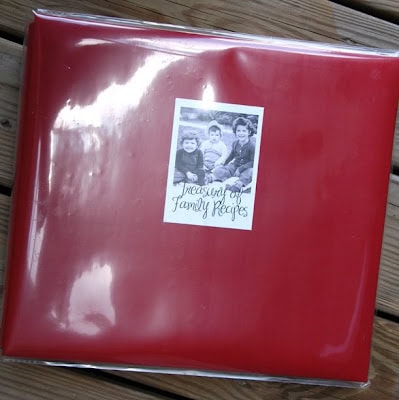
I come from a long line of wonderful cooks. My mom, grandma, and great-aunt all had recipes our family looked forward to, and some of my favorite memories are tied to what they made.
After my grandma passed away, my mom inherited her handwritten recipe cards. During a visit, I noticed that they were tucked away in a box. I wanted to put them somewhere my mom could easily find and enjoy them, while keeping the cards together.
So I made her a family recipe scrapbook. It’s still one of my favorite projects because it combines something useful with something personal: the recipes we love, written in Grandma’s handwriting.
If you have a box of handwritten recipes, loose pages, or recipe clippings, this is a lovely way to organize them. Keep the project simple with a binder and clear pockets, or add photos and decorative paper to make a family keepsake.
What You’ll Need
- A recipe binder or scrapbook album
- Clear pocket pages sized to fit your recipe cards
- Full-page protectors for larger recipes
- Acid-free, lignin-free paper or cardstock for dividers and notes
- Divider tabs
- A scanner or smartphone camera
- Optional: copies of family photos, patterned paper, and blank recipe cards
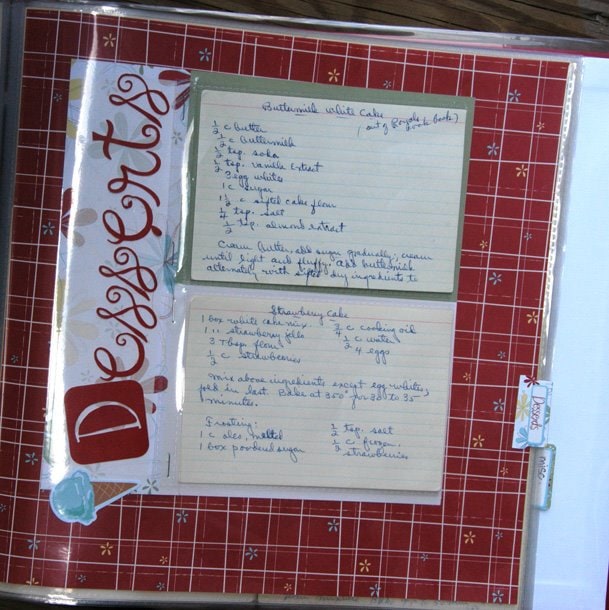
Measure your cards before buying supplies. Mine were 4 × 6 inches, so divided photo pages worked well in a 12 × 12-inch album. If your collection includes several sizes, choose an album that accepts a mix of pocket pages and full-page sleeves. Check that the pages fit your album’s rings or binding system, too.
For original cards, choose preservation-quality sleeves made from uncoated polyester, polypropylene, or polyethylene. Keep decorative papers and adhesive away from the originals; decorate a separate divider or use a printed copy of a recipe instead.
How to Make a Family Recipe Book
1. Gather and Sort Your Recipes
Start by gathering the cards, loose sheets, and clippings you want to include. Work on a clean, dry table with clean hands, and keep food and drinks away while you sort.
Make a few broad piles, such as main dishes, soups, breads, side dishes, and desserts. You can also create a section for holiday favorites if your family has recipes that come out every Thanksgiving or Christmas.
Set aside cards that are fragile or difficult to read. Don’t force a brittle page flat or try to scrub away old stains. If a recipe is too delicate to handle comfortably, use a copy in your book and keep the original in a supportive paper enclosure.
2. Scan or Photograph Every Recipe
Before placing the recipes in your album, make digital copies. This gives you a backup and makes it easy to share recipes with siblings, children, or other family members.
Scan or photograph both sides of each card, even if the back contains only a short note. A baking temperature, ingredient substitution, or extra instruction can be easy to overlook.
If you’re using your phone, place the card on a plain background in even light. Hold the camera directly above it, avoid shadows and glare, and check that the handwriting is readable when you enlarge the image. Save a full-color copy to preserve the original card’s look.
Use descriptive file names such as Grandma_Hot_Milk_Cake_Front and Grandma_Hot_Milk_Cake_Back. Keep the files in one clearly labeled folder, with a second copy in another location, such as cloud storage or an external drive.
3. Choose How to Organize the Book
I organized my mom’s album by recipe type, which makes it easy to find something when she wants to cook. You could also group recipes by family member or occasion.
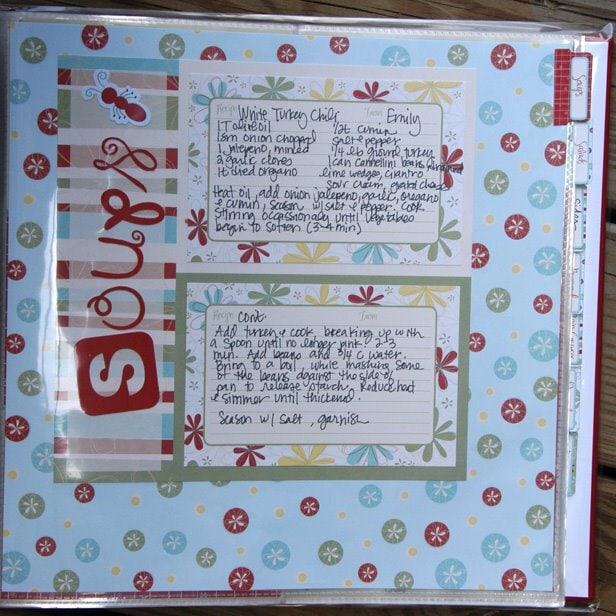
Keep the categories broad enough that you won’t need to reorganize everything when you add another card. If you have only a small collection, start with a few sections and leave room for more.
A short index at the front is useful, especially if a recipe could fit in more than one category. List the recipe name and its section so everyone knows where to look.
4. Place the Cards in Clear Pockets
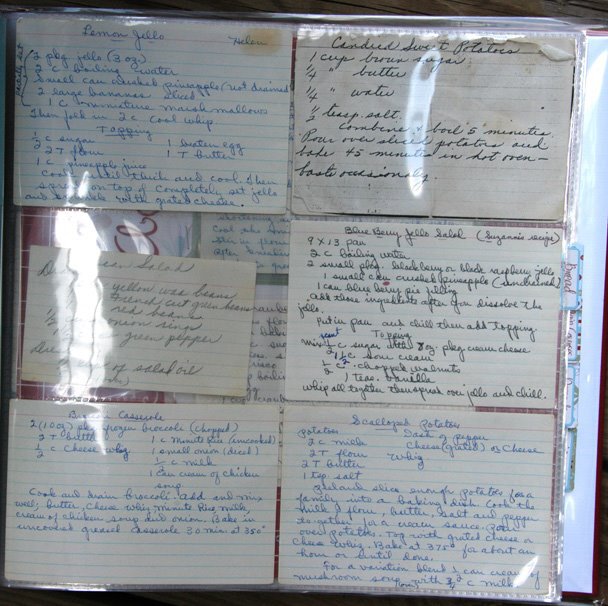
Slide each card into a pocket large enough to hold it without bending the edges. Avoid trimming original cards to make them fit or attaching them with glue or tape.
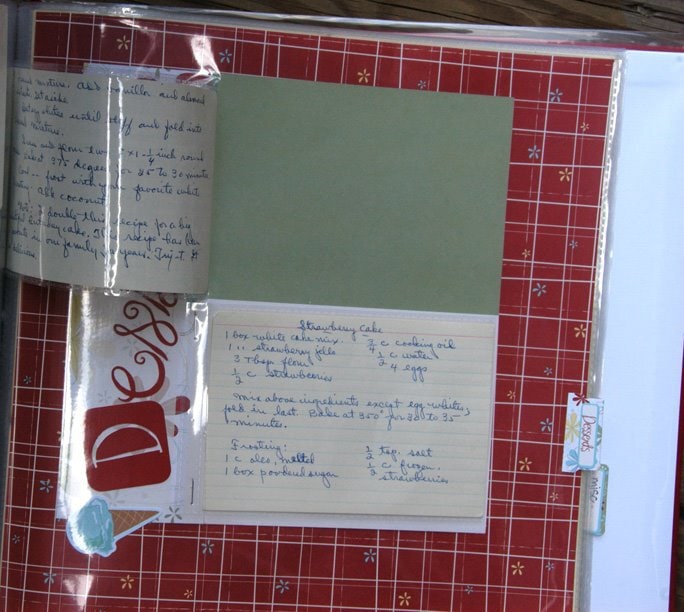
For recipes written on both sides, place one card in each clear pocket so you can turn the page to read the back. Putting two cards back to back works only when both recipes are written on one side.
Use larger sleeves for full sheets of paper. If a card is an unusual size, put it in a larger pocket rather than forcing it into a smaller one.
Clear pockets make the cards easier to browse and handle, but the openings don’t make them waterproof. For everyday cooking, consider printing a working copy and keeping the original safely in the album.
5. Add Dividers and a Personal Cover
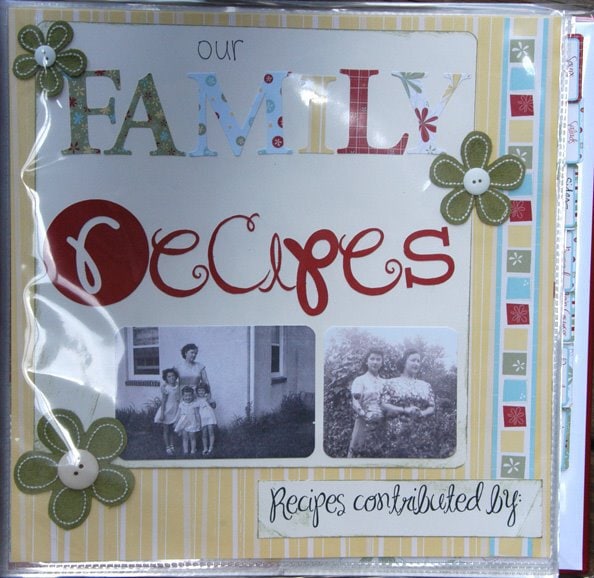
Label your sections with divider tabs. A single paper collection or a small group of coordinating colors will help the book feel pulled together without much decorating.
For my mom’s album, I used an old photo of her with her two sisters on the cover. A copy of a family photo, a handwritten title, or a picture of the person whose recipes you’re preserving would all make a personal cover.
Use copies of old photographs for decorating so you can keep the originals stored separately. You can also add a short introduction explaining whose recipes are in the book and why you wanted to save them.
6. Include the Stories Behind the Recipes
The recipe tells you what to cook, but a few extra sentences can tell you why it matters to your family.
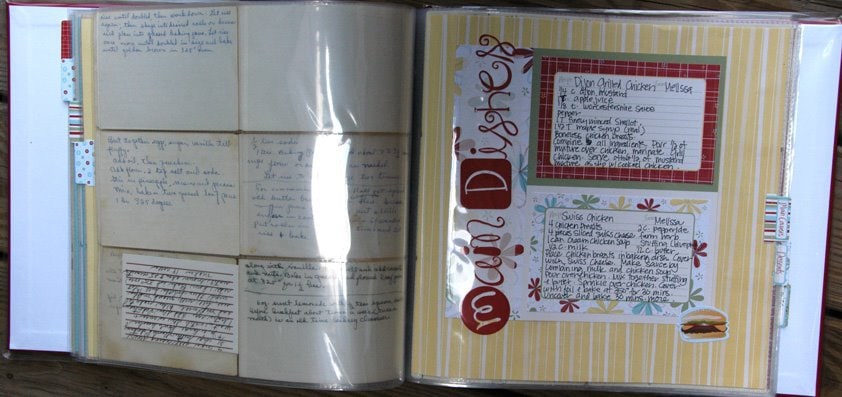
On a separate card, write who made the dish, when you served it, and anything you remember about it. Was it Grandma’s birthday cake? The rolls your mom made for every holiday dinner? A casserole that always appeared at family gatherings?
Record those details while you can ask relatives about them. Even a familiar recipe can become harder to identify once the person who made it is no longer there to explain it.
7. Add Recipes From the Next Generation
I included a few of my favorites and my sisters’ favorites alongside Grandma’s recipes. We wrote them by hand, which made them feel like part of the same collection.
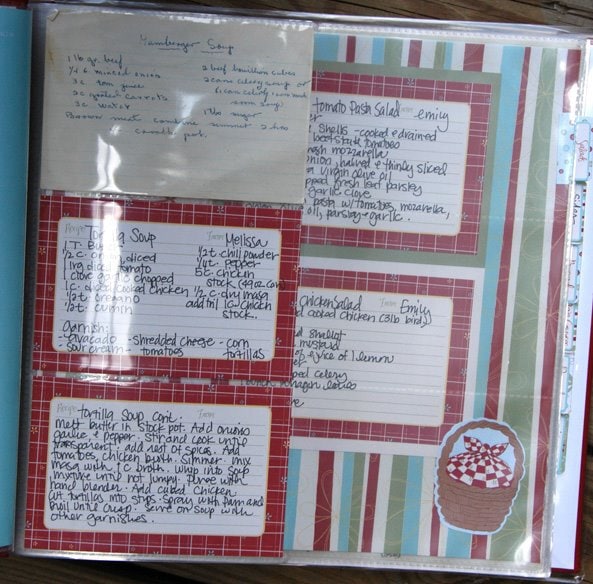
Leave a few empty pockets for new recipes. This doesn’t have to be a finished book that never changes. It can grow as your family adds new favorites.
What to Do With Hard-to-Read or Incomplete Recipes
Older recipes sometimes assume that the cook already knows what to do. A card might say “bake until done,” leave out a pan size, or use an unclear measurement.
Keep the original wording, then add a separate typed or handwritten version for easier reading. If you test the recipe and work out missing details, record them on your new version, including the pan size, oven temperature, and approximate cooking time.
Label those details as your testing notes so future readers can tell what was on the original card and what you added. If you’re unsure about an ingredient or measurement, ask a relative before guessing.
How to Store Your Original Recipe Cards
Keep original cards in a cool, dry place away from direct sunlight, stove heat, and spill-prone areas. An interior closet or cabinet away from plumbing is a better choice than an attic or damp basement.
Use acid-free, lignin-free folders or boxes when storing cards outside the album. Avoid tape, glue, rubber bands, and paper clips on the originals. For especially fragile or damaged recipes, a paper conservator can advise on suitable care. The Library of Congress guide to caring for paper is a helpful resource.
How to Share Family Recipes Without Giving Away the Originals
Once you have digital copies, you can make multiple recipe books. Print the scans for other family members, combine them into a PDF, or share a folder of recipe images.
A printed scan keeps the familiar handwriting visible. You can place a typed version beside it if the original is difficult to read, giving everyone an easy-to-use recipe along with a copy of the card they remember.
This would make a thoughtful Christmas, wedding, or housewarming gift. You don’t need to copy the entire collection at once. A small book of ten or twelve family favorites is a good place to start.
Start With a Few Favorite Recipes
You don’t need an elaborate scrapbook to preserve your family recipes. Start with a few favorites, make copies, and put them somewhere you can find again.
The handwriting, little notes, and memories are what make these cards special. Saving them gives the next generation a chance to cook the same dishes and know a little more about the people who made them.
I love this post on preserving family recipes. I recently lost my mom about a year ago and she too was a fabulous cook and she was so passionate about fixing great meals for her family and friends. My dad, at 82 has been living in their house until last weekend when there was a terrible house fire.. no one hurt but house badly damaged. My sister and I were panicked until we got to house wanting to grab my mom’s handwritten recipes. Most were able to be saved. I really want to preserve them and love your album idea. My sister and I are going to share with Earth other the many recipes but wanted to see if you would tell me of the brand of album and page protectors you used that I could purchase, I love to scrapbook but don’t have a ton of time. Just wanted to see where I can get supplies.
Thanks again for your post,.
Jennifer
I love it.I’ll be making one for my daughter for sure :))
Thank you.
What a great treasure! I am inspired to do the same with my grandmothers recipes… that is if I can pry my brothers hands off of them!! ha You see he is the “cook” of the family!
That is fabulous! You have so many great talents! Thanks for sharing!
Have A Great Day! =)
I love this idea. My most favorite memories of my grandmother revolve around her kitchen. Her cook book is going to be a treasured gem if I can get my hands on it!
Love it! I miss the times we used to get together and scrapbook at the office. You always have such great ideas!
SO Priceless!!!!
Gorgeous!! You did a wonderful job!
I really love this idea. I have always thought of scrapbooking and cooking as kinds of arts. Why not combine the two. Great idea!
What a great idea and perfect timing too! I’m getting into Christmas present mode and trying to come up with fun ideas and this is great!! THANK YOU!
That is awesome!! Thanks for the inspiration!
Oh I love it!! I have been wanting to do something like this for years now!! Yours turned out so great!
Thanks for sharing.