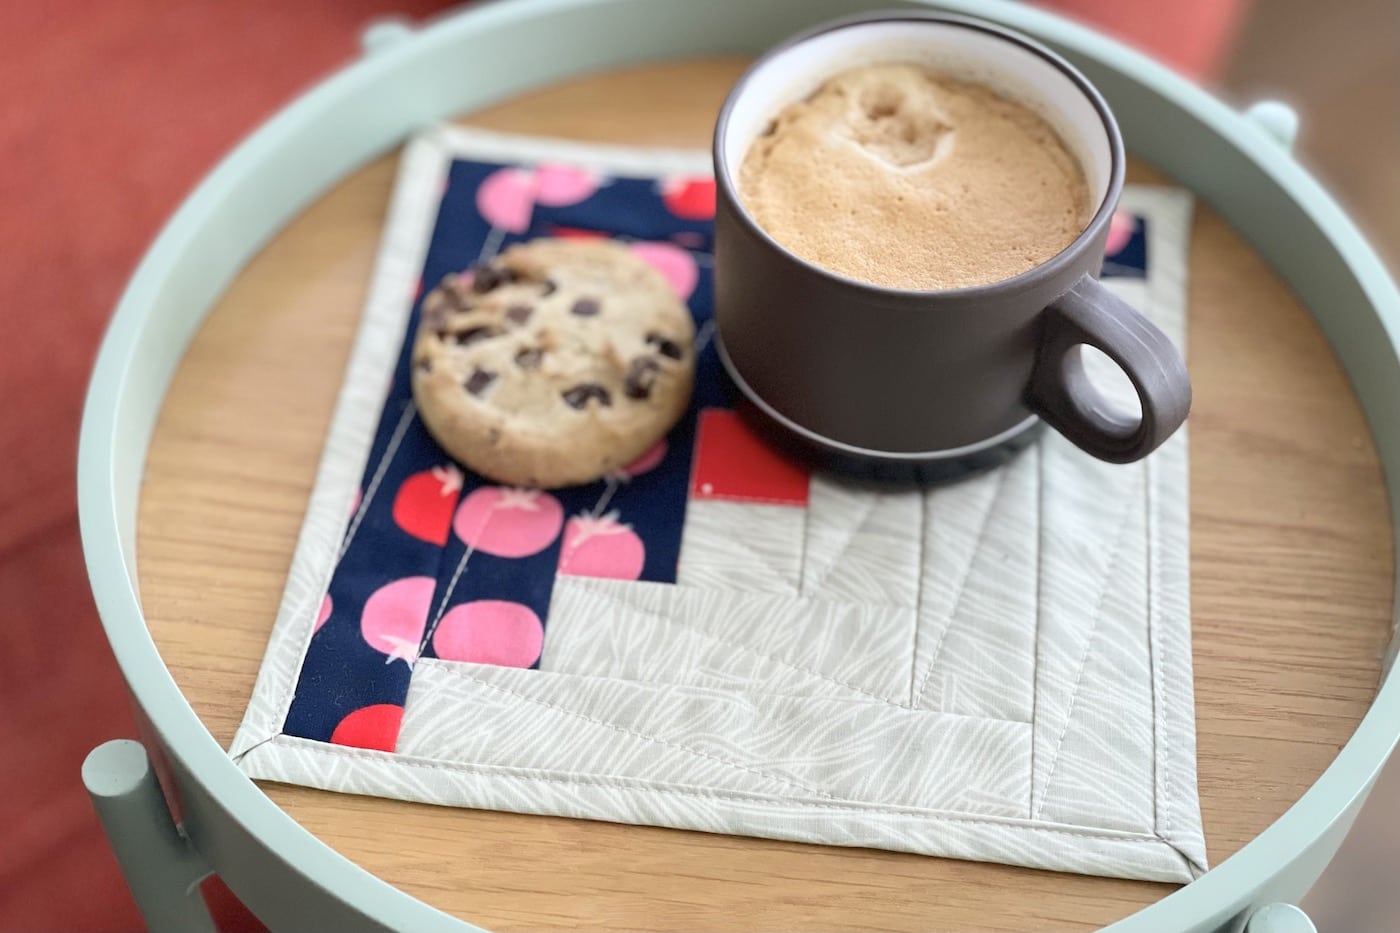
Coffee Cabin Self-Binding Mug Rug Tutorial
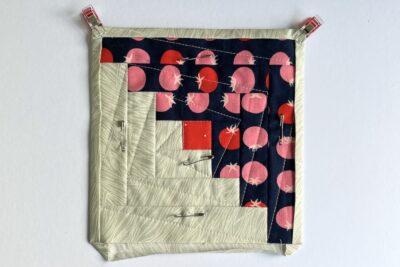
Our April Mug Rug Pattern features a unique twist; it’s created from a Log Cabin Quilt block and bound using the backing fabric, so it’s self-binding!
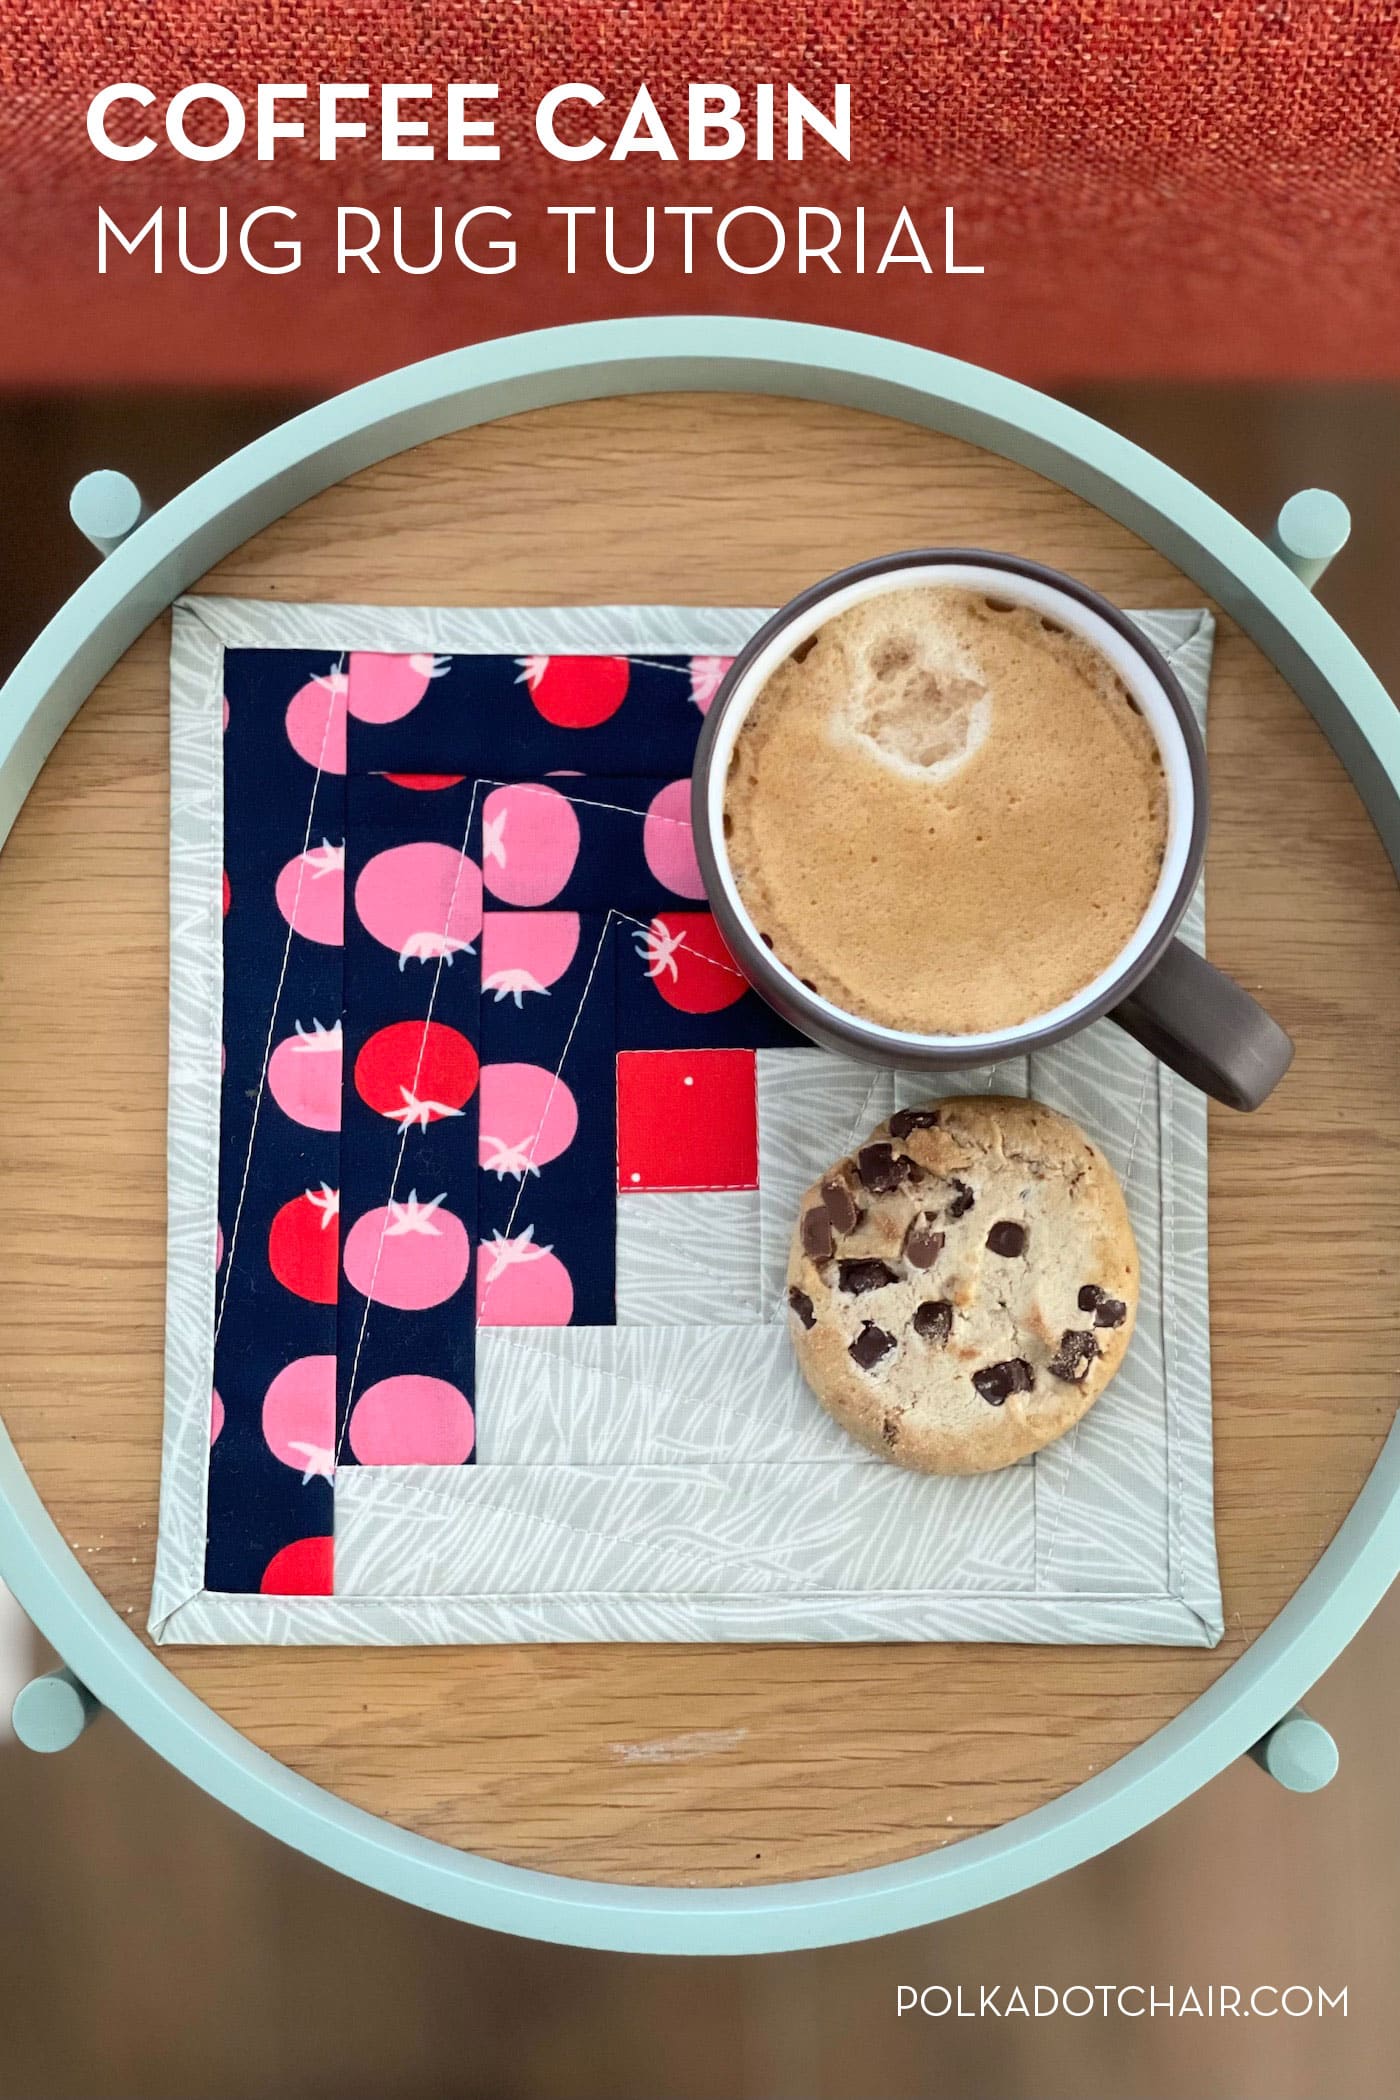
Log Cabins are one of my favorite traditional quilt blocks, so I couldn’t resist using it for this month’s Mug Rug of the Month.
I’ve gone with a two-tone design (plus the traditional red central square…did you know that it is meant to represent the heart of the cabin?!), but you can use one main fabric or lots of different ones for a more scrappy look. All combinations look great in a log cabin block!
The skill focus for April is creating the mug rug backing and binding all from one piece of fabric. You can use this technique on any style of square or rectangular mug rug; it’s a great way for a quick finish and reduces some of the bulk you might get when using separate backing and binding.
Monthly Mug Rug Free Patterns & Skill Focus
Each month Amy Ball is creating a free Mug Rug pattern to share with all of you. In addition to the pattern, each month, you’ll learn a new quilting skill. Here are all of the mug rugs shared so far, along with their corresponding skill focus.
- January: Fabric Flash Mug Rug – Using Selvages
- February: First Edition Mug Rug – Fussy Cutting
- March: English Bloom Mug Rug – English Paper Piecing (EPP)
- April: Coffee Cabin Mug Rug – Binding with Quilt Backing
- May: Street Party Bunting – Raw Edge Applique
- June: Big Stitch Mug Rug – Hand Quilting
- July: Summer Sun Mug Rug – Improv Piecing
- August: Heart Mug Rug – Patchwork Piecing
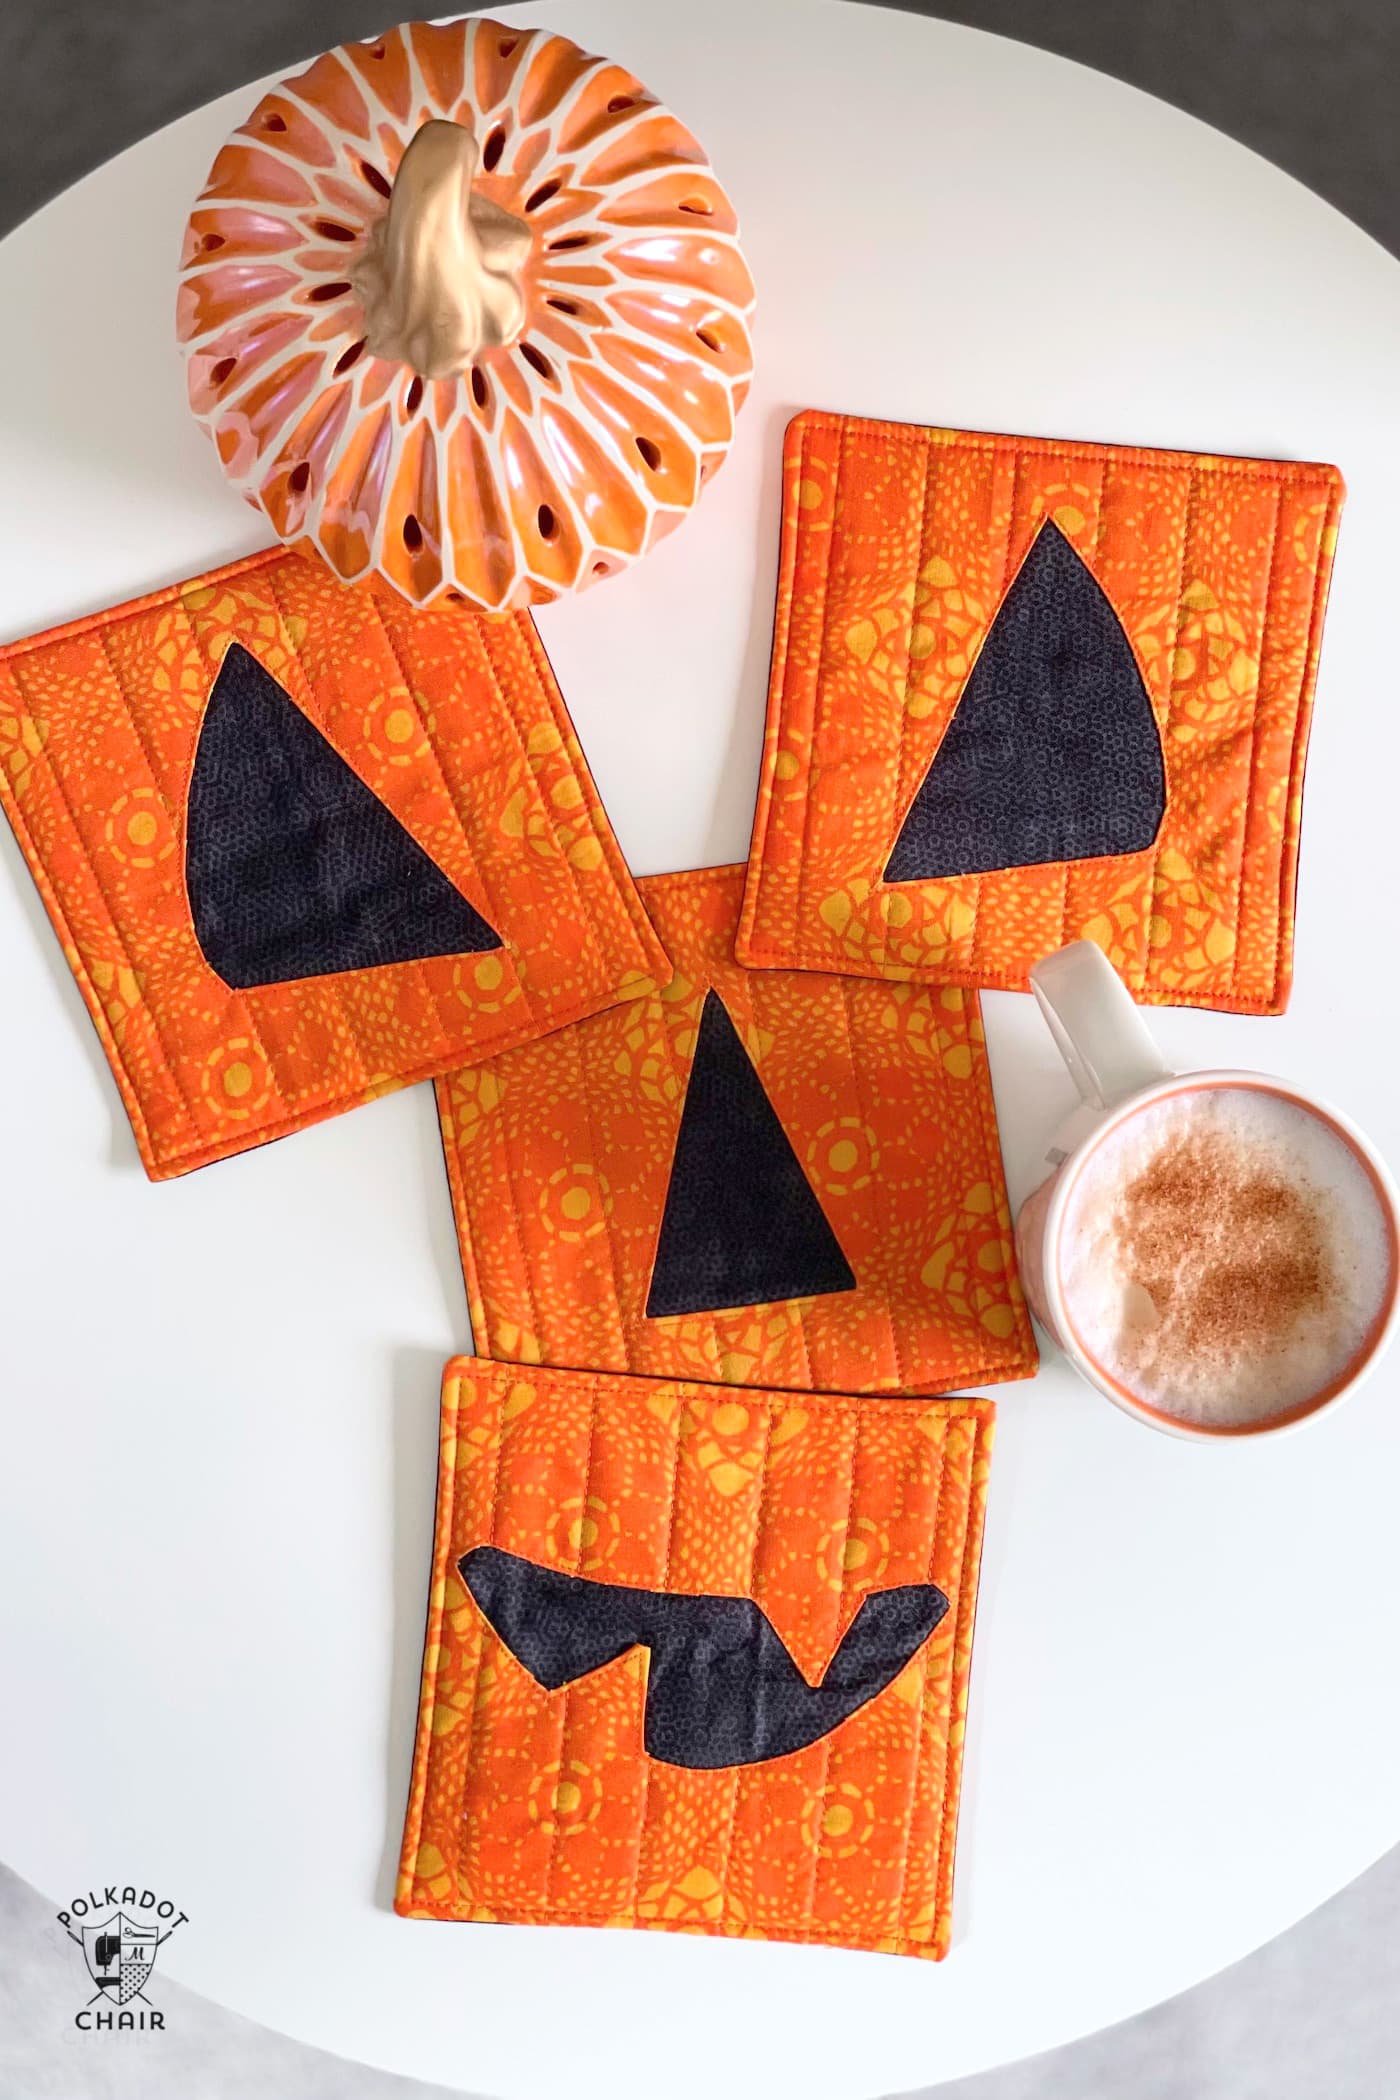
- September: Pumpkin Face Mug Rug – Reverse Applique
- October: Cozy Cup Mug Rug – Big Stitch Binding
- November: Christmas Tree Mug Rug – Free Motion Quilting
Instructions

Coffee Cabin Mug Rug
Equipment
- quilting ruler
supplies
Fabrics:
- 1 Fat Eighth Fabric A
- 1 Fat Eighth Fabric B
- 1 large scrap Fabric C Red
- 1 Fat Eighth Fabric D for backing & binding
Other:
- 1 piece Batting 9” square
Instructions
Cutting:
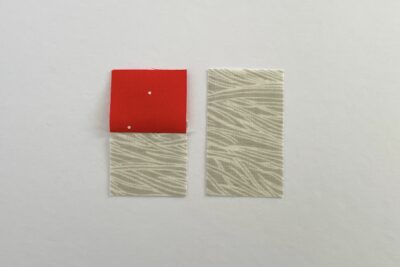
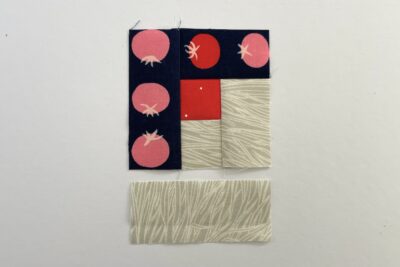
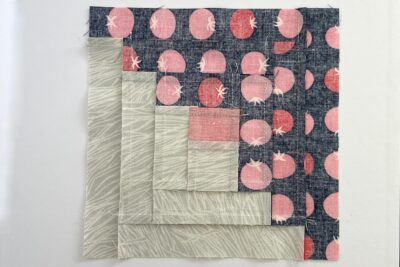
- From fabric A cut:1½” square (1), 1½” x 2½” (1), 3½” x 1½” (1), 1½” x 4½” (1), 5½” x 1½” (1), and 1½” x 6½” (1).From fabric B cut: 2½” x 1½” (1), 1½” x 3½” (1), 4½” x 1½” (1), 1½” x 5½” (1), 6½” x 1½” (1), and 1½” x 7½” (1). From fabric C cut:1½” square (1). From fabric D cut: 9” square (1).
Construction:
- Use a ¼” seam allowance, unless otherwise stated.
- Take the fabric C 1½” square and the fabric A 1½” square. Sew them together with the fabric C square on top.

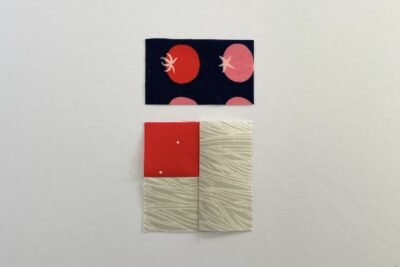
- Take the fabric A 1½” x 2½” rectangle and sew it to the right edge of the unit from step 1.
- Take the fabric B 2½” x 1½” rectangle and sew it to the top edge of the unit from step 2.
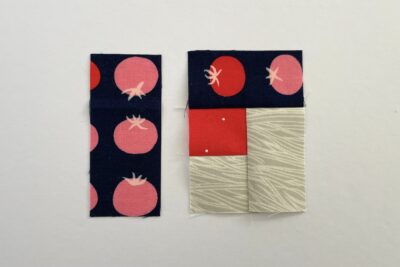
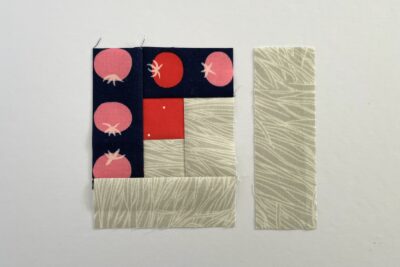
- Take the fabric B 1½” x 3½” rectangle and sew it to the left edge of the unit from step 3.
- Take the fabric A 3½” x 1½” rectangle and sew it to the bottom edge of the unit from step 4.
- Take the fabric A 1½” x 4½” rectangle and sew it to the right edge of the unit from step 5.
- Take the fabric B 4½” x 1½” rectangle and sew it to the top edge of the unit from step 6.
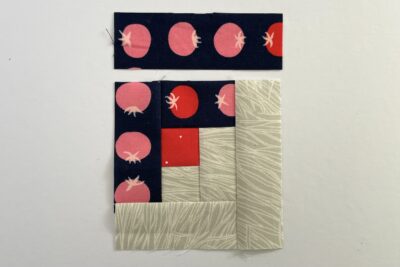
- Take the fabric B 1½” x 5½” rectangle and sew it to the left edge of the unit from step 7.
- Take the fabric A 5½” x 1½” rectangle and sew it to the bottom edge of the unit from step 8.
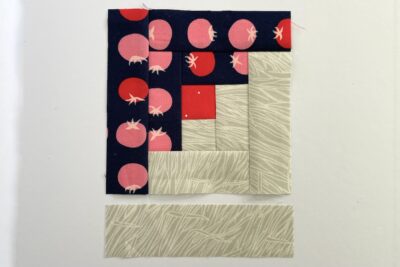
- Take the fabric A 1½” x 6½” rectangle and sew it to the right edge of the unit from step 9.
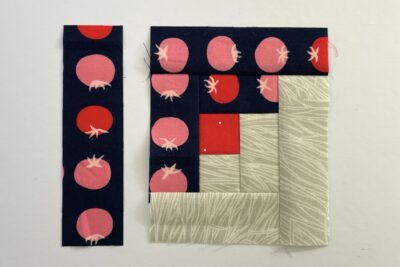
- Take the fabric B 6½” x 1½” rectangle and sew it to the top edge of the unit from step 10.

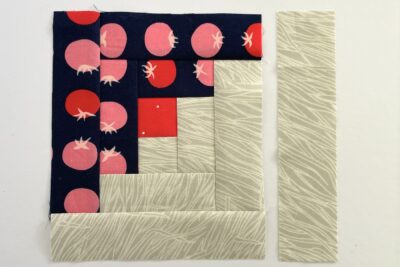
- Take the fabric B 1½” x 7½” rectangle and sew it to the left edge of the unit from step 11.
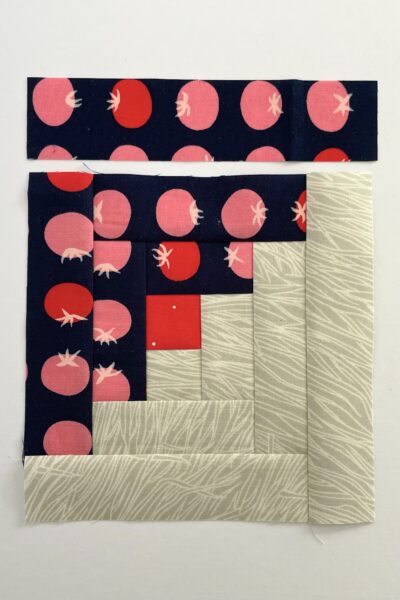
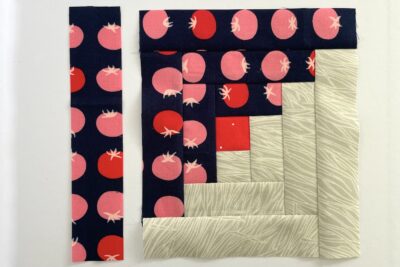
- Press well.
Quilting and Finishing:
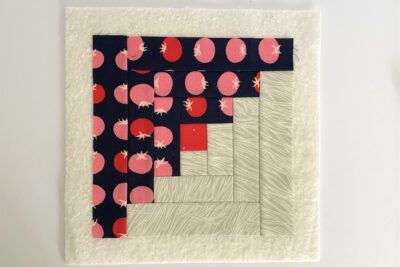
- Take the batting square and place the pieced mug rug block on top with the right side facing towards you. Make sure all the layers are smooth and flat then baste together using your preferred method.
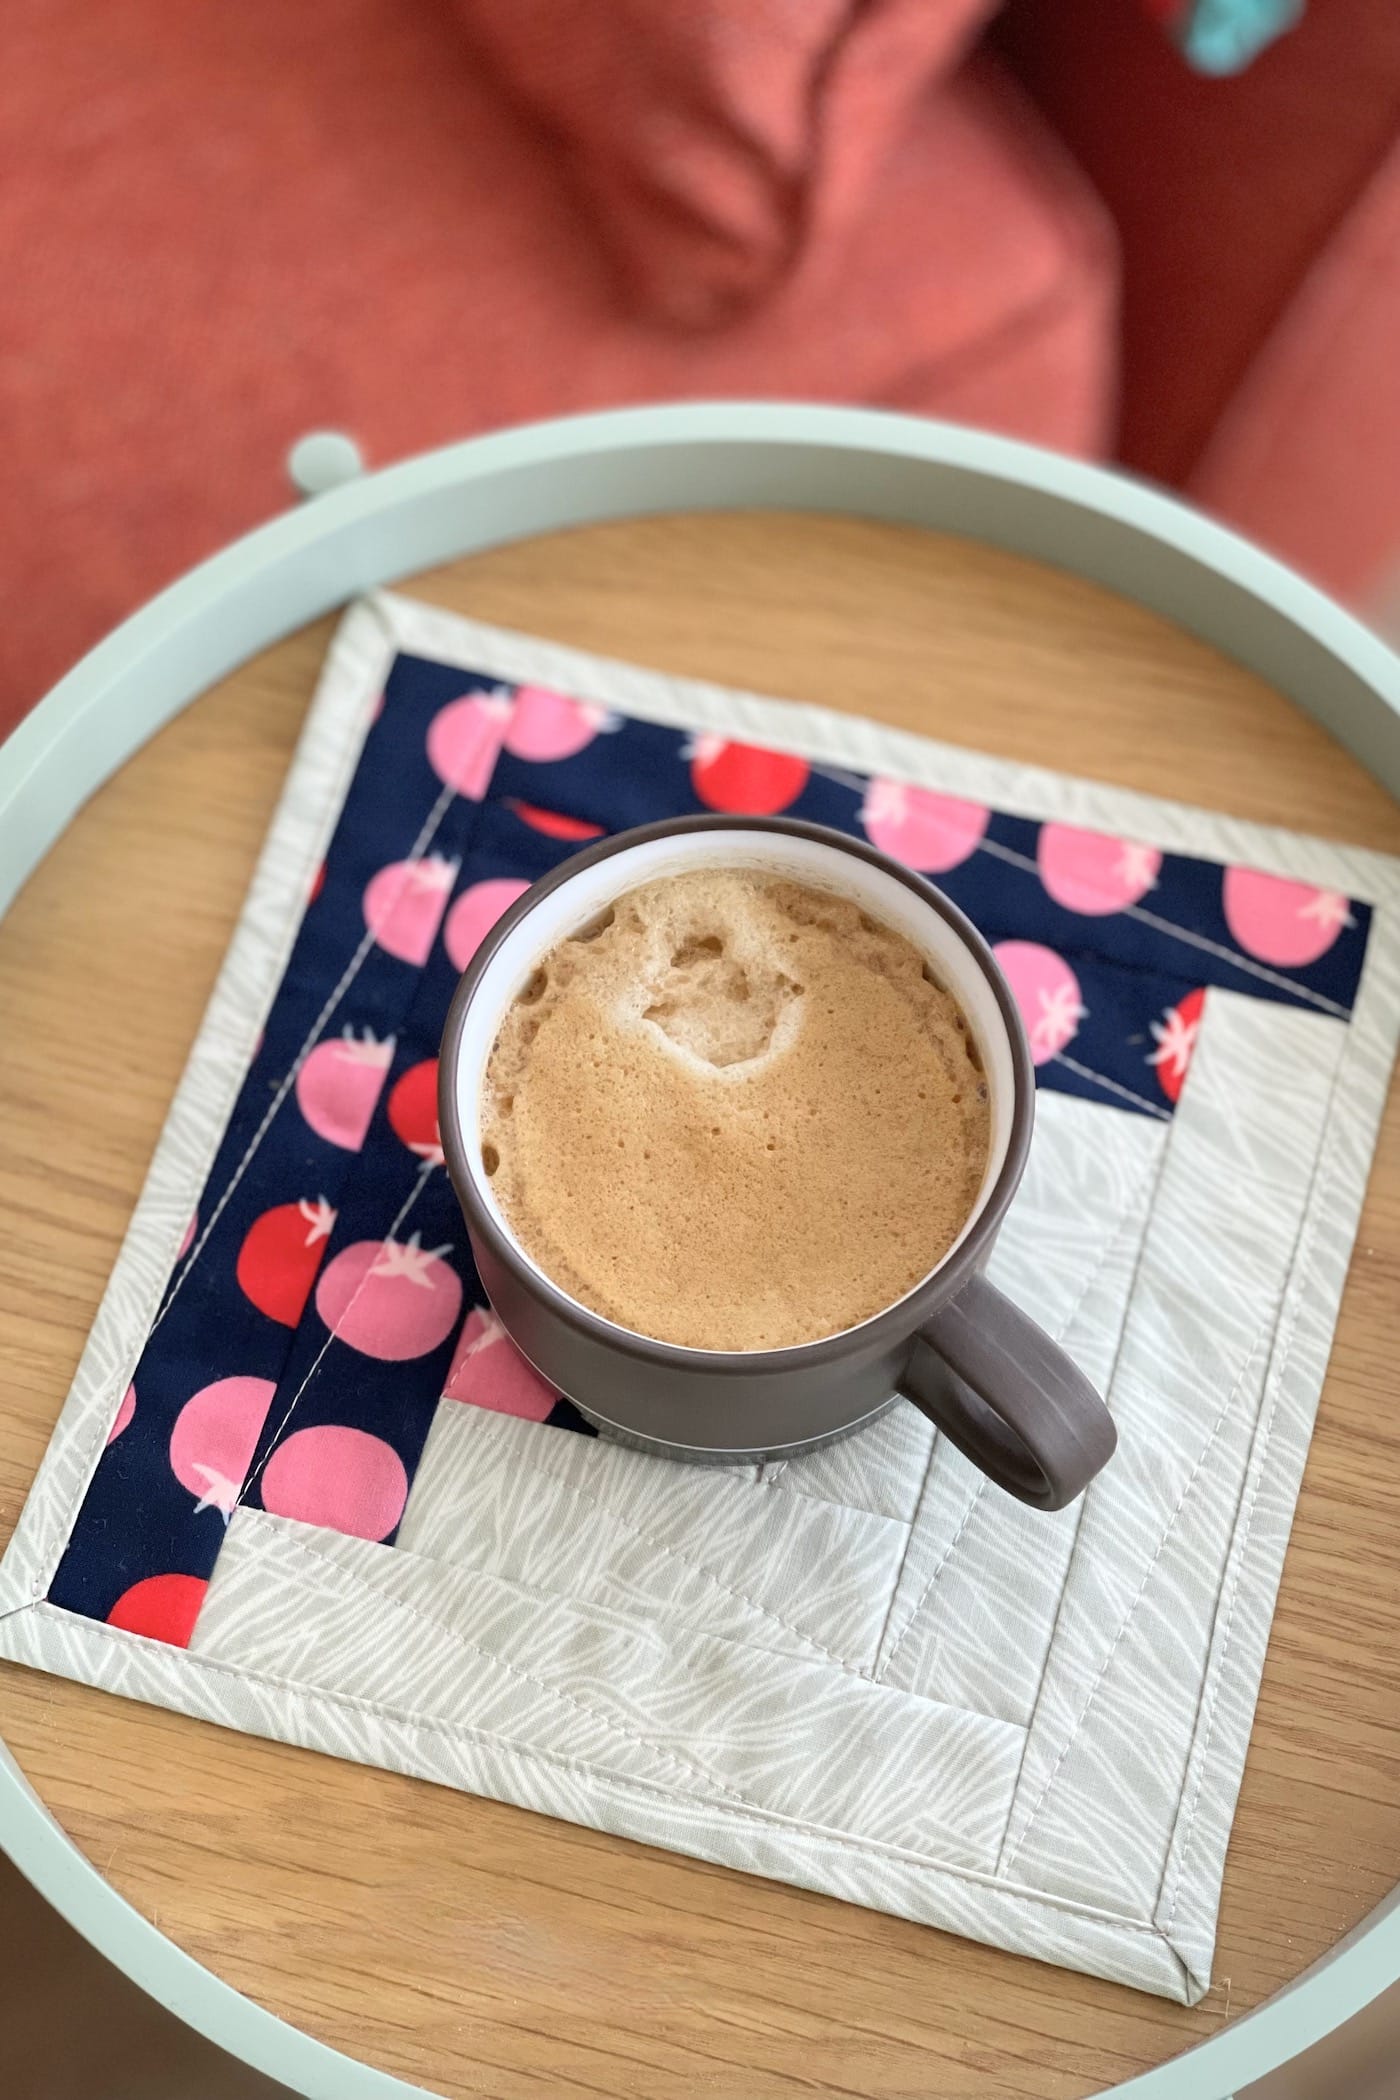
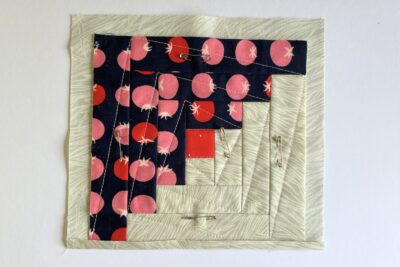
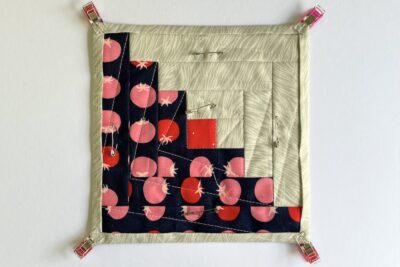
- Quilt as desired. I have used a straight line spiral, starting at the bottom left corner. Use the diagram as a guide for how to create the same design.
- Once you have finished quilting, trim off the excess batting, and square up the mug rug if required.
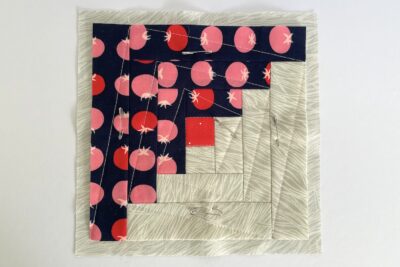
- Take the fabric D 9” square and place it right side down. Add the quilted mug rug block with the right side facing towards you, making sure the mug rug is centred on the fabric square (there should be a ¾” of excess fabric on all four edges). Pin the layers together so they don’t move around.
- Press one raw edge of the backing fabric towards the mug rug so the raw edges meet.
- Then press the remaining excess backing fabric over the raw edge of the mug rug to cover it and create your first binding edge. I’d recommend securing all the binding edges in place with some dots of fabric glue. Press to give a crisp finish.
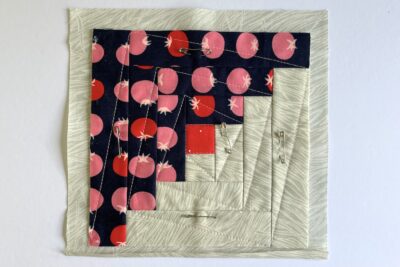
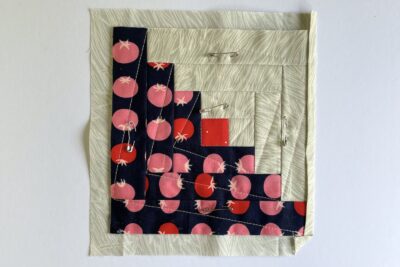
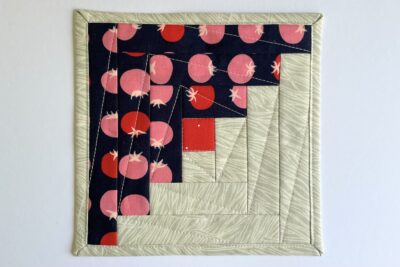
- Rotate the mug rug unit so the binding edge from step 6 is along the right edge and fold up the bottom corner, creating a 45° angle. Use the photo as a guide.
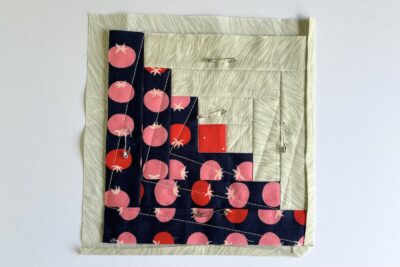
- Now press the bottom raw edge of the backing fabric towards the mug rug so the raw edges meet.
- Then press the remaining excess backing fabric over the raw edge of the mug rug to cover it and create your second binding edge. Take care to ensure the mitred corner matches to the first binding edge to create a neat corner. Press to give a crisp finish.
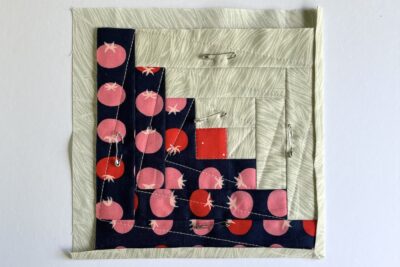
- Repeat steps 7 to 9 for the third edge.
- For the final raw edge start by folding up both remaining corners at 45°, then press the bottom raw edge of the backing fabric towards the mug rug so the raw edges meet.
- Then press the remaining excess backing fabric over the raw edge of the mug rug to cover it and create your final binding edge. Take care to ensure both mitred corners match to the binding edges to create neat corners. Press to give a crisp finish.
- Sew close to the binding edge (about ⅛”) to secure it in place. Press well to finish.
- Make a hot drink, head out into the woods (this is optional!) and enjoy your new Coffee Cabin mug rug.

About the Designer

Amy lives in the north of England with her husband and son. When she’s not sewing and quilting, Amy can usually be found baking or reading. You can find her on Instagram @amyatthegate