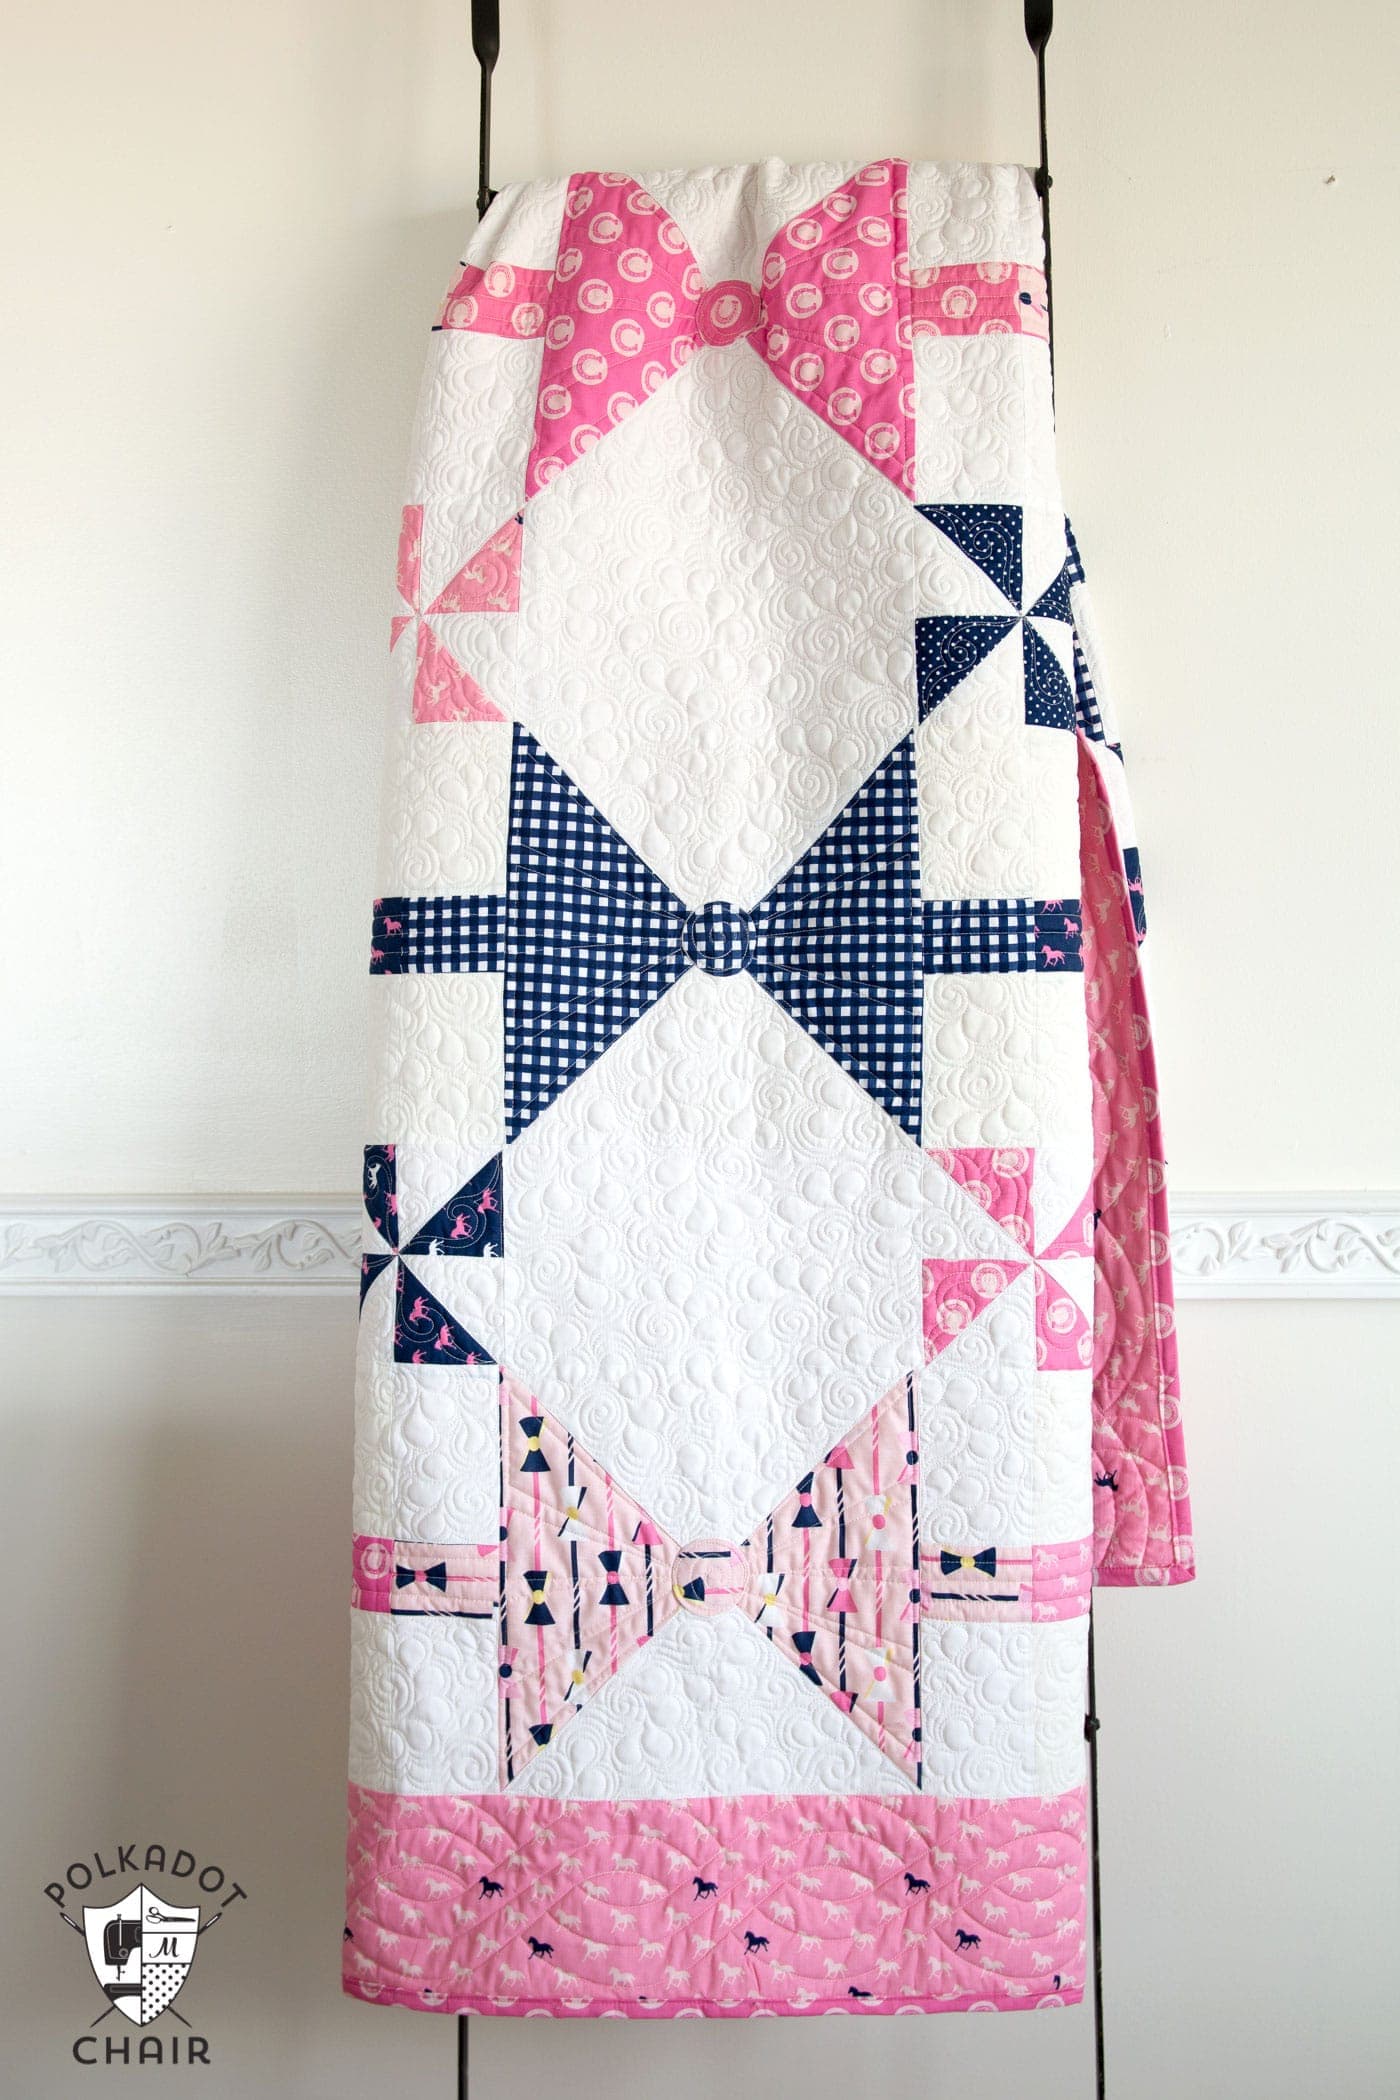
Patchwork Doll Quilt Tutorial
Learn how to make a simple patchwork doll quilt step by step with our free Baby Doll quilt pattern.
Several years ago a few days before I needed to send off “the” Christmas package to my family out west, I decided that I needed to throw just “one more” gift in there.
Normally I have a nice time planning out projects to sew as gifts for my nieces and nephews, but this year I had not planned on sending them any handmade items.
Partially because I was stumped and partially because I didn’t have a sewing room (my stuff was all over the hallway and in the process of being moved).
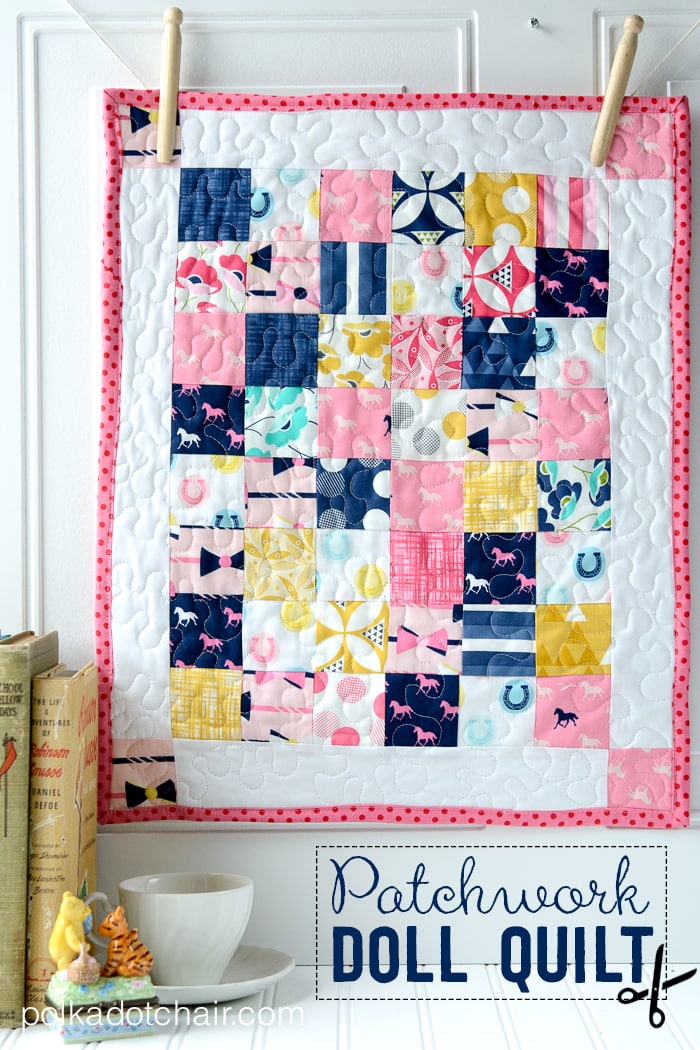
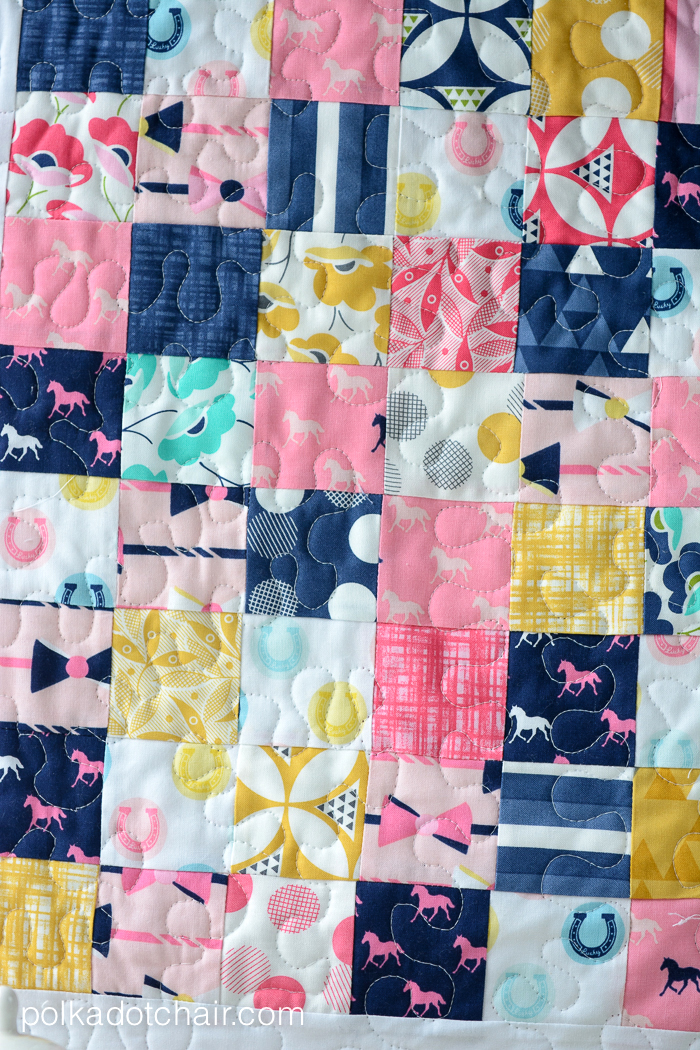
As I was moving my fabric, I stumbled over a mini charm pack fabric, that I picked up at Quilt Market in October. I noticed how nicely the colors coordinated with my new Derby Style line of fabric and thought it would be fun to whip a quick doll quilt to go with the doll we had purchased for my niece for Christmas.
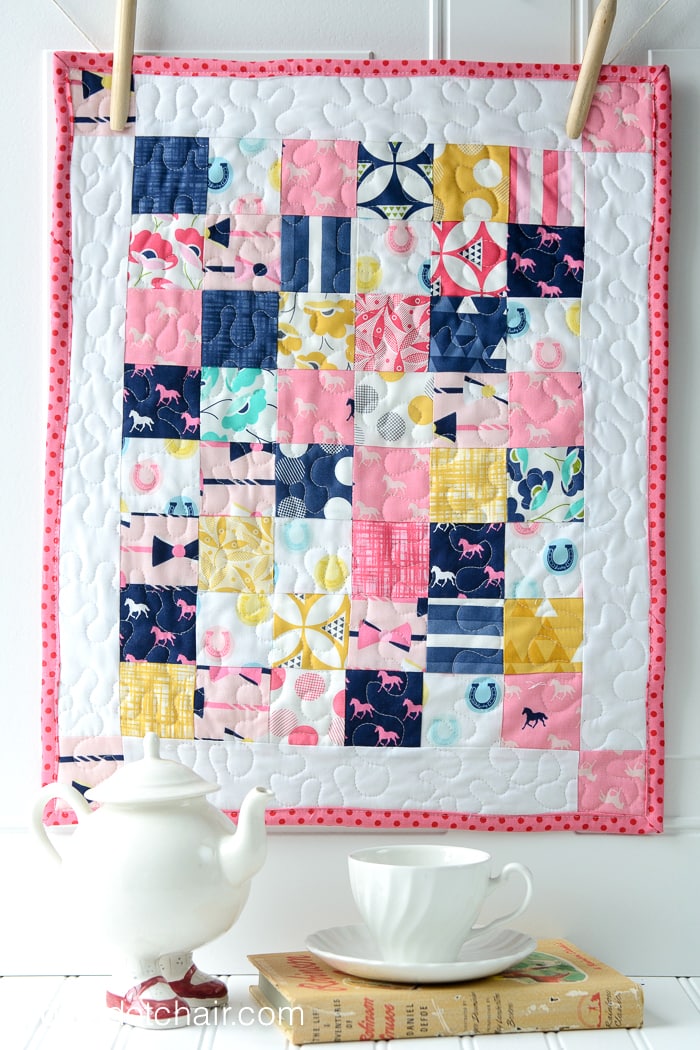
We had bought her a Lalaloopsy doll, and I loved how the bright colors of the doll coordinated with the fabric.
About the Doll Quilt
This quilt is a quick sew and would be a great project for a beginner or teen sewist. You can whip one up quickly if you buy a mini charm pack, but you can also cut out squares just as fast.
Fabric Requirements
If you want to make one, you’ll need fifty two 2 1/2″ squares of fabric in various prints. (4 of these squares are for the corners of the quilt).
You can buy a mini charm pack or cut them from a variety of fat quarters. I wouldn’t buy yardage for this project; you’d end up with too much waste. You can also use some of your scrap pile.
If you have leftover pieces from a 5″ precut stack you can also use those, you can get four 2 1/2″ squares from one 5″ square of fabric.
What Size is a Doll Quilt?
Doll quilts are normally made in a variety of sizes, this quilt is 18″ x 22″ which is the same size as a Fat Quarter of fabric. It is designed that way to reduce the amount of fabric waste in the pattern.
Instructions
Patchwork Doll Quilt Pattern
Equipment
- Basic Sewing Supplies
supplies
- 52 2 ½″ squares of fabric in various prints. 4 of these squares are for the corners of the quilt. You can buy a mini charm pack or a cut them from a variety of fat quarters. I wouldn’t buy yardage for this project, you’d end up with too much waste. You can also use some of your scrap pile.
- 1 Fat Quarter Fabric for quilt back
- 1 Fat Quarter Fabric for binding
- 1 piece Quilt Batting at least 18" x 22"
Instructions
Cutting:
- Finished Quilt Size is approx. 16 ½″ x 20 ½″
- 2 strips of white fabric each 2 ½″ x 12 ½″
- 2 strips of white fabric each 2 ½″ x 16 ½″
Construction: All seams are ¼″
- Begin by arranging your squares in a pattern that you like. You need 6 squares across by 8 squares down. Taking care to balance out the various colors and lights and darks across the quilt top.
- Sew together in rows of 6.
- Press the seams to one side. Alternating which direction you press your seams by row. For example press the seams of the even rows towards the right and the odd rows towards the left.

- Next sew all 8 rows of six together. Press seams to one side.
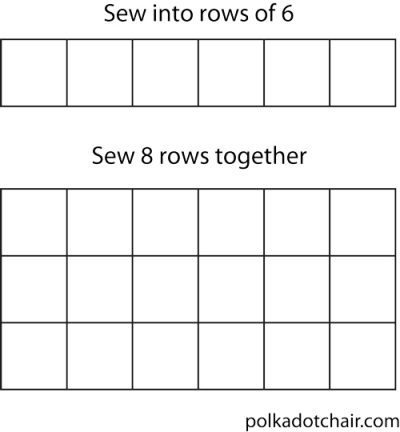
To assemble the remainder of the quilt.
- Stitch one 2 ½″ square to each side of the two 2 ½″ x 16″ pieces. Press seams to one side. Set aside.
- Stitch a 2 ½″ x 12″ piece of fabric to the top and bottom of the sewn squares. Press.
- Stitch the 2 ½″ x 16″ pieces with 2 ½″ squares sewn on, to the two sides of the quilt top. Press.

- Quilt as desired. If you’d like a simple tutorial for doing this you can see my Machine Quilting Basics Sewing Lesson.
- Bind as desired.

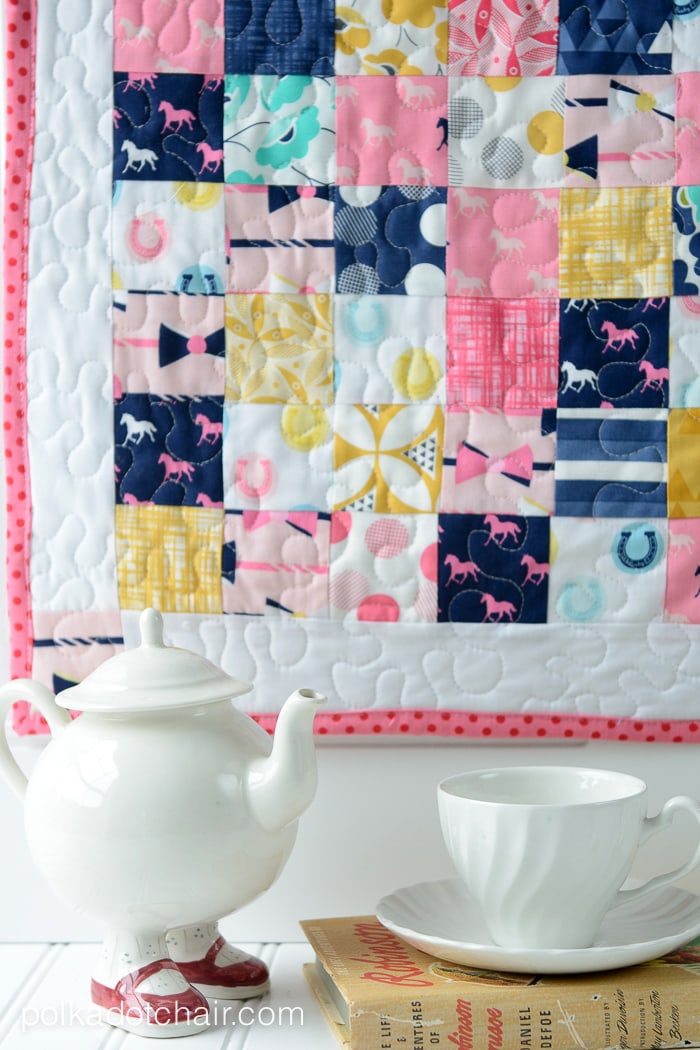
Fabrics in the quilt above are from Derby Style by Melissa Mortenson for Riley Blake Designs and Color Theory from V & Co for Moda Fabrics, both due in stores sometime this month.
That’s it!!
You can easily stitch up a few quilts in an afternoon as gifts for your favorite toddler or little girl!
Love this. This is just what my great grandaughters need for their “babies,” and just what I need for a quick and easy project. Thank you so much!
Just to let you know, the sashing should be cut at 16 1/2 and 12 1/2 inches long, not 16 and 12. This is because the pieced middle hasn’t had its outside seem allowances used up before you attach the sashing.
Thank you for the correction.
Melissa,this quilt is so adorable,My granddaughter will love it! I just made The Ruby Lou Bag,One for her and and a mini for her American Doll, all I need is buttons and Its ready for her on Valentines day. Its the sweetest pattern I have ever seen,Thank you for your tutorials
Oh I’m so glad that you like it!!! I love that Ruby Lou bag too- It’s on my list of things to make again!
So cute and easy!
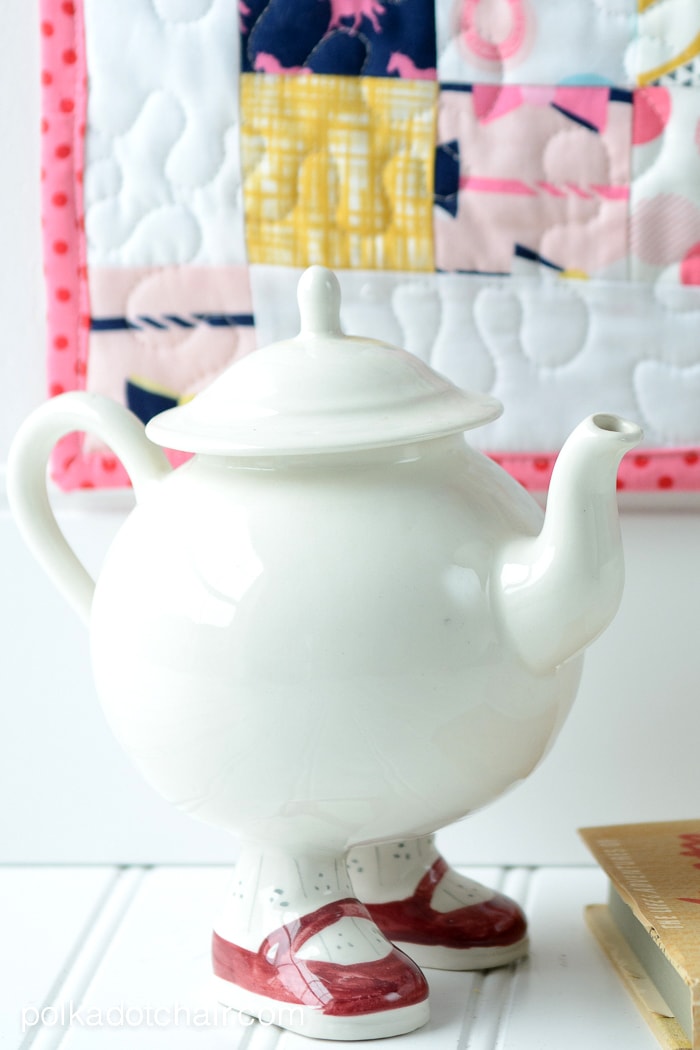
LOVE the teapot! I have two cups that go with it.
Oh really! When I bought the teapot I remember wondering if I should buy the cups too 🙂
Hi Melissa, I am 41 years old and have always been in love with fabric but never have ever used a sewing machine. I’ve finally decided it’s time to see if this “old dog can be taught a new trick:)” I really want to learn and your blog and book has really inspired me and I absolutely love your fabric line and all of your projects. So I wanted to ask, do you have any suggestions for a beginner on what sewing machine would be good for someone just starting out? Also…..I love this baby blanket…my 7 year old daughter wants this for her bitty baby doll:) The fabrics look great together…And my daughter loves your fabric line as well. She wants to learn to sew as well so this is a mother/daughter goal for us to learn together:) Thank you!
Hi Heather! It’s never too late to learn to sew! As for a sewing machine recommendation: I would recommend that you find a local sewing shop that sells machines. You can ask them a million questions about the machines and they are there to help you after you buy the machine. Many also offer free new owner classes, which would be a big help to someone just starting out. Most shops have machines of all different price ranges, including some for beginners.
The quilt is adorable and you are right, the two fabric lines go very well together. Bet your niece was really happy with her gifts!