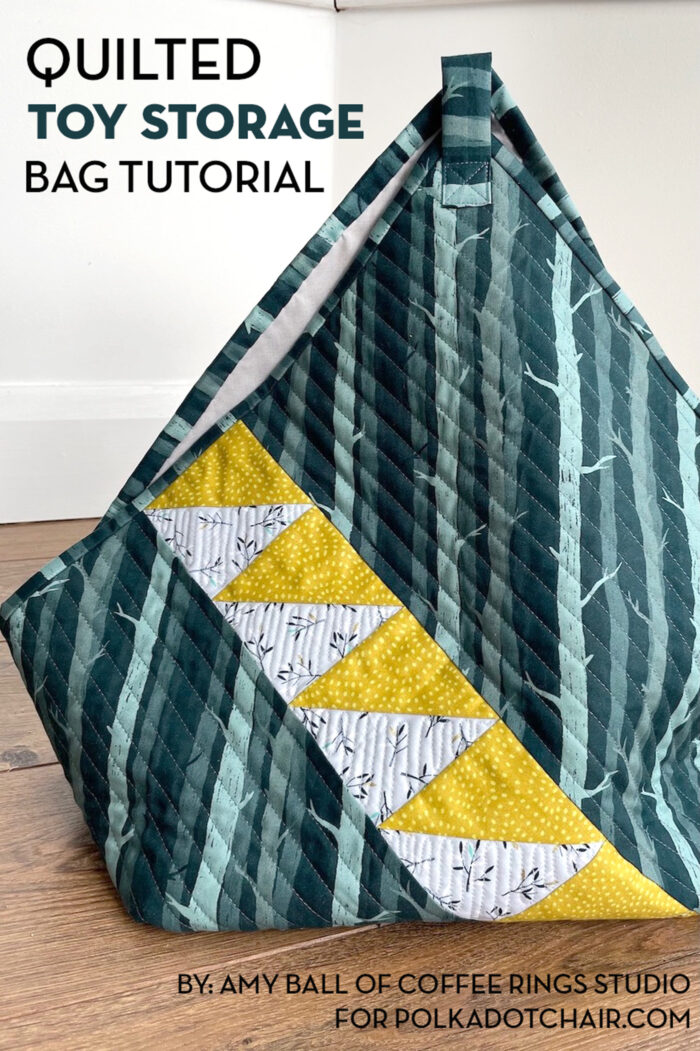
Quilted Toy Storage Bag Tutorial
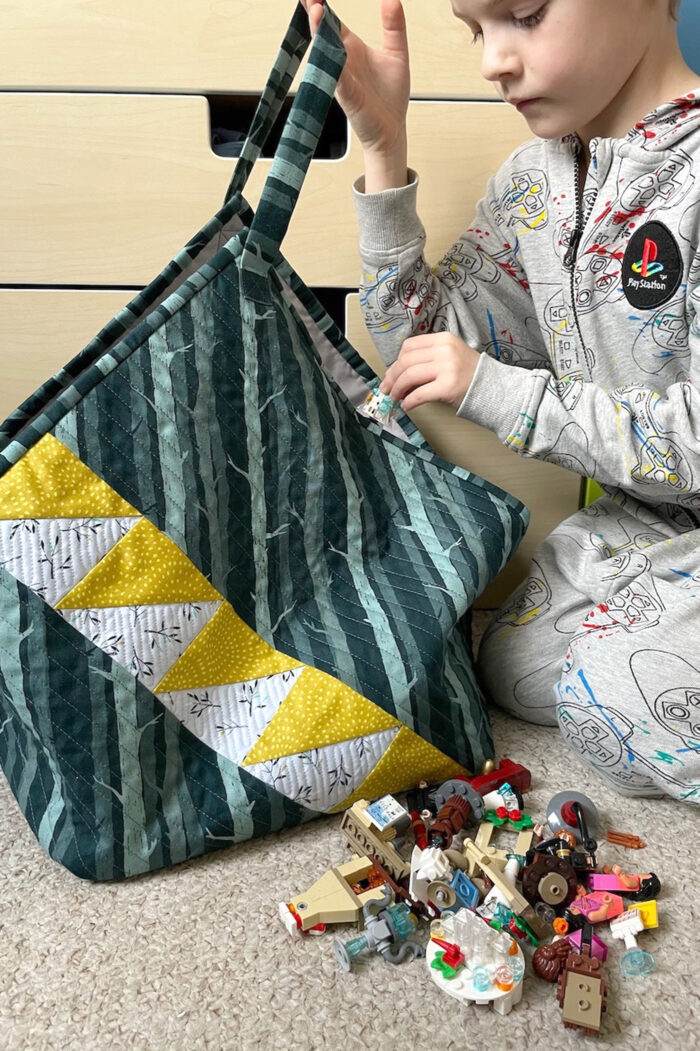
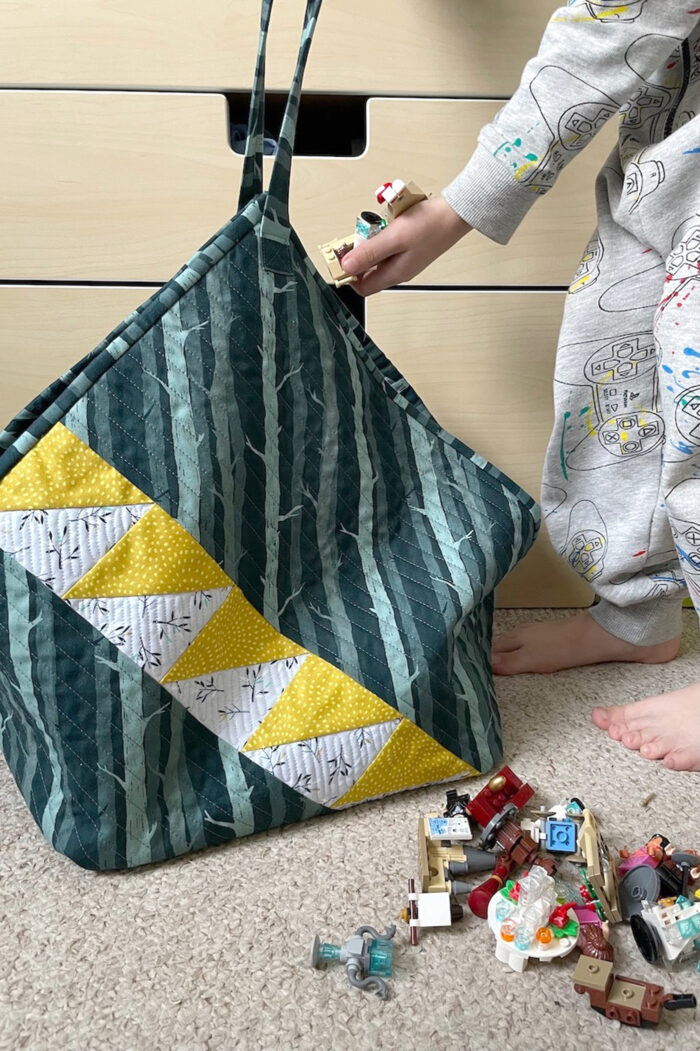
The wide-open top of this quilted toy storage bag makes it perfect for kids to use to clean up their toys. It would be especially great for Lego storage! Create one today with our free toy storage bag sewing tutorial created by Amy Ball.
If your house is anything like mine, you always need more storage! This bag has a cute shape and good size base so it looks good but also stores a lot.
Quilted Toy Storage Bag Pattern
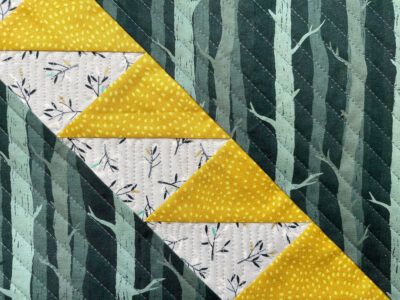
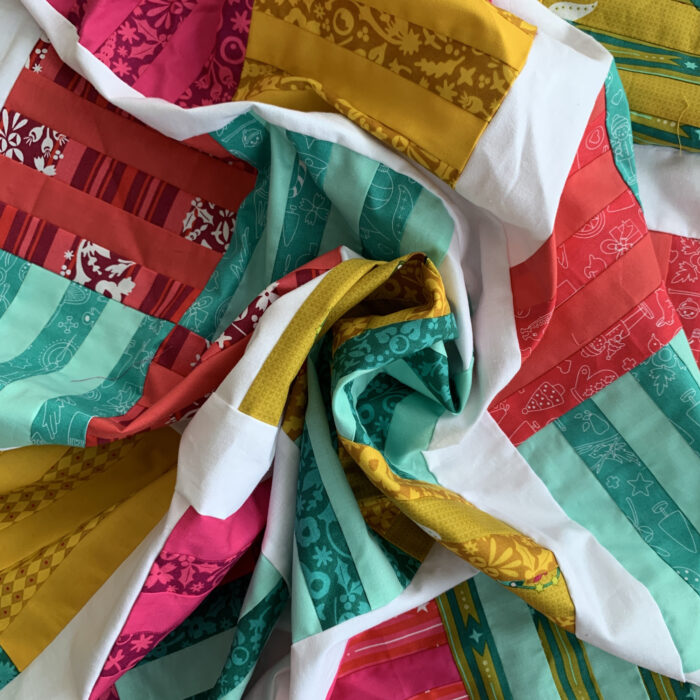
The half-square triangle detail gives you a chance to use up some cherished fabric scraps and as the bag is squashy, it’s easy to put away when not in use.
Quilted Toy Storage Bag Tutorial
Equipment
supplies
- 1 metre/yard Main fabric; 10½” x 11½” piece, 18” x 2½” piece, plus four pieces using the cutting guide in the instructions
- 1 metre/yard Lining fabric; 10½” x 11½” piece plus two pieces using the cutting guide in the instructions
- 2 Fat Eighths HST fabric or large scraps; five 4⅜” squares from each fabric plus two 3½” x 2” rectangle from one fabric
- 1 piece Batting – 52” x 18” piece; 10” x 11” piece plus two pieces using the cutting guide in the instructions
- Binding – two 2½” x wide of fabric strips from the main fabric
Instructions
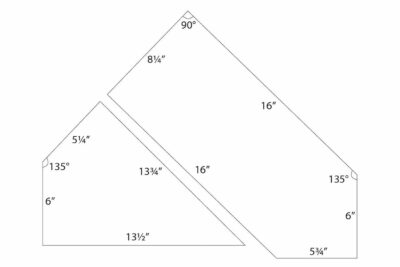
Create the Pattern Piece
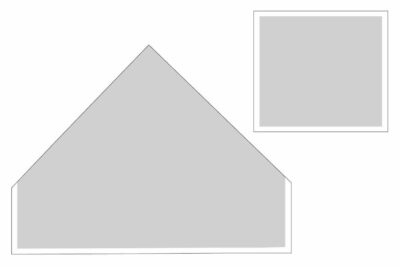
- As you need to cut a few unusual shapes for this pattern, I’d highly recommend marking out the cutting lines with a fabric pen/pencil so you can check all your measurements are correct being cutting your fabric. Follow the guide for how to mark and cut your main fabric. You need four pieces in total, two of each shape. For the second set, you could draw out the lines again or use your first set as templates.

Half square triangle construction:
- Pair two different fabric squares, right sides together. Draw a diagonal line on the reverse of one square. - Sew ¼” either side of the drawn line then cut along the drawn line. Press the HSTs open and trim each one to 3½” square. - Repeat to make eight more half square triangles.
- Sew together five HSTs to make a long, rectangular panel. Make sure the same fabric is always in the top left of each HST unit. Then sew the 3½” x 2” rectangle to the right edge of the HST panel. Repeat to make a second panel.
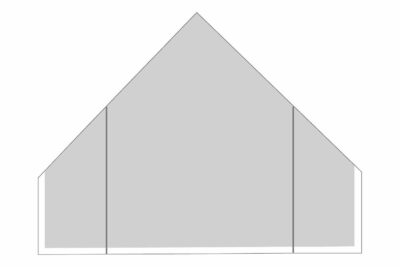
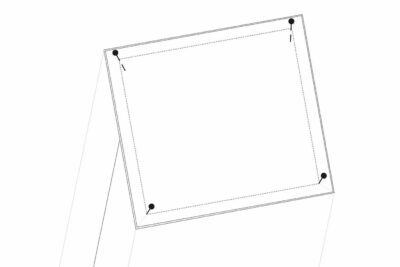
- Take two of the main fabric pieces from step 1 (one big and one small) and one of the HST panels and sew together following the guide. Make sure you align the top edges of the three pieces and then trim the little bit of excess off the bottom edge. Repeat to make a second.


Cut Lining Fabric
- Use one of your completed side pieces as a template to cut two more from the lining fabric. Set aside.
- Now use one of your completed side pieces as a templates to cut two from the batting and then trim ¼” from the two vertical sides and bottom edges.
Baste
- Baste the batting pieces to the main fabric sides and main fabric base.
Quilt
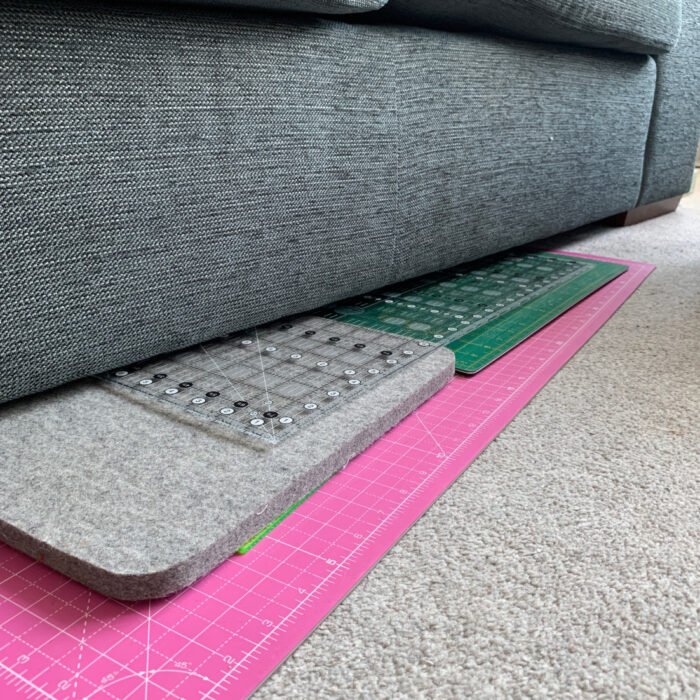
- Quilt the side and base pieces. The denser the quilting the more ridged your bag will become. I have quilted ½” spaced diagonal lines on the base, and ½” spaced diagonal lines on the main fabric sections of the sides plus free motion quilting switchbacks on the half square triangles.

The construction of the main fabric bag and the lining use the same method.
- You need to start by pressing the fabric sides 5½” in from the short vertical edges to create a vertical fold with the wrong sides together. (For the lining you’ll press right sides together)
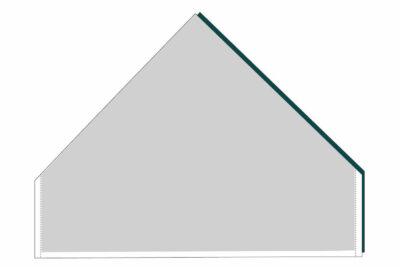
- With the two fabric sides right sides together, sew with ¼” seam allowance along the short vertical edges. Securing your stitching at the top and bottom. (For the lining use ⅜” seam allowance)
- Pin the quilted base in place, right sides together, matching the corners to the four pressed folds from step 9. Starting at one corner, work your way around sewing in place. Take your time to pivot carefully at each corner.
Insert Lining
- Drop the liner inside the main bag with the wrong sides together. If you want to reinforce the base you could add something like plastic or cardboard before dropping the liner in.
- Add a couple of hand stitches right in the corners of the lining to secure it to the main bag. This will help to keep the lining in place.
- Baste around the raw edges to keep the lining and bag front together. You can miss this step and pin/clip instead but I find it easier to add the binding with the layers basted together.

Sew Binding
- Sew together the binding strips end to end using a 45 degree diagonal seam to create one long length. Fold it in half along the full length, wrong sides together, and press.
- Add the binding to the edge of the bag in the same way you would for a quilt. Create a mitered corner at the two top points and when adding the binding at the side corners, gently pull the sides into a straight line. Cut a V into the seams (not the binding) at the side corners to help the binding fold over into place. Finish by hand sewing the binding to the inside of the bag.
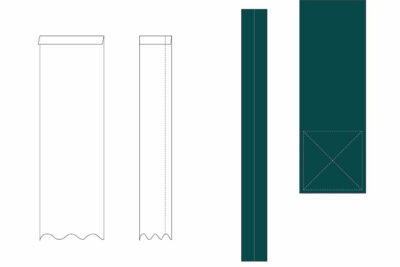
- Take the 18” x 2½” piece cut from the main fabric and press the two short edges ½” towards the wrong side, then press along the full length right sides together and sew with ¼” seam allowance.
- Turn the handle right side out and press so the seam runs down the middle. Sew the two ends of the handle to the two sides of your bag using a box stitch design for strength.
- Now it’s time to fill you bag with your favourite things!

About the Designer

Amy lives in the north of England with her husband and son. When she’s not sewing and quilting, Amy can usually be found baking or reading. You can find her on Instagram @amyatthegate
More Great Projects Designed by Amy
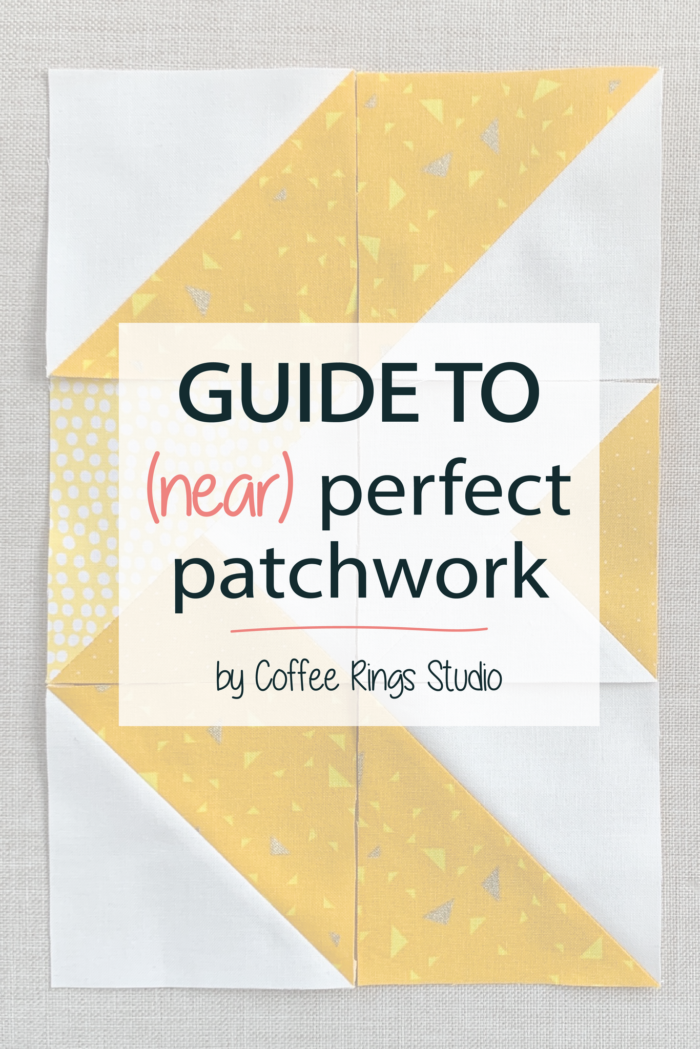
Guide to (near) Perfect Patchwork
Top 4 Tips for creating an invisible sewing space
Seeing past the rainbow; a pattern focus on Rainbow Lattice
Looking for DIY Storage Ideas? You Might Like These Projects!
Padded Fabric Storage Bin Pattern


I can not print out your full tutorial with illustrations? I’m very visual & need your illustrations to help me. Is there any way you can send it to me? I find it most frustrating trying to get some free patterns like this, I don’t know why if you offer them we can’t get the illustrations also? Thank you.
I am using the same print form that you find on many recipe blogs. Unfortunately, there is not a version that prints with photos and I don’t have the technical “know how” to create a form myself. Most sewing/craft bloggers do not offer a print option at all. I have worked EXTREMELY hard over the years to make it user friendly. I have literally put hundreds of hours into finding a way to print instructions. In addition, when these get printed many dishonest people will “resell” my tutorials. This is the best I can offer, I’m sorry if it’s not good enough for you.