How to Make Silver Platter Chalkboards
If you like this DIY Silver Platter Chalkboard Christmas Gift idea & tutorial, you may also love these Santa Claus Mason Jars.
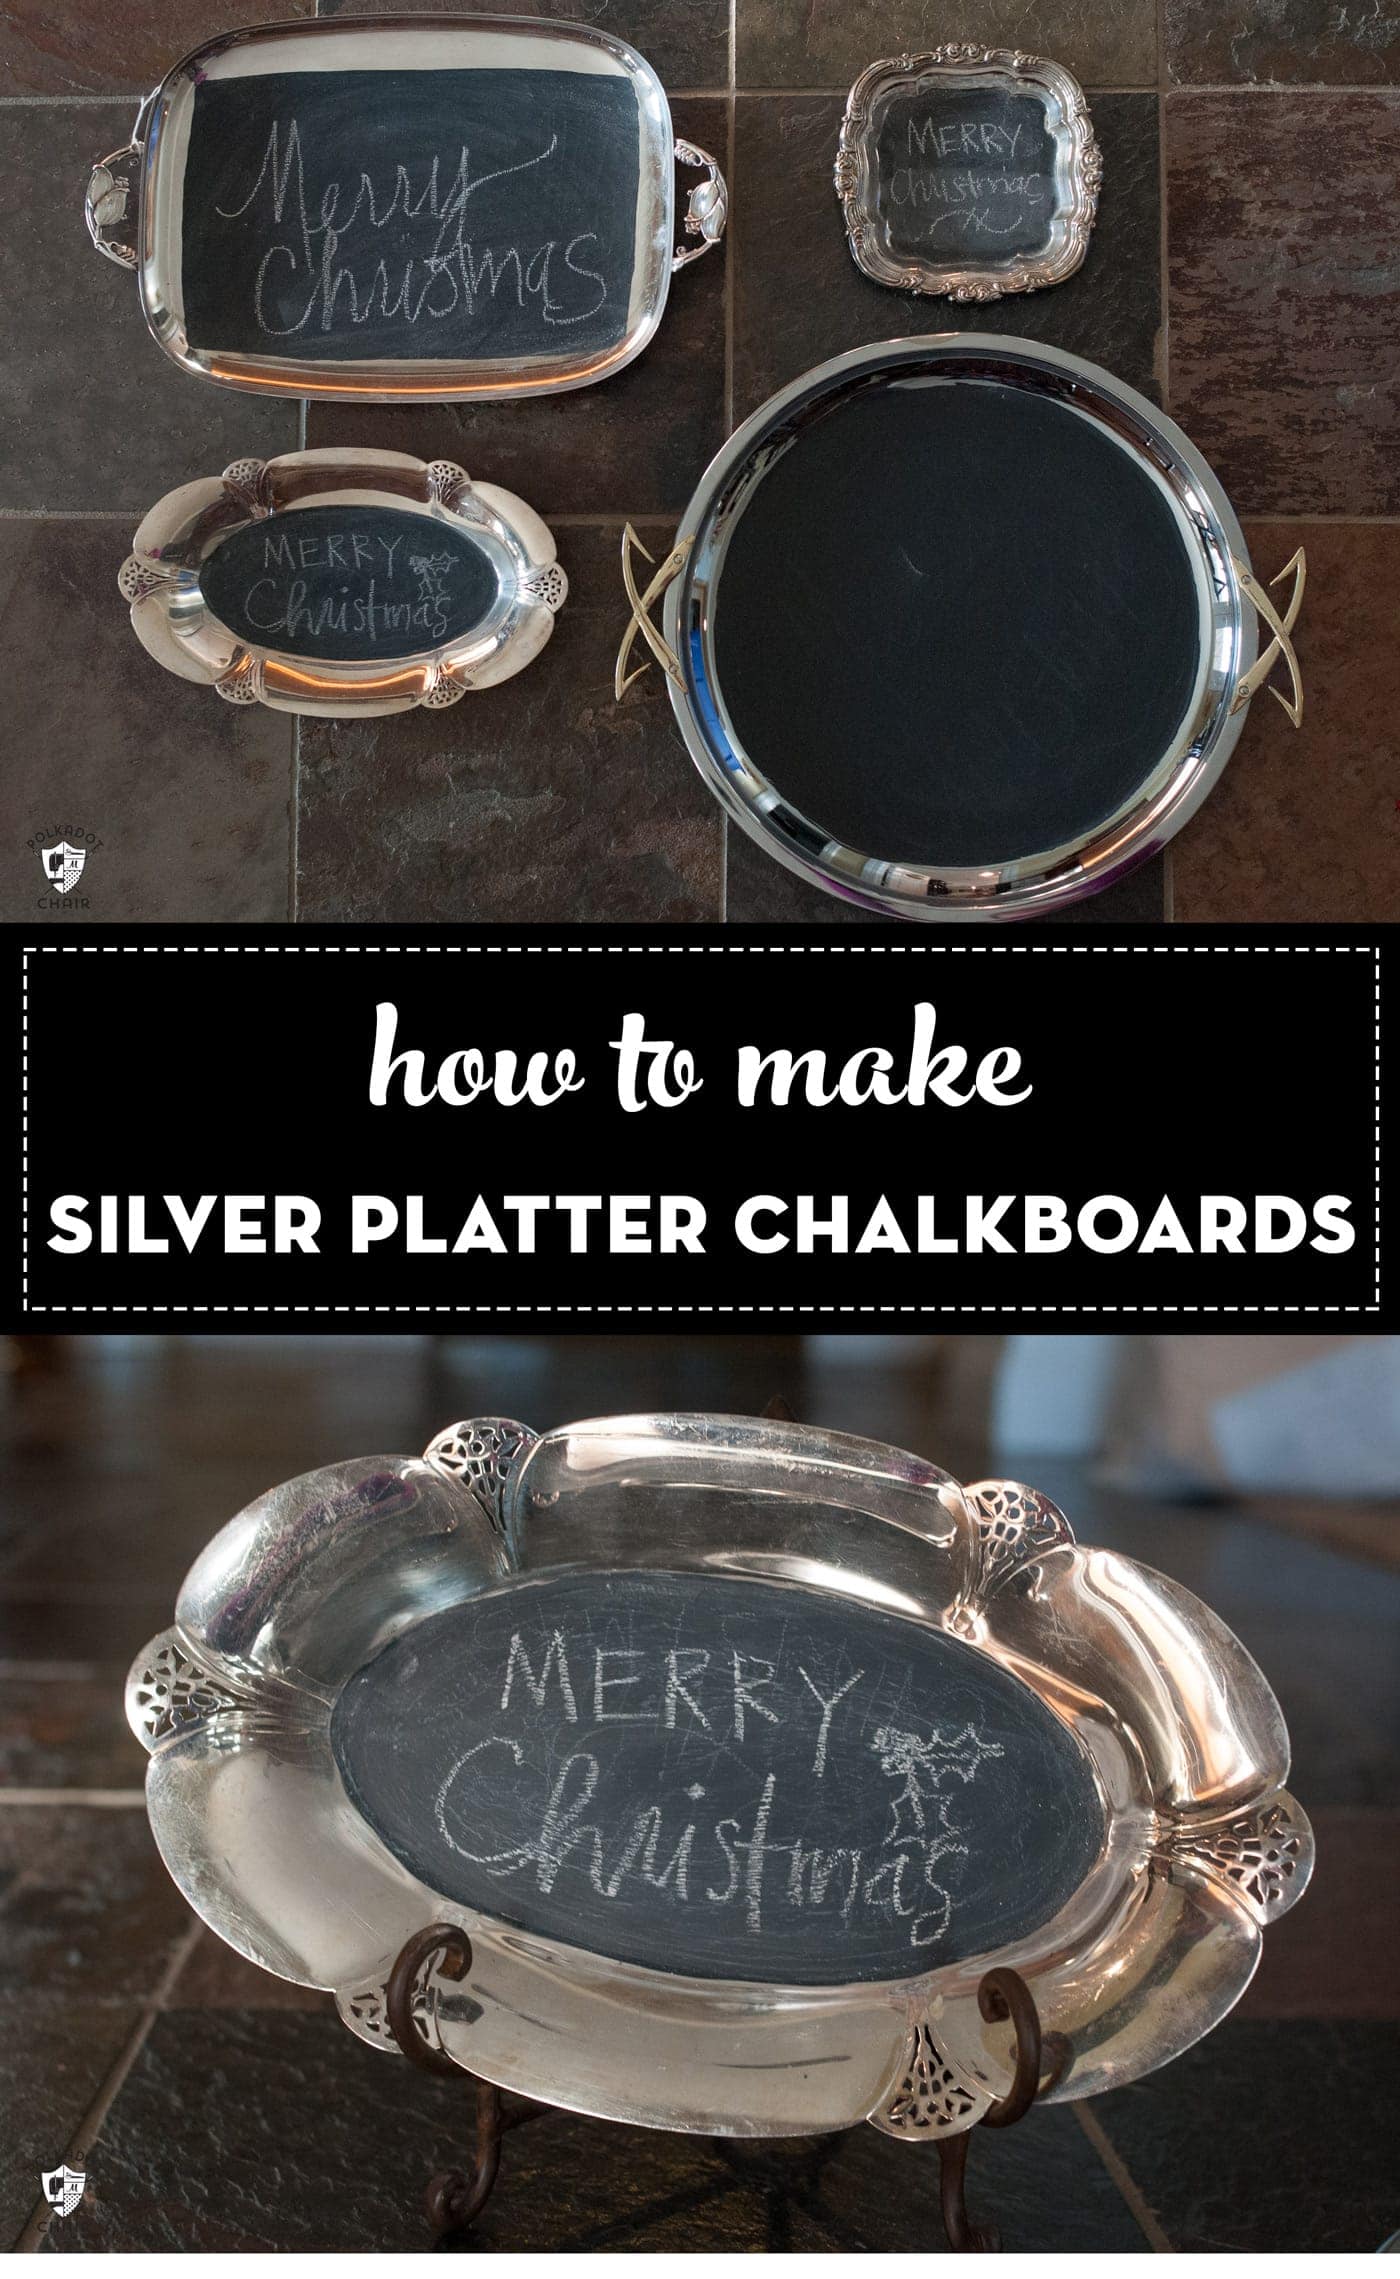
Today I’m sharing with you a gift idea that I know is not new. I can’t remember the first place that I spotted one of these platters, but I immediately fell in love with them.
The idea of a Silver Chalkboard platter was so fun and unique that I spent the better part of the Fall scouting out platters at my local antique and thrift shops. Let me tell you these things are not super easy to find! All of these platters had damage and were not usable for food. Also, none of them were very valuable and I’m pretty sure are not even real silver. Some of them felt pretty plastic.
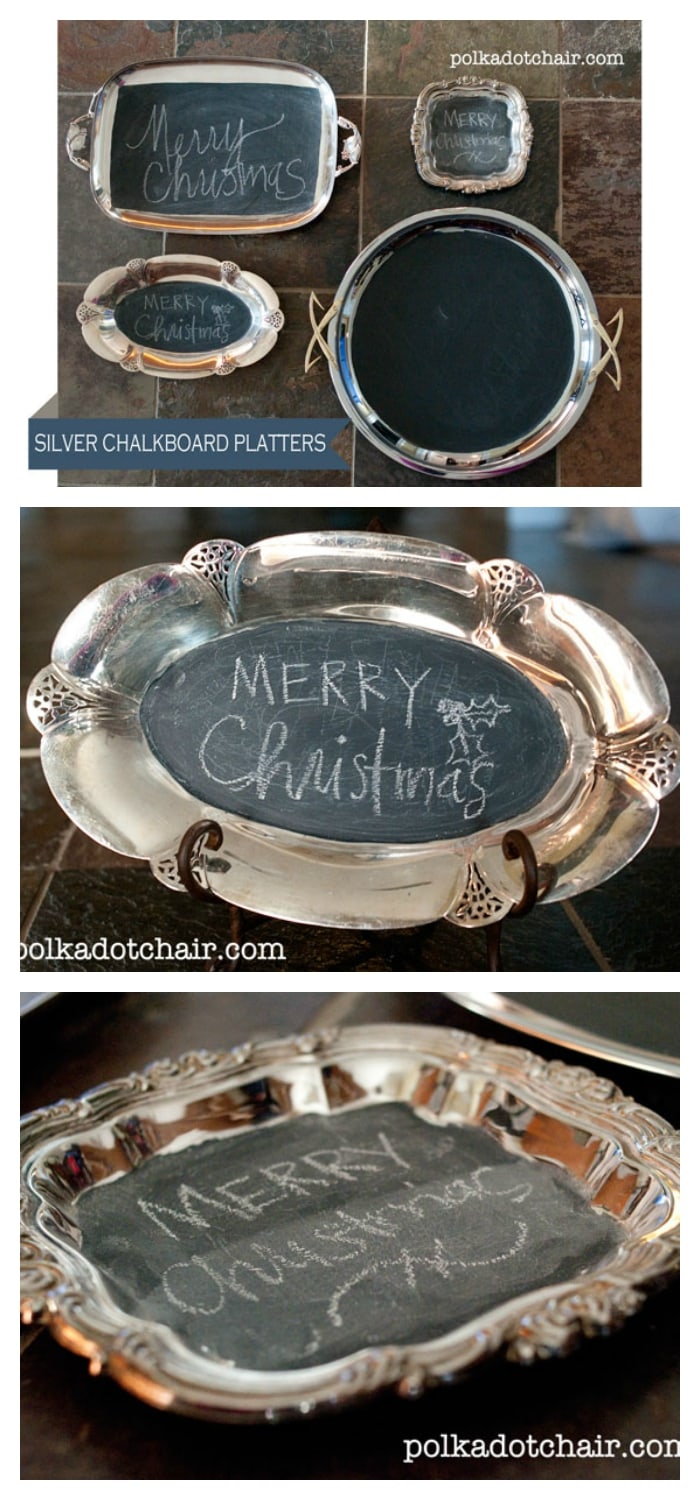
After a bit of thrifting, I did manage to find 4 silver platters that I loved.
How to turn a Silver Platter into a Chalkboard:
1- Before you start to paint, sand the platter surface lightly with sandpaper. You need to rough up the surface so the paint has something to stick to.
2- Use good quality chalkboard paint. My favorite is Benjamin Moore. Gives a nice smooth coat.
3- Don’t bother with painters tape- it’s too hard to get lined up right. I found it easiest to use a small foam brush to outline the edge of where the chalkboard paint should go. Then I filled in the center.
4- It will take 3-4 coats.
5- Let the paint dry at least 24 hours before you write on it.
6- Season the chalkboard painted surface by rubbing it all over with chalk, then wipe it off. Use a softer chalk… the cheaper the better I found.
For a fun gift idea, package them up with easels and letter them with Merry Christmas!


I love the silver tins…What a wonderful gift idea….I am wanting to find some one to penpal with ,swap small gifts and lots of ideas. If you are interested e-mail me….I’m in Texas…if not maybe you know someone who is….I love to quilt, craft, read and have a farm full of animals…..God Bless…………………
That sounds kinda fun to me!! Im game!
very cute but you may be ruining some really nice antique silver here…I hope you know your stuff and do this only to the pieces that are not real antiques…..sorry to sound negative, but I hate to see antiques ruined by crafters…
None of them cost more than $10 and I’m pretty sure they are not even real silver… the weight of them just doesn’t hold up to be real and they were not tarnished.
We’ve got lots of great “fancy” antique stores in Kentucky… I’m only shopping at the cheap junk stores for these.
like the idea, maybe a silly question, but I am thinking these are decorations? not meant for serving food of any kind? curious
No,
Not for food…. just to use a fun little sign in your house. I’ve got mine in my dining room. They would also be cute to use as as serving tray to hold things like salt and pepper shakers or napkins.
thanks, that is what I thought. Cute idea, we give family gifts at Christmas for our 4 married children. This might be a good idea for next Christmas!!
Couple questions… might be silly,but this is my first attempt so I don’t know. 1) Is there a certain grade of sandpaper I should use. And 2) If someone wanted to try this with real sliver is there a safe way to do it?
Great Idea!! I have several trays I don’t use, but I think they are Real silver, not plated, so I’m not sure this is a good idea for them.