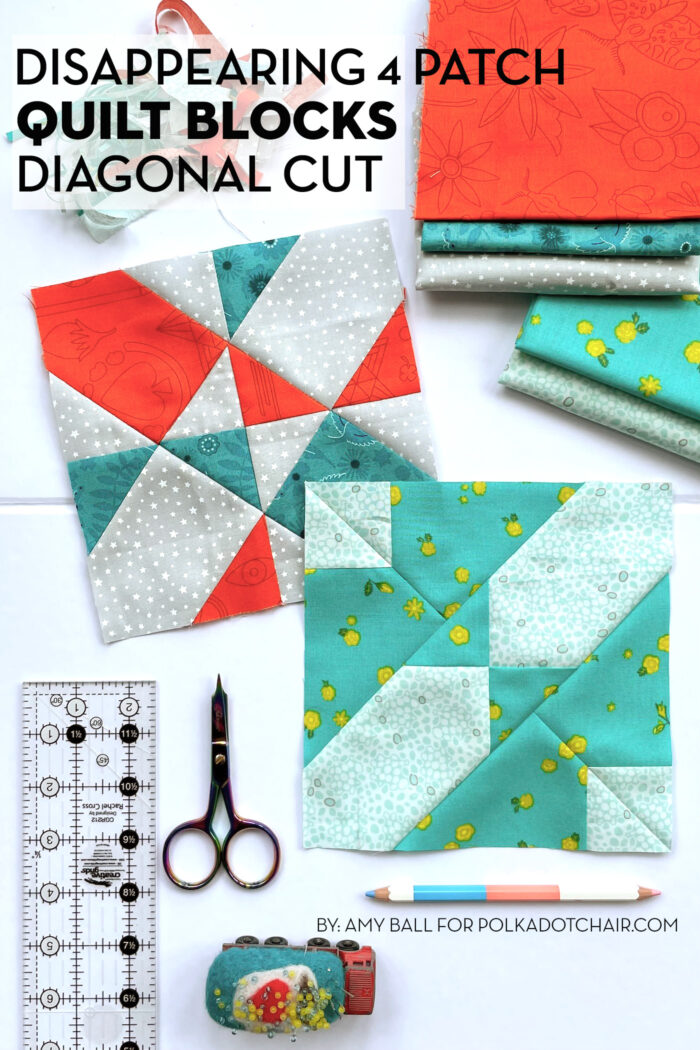
Diagonal Cut Disappearing 4 Patch Quilt Block Tutorial
Learn how to create disappearing four-patch quilt blocks using diagonal cuts. Using this method, you can create quilt blocks that look much more complicated to piece than they actually are! We’ve even created 6 sample quilt top layouts featuring the blocks for you as well.
Last month we looked at making disappearing four patch designs that used horizontal and vertical cuts. These are perfect for directional and non-directional prints because none of the patch pieces are rotated to create the new block design.
What is a Disappearing 4 Patch Block?
A disappearing four-patch block is designed by arranging and sewing together four squares of fabric to create a traditional four-patch quilt block. Instead of leaving the block like this, it is cut up, and the pieces are rearranged to make the original design “disappear.” These blocks are great for using scraps and putting them together into quilts or other patchwork projects.
4 Patch Blocks Made with Diagonal Cuts
There are two more designs in this month’s tutorial, but this time they both use diagonal cuts. Because the way the pieces are rearranged and rotated in these blocks, I’d highly recommend using non-directional prints.
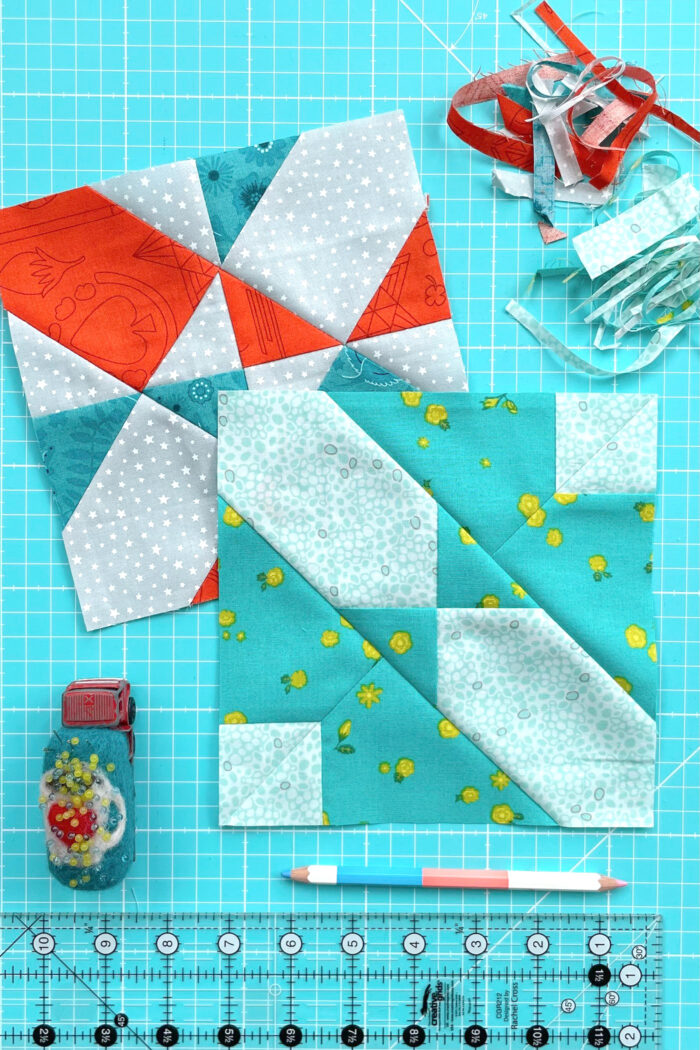
Diagonal Cut Disappearing 4 Patch Quilt Blocks
Equipment
supplies
Jumbled Corners Block
- 2 squares fabric 4½” x 4½” Colour A background
- 1 square fabric 4½” x 4½” Colour B main print
- 1 square fabric 4½” x 4½” Colour C main print
Butterfly Block
- 2 squares fabric 4½” x 4½” Colour A background
- 2 squares fabric 4½” x 4½” Colour B main print
Instructions
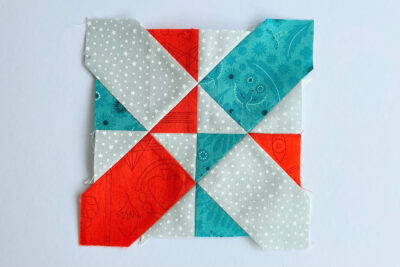
Jumbled Corners Block
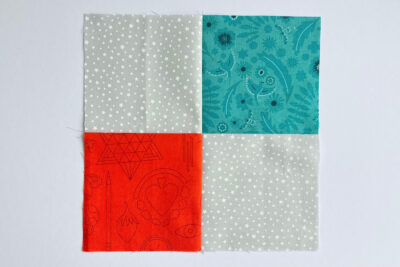
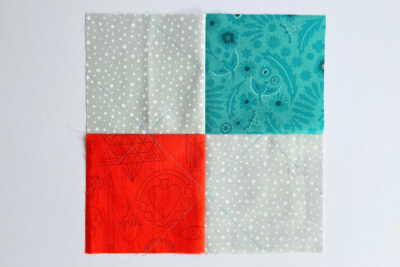
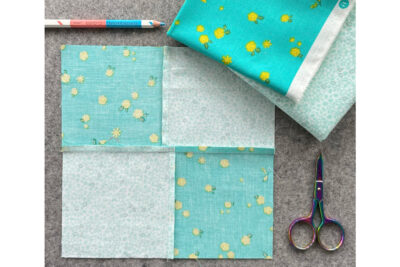
- Take four 4½” squares, two of fabric A, one of fabric B and one of fabric C. Sew them together into a four patch block with the fabric A squares in opposite corners.

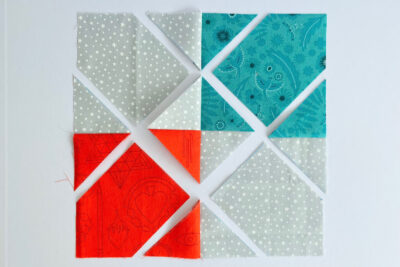
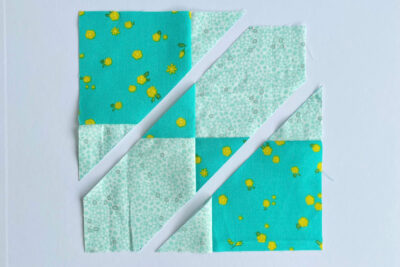
- Mark 2⅛” on the block edges, either side of each seam; you should have eight marks. Now join these up with drawn diagonal lines across the block.
- Cut along all the drawn diagonal lines. Try to do this slowly and carefully so that the pieces don’t move. If the pieces do move then you have the drawn lines as guides to help with the cutting.
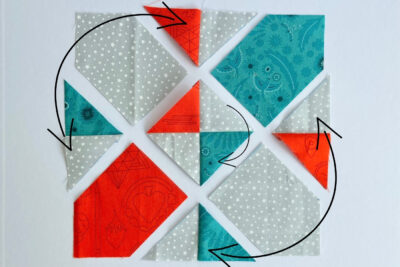
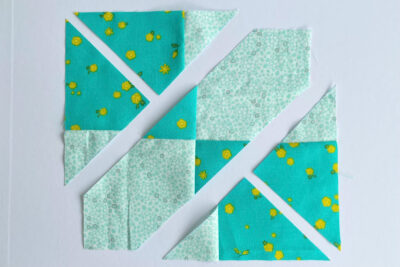
- Rearrange the pieces. Swap the top and left triangles pieces with each other, swap the right and bottom triangles with each other, and rotate the centre square 90° clockwise.
- Sew the units together into three diagonal rows.
- Then sew the three rows together and press well.
- Finish the block by trimming off the excess fabric to create a 7” square block.

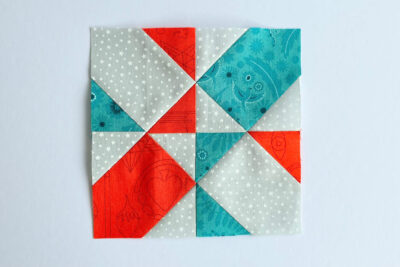
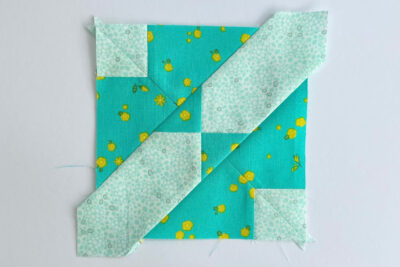
Butterfly Block
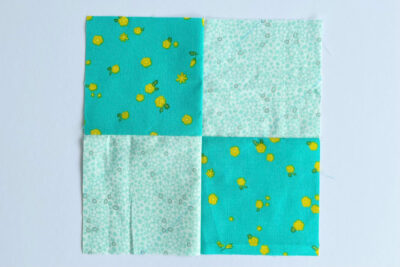
- Take four 4½” squares, two of fabric A and two of fabric B. Sew them together into a four patch block with the fabrics alternating.
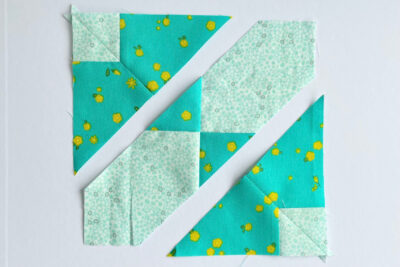
- Position the block with your main print (fabric B here) in the top left and bottom right corners. Mark 2⅛” in and down from the top right corner, and mark 2⅛” in and up from the bottom left corner. These markings should all be on your background (fabric A) squares. Now join the marks up with two drawn diagonal lines across the block.
- Cut along the two drawn diagonal lines.
- Then cut the two triangle units in half from the long edge to the opposite central corner.
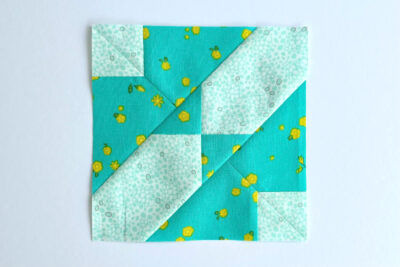
- Swap the triangle units in each corner so the little fabric A triangles now create a square in two block corners.
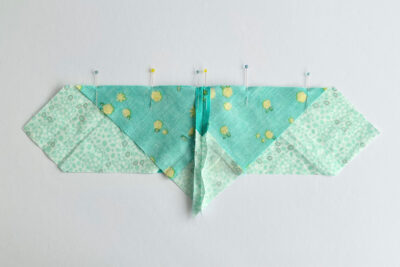
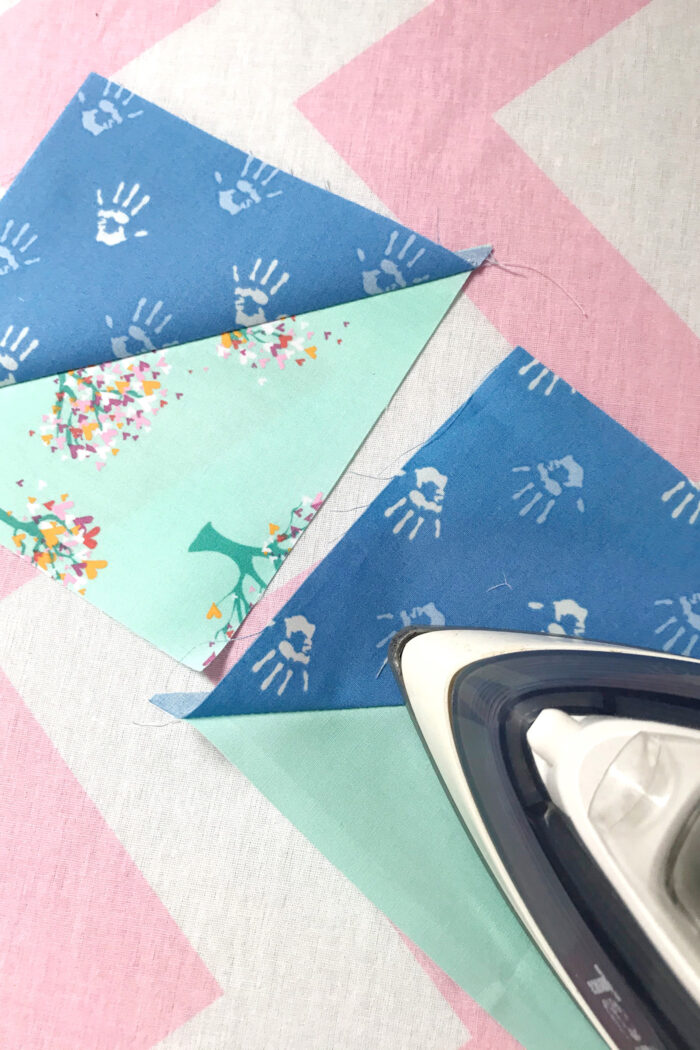
- Sew the triangle units together and press the seams open.
- Then sew the two large corner units to the central diagonal unit. Make sure the central seams are right in the middle of the little fabric B triangles from the central diagonal unit. Match up this central seam first rather then starting at one end as there will be excess fabric here which is trimmed off later.
- Press well.
- Finish the block by trimming it down to create a 7” square block.
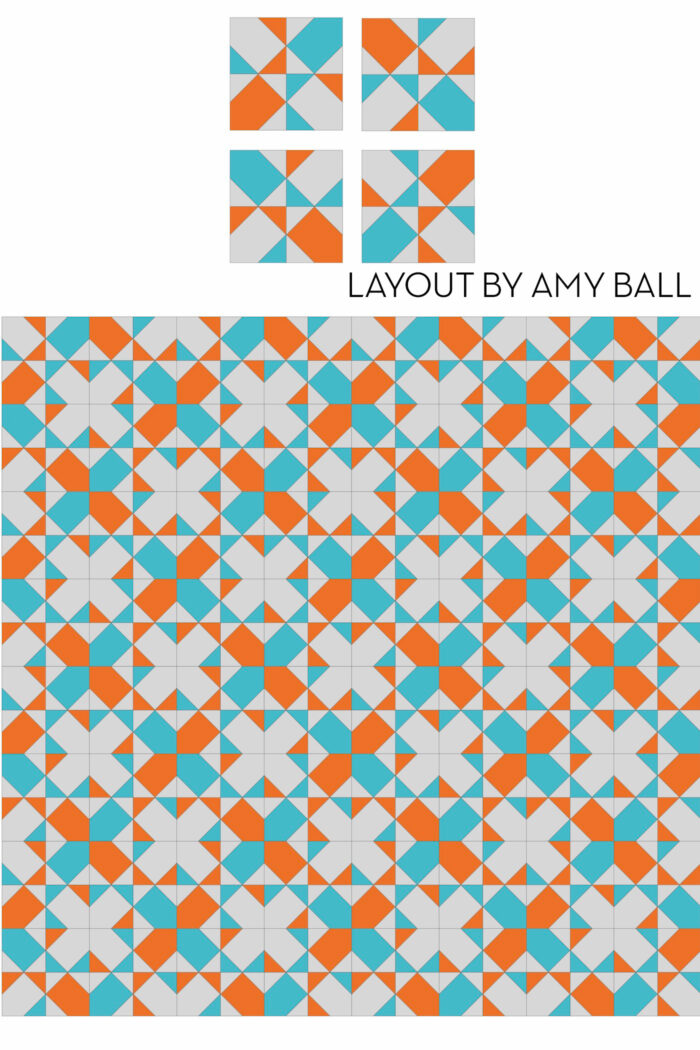
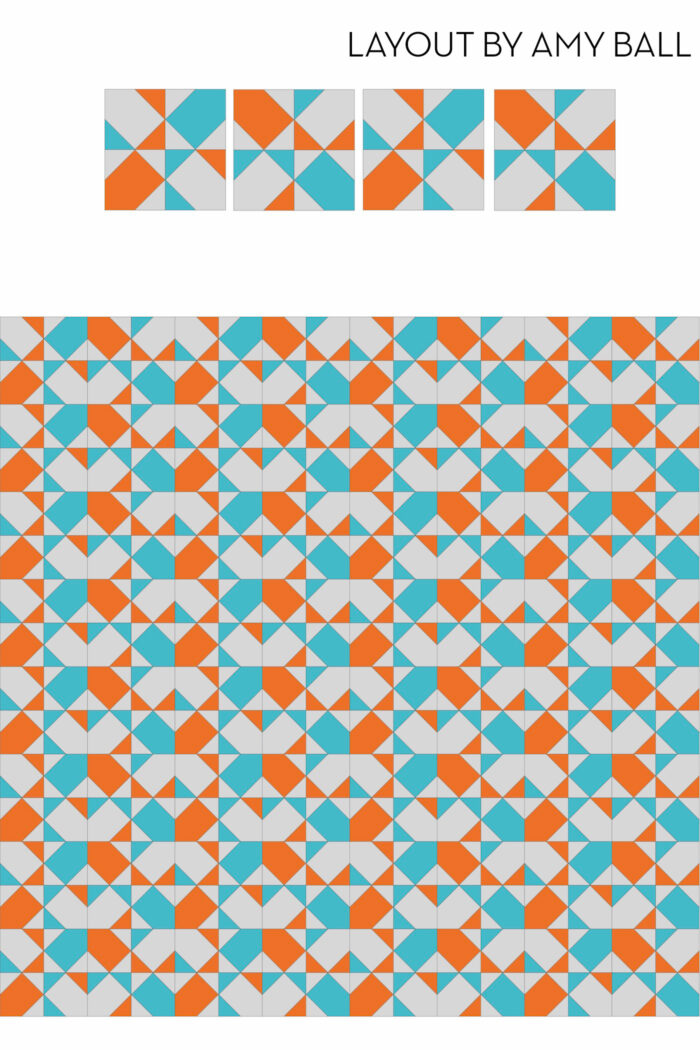
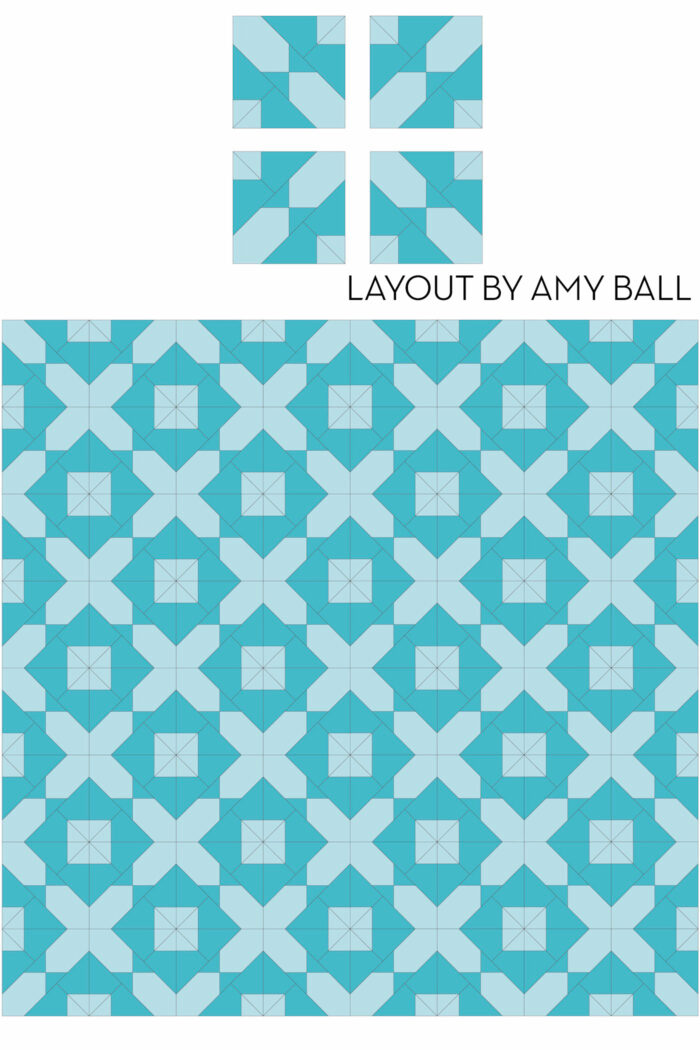
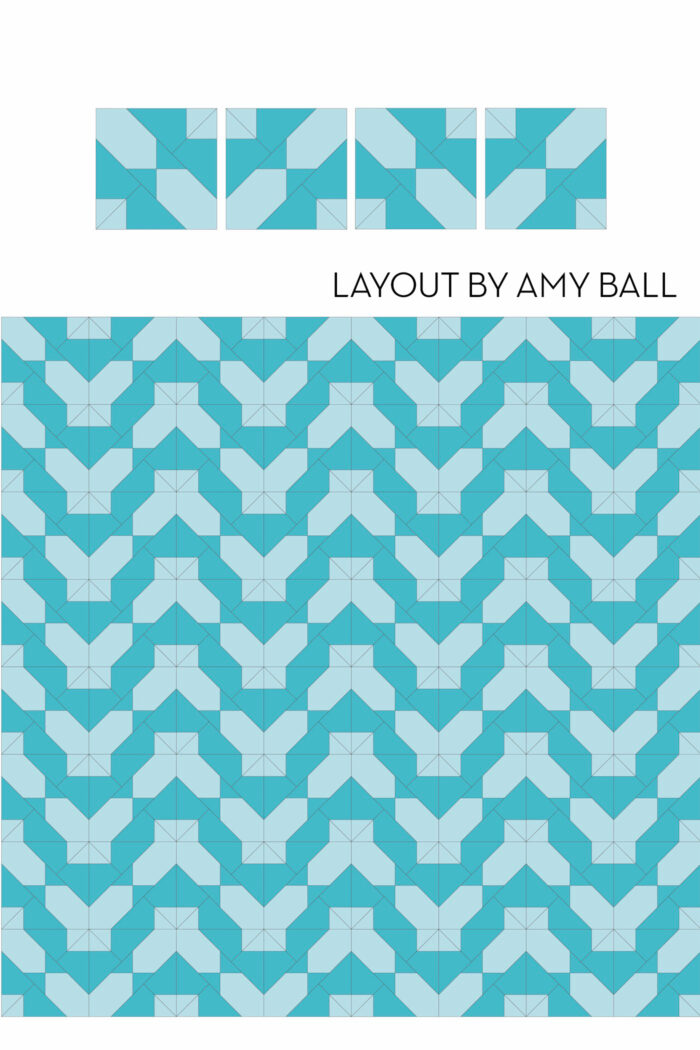
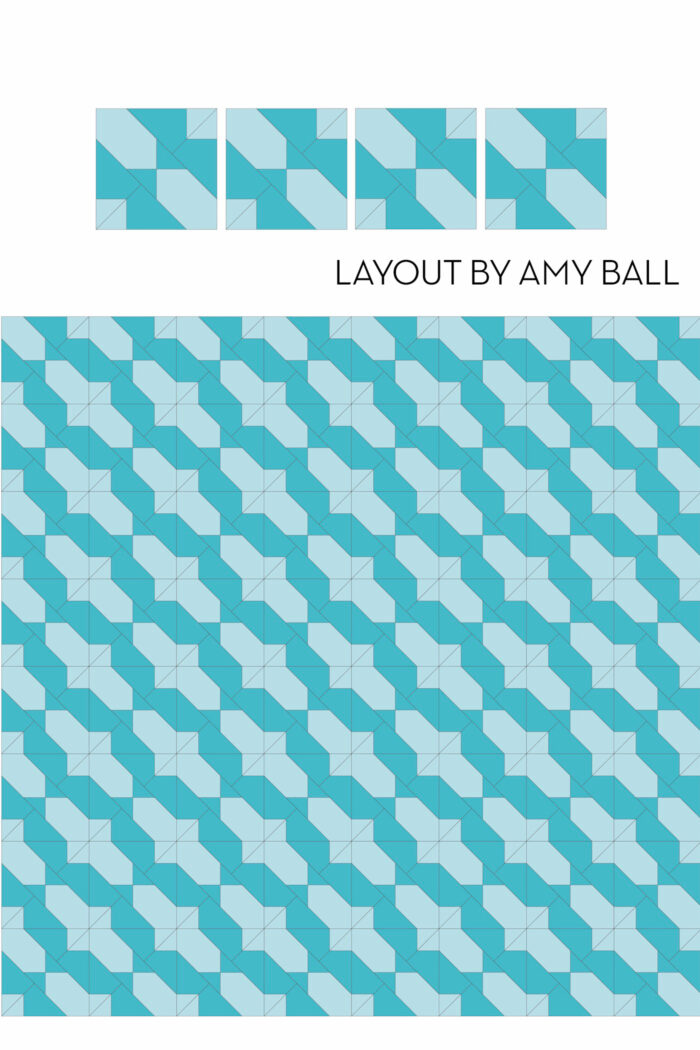
Quilt Top Layouts Using Diagonal Cut Disappearing 4 Patch Blocks
As you sew these blocks and arrange them into grids to create a quilt, you can see that you can make some really cool quilt tops.
Here are a few mockups of the blocks. The top row shows how the blocks are sewn together; the bottom is the rows sewn into a quilt top.
Jumbled Blocks
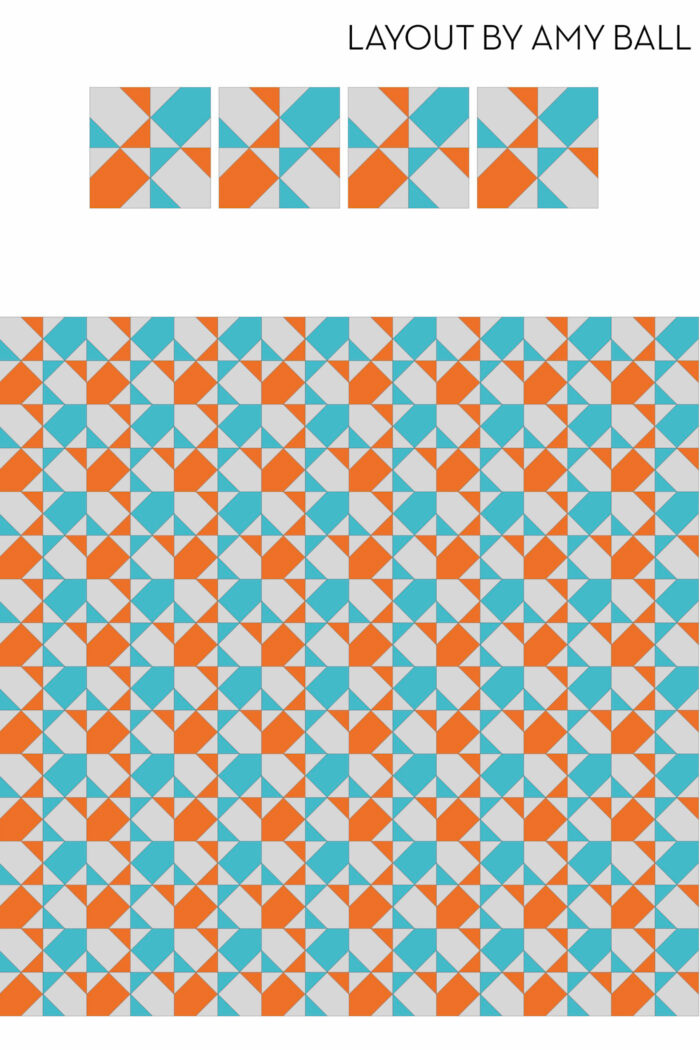
Butterfly Blocks
About the Designer
Amy lives in the north of England with her husband and son. When she’s not sewing and quilting, Amy can usually be found baking or reading. You can find her on Instagram @amyatthegate

Also by Amy:
Guide to (near) Perfect Patchwork
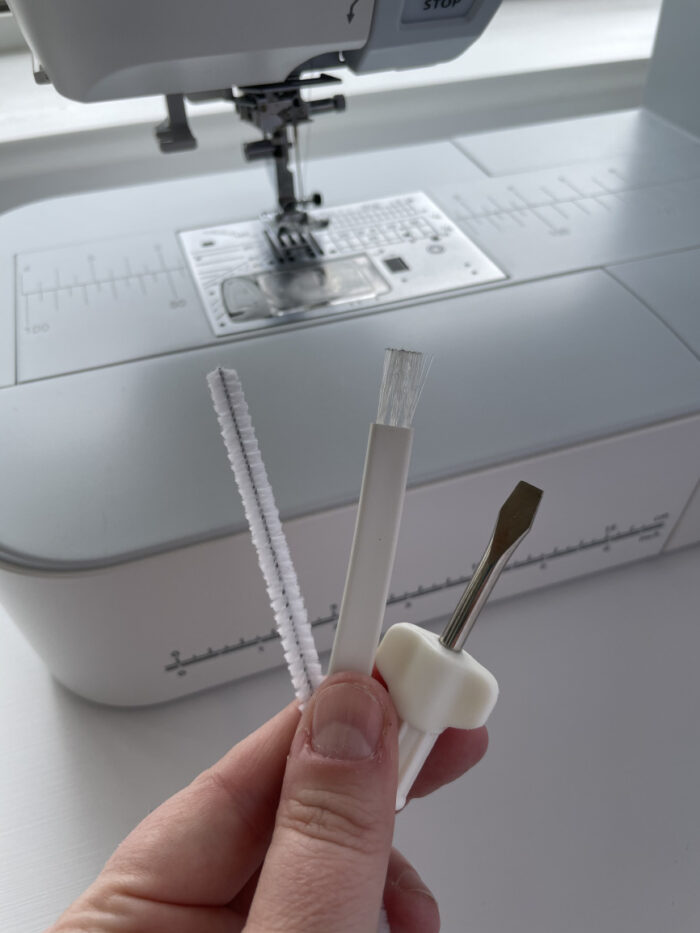
Cleaning your sewing machine | Top tips
It is 10:55 pm and I just HAD to make this block! LOVE IT! I’m cutting now – took a while to pick the colors. Step 2 gave me a little pause but the photos cleared that up. Thanks so much for this pattern!