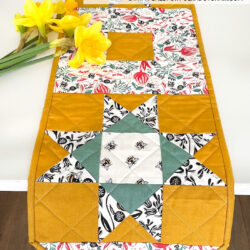
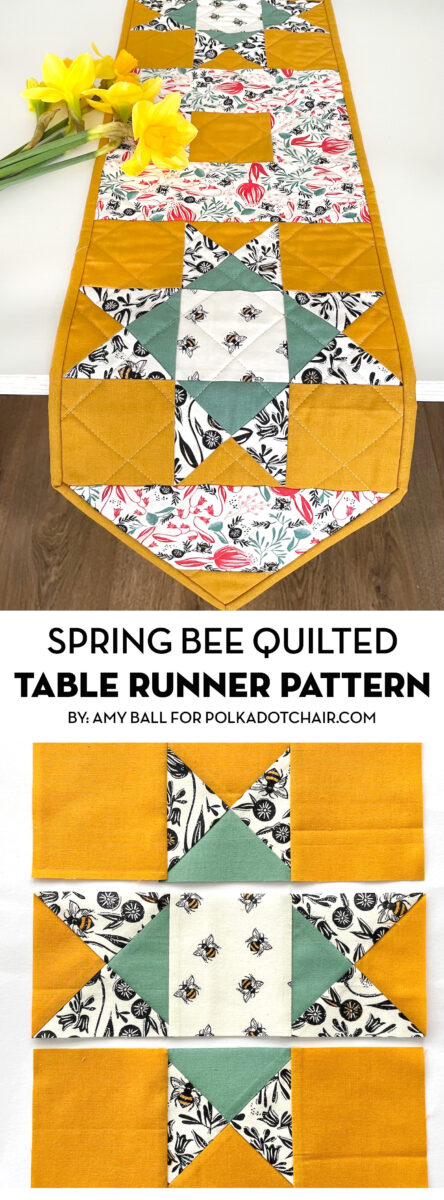
Spring “Bee” Quilted Table Runner Pattern
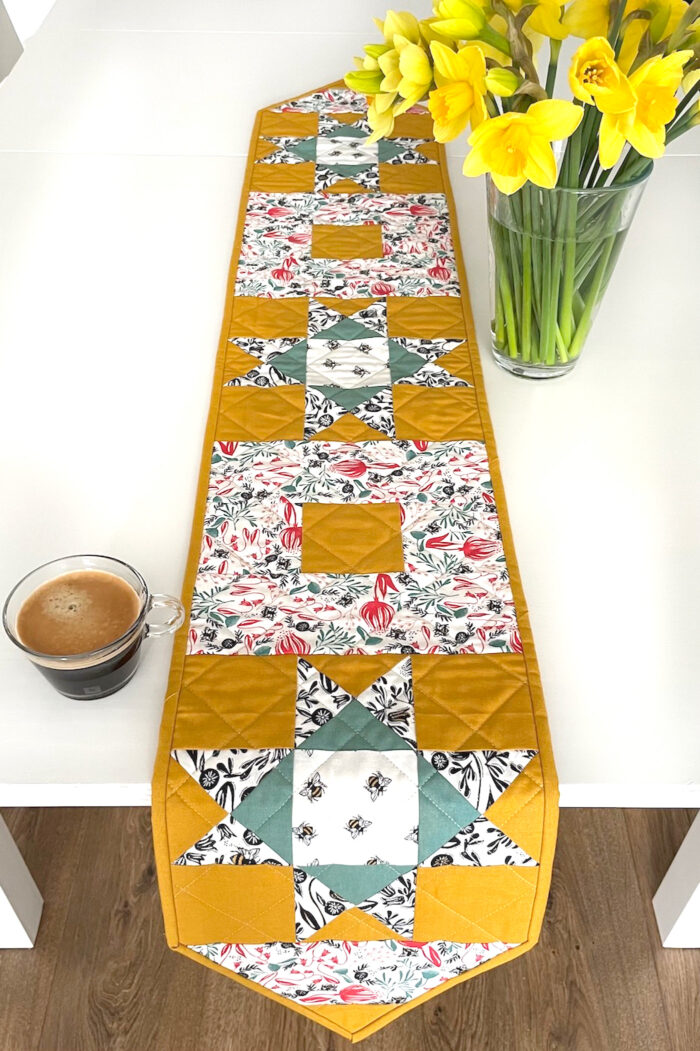
Celebrate Spring by adding a pop of color to your home decor! This brightly colored quilted table runner would make a great addition to your table this season. Learn how to make it with our free Spring Bee Quilted Table Runner Pattern by Amy Ball.
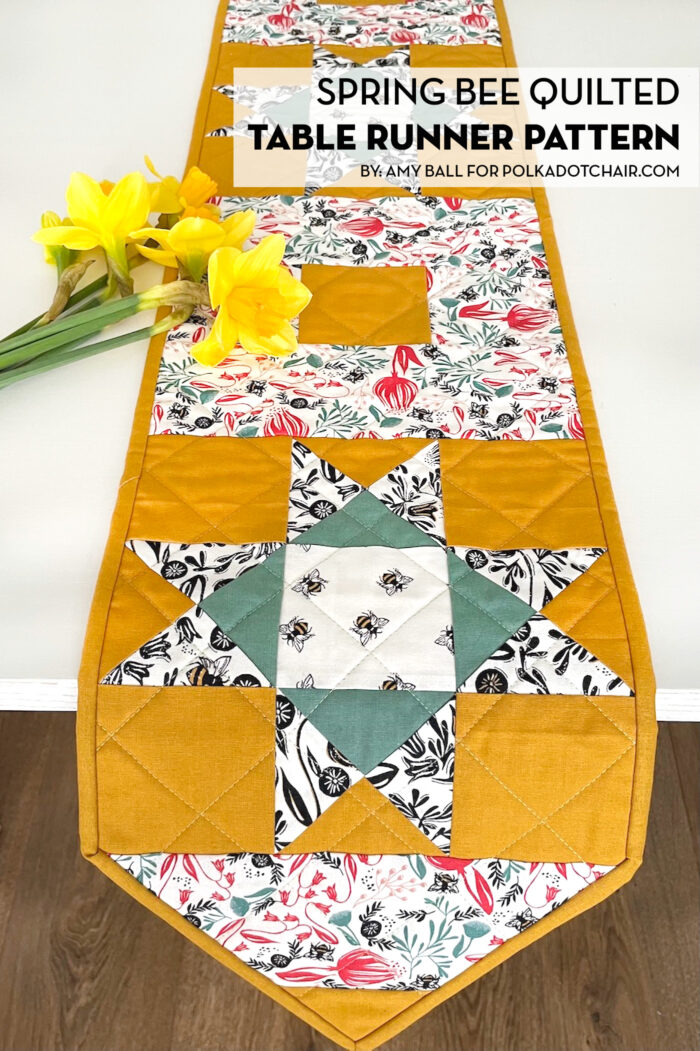
Say goodbye to winter and welcome a new season into your home with this spring-colored table runner. Table runners are a lovely way to dress up your dining table (or any other large table or surface in the house!) and a great way to try out new patchwork and quilting techniques as they don’t have as many blocks as a quilt.
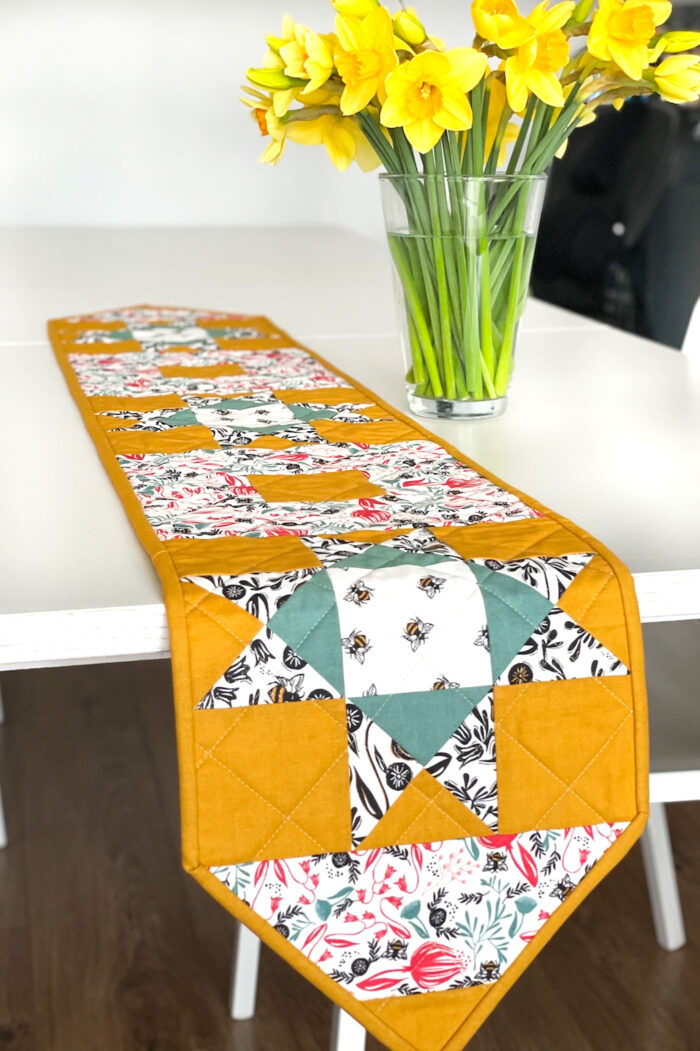
You could even use heat-resistant batting to protect your table from hot dishes!
Spring “Bee” Quilted Table Runner Pattern
Equipment
supplies
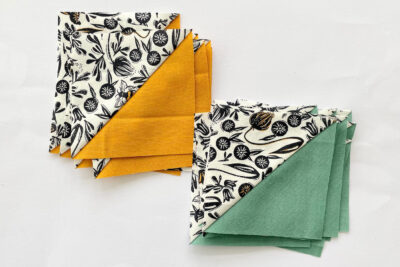
- 1/2 yard
Fabric A
yellow - 1 Fat Quarter Fabric B green
- 1 Fat Quarter Fabric C multi coloured
- 1 Fat Quarter Fabric D black & white
- 1 Fat Quarter Fabric E bees, or large scraps
- 1 Yard Backing fabric
- 1 Piece
Batting: 56” x 11”
- Binding: included in Fabric A allowance
Instructions
Cutting:
- From Fabric A cut 4¾” square (3), 3½” square (14), and 9½” x 2” (2)
- From Fabric B cut 4¾” square (3)
- From Fabric C cut 3½” square (4) and 9½” x 3½” (6)
- From Fabric D cut 4¾” square (6)
- From Fabric E cut 3½” square (3)
- From backing fabric cut 29” x 12” (2)
- From binding fabric (Fabric A) cut 2¼” x width of fabric strips (4)
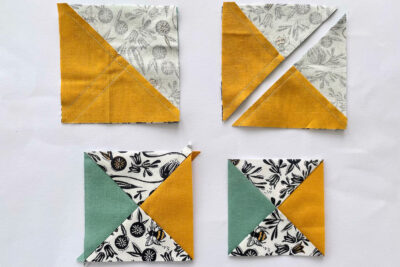
Preparation: Make Quarter-Square Triangles as follows
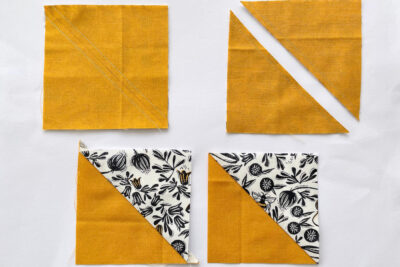
- First you need to make half square triangles. Place one Fabric A and one Fabric D 4¾” square right sides together then draw a diagonal line from one corner to the opposite on the top fabric. Pin the two pieces together.

- Sew ¼” above and below the drawn line then cut along the drawn line.
- Press both half square triangles (I recommend always pressing the seam towards Fabric D so you can nest the seams later on) them trim to 4¼” square.
- Repeat steps to make a total of six Fabric A/D half square triangles and a total of six Fabric B/D half square triangles.
- Take one Fabric A/D and one Fabric B/D half square triangle and place them right sides together with the diagonal seams lined up and nested together, then draw a diagonal line from one corner to the opposite on the top fabric making sure the line runs in the opposite direction to the seam. Pin the two pieces together.
- Sew ¼” above and below the drawn line then cut along the drawn line.
- Press both quarter square triangle units (I recommend pressing the seam open to avoid bulk when you join the blocks together) then trim to 3½” square.
- Repeat steps to make a total of twelve Fabric A/B/D quarter square triangles.
Block Assembly Part 1:
- Take one Fabric A 3½” square and two Fabric C 3½” squares. Sew them together into a row with the Fabric A square in the centre. Press.
- Now sew two Fabric C 9½” x 3½” rectangles to the long sides of the unit you made in the previous step.
- Repeat steps to make a second block. Set these aside.
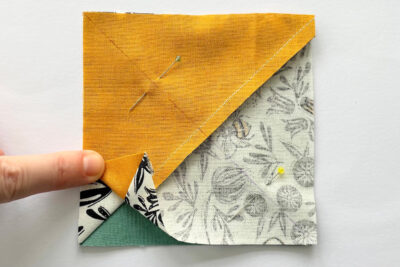
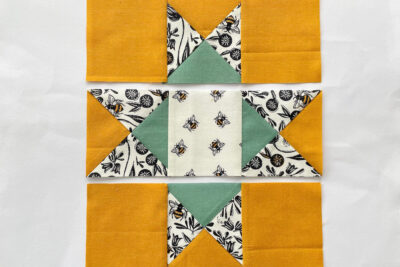
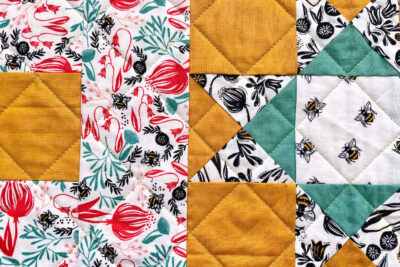
Ohio Star Block Assembly:
- Take two Fabric A 3½” squares and one QST unit. Sew them together into a row with the QST in the centre (positioned with the Fabric A section at the top). Press.
- Take two more Fabric A 3½” squares and one QST unit. Sew them together into a row with the QST in the centre (positioned with the Fabric A section at the bottom). Press.
- Take two QST units and one Fabric E 3½” square. Sew them together into a row with the Fabric E square in the centre and the QST units positioned so the Fabric B sections are being sewn to the Fabric E square. Press
- Join the three rows together, using the photo as a guide, to complete the block.
- Repeat steps to make two more blocks like this. Set these aside.
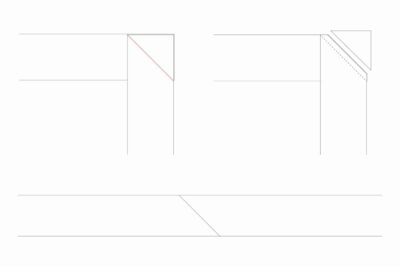
Diagonal Block Assembly:
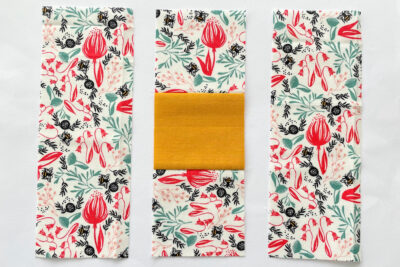
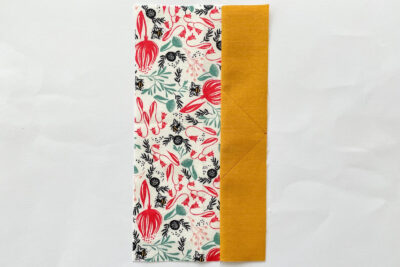
- Take one Fabric C 9½” x 3½” rectangle and one Fabric A 9½” x 2” rectangle. Sew them together along the long edge.
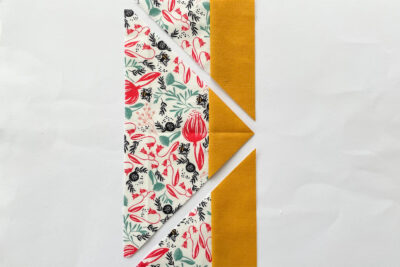
- Mark the centre point of the long edge of the Fabric A piece. Then mark ¼” in from the top and bottom corners of the Fabric C piece (mark along the shorter edges). Now draw a line from the centre point to the top edge mark and a second line from the centre point to the bottom edge mark. Cut along the drawn lines to create a triangular-shaped block.
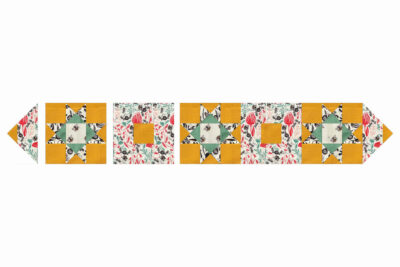
- Using the diagram as a guide, sew all the blocks together and press well.
Quilting and Finishing:
- Take the two backing fabric pieces and sew them together along the short edge to make one long piece.
- Now it’s time to make a quilt sandwich. Place you backing fabric (right side facing down) with your batting on top, then add the patchwork top with the right side facing towards you. Make sure all the layers are smooth and flat then baste the layers together using your preferred method. [Top Tip: you can buy heat-resistant batting; use this and your table runner will double as a heat protector for your table!]
- Quilt as desired. I have used diagonal straight line quilting to match the quarter square triangles seams with the lines 2” apart. I started by marking the lines over the central block and then worked my way out.
- Once you have finished quilting, trim off excess backing fabric and batting.
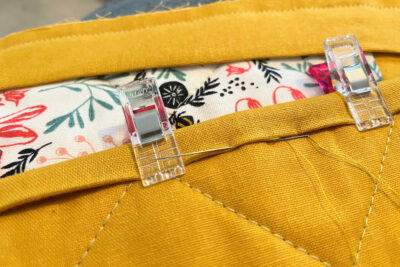
- To prepare the binding take the four WOF strips and sew them together, end to end, using a 45° seam to create one long length.
- Fold the binding in half along the full length (wrong sides together) and press.
- Pin/clip the binding in place on the front, round the table runner edge then sew to the front using a ¼” seam allowance using the same method for corners that you would with a quilt.
- Fold the binding round to the back and pin/clip in place making sure your mitred corners are nice and neat. Hand sew the binding in place.
- Enjoy your new table runner!


About the Designer
Amy lives in the north of England with her husband and son. When she’s not sewing and quilting, Amy can usually be found baking or reading. You can find her on Instagram @amyatthegate
More Great Projects by Amy:

Perfect Spot on Seams
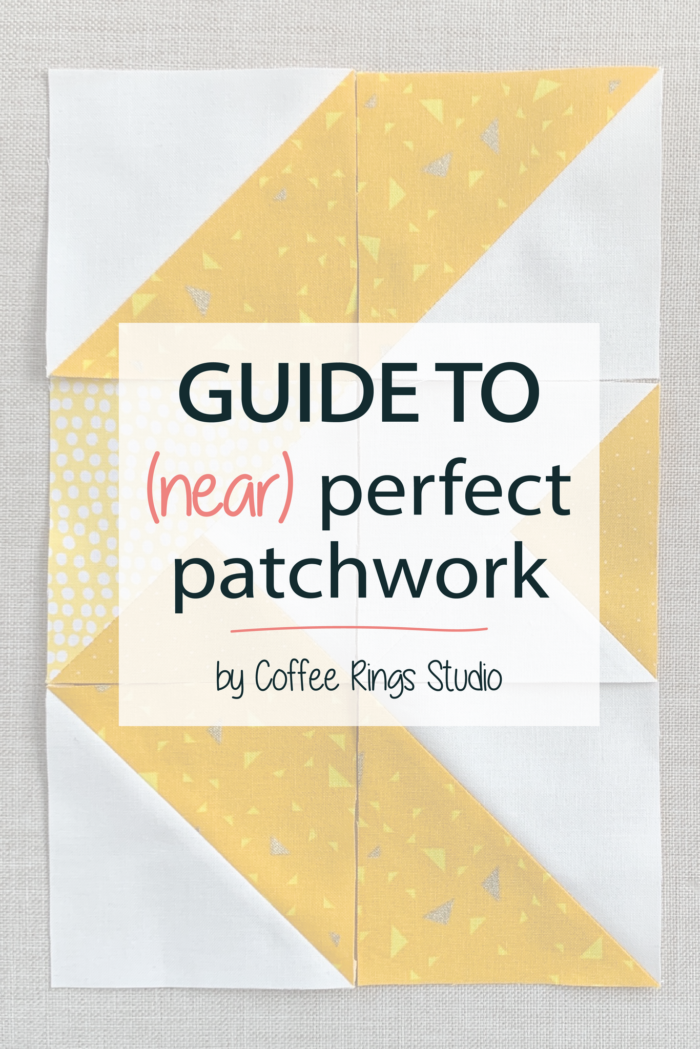
Guide to (near) Perfect Patchwork
Seeing past the rainbow | A pattern focus on Rainbow Lattice
You May Also Like:
Linen Christmas Table Runner Pattern
Sweet table runner pattern. Great directions. Works up fast. Makes a great gift!
Thank you Melissa, so simple, and lovely! Can’t wait to make a few.