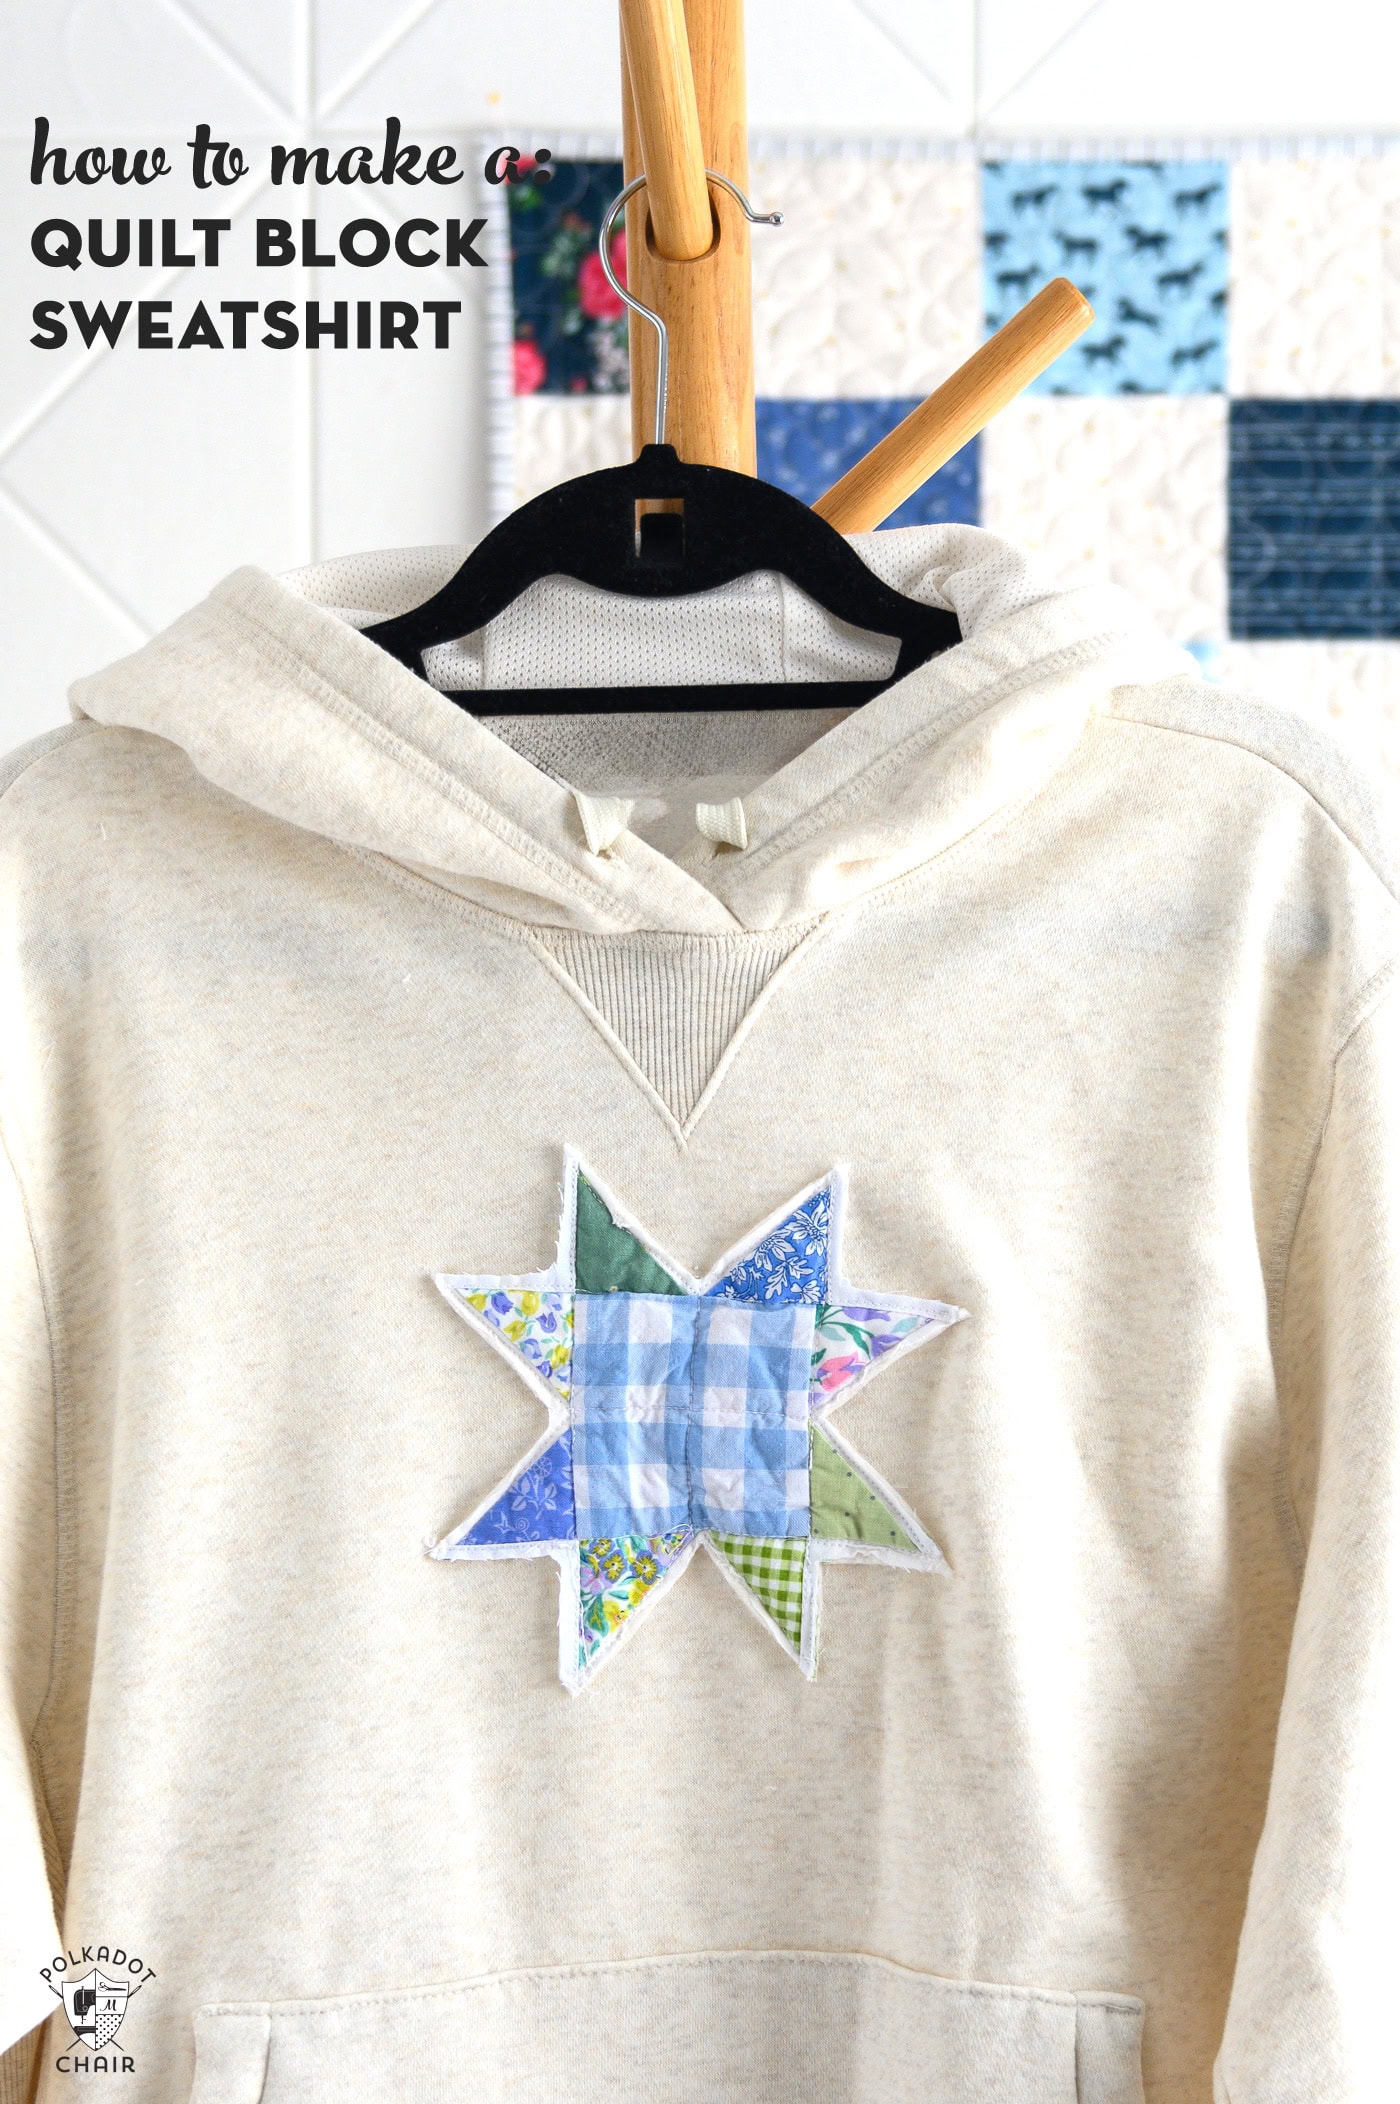
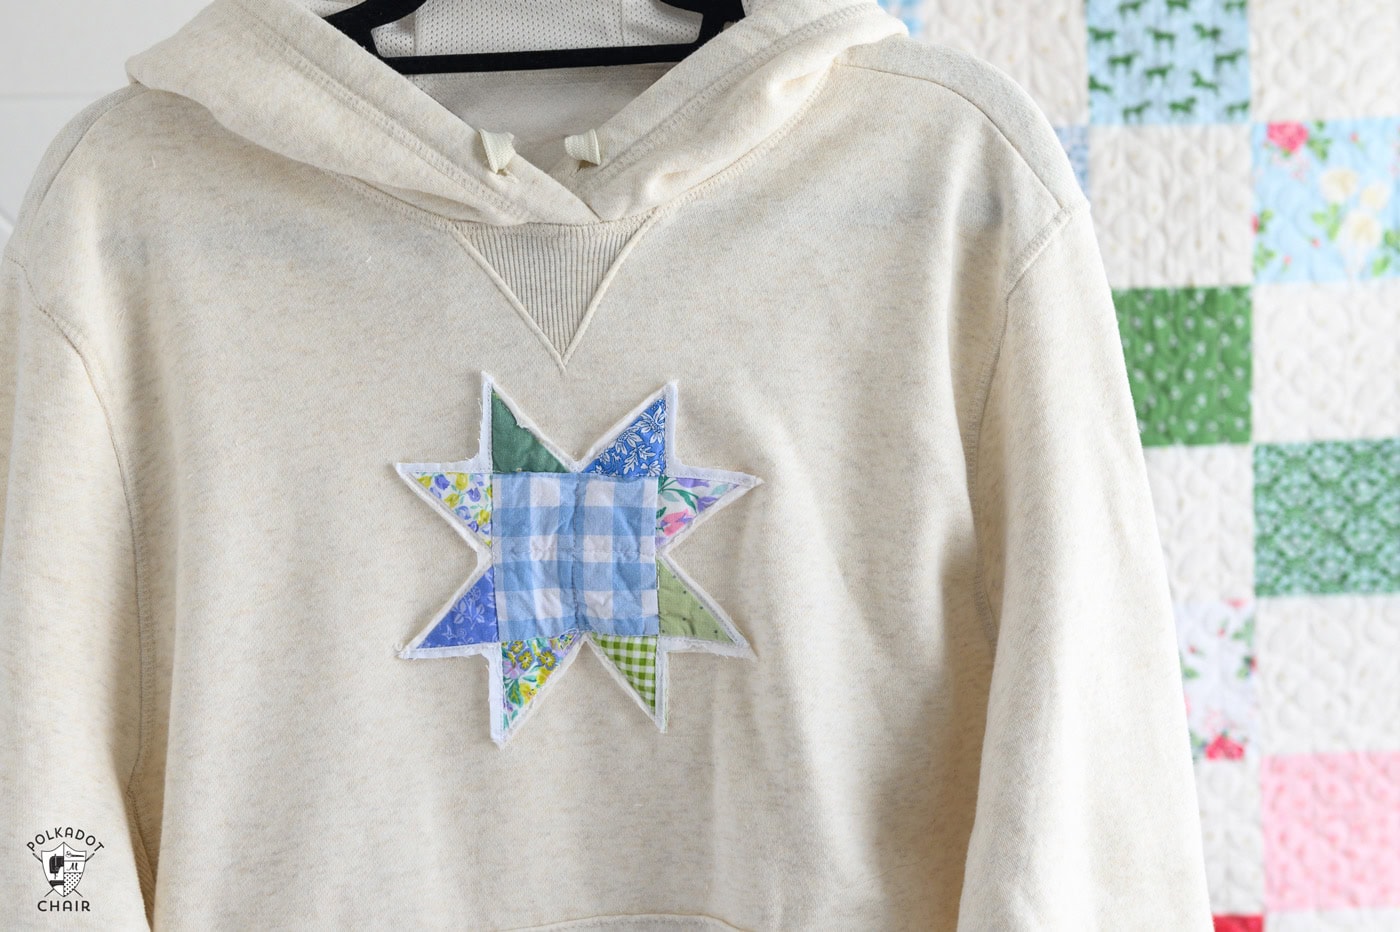
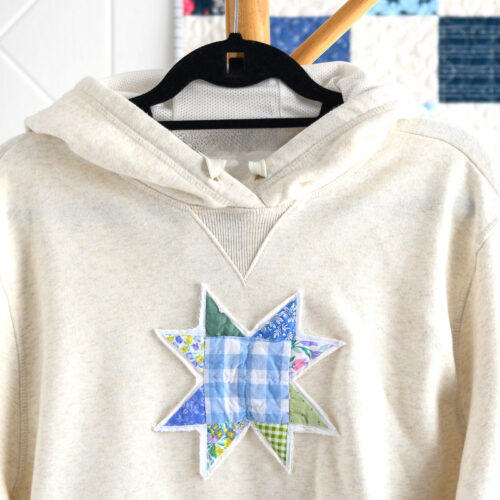
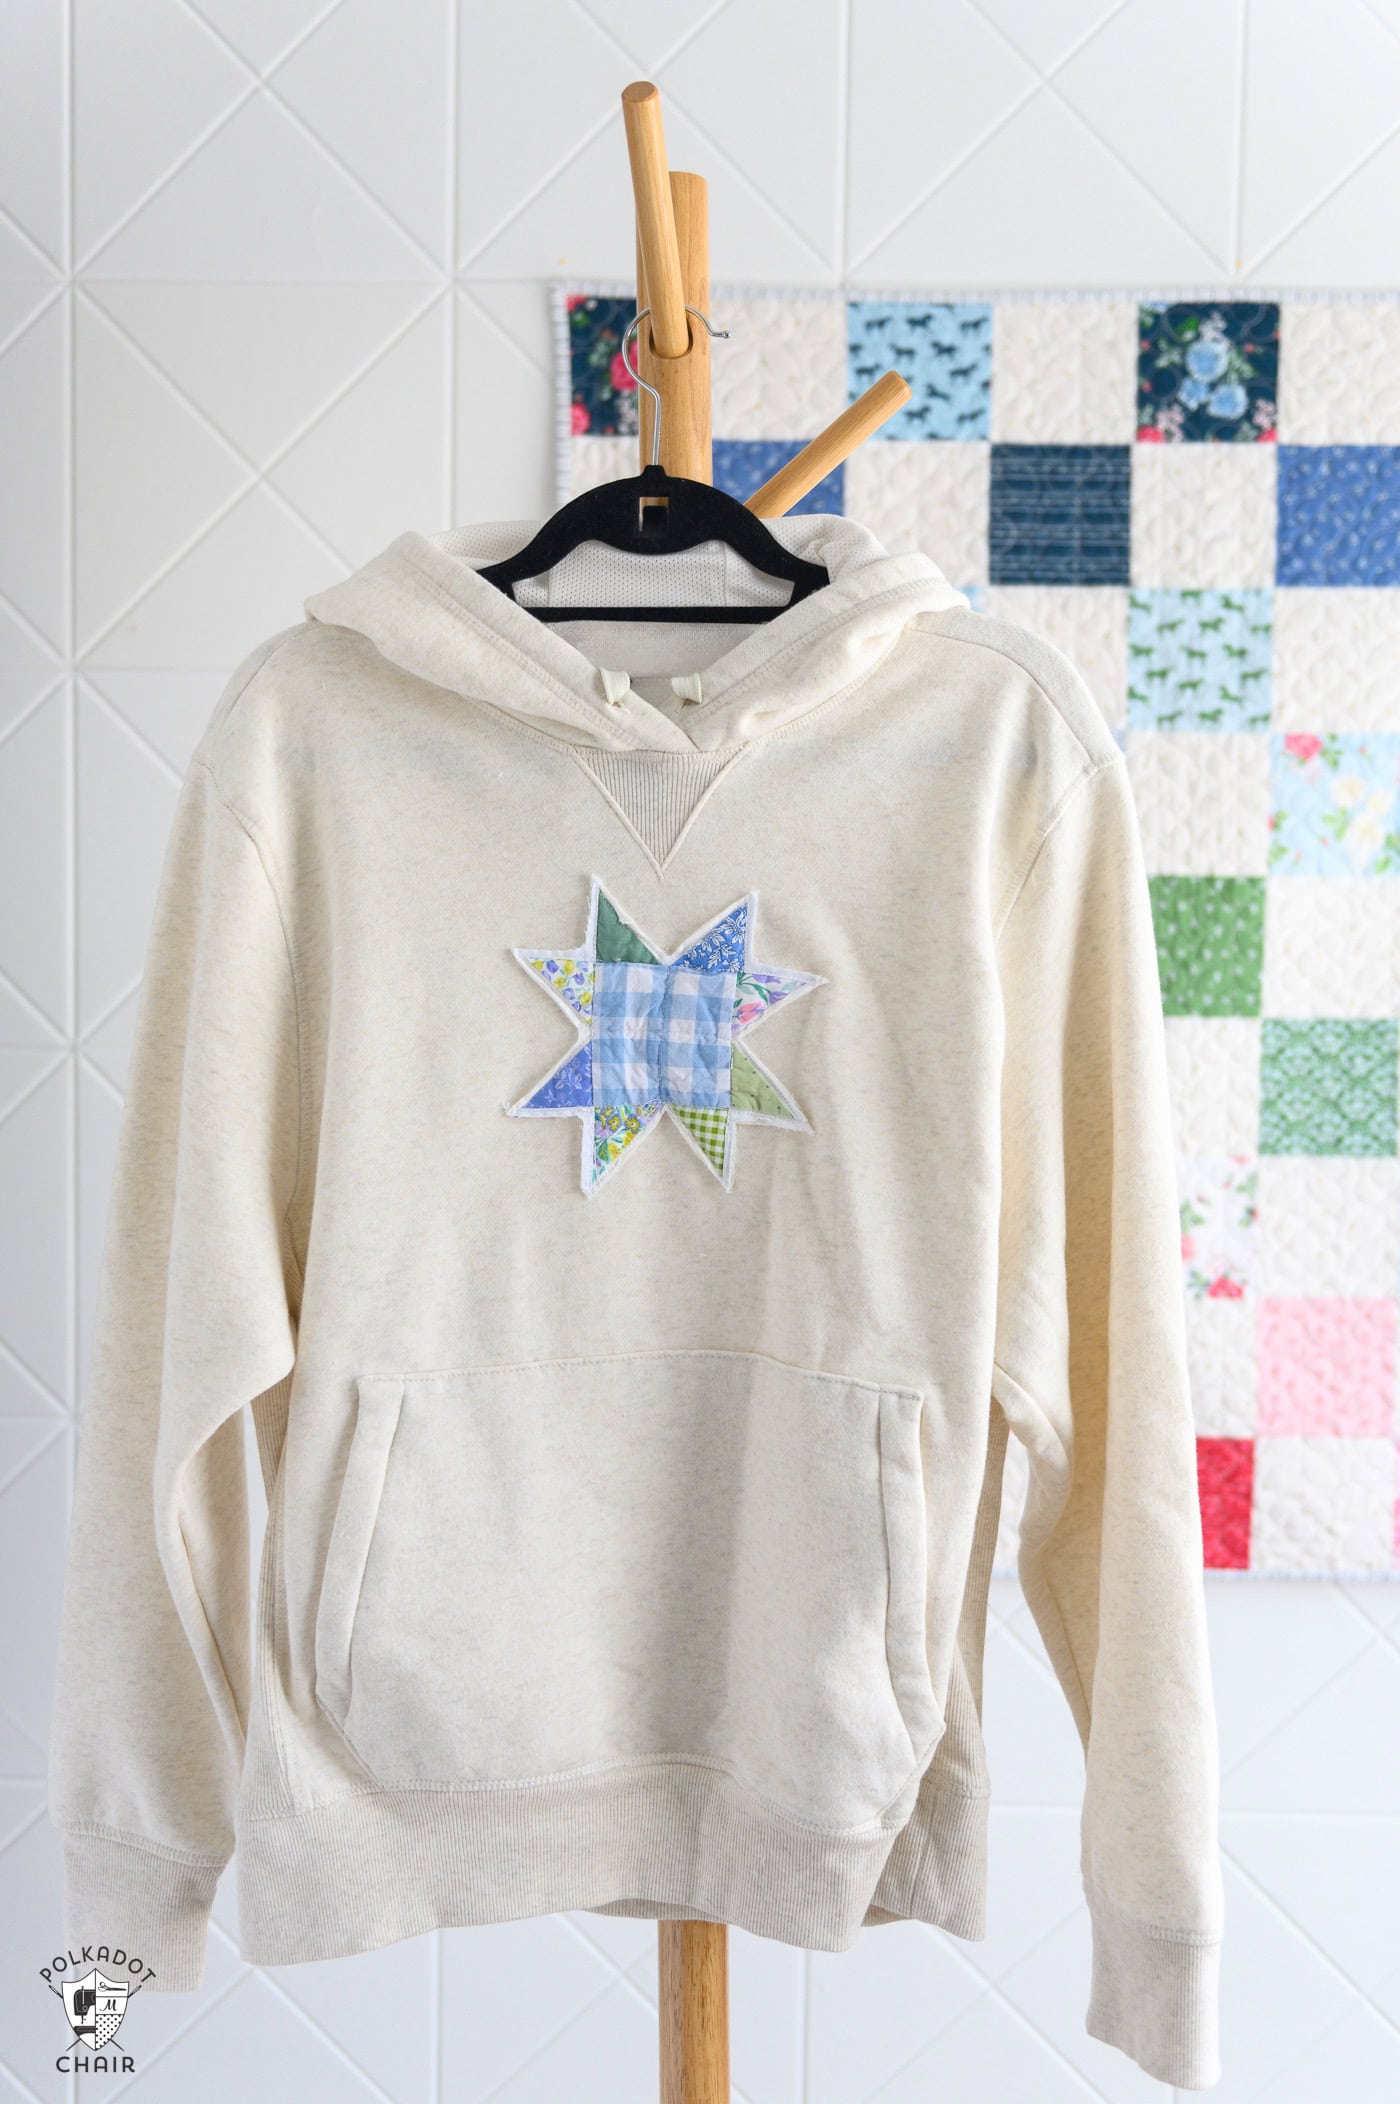
How to Make an Upcycled Quilt Block Sweatshirt
Quilted clothing is trending right now, but how do you get the look of an upcycled quilt project without cutting up an old quilt? You make a new quilt look old! Learn how to create this charming sweatshirt with our free Upcycled Quilt Block Sweatshirt Sewing Tutorial.
I must say that I’m enjoying the resurgence of quilted clothing. I’ve got a quilted coat on my “to make” list (I have the plan, but I have yet to start it). The trend has caught on with the younger set, with my daughters and nieces requesting quilted clothing!
My daughters & nieces were home for the Holiday break and requested a craft night. Each wanted to make a small quilted clothing item. I left the design up to them and only helped with the construction and measurements.
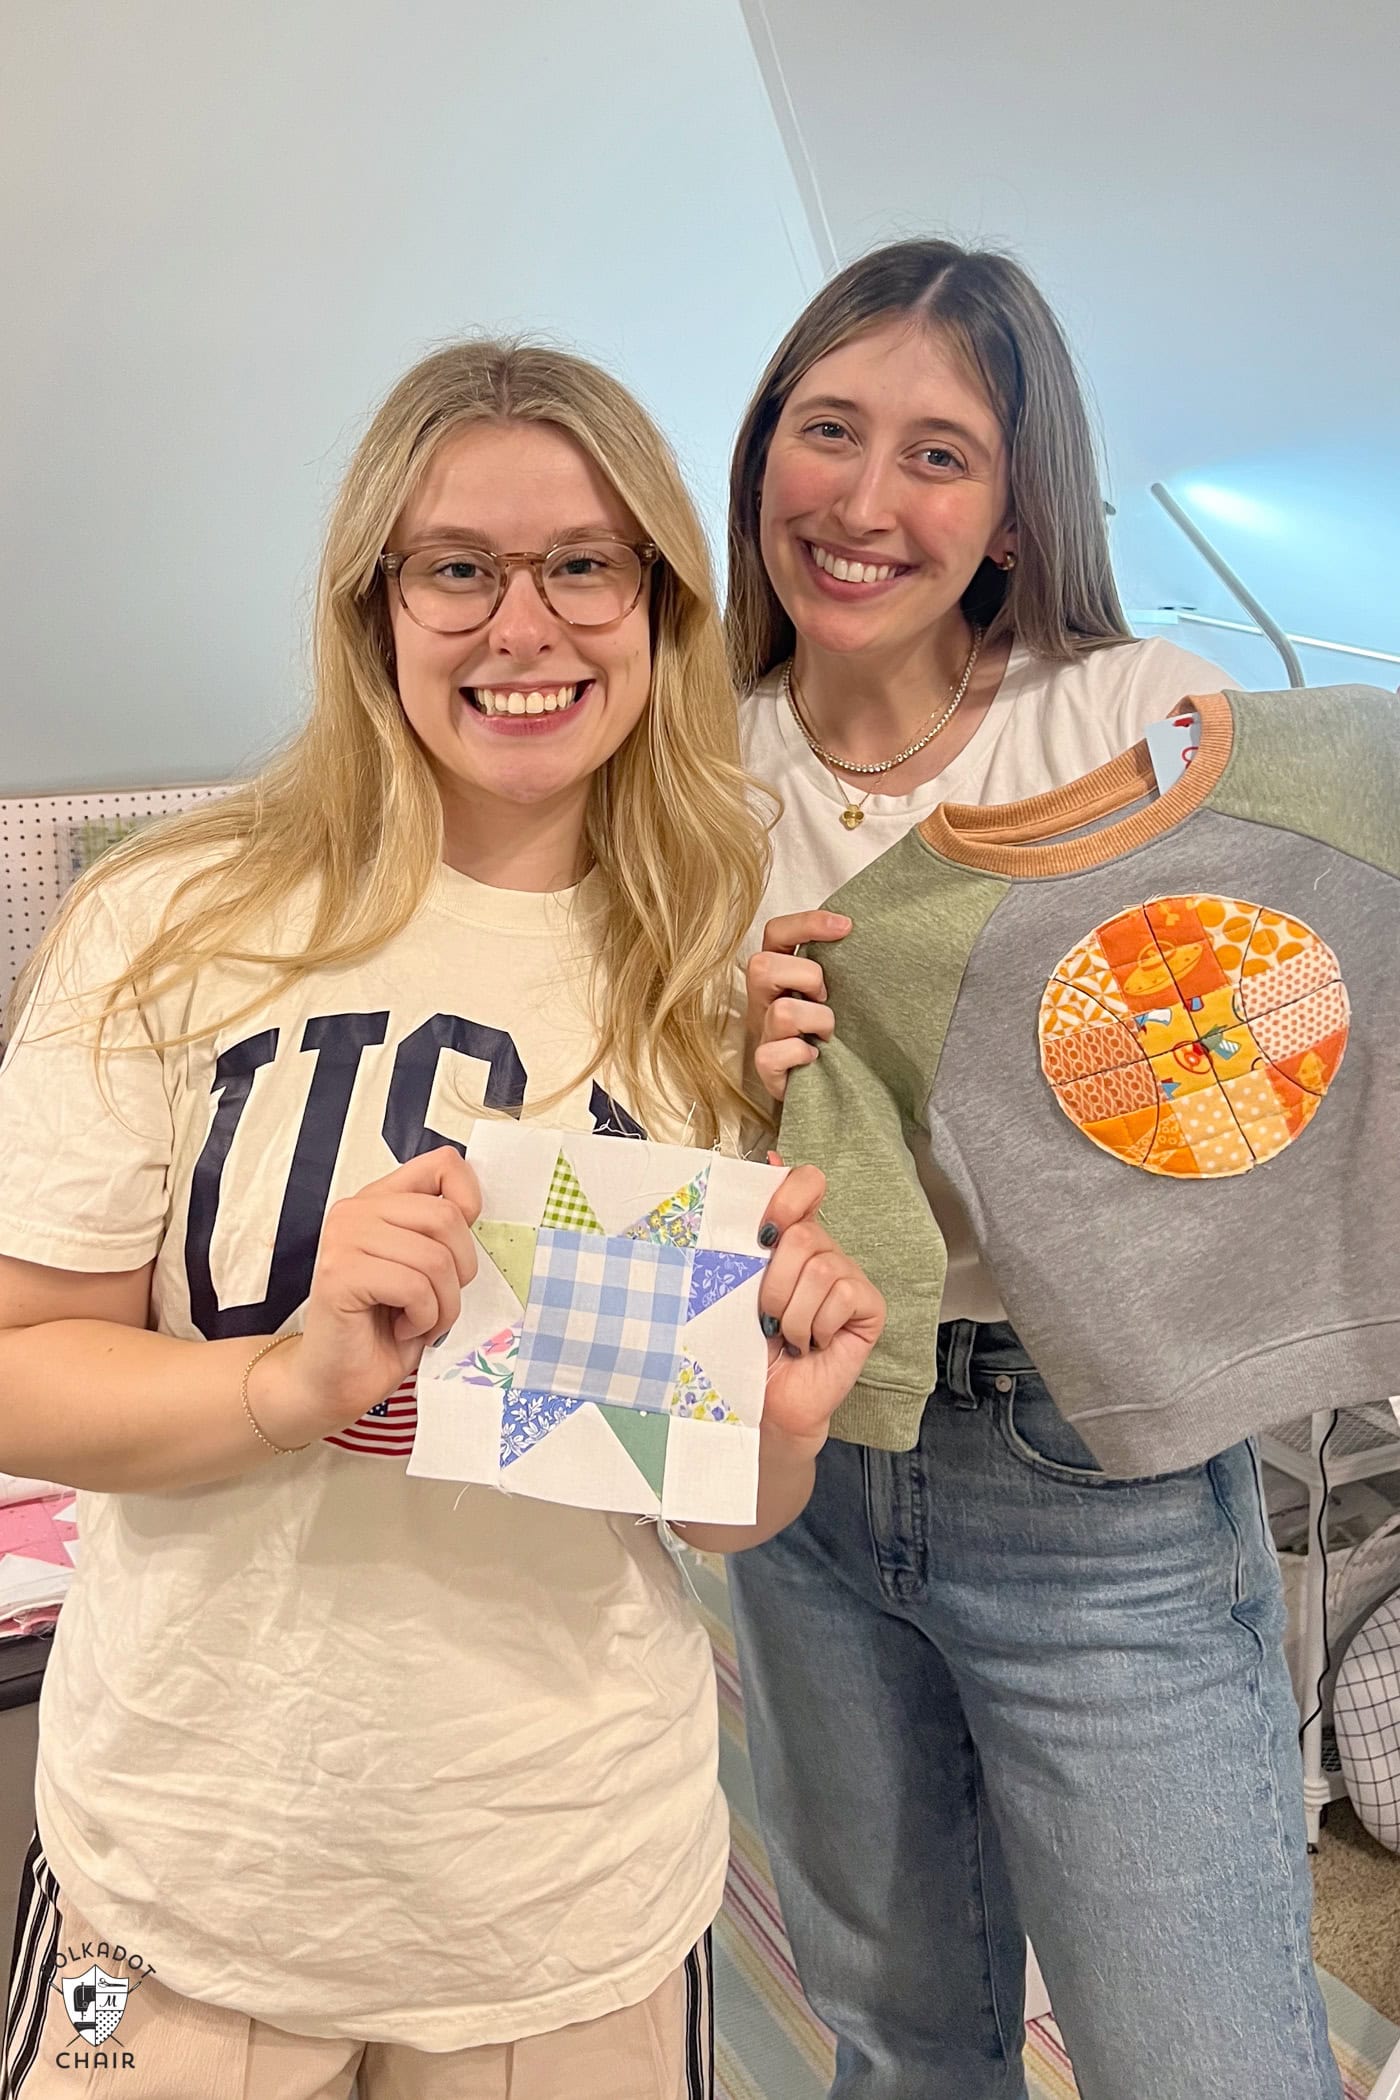
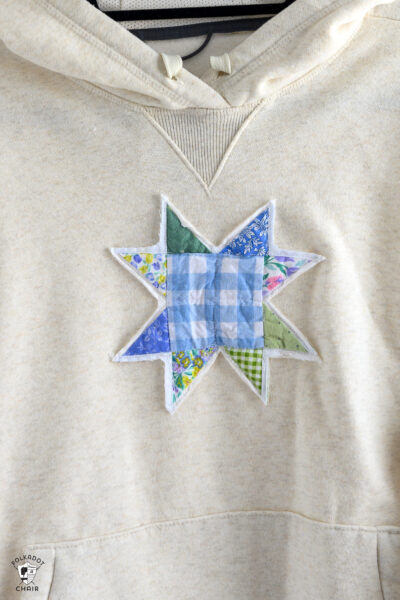
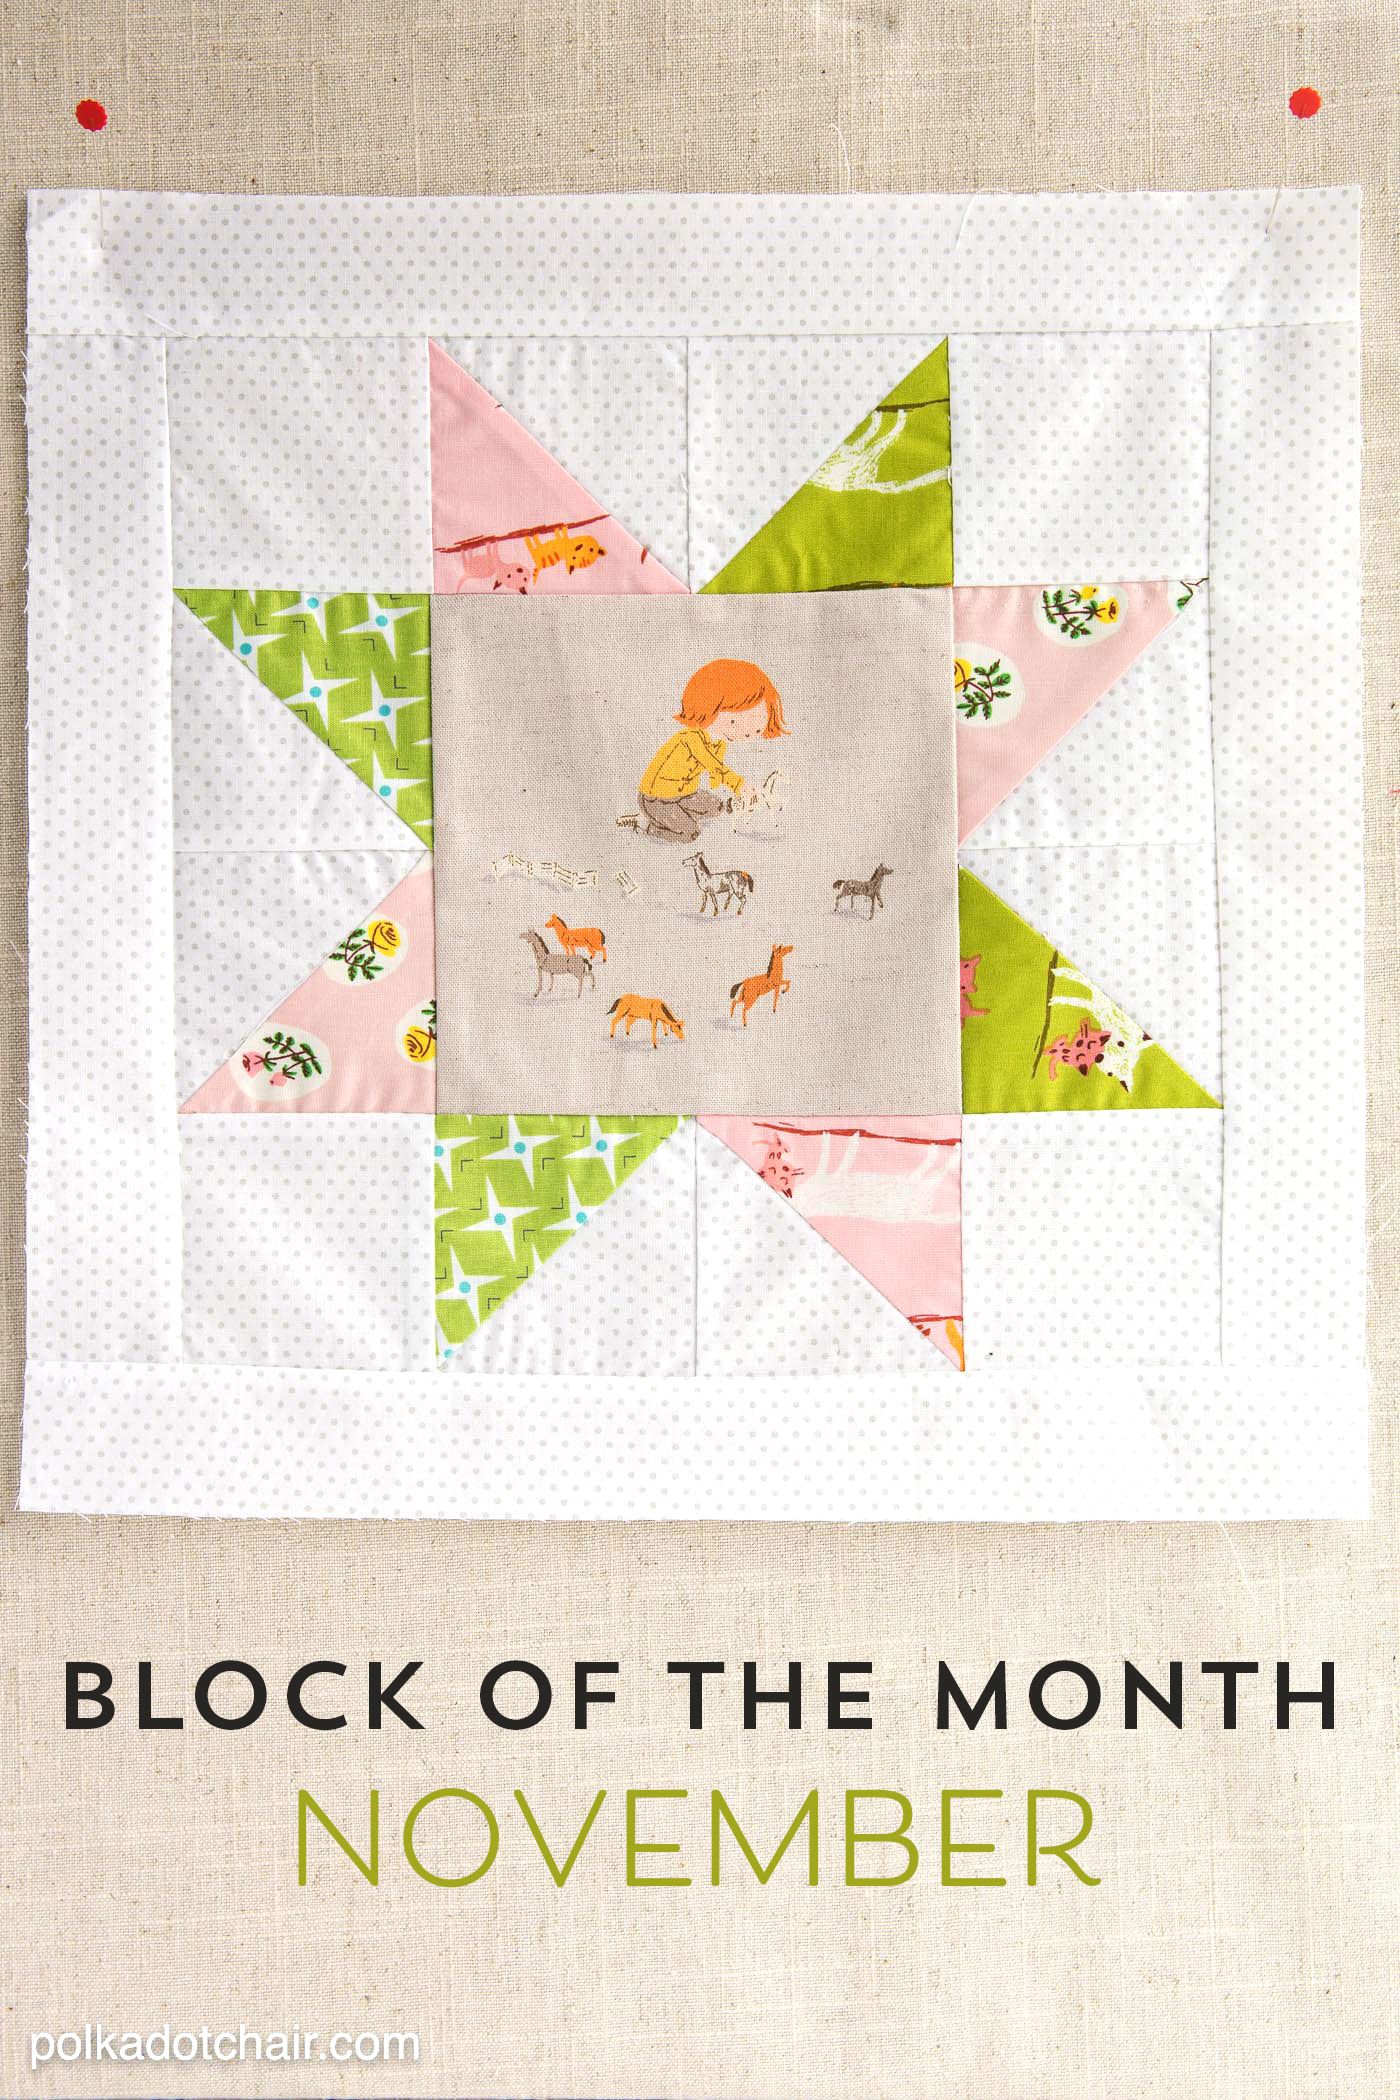
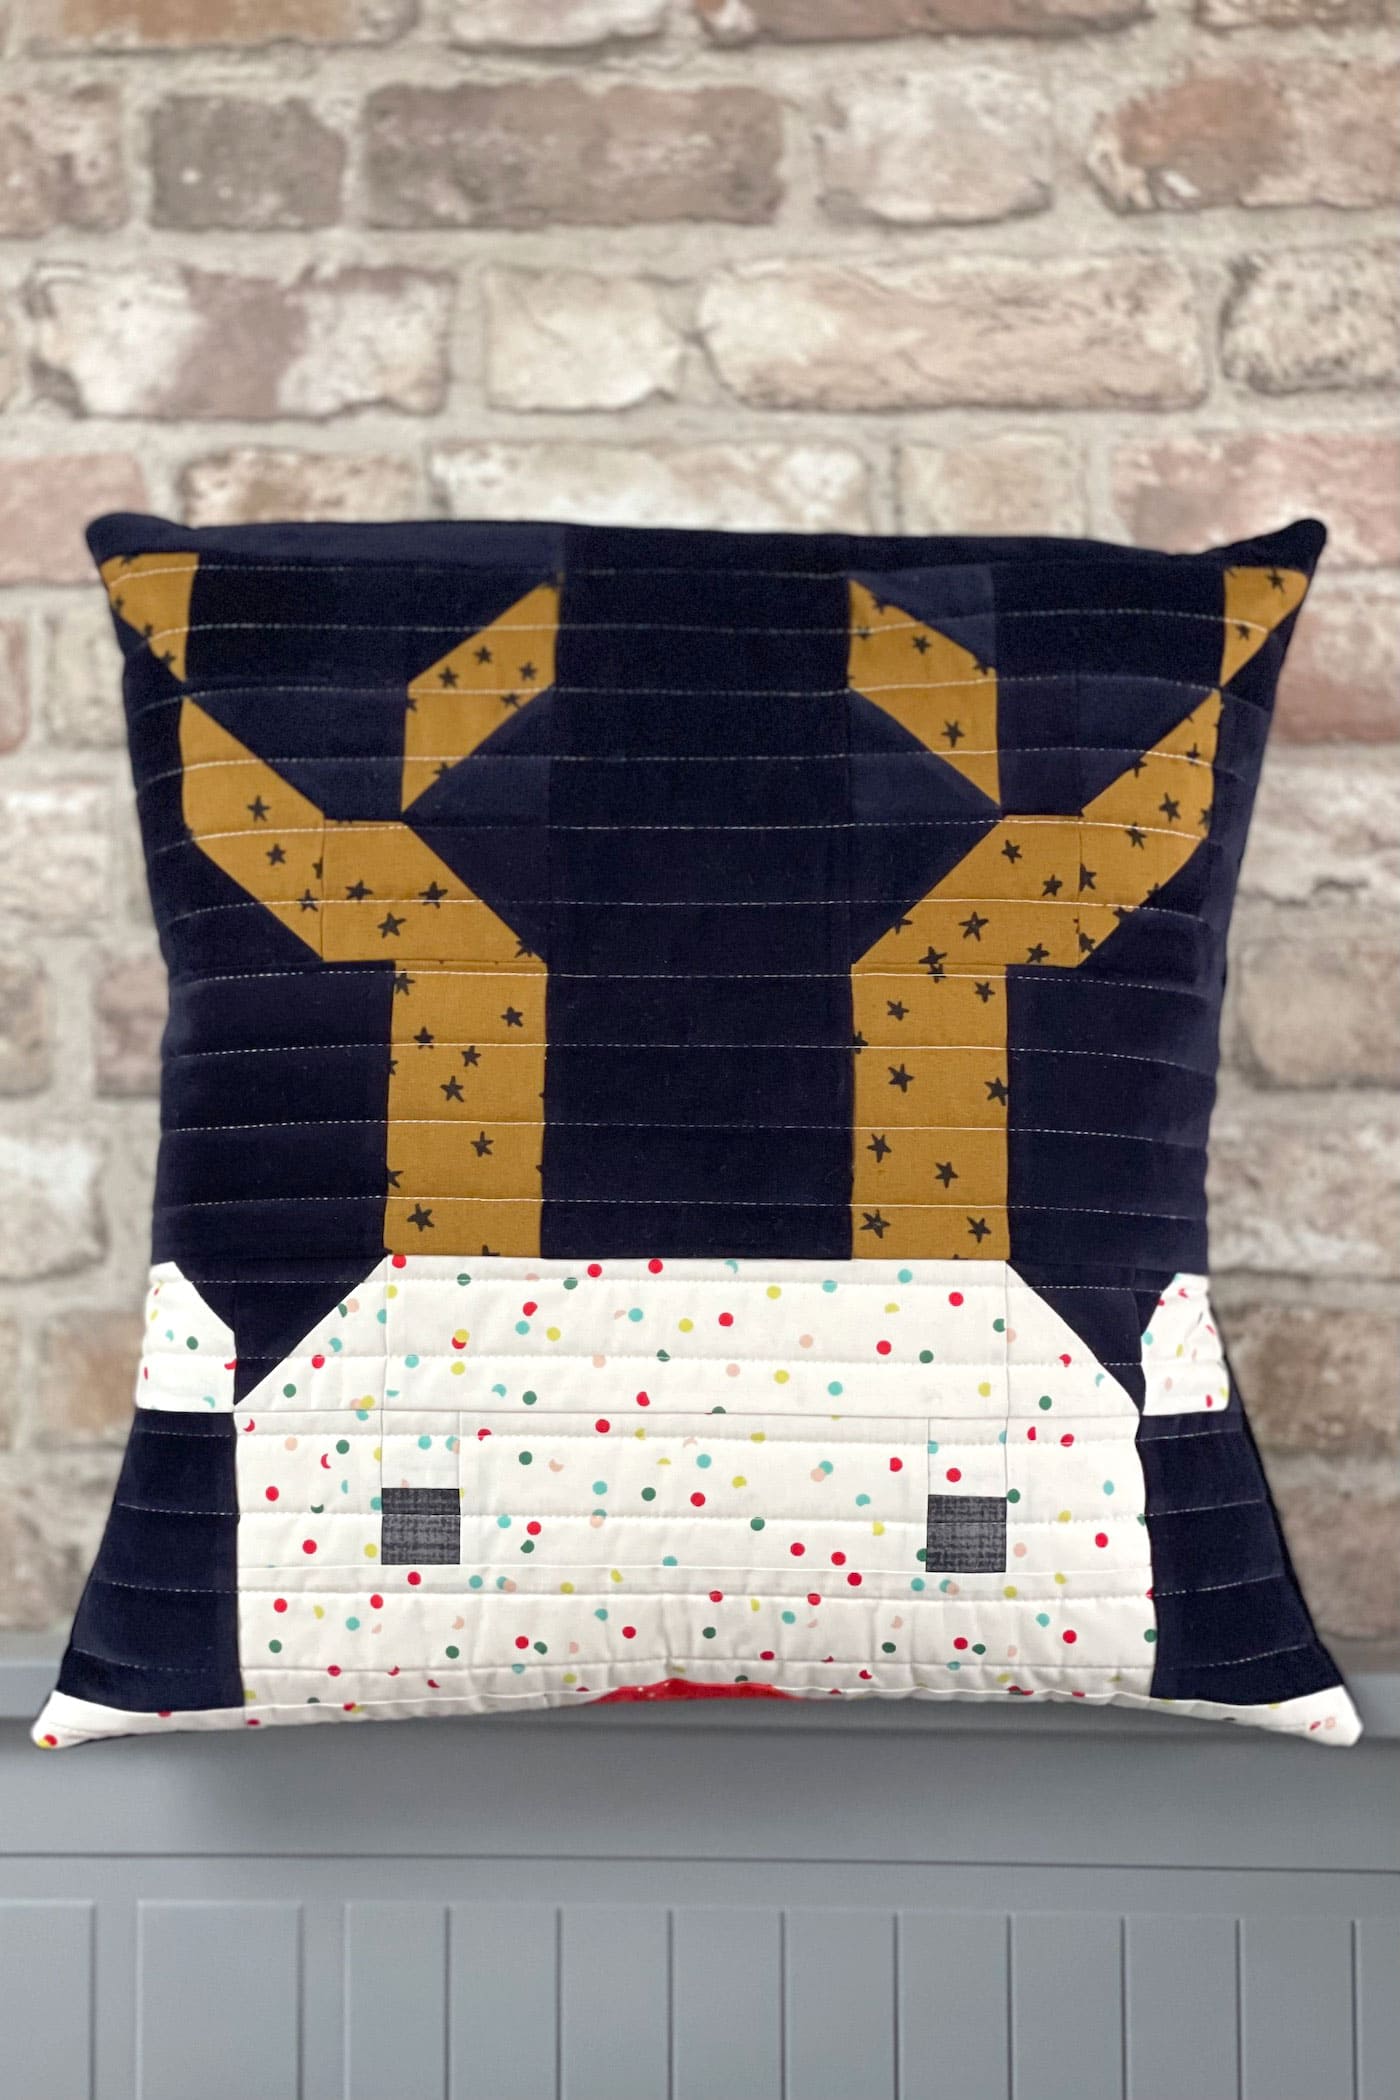
My niece created this cute Quilted Basketball Sweatshirt for her son, and my daughter created a simple sawtooth star quilt block designed to be sewn onto a sweatshirt.
This project is similar to the Disney Sweatshirt I shared last Fall, but the construction steps are a bit different, so I thought I’d share a detailed tutorial with you.
How Do I Make My Quilted Item Look Vintage?
The trick to making these quilted items look vintage without cutting up a vintage quilt is to machine quilt and wash and dry the items before they are sewn onto the piece of clothing.
When you choose your fabrics, pick simple designs and colors that would exist on a vintage quilt.
You could also do this with an actual vintage quilt. I know that many are so damaged that only small portions remain. This would be the perfect project, primarily if it’s constructed of simple quilt blocks.
Supplies Needed

Supply List
- Sweatshirt
- Eight Large Scraps of Fabric for Star Block
- 3 1/2″ x 3 1/2″ or Larger Fabric Scrap for Center
- 8″ x 8″ Fabric for Backing
- 8″ x 8″ Piece of Fabric Batting
This project uses small pieces of fabric, making it a great way to use up some of the scraps in your fabric bin.
Update: There have been slight corrections made to the tutorial. The pieces of Fabric B & C should have been cut to 2″ x 2″, not 1 1/2″ x 1 1/2″. The corrected dimensions are in the directions below.
Quilt Block Sweatshirt Sewing Tutorial
Equipment
supplies
- 8 pieces Print Fabric Cut to 2” x 2” for Star Points
- 4 pieces White Fabric Cut to 2” x 3 1/2”
- 4 pieces White Fabric Cut to 2" x 2"
- 1 piece Fabric Cut to 3 1/2” x 3 1/2” for Center of Block
- 1 piece Fabric 8” x 8” for Backing
- 1 piece Cotton Batting 7 1/2” x 7 1/2”
Instructions
Step One:
- Fabric Key: Center Fabric = Fabric A White Fabric= Fabric B Star Points = Fabric C
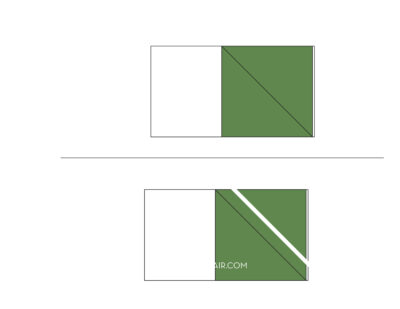
- Draw a diagonal line on the wrong side of your 2” x 2” Fabric C pieces.

- Place one 2” x 2” piece of Fabric C on top of one of the 2” x 3 1/2” piece of Fabric B as shown in the diagram.
- Sew along the drawn line.
- Trim 1/4” on the outside of the sewn line. Flip the fabric up and press.
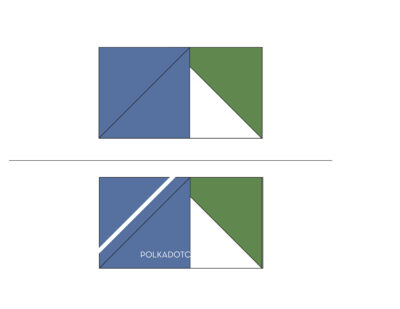
- Repeat with another 2” x 2” piece of Fabric C on the other side of the unit.
- Repeat three more times so that you have four sewn units.

Step Two:
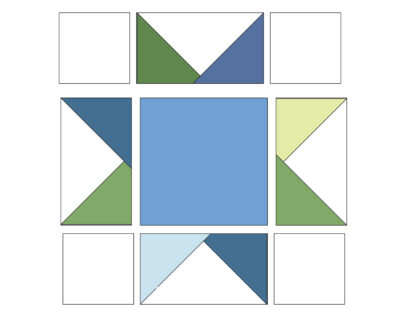
- Sew the following pieces together in order, as shown in the diagram.
- Row 1: 2” x 2” Fabric B, Unit from Step One, 2” x 2” Fabric B
- Row 2: Step One Unit; 3 1/2” x 3 1/2” Fabric A; Step One Unit
- Row 3: 2” x 2” Fabric B, Unit from Step One, 2” x 2” Fabric B
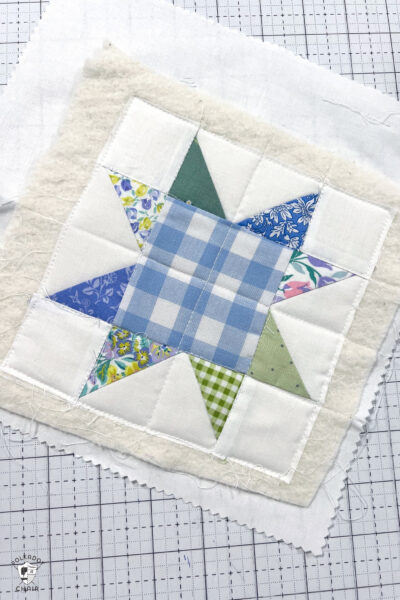
- Press the seams of Rows 1 and 3 away from the center. Press the seams of Row 2 towards the center. Sew rows together as shown. Trim and square up to 6 1/2” x 6 1/2”
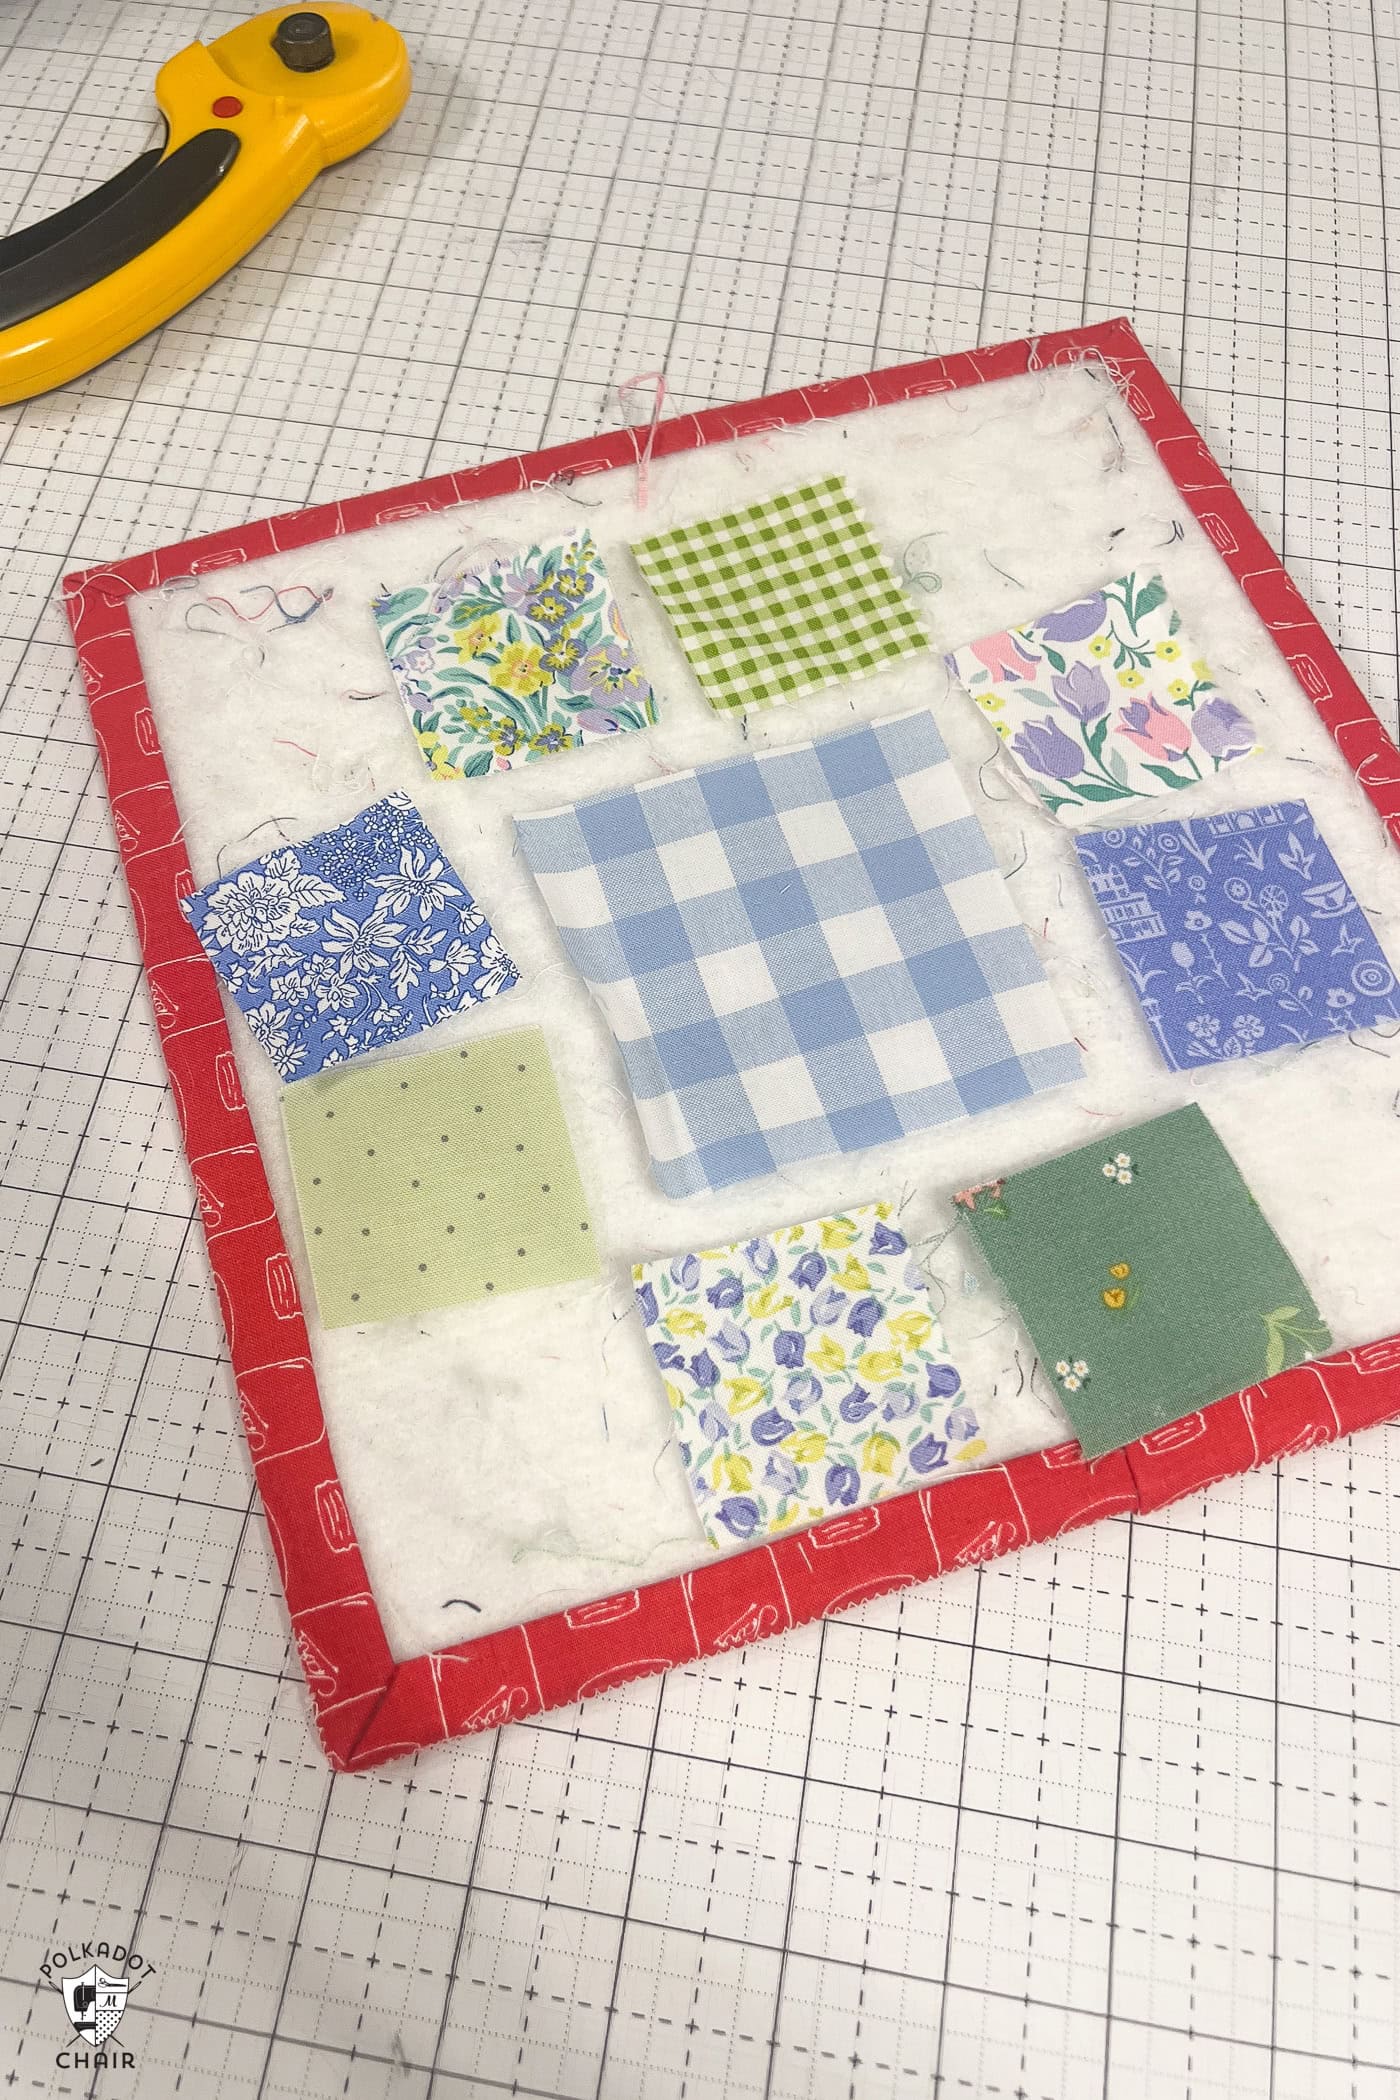
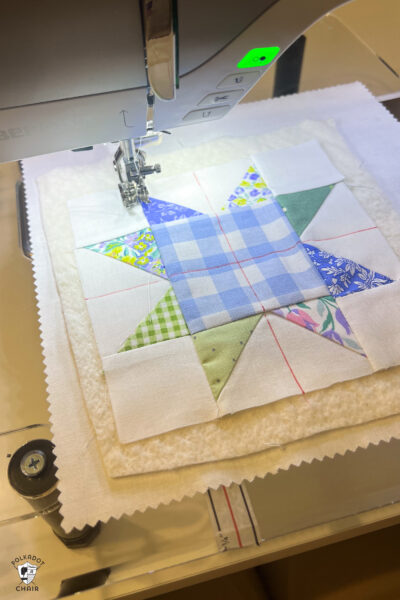
Step Three: Quilt
- Make a quilt sandwich with the background fabric on the bottom, the batting piece on top, and the completed quilt block on top.

- Mark lines 1 1/2” apart (mine were on my seam lines) or whatever your desired quilting density is. If you want a more textured look, mark your lines 1/4” or 1/2” apart.
- On your sewing machine with a walking foot installed, quilt the lines going horizontally and vertically. Sew around the edges of the quilt block to secure them in place before they are washed.
Step Four: Wash
- After your piece is quilted, wash and dry the quilted piece and your sweatshirt. This will help to ensure they both preshrunk before sewn to each other.
Step Five:
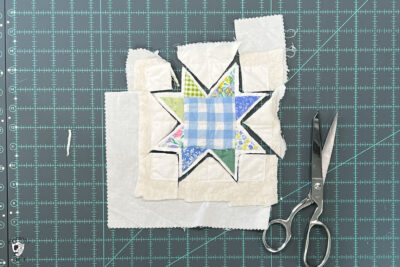
- Remove from the dryer, and lightly press the quilt block if necessary.
- Cut it out around the edges of the points about 1/4” from the outside of the seam.

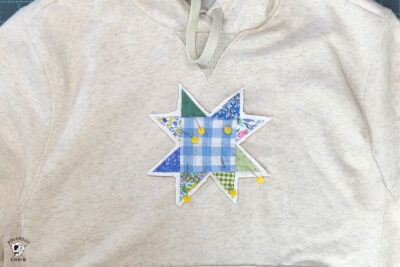
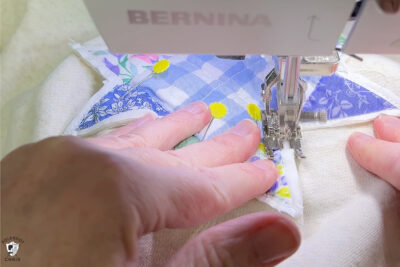
- Pin the cut block to your sweatshirt in the desired location.
- Using your sewing machine, sew in place. If you have an arm or table on your machine that you can remove, this step will be much easier.
- That's it, enjoy your sweatshirt.
Project Notes
For those of you screaming at the computer screen that the fabric will fray, yes, I know it will, but this project is meant to be intentionally scrappy and vintage-inspired. The fraying fabric adds to the upcycled look.
If you are worried about excessive fraying, you can stitch around the perimeter with a small zig-zag stitch to mitigate fraying after you’ve sewn your quilt block to your shirt. You can also apply Fray Check to any spots that seem to be more prone to fraying.
If you want to make this with a larger quilt block, you can use our free 12″ Sawtooth Star quilt block pattern to create your block, then sew it onto your sweatshirt.
You do not need to cut out around the star points as I did. You could leave your quilt block as a square, but we felt that it looked more upcycled when cut around the star.
Since both the quilt block and the sweatshirt were washed and dried before sewn together, you can wash and dry the completed sweatshirt afterward.

I enjoyed the dorky project, thx!
A quilt block on a sweatshirt is a bit dorky. Quilt blocks belong on quilts:)
For those who are concerned about the fraying, they need not be concerned. This method is much like making a rag quilt. The look is amazing. If you want more of a rag look, then clip the edges every 1/4″ from edge to stitching line. being careful not to clip the stitching line.