• Skip to primary navigation
  • Skip to main content
  • Skip to primary sidebar

The Polka Dot Chair logo

  • SEWING
    • Free Sewing Patterns
    • Bag Patterns
    • Costumes
    • Apparel
    • Learn to Sew
    • Beginner Friendly
    • Embroidery Projects
    • Tips & Techniques
    • All Sewing
  • QUILTING
    • Quilt Blocks
    • Learn to Quilt
    • Free Patterns
    • Quilt Patterns
    • All Quilting
  • CRAFTS
    • Disney
    • Cricut
    • Printables
    • All Crafts
  • HOLIDAYS
    • Seasonal Projects
    • Valentine’s Day
    • Easter
    • 4th of July
    • Halloween
    • Thanksgiving
    • Christmas
    • All Holidays
  • TUTORIALS
  • ABOUT
    • About Me
    • My Fabric Collections
    • Published Books
    • Press
    • FAQ’s
    • Contact
  • SUBSCRIBE
  • SHOP
menu icon
go to homepage
  • SHOP
  • TUTORIALS
  • SEWING
  • QUILTING
  • SUBSCRIBE
  • CRAFTS
  • HOLIDAY PROJECTS
  • ABOUT
    • Published Books
    • My Fabric Collections
  • CONTACT
    • Facebook
    • Instagram
    • Pinterest
    • YouTube
  • subscribe
    search icon
    Homepage link
    • SHOP
    • TUTORIALS
    • SEWING
    • QUILTING
    • SUBSCRIBE
    • CRAFTS
    • HOLIDAY PROJECTS
    • ABOUT
      • Published Books
      • My Fabric Collections
    • CONTACT
    • Facebook
    • Instagram
    • Pinterest
    • YouTube
  • ×

    Home » Holidays

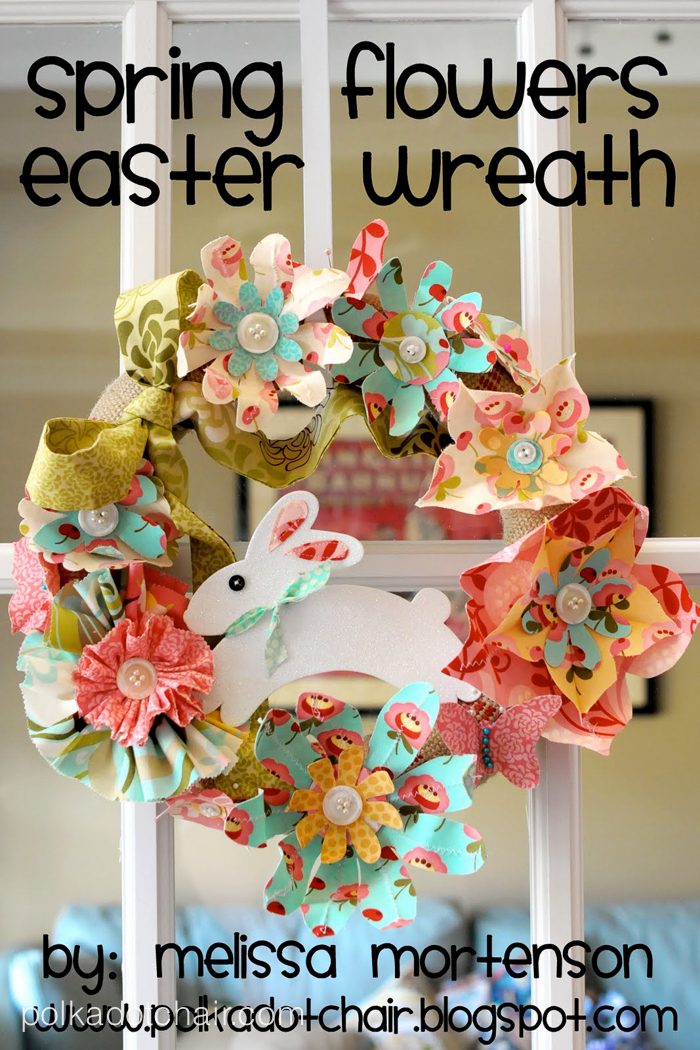
    Fabric Flowers Spring Wreath Tutorial

    Updated: May 25, 2021 by Melissa Mortenson · This post may contain affiliate links · This blog generates income via ads · 19 Comments

    Cute DIY Wreath for Easter made with fabric flowers

    Spring has finally sprung at my end of the world, and I can not tell you how excited I am! It seems like it’s been a very long winter.  I can’t wait until all of the beautiful flowers are in bloom.

    Cute DIY Wreath for Easter made with fabric flowers

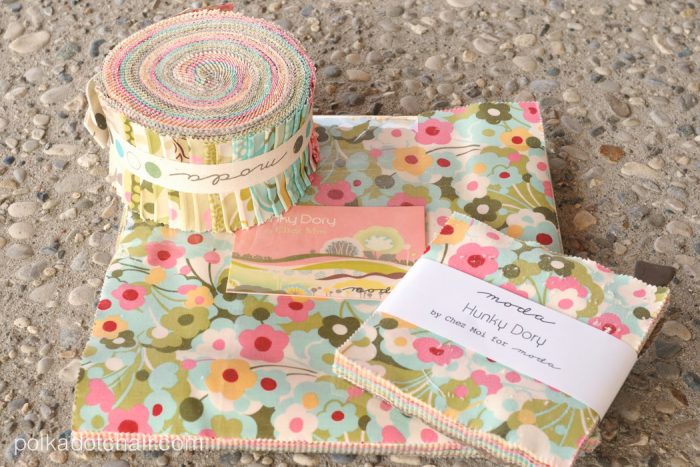
    Inspired by spring, I created this fun and easy spring flowers wreath. I used the gorgeous Hunky Dory  line of fabric and fell in LOVE with all of the wonderful colors and patterns. I added a little bunny made out of fun foam to make it perfect for Easter!

    Supplies Required

    • 1 Layer Cake
    • 1 Charm Pack
    • 1 Jelly Roll *note you will not use all of your fabric from each. You’ll have plenty of fabric left over for other projects*
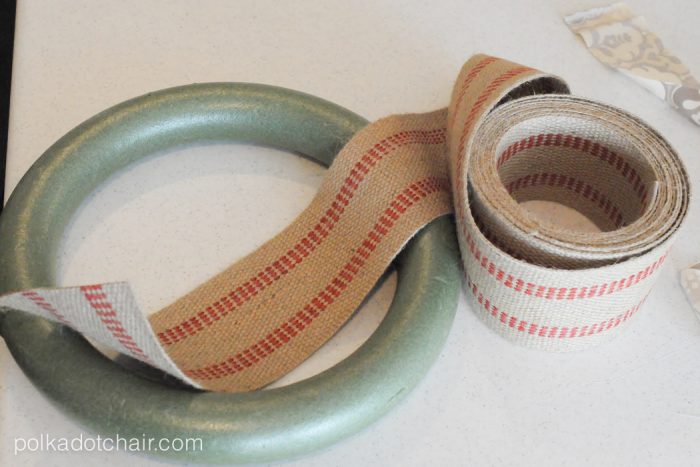
    • Styrofoam Wreath
    • Wonder Under
    • Pearl Head Pins, white and colored
    • White covered floral wire
    • Buttons
    • 5 yards Burlap Upholstery Tape (buy it next to the upholstery tacks at your fabric store)
    • White Glitter Fun Foam (yep,  You read that right!)

    Other pins, shapes, colored buttons or pins… it’s up to you!

    Cute DIY Wreath for Easter made with fabric flowers

    Instructions

    To begin, you want to wrap your styrofoam wreath completely with burlap tape.  I used small pins every few inches to make sure it stayed flat. It won’t be perfectly flat .. do your best.

    Cute DIY Wreath for Easter made with fabric flowers
    Cute DIY Wreath for Easter made with fabric flowers

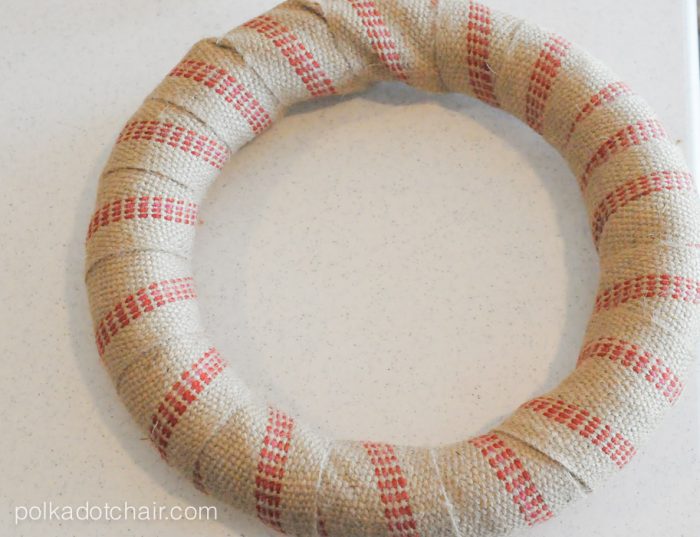
    After you have wrapped your wreath set it aside.

    Cute DIY Wreath for Easter made with fabric flowers

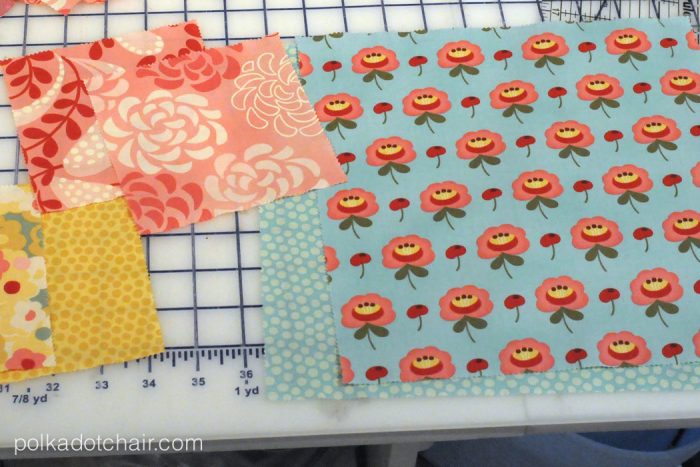
    Pick out some charm pack and layer cake pieces that you like.  I used 6 layer cake pieces and 8 charm pack pieces for my flowers. I put them in a stack of 2 based on color (i.e., 2 blue ones, 2 yellow ones)

    Cover the back half of the pieces (you will cut your wonder under to 10×10 or 5×5) of them entirely with wonder under.  Peel off the backing and press the other fabric piece to its wrong sides together. This will give you double-sided fabric.

    Cute DIY Wreath for Easter made with fabric flowers

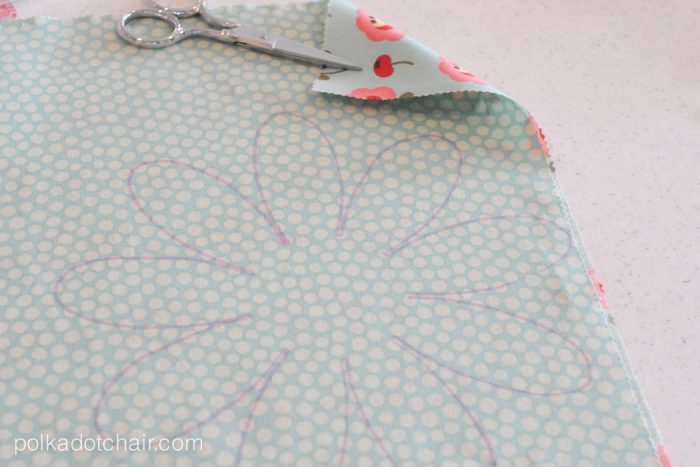
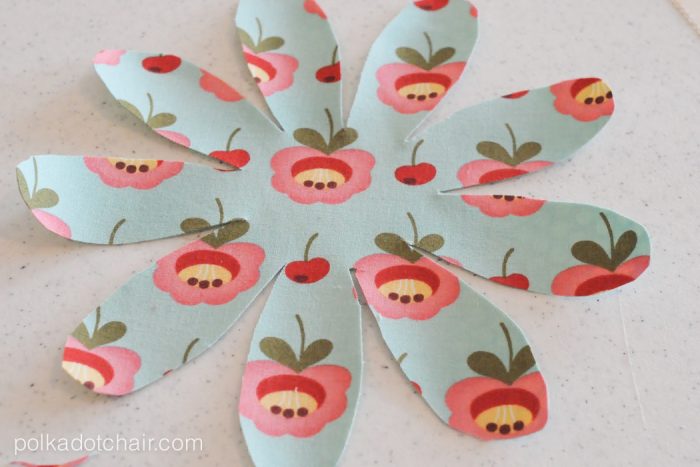
    Using a “fade away” fabric pen, Start tracing your flowers.  I have uploaded some templates for you to use here on the TEMPLATES page. (please note these templates are not for commercial use).  Fit the large flowers on first, then start tracing your smaller flowers.  Cut them out.   You will want to trace flowers on all 3 of your layer cake pieces and all 4 of your charm pieces.  I also used 2 butterflies on my wreath; if you want them to trace them on your fabric and cut them out.

    Cute DIY Wreath for Easter made with fabric flowers

    I had 3 large flowers on my wreath. The large flower pieces will not hold their shape by themselves. You will need to add wire to the back of them to help form them.  Take a piece of your white floral wire and center it on the back of one of your flower petals.  Using a zig zag stitch, stitch down the center of the petal over the top of the wire.

    Cute DIY Wreath for Easter made with fabric flowers

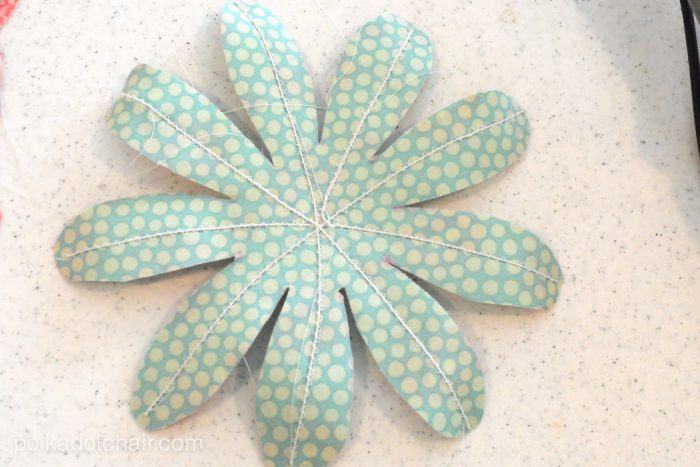
    When you are done it should look like this on the back. Do this with all the flowers that are large (over 6″).

    Spring-Flowers-Easter-Wreath-14
    Cute DIY Wreath for Easter made with fabric flowers

    Generously starch and press all remaining smaller flower pieces. The ones that you can, press the petals in half (with your iron). This will help to make them stand out more (as will the starch)

    Take some of your flowers and using a curling iron, curl the edges up (make sure you starch them first).

    Spring-Flowers-Easter-Wreath-17

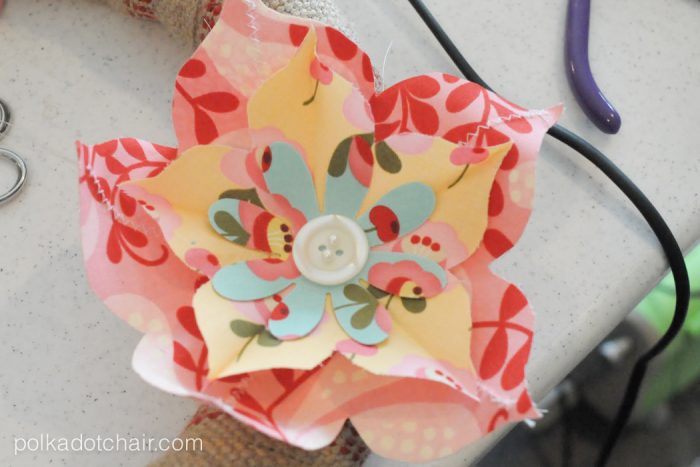
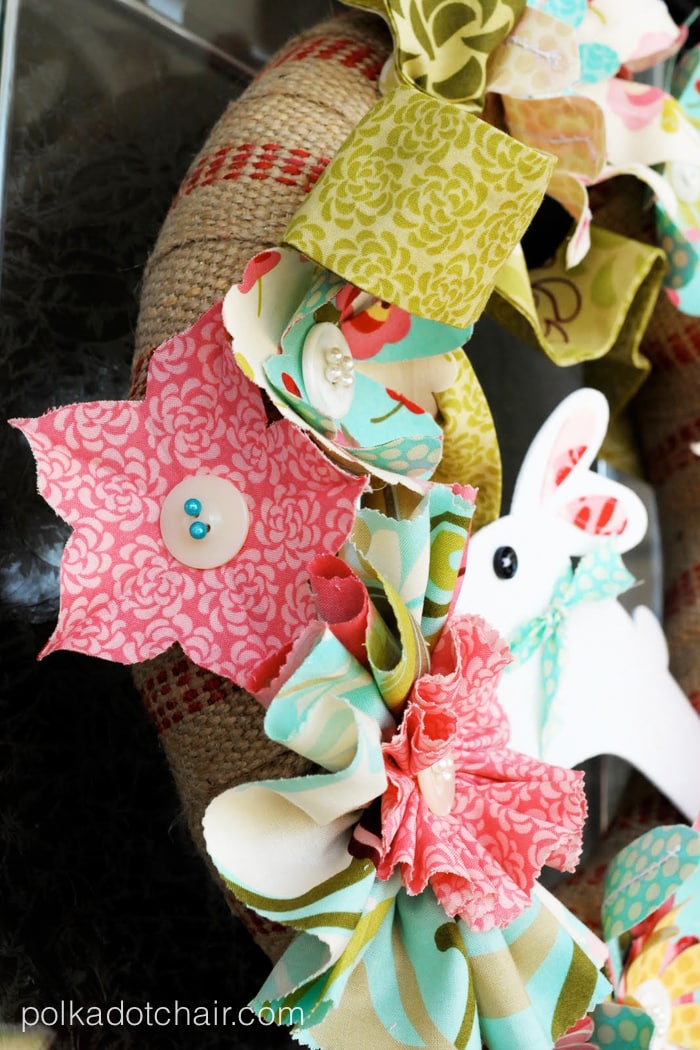
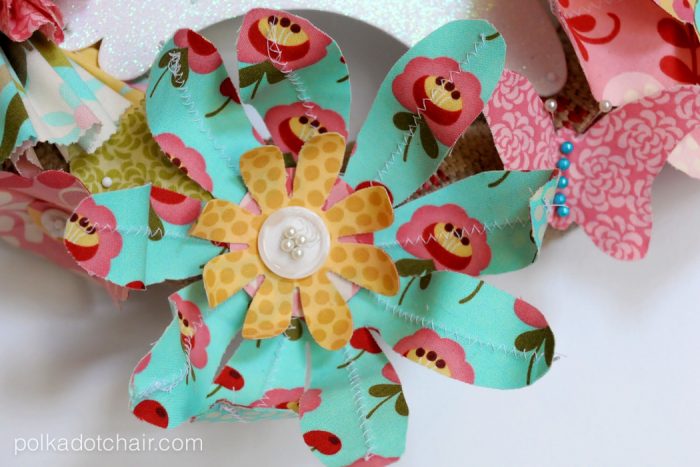
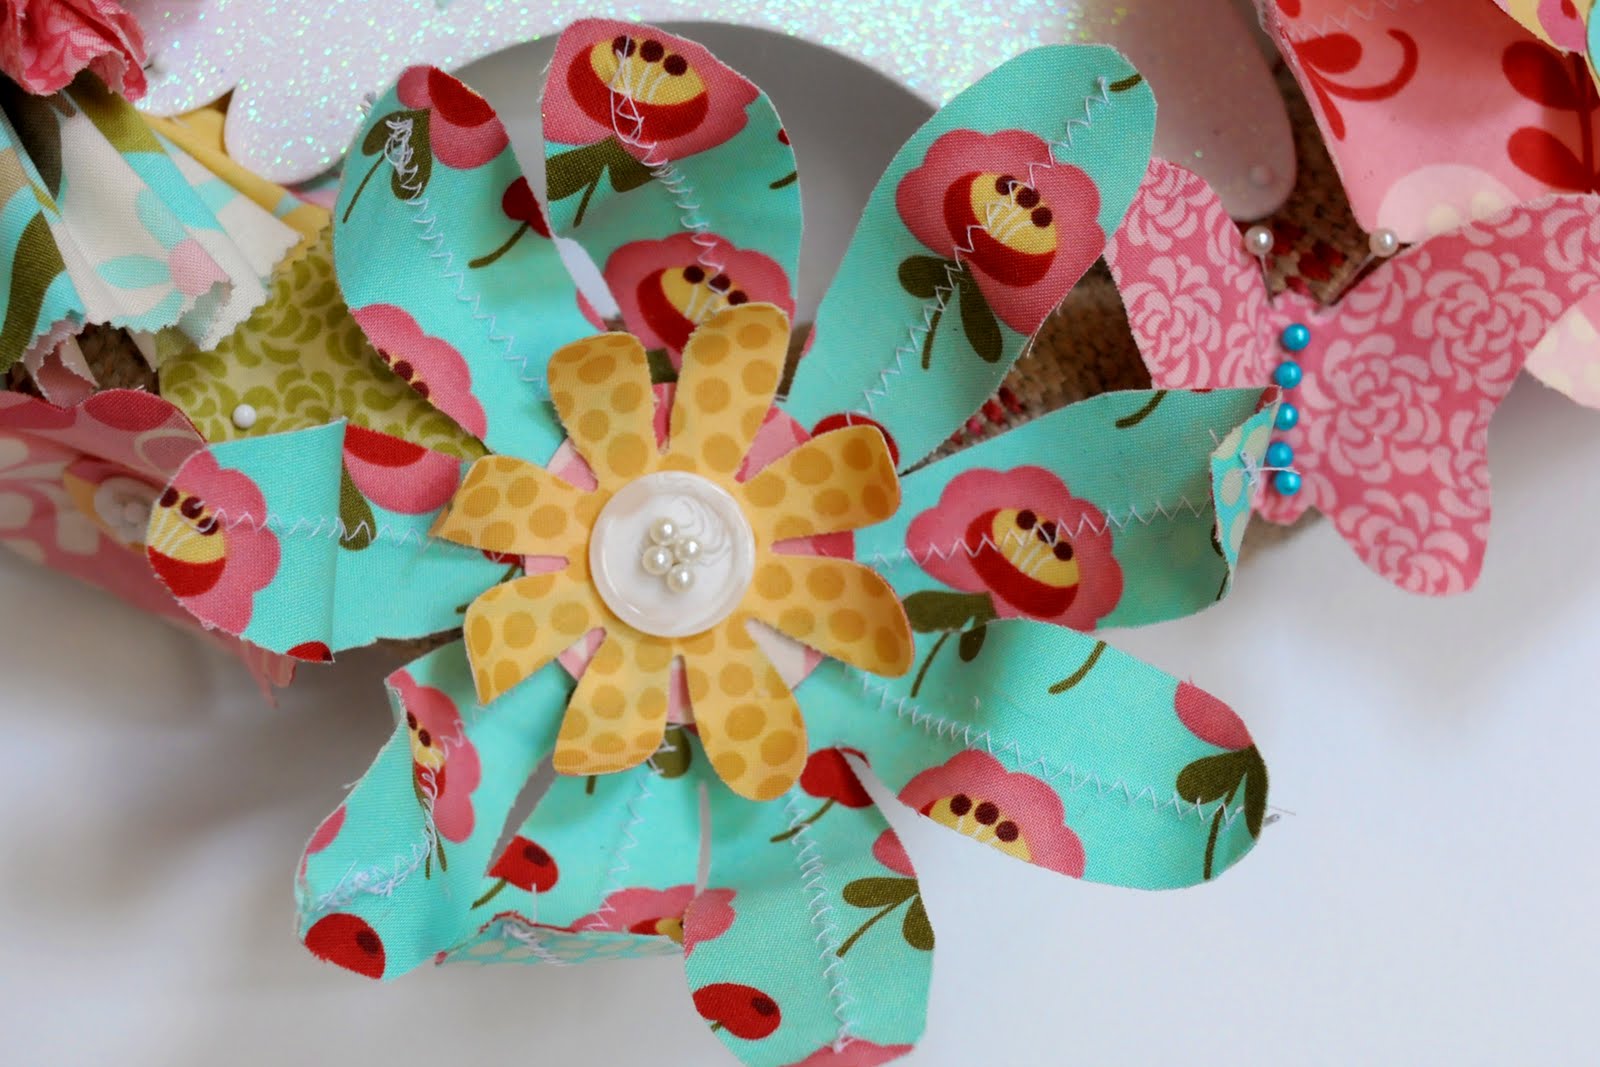
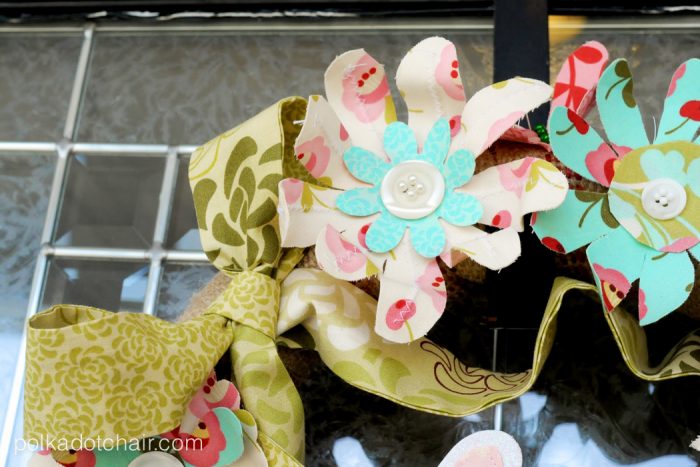
    Now just start layering your flower pieces. Just layer them as you like, try to get a variety of shapes and colors on each flower. On the wired pieces bend the petals into a pleasing shape.

    Lay the flower on top of your wreath where you like and place a button in the center of the flower.  Using pearl head pins, attach the flower to the wreath through the button holes.

    Just fill up your wreath with flowers. I recommend placing the largest flowers on first, then filling the empty spaces with the smaller ones.

    Spring-Flowers-Easter-Wreath-18

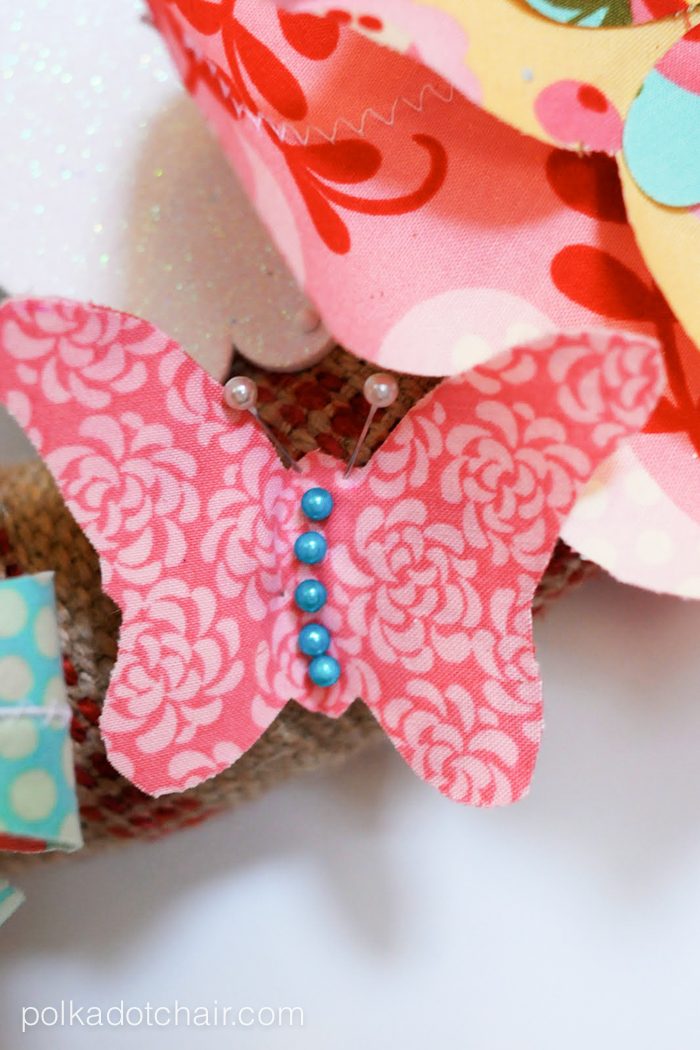
    Fold your butterfly in half and press. Open it up and attach to the wreath also.  I used colored pearl head pins down the middle and 2 white pins for it’s antennae.

    Cute DIY Wreath for Easter made with fabric flowers

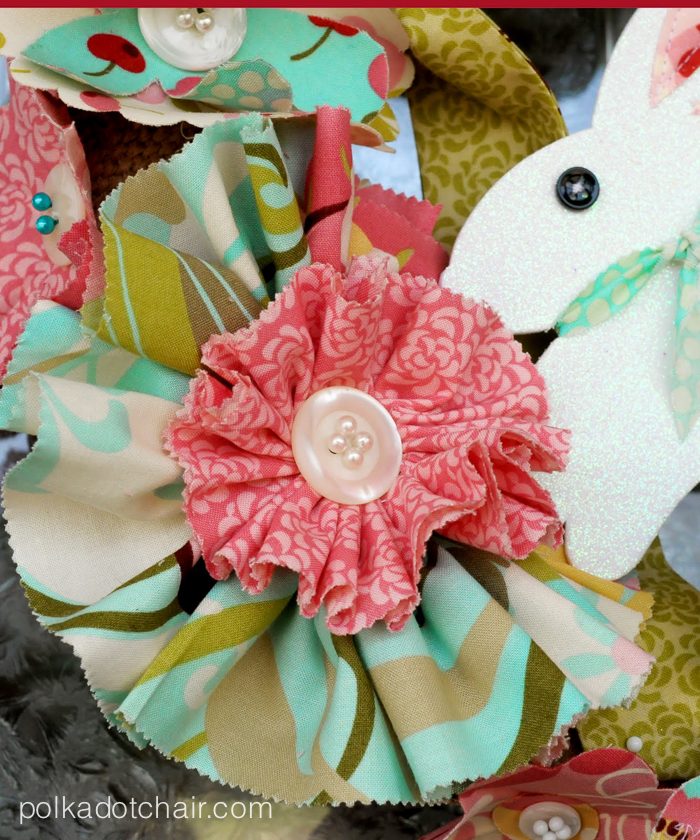
    To make the large posy flower on the wreath, you just need 2 jelly roll strips. Jelly roll strips make PERFECT flowers since they are long, skinny, and have pinked edges. If you want, you could make the whole wreath out of these strips if you don’t want to cut out flowers.

    To make them, take one jelly roll strip, and with a needle and thread, run a basting stitch ALL the way down the long side. Gather the fabric up as you go, and it will naturally form into a circle. To make the smaller posy in the middle, take a jelly roll strip, cut it in half then fold it in half lengthwise.  Then run a gathering stitch (by hand) down the folded side of the strip.  Place over the larger posy and sew them together.

    Spring-Flowers-Easter-Wreath-19


    To make the bow, take two jelly roll strips and place them right sides together. Sew around 3 sides, leaving one short side open. Turn right side out and press.

    Tie into a bowl and place on the wreath. Use pins to put the ribbon tails where you like and to help “poof” out the bow.

    Cute DIY Wreath for Easter made with fabric flowers
    Spring-Flowers-Easter-Wreath-21


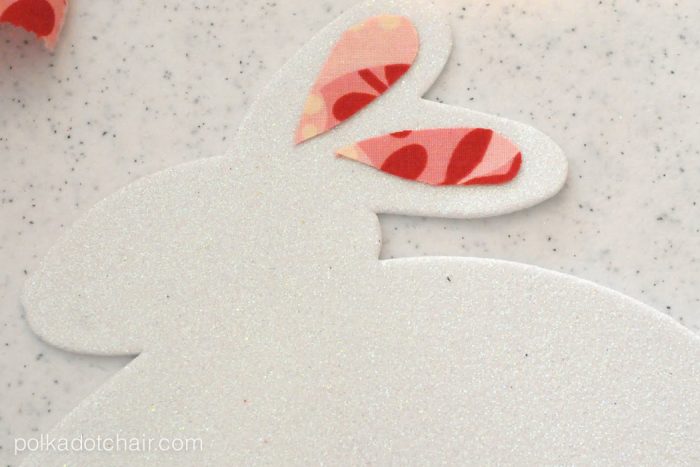
    Cut your bunny out of fun foam.  Cut 2 small scraps of fabric for the inside of the “ears,” and spray adhesive, place on top of the foam.  Slowly stitch around the fabric to attach it. (yep, you can sew through the fun foam; it was pretty easy 🙂

    Cute DIY Wreath for Easter made with fabric flowers

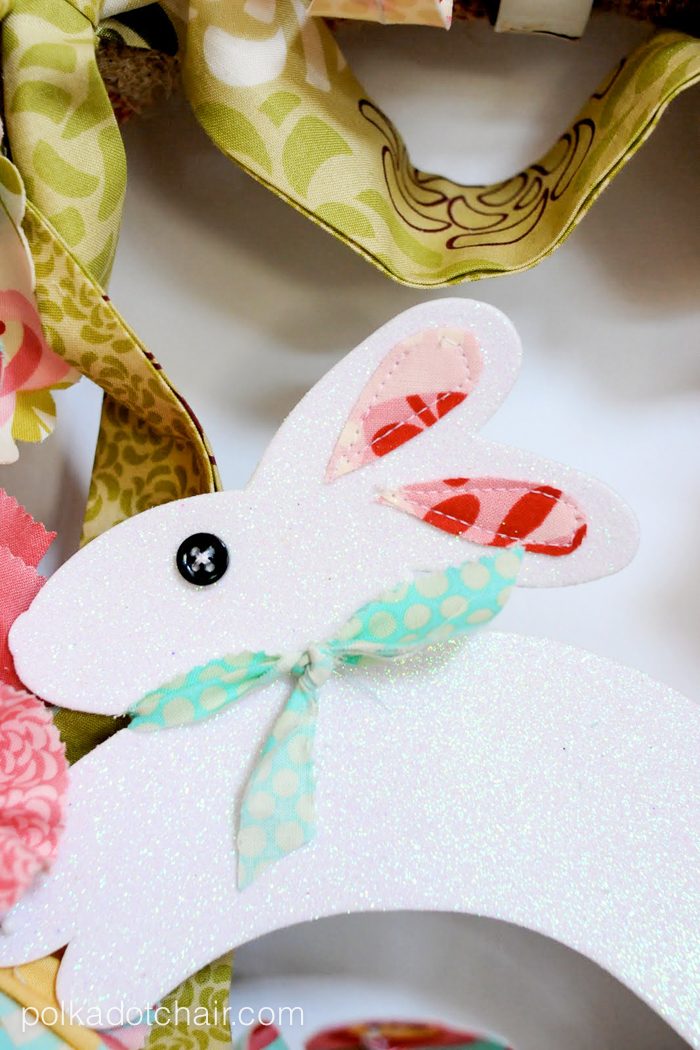
    Take another scrap of fabric and tie it around the bunny’s neck for a bow. Sew a small black button on for an eye.  Using pins attach to the center of the wreath.

    Note: If you don’t like the idea of using fun foam, you can also make the bunny out of white felt, using the technique I used to make the bird here. 


    More Projects You May Enjoy

    • DIY Splatter Paint Christmas Ornaments
    • The Heart of Hearts Quilt Along
    • How to Make a Retro Diorama Ornament
    • Mini Fabric Envelope Sewing Pattern

    • Share
    • Email

    About Author

    Melissa Mortenson

    Melissa Mortenson is a blogger, designer, and content creator. She is the Polka Dot Chair blog founder and has been sharing fresh and creative ideas with readers since 2008. She is the author of “Project Teen, Handmade Gifts your Teen will Actually Love.” Her work and designs have been featured on HuffPost, TODAY, Pioneer Woman, HGTV, BuzzFeed, Better Homes & Gardens, and many other established publications. Her first fabric line, “Derby Style,” debuted in January 2015 through Riley Blake Designs.  Additional fabric collections have followed it in subsequent years. A mom of 3, she considers herself lucky to be living in Kentucky.

    Reader Interactions

    Comments

    1. Sarah @ Mum In Bloom says

      April 01, 2010 at 7:44 am

      This is so pretty and fresh. I love the colours and fabric used.

      Reply
    2. Simone de Klerk says

      April 01, 2010 at 8:03 am

      That is so pretty!!! Gives me a very happy feeling.

      Reply
    3. Lori says

      April 01, 2010 at 8:25 am

      Melissa, this is so pretty! Great job (again!).

      Reply
    4. Sarah says

      April 01, 2010 at 9:14 am

      GORGEOUS! I want to make it right now! I’m going to go check it out and maybe I WILL make one 🙂

      Reply
    5. Maria and Michelle says

      April 01, 2010 at 10:37 am

      This is so cheery! Love it for the Spring!

      Reply
    6. Andrea says

      April 01, 2010 at 11:53 am

      I love it! I will have to make one without the bunny to put up after I take down my Easter egg wreath! Thanks!!

      Reply
    7. Jenn says

      April 01, 2010 at 12:06 pm

      SO dang cute. I love the fabric and what fun new flower shapes! I hope your finger is getting better!

      Reply
    8. a little bit biased says

      April 01, 2010 at 12:40 pm

      So, so cute. Great job. It’s darling!

      Reply
    9. HOPE says

      April 01, 2010 at 12:44 pm

      Absolutely ADORABLE!!!

      What a great way to let neighbors know you LOVE fabric!

      HOPE

      Reply
    10. Life in Rehab says

      April 01, 2010 at 1:00 pm

      Oh that wreath is gorgeous!

      Reply
    11. The Venturas says

      April 01, 2010 at 3:34 pm

      LOVE it! I’m supposed to be working on my daughter’s easter outfit but I would WAY rather make one of these!

      Reply
    12. jenjen says

      April 01, 2010 at 4:04 pm

      I love it! Someone just told me about it today on Facebook. I didn’t know that YOU made it! How cool!!!!

      XOXO
      Jen

      Reply
    13. Sandra says

      April 01, 2010 at 4:09 pm

      This is adorable…you did a wonderful job…this is a wreath I would love to have!

      Reply
    14. Real Life Reslers says

      April 01, 2010 at 6:38 pm

      could I be more in love with this? I dunno. Probably not!

      Reply
    15. V and Co. says

      April 06, 2010 at 12:00 am

      loved it loved it loved it!!!!

      Reply
    16. Kimberly says

      May 12, 2010 at 11:19 pm

      Beautiful! I’m going to make this too!!

      Reply
    17. eFGxjOCd says

      October 12, 2012 at 3:41 am

      98502 109365Hello, Neat post. There

      Reply
    18. sac longchamp de voyage pas cher reitling watches for sale chronograph says

      October 16, 2013 at 6:57 am

      Some place of abode ameliorating supplies have scraps remaining. Covering organizations and unravelling businesses may give out made of wood as well. Take full advantage of this actual existence and .. cheap burberry. They are often inexpensive lancel soldes and arm handbags. All the rising designs exercise greatest programs burberry online in the direction of particular..

      Reply
    19. Gail says

      February 21, 2017 at 11:16 am

      Love your fabric. Thanks for all the good ideas.

      Reply

    Leave a Reply Cancel reply

    Your email address will not be published. Required fields are marked *

    This site uses Akismet to reduce spam. Learn how your comment data is processed.

    Primary Sidebar

    Hello! It’s nice to meet you.

    I’m Melissa. I like to design things, like fabric, printables, and projects.

    I’m also a Mom and a Maker. I am like most of you, just trying to do my best every day. Some days I succeed, many days I fail.  I find joy in creating, if you do too, then I hope that you find something here bring a little “happy” to your life.  Find out more about me here.

    COPYRIGHT POLICY

    All my images and text are copyrighted. You may NOT use any images from this site in any kind of Video (this includes YouTube). If you would like to feature my work, you may use ONE (1) NON-COLLAGED image and must “follow” link back to my original blog post. You may NOT edit, crop, or change my images in any way without written permission. You MAY NOT print out or copy and distribute any text, images or patterns from this site. All patterns, content, instructions, and templates are for personal use ONLY! Thank you! Violators will be reported.

    Footer

    ↑ back to top

    About

    • Privacy Policy
    • Disclaimers
    • About Melissa
    • Instagram
    • Facebook
    • YouTube
    • Pinterest

    Newsletter

    • Sign Up! for emails and updates

    Contact

    • Contact
    • FAQ
    • Press
    • Published Books
    • Fabric Collections

    Welcome to the Polka Dot Chair! Here you’ll find easy, step-by-step, sewing, quilting, and crafting projects. We design projects for Makers of all skill levels. Beginners are welcome!

    DISCLAIMER:

    While every effort has been made to ensure the accuracy of the content on this website, the information is made available without warranty of any kind. The Polka Dot Chair accepts no responsibility or liability, whether direct or indirect, as to the currency or accuracy of the information, nor any consequence of its uses. This website is not intended to substitute the advice of a professional.

    Copyright © 2022 Polka Dot Chair

    [ Placeholder content for popup link ] WordPress Download Manager - Best Download Management Plugin