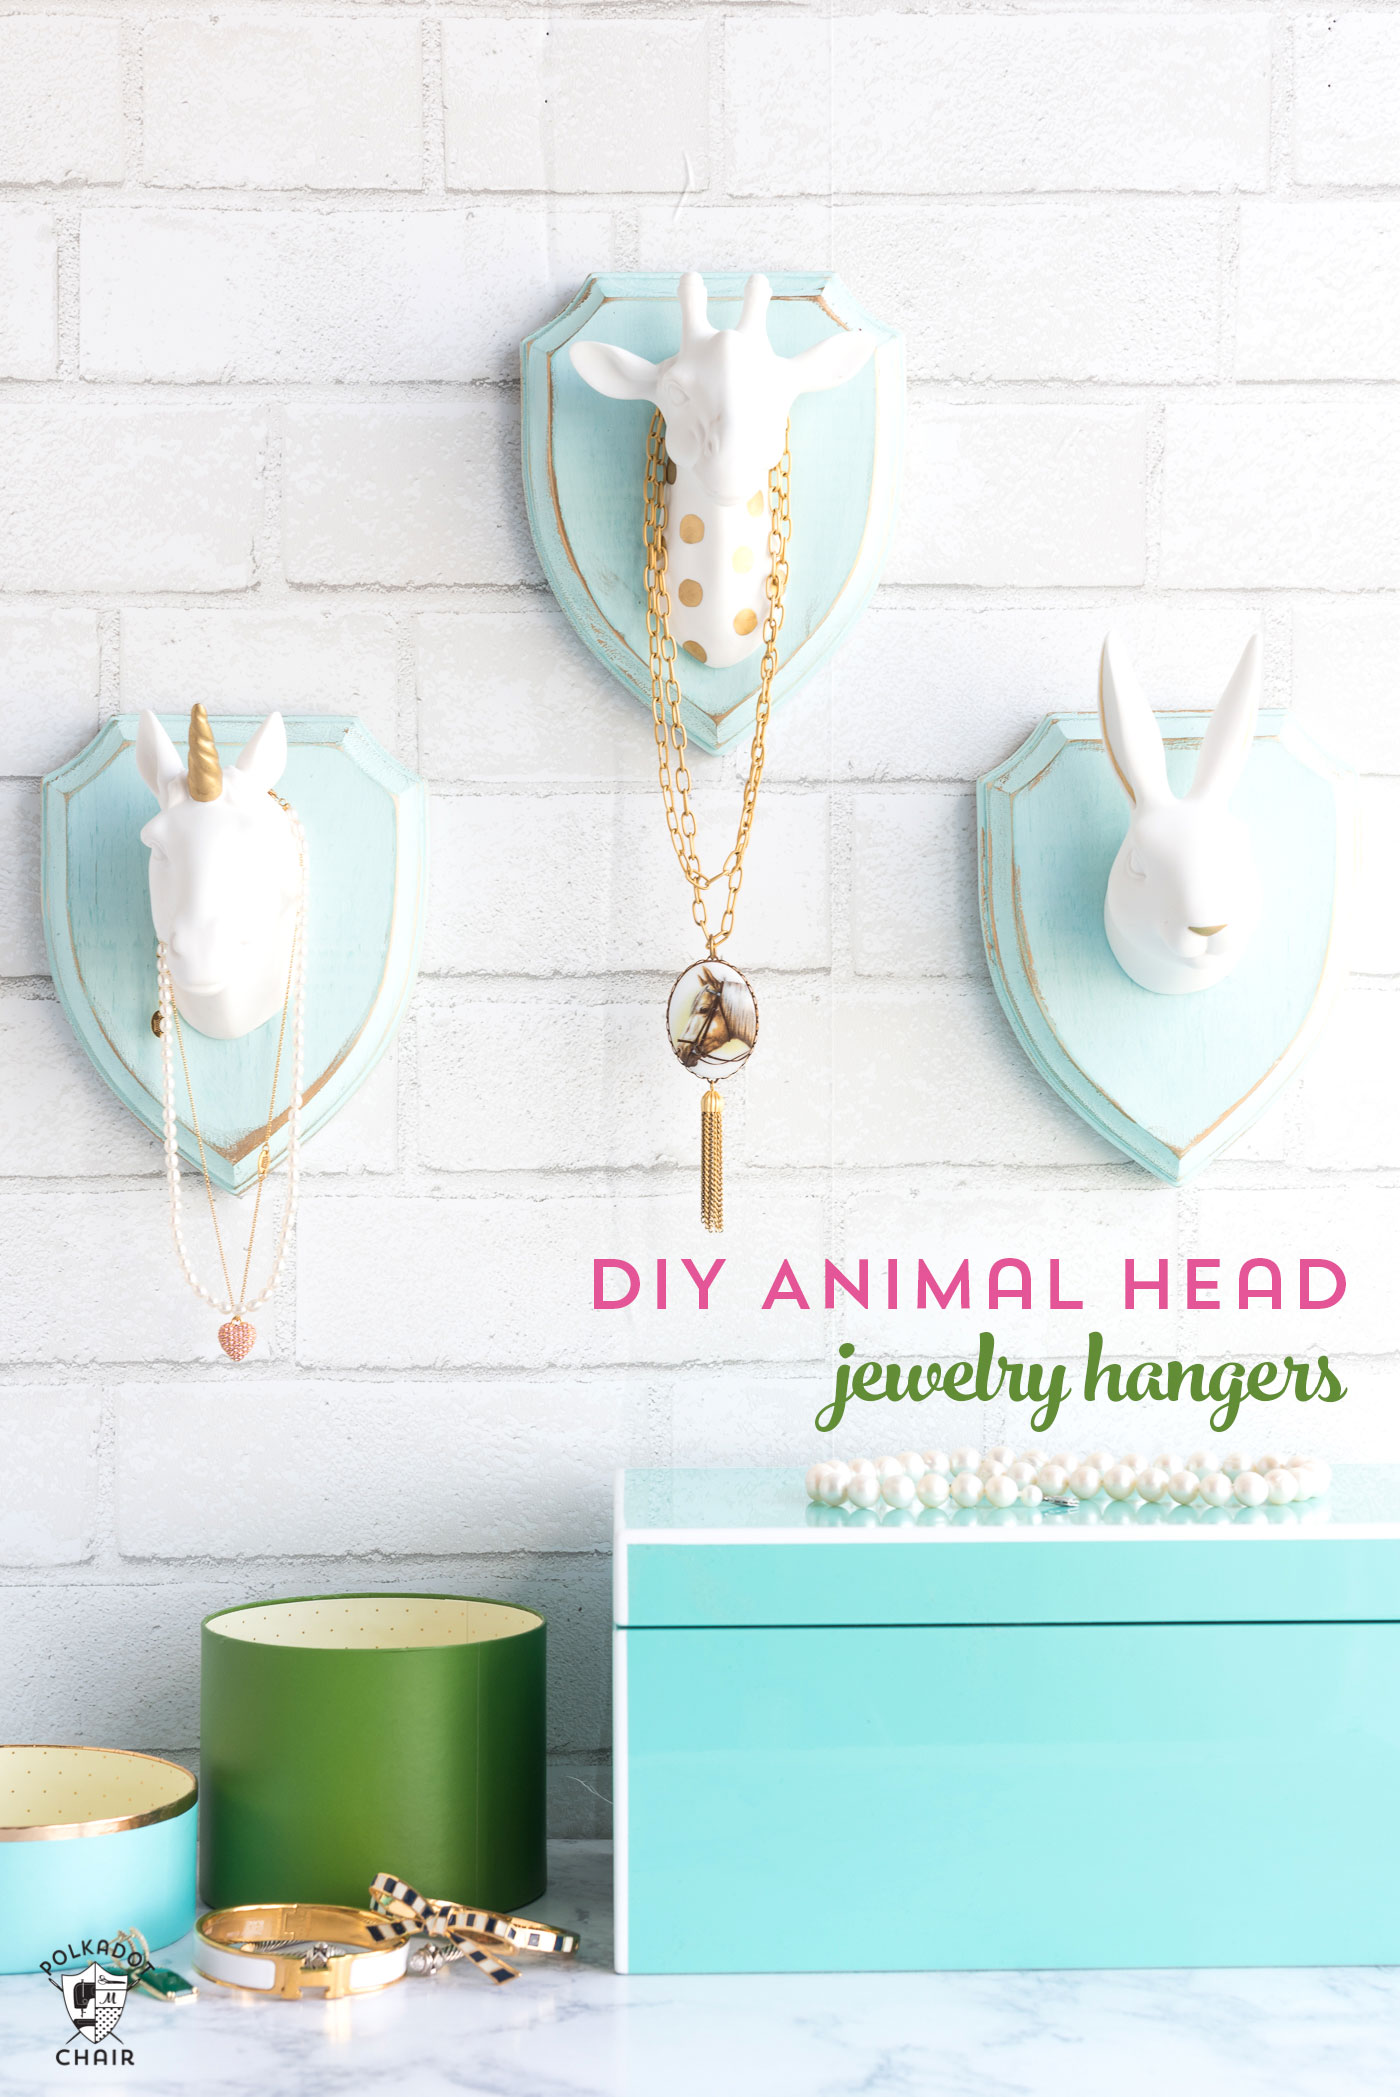
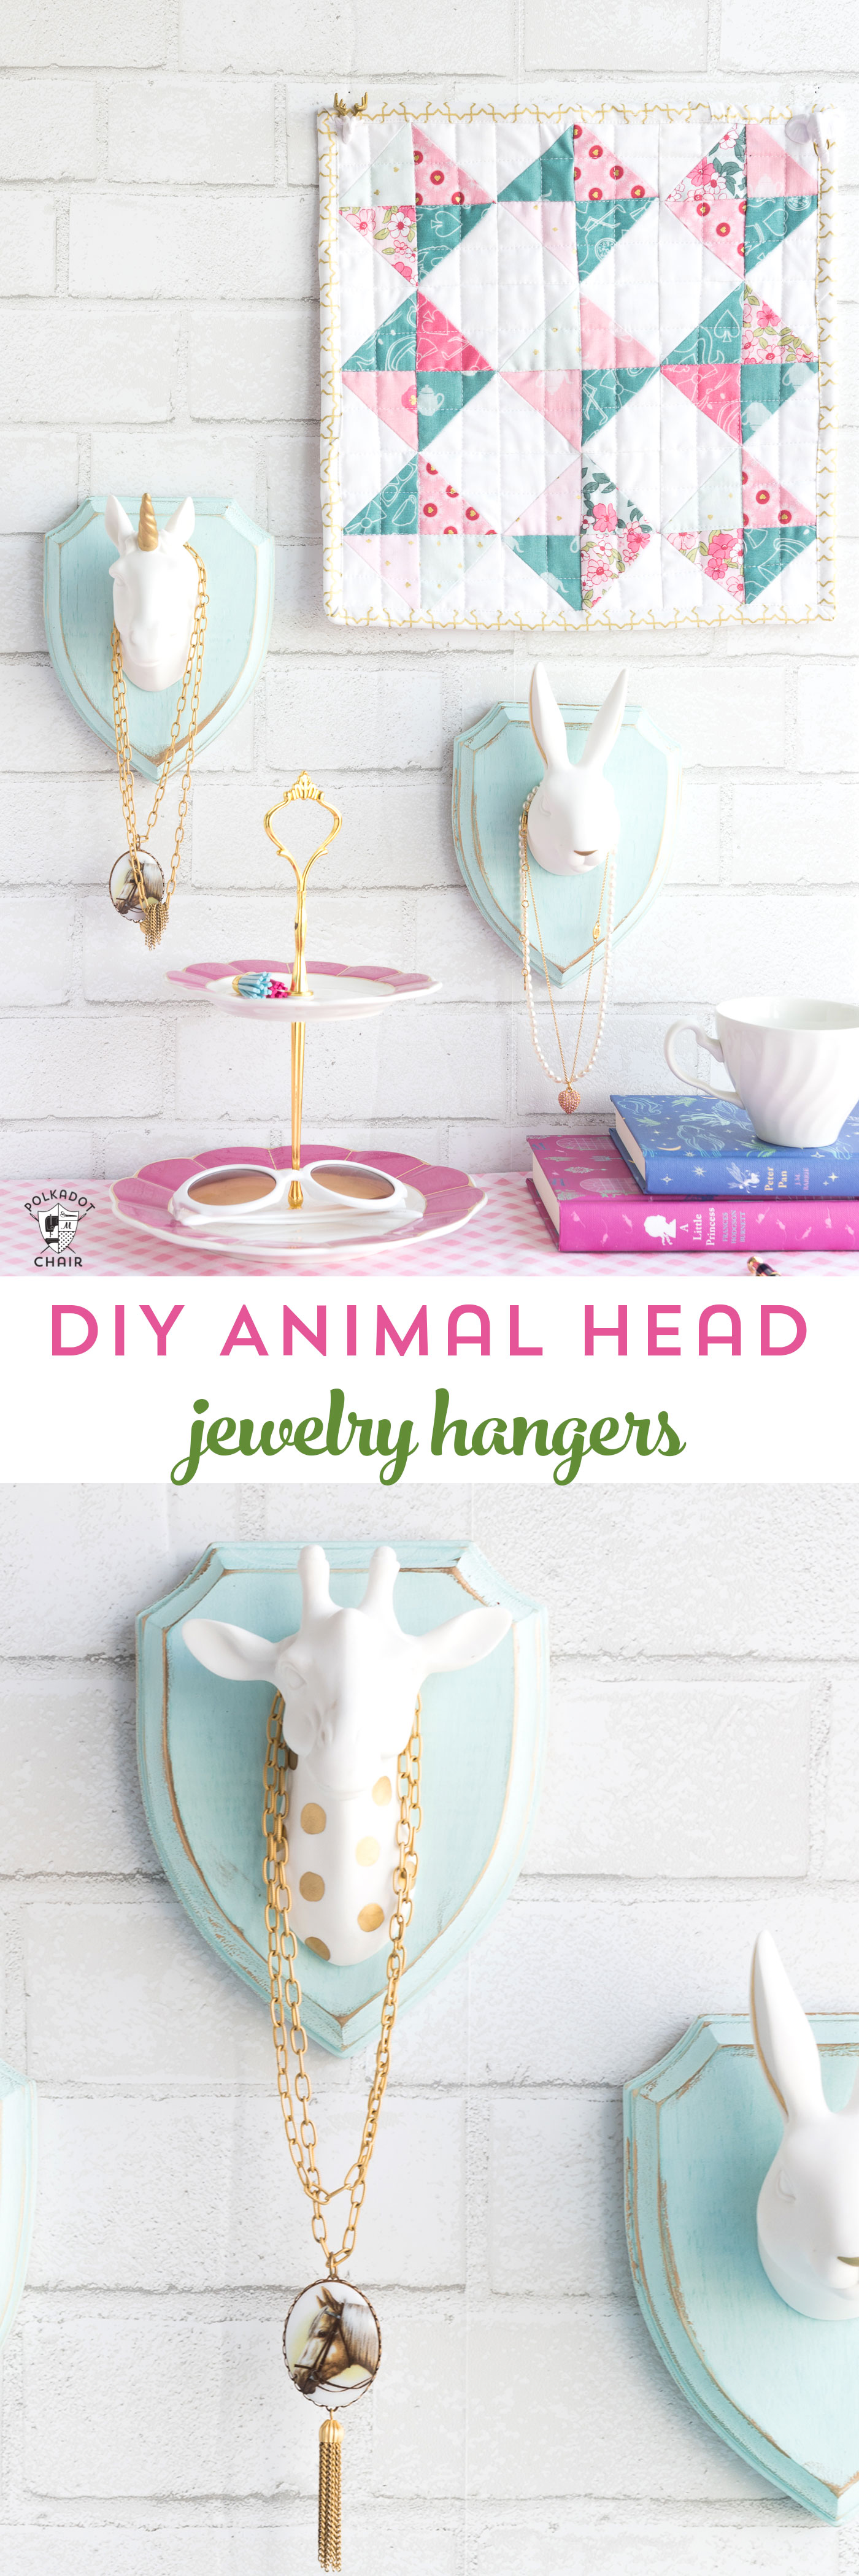
Whimsical DIY Jewelry Hangers
Today I have a fun and whimsical DIY project to share with you. I don’t know about you, but I do not like keeping my necklaces in drawers or jewelry boxes. They just tangle up to easily. Instead, I love to hang them on my wall. That way they stay tangle free and are easy to find when I need them. These animal head DIY jewelry hangers would look equally fantastic hanging on your wall, or the wall of a teenager! Keep reading to get the full “how to”.
If you’ve been following along here for a bit you may have noticed that a subtle pattern has been developing. Lots of projects that involve animals (I should clarify, representations of animals that is *wink*). I think it all kinda happened by accident. I designed my Derby fabric line (horses) then followed it with Wonderland (bunnies) then Wonderland Two (more bunnies) and now this summer we’re moving onto Safari Party (elephants, giraffes and zebras, oh my!)
Now whenever I’m out shopping I feel like I notice animal themed objects everywhere. I think it’s just because it’s on my “radar” now. In the past couple of years I’ve picked up bunny teapots, stuffed zebra heads (faux of course), ceramic bunnies, and even a coin purse with a bunny poking it’s ears out of a top hat. I buy these things because I think they’d make great props for project photos, but honestly I think I just love collecting whimsical objects.
A few months ago I stumbled on these animal head “wall art” pieces at Target and I knew that they were going home with me.

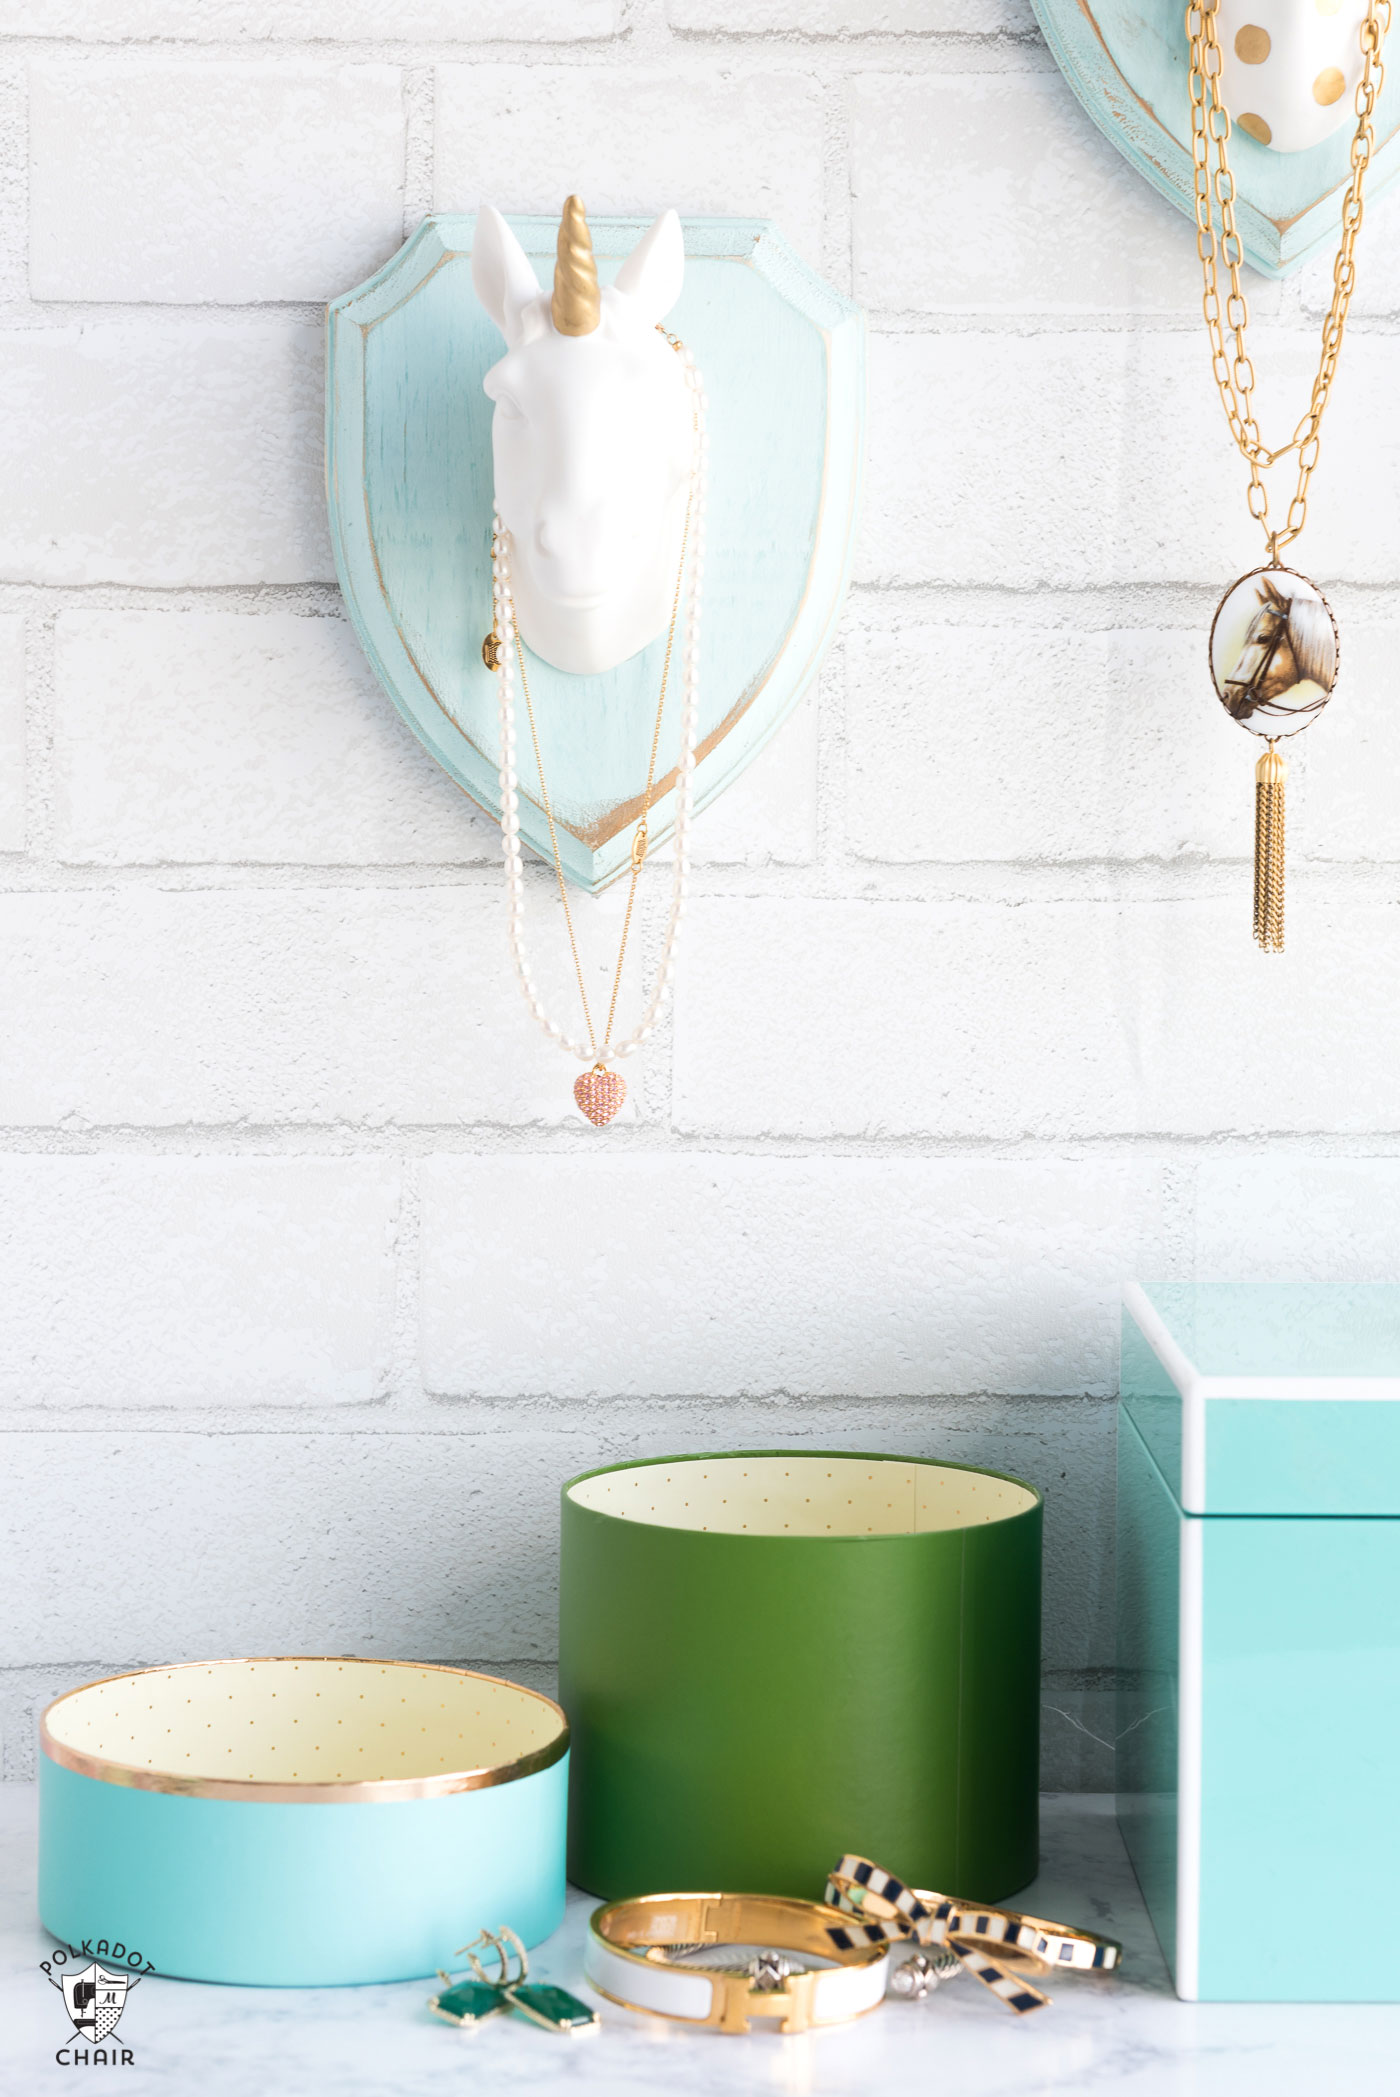
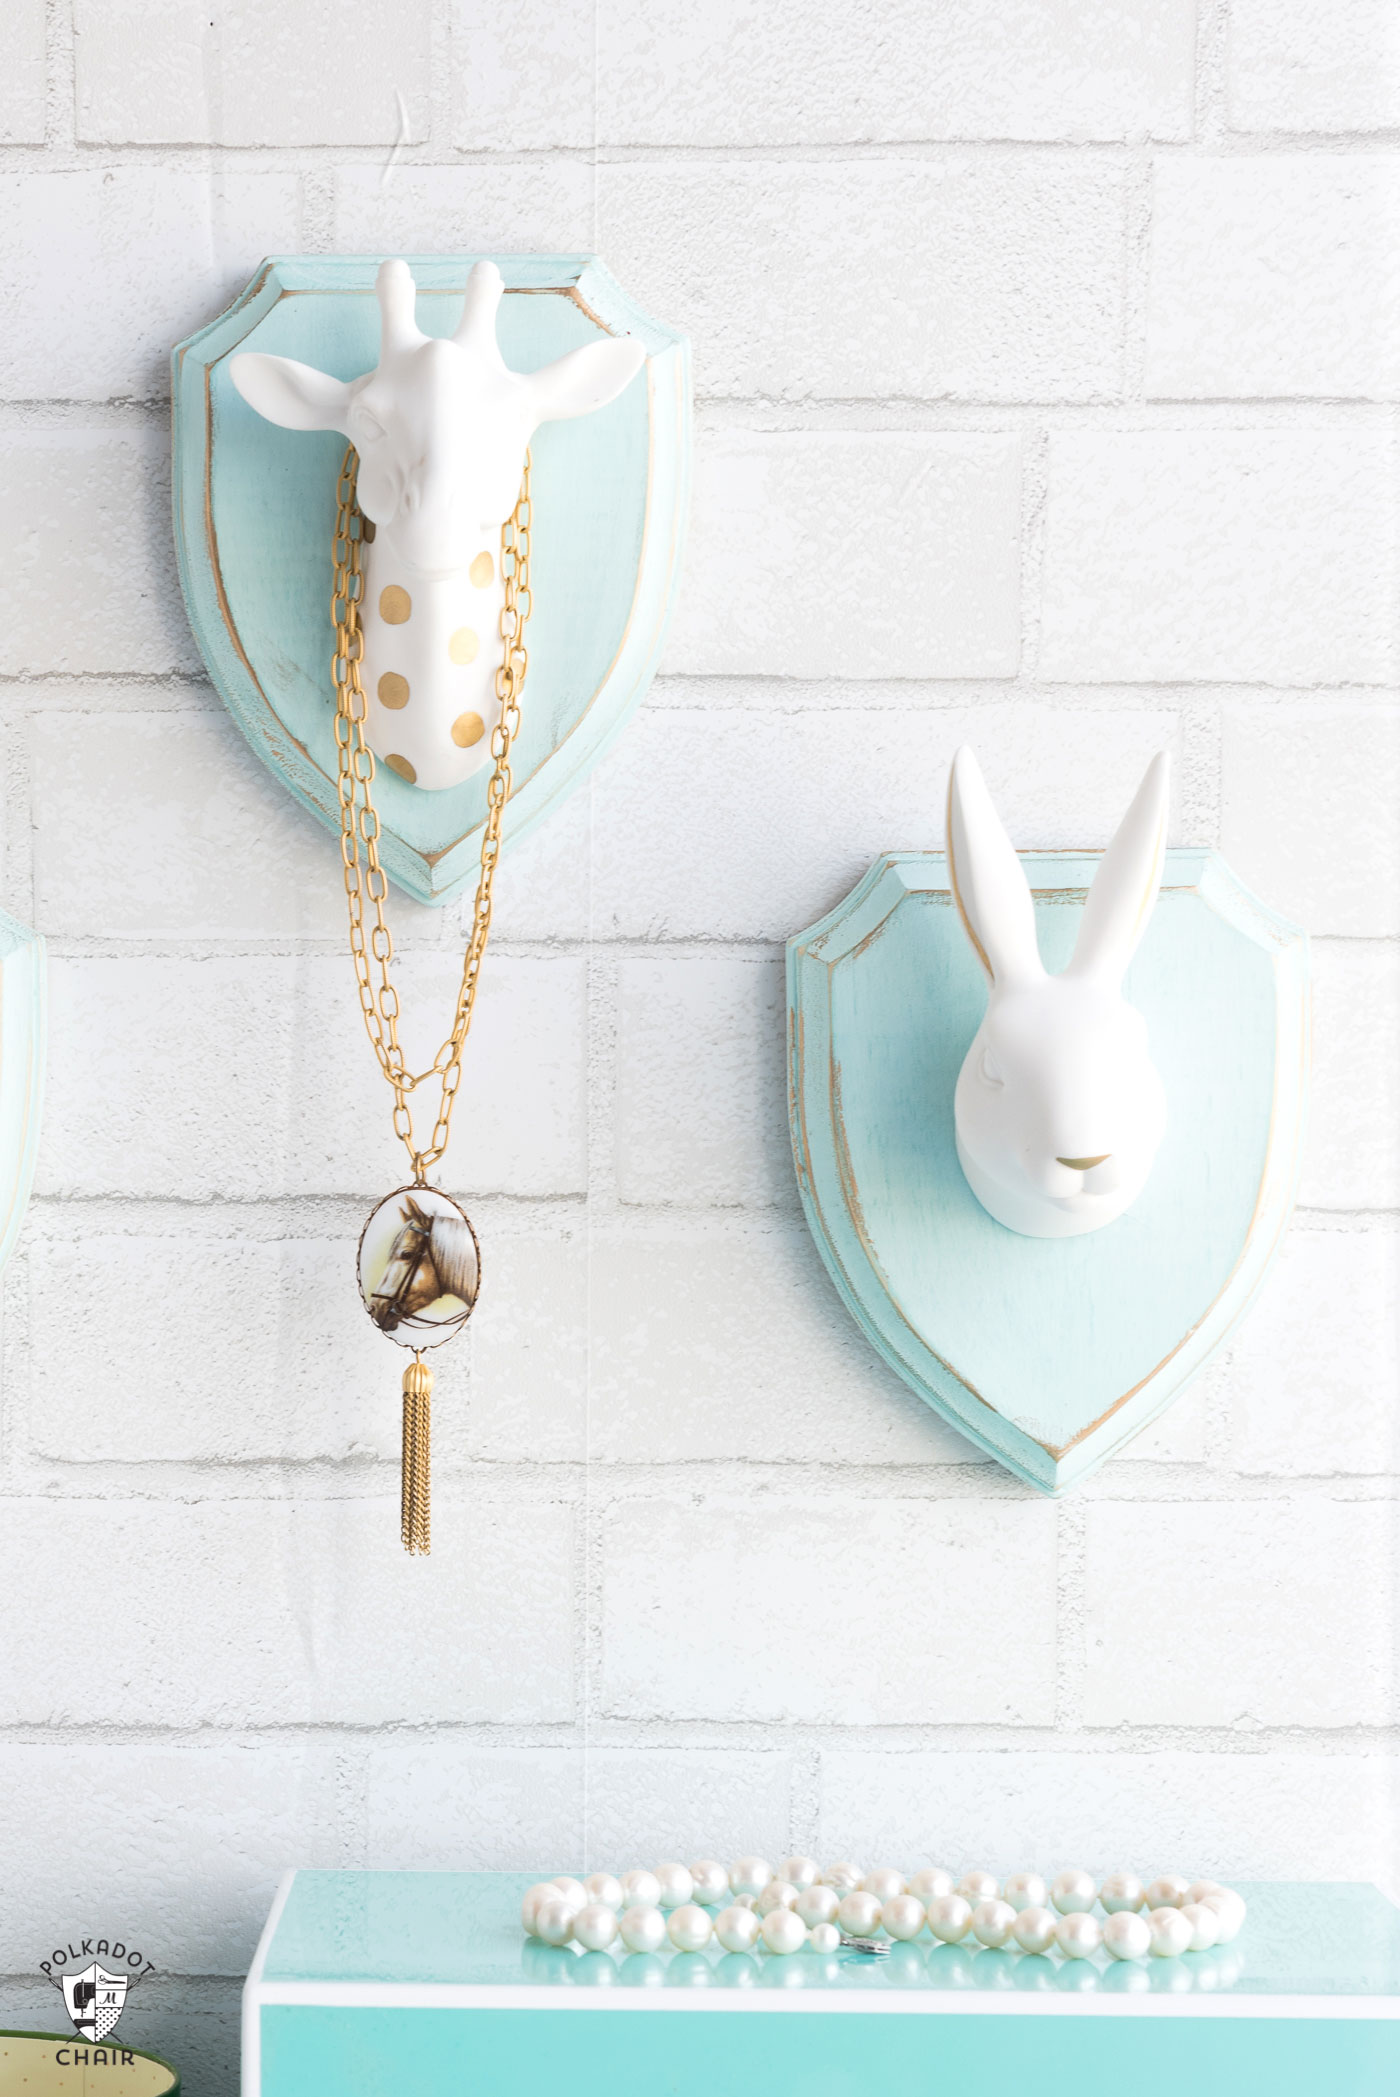
I decided it would be fun to turn them into jewelry hangers for my room. We are getting ready to repaint our bedroom and I think these would be perfect in there. A bit of whimsy to keep the room from looking too serious.
If you’re looking to make this project I will tell you that I saw these in stock still at my local Target last week. They have them listed online, but don’t have the option to ship. I’ve also seen similar objects on amazon and other online retailers.
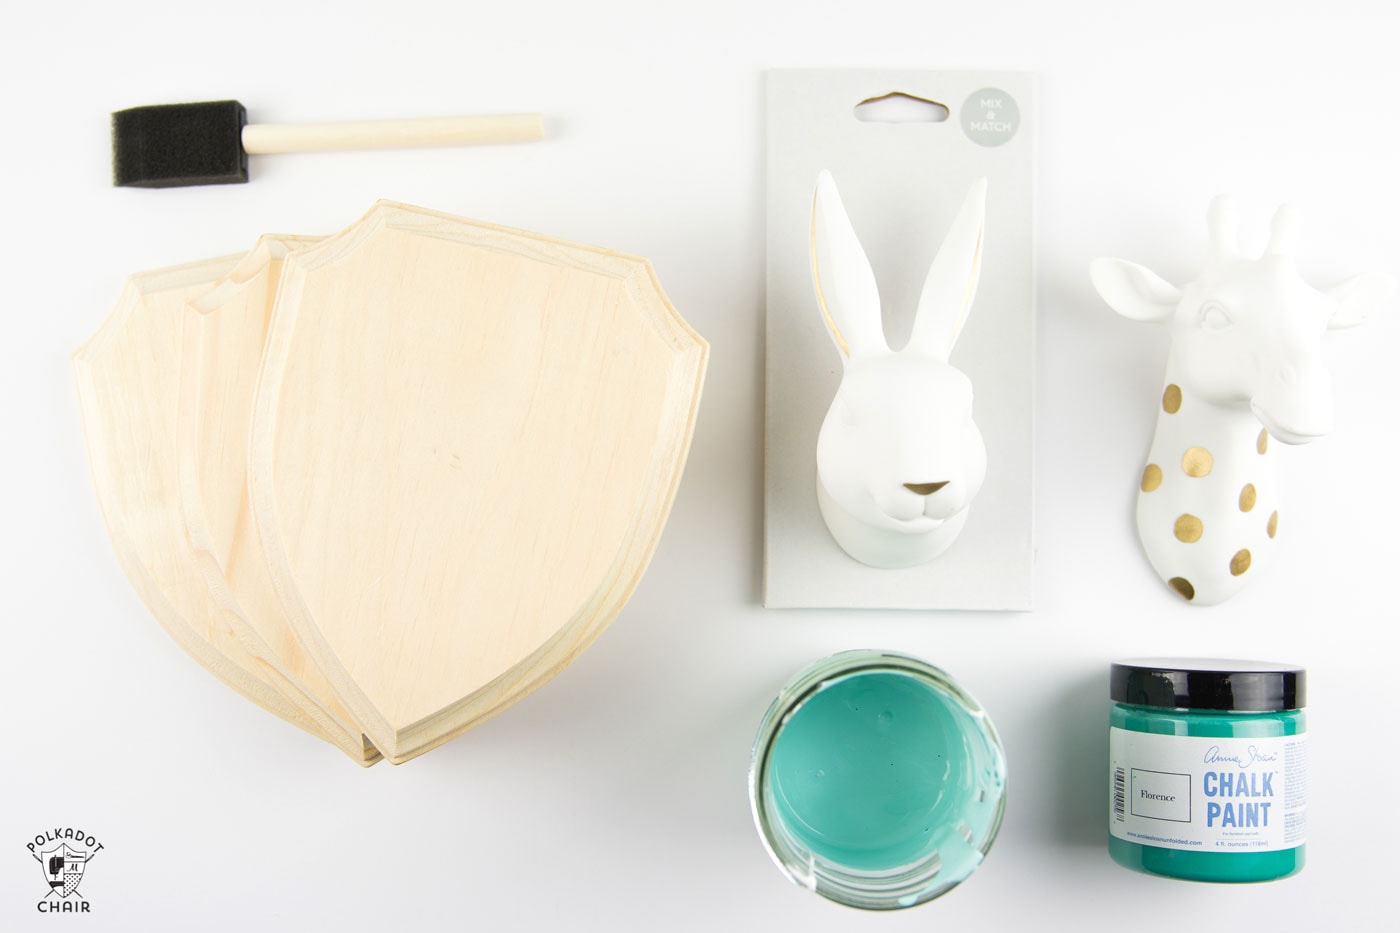
If you’d like to make something similar you’re going to need:
-Animal Head Wall Decor (that’s what they are called at Target, I honestly don’t even know what to call them, “fake” animal heads??, that sounds a bit creepy *wink*)
-Wood Shield Plaques – I got mine at JoAnn’s
-Annie Sloan Chalk Paint in Florence
-Annie Sloan Chalk Paint in White
-Paint Brush
-Annie Sloan Wax
-Gold Gilding Wax
-Screw that fits Animal Head
-Sandpaper
-Hot Glue Gun
Before we get started I should mention that I started this project in January and have been “juggling” quite a few projects all at the same time. Somehow in the “juggle” I’ve lost some of the photos that I took of the project in process. I do think it’s pretty straight forward though.
Here’s what you need to do:
Begin by sanding down your wood plaques.
Next mix 1 part of Florence chalk paint with 4 parts of white chalk paint. This will give you the soft minty blue color. If you don’t like the color you get, keep mixing until you like it.
Paint the plaques. You’ll need two coats of paint. Let them dry completely between coats.
Next lightly sand the plaques to smooth out the paint and to distress the edges.
Apply a thin coat of wax to the plaques. Let it dry, then apply another coat. Using a soft white cloth buff the surface of the plaque to give it a nice sheen.
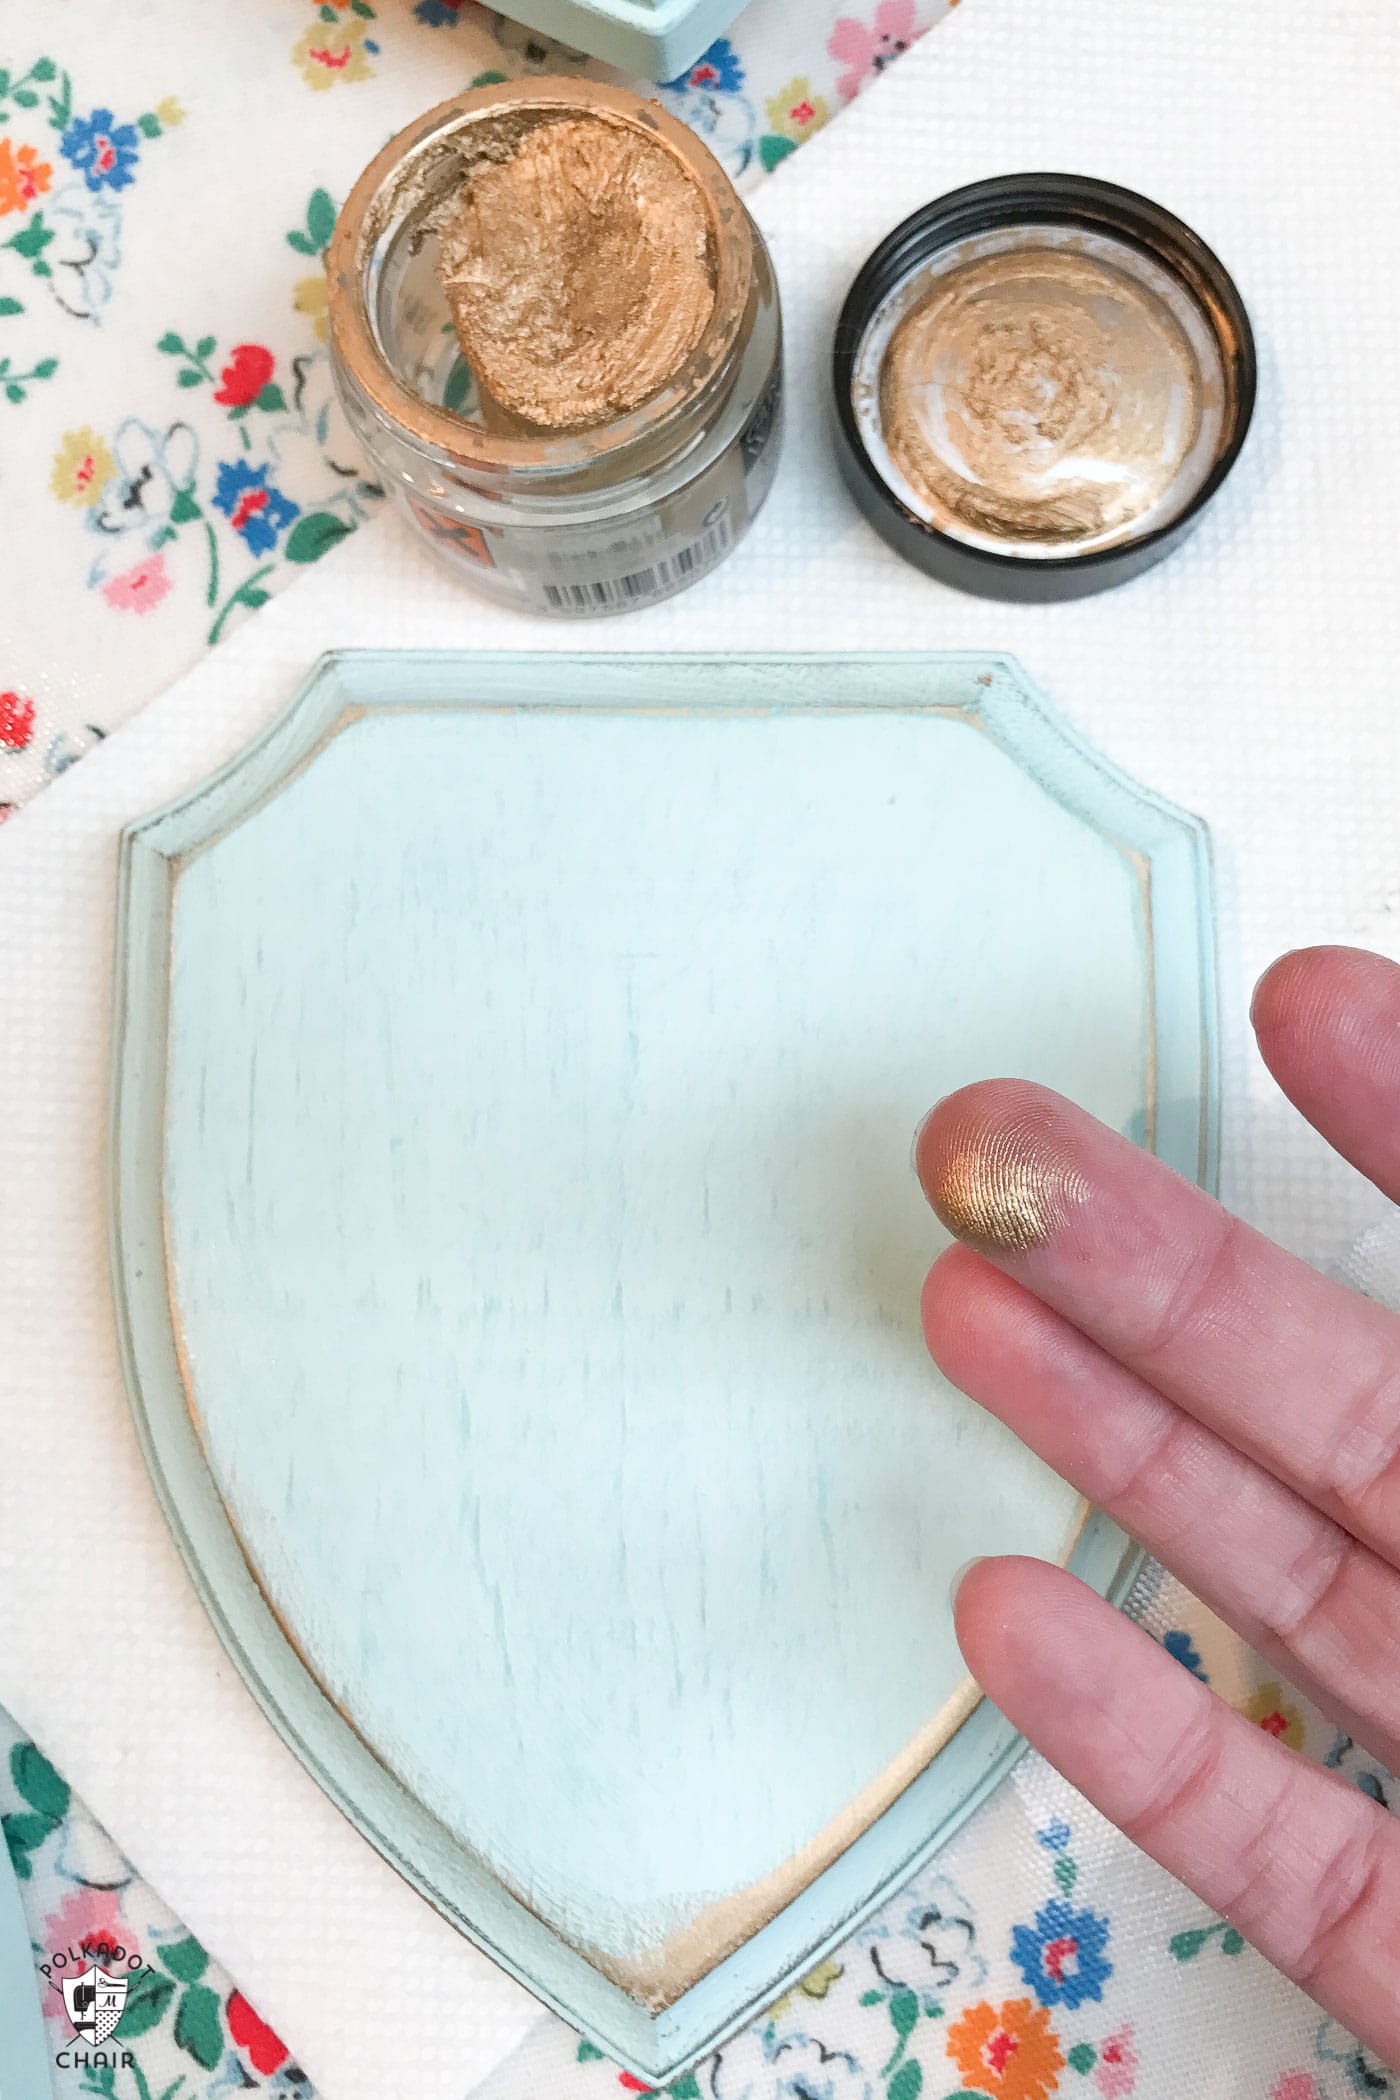
As a finishing touch, pick up a bit of the gold gilding wax with your finger and lightly brush it on the edge of the plaques. Gilding wax is not cheap, but let me tell you that with this one jar I’ve gilded and entire bookcase and these plaques, and you can see from the photo how much I still have left over. I got mine in Louisville at Vintage Style and Designs. She also carries the Annie Sloan chalk paint.
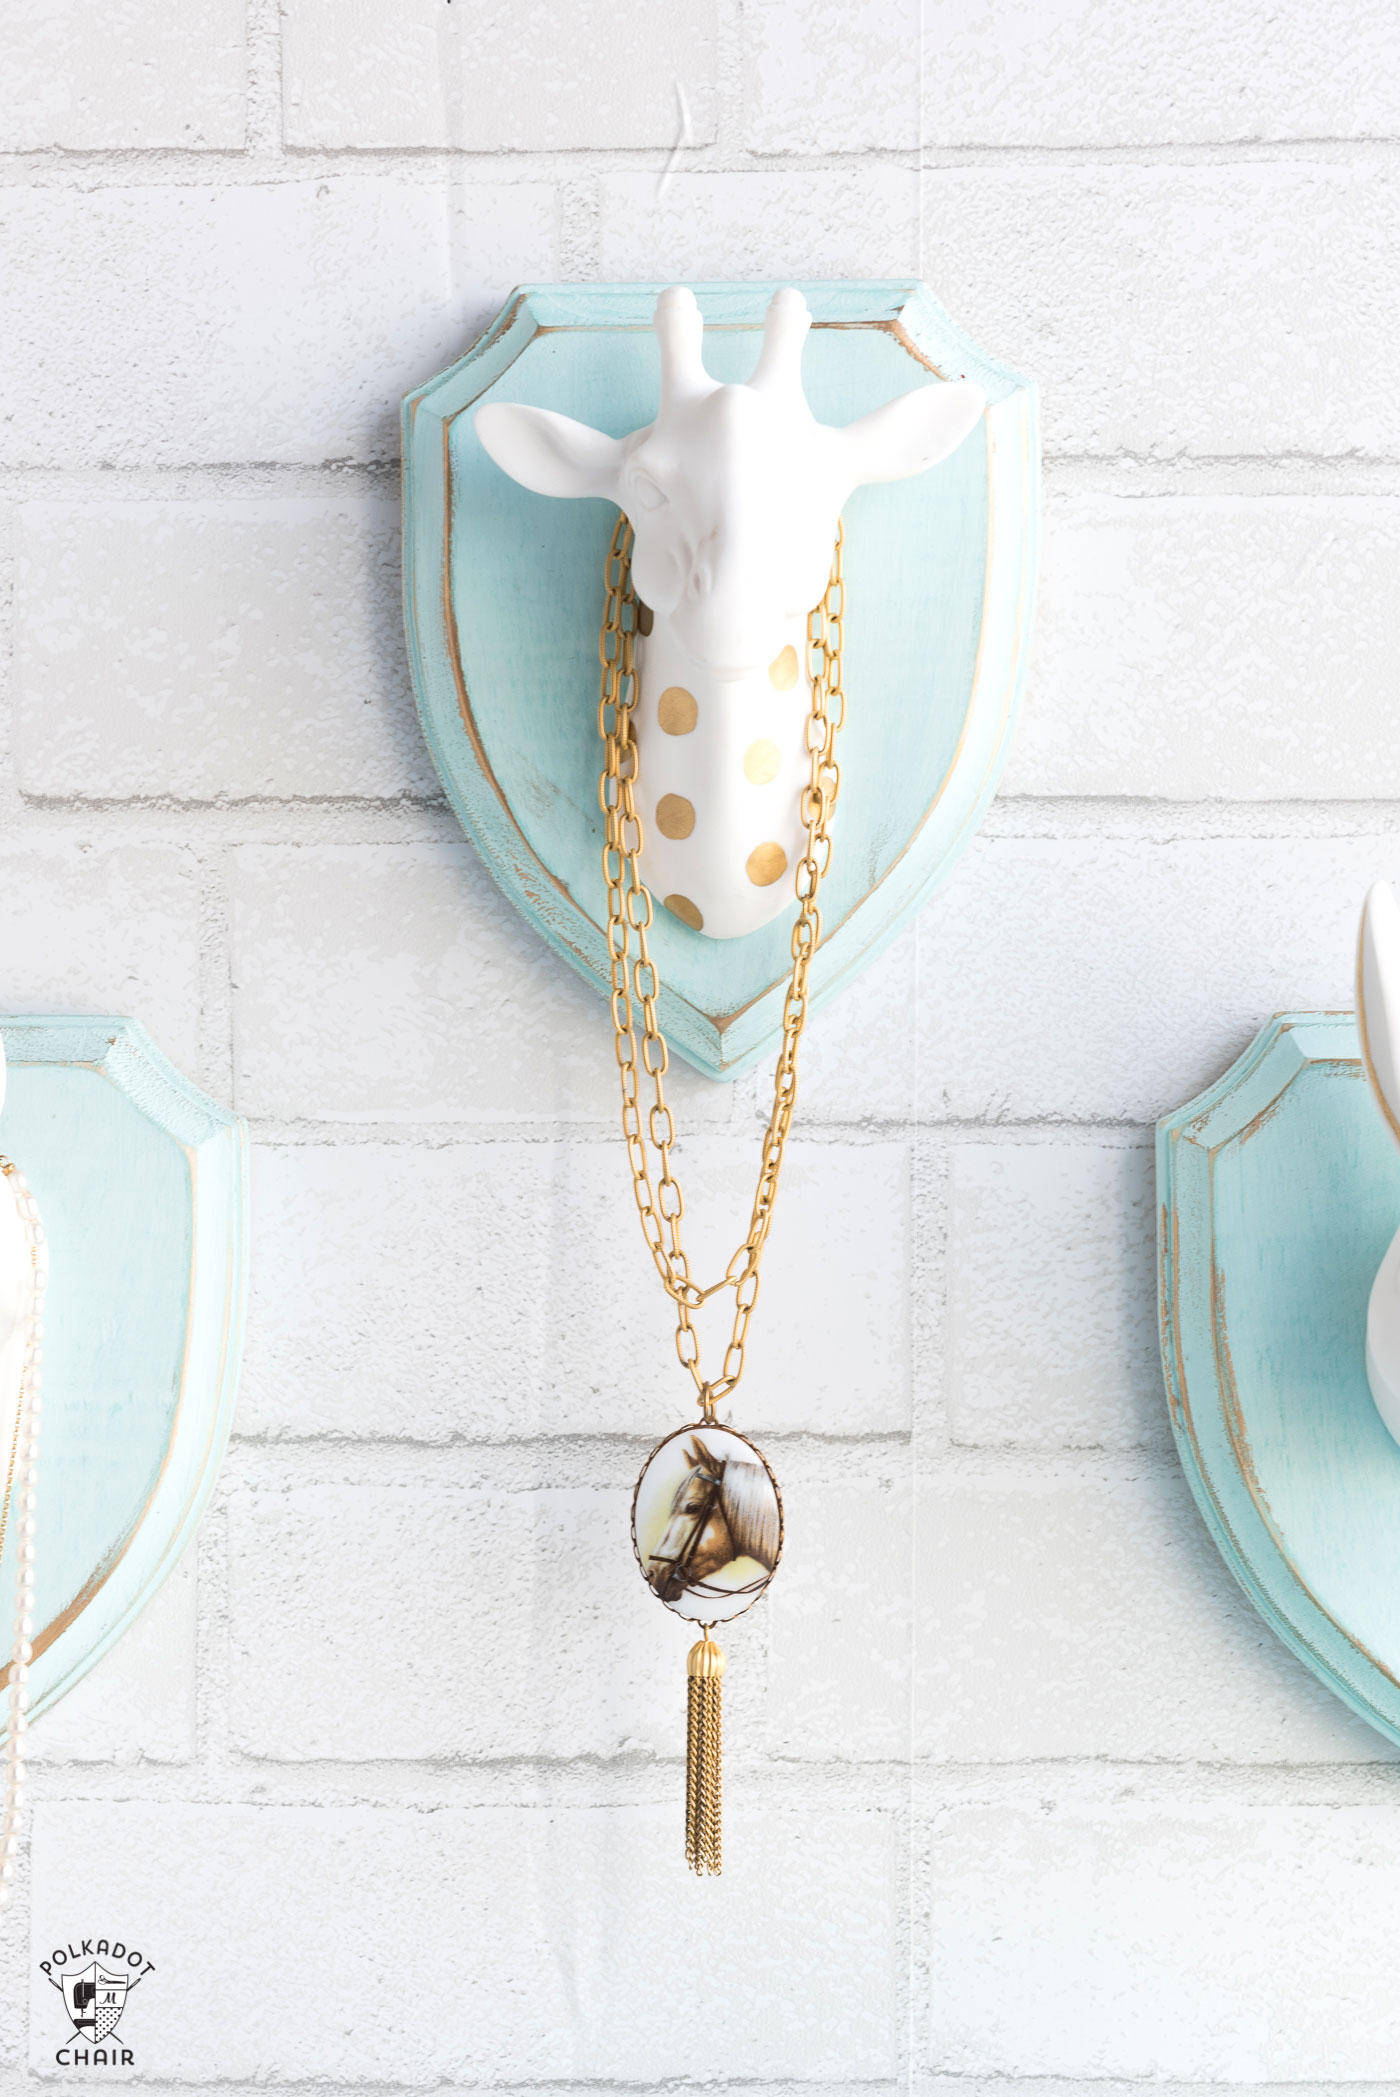
After the gilding wax is dry, you can attach the animal heads.
The heads have a keyhole on the back. Find a screw that fits in the keyhole and mark it’s location on the plaque.
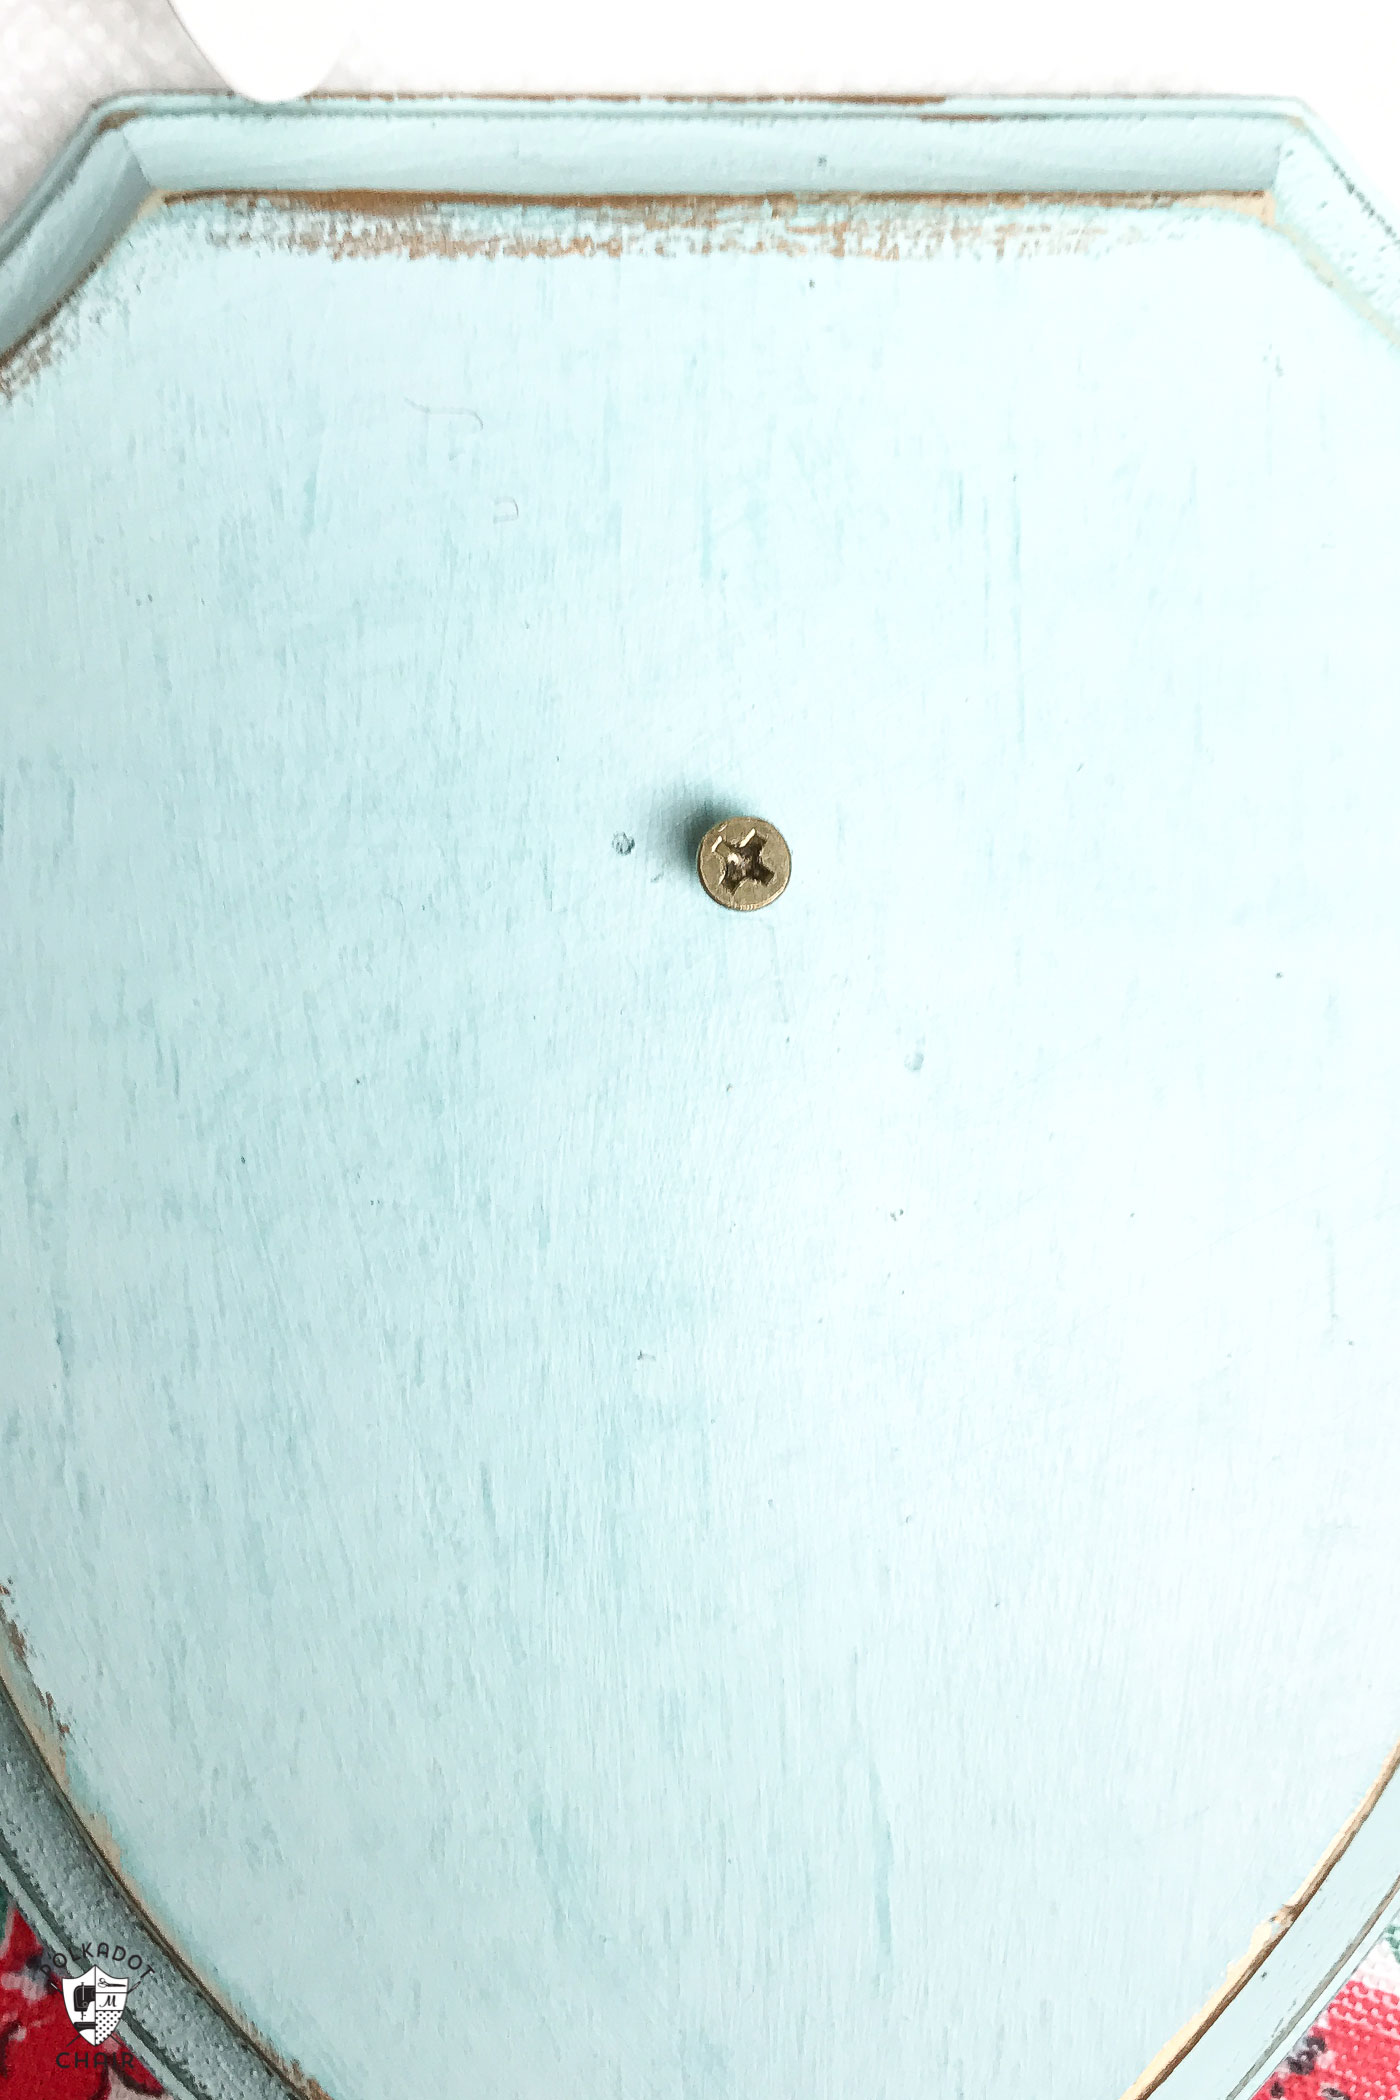
Attach the screw to the plaque then attach the animal head. The animal head only attaches at the top, so to secure it further I added a touch of hot glue to the base of the animal. I applied it between the base of the animal head and the plaque.
That’s it!
To hang on your wall I recommend using command strips.
I love your work. You are so talented. But please no heads of anything. I don’t understand why any one would want to put heads of animals on a wall, be they pretend or stuffed.
I love the mini quilt wall hanging! Do you have a pattern or tutorial for it?
On her blog Feb. 8, 2017 ?
Thanks!
Such a cute idea! And what a fun touch for your bedroom 🙂