DIY Horse Applique Pillow Sewing Pattern
This DIY Horse Appliqué Pillow Cover Pattern is a fun “quick fix” sewing pattern. It’s easy to make and is suitable for someone who is just beginning or learning to sew. It also makes a great kids’ sewing project! If you like this tutorial, then you may also like this reading pocket pillow tutorial.
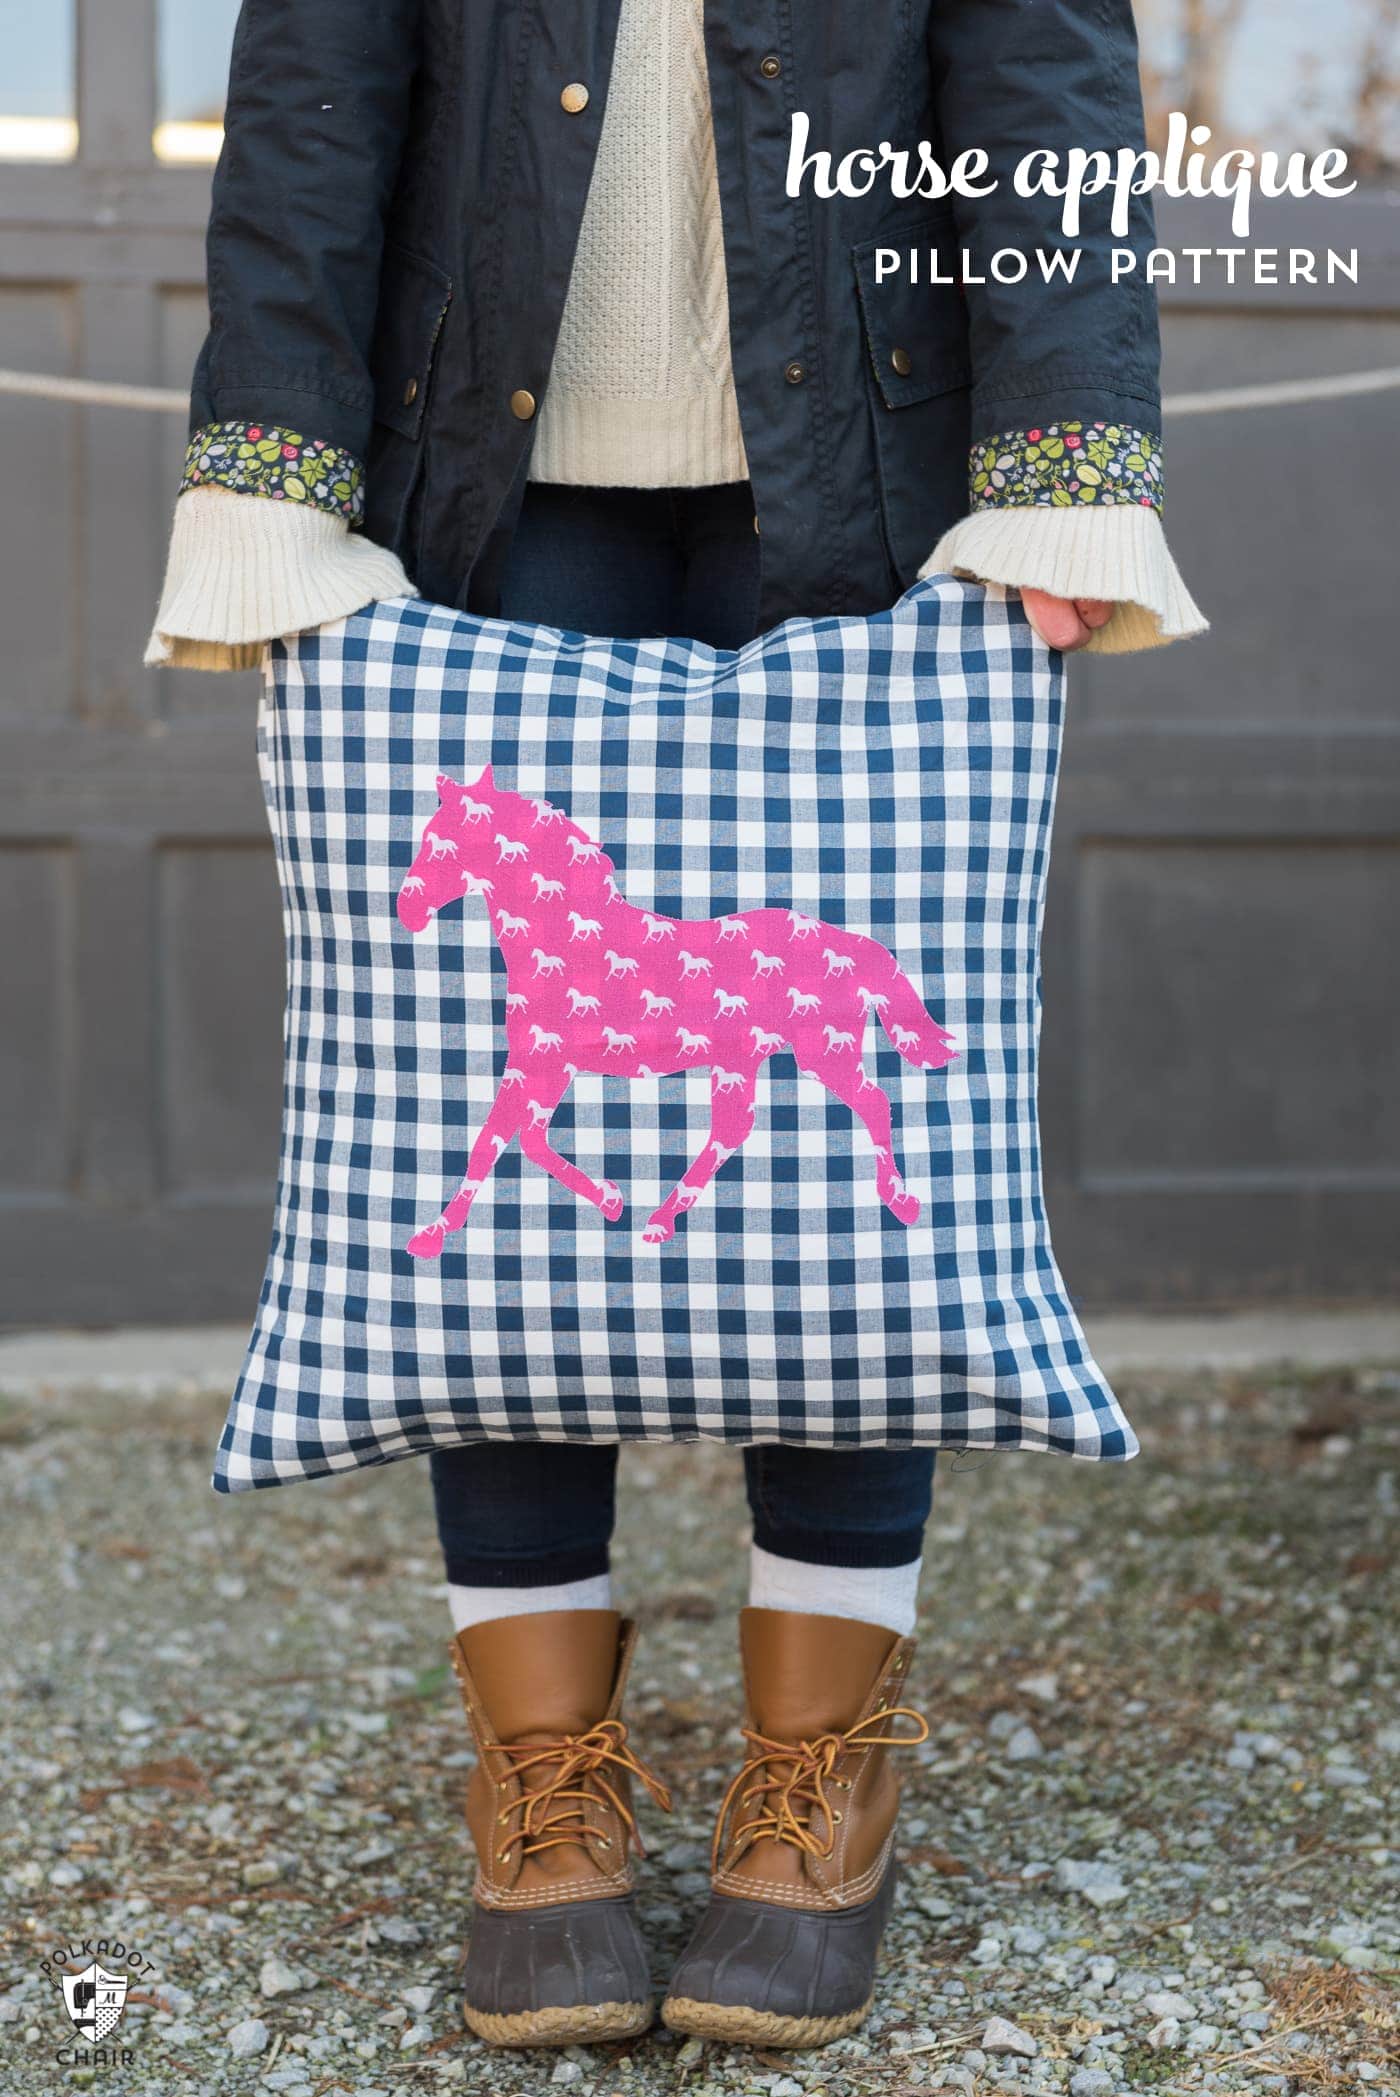
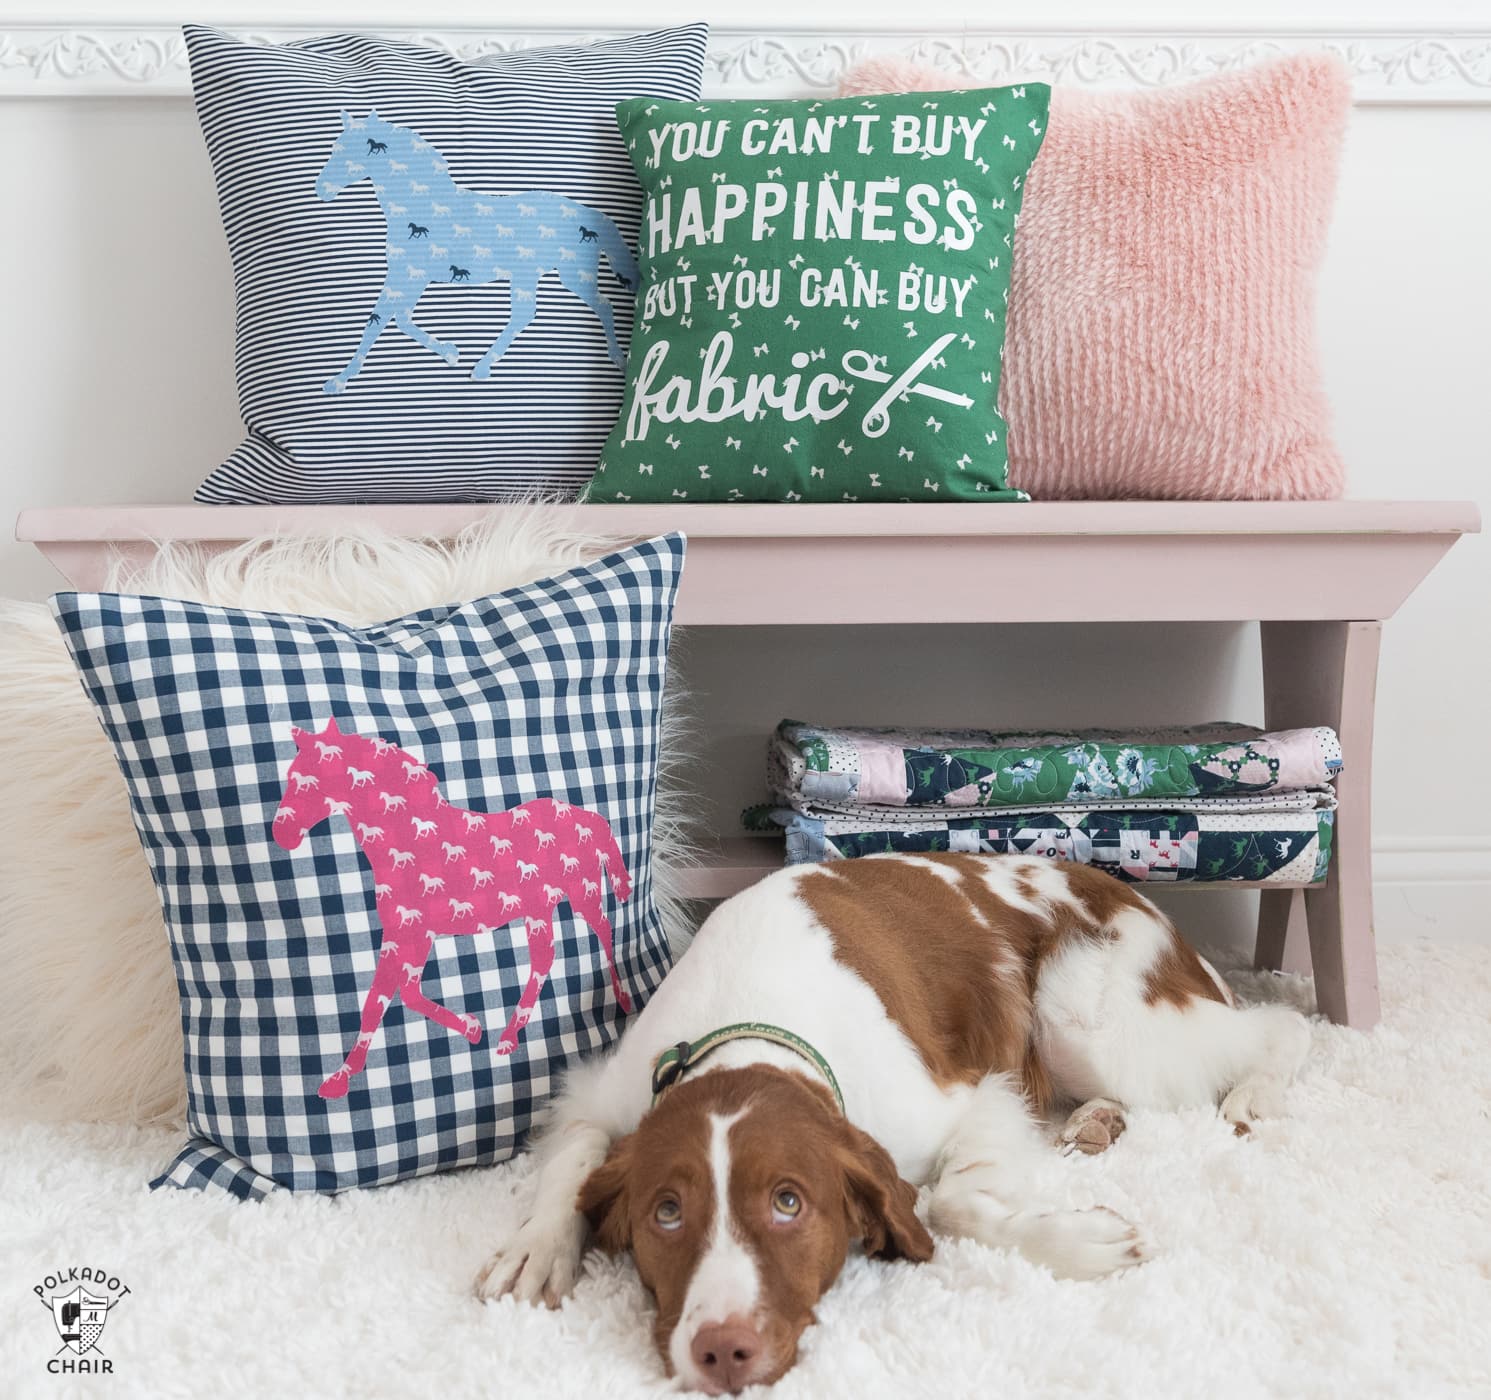
I can not seem to get enough gingham lately! I’m completely smitten with the print and want to find a way to incorporate it into every sewing project I undertake. Obviously, that’s not a good idea, and I don’t put it in “every” project, but I have managed to find quite a few.
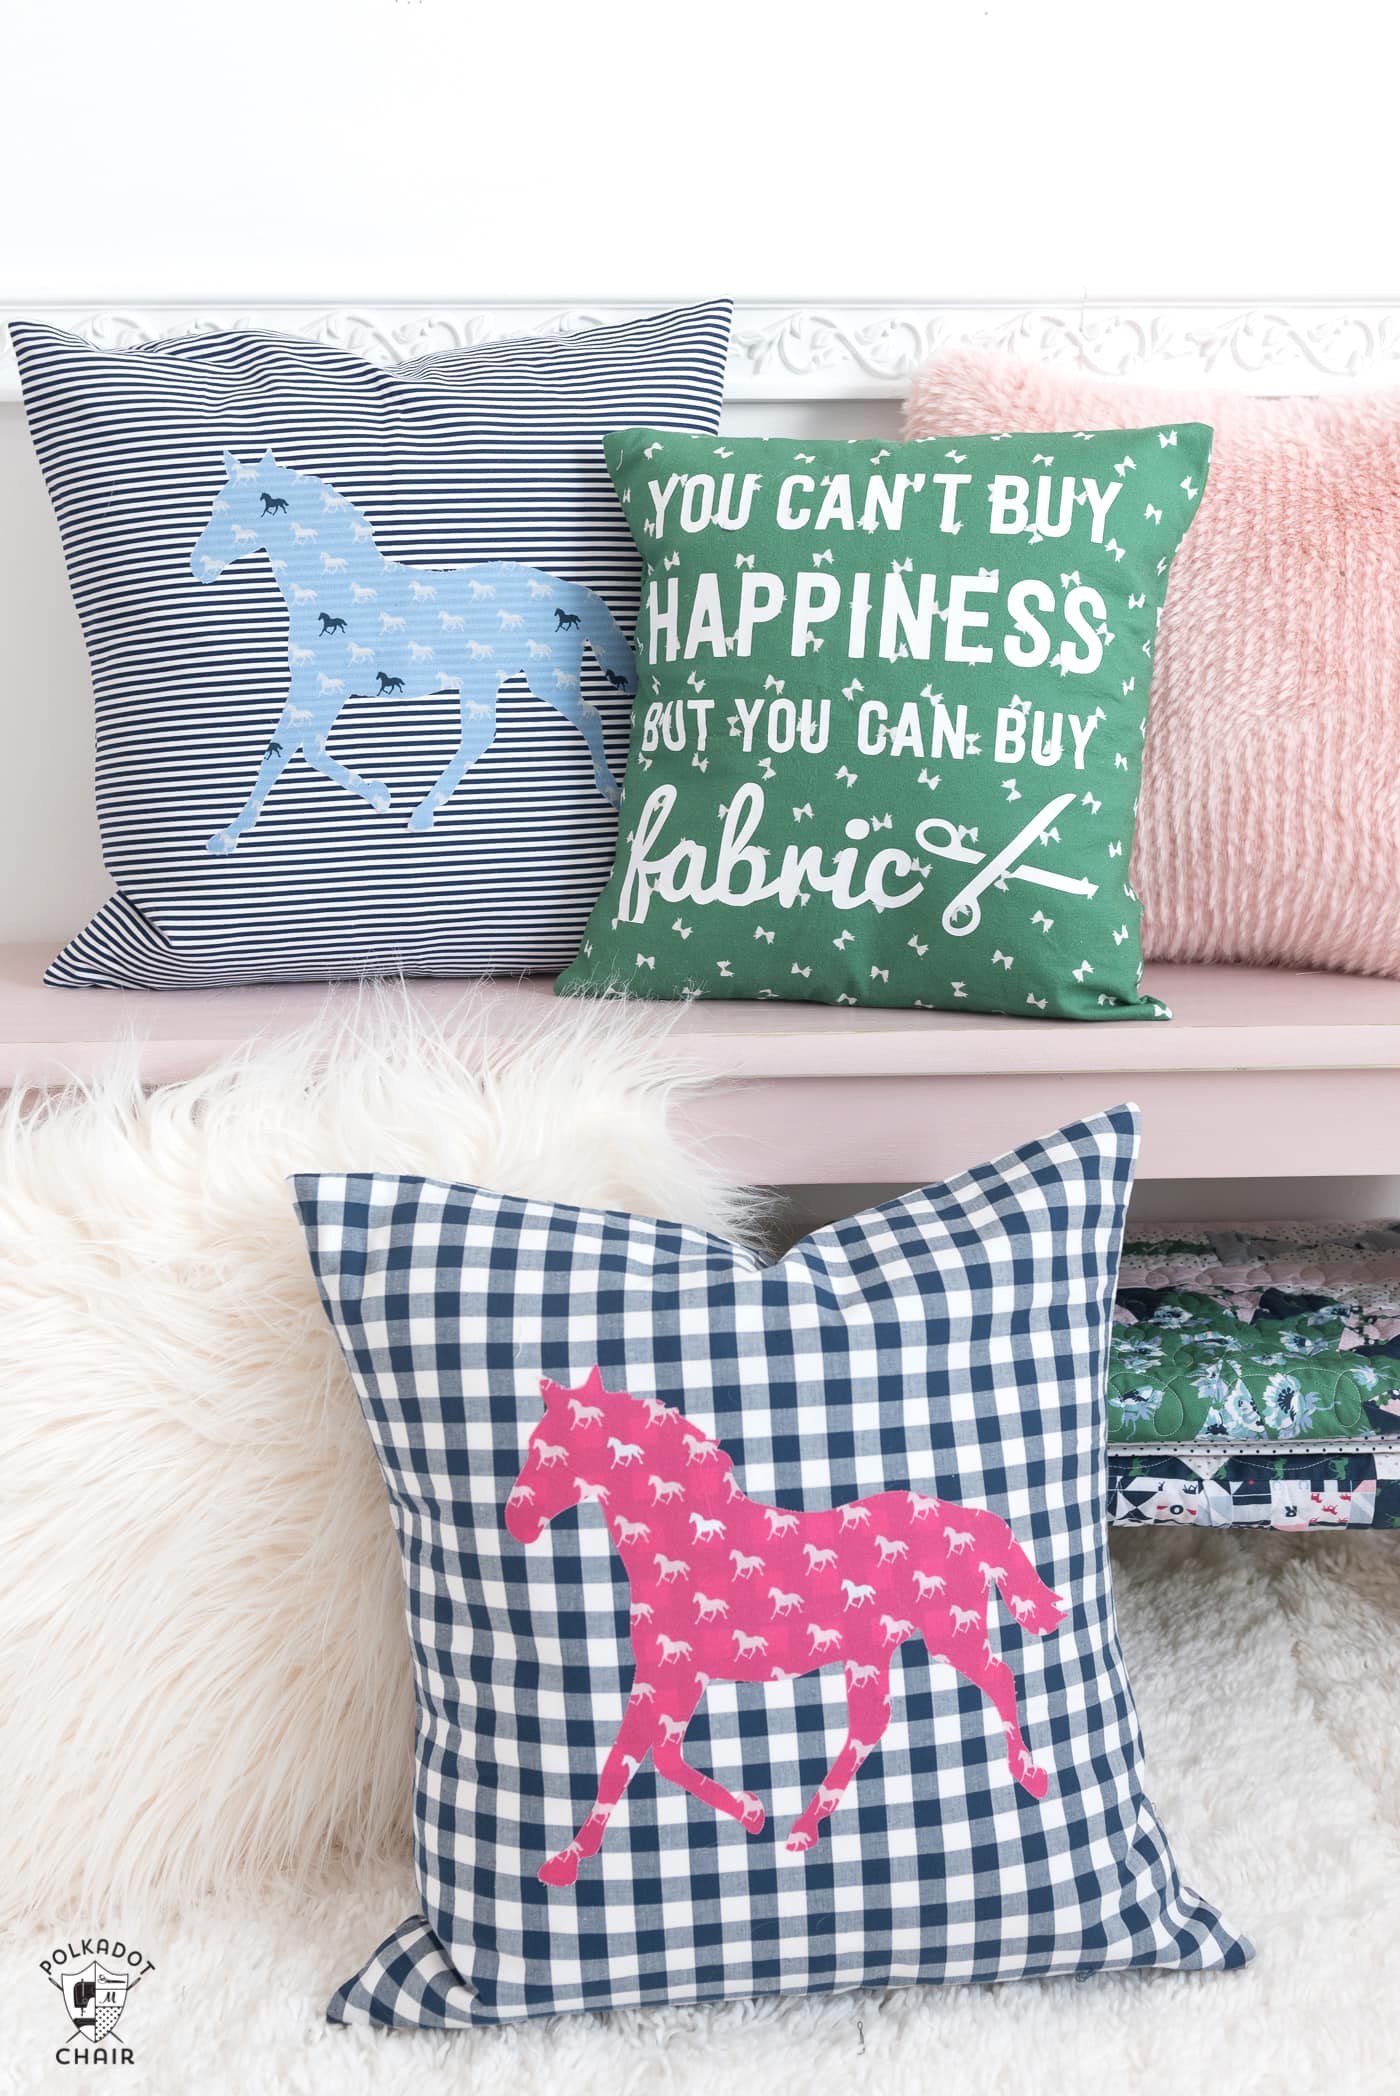
Riley Blake released a new line of woven ginghams last year.
Yard Dyed vs. Printed Fabrics
Most quilting and sewing fabrics begin as plain white fabric, to which color and pattern are added using inks and silk screens. The fabrics are printed with the color, but the actual fibers start white.
Woven fabrics have color in the threads (referred to as yarn-dyed), which are then woven into a pattern. So, the navy woven gingham you see above is actually made from navy thread and white thread. This adds depth and texture to the print. Most men’s shirts are made from woven fabrics.
The new Riley Blake ginghams have a wonderful drape and texture. They are also wonderful for sewing clothing. I have a few spring tops I’m working on right now, using the fabric. The ginghams come in two sizes: small and large (shown).
I decided to use some of the gingham to stitch up some quick throw pillows. These pillows are so easy to make—you just need a few supplies.
(Pattern for the Fabric Sayings Pillow can be found HERE)
How to Get the Horse Appliqué Shape
Fill out this form, and we will email you a copy of the horse appliqué template.
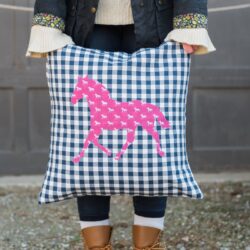
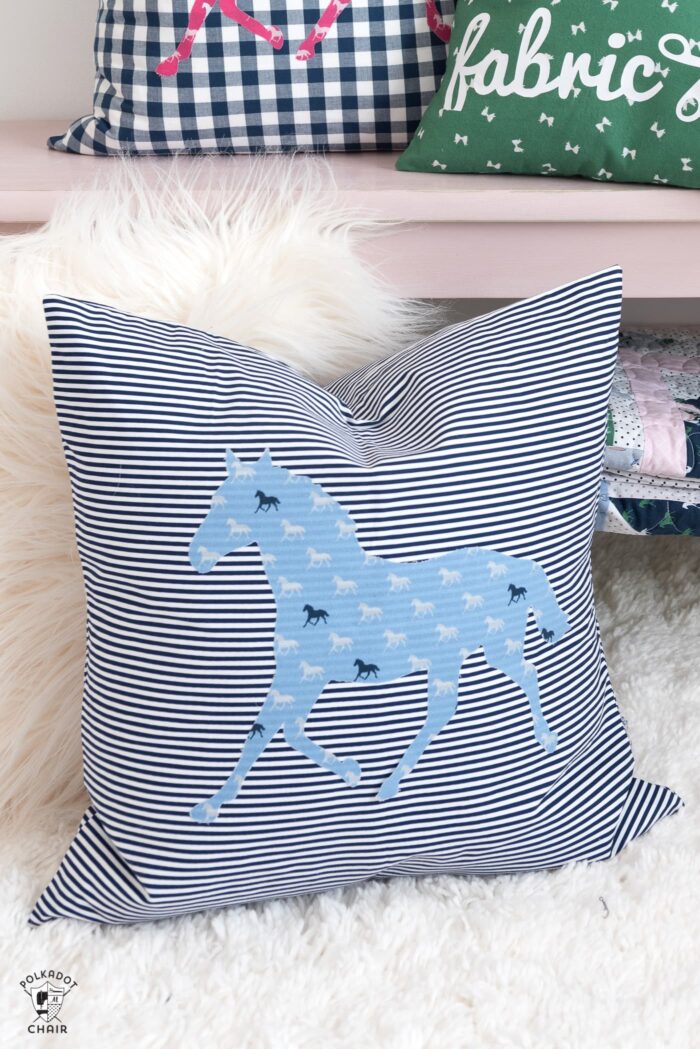
DIY Horse Appliqué Throw Pillow Pattern
supplies
- 3/4 yard of fabric
- 3/4 yard of 20″ wide Shape Flex Interfacing
- 1 piece Heat N Bond Lite
- 1 Fat Quarter of Fabric for the Horse. The fabric used for the horses is from the Derby Day Collection from Riley Blake Designs.
- Thread to match the horse
- 1 20″ pillow form I recommend a down pillow form
Instructions
Applique Instructions:
- If you are downloading the Cricut File, follow the instructions on THIS POST for cutting out the appliqué shape using your Cricut Machine.
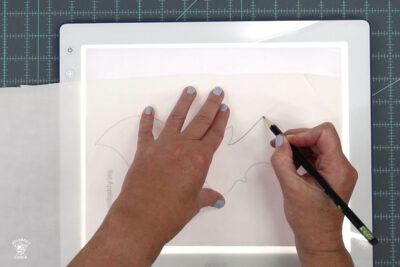
- Print out the appliqué shape. I made it as large as I could for you, as it needed to fit on a standard piece of paper. If you want a larger horse, you’ll need to take it to a copy shop and have it enlarged.
- The image is already reversed on the printout for the appliqué.
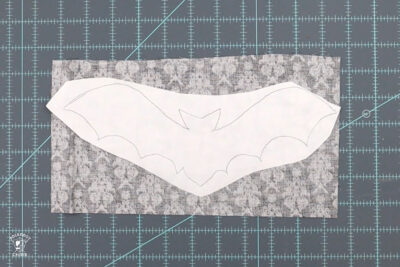
- Using the Heat and Bond Lite, trace the horse's shape onto the paper side of the Heat n Bond. Cut it out loosely.(note the photos are from another project, but the instructions are exactly the same).

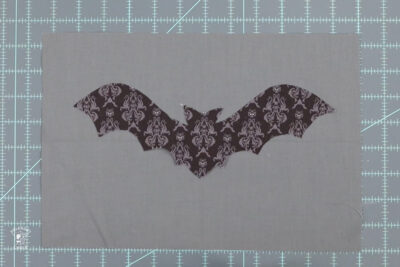
- Iron the shape onto the wrong side of your horse fabric.
- Cut out more precisely. Set aside.
Pillow Instructions:
- Cut a 20″ x 20″ piece of fabric for your pillow front. We will talk about the fabric for the back of the pillow in a moment.
- Cut a piece of 20″ x 20″ Shape Flex.
- Using your iron, adhere the Shape Flex onto the wrong side of your pillow fabric. The Shape Flex gives the pillow cover enough body to hold its shape and not look lumpy.
- Center the horse on the 20″ pillow front piece. Peel the backing off the horse and iron it onto the front of the pillow. You can leave it like this; however, I recommend stitching the horse down.
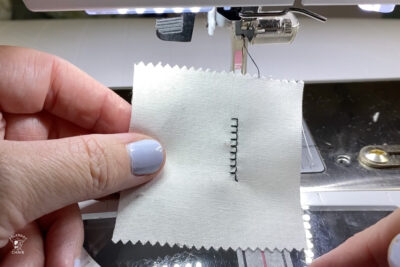
- Stitch down the horse shape using either a straight stitch or an appliqué stitch on your sewing machine.
How to Sew the Pillow Back:
- You have a few different options for adding a back to the pillow.
Option 1:
- You can cut another 20″ piece of fabric and pin it right sides together with the pillow front. Then stitch around the perimeter of the pillow cover, leaving an opening on one side to slip the pillow form in.
- After sewing the pillow cover, turn it right side out, slip the pillow form in, and slip stitch the opening closed.
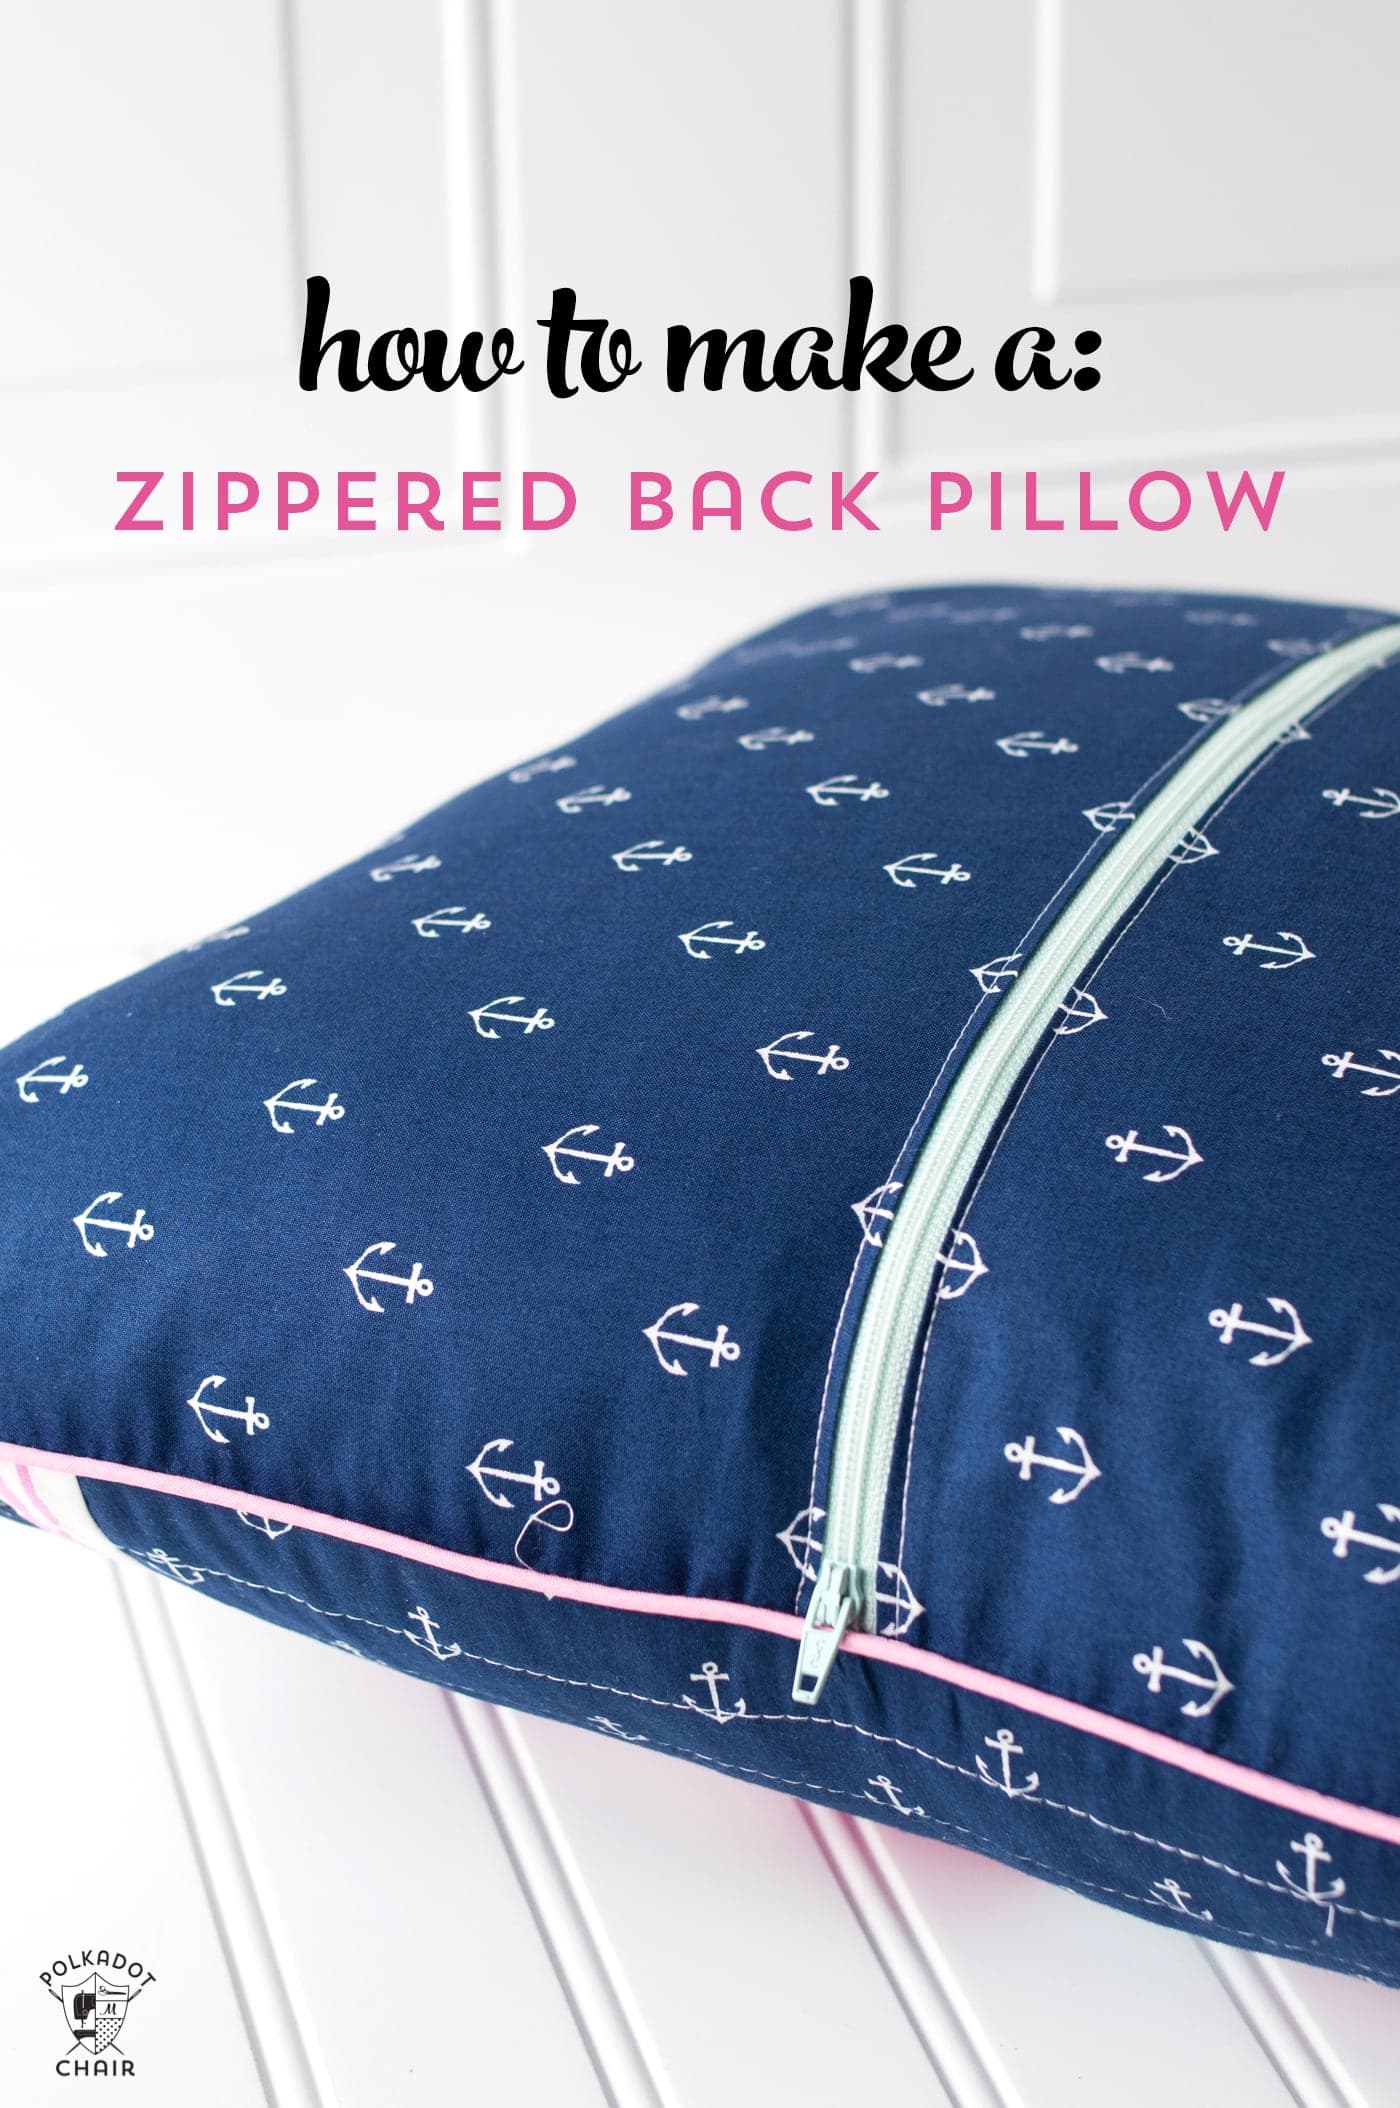
Option 2:
- You can create a zippered back for your pillow cover. To see how, follow the tutorial on THIS PAGE.
- After sewing your pillow cover, slip your pillow form into it.
- That’s it! You’re done!
After sewing your pillow cover, slip your pillow form into it. That’s it! You’re done!
Now go make a bunch of pillows!
Other Projects You May Like:
How to Make a Pillowcase in 3 easy steps!
Sew Your Own Splash-Proof Phone Case: Perfect for Summer!
15 Must Know Bag Making Tips and Tricks