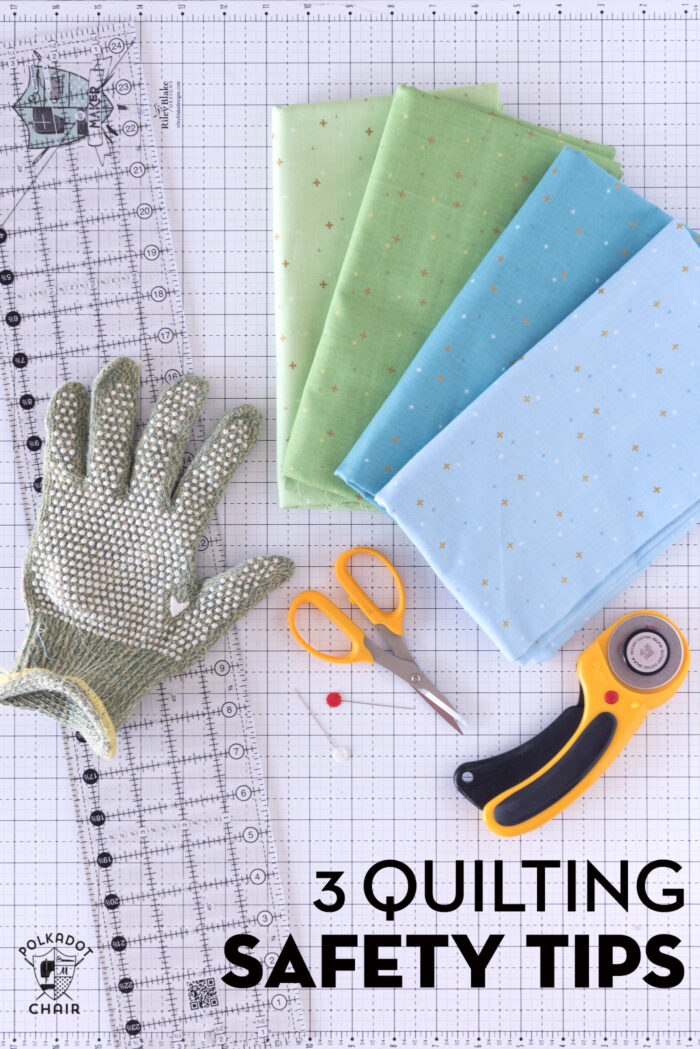
3 Must-Know Quilting Safety Tips
Quilting is one of my favorite hobbies, but like many hobbies, there are a few things that you should be aware of if you’re a new or experienced quilter. Trust me when I tell you that I learned all of these things the hard way! Today I’m sharing some of my quilting safety tips.
Let me tell you a story. Many years ago, I used my rotary cutter and quilt ruler to cut some binding strips for a table runner I was working on. The ruler and the rotary tool slipped, and I cut off the top of my finger.
I’m not exaggerating when I tell you that 1, I had never even considered the possibility of injuring myself with a rotary blade, and 2, I’m lucky they could stitch my fingertip back on. After multiple stitches and a visit to a hand specialist, I am grateful to this day that it was not worse.
I hope that’s not TMI, but ever since then, I’ve been pretty vocal about safety when it comes to working with sharp objects, and when you quilt, you work with a lot of sharp objects.
Here are a few things that I’ve started doing since then (and I tell all my quilty friends to do the same).
Since quilting involves using a sharp rotary blade (like a pizza cutter, but for fabric), you need to be careful as you cut your material for your projects.
1. Get a Cut Glove
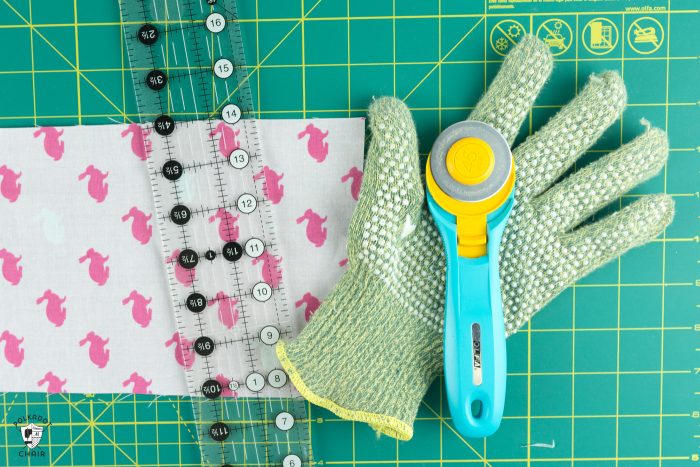
Buy a cut glove and wear it EVERY time you use your rotary tool. A cut glove is a glove that is made from cut-resistant material. If your rotary blade accidentally slips, it will help protect your finger (since the blade does not cut the glove’s fabric).
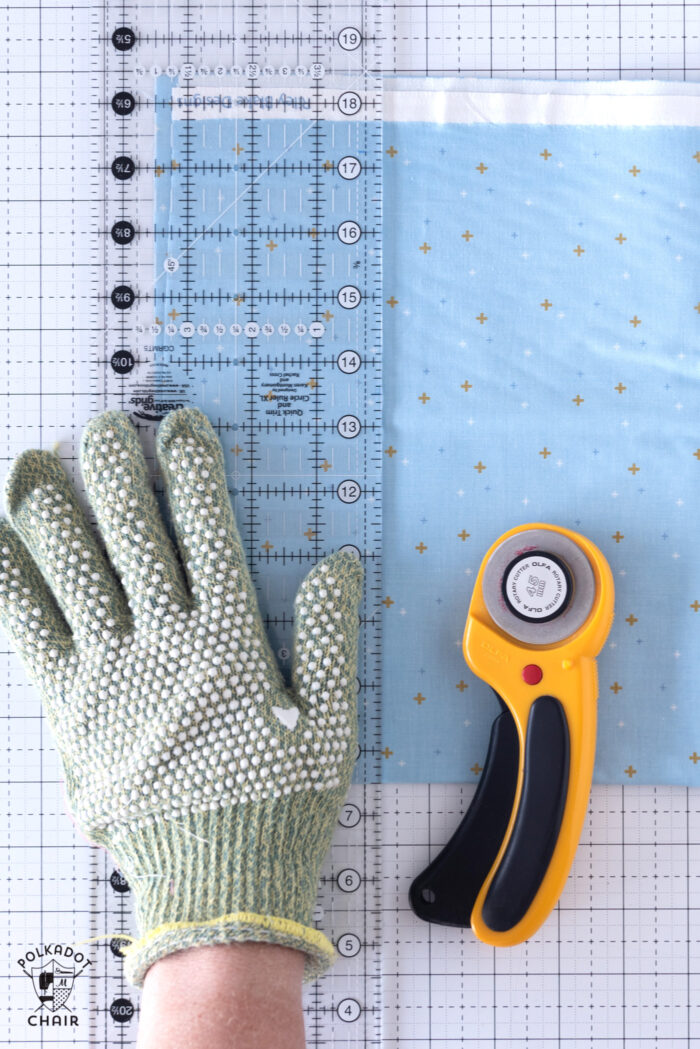
I was cutting one tiny strip of fabric when my accident happened. It was just a “quick cut.” You never know, so better safe than sorry. This cut glove goes on the hand that holds the ruler in place and will protect your hand if the tool slips.
TIP: I now only use retractable rotary blades; I feel like they give me extra protection.
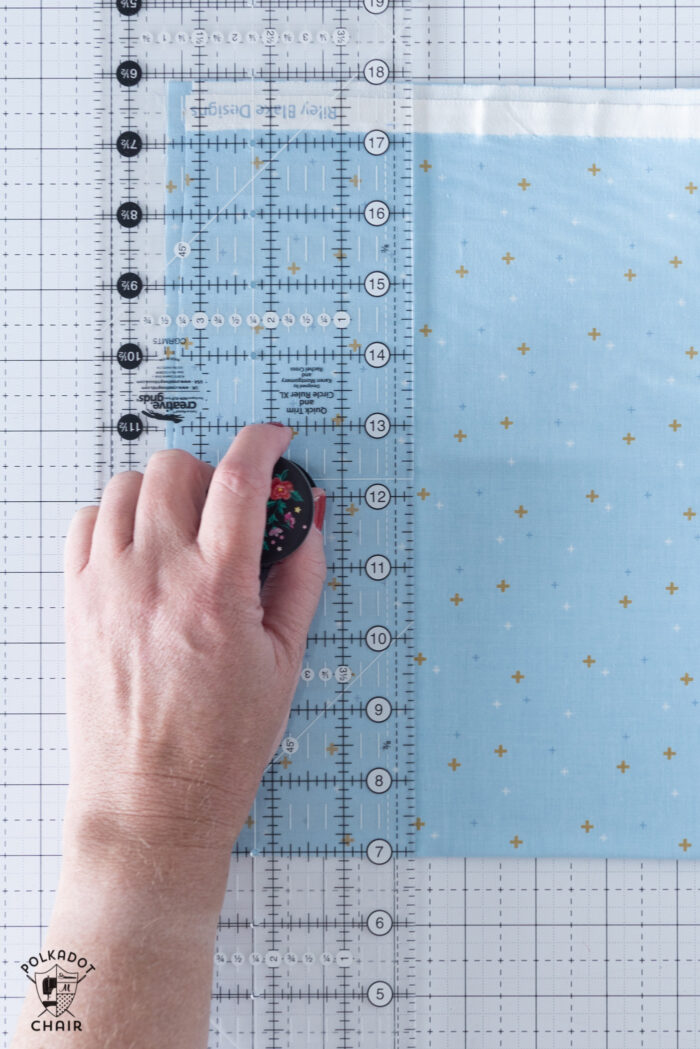
2. Use Non-Slip Rulers
It drives me crazy when my rulers slip while I’m cutting my fabric. The ruler slipping contributed to my injury. In addition to wearing a cut glove, use non-slip rulers. The Creative Grids brand of rulers is one of my favorites.
Creative Grids rulers feature a coating on the back that “grips” the fabric so they are less likely to slip. They come in all shapes and sizes. I currently have the 2 1/2″ x 18 1/2″ and the 4 1/2″ x 24 1/2″.
3. Apply Non-Slip Dots to Quilt Rulers
No need to toss out your existing quilt rulers, even if they slip a little. You can purchase non-slip dots to put on the bottom of the ruler. Most are clear and won’t obstruct your view. I add the dots to my quilt rulers, even my small square rulers (and bloc-loc rulers).
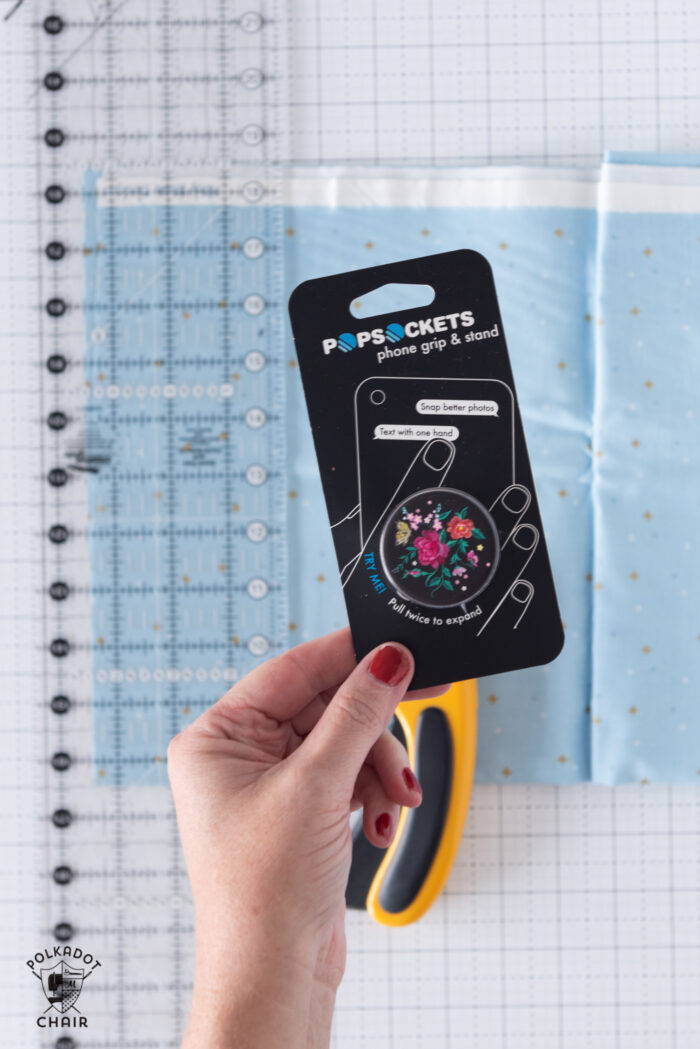
TIP: If you don’t want to add a non-slip dot, add a Pop Socket! I recently spotted a quilter with a pop socket on her quilt ruler. It’s such a brilliant idea! They are removable and give you a spot to “hold” when you’re holding your quilt ruler.
A Few More Tips
Rotary blades are not the only thing you should be aware of when quilting; here are a few other things to keep in mind as well.
- Change your blade frequently; a dull blade is more dangerous than a sharp one as you are more likely to press too hard, increasing the likelihood of injury.
- Be extra careful when you’re changing your rotary blades. Wear the glove during this process if you need to.
- Dispose of dull blades properly. It’s dangerous to throw them in the trash. I keep the case that the blades came in originally to hold the dull blades. I just marked USED on the top with a marker to confuse the blades with my unused newer blades.
- When you’re using your sewing machine do not ever use your finger to guide the fabric all the way up to the needle. Use a seam ripper or stiletto tool to push the fabric instead.
- When working with hot irons, hold your fabric with a seam ripper or stiletto as well. This will allow you to get your iron closer to the section of your quilt block that you’d like to press, but protect your fingers as well.
Tell me, what did I miss? Do you have any tips to share? If so, leave them in the comments section so everyone can benefit!