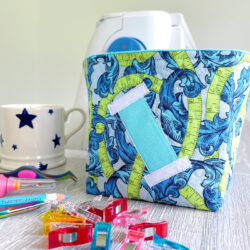
Fabric Storage Cube Sewing Pattern
Store your binding clips, threads, and other sewing notions in style with this cute quilted fabric storage cube. Make one today with our free pattern!
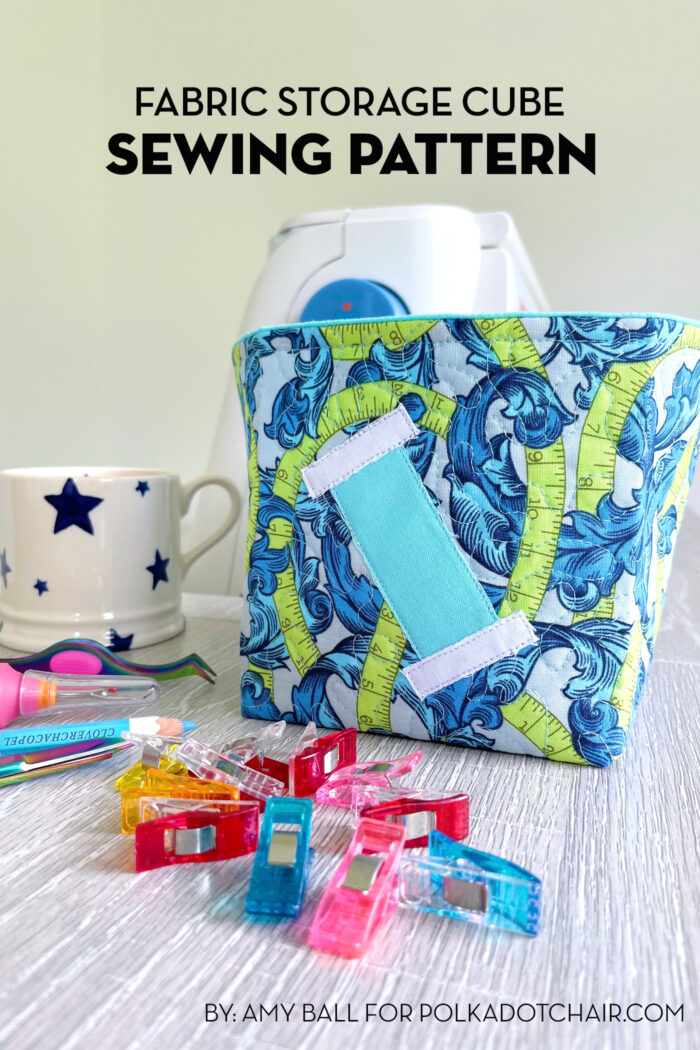
Amy Ball is back with us again today. This time she’s sharing a free tutorial for a quilted storage cube that’s perfect to use in your sewing room.
It would be so cute to create an entire set of these cubes in all different colors. I can see them being used to store binding clips, thread, seam rippers, pens, and so many other sewing notions.
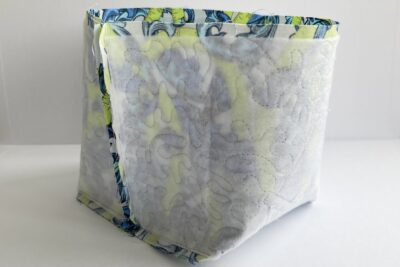
I like to try and keep my sewing space tidy, but I also want everything I might use close to hand. These quilted storage cubes are perfect for staying organized and have a cute sewing-theme appliqué on the front, which is great for using up some small fabric scraps.
Fabric Storage Cube Sewing Pattern
Equipment
supplies
Main Fabric
- 1
Fat Eighth
Lining Fabric
- 1 Fat Eighth
Applique Fabric
- 2 Scraps of Fabric 1 white and 1 bright colour
Interfacings
- 2 scraps Lightweight interfacing
- 1 piece
Fusible fleece/batting 20” x 8”
Instructions
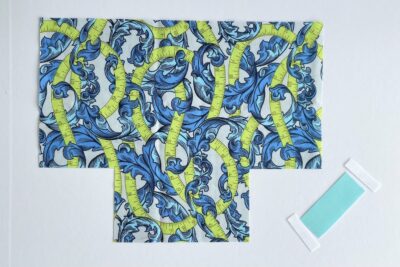
Cutting:
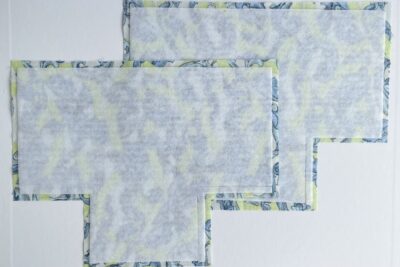
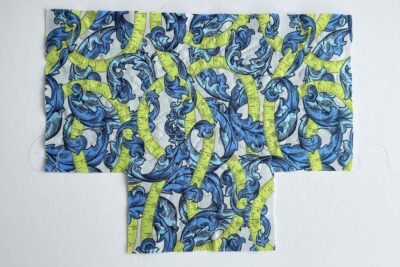
- From Main Fabric Cut:10½” x 8¼” (2) From Lining Fabric Cut:10½” x 8¼” (2) From white appliqué fabric cut:1½” x ⅜” (2) From bright appliqué fabric cut:2½” x 1” (1)From fusible fleece/batting cut:10” x 7¾” (2)
Construction:
- Cut 2¾” squares from two corners along the long edge of both main fabric pieces, both lining fabric pieces and both fusible fleece pieces.

- Attach the fusible fleece to the wrong side of the main fabric pieces, following the manufacturer's guidelines. If you’re using batting then glue baste it to the wrong side of the main fabric pieces. There should be ¼” round all the edges without any fusible fleece/batting.
- Quilt the two main fabric pieces. In my example, I have used a free motion quilting meander motif but you could use anything; free motion or straight line quilting. Don’t forget, the denser you make the quilting, the more body and strength the sides of the storage cube will have.
- Now it’s time to add the thread spool appliqué. Attach the lightweight interfacing to the wrong side of the appliqué pieces you have already cut out, following the manufacturer's guidelines, and trim down if required.
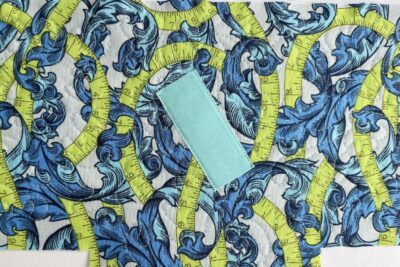
- Mark the center of one quilted piece (2¾” down from the long, top edge and 5¼” in), put the bright 2½” x 1” fabric piece over the center spot at an angle, and secure it in place with pins or a small amount of fabric glue. Sew along the two long sides, close to the fabric edges.
- Then add the two white 1½” x ⅜” fabric pieces to the top and bottom of the bright rectangle, using the photo as a guide for placement and slightly overlapping the bright rectangle, and sew around all the sides close to the fabric edges.
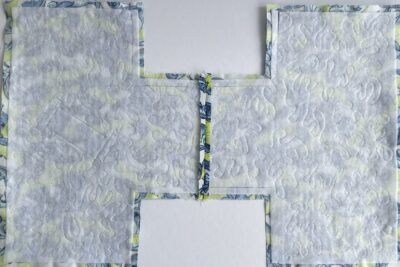
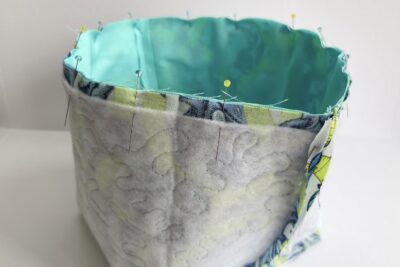
- Sew the base edges together, using a ¼” seam allowance, and press the seams open.
- Now the sew the sides together and finger press the seams open.
- For the corners, bring the side seam to meet the base seam, right sides together and pin. Move any excess fabric out of the way so the pinned seam lies flat. Sew. Repeat for the second corner. You’ll now have the outer cube completed.
- Repeat steps 7 to 9 with the lining fabric pieces but leave a 3” turning hole in the base edge seam.
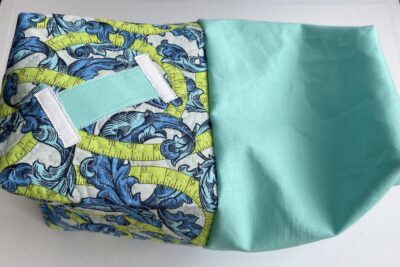
- Turn the lining cube right side out and put it into the outer cube (the right sides should be facing), match up the side seams and pin around the top edge. Sew.
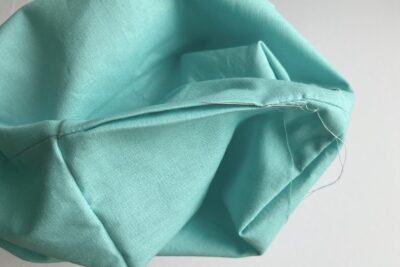
- Using the gap in the lining, turn the cube right side out and carefully poke out the corners.
- Sew up the gap in the lining by hand or machine.
- Push the lining cube into the main fabric cube, press the top edge seam and top stitch all the way round the top of the cube to finish.


About the Designer

Amy lives in the north of England with her husband and son. When she’s not sewing and quilting, Amy can usually be found baking or reading. You can find her on Instagram @amyatthegate
Also by Amy:
Guide to Near Perfect Patchwork
Choosing Fabric Colors | the basics
Quilting Ideas | Everlasting Star Pattern