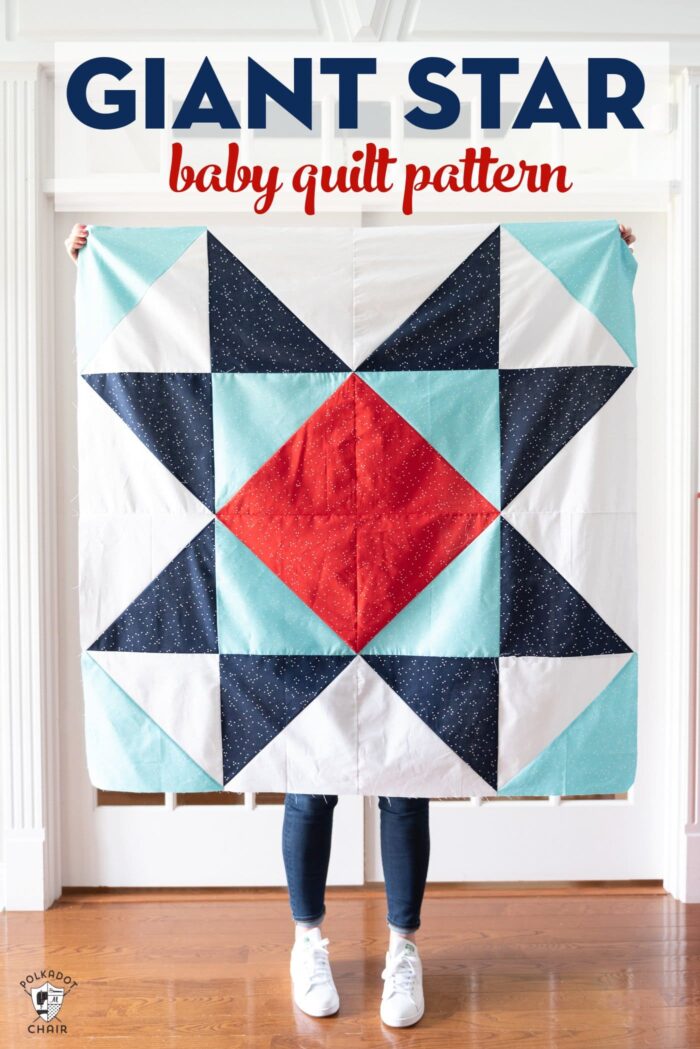
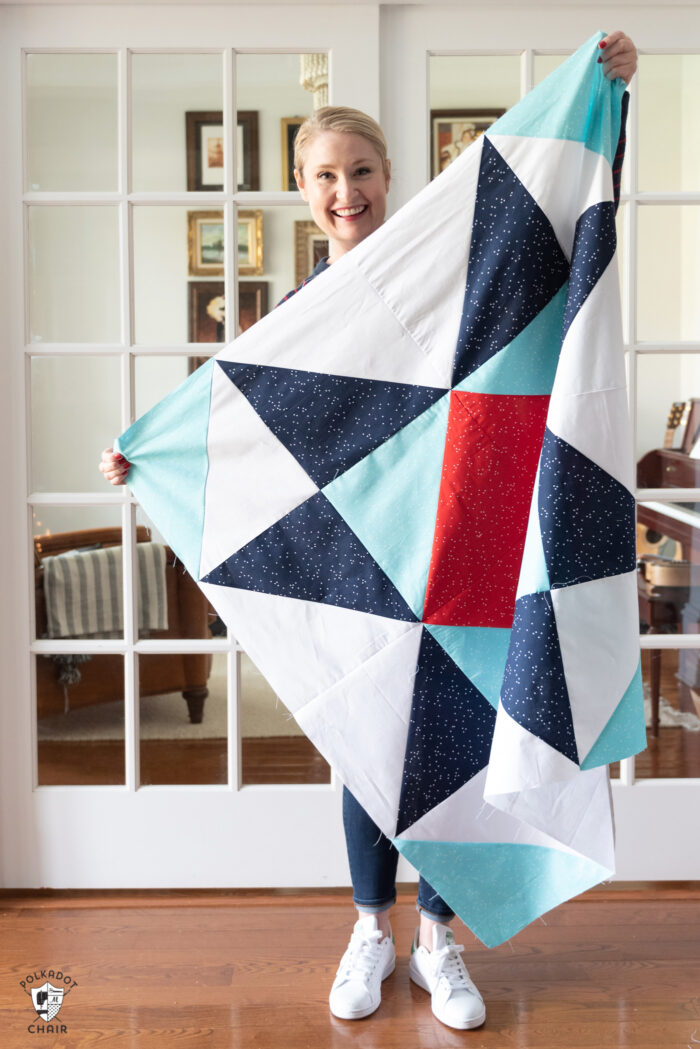
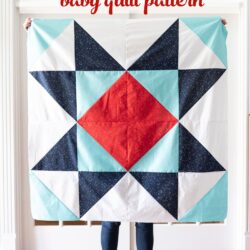
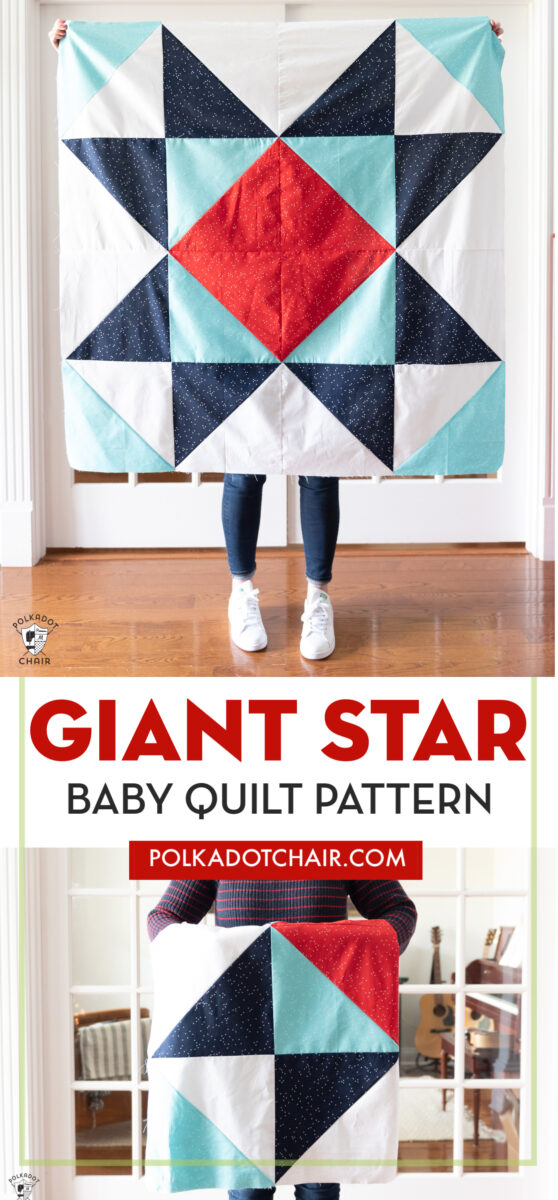
Giant Star Baby Quilt Pattern
Stitch up a baby quilt in an afternoon with this Giant Star baby quilt pattern! The giant star quilt block is not only striking and modern but oh so fast to sew!
Funny story. This baby quilt was made on accident (I feel like there’s a potential double entendre in that sentence LOL!). I was writing the pattern for the last block in my Just for Fun Quilt along and messed up the quilt math. I ended up with a quilt block that was two times too big!
Luckily the mistake was caught before I posted the block pattern (you can read all about it here). Today I thought that I’d share with you how to make this “bonus” easy baby quilt pattern.
This quilt features one large Sawtooth Star Quilt block, sometimes called a variable star. I’ve shared a few other large quilt block baby quilt patterns in the past. This one from Amy Smart is a particular favorite of mine.
Since this quilt block is constructed as one large block (instead of several smaller blocks) it is very quick to make. It’s a very simple baby quilt and I love that it feels a bit modern. In fact, I made mine in about 2 hours.
How to Make a Giant Star Baby Quilt:
I have noticed that many of my daughter and nieces friends who are having babies prefer more graphic or modern baby quilts. If you know someone who’s taste leans a bit more towards clean lines then this baby quilt pattern might be a good choice.
All fabrics are from the Blossom Line by Riley Blake Designs. You can purchase it here. Because of the large size of the quilt blocks in this quilt, I do not recommend using a fat quarter of fabric. Purchasing yardage is a more economical way to make the baby quilt.
Fabric Requirements
- Navy Fabric: 3/4 Yard Fabric
- Aqua Fabric: 3/4 Yard Fabric
- Red Fabric: 1/2 Yard Fabric
- White Fabric: 3/4 Yard Fabric
Baby Quilt Size:
Approximate Dimensions: 48″ x 48″
If you’re brand new to quilting, here are a few tips to keep in mind. 1- Be careful as you cut to keep your measurements precise.
2- Double check your seam allowance on your sewing machine. You want it to be 1/4″ exactly. I recommend marking that spot on your machine with a bit of washi tape so you don’t forget where it is.
Also check out: 3 Tips for Beginning Quilters & How to Make a Quilt from start to finish.
Giant Star Baby Quilt Pattern
Equipment
supplies
- Navy Fabric: 3/4 Yard
- Aqua Fabric: 3/4 Yard
- Red Fabric: 1/2 Yard
- White Fabric: 3/4 Yard
Instructions
Cutting Directions
- Navy Fabric: 4 Pieces each 13″ x 13″
- Aqua Fabric: 4 Pieces each 13″ x 13″
- Red Fabric: 2 Pieces each 13″ x 13″
- White Fabric: 6 Pieces each 13″ x 13″
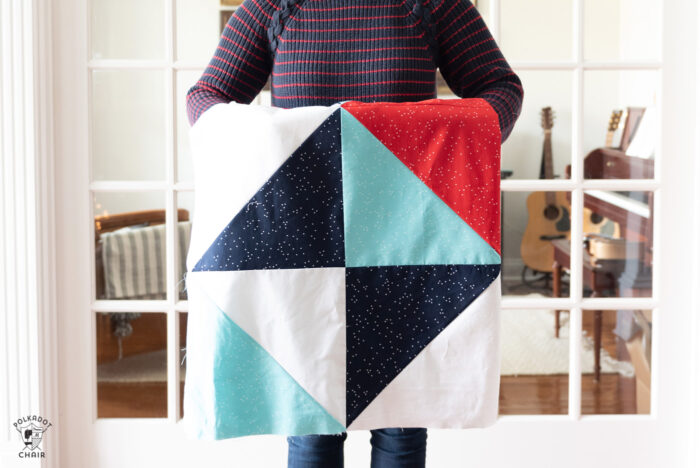
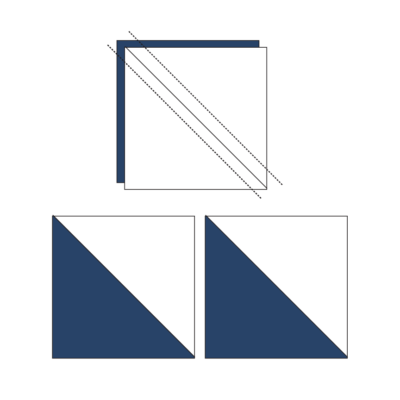
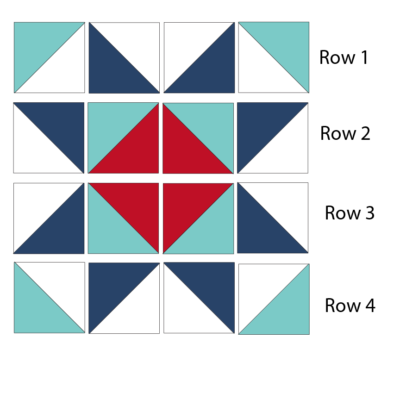
Create the White and Navy Half Square Triangles
- Pair one Navy 13″ x 13″ pieces of fabric with one of the White 13″ x13″ pieces of fabric. Create 2 Navy/White Half square triangles.

- Repeat, 3 times. You should have 8 Navy/ White Half Square triangles.
- Trim and square up to 12 1/2″ x 12 1/2″
- If you need help making a Half Square Triangle, you can view THIS post for full instructions.
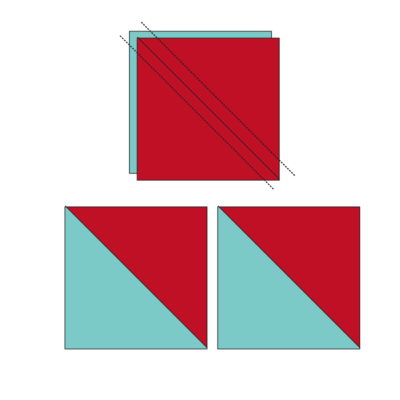
Create Aqua and Red Half Square Triangles
- Pair one Red Square with one of the Aqua Squares. Create 2 Red/Aqua Half Square Triangles.
- Repeat. You should have 4 Red/Aqua Half Square Triangles. Trim and square up to 12 1/2″ x 12 1/2″
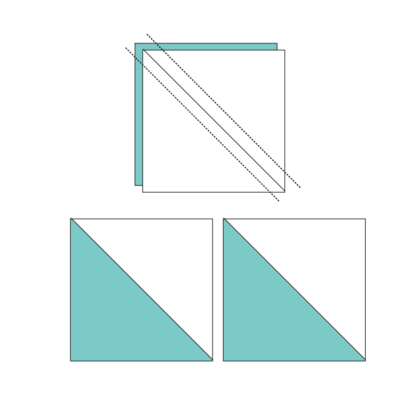
Aqua and White Half Square Triangles
- Using 1 white and 1 Aqua squares of fabric, create 2 Aqua/White Half Square Triangles.
- Repeat. You should have 4 Aqua/White Half Square Triangles. Trim and square up to 12 1/2″ x 12 1/2″
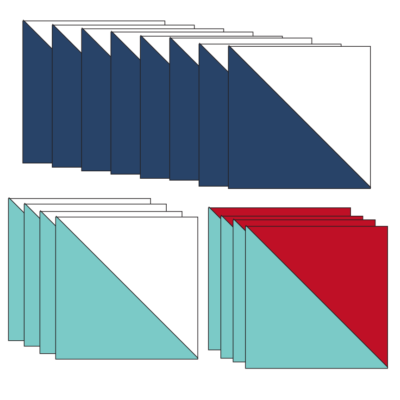
Count Your Blocks; you should have:
- 8 White and Navy Half Square Triangles
- 4 Red and Aqua Half Square Triangles
- 4 Aqua and White Half Square Triangles.
- All pieces should be 12 1/2″ x 12 1/2″
Finishing
- Assemble the quilt top by rows according to the diagram.
Finished Quilt
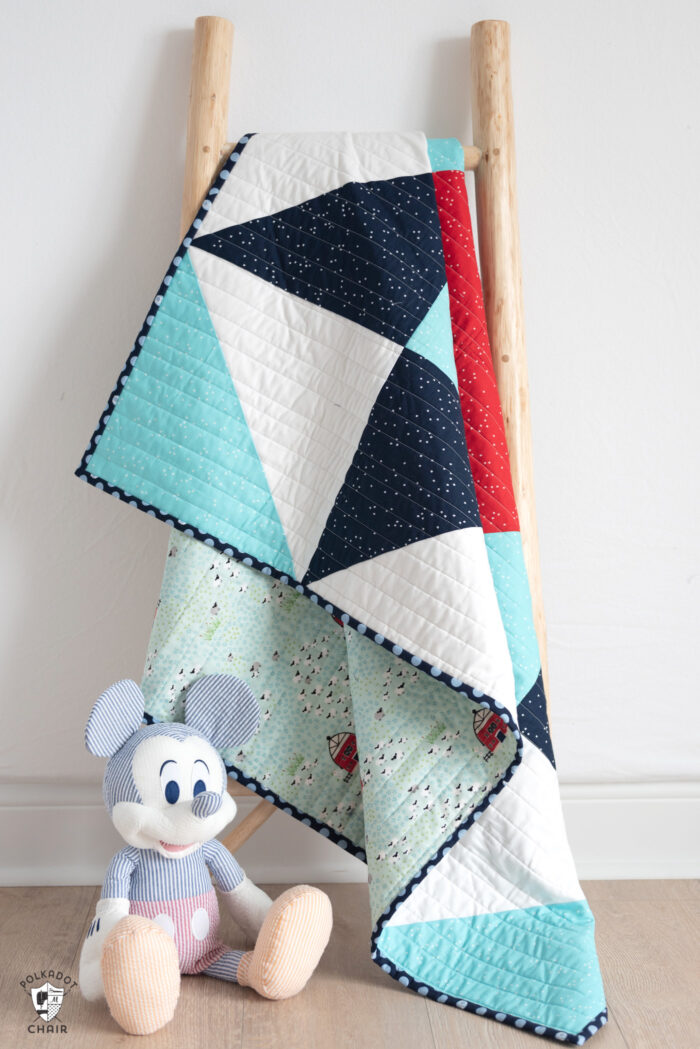
I finished my quilt on my domestic machine. It is quilted with straight lines, approx 1″ apart. You can find all the details for my finished project in my Finish it Friday blog series.
More Free Baby Quilt Ideas & Free Baby Quilt Patterns:
Turnstile Block Baby Quilt Pattern

How much fabric is required for the quilt back and for the binding?
I’d like to know that info too! I could guess, but knowing would be so much better.
What size backing did you use? I want to use the same fabric as the red as my backing.
Just bought stars and moon themed material to do the star quilt. My daughter is expecting ( very very early days) after successful IVF. Wish me luck as first quilt attempt. 🤞👍
Wishing luck to both of you!
I’m a beginner. How much fabric did you buy for the backing? The binding? How wide do you cut the binding?
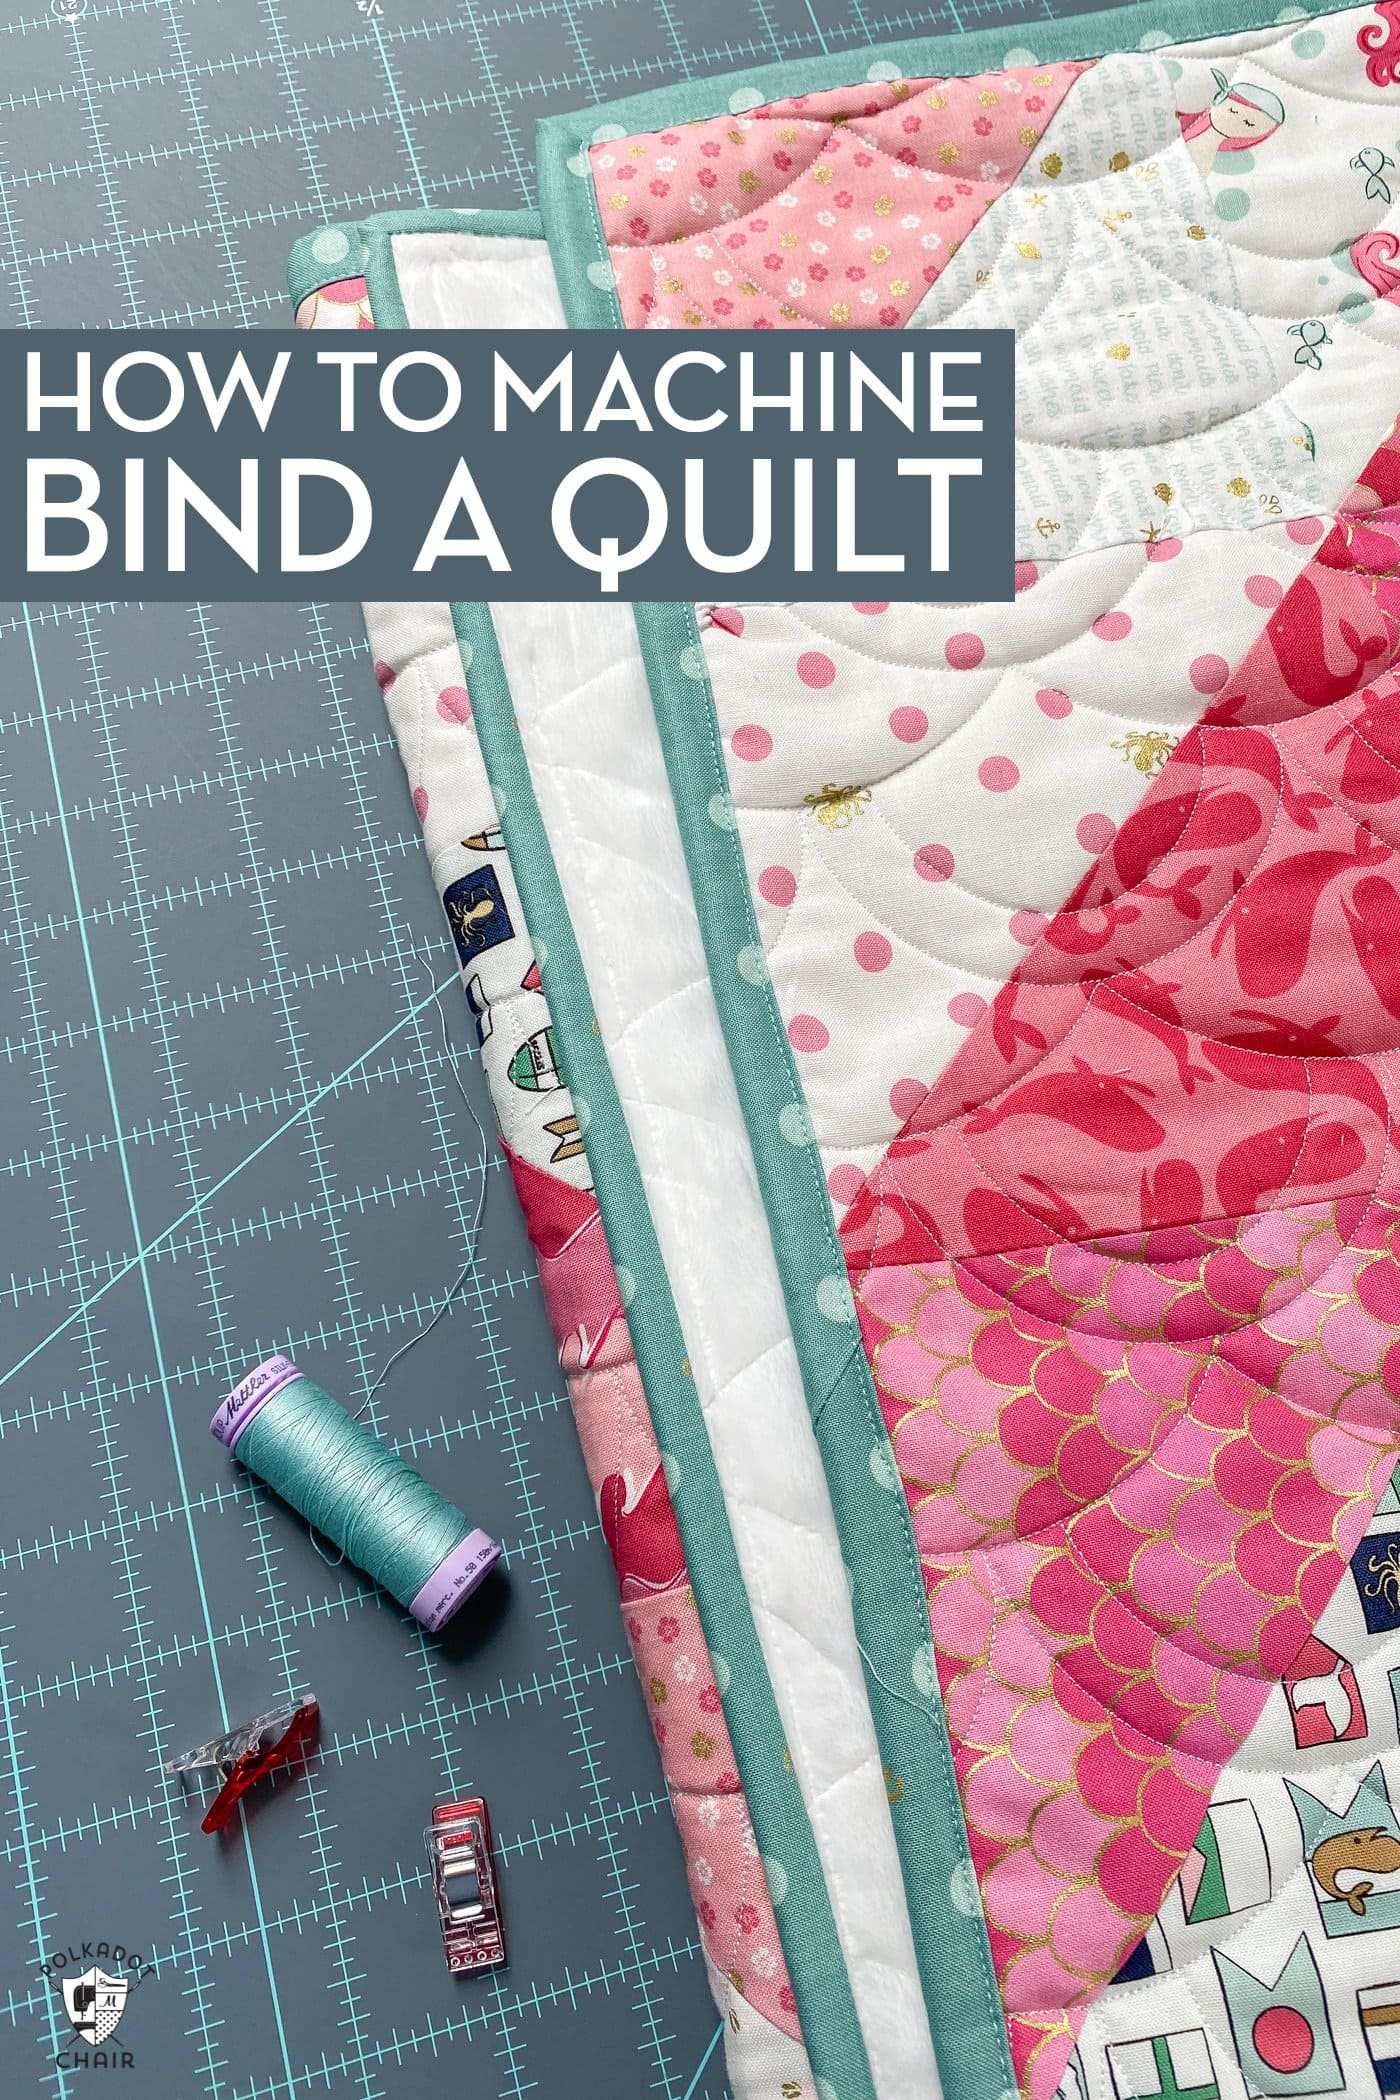
Binding instructions can be found here: https://www.polkadotchair.com/how-to-machine-bind-a-quilt/
The backing fabric will depend on which fabric you buy. There are a lot of options. If you are new check out how to make a quilt from start to finish https://www.polkadotchair.com/how-to-make-a-quilt-from-start-to-finish/ and how to finsh a quilt on our site https://www.polkadotchair.com/tips-for-finishing-quilt/. If we listed all of that information in one blog post it would be way to long.
Love this idea for a baby quilt, thank you for the tutorial. What would you suggest to shrink the final size to 40 x 40?
There’s not an easy way to do that.
I am a total newbie. This is the first quilt I am making. So here’s a newbie question. When I look up tutorials to square up the HST, it mentions getting a quilting ruler that’s bigger than your block. What size ruler should I get to make these 12.5 square HST?
I would get a 12 1/2″ ruler. I don’t know why they say to get one bigger? Maybe so you can use it for more block sizes? I always buy square up rulers the same size as what I want it squared up to.
Loved this page great directions. I made one for a friend. Wish it would let me post picture on here to show you.
Oh, no no, I wouldn’t dare call them tips, I’m too much of a newbie to dare tip anyone… more like encouragement I guess? To new sewers trying quilting and getting discouraged midway through because it looks disastrous and uneven, it’s me saying “See how bad I was? If even for me it worked out in the end, stay hopeful, it should for you too.”
Thank you Melissa, you’re a wonderfully creative and generous blogger, Polka Dot Chair is one of my favorite sewing blog!
Encouragement for beginners IS a great tip! People need to know that everything doesn’t always work the first time!
It IS an easy quilt! I just finished it for my newborn nephew – my first quilt ever!
I went with a tri-colored bears blankie for the middle, and chose coordonnating colors for the star (dusty pink – if there’s a pink that’s almost masculine, it would be dusty pink, no?), background (turquoise) and triangle corners (marine blue). For the pink star, I had our grandmother’s “special occasion” napkins with embroidered daisies and I used that.
Unlike the previous poster, I did not make it in a day (I wish!!! No, it took me around two weeks, all told). I made a lot of newbie mistakes…:
– I decided on a patterned back also – a simple one, 4 long strips of different textured material – and then had to fuss like mad to have the back fit with the front
– Once completed, there were some parts where the fabric came short, so I had to sew add-ons (luckily it was staight lines so it was easy to fit the patterns together).
– The needle often sometimes got away from me so I undid a lot of stitches.
– I quilted an easy design (staight lines) but wasn’t too confident in my ability to sew straight lines, so I chose thread the same color as the fabric… I had to change thread for every fabric quilted…
– Since my own kids looooved playing with taggies, I added ribbons here and there while sewing the fabrics together. That went like a charm actually, and the result was pretty good.
Despite all my troubles, it came off beautiful! The simple design made it easy to correct my mistakes, so thanks a lot!! (^_^)
(Now, on to the herringbone quilt!!)
I’m so glad that you enjoyed the pattern. Thank you for the tips!!
Thank you so much for this beautiful and easy quilt. Also thank you for the fabric. I am a beginner and have a hard time choosing a fabric.
We had a chilly night a couple nights ago and I realized my 1y/o doesn’t have a quilt!? I was looking for something quick to sew that I probably already had the fabric for. This was perfect! I didn’t deviate from the colors… Didn’t have time to dream up something new. And the colors were already stunning, so why reinvent the wheel? But for the white I did a white fabric with camel-colored pen stripes. Turned out equally as beautiful. Even with my 4 wild boys running around I still managed to complete this in 1 day. Thanks for the inspiration!
I’m so glad you like it and hope your kids enjoy it!
Thank you for posting this giant star baby quilt pattern. It looks like a simple and quick one to whip up.
Wonderful site … Thank you … I am about to embark on making my first quilt … Excited … Nervous … Thank you for the inspiration … Absolutely love the Baby Star quilt
Melissa
I enjoy receiving your emails and comb them to eke out the quilts I like …lol…almost all
I teach Beginners Quilting and recommend your website to all .
Loving this Giant Star Baby Quilt
Kathleen O’Flaherty
Niagara Region
Ontario Canada 🇨🇦