How to Make a Disappearing Four Patch Quilt Block
Did you know that with a few simple cuts you can easily change a simple quilt block to one that looks much more complex than it really is? Learn a fun way to hack a simple four-patch quilt block into a more detailed block using these techniques by Amy Ball.
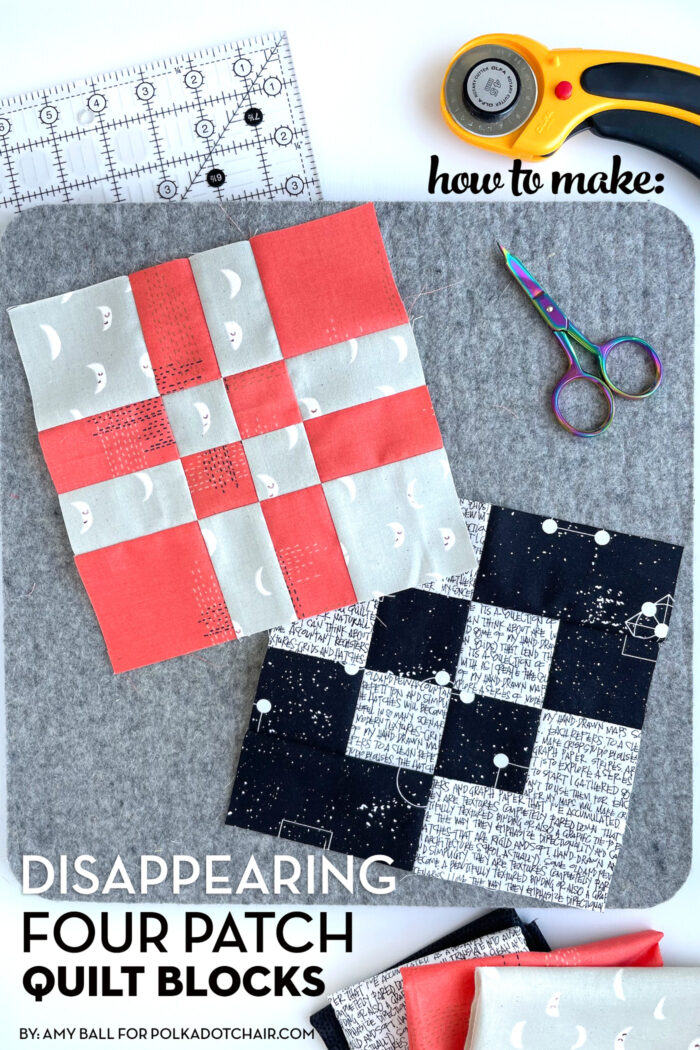
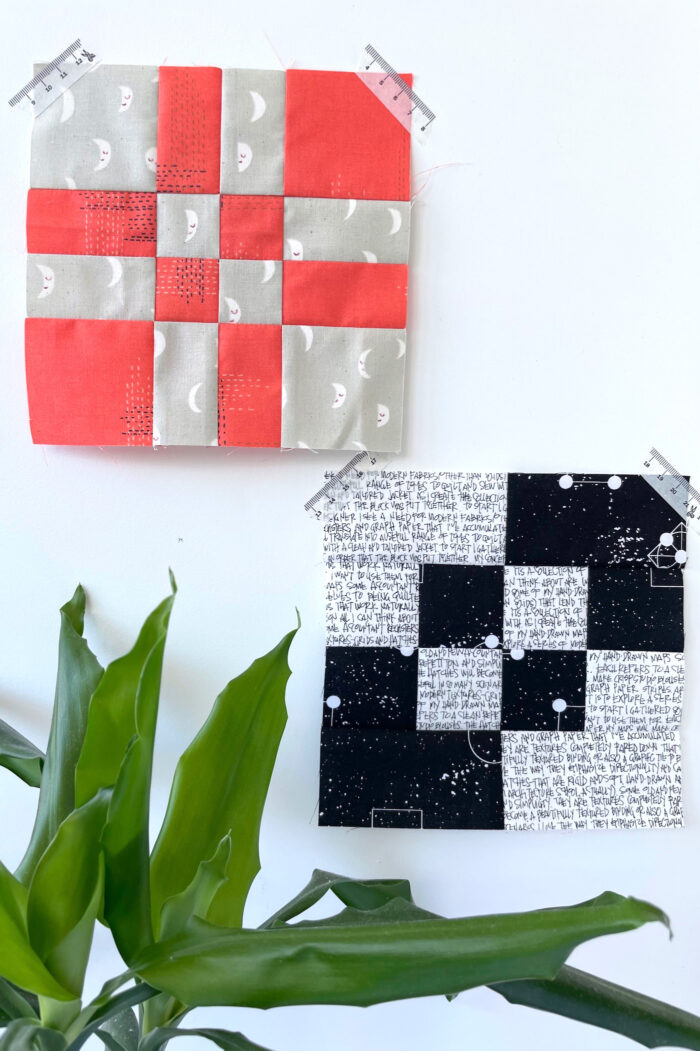
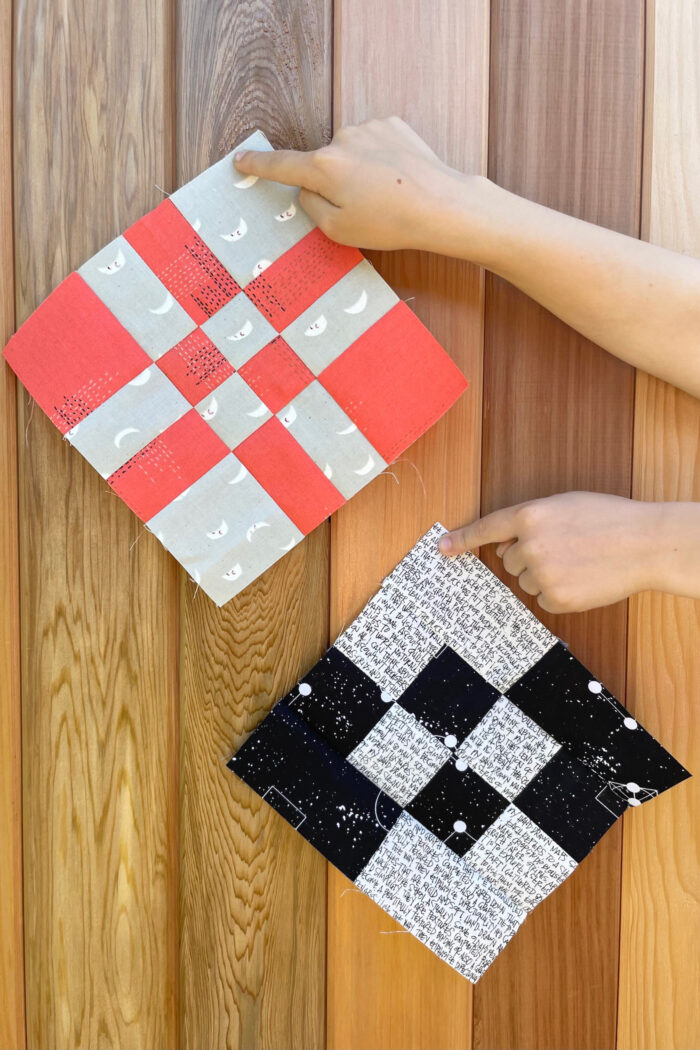
In my opinion, one of the coolest things about quilting is all of the different ways that you can cut and sew the fabric together to create unique and interesting shapes. When you first look at these quilt blocks you might think that they are construed by first cutting the fabric into very small squares. That is, however, not the case. These blocks are construed using a method commonly referred to as “disappearing block”.
What is a Disappearing Four Patch Block?
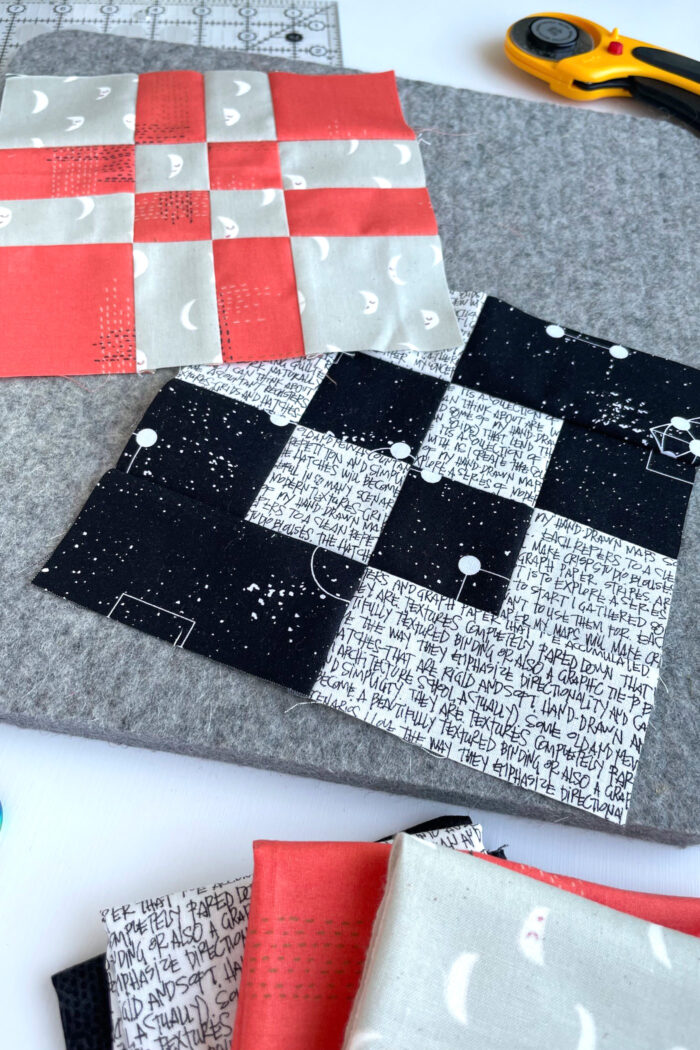
A disappearing four patch block is designed by arranging and sewing together four squares of fabric to create a traditional four patch quilt block. Instead of leaving the block like this, it is cut up and the pieces rearranged to make the original design “disappear”. These blocks are great for using up scraps and you can put them together into quilts or other patchwork projects.
What Can you Make with a Disappearing Four Patch Block?
I took a few minutes and mocked up a couple of quilt top layouts using the blocks that Amy designed. These are very quick sketches to give you an idea of what the blocks do when placed next to each other in a quilt.
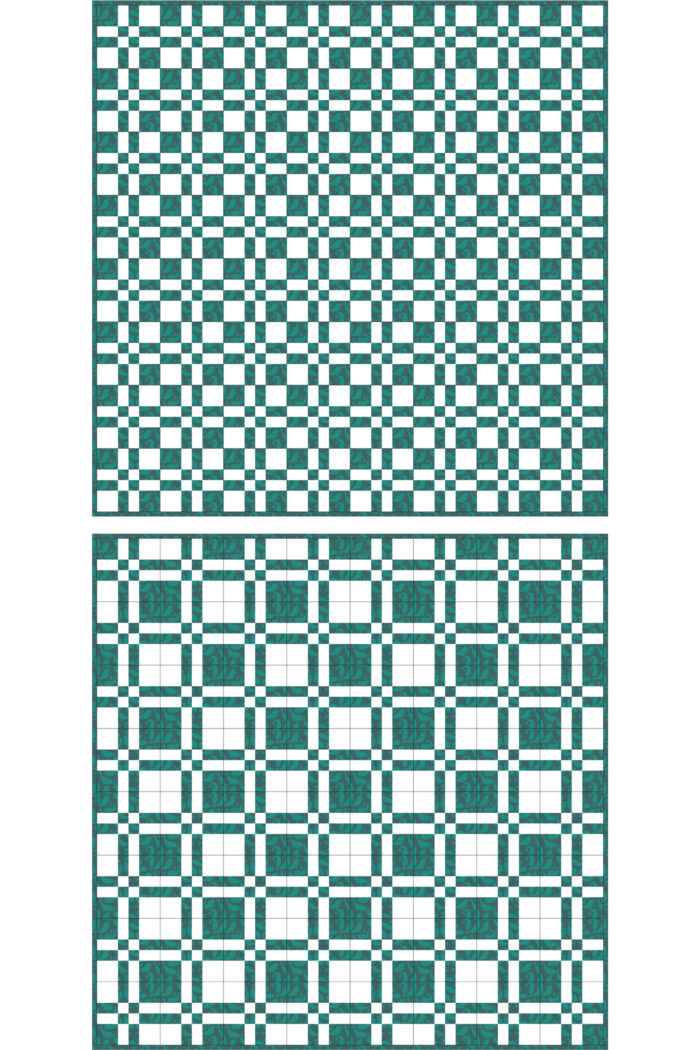
One layout features the blocks all set in the same direction. The other layouts feature every other block rotated 90 degrees. You can see that you can create some really cool layouts by rotating these simple blocks.
Amy’s blocks measure 7 1/2″. The quilt layouts I mocked up are approximately 56×56. However, you can easily make them smaller or larger by adding or subtracting columns or rows from the final layout.

I’ve created a simple PDF with the layouts. It does not contain the block pattern, you’ll need to use Amy’s below for that. But they will give you something you can print out to look at as you arrange your blocks into a quilt.
It has been added to our Sewing Templates Library.
About the Blocks
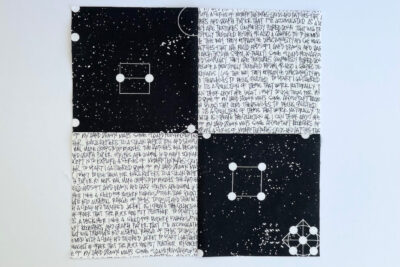
In these tutorials there are two different designs, both using vertical and horizontal cuts. Because of the way the pieces are rearranged in these blocks, they are great for directional prints.
The blocks are called Mini Squares & Corners. You can get tutorials for both below.
Check back next month for Part Two which will feature designs that using diagonal cuts to the original four patch block.
Disappearing Four Patch Blocks
Equipment
supplies
Mini Squares Block
- 2 squares fabric 4 1/2" x 4 1/2" Color A
- 2 squares fabric 4 1/2" x 4 1/2" Color B
Corners Block
- 2 squares fabric 4 1/2" x 4 1/2" Color A
- 2 squares fabric 4 1/2" x 4 1/2" Color B
Instructions
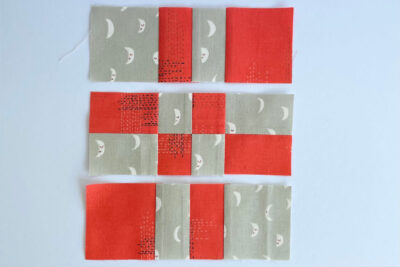
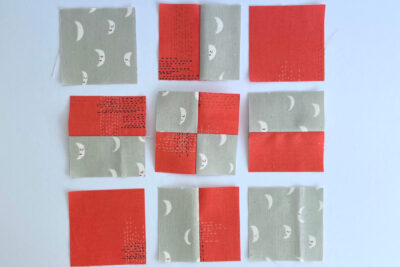
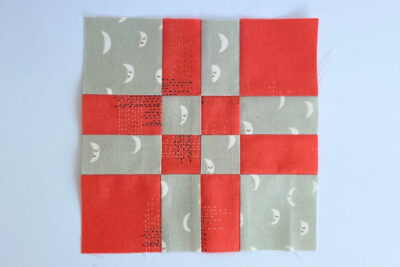
Mini Squares Block:
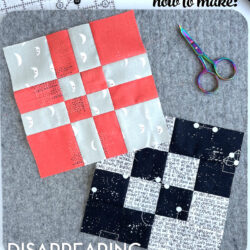
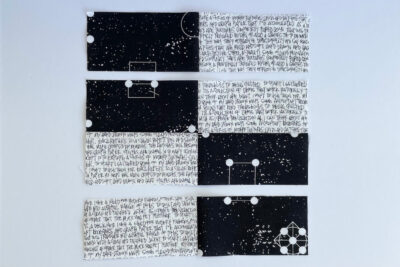
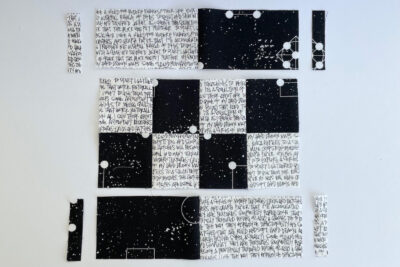
- Take four 4½” squares, two of one fabric A and two of fabric B. Sew them together into a four patch block with the fabrics alternating.

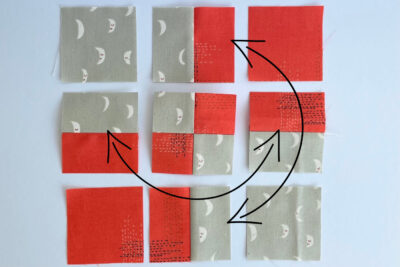
- Cut across the whole block 1½” from either side of both seams.
- Swap the two central vertical-seam rectangle units with each other, and then swap the two central horizontal-seam rectangle units with each other.
- Now sew the units together into three rows.
- Then finish the block by sewing the three rows together.
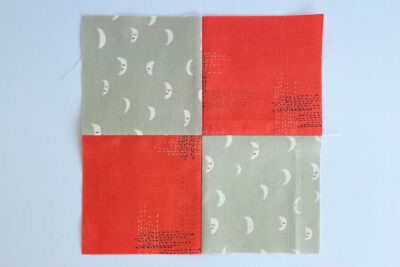
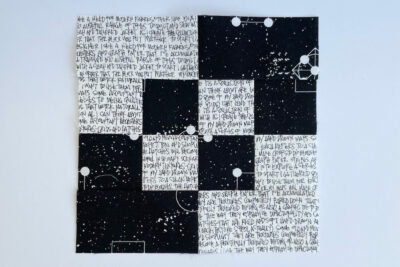
- (photo of finished block)

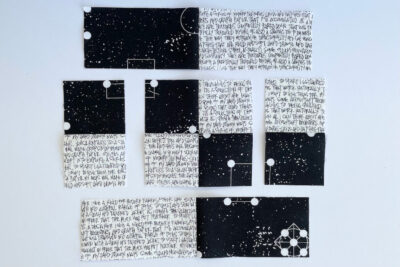
Corners Block:
- Take four 4½” squares, two of Fabric A and two of Fabric B. Sew them together into a four patch blocks with the fabrics alternating.
- Cut across the whole block 2” above and below the horizontal seam.
- Then cut 2” either side of the vertical seam but only on the middle section.
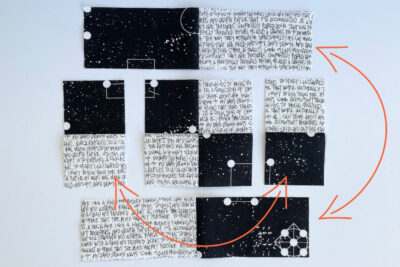
- Swap the two long horizontal units with each other, and then swap central horizontal-seam rectangle units with each other.
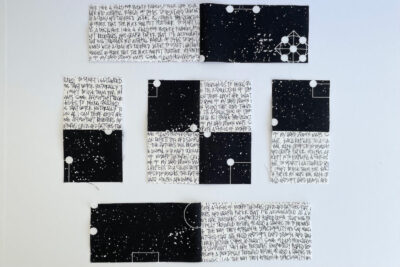
- Sew the units in the central section together into a row.
- Trim 3¾” from either side of the central seam in both long horizontal units.
- Now sew these to the row from step five.
About the Designer

Amy lives in the north of England with her husband and son. When she’s not sewing and quilting, Amy can usually be found baking or reading. You can find her on Instagram @amyatthegate
More Great Projects by Amy
The Ruler Rules | digital course
Cleaning your sewing machine | Top tips
Press Perfection | Top pressing tools

Would there be a problem with using 5” block? TIA!!I
Is it possible to do the corners block in a bigger size, and what would the cuts sizes be?
Fairly new quilter.
Most of the time “upsizing” a quilt block is not a matter of simple math, So there’s not really an easy way to change the size of this block. I’m sorry!
Does pressing to one (dark) side consistently impact how the blocks go together? Or should seams be pressed open? Thanks!
It’s really personal preference. Some quilters always press the seams open. I prefer to press to the side consistently. Do whatever works best for you.
For the four corners block, could you not just turn the center piece one-quarter turn, rather than moving all the other cut pieces?
I’ll ask Amy, but I’m pretty sure she does it that way to keep the fabric all running in the same direction. If you’re not working with directional prints, it would not matter.
Hi Marian,
Both these blocks were deigned specifically with directional prints in mind. Rotating any of the pieces would disrupt the fabric print’s direction.
Plus the extra movement I have for the corners blocks means the fabrics as a whole switch positions too and personally I think that adds to the fun of a disappearing patch! In my example the black fabric starts top left and bottom right; by moving the way I show in the tutorial the black pieces end up in the opposite corners. It’s just gives much more of an overall change the way I have moved the pieces around.
Amy 🙂
Melissa, I agree that our creative process must be protected vigorously through copyrights. Regarding your copyright info on the Disappearing 9 Patch, this technique has been taught be other quilters for years, Jenny Doan is one example. She also teaches other “disappearing” blocks. How can a copyright be valid if others are teaching it, and the info is available for free on the net?
Similar to recipes, the copyright refers to the exact text and images from the site. It is possible to copyright images and specific instructions. You can’t copyright a block. For example, no one owns the copyright on an Ohio Star Block or for “chocolate chip cookies” for example. You could copyright your exact words in a quilt pattern that teaches how to make an Ohio Star Quilt Block. The same with the images of the finished blocks.
The statement came about because many (I’m talking hundreds) stores were printing out pages from my blog and selling them in their stores and online. Even the free tutorials. I’d prefer not to have the statement there, but have been burned in the past. I would never claim copyright to a quilt block, that’s impossible. They’ve been around for YEARS. I just got the new Barbara Barrikman quilt block encyclopedia and many date back to before the 1900’s. I’m not stating I invented this technique and am clear to state that frequently on the blog.