• Skip to primary navigation
  • Skip to main content
  • Skip to primary sidebar

The Polka Dot Chair logo

  • SEWING
    • Free Sewing Patterns
    • Bag Patterns
    • Costumes
    • Apparel
    • Learn to Sew
    • Beginner Friendly
    • Embroidery Projects
    • Tips & Techniques
    • All Sewing
  • QUILTING
    • Quilt Blocks
    • Learn to Quilt
    • Free Patterns
    • Quilt Patterns
    • All Quilting
  • CRAFTS
    • Disney
    • Cricut
    • Printables
    • All Crafts
  • HOLIDAYS
    • Seasonal Projects
    • Valentine’s Day
    • Easter
    • 4th of July
    • Halloween
    • Thanksgiving
    • Christmas
    • All Holidays
  • TUTORIALS
  • ABOUT
    • About Me
    • My Fabric Collections
    • Published Books
    • Press
    • FAQ’s
    • Contact
  • SUBSCRIBE
  • SHOP
menu icon
go to homepage
  • SHOP
  • TUTORIALS
  • SEWING
  • QUILTING
  • SUBSCRIBE
  • CRAFTS
  • HOLIDAY PROJECTS
  • ABOUT
    • Published Books
    • My Fabric Collections
  • CONTACT
    • Facebook
    • Instagram
    • YouTube
  • subscribe
    search icon
    Homepage link
    • SHOP
    • TUTORIALS
    • SEWING
    • QUILTING
    • SUBSCRIBE
    • CRAFTS
    • HOLIDAY PROJECTS
    • ABOUT
      • Published Books
      • My Fabric Collections
    • CONTACT
    • Facebook
    • Instagram
    • YouTube
  • ×

    Home » Sewing

    18″ Doll Sleeping Bag Sewing Pattern

    Updated: Apr 5, 2022 by Melissa Mortenson · This post may contain affiliate links · This blog generates income via ads · 27 Comments

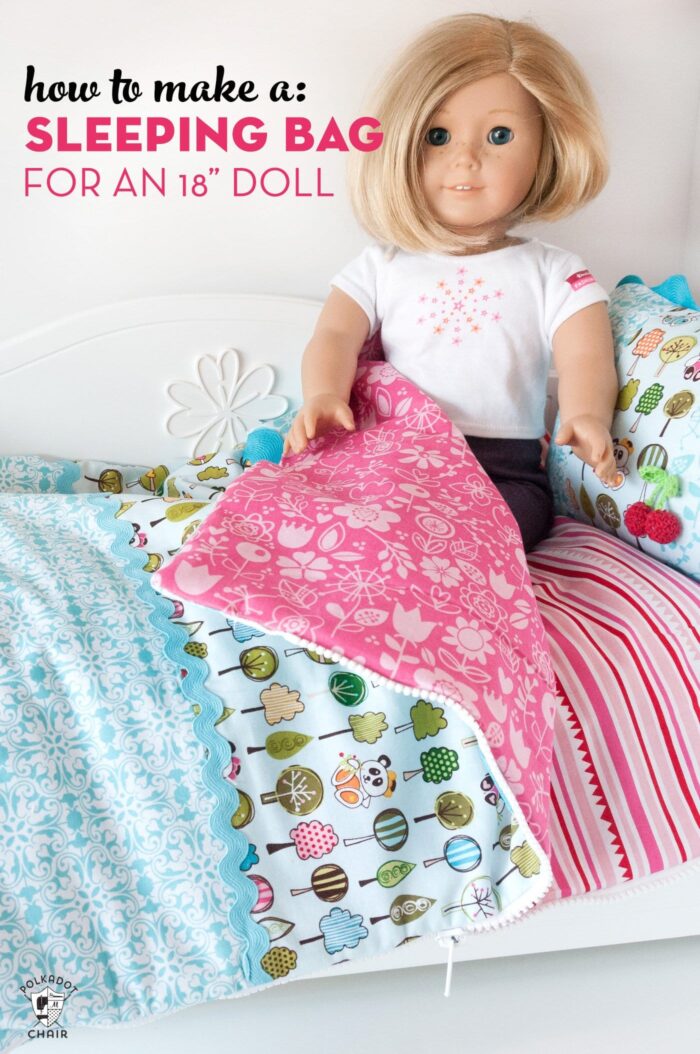
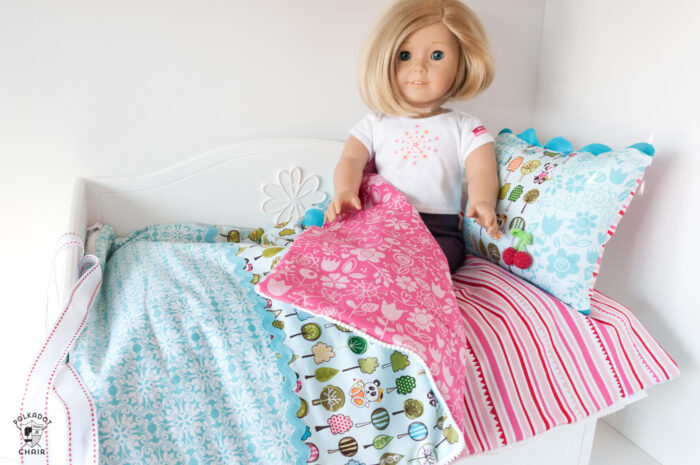
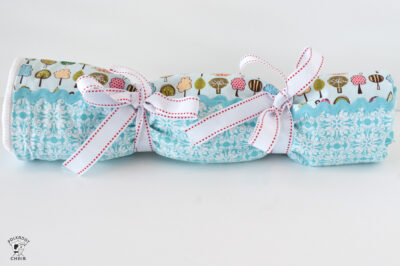
    Today I’m going to show you how to make this fun and easy sleeping bag, for an American Girl doll (or any other 18″ doll)! Just a note; this doll sleeping bag sewing pattern has a zipper in it!! But do NOT be afraid!! Zippers are NOT SCARY! Just go slow and you will be fine.

    My girls loved playing with American Girl Dolls when they were younger. They had a few different dolls and enjoyed dressing them up and taking them with them on adventures. They loved reading the books that went along with the dolls just as much as the dolls themselves. Which made me a fan.

    Table of Contents
    • Sewing Pattern for a Sleeping Bag for an 18″ Doll
    • Supplies and Cutting Directions for the Sleeping Bag and Matching Pillow
    • Construction Steps
    • How to Make a Matching Pillow

    I’m excited to be sharing with you a fun project from the archives. This sewing tutorial for a sleeping bag sized for an 18″ doll. This tutorial dates all the way back to 2012 if you can believe that. It’s been cleaned up, improved and is “all-around” more user-friendly! Enjoy!

    Sewing Pattern for a Sleeping Bag for an 18″ Doll

    Here’s what you need to make this project: All fabric shown is from the Sunny Happy Skies Fabric Line by Riley Blake. This line is now a few years old and I do not believe it is still for sale.
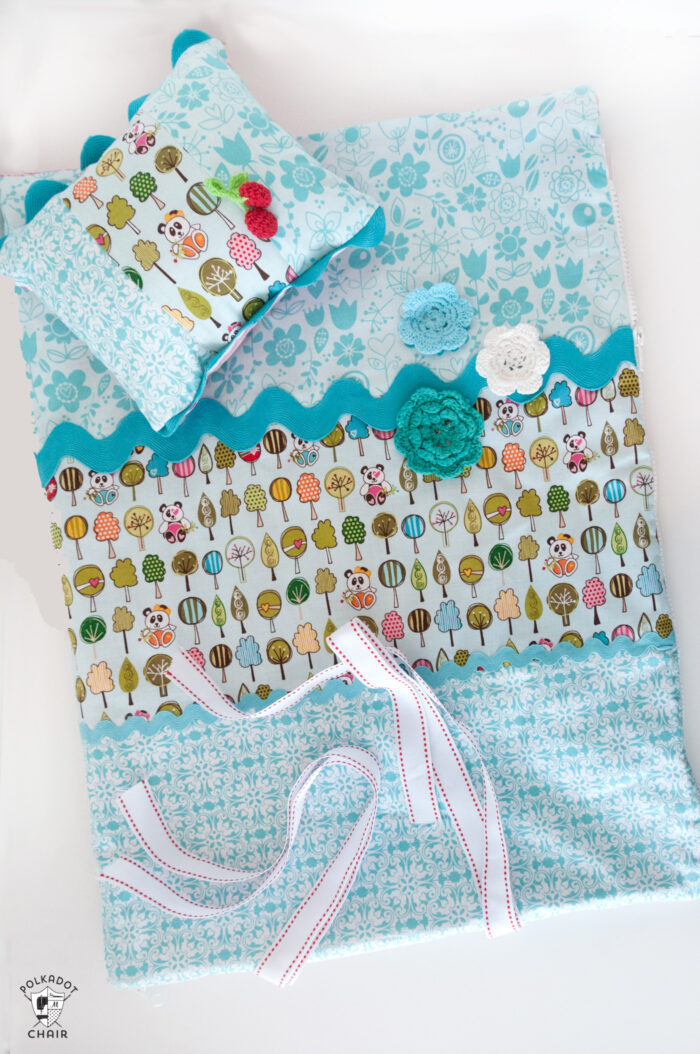
    Supplies and Cutting Directions for the Sleeping Bag and Matching Pillow

    • 3 pieces of fabric 8″ x 36″ for the outside of the sleeping bag 
    • 2 pieces of fabric 18.5″ x 23″ for the bag lining 1, 
    • 36″ separating zipper- you could use a parka zipper- the zipper MUST separate, it’s very important 
    • Quilt Batting- I recommend something fluffy (you can use 2 layers if you like) 
    • 1 yd jumbo Riley Blake rick rack 1 yd medium Riley Blake rick rack (optional) 
    • 2 pieces of ribbon 36″ each 
    • If desired, embellishments for the sleeping bag, I used crocheted flowers.
    • Supplies For the pillow:
    • 3 strips of fabric 3.5″ x 8″ (for pillow front)
    • 1 piece of fabric 8″ x 9″ (for pillow back) 
    • 2 pieces jumbo rick rack cut to 9″ wide stuffing

    All seams are ¼″

    Construction Steps

    Step One: Create the Sleeping Bag Outside

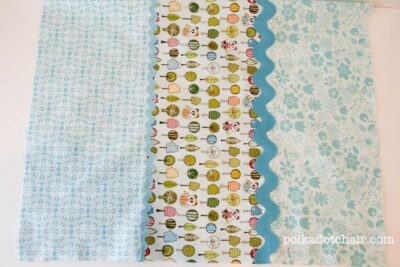
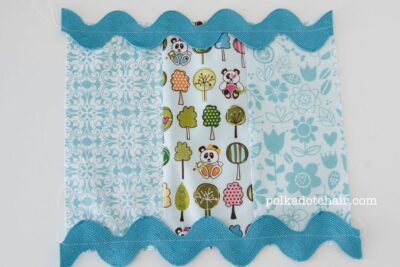
    Stitch the 3, 3″ x 36″ strips of fabric together along the 36″ sides. Press seams either open or to one side. It does not matter which way you press.

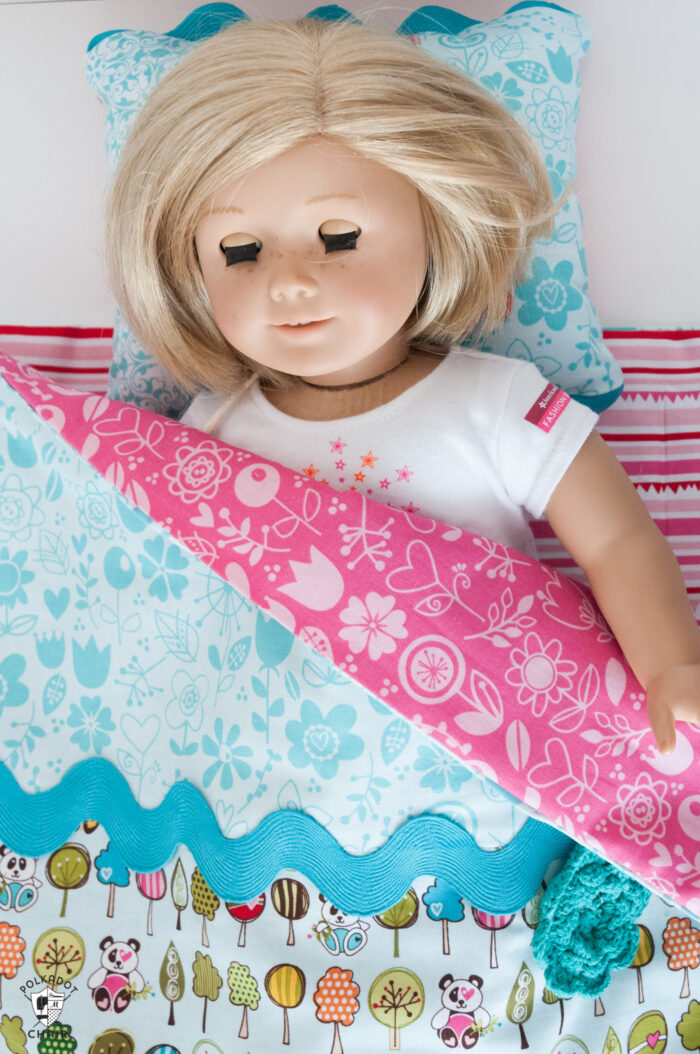
    If desired, apply jumbo and medium rick rack to the sleeping bag front over the top of the seams between the strips. You can stitch down the center of the ric rac or iron it on using fusible seam tape. Since this is a project that may take a lot of wear and tear, I recommend stitching it in place. The ric rack is optional. Add it only if you like it.

    Step Two: Add the Ribbon Ties to the Sleeping Bag

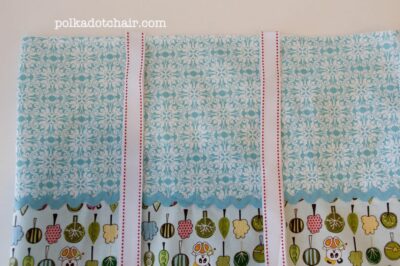
    Fold the two 36″ pieces of ribbon in half lengthwise and stitch to the bottom of the sleeping bag on what will be the back.  Think of the sleeping bag as a book; it will open and one side will be the front and one side the back. When folded up and zipped the sleeping bag will be approx 18″ x 23″.

    Stitch the first piece of ribbon 6″ in from the outside edge of the sleeping bag. Stitch the 2nd piece of ribbon 6″ away from the first piece.

    Step Three: Add the Zipper

    Separate your zipper- Mark the wrong side of the zipper with a marking pen (sometimes it’s easy to mix up the right and wrong sides of the zipper).

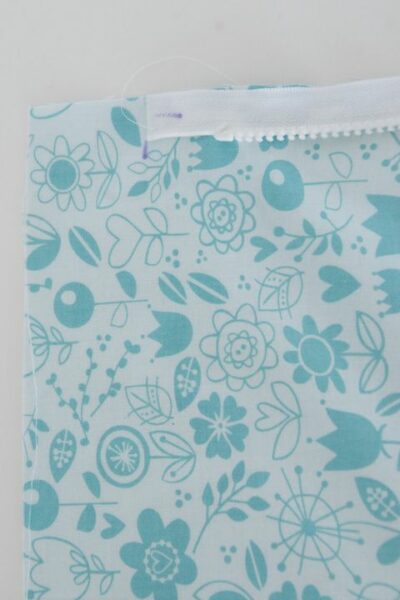
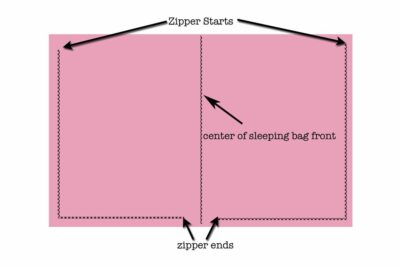
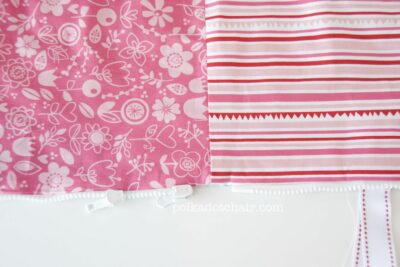
    Pin one side of the zipper to one half of the sleeping bag- starting 1″ in from the center bottom of the bag and wrapping around to the top of the sleeping bag. 

    You will pin the zipper upside down (so that the right side of the zipper faces the right side of the fabric) with the teeth of the zipper facing IN. (see photo)

    To get the zipper to go around the corner- clip a “V” into the zipper tape where it meets the corner of the sleeping bag. The zipper will reach to within 1″-2″ of the top of the sleeping bag. It does not need to go all the way to the top.

    Now, pin the other part of the zipper to the other half of the sleeping bag so that the zippers are a mirror image of each other.

    illustration of zipper layout for sleeping bag

    Using your zipper foot- stitch the zipper to the sleeping bag front. It is helpful to “move” the zipper pull as you sew so that it does not get in the way of your zipper foot.

    TIP:

    >TEST your zipper before you proceed.  Make sure you have it installed correctly before moving on to the next step. 

    Step Four: Create the Bag Lining

    Sew the two, 18.5″ x 23″ pieces of fabric together along the 23″ seams to form the bag lining. Press seam open. 

    Step Five: Add the Batting

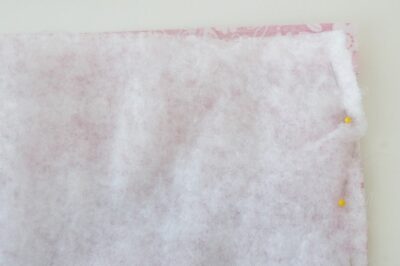
    Place sewn bag lining piece right sides together with bag outside piece. Cut a piece of batting to the size of your bag. Place this on the wrong side of the bag lining piece.  

    >You will have a “sandwich” with batting at the top, then bag lining and bag front. Remember bag lining and bag front are right sides together.

    batting in sleeping bag

    Step Six: Sew Sleeping Bag Front & Lining Pieces Together

    Start stitching at one top corner of the sleeping a bag, and stitch all the way around, leaving a 3-4″ opening on the top of the bag to turn it right side out. Make sure you don’t catch your ribbon pieces in the seams. 

    Stitch along the line you JUST made to attach your zipper- this will ensure that the zipper is placed correctly in the bag.

    Note: you are still sewing with your zipper foot. Clip corners and turn right side out.

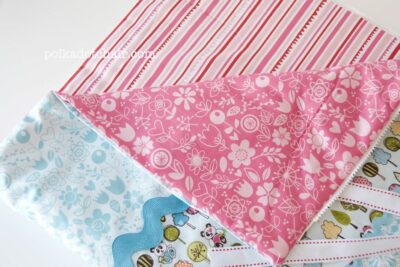
    sleeping bag folded over

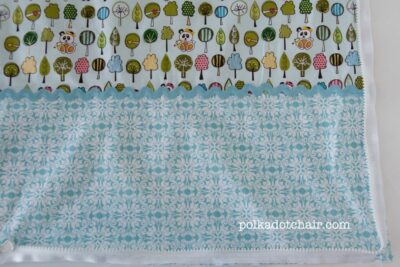
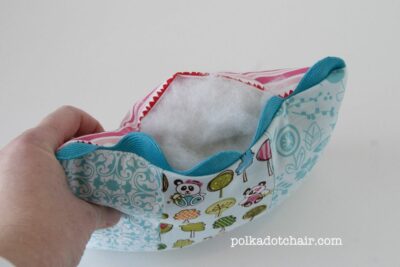
    It should look like this, with an opening like this at the top:

    closing the opening in the sleeping bag

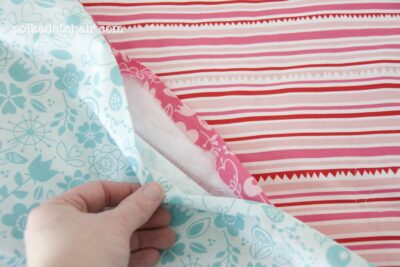
    And the base of the zipper should look like this:

    zipper detail of sleeping bag

    Hand stitch opening in the top of the sleeping bag closed.

    If desired: To finish the sleeping bag, hand stitch on crocheted flowers to the front. 

    How to Make a Matching Pillow

    To make the pillow, stitch the three 3.5″x8″ pieces of fabric together along the 8″ sides. Press seams open

    Adding ric rac to pillow front piece

    Stitch 2 pieces of rick rack each 9″ long to the top and bottom of pillow piece. Stitch right down the center of the rick rack.

    >Place right sides together and stitch 8″ x 9″ piece of fabric to pillow front. Leave a 2″ opening to turn pillow right side out. Stuff pillow and hand stitch opening closed.
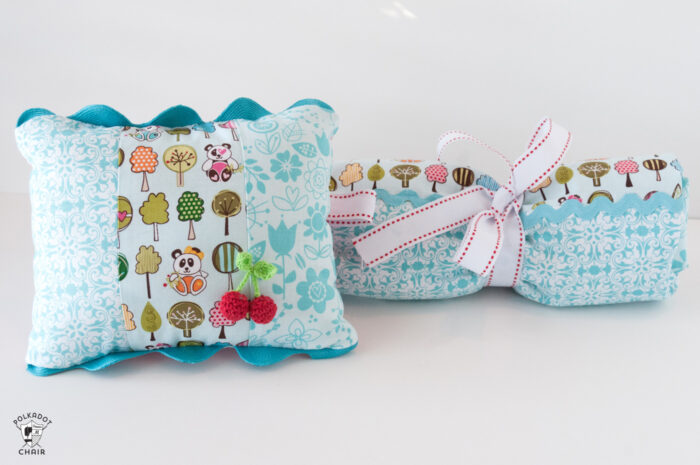
    adding stuffing to pillow

    More Doll Sewing Patterns That You May Like:

    Wonderland Mini Quilt Pattern (Doll Sized)

    Doll Twirly Skirt Sewing Pattern

    Apron Sewing Tutorial for an 18″ Doll

    Doll Carrier and Backpack Tutorial
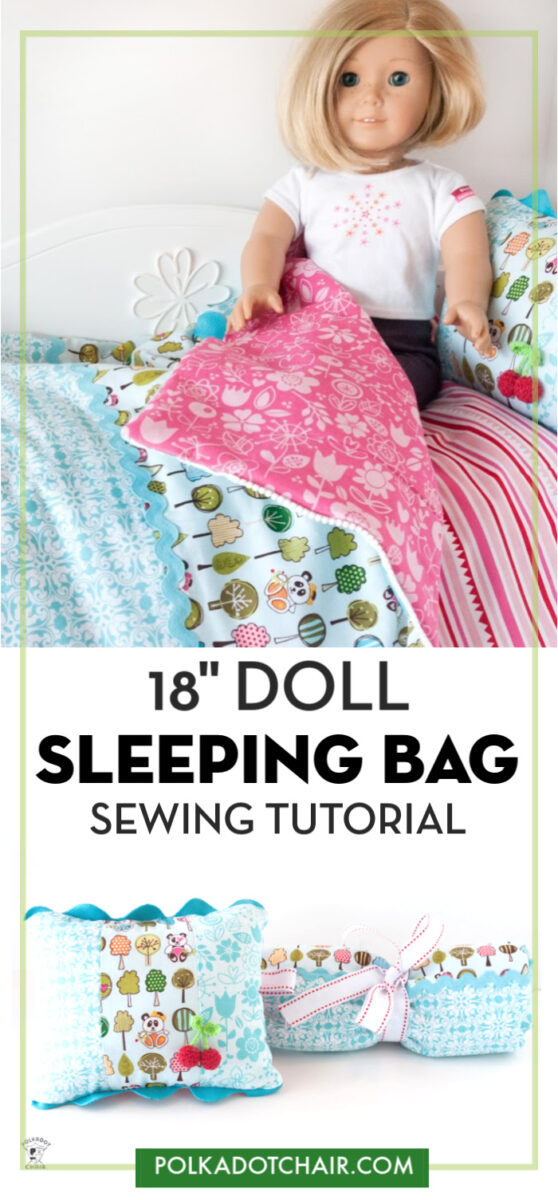
    More Projects You May Enjoy

    • Thread Weights Used In Machine Quilting Explained
    • New! All Ears Pouch Pattern & Sew Along
    • Sewing Machine Needles Explained & Printable Guide
    • Color Combination Ideas for your Next Quilt or Sewing Project

    • Share
    • Email

    About Author

    Melissa Mortenson

    Melissa Mortenson is a blogger, designer, and content creator. She is the Polka Dot Chair blog founder and has been sharing fresh and creative ideas with readers since 2008. She is the author of “Project Teen, Handmade Gifts your Teen will Actually Love.” Her work and designs have been featured on HuffPost, TODAY, Pioneer Woman, HGTV, BuzzFeed, Better Homes & Gardens, and many other established publications. Her first fabric line, “Derby Style,” debuted in January 2015 through Riley Blake Designs.  Additional fabric collections have followed it in subsequent years. A mom of 3, she considers herself lucky to be living in Kentucky.

    Reader Interactions

    Comments

    1. Tracy VT says

      April 20, 2012 at 8:30 am

      I’ll take mine ‘upsized’! I’d love the fabric choices for me!

      Reply
    2. Amy says

      April 20, 2012 at 10:23 am

      Oh, this is completely precious! My daughter would LOVE this!! Pinning! Thank you for sharing!! 🙂

      Reply
    3. LeighAnn says

      April 20, 2012 at 12:41 pm

      Those are sweet and. A great way to use up scraps! I’m thinking Christmas presents!

      Reply
    4. Christine says

      May 29, 2012 at 12:46 pm

      This way to adorable. I can’t stand it. The fabrics you picked are gorgeous.

      Reply
    5. dee says

      August 03, 2012 at 6:42 pm

      Hi
      I used your directions and made 2 sleeping bags for a girl with 2 American girl dolls. I had no trouble following your steps! (Okay…I put the zipper in backwards with the tab on the inside of the bag….found the problem before all was done!) I’m a quilter but I don’t sew using zippers so I really appreciate the photos.
      thanks
      dee

      Reply
    6. Lisa says

      December 06, 2012 at 10:57 pm

      Hi!
      Thank you so much for posting this tutorial! I just finished the sleeping bag and pillow for my daughter’s American Girl doll. It is adorable, and the tutorial was so easy to follow! The pictures were really helpful, too! Thanks again!

      Reply
    7. Donna Rice says

      February 15, 2013 at 3:03 am

      Very excited! Can’t wait to make. Thank you for sharing.

      Reply
      • Melissa Mortenson says

        February 15, 2013 at 9:55 am

        So glad you like it!

        Reply
    8. momof2cubs says

      February 19, 2013 at 1:58 pm

      This is nice. It gives me confidence in making things for my daughters doll, instead of buying commercialized things. I want to make that effort for her. 🙂

      Reply
    9. jade says

      August 23, 2013 at 6:08 pm

      nossa!Eu amei seu cite!!!!!

      Reply
    10. Shelley says

      February 19, 2014 at 4:46 pm

      I made one of these today, I am so proud of myself. It is my first project with a zipper, your instructions are very clear, couldn’t be better. The only difference between mine and the pictured sleeping bag is that I chose only one print instead of three. Thanks for sharing. I will be making another to use up scrap fabric.

      Reply
      • Melissa Mortenson says

        February 26, 2014 at 11:10 am

        I’m so glad that you were able to use the tutorial!! My daughter still plays with her sleeping bag, it’s come in very handy!

        Reply
    11. Quilter CA says

      June 22, 2014 at 7:15 pm

      Finished mine today. Unfortunate part for me, the sleeping bag is actually inside out and the ribbon is now forever encapsulated inside with the lining. Clearly, I misunderstood something, not sure where it all went wrong. Good news, I am the only one who knows it is inside out!

      Reply
    12. melissa says

      July 27, 2014 at 10:06 pm

      Hi,
      I like this sleeping bag (i’m a beginner sewer). I have one quesiton-what’s the size of the sleeping bag when complete? I don’t plan to use 3 strips of fabric, but one piece instead but it doesn’t seem from the materials that the would be line up-for example :
      3 pieces of fabric 8″ x 36″ for the outside of the sleeping bag
      2 pieces of fabric 18.5″ x 23″ for the bag lining 1

      when I do the deminsions-it doesn’t seem to match up? Can you help? I just want to use one piece of fabric; so what’s the deminisions for front and back??

      Reply
    13. Stephanie says

      March 16, 2015 at 12:34 pm

      Made this for my niece who loves Wonder Woman and her American Girl doll. I gave her a Wonder Woman sleeping bag for Christmas and wanted her doll to have one, too. I’m a very novice seamstress but it was easy and turned out great. Couldn’t find Wonder Woman fabric so did a red, white & blue theme w/ gold trimmings.

      Reply
    14. Karen Keene says

      March 31, 2015 at 1:26 pm

      I just turned my sleeping bag inside out and the zipper is in the INSIDE of the bag! What did I do wrong? Feeling frustrated

      Reply
      • Melissa Mortenson says

        April 06, 2015 at 12:19 pm

        The zipper has a right and a wrong side the same way fabric does. When you sew the zipper in make sure that the right side of the zipper is facing the right side of the fabric. My guess is you had it the other way around.

        Reply
    15. Laurie says

      November 12, 2016 at 12:04 pm

      What do you mean when you say cut a V in the zipper at the corner? I’ve never turned a corner with a zipper before. Thank you!

      Reply
    16. Marcia Hendrix says

      October 22, 2017 at 1:38 pm

      Hi – can you please tell me where I can find the crocheted appliques – I checked the Riley Blake site – I cannot find them.

      Thank you – Marcia

      Reply
    17. nana says

      December 24, 2017 at 2:40 pm

      so creative. can’t wait to make this. So generous of you to share with such wonderful instructions and pictures. thank you!

      Reply

    Leave a Reply Cancel reply

    Your email address will not be published. Required fields are marked *

    This site uses Akismet to reduce spam. Learn how your comment data is processed.

    Primary Sidebar

    Hello! It’s nice to meet you.

    I’m Melissa. I like to design things, like fabric, printables, and projects.

    I’m also a Mom and a Maker. I am like most of you, just trying to do my best every day. Some days I succeed, many days I fail.  I find joy in creating, if you do too, then I hope that you find something here bring a little “happy” to your life.  Find out more about me here.

    COPYRIGHT POLICY

    All my images and text are copyrighted. You may NOT use any images from this site in any kind of Video (this includes YouTube). If you would like to feature my work, you may use ONE (1) NON-COLLAGED image and must “follow” link back to my original blog post. You may NOT edit, crop, or change my images in any way without written permission. You MAY NOT print out or copy and distribute any text, images or patterns from this site. All patterns, content, instructions, and templates are for personal use ONLY! Thank you! Violators will be reported.

    Footer

    ↑ back to top

    About

    • Privacy Policy
    • Disclaimers
    • About Melissa
    • Instagram
    • Facebook
    • YouTube
    • Pinterest

    Newsletter

    • Sign Up! for emails and updates

    Contact

    • Contact
    • FAQ
    • Press
    • Published Books
    • Fabric Collections

    Welcome to the Polka Dot Chair! Here you’ll find easy, step-by-step, sewing, quilting, and crafting projects. We design projects for Makers of all skill levels. Beginners are welcome!

    DISCLAIMER:

    While every effort has been made to ensure the accuracy of the content on this website, the information is made available without warranty of any kind. The Polka Dot Chair accepts no responsibility or liability, whether direct or indirect, as to the currency or accuracy of the information, nor any consequence of its uses. This website is not intended to substitute the advice of a professional.

    Copyright © 2022 Polka Dot Chair

    [ Placeholder content for popup link ] WordPress Download Manager - Best Download Management Plugin