• Skip to primary navigation
  • Skip to main content
  • Skip to primary sidebar

The Polka Dot Chair logo

  • SEWING
    • Free Sewing Patterns
    • Bag Patterns
    • Costumes
    • Apparel
    • Learn to Sew
    • Beginner Friendly
    • Embroidery Projects
    • Tips & Techniques
    • All Sewing
  • QUILTING
    • Quilt Blocks
    • Learn to Quilt
    • Free Patterns
    • Quilt Patterns
    • All Quilting
  • CRAFTS
    • Disney
    • Cricut
    • Printables
    • All Crafts
  • HOLIDAYS
    • Seasonal Projects
    • Valentine’s Day
    • Easter
    • 4th of July
    • Halloween
    • Thanksgiving
    • Christmas
    • All Holidays
  • TUTORIALS
  • ABOUT
    • About Me
    • My Fabric Collections
    • Published Books
    • Press
    • FAQ’s
    • Contact
  • SUBSCRIBE
  • SHOP
menu icon
go to homepage
  • SHOP
  • TUTORIALS
  • SEWING
  • QUILTING
  • SUBSCRIBE
  • CRAFTS
  • HOLIDAY PROJECTS
  • ABOUT
    • Published Books
    • My Fabric Collections
  • CONTACT
    • Facebook
    • Instagram
    • Pinterest
    • YouTube
  • subscribe
    search icon
    Homepage link
    • SHOP
    • TUTORIALS
    • SEWING
    • QUILTING
    • SUBSCRIBE
    • CRAFTS
    • HOLIDAY PROJECTS
    • ABOUT
      • Published Books
      • My Fabric Collections
    • CONTACT
    • Facebook
    • Instagram
    • Pinterest
    • YouTube
  • ×

    Home » Crafts

    How to make Adorable Felt Flowers

    Updated: Jan 29, 2019 by Melissa Mortenson · This post may contain affiliate links · This blog generates income via ads · 1 Comment

    All of this cold weather has me itching for Spring! It may be cold now, but you can add a bit of “spring” to your week by creating these adorable felt flowers. Amy from Ameroonie Designs is here with us today showing you how. 
    Felt Flowers on white table

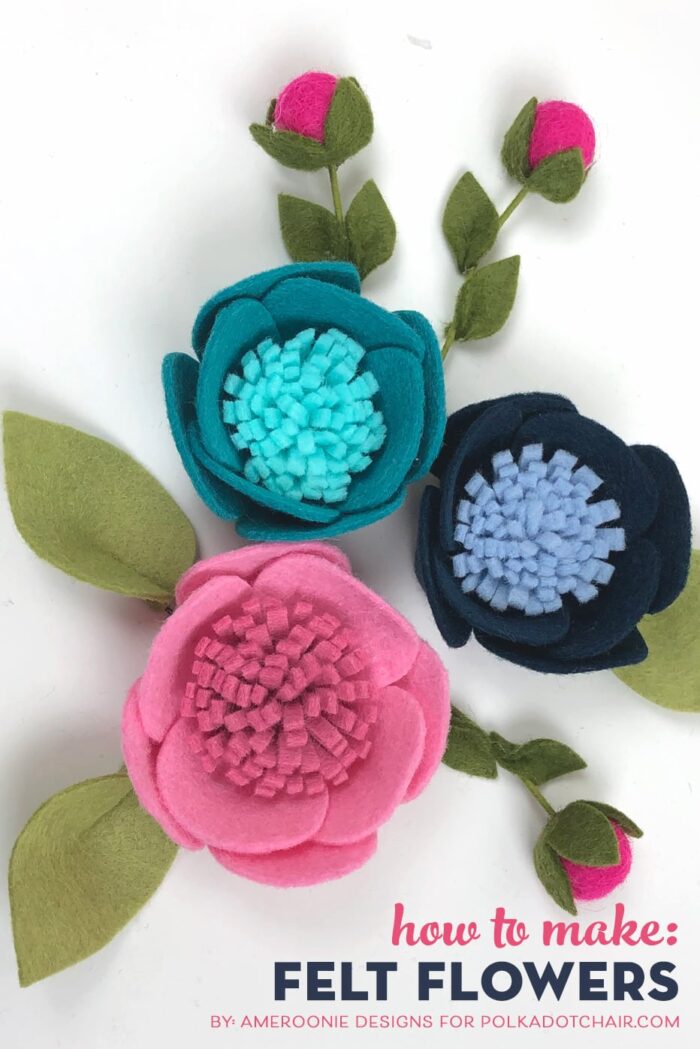
    Felt flowers are one of my very favorite things to create. They are versatile, fun and quick projects I can make for just about any occasion!

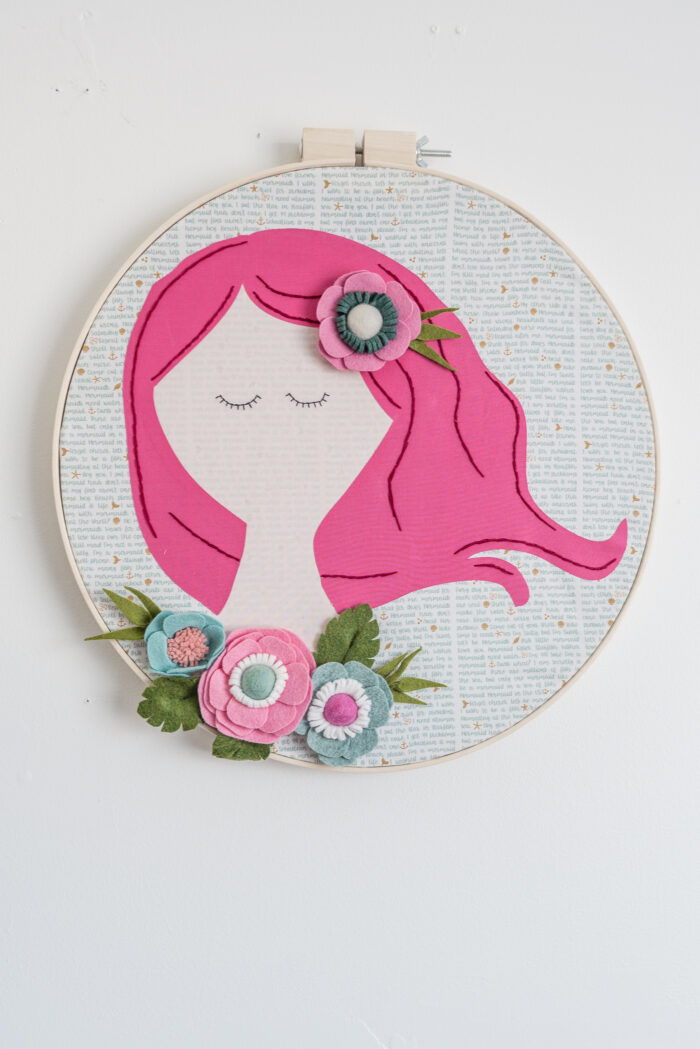
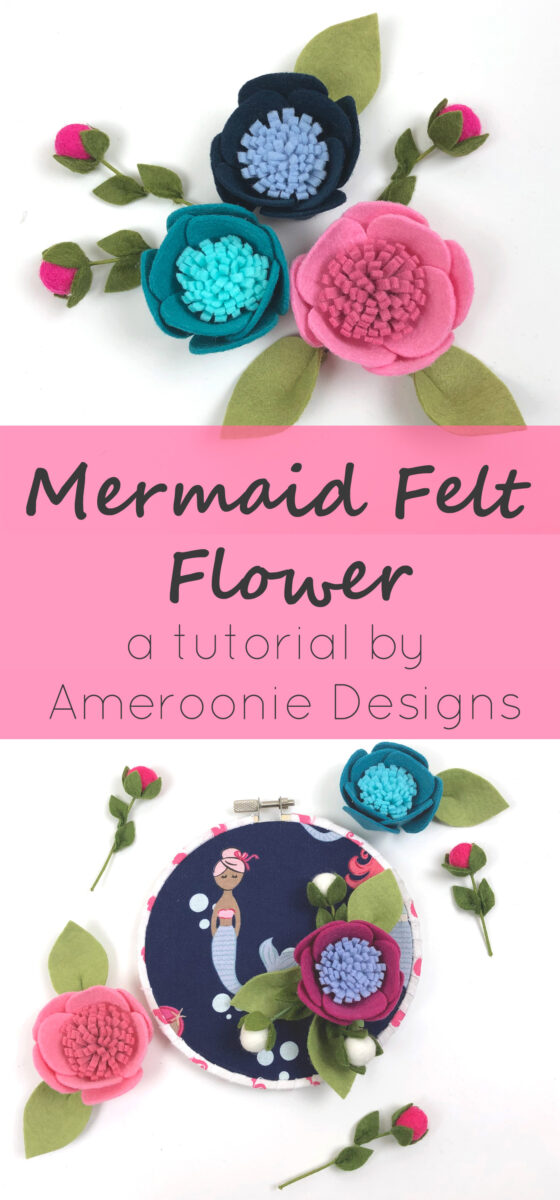
    These felt flowers were inspired by Melissa’s new fabric- Let’s Be Mermaids. They are simple to create and can be customized for any project you are making! The pattern includes the pieces needed to create the simple little pom flowers as well, but today’s tutorial is only going to cover the steps for creating the focal flower with the fringe center- I’m calling them my Mermaid flowers.


    If you would like a video tutorial for making this flower, I have one up on my YouTube channel.

    DIY Felt Flowers Tutorial:

    Felt Flowers on white table

    Supplies:

    To begin, you will need to print off the pattern pieces. I like to print off any pattern I’m using for felt on freezer paper sheets, but you can print them off onto regular paper as well if you have a different method you prefer for cutting out felt patterns.

    Felt, in the colors of your choice- this pattern uses two colors for the flower (one for the center and one for the petals) and two different shades of green for the leaves. I typically use wool blend felt for my flowers.

    Wire- for the leaves and pom flowers.

    If you are adding the mini pom flowers to your project, you will also need 3 of the extra small poms.

    Construction the Felt Flowers:

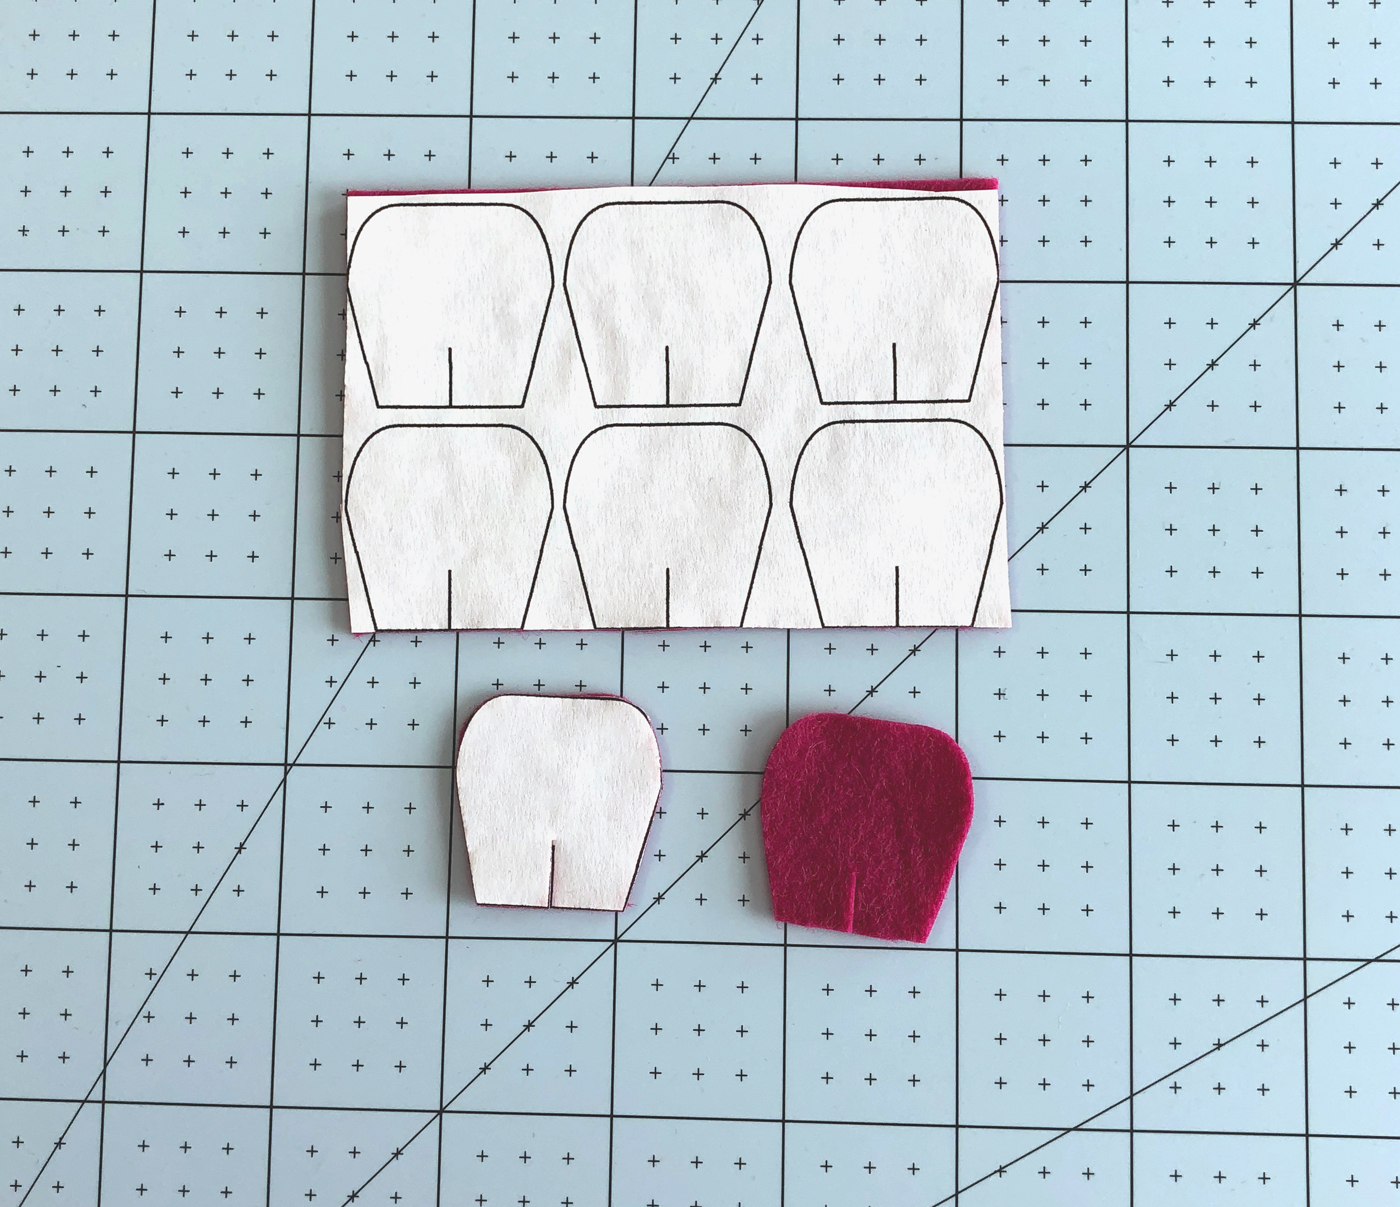
    If you are using freezer paper, begin by adhering it to the felt, a couple of seconds with a hot, dry iron is all it takes.

    Cut out all your shapes, including the slits in the petals.

    Remove all of the freezer paper.

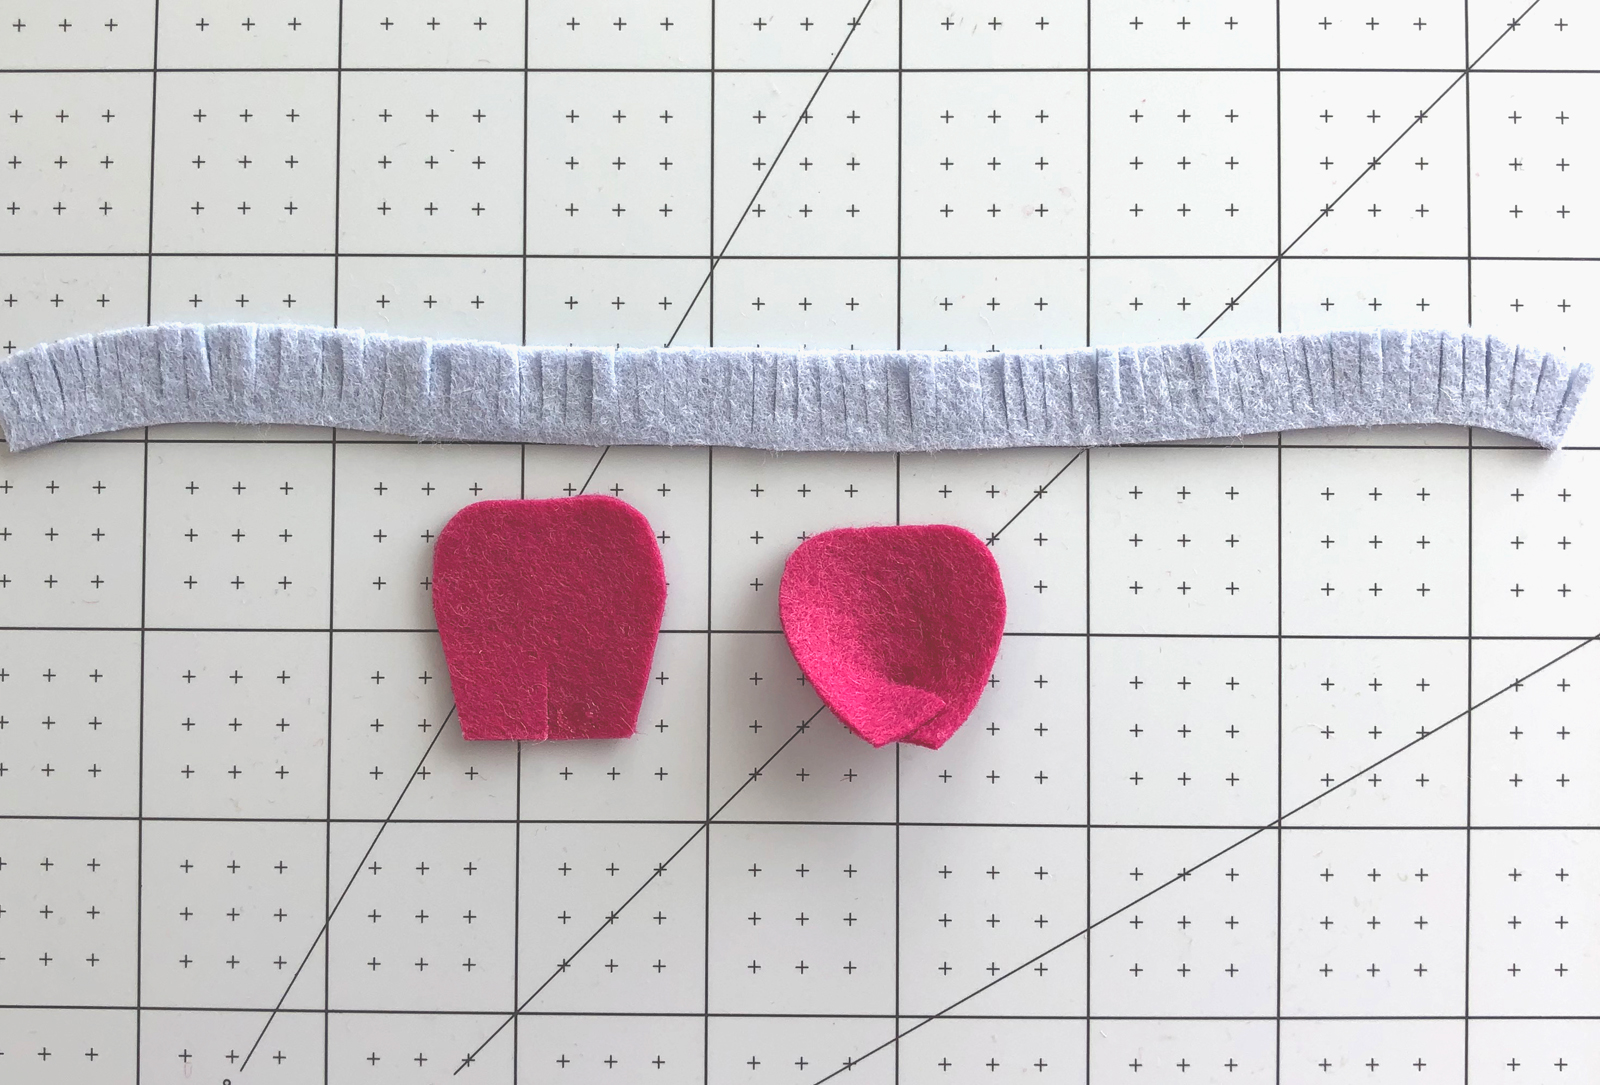
    Use scissors to cut fringe along the length of the long strip of felt. Cut about ¾ of the way through the strip.

    Place a small line of glue along the bottom edge of the fringed strip and roll it up. Keep the straight edge in line to create a flat bottom.

    Take each of the petals and put a dot of glue on one corner next to the slit.

    Cross over the second side of the slit to create a cupped shape to the petal.

    Add a small dot of glue to the point of a petal. Adhere it to the bottom of the fringed center.

    Place the second petal directly across from the first.

    Add the next two petals to fill in the space between the first two petals.

    Repeat with the next four petals, offsetting them so they are between the first row of petals.

    To make the leaves:

    Take a short piece of wire (1 ½″- 2″) and add a very thin amount of glue to the very end (about ¼″ worth) of your wire.

    Place your wire in the center of the bottom of the leaf and fold over.

    Press the felt well next to the wire, I will use my fingernail to get right up next to the wire.

    If you would like the tutorial for the felt pom flowers- you can find the YouTube video on my channel.


    Finishing:

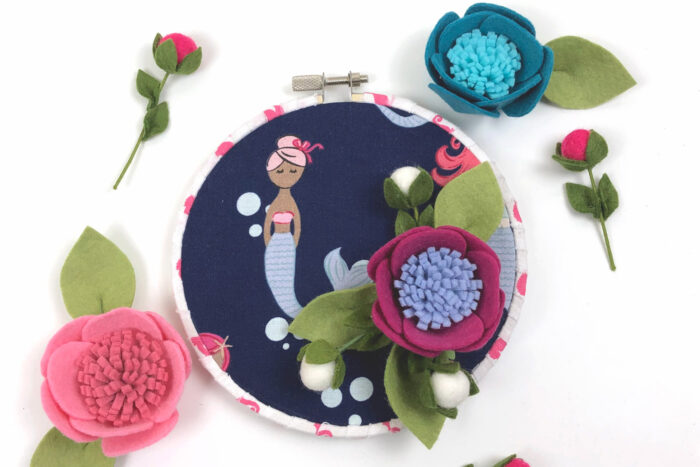
    I placed a bit of fabric in a small 5″ hoop. I wrapped the outside of the hoop with a ½″ wide strip of fabric before placing the feature fabric in the hoop.

    Arrange your flower and leaves to your liking and add them to the hoop with hot glue.

    A whole group of these hoops with flowers would be absolutely delightful- as you can see in pictures of Melissa’s booth at Quilt Market where she debuted this fabric. I had the great pleasure of making all the felt flowers for her hoops and was totally inspired by her gorgeous fabric.

    More Ideas:

    I hope you will enjoy making these fun flowers. They are so versatile, I can totally see them being used in hair accessories, on packages and in many variations of home decor.

    And if you want even more patterns for felt flowers- I have the patterns for all of these flowers, along with the felt banner for this project available in my Etsy shop. Once you get started, it’s hard to not add felt flowers to everything you make!

    Like this sign, I made for this post from Christmas.
    Have so much fun making all the felt flowers!
    xoxo,
    Amy


    About the Maker:

    Amy Chappell Bio Photo

    Hi! My name is Amy Chappell and I blog over at Ameroonie Designs. I currently live in Utah with my husband and 6 kids. I love being a mom but needed an outlet that would give me something to do that stayed done, enter sewing and creating. Love the satisfaction of taking fabric and ideas and making something new. I also love that blogging has given me a way to meet new people and find a community of amazing people who love fabric and sewing as much as I do.
    xoxo,
    Amy
    Ameroonie Designs
    www.amerooniedesigns.blogspot.com

    Other Great Projects by Amy:

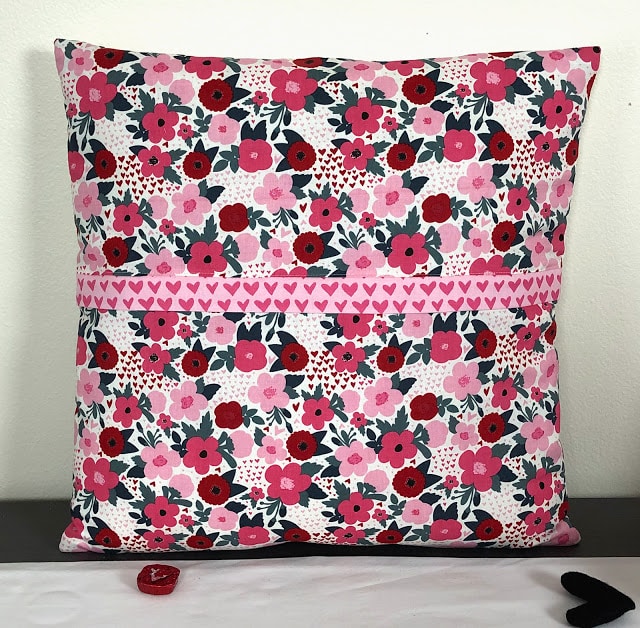
    How to make a pillow back with a hidden zipper

    Valentine’s Applique Pillow

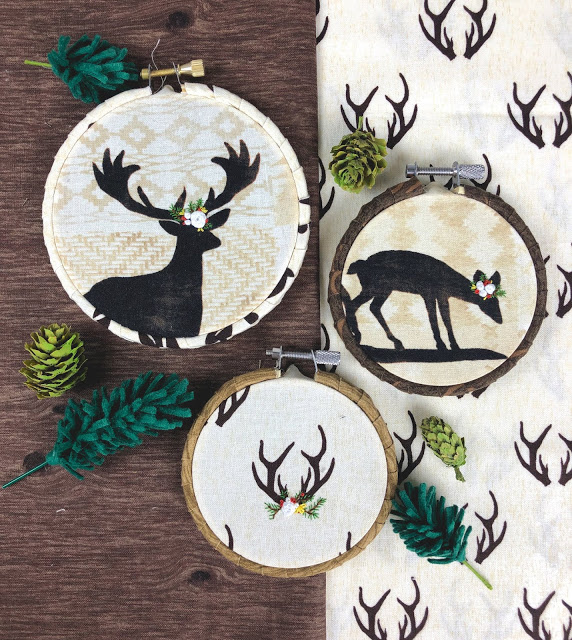
    Floral Crown Woodland Embroidery Hoop Tutorial

    You May Also Like:

    How to make a Magnolia Wreath

    20 Cute Projects to make with Pom Poms

    Free Winter Hand Embroidery Pattern


    Felt Flowers on white table

    More Projects You May Enjoy

    • DIY Splatter Paint Christmas Ornaments
    • How to Make a Retro Diorama Ornament
    • How to Make String Christmas Ornaments
    • How to Make a Halloween Potions Centerpiece & Free Printable Potions Jar Labels

    • Share
    • Email

    About Author

    Melissa Mortenson

    Melissa Mortenson is a blogger, designer, and content creator. She is the Polka Dot Chair blog founder and has been sharing fresh and creative ideas with readers since 2008. She is the author of “Project Teen, Handmade Gifts your Teen will Actually Love.” Her work and designs have been featured on HuffPost, TODAY, Pioneer Woman, HGTV, BuzzFeed, Better Homes & Gardens, and many other established publications. Her first fabric line, “Derby Style,” debuted in January 2015 through Riley Blake Designs.  Additional fabric collections have followed it in subsequent years. A mom of 3, she considers herself lucky to be living in Kentucky.

    Reader Interactions

    Comments

    1. Betty Hagewood says

      February 03, 2019 at 9:41 pm

      That is so pretty. I have a lot of different felt and now I know what to do with it. Thanks

      Reply

    Leave a Reply Cancel reply

    Your email address will not be published. Required fields are marked *

    This site uses Akismet to reduce spam. Learn how your comment data is processed.

    Primary Sidebar

    Hello! It’s nice to meet you.

    I’m Melissa. I like to design things, like fabric, printables, and projects.

    I’m also a Mom and a Maker. I am like most of you, just trying to do my best every day. Some days I succeed, many days I fail.  I find joy in creating, if you do too, then I hope that you find something here bring a little “happy” to your life.  Find out more about me here.

    COPYRIGHT POLICY

    All my images and text are copyrighted. You may NOT use any images from this site in any kind of Video (this includes YouTube). If you would like to feature my work, you may use ONE (1) NON-COLLAGED image and must “follow” link back to my original blog post. You may NOT edit, crop, or change my images in any way without written permission. You MAY NOT print out or copy and distribute any text, images or patterns from this site. All patterns, content, instructions, and templates are for personal use ONLY! Thank you! Violators will be reported.

    Footer

    ↑ back to top

    About

    • Privacy Policy
    • Disclaimers
    • About Melissa
    • Instagram
    • Facebook
    • YouTube
    • Pinterest

    Newsletter

    • Sign Up! for emails and updates

    Contact

    • Contact
    • FAQ
    • Press
    • Published Books
    • Fabric Collections

    Welcome to the Polka Dot Chair! Here you’ll find easy, step-by-step, sewing, quilting, and crafting projects. We design projects for Makers of all skill levels. Beginners are welcome!

    DISCLAIMER:

    While every effort has been made to ensure the accuracy of the content on this website, the information is made available without warranty of any kind. The Polka Dot Chair accepts no responsibility or liability, whether direct or indirect, as to the currency or accuracy of the information, nor any consequence of its uses. This website is not intended to substitute the advice of a professional.

    Copyright © 2022 Polka Dot Chair

    [ Placeholder content for popup link ] WordPress Download Manager - Best Download Management Plugin