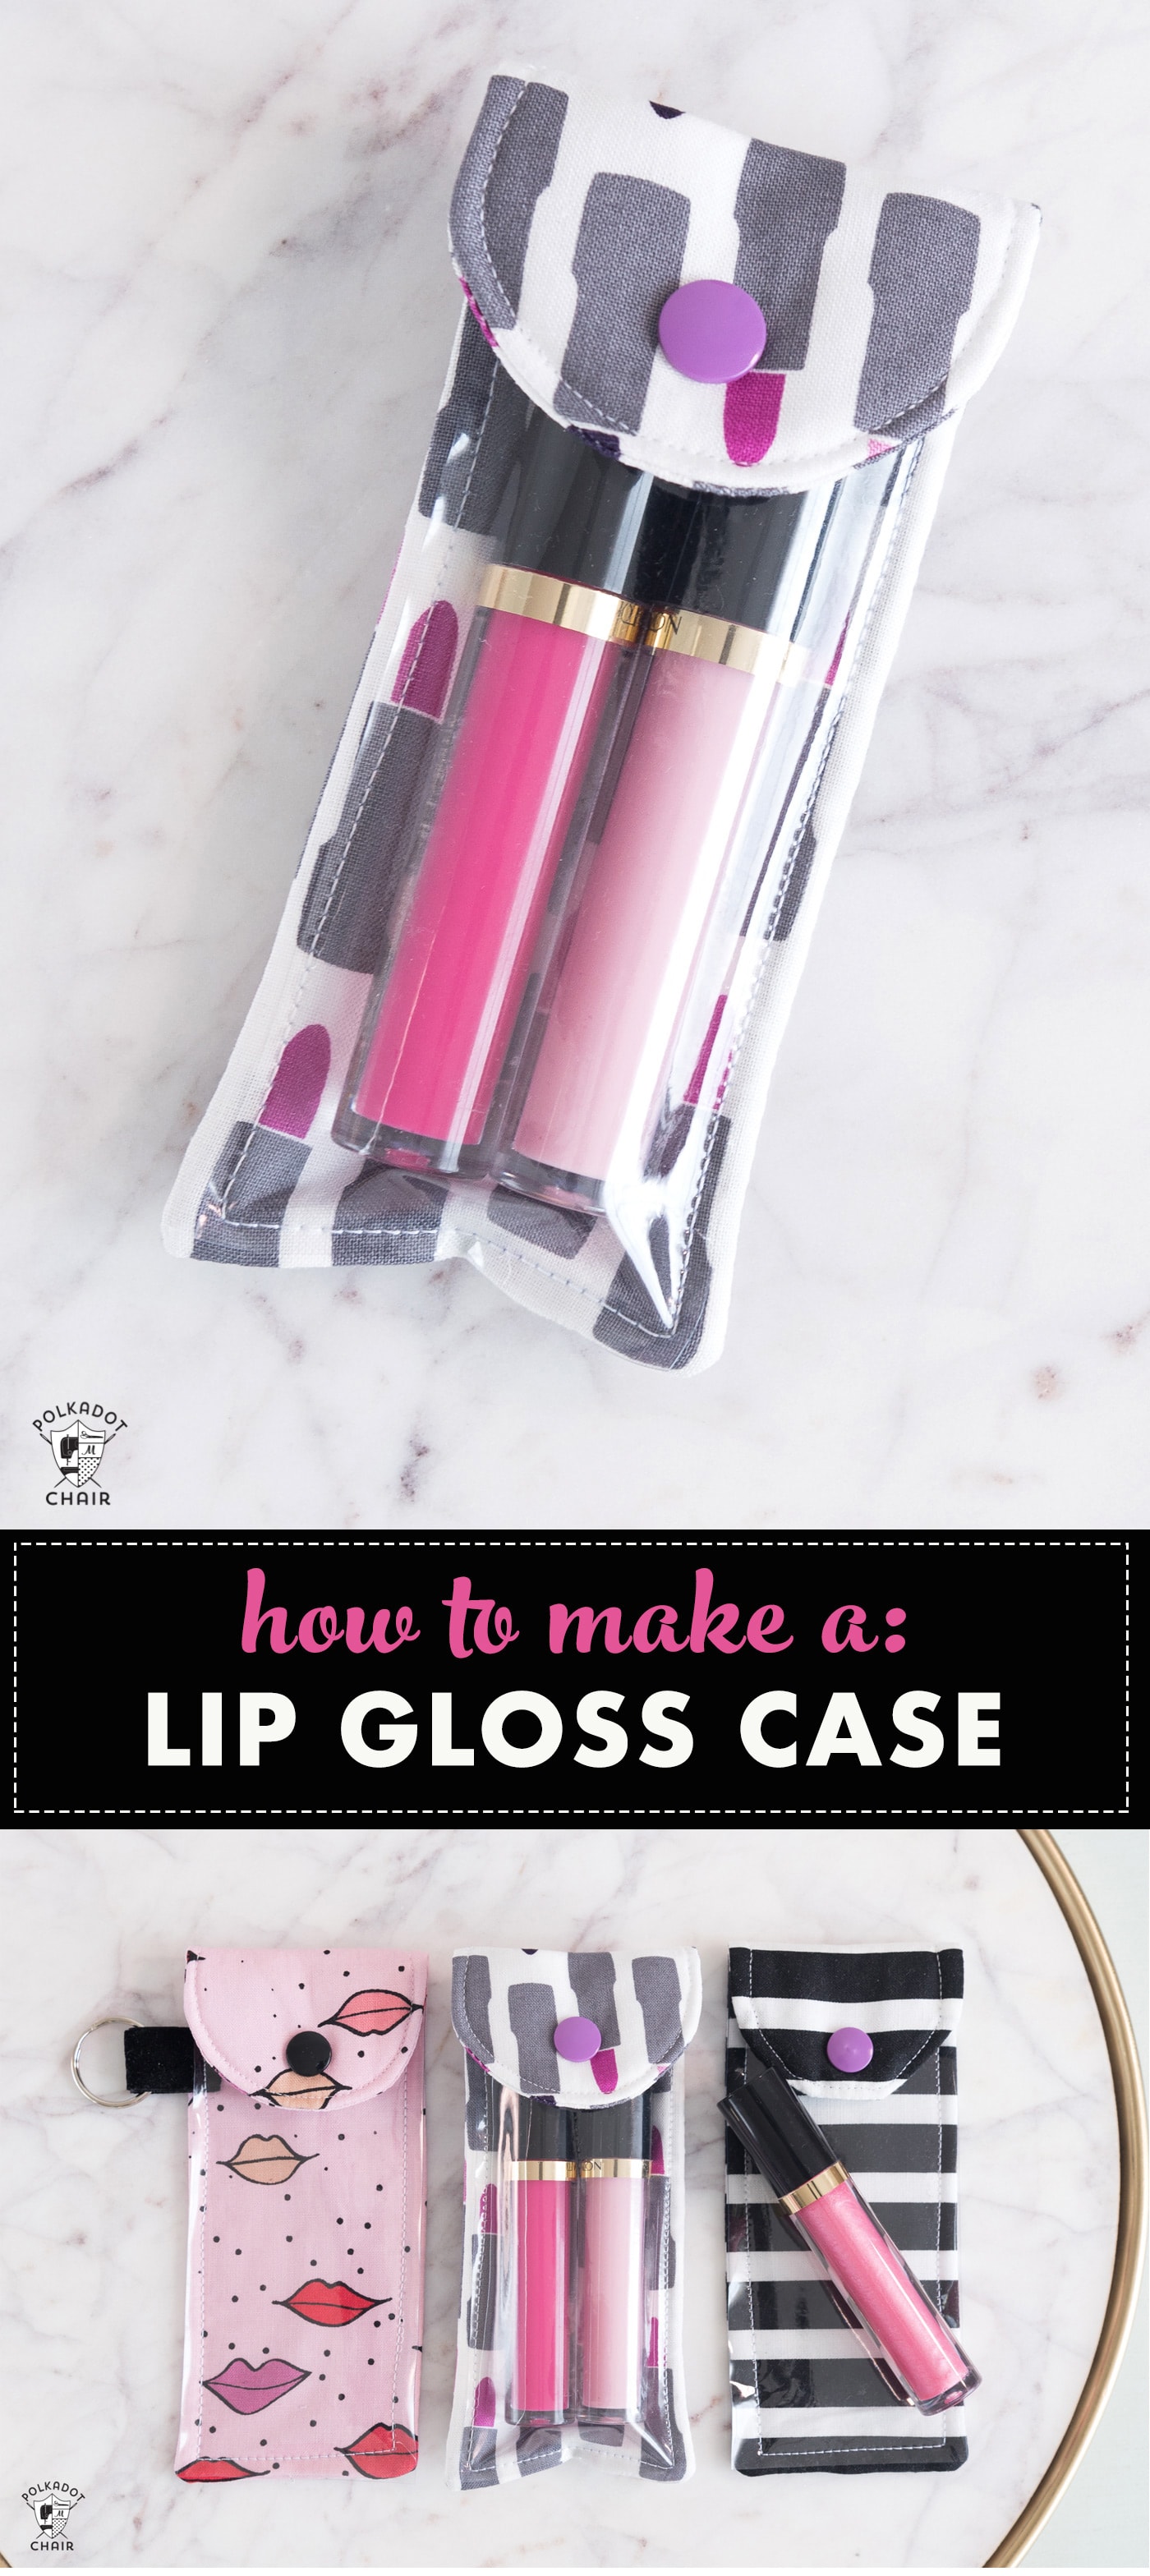
How to Make A Lip Gloss Pouch
A free, beginner-friendly sewing pattern for a cute snap pouch with a keyring to hold your lipgloss, lipstick, or chapstick.
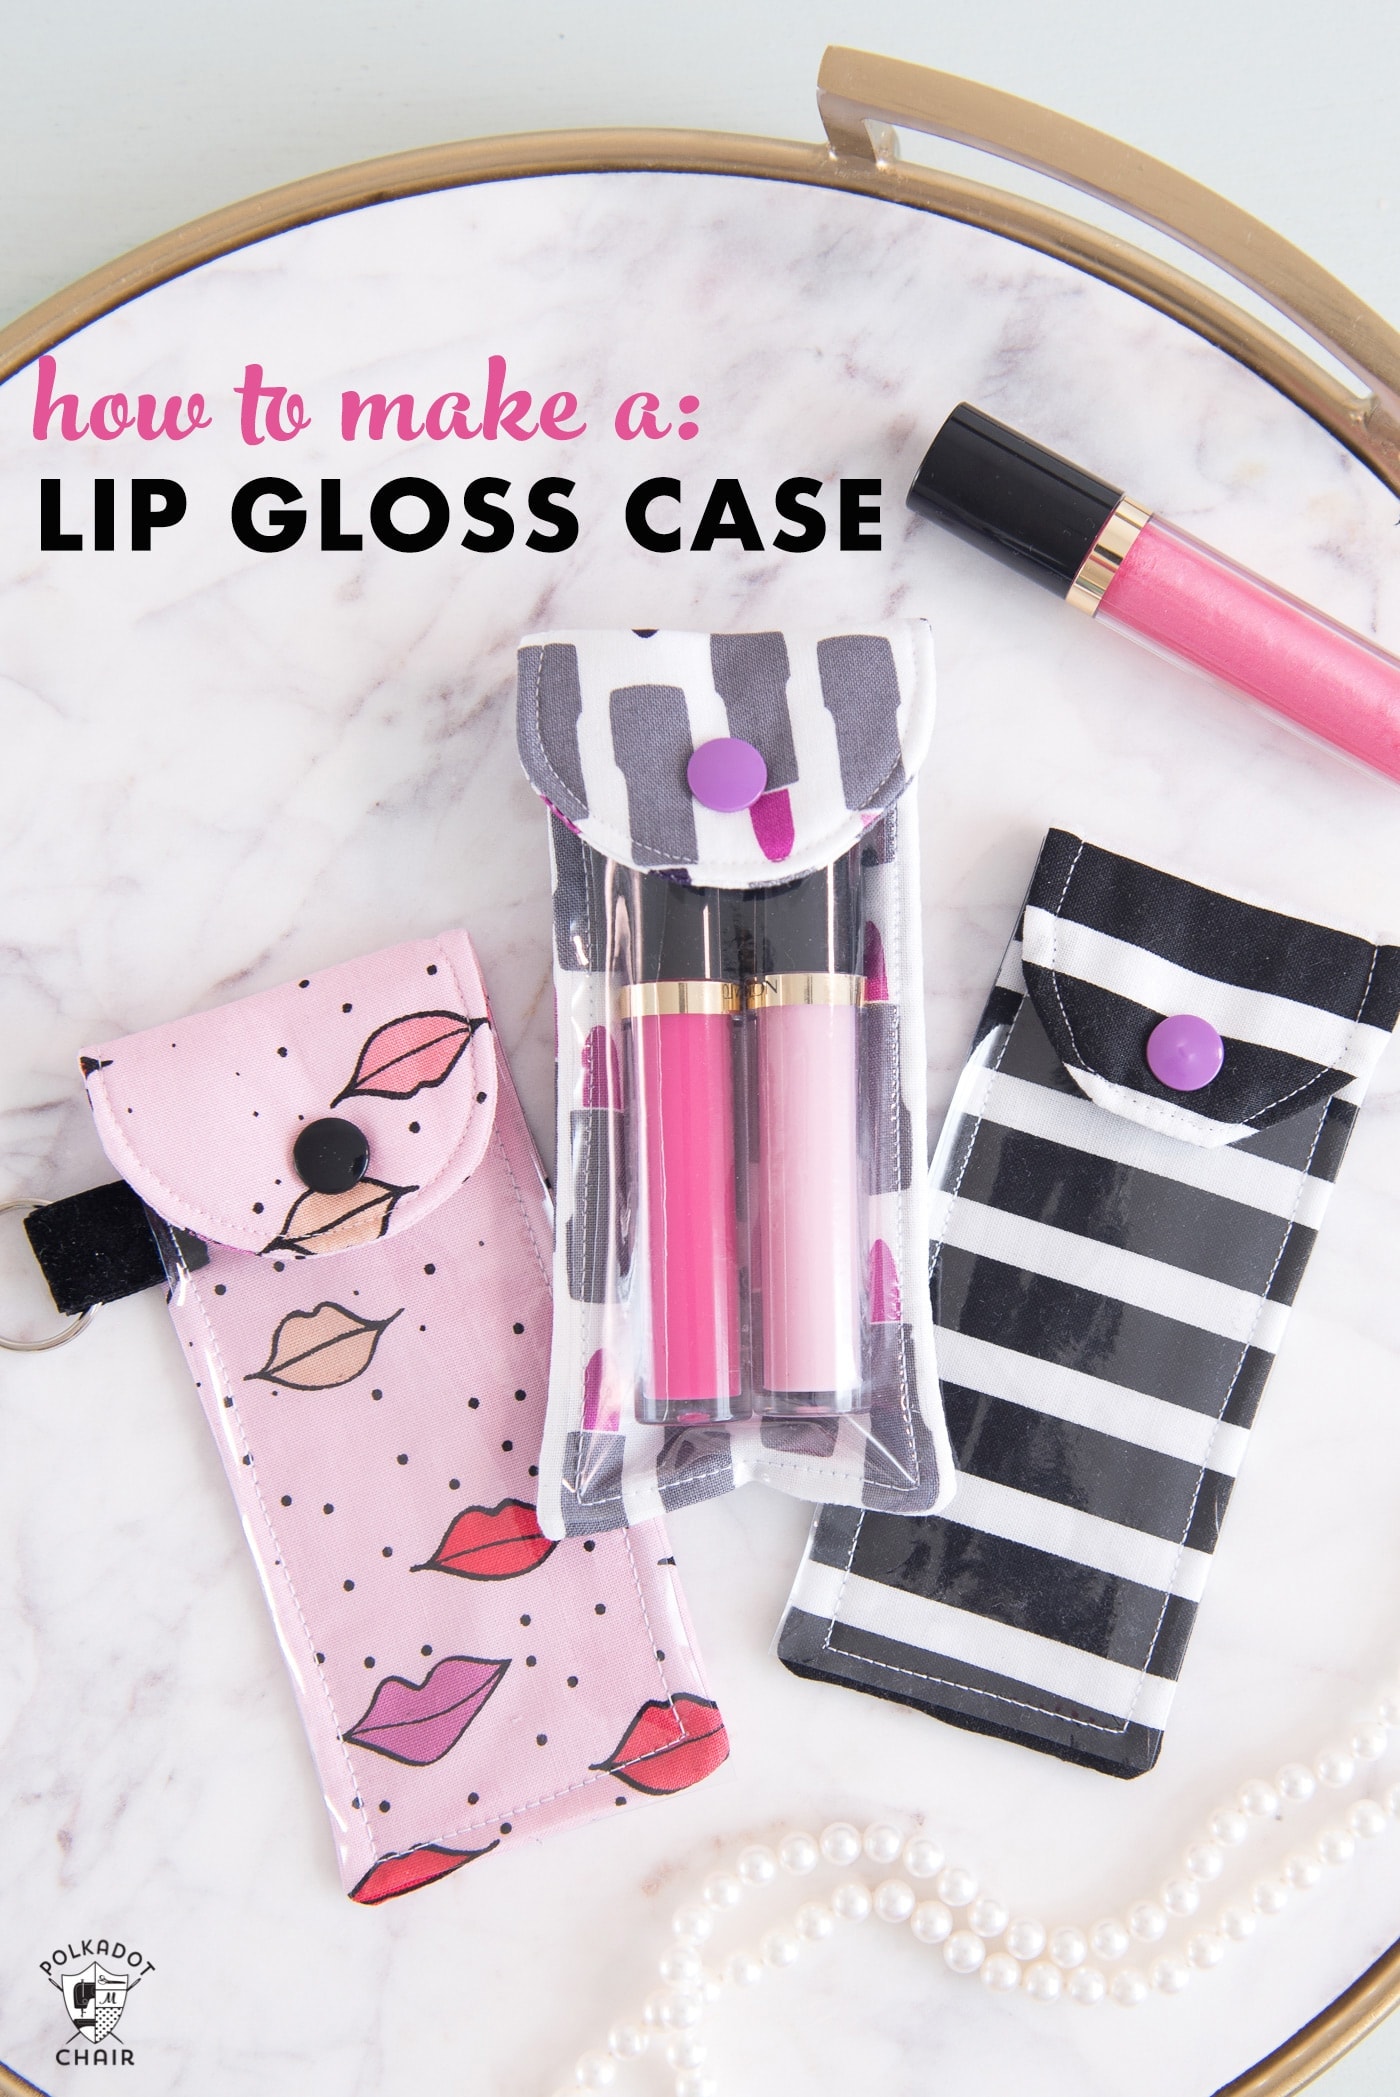
I hate it when I lose my lip gloss in the bottom of my purse! It’s always a mess; my bag sometimes feels like a black hole.
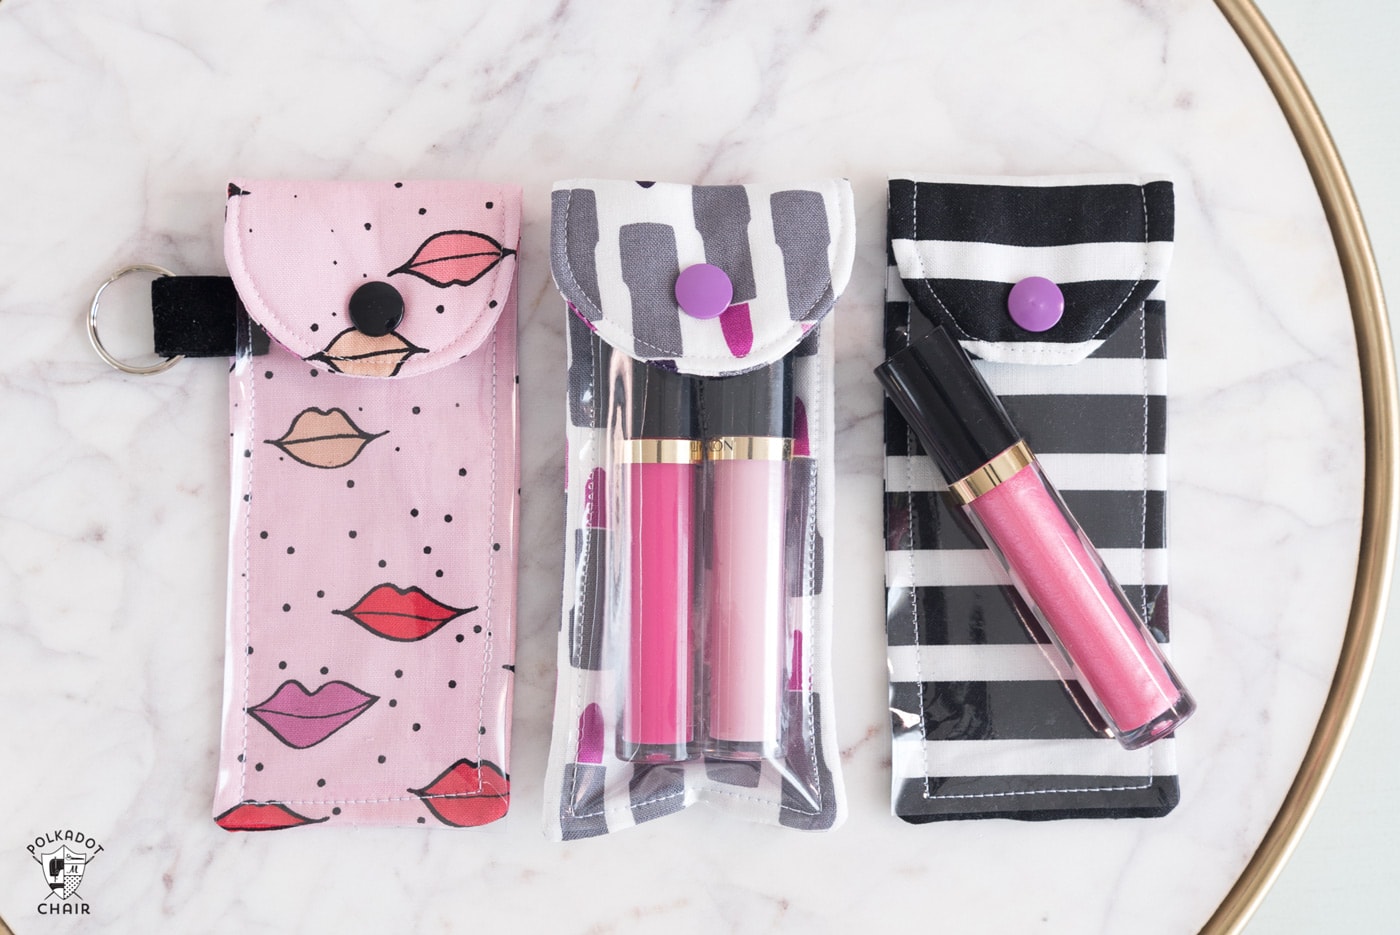
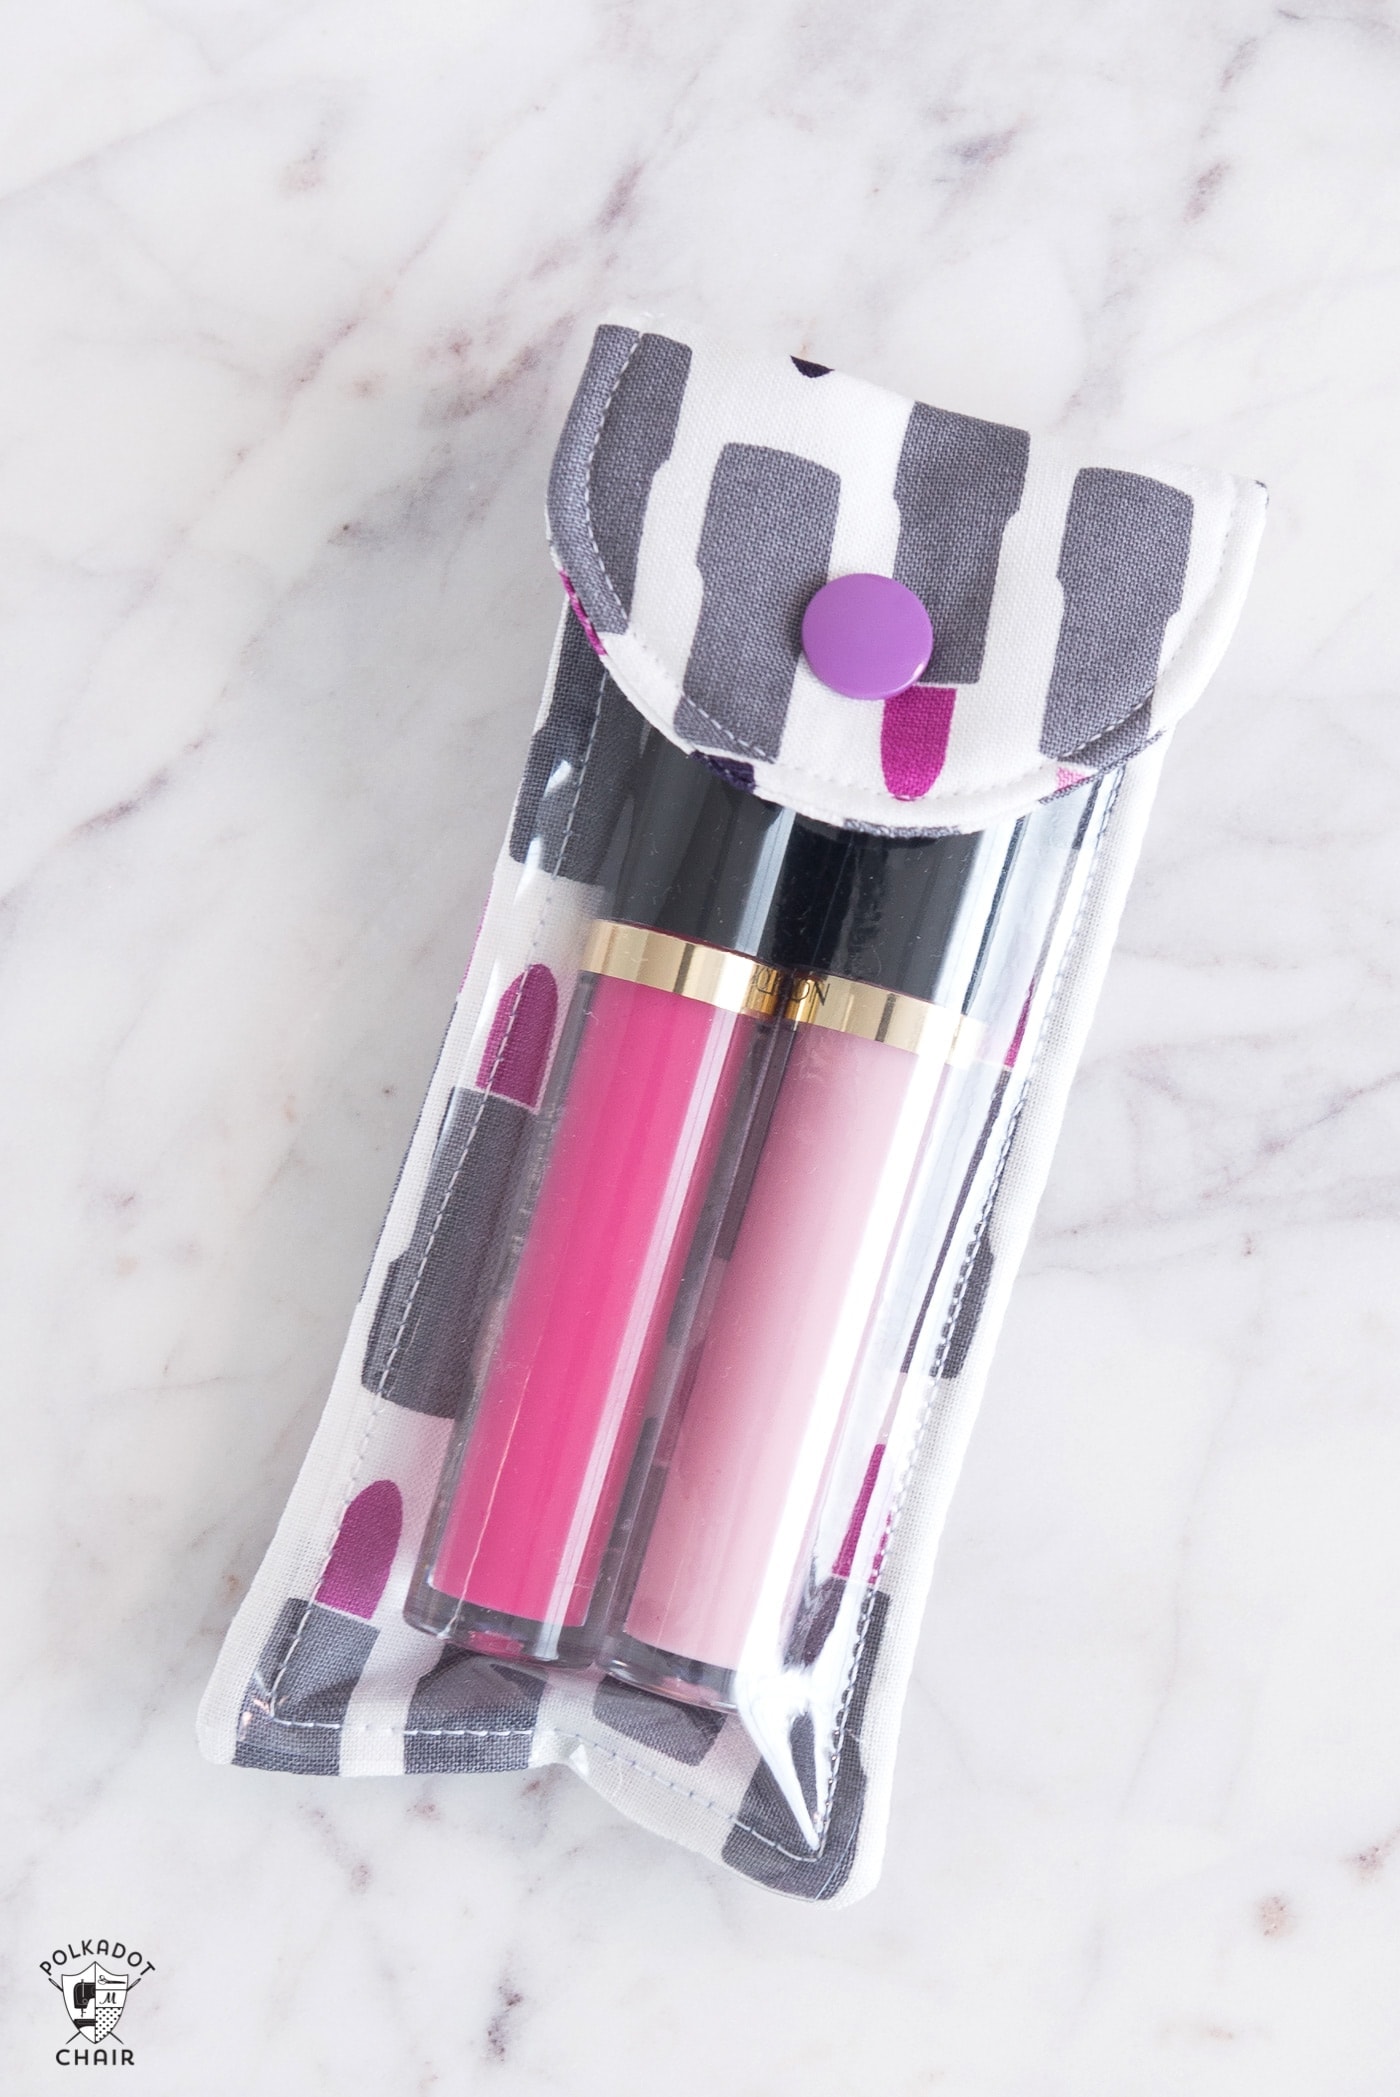
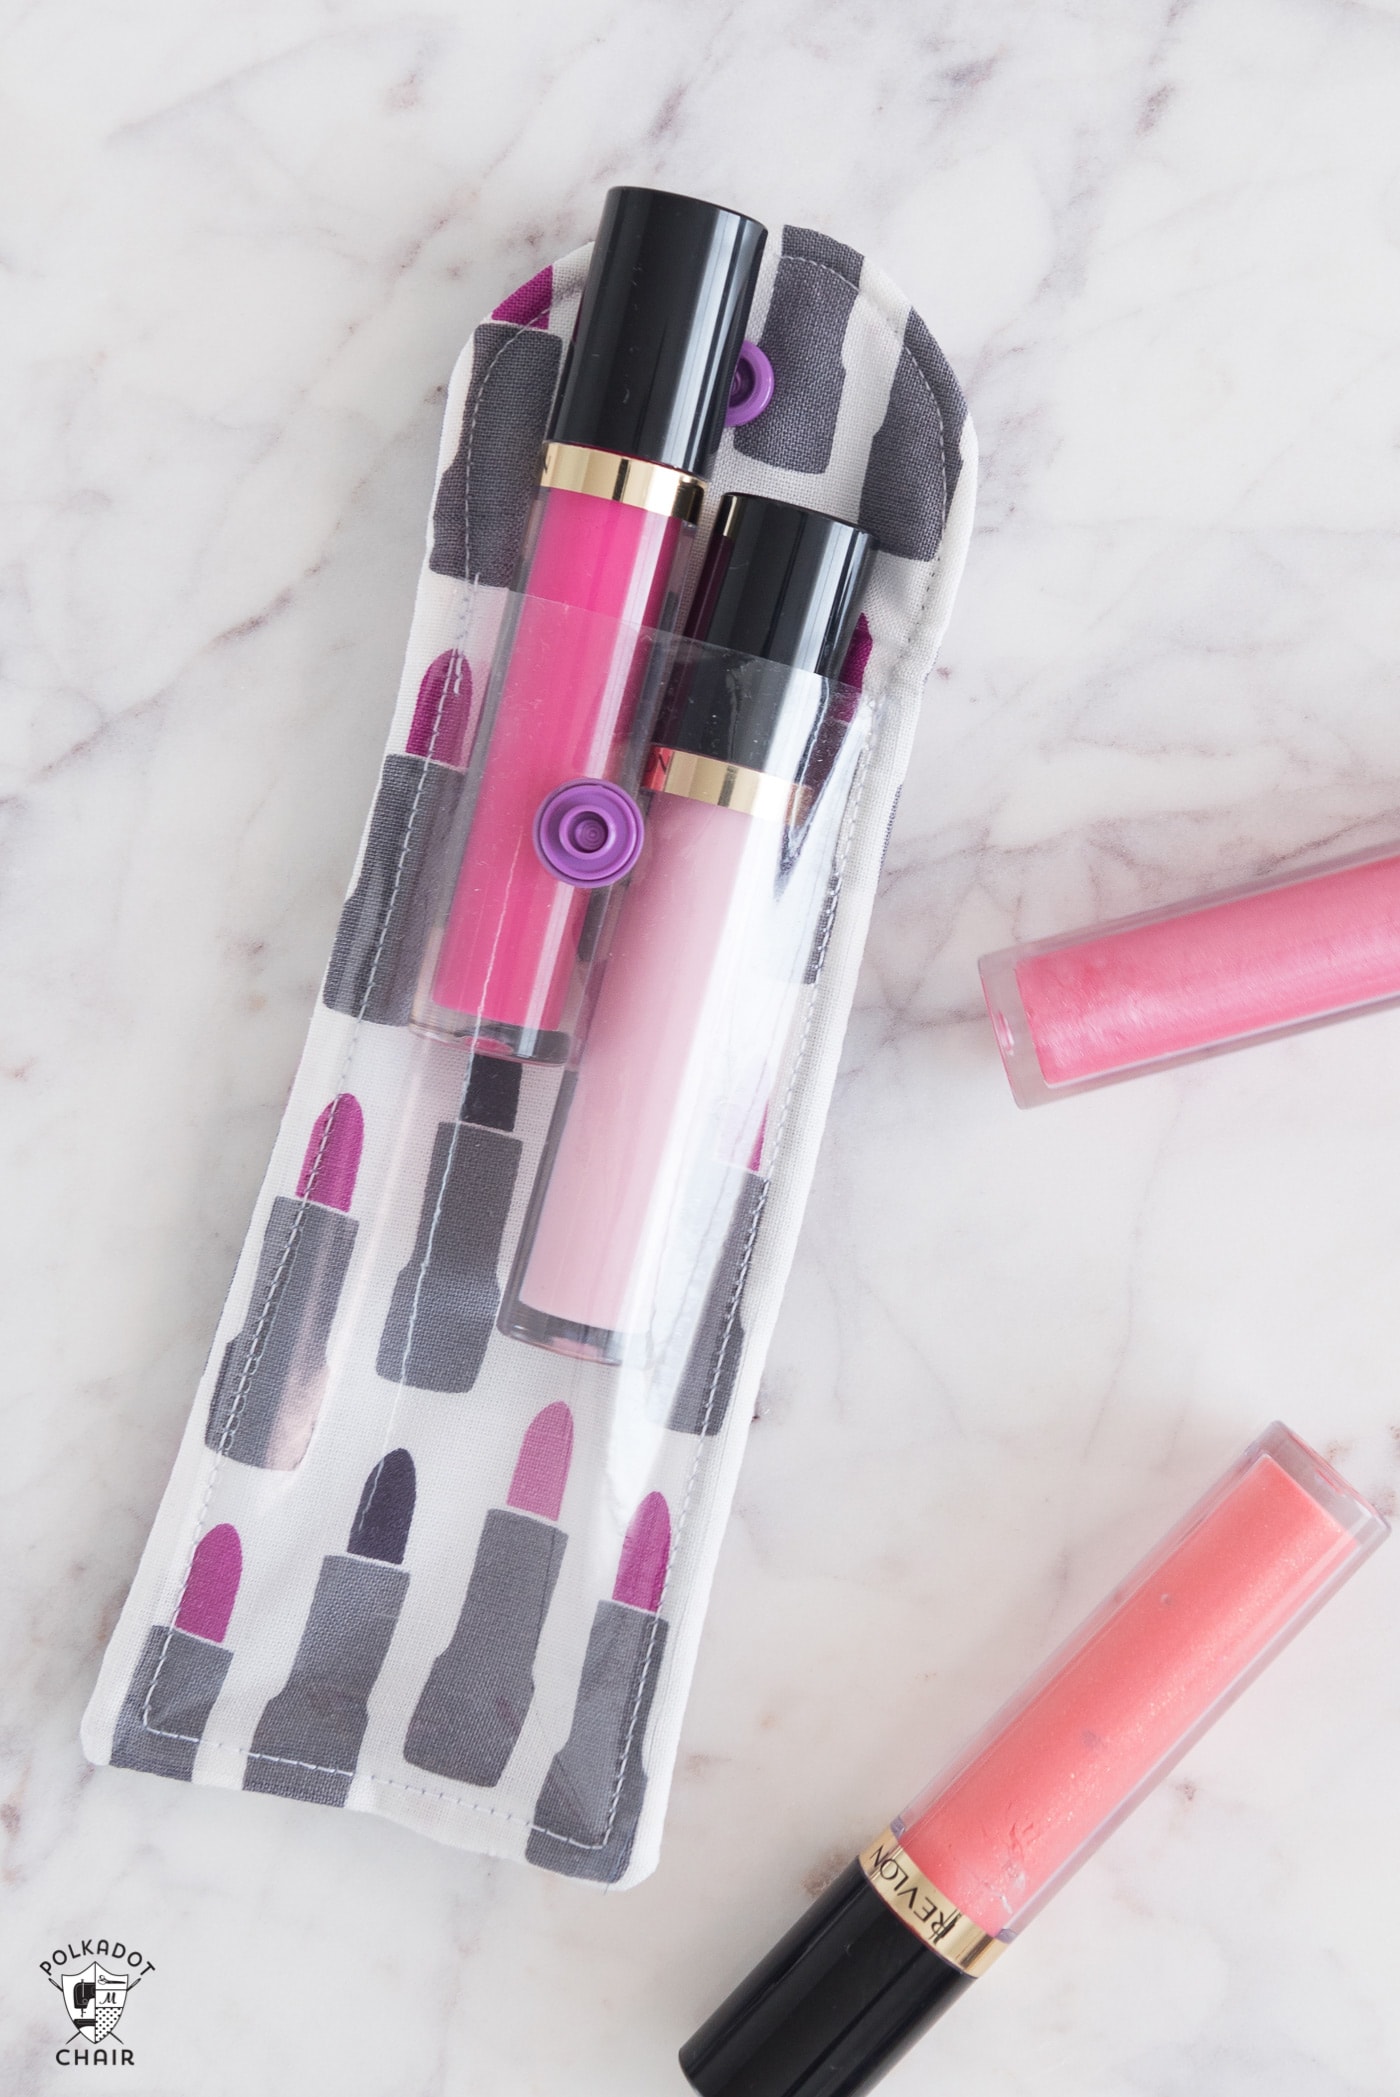
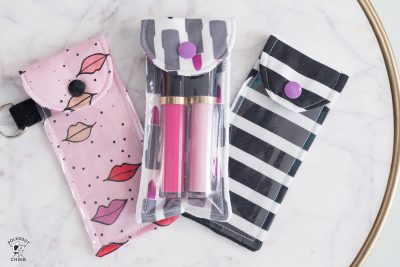
To solve this problem, I stitched up a simple lip gloss pouch. The pouch has a clear front, so I can always see which lip gloss is inside.
These simple little travel lip gloss or lip balm pouches make great gifts since they are so easy to stitch up! Make a bunch to give away as gifts for your girlfriends or teacher appreciation gifts.
Small Sewing Projects for Handmade Gifts:
I’m always looking for ideas for simple gifts that I can make for my friends or the kid’s teachers. My “go-to” gift was a simple cosmetic bag for the longest time.
One day a friend of mine texted me a photo of all of the little zip bags I’ve made for her over the years and I realized that I need to “branch” out with my sewn gift ideas a bit! (She was texting me to say “thank you” since she used them all). I mean, how many cosmetic zip bags can you give a person!?
As soon as I finished designing these little lip gloss pouches, I realized they would be great gifts! Guess what everyone’s getting for Christmas this year? If you know me, try to act surprised!
These little lip balm pouches took me about 15 minutes to sew. Part of that time was spent unpicking since I messed up a step. If you’re looking for a fun DIY gift that you can make quickly and in bulk, these little travel cases might do the trick!
The bags are sewn from Kate of SeeKateSew.com ‘s new line, “Kiss me, Kate”. It’s a fabric line that she says is inspired by her love of Sephora! The adorable line features one of my favorite color combos, pink with black and white.
You can see more about the line over at her blog. I’ll link up a few other cute Kiss Me Kate projects at the bottom of the post.
Supplies Needed
- 1 Fat Quarter Fabric for the Case
- 1 piece 3×8 or larger scrap of Fusible Fleece
- 1 piece 3×8 or larger scrap of Clear Vinyl – purchase at the fabric store on a roll or in a small package; sometimes it’s called Quilters Vinyl or Vinyl for bags; you can also use a clear vinyl shower curtain.
- KAM Snap Setter I purchased a KAM Snap starter kit; the one I used is linked here.
- KAM Snaps
- Teflon Foot for Sewing Machine: you can also try putting a piece of Scotch tape on the bottom of your standard presser foot.
- A scrap of 1″ wide ribbon Optional
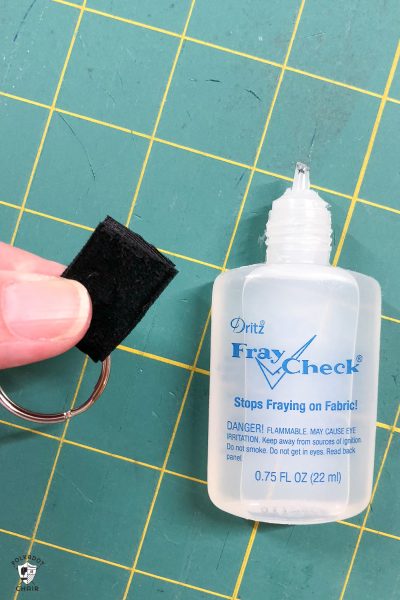
- Fray Check
- One 1/2″ to 1″ Purse Ring
How to Get the Pattern Piece
This project requires a pattern piece. If you fill out the form below, I’ll email you a copy of the PDF of the piece.
You will still need to read and/or print the directions on this page to complete your project.
Now, let’s make a Lip Gloss Pouch!
Lipgloss , Lipstick or Chapstick Case Sewing Pattern
Equipment
supplies
- 1 Fat Quarter Fabric for the Case
- 1 piece 3×8 or larger scrap of Fusible Fleece
- 1 piece 3×8 or larger scrap of Clear Vinyl purchase at the fabric store on a roll or in a small package; sometimes it’s called Quilters Vinyl; you can also use a clear vinyl shower curtain.
- KAM Snap Setter I purchased a KAM Snap starter kit the one I used is linked here.
- KAM Snaps
- Teflon Foot for Sewing Machine you can also try putting a piece of Scotch tape on the bottom of your standard presser foot
- Scrap of 1″ wide ribbon Optional
- Fray Check
- 1 1/2″ to 1″ Purse Ring
Instructions
Cutting:
- 2 pieces using the lip gloss case pattern piece from your Fat Quarter
- 1 piece using the pattern piece from Fusible Fleece
- From vinyl cut one piece 2 1/2″ x 5 1/2″
Add Fusible Fleece:
- Apply the fusible fleece to the wrong side of one of your case pattern pieces. Place the two cut case pattern pieces together on the right side facing, and stitch around the exterior of the pieces using a 1/4″ seam allowance. Leave a 1″ opening in the bottom straight section of the piece.
Turn Right Side Out:
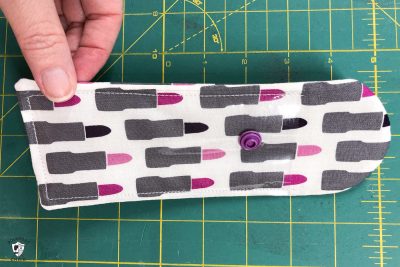
- Turn the piece right side out. Press it well, and catch the opening at the bottom of the case as you press.

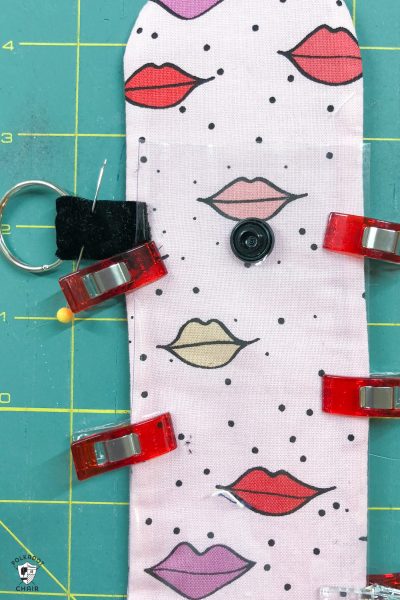
Add Jump Ring:
- If desired, fold a ribbon in half and finish the edges with a fray check. Feed a small purse ring through it and clip it to the case about 2″ down from the top of the curved edge.
- (note: I realized AFTER I made this that you could also unpick a bit of the side seam and stitch the ribbon into the seam of the case if you’d like instead; it’s up to you. I trimmed my ribbon enough that it’s not showing too much through the vinyl).
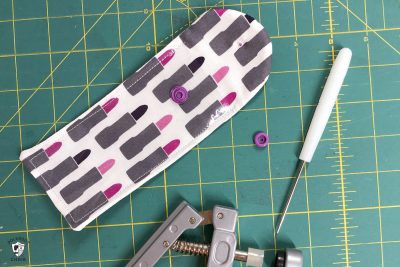
Assemble:
- On your cut vinyl piece set, you will find one KAM snap. The snap should be 1″ down from the top and centered in the piece.

- To do this, poke a small hole in the vinyl, then feed the outer snap piece through the hole, place the inner snap piece over the top on the other side, and squeeze with the setting tool to secure. (Your KAM setter will come with more detailed instructions)
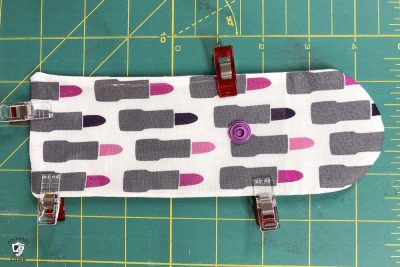
Finishing:
- Place the vinyl piece onto the case piece so that the portion of the snap that snaps is facing up.
- Hold it in place with binding clips.
- With the Teflon foot on your sewing machine, stitch around the perimeter of the case, close to the edge. If you need help with this step, read our article with tips for working with coated fabrics (like vinyl).
- You will stitch around the case. I did a small backstitch at the top of the vinyl just to secure it more. (Note: In my photo above, the top of the case is not stitched; it should be. I just stitched the pocket in this example so you can see better where the vinyl piece sits on the case.)
- Fold off the curved top of the case and note where it should meet the snap on the vinyl. Mark it and set the other half of the snap-in this piece.
- That’s it! Enjoy!!
Other Cute Projects Make with Kiss Me Kate Fabric:
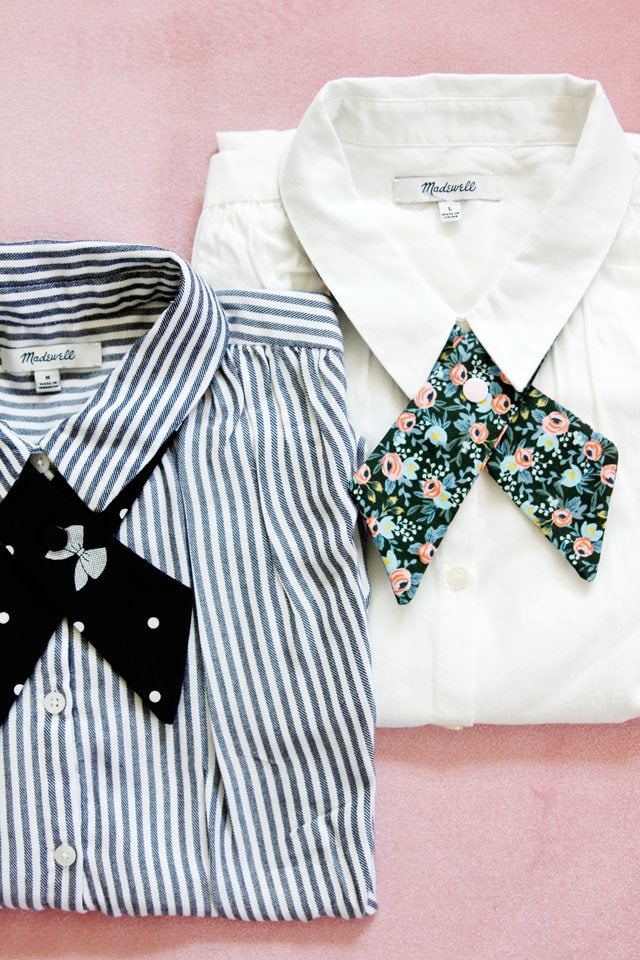
Women’s Cross Over Tie Pattern
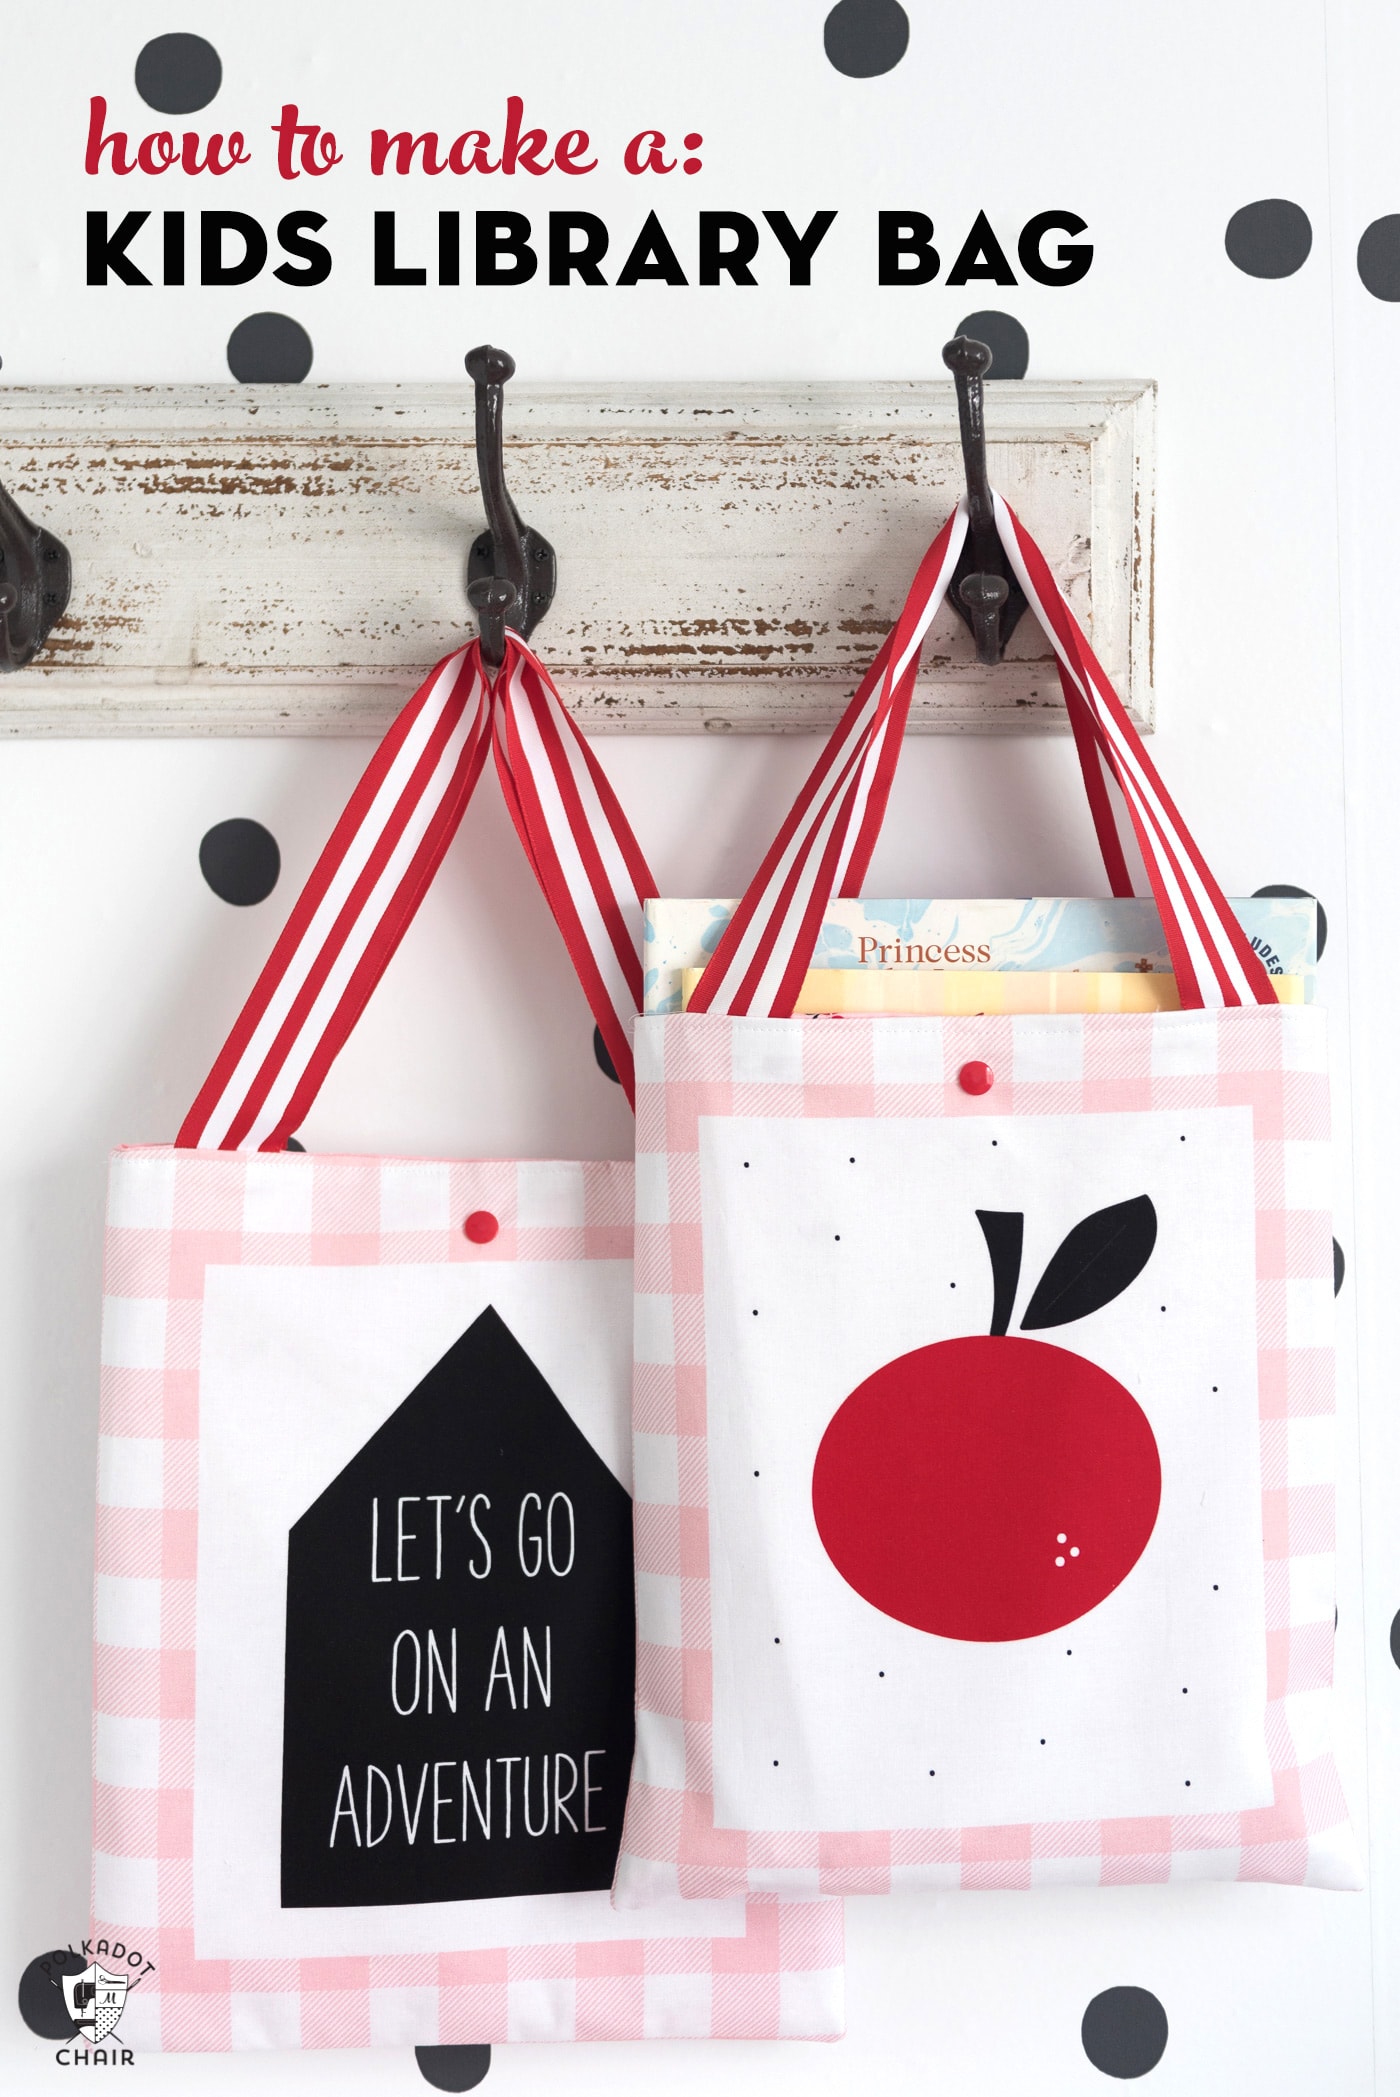
More Makeup Cases and Cosmetic Bag Sewing Patterns
How to Make a Simple Zippered Pouch
Vinyl-Lined Make-Up Bag Sewing Tutorial
Awesome idea. Thx for posting.
Love this idea. Thanks for sharing.
These lip gloss pouches would also be great for the 10 ml. aromatherapy roller bottles.
Great idea! I don’t use gloss, but I HAVE had a lipstick open up a time or two and manage to get on everything in my purse.
Thank you for the pattern. What gauge vinyl did you use? I am concerned that the KAM snap will rip through the vinyl if it is too thin. Thank you.
I’m not sure. It was a package of quilters vinyl if that helps. It does not feel thick but it is quite sturdy.
can you tell me how to get the template for the lip gloss case, if i click on the link it does take me to the templates but there is not one for the lip gloss case, thank you
I can see it. It’s on the very bottom of the page. Try doing a refresh of your browser (command,shift, R) it might be loading an older version of the page. Also if you click on sort by DATE on the top of the downloads window (blue button) it will bring up the newest downloads first.