How to make a Planner and Create Printable Stickers
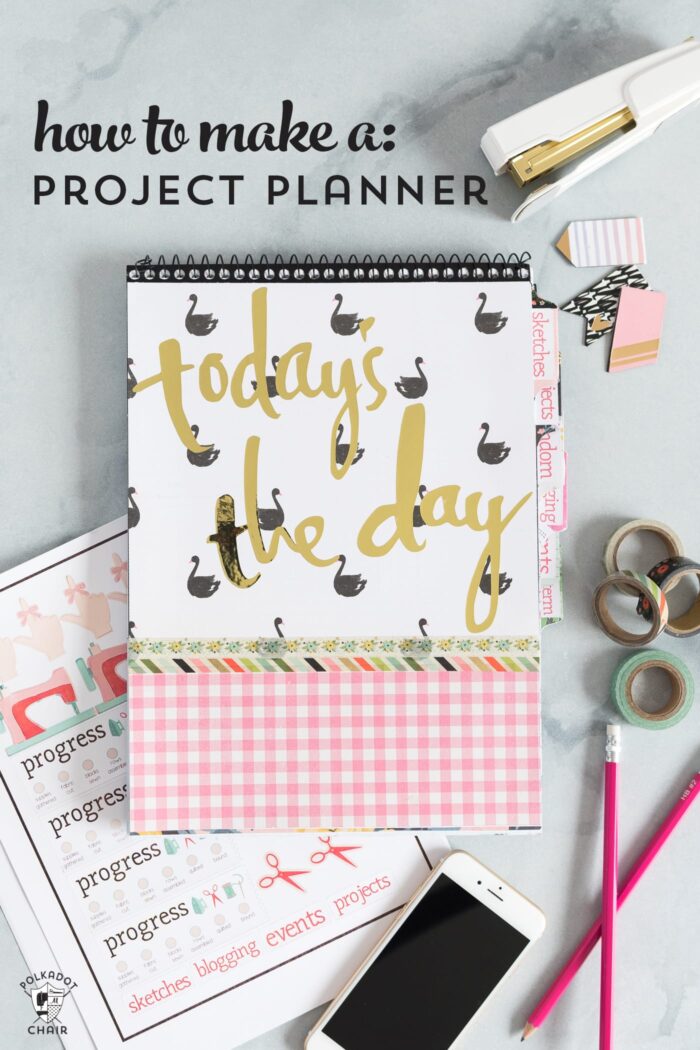
Today, I’m going to show you how to make a planner using a simple notebook! I love planners, but can’t always find ones that are “exactly” what I want. A few years ago, I started making my own.
The planner I’m going to show you how to make today is perfect for planning out and organizing all of your sewing and quilting projects. I will also show you how to make and print your own stickers for your planner. I work as a Brand Ambassador for Cricut, this is sponsored content.
I get asked a lot of questions about blogging and project planning. Like, “How do you come up with and keep track of my blogging ideas?” and “What is your design process for creating new projects?”. Today, I’m going to share a bit about my blogging and design workflow with you.
DIY Project Planner Ideas
One thing that you might not know about me is that I love to make my own planners. I’m a bit of a notebook “hog” and have stacks of them around my house.
I keep a notebook with me at all times, just in case inspiration strikes while I’m waiting in the doctor’s office or something. They are, for me, one of the “keys” to keeping this whole blogging/designing thing going.
I have a “system” for my notebooks. I have a few that I keep next to my cutting table, where I jot down notes as I create tutorials and patterns. (You may think you’ll remember what size you cut that fabric, but trust me, I’ve learned you won’t.) I tend to fill them up pretty fast.
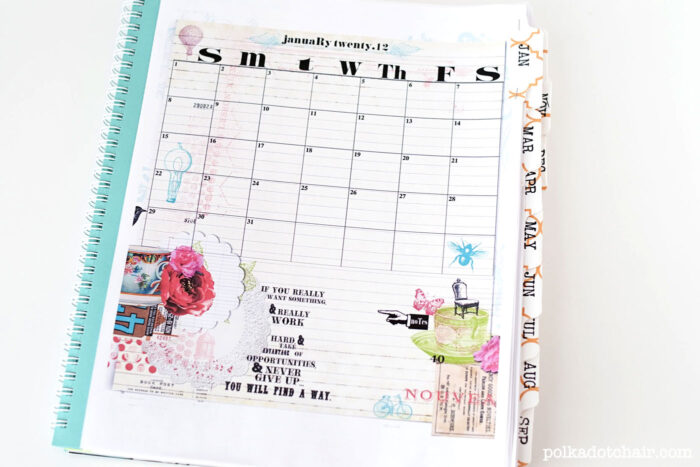
For years, I used to always make a planner with a notebook and printable calendar sheets. You can see a tutorial for the one below HERE.
Blogging Calendar Tips
In the last few years, blogging has taken over a larger part of my life, and I’ve realized that I need to separate my “calendering” from my “project planning”. I purchased a simple calendar/planner to use JUST for keeping track of my dates/deadlines that sits next to my computer on my desk.
After I separated the calendar from my planner, I played around with other notebook systems that I thought would work for me. One year I used a separate notebook for each item I was working on (i.e. one notebook for sketches, one for blogging ideas, etc). I found as the year went on that it became cumbersome to do it that way.
Then I started using ONE notebook for everything, but found that my stuff got all “mixed up”. I would flip through it, looking for a project sketch, and find it in between my plans for Quilt Market.
Also, I would “forget” projects that I was working on because they would get lost in between other projects in the book. Soon, I realized that I needed a divided notebook. I am very “picky” about my notebooks. The cover has to be sturdy enough to use it, not on a table, and I prefer graph paper to lined paper. As you can imagine, nothing like that is on the market right now.
This year, I decided to create ONE project planner (one planner to rule them all, LOL!!! -sorry, I had to throw that in there *wink*). I started with a simple graph paper steno notebook and added tabs and dividers to create the sections that I needed.
How to Make a Cute Project Planner
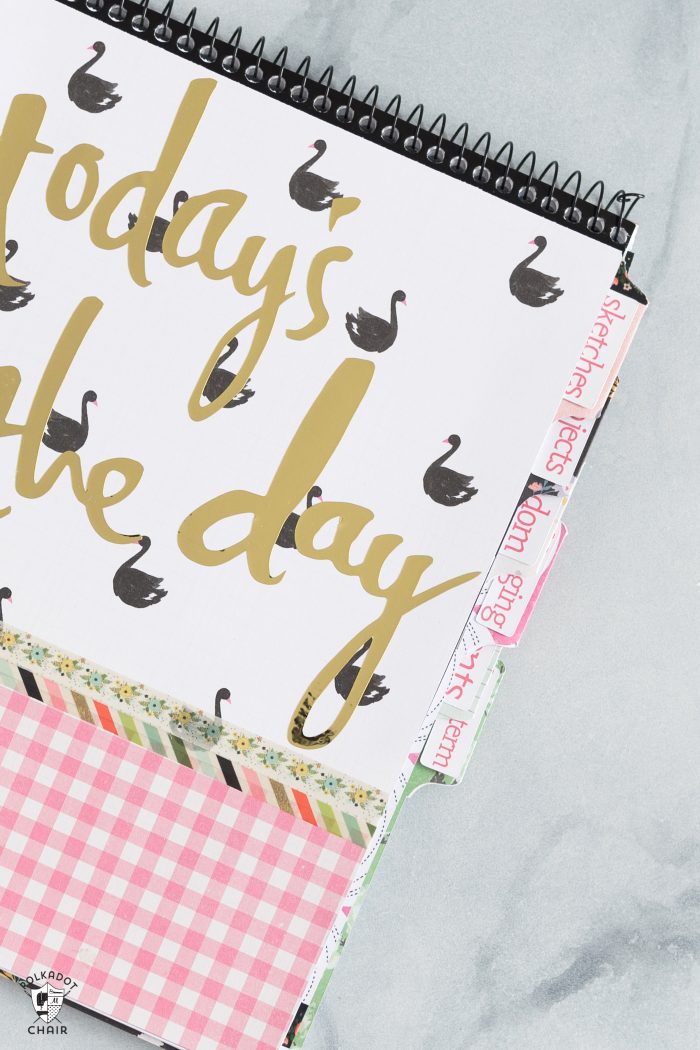
Also, I covered it, because well, it was ugly before LOL! (I just used papers that I had in my stash of craft supplies). I’ll link to the notebook I ordered below since I ordered 3 of them from Amazon to see which one I liked the best (see picky!).
I created tabs for the notebook based on what I wanted in the planner. I have Sketches, Projects, Blogging, Random, Events, and long-term.
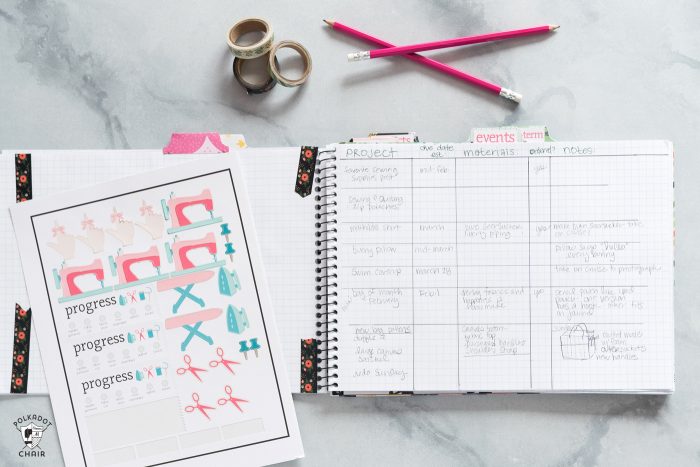
Each section has a layout that I plan to stick to as the year goes on.
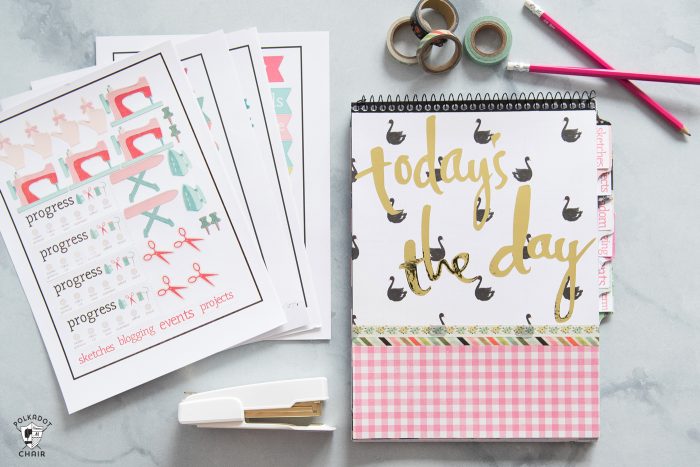
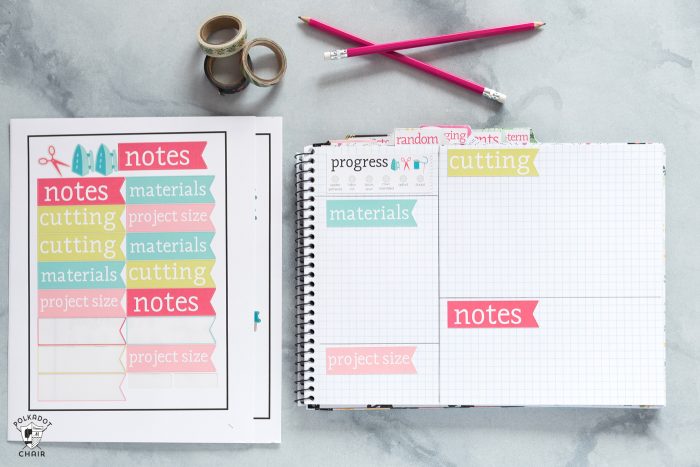
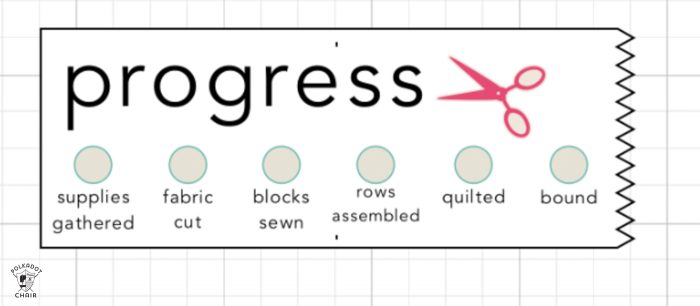
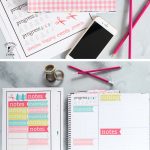
Since I use the same “format” for many of my projects, I created a set of stickers to put in the pages to help me keep my projects organized.
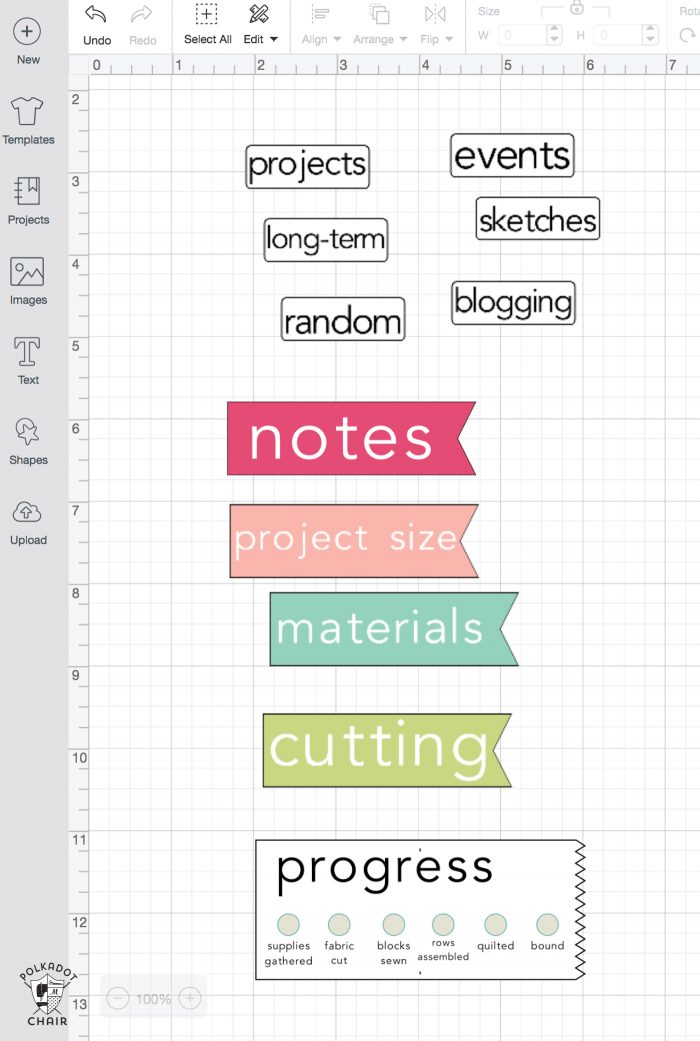
Here, you can see how I outline my quilt projects. I list the materials needed for the project, all of the pieces I need for the project, and any notes I need to remember for the project. I also added a project size section since I always seem to forget that as I’m designing my projects.
How to Make Stickers for Your Planner
To create the stickers and planner tabs, I used my Cricut Maker. I know that many of you may have purchased the Maker to use for your sewing and quilting projects. Today I wanted to show you a bit about some of the OTHER things it can do, including what I think is one of it’s coolest features, PRINT, and CUT!
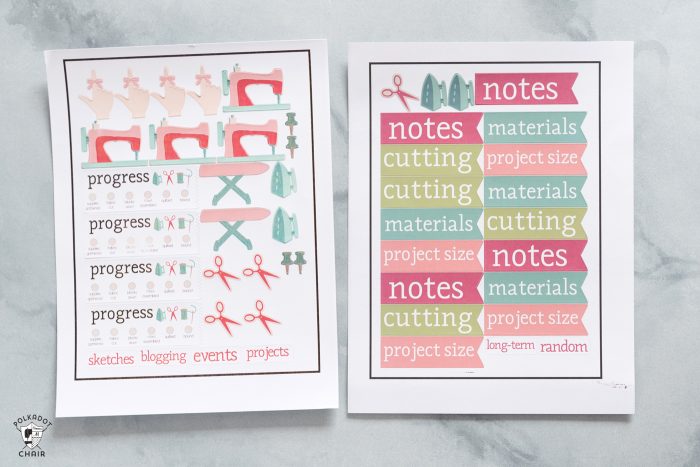
I created all of these images exclusively in the Cricut Design space. I’ll show you how to do it yourself, but since it is all design space elements, I can share my file with you! That way, you can make your own at home, exactly the same way that I did!
This post is a LONG one, so I thought I’d break it down for you.
In this post I’m going to show you how to:
- -Make your own Project Planner using a simple notebook
- -Create and cut out custom tabs for your planner
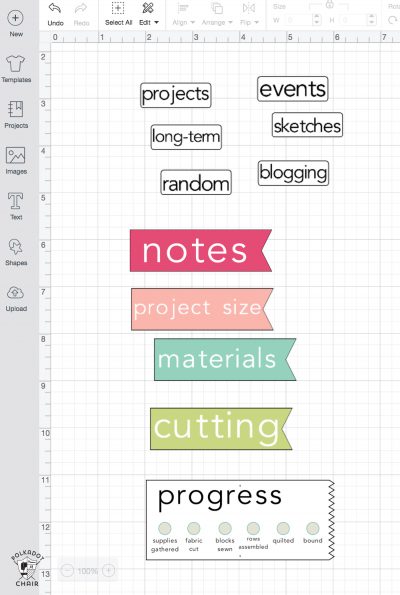
- -Create your Own Label Stickers in the Cricut Design Space
- -Print and Cut Custom Stickers with the Cricut
Okay, let’s get started.
How to Make Your Own Project Planner using a simple Notebook.
First up, I’m going to show you how to transform your Notebook into a planner.
You’re going to need:
- Notebook. You can use a composition notebook if you like (it’s what is pictured in the photo below). I purchased a Steno Graph Paper notebook from Amazon. This is the one I got, I also purchased this one and it is a close second as far as ease of use goes.
- UHU Glue Stick
- Exacto Knife and Ruler
- Decorative Paper that you like
- Cricut Adhesive Foil & Transfer Paper
- Washi Tape (optional)
Loosely cut your decorative paper a bit larger than the front of your notebook. Make sure you have a clean cut at the top of the page.
With your glue stick, apply glue to the back of the paper generously. Apply glue to the notebook cover as well. Glue the paper to the front of the notebook with the straight edge you cut on the map flush with the spine of the notebook. Rub the paper well to distribute the glue.
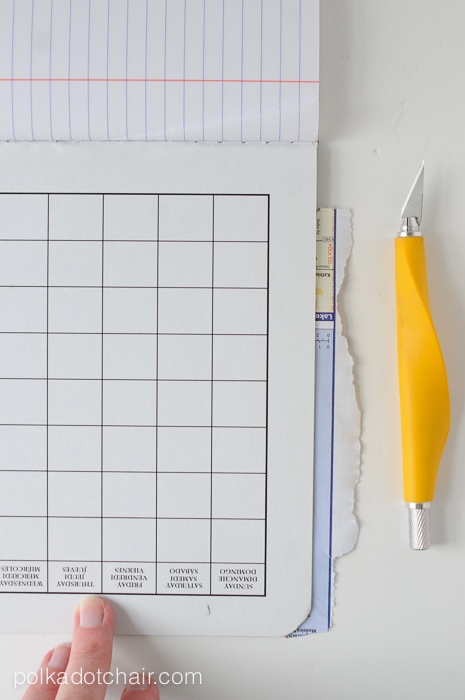
Flip the notebook over and, using an Exacto knife and a cutting mat, cut the paper flush with the edge of the notebook.
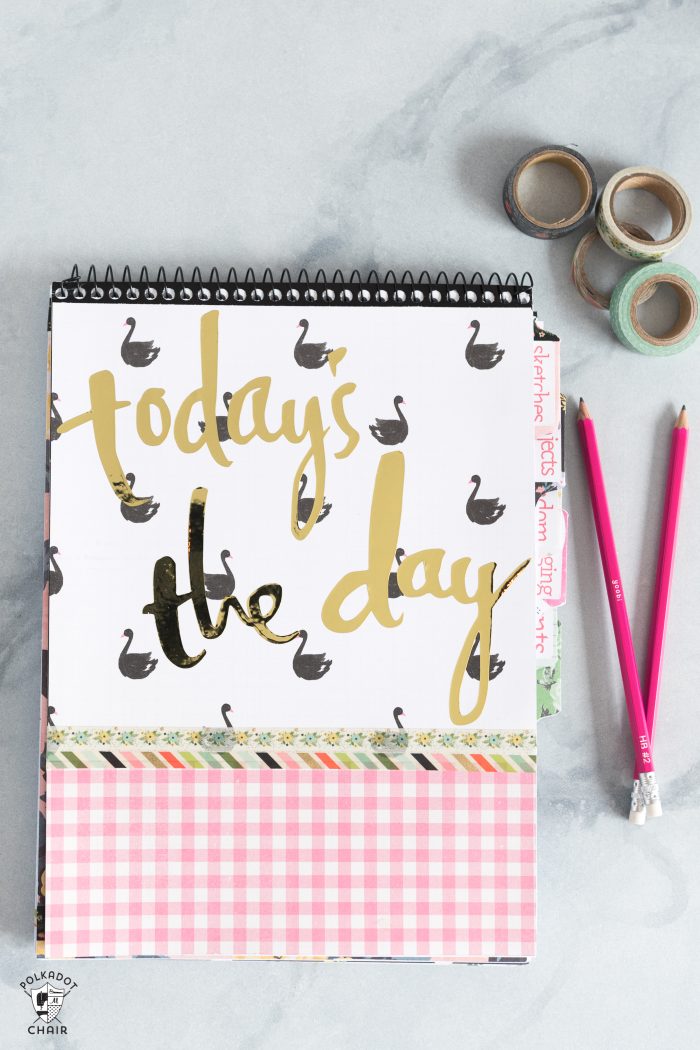
For my cover, I used two different papers and covered the seam between them with washi tape. I also cut out an image from the Cricut Design space and adhered it to the cover with Adhesive Foil.
Above, I’ve linked to the exact image I used in the Cricut Design space.
Okay, now moving on.
How to Create and cut out Custom Tabs for your Planner
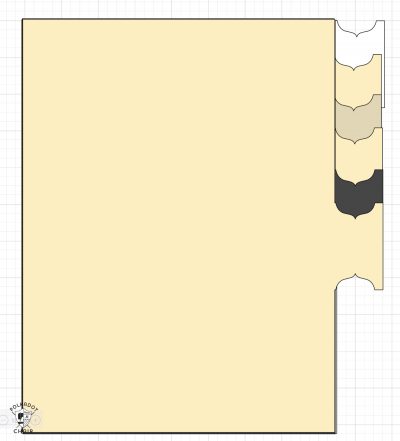
Now, we are going to use our Cricut and a bit of shape manipulation in Design Space to show you how to make the divider tabs for your planner. I chose to make full page divider tabs for my planner. I wanted them to be sturdy.
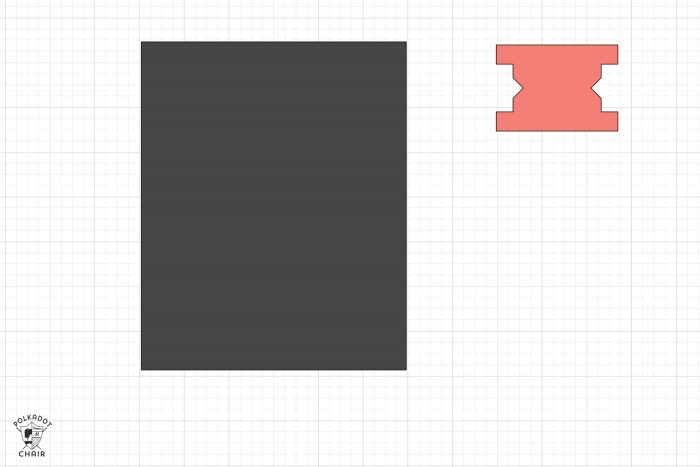
In Cricut Design Space, draw a rectangle that is the exact size you want your tab to be (mine was the same size as my paper). Then go to IMAGE and type in “tab” and pick a tab that you like.
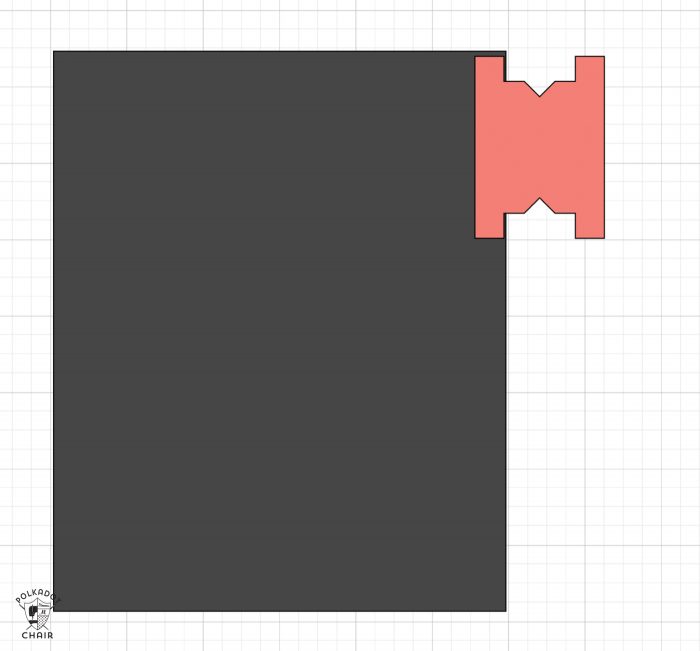
Align the tab so that it is on top of the rectangle, in the location that you want.
Click both layers in the layers palette on the right.
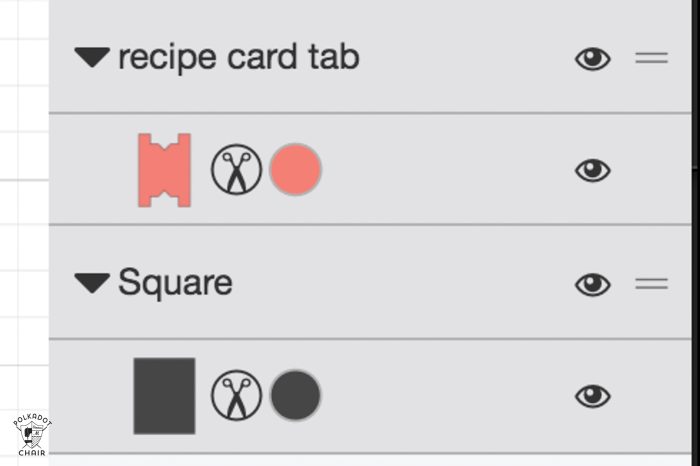
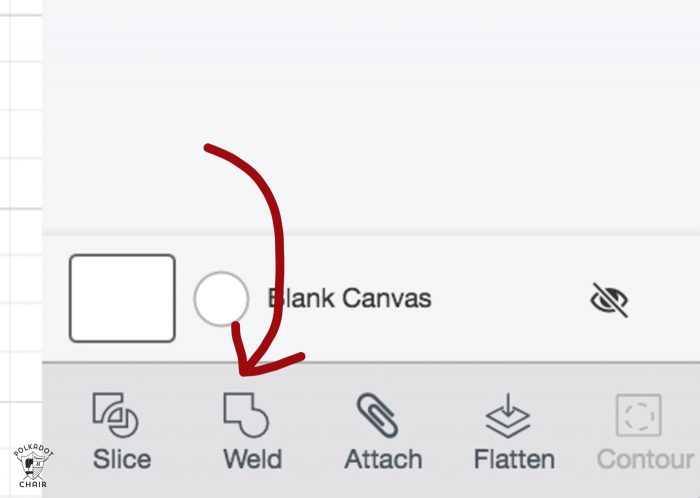
Then click WELD.
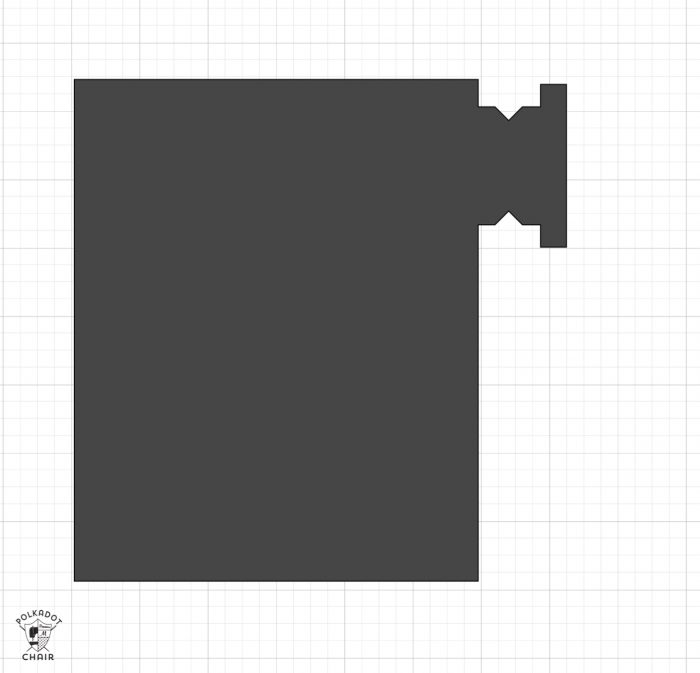
This will turn your separate images into one LARGE image. Pretty cool, right???
Repeat, moving the tab down 1″ each time you create a new tab.
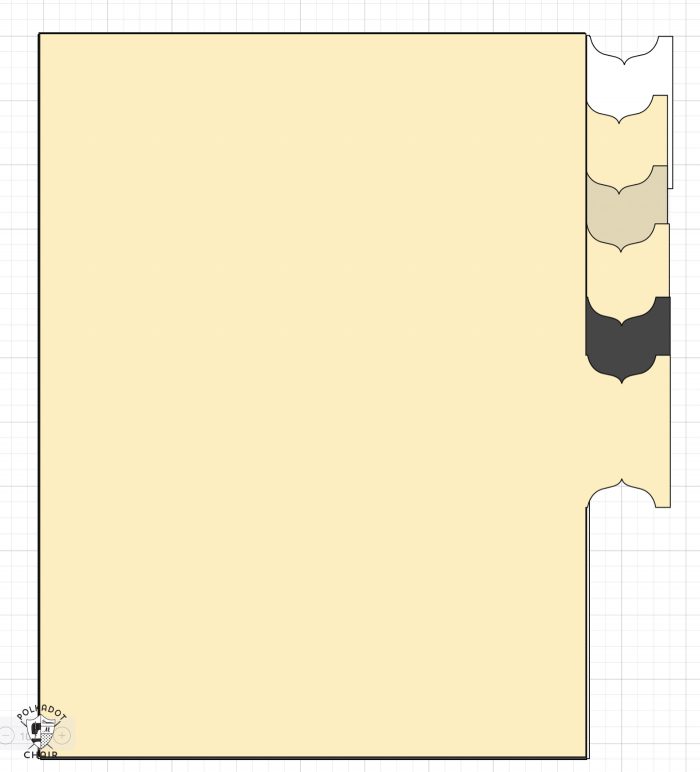
When you’re ready, click MAKE IT and follow the prompts on the screen.
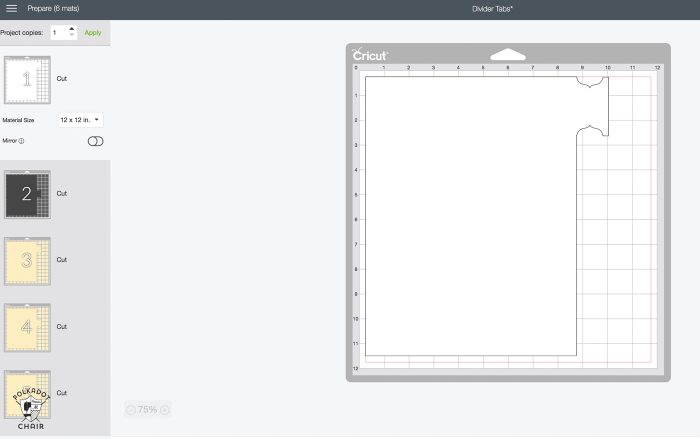
Cut out all of your tabs.
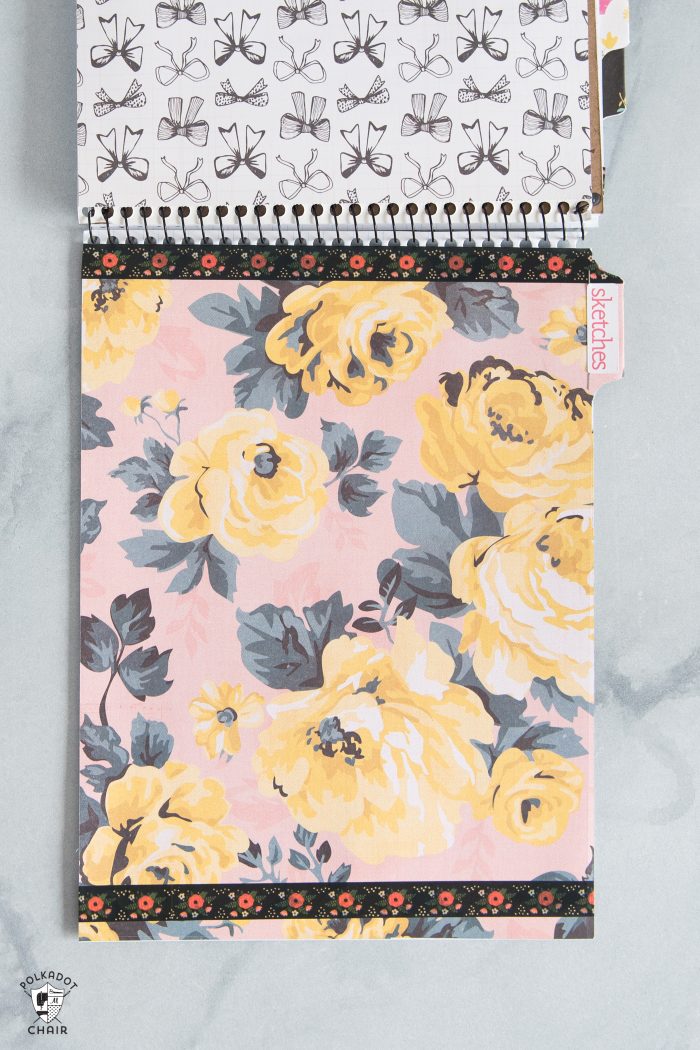
Glue your cut out tab to the page you want in your notebook. Fold over the tab. I used a tiny staple to hold it in place.
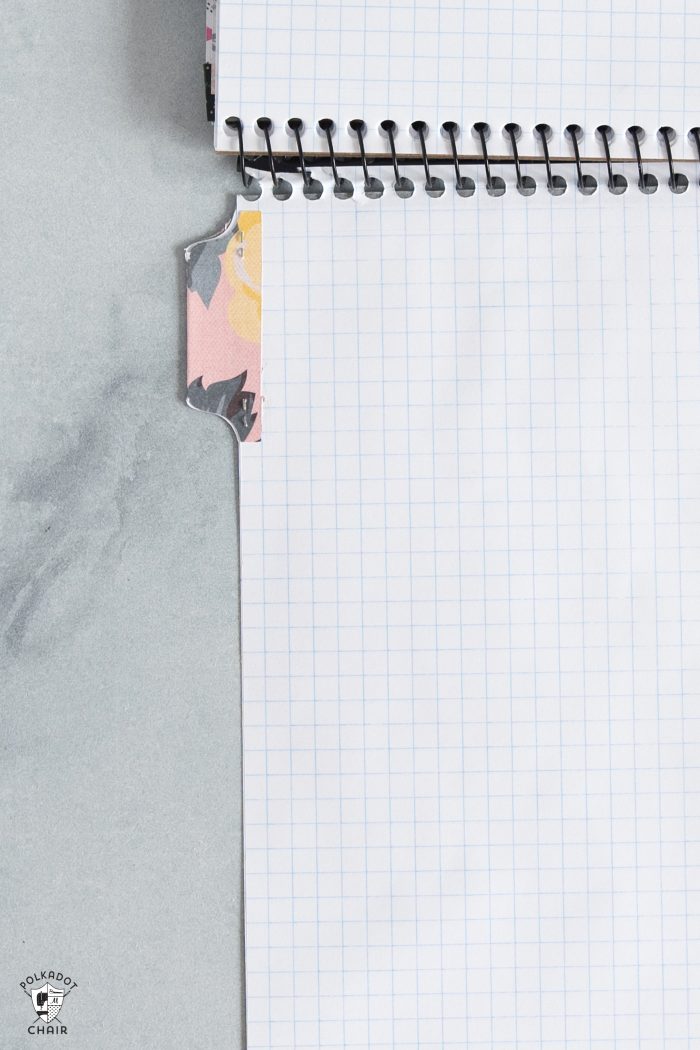
Use a bit of Washi tape to reinforce the binding so the page won’t tear out too easily.
We will add the label sticker later, don’t worry about that right now.
If you want to use my Cricut Design Space file (instead of going to all of the trouble to make your own), you can just CLICK here, and it will let you open my project!!
Create your Own Label Stickers in the Cricut Design Space.
You’re going to need:
-Cricut Printable Sticker Paper
-Strong Grip Mat or new Standard Grip Mat (the sticker paper is a bit slippery on the back, the strong grip mat held it in place better).
Okay, now I’m going to show you how to make those labels! The beauty of this is that you can make them any size, any color, and with any text you want!
Open Design Space and select the shape you want – I used both a rounded rectangle and a flag shape. For this tutorial, select the rounded rectangle.
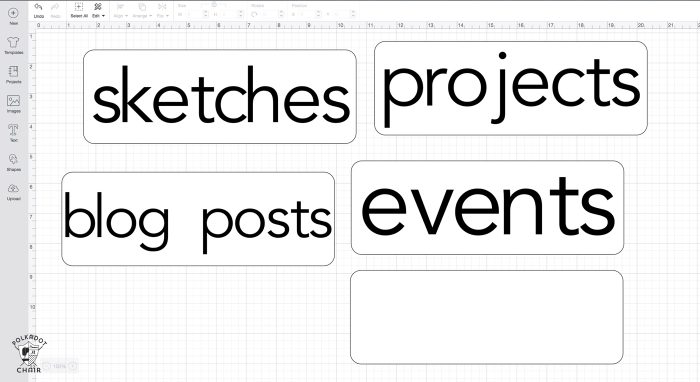
Select the Text tool and type in your word. On the attributes panel for the word (on the right) click the scissors icon. Then click PRINT. This will change the word to printing instead of cutting. You can also change the color of the text on this screen.
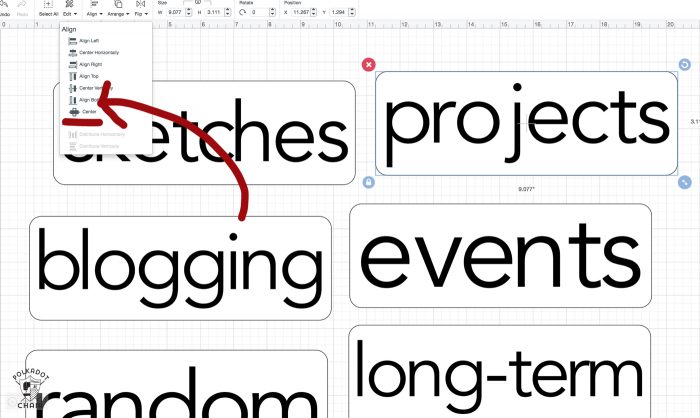
Using your mouse, select the rounded rectangle and the word. Click on Align above and click CENTER. This will center your words perfectly in your rectangle.
Next, select both the rectangle and the words, using your mouse or using the layers panel on the right. Click FLATTEN. This changes the file to a print and cut. The software knows that you want to print the words THEN cut the rectangle. Don’t worry that the black line disappears around the rectangle. It will still cut.
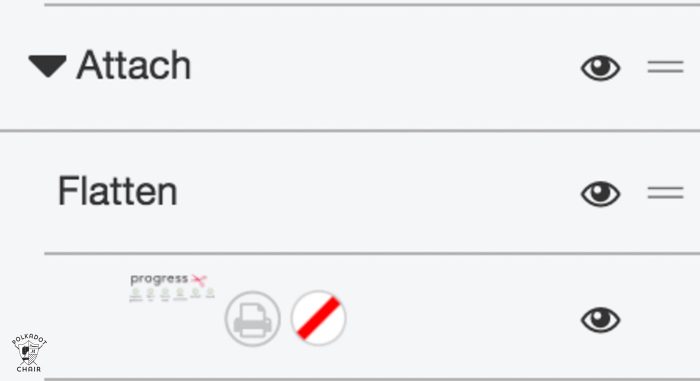
Since we are using Cricut sticker paper we want to make the BEST use of the paper. You don’t want to waste most of your sheet. I kept making labels until I filled up 2 sheets of paper. I made each label ONE AT A TIME, then clicked to flatten each one separately. You do NOT want to flatten the whole file at once, that will not make each label cut separately. Flatten as you want them cut.
When you are ready to print and cut. First, make sure you’ve calibrated your machine. To do that click on the upper left-hand corner, and click Calibrate. Then just follow the prompts.
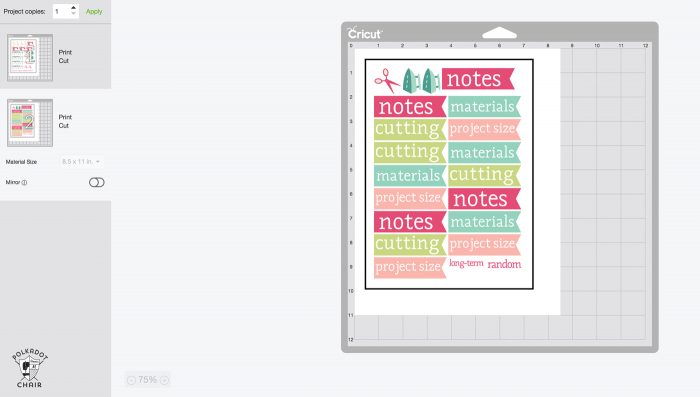
Click MAKE it and follow the prompts on the screen. You will first print the image (on sticker paper), then load it into the machine and cut it. Then print again and cut again.

You’ll end up with LABELS!! So cool right?
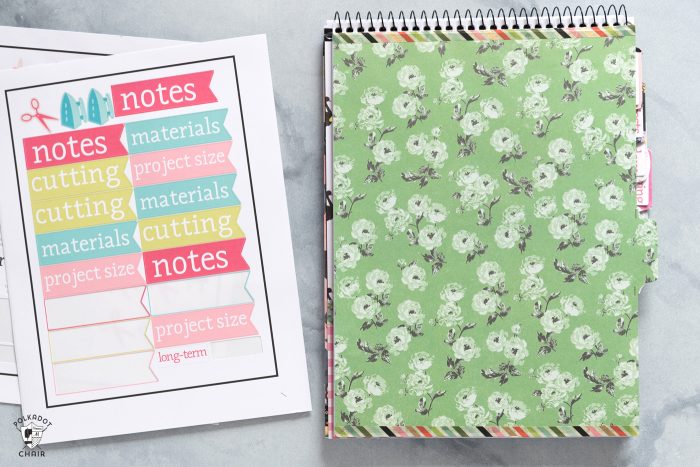
Now, just put them on your Tabs!
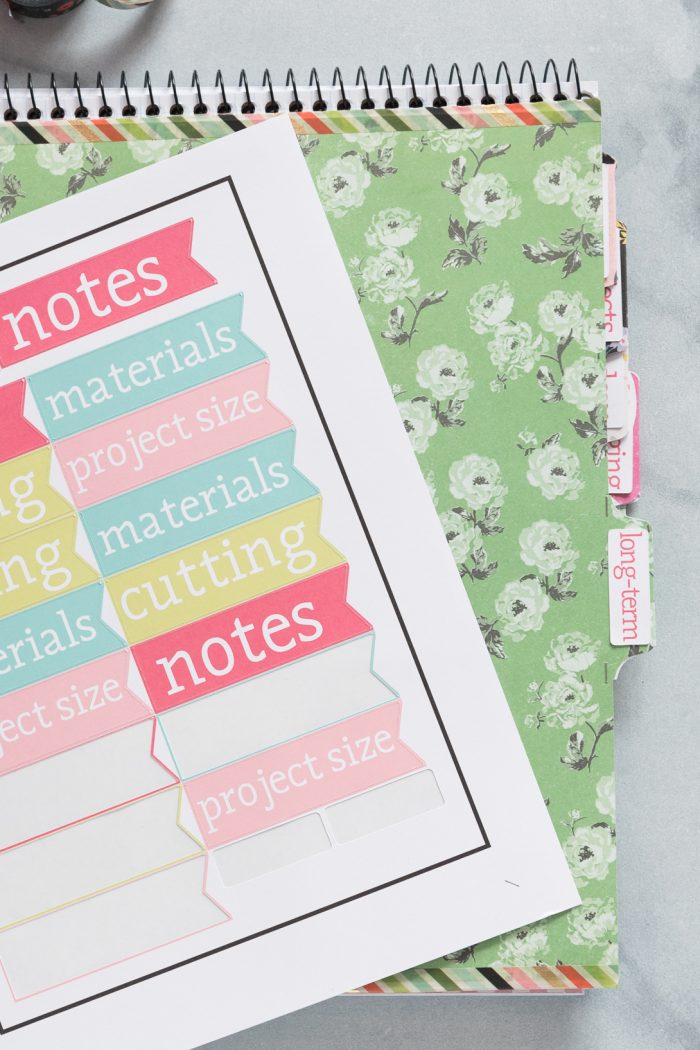
Okay, now let’s talk about how to make the cute stickers!
Print and Cut Custom Stickers with the Cricut
In Design Space click IMAGE. Find what you want to make a sticker. There are so many cute ones in Design Space. I found a lot of sewing/quilting themed images.
Bring it into design space. Size it and recolor if you want (click on the attributes panel for the layer to change the colors).
Select all of the layers in the image then click FLATTEN.
Repeat until you’ve filled up a sheet.
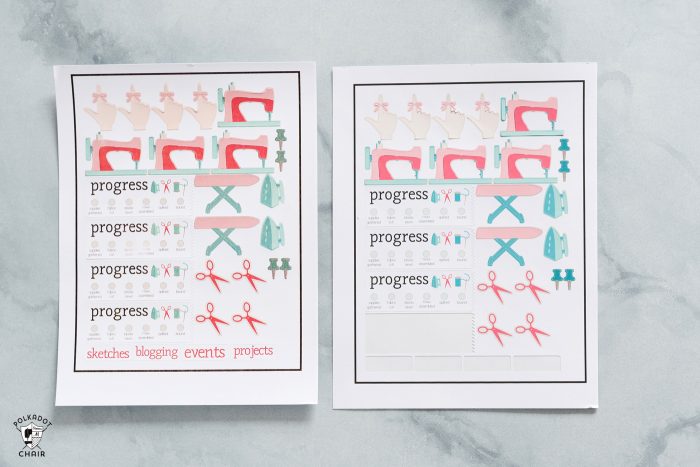
Okay, here’s the good news! I’ve also shared my STICKER file with you!!
Just click below to find it and open the file in Design space. It includes all of the links to the images I used to make my stickers. The words, the cute sewing icons, and the shapes! It took me HOURS to create, so I’m happy to share it with you.
Okay, I know that was a lot to take in. But I want these monthly Cricut posts to be INFORMATIVE for you. I want to teach you as much as possible how to use the machine so you can make the projects that you have pictured in your head! You know, the whole “teach a man to fish” concept.
Just to wrap up, here is a list of the Products and Files I used in my post – CLICK the right page:
- Cricut Maker 3 (you can get great deals on machine bundles on Cricut.com)
- Roll Holder for Maker 3
- Cricut EasyPress (I like the large size the best): Make sure you get the EasyPress mat as well.
- Cricut Weeding Tools: (I use the small hook tool ALL the time, making weeding vinyl so much easier).
- Cricut BrightPad: A cordless, flat, bright lightbox. I use it to weed Cricut vinyl and use it all the time to trace applique shapes for sewing & quilting.
- Cricut Iron On Vinyl
- Cricut Permanent Vinyl
Divider Tab Files:
Sticker Files:
Other:
You may also like these projects:
DIY Monogrammed Chuck Taylors using a Cricut
How to make a painted DIY vintage soda crate
This is a sponsored conversation written by me on behalf of Cricut. The opinions and text are all mine.


Melissa, thanks for this great post. I like doing your own thing. It gives you exactly what works for you.
Melissa, what an awesome post! I just got back into quilting after a 20 year break, and I’m starting small, with lap and wall quilts. This is a great way to keep track of each project, while i re-learn each technique! Thanks for all your hard work!
Great post Melissa! Lots of good information. I’ve saved both of the Cricut files and look forward to using them in the future!
So glad you like it!
Can these be made without a cricut maker? I do not have one . Don’t even know what they look like., but would like to make one of these planners.
Marlene
Yes, it’s just a basic notebook with paper glued on. Just buy some pre made tabs at the office store and you should be able to get a similar result.
I absolutely love this but don’t have a cricut or know how to use the soft ware. Is there anywhere that these are jpg files that I can just print and hand cut to make my sewing project planner? I have my graph paper notebook and have tabs but love the layout you do for each page listed with Notes, Material, cutting, Progress, etc and the few fun sewing stickers. I am working on the cover right now. This is so fabulous , you are so creative! Any help greatly appreciated. Thank you!!
Apparently not available now. 😢
I checked and it is still there, what message are you getting exactly?
Interestingly, it won’t load on the ipad. Only on the computer. I guess the size? I ONLY use my ipad for designing and with my Cricut, so every once in a while, there’s a problem, but not often. I was on an ipad Pro, so certainly not a power problem. It’s all good, I got them now!!! Thank you so much for these! I use a regular Quilter’s Planner, but need extra project pages, so this is perfect! 🙂