How to Sew a Charming Felt Applique Bookmark
Add a touch of handmade charm to your reading experience with our delightful felt bookmark pattern. The step-by-step instructions in this pattern will walk you through creating charming and functional bookmarks using hand sewing and reverse applique techniques.
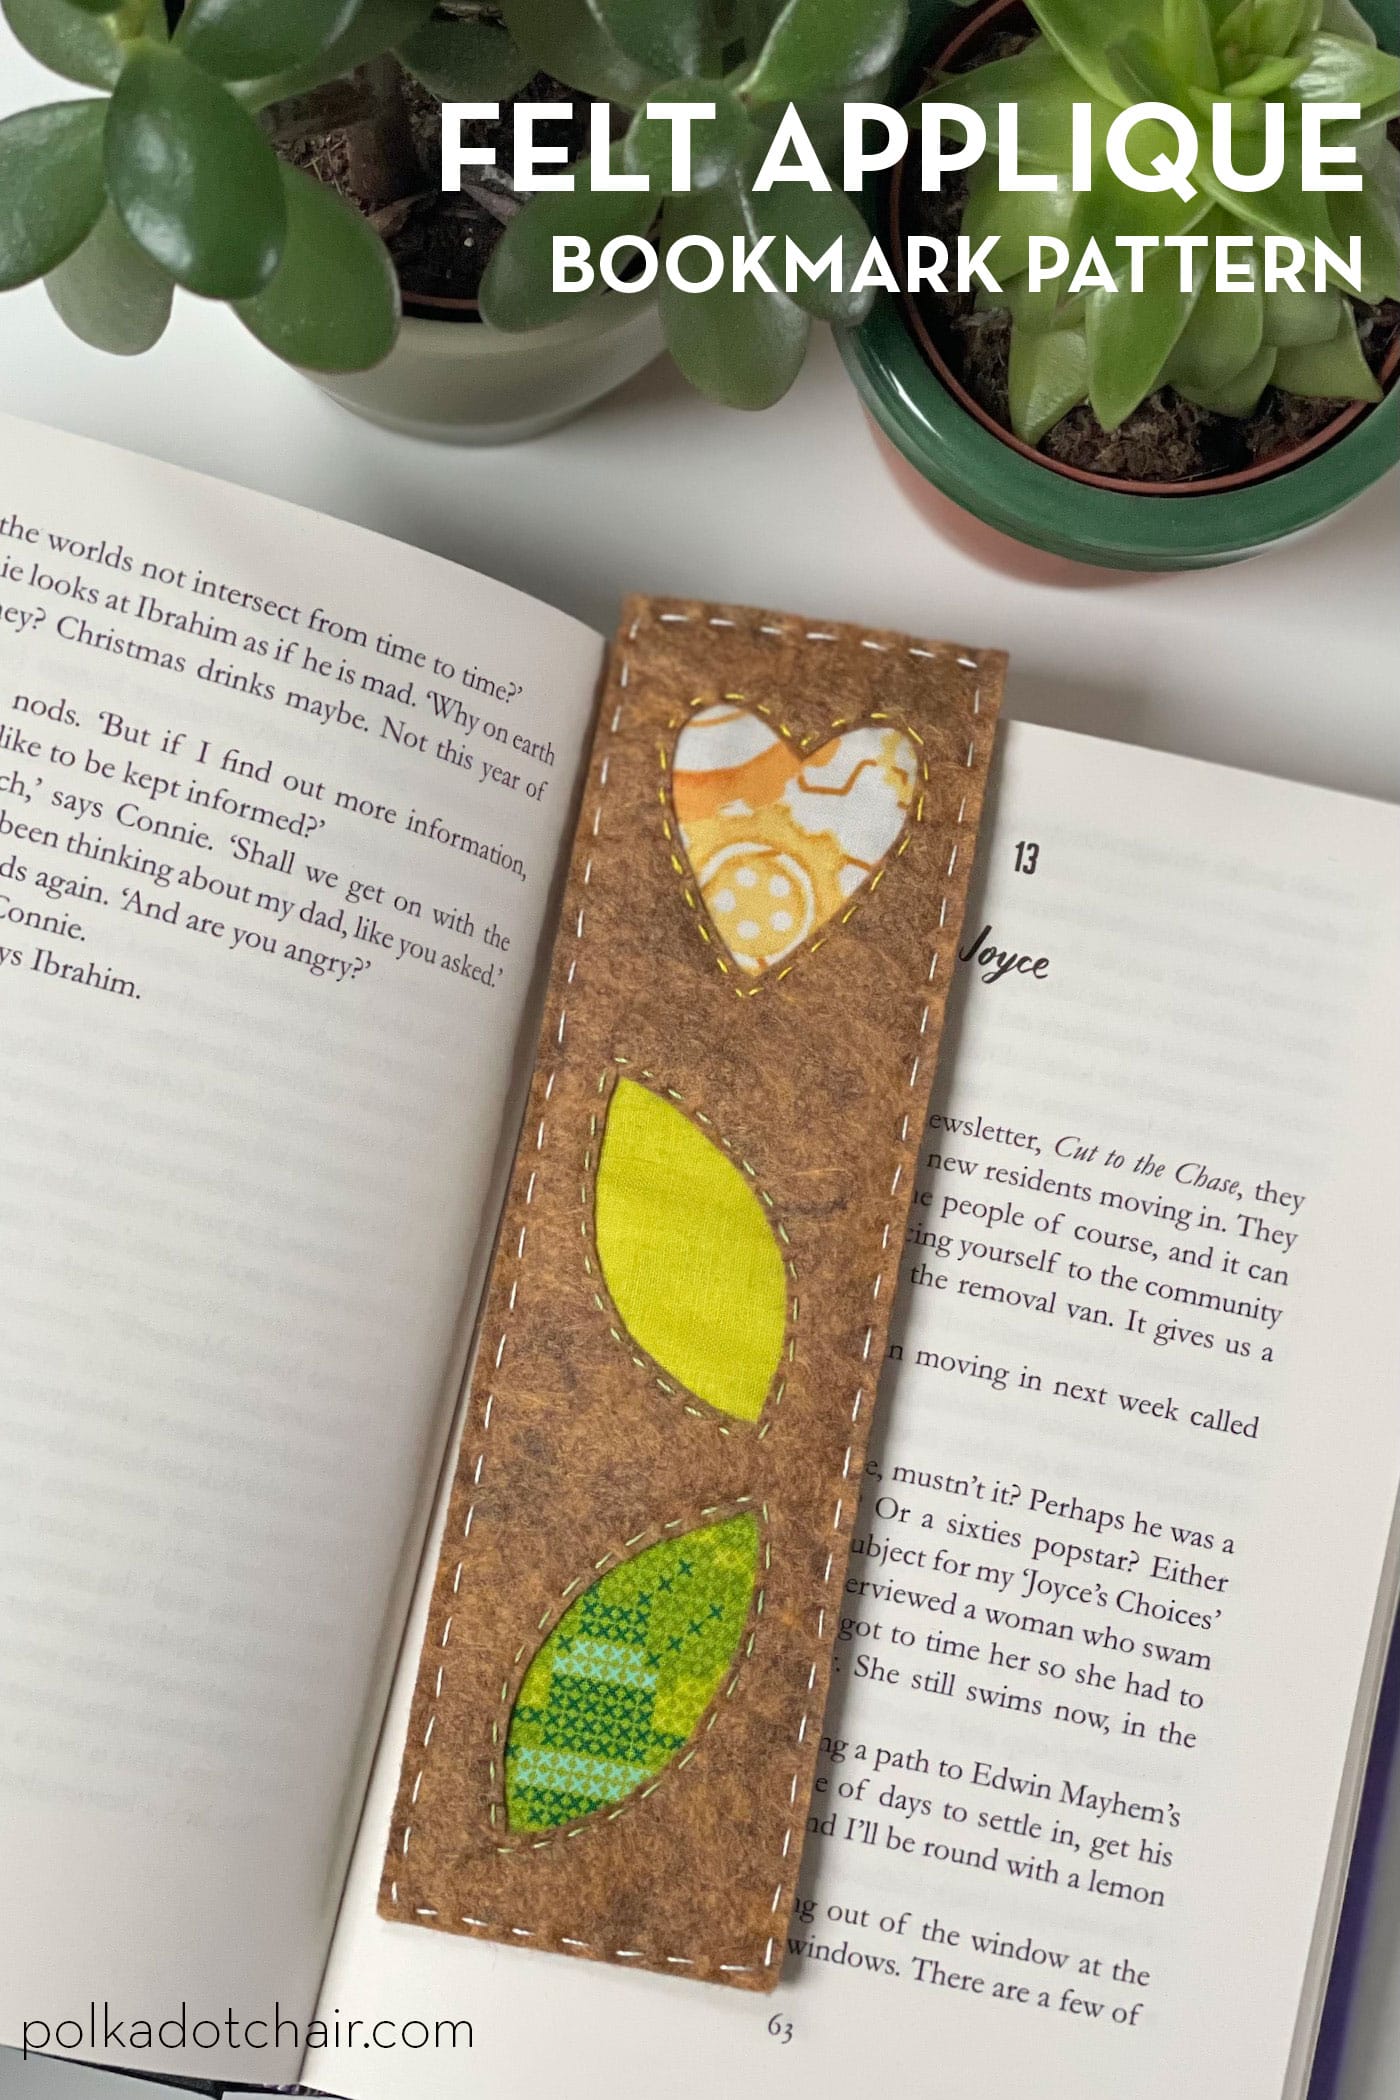
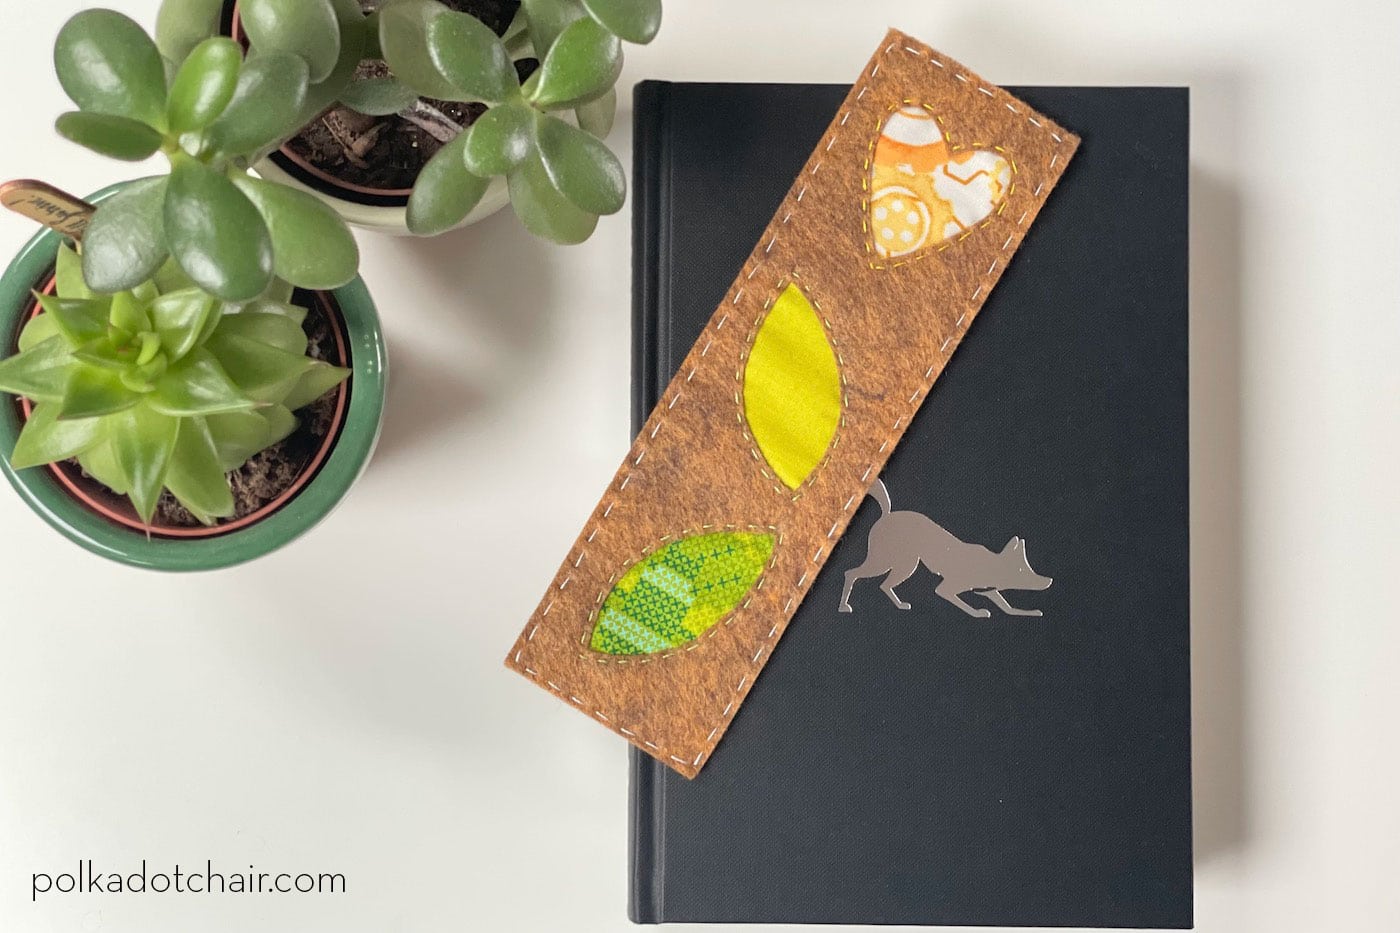
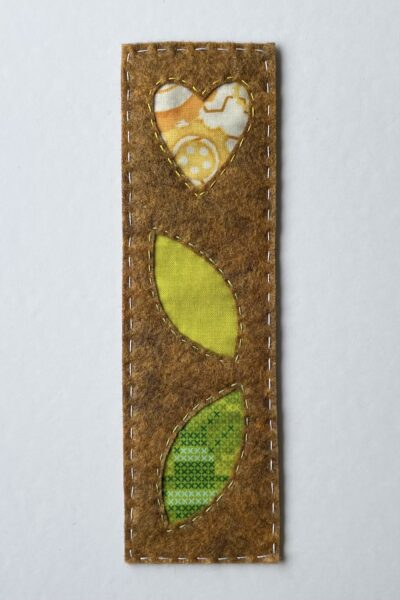
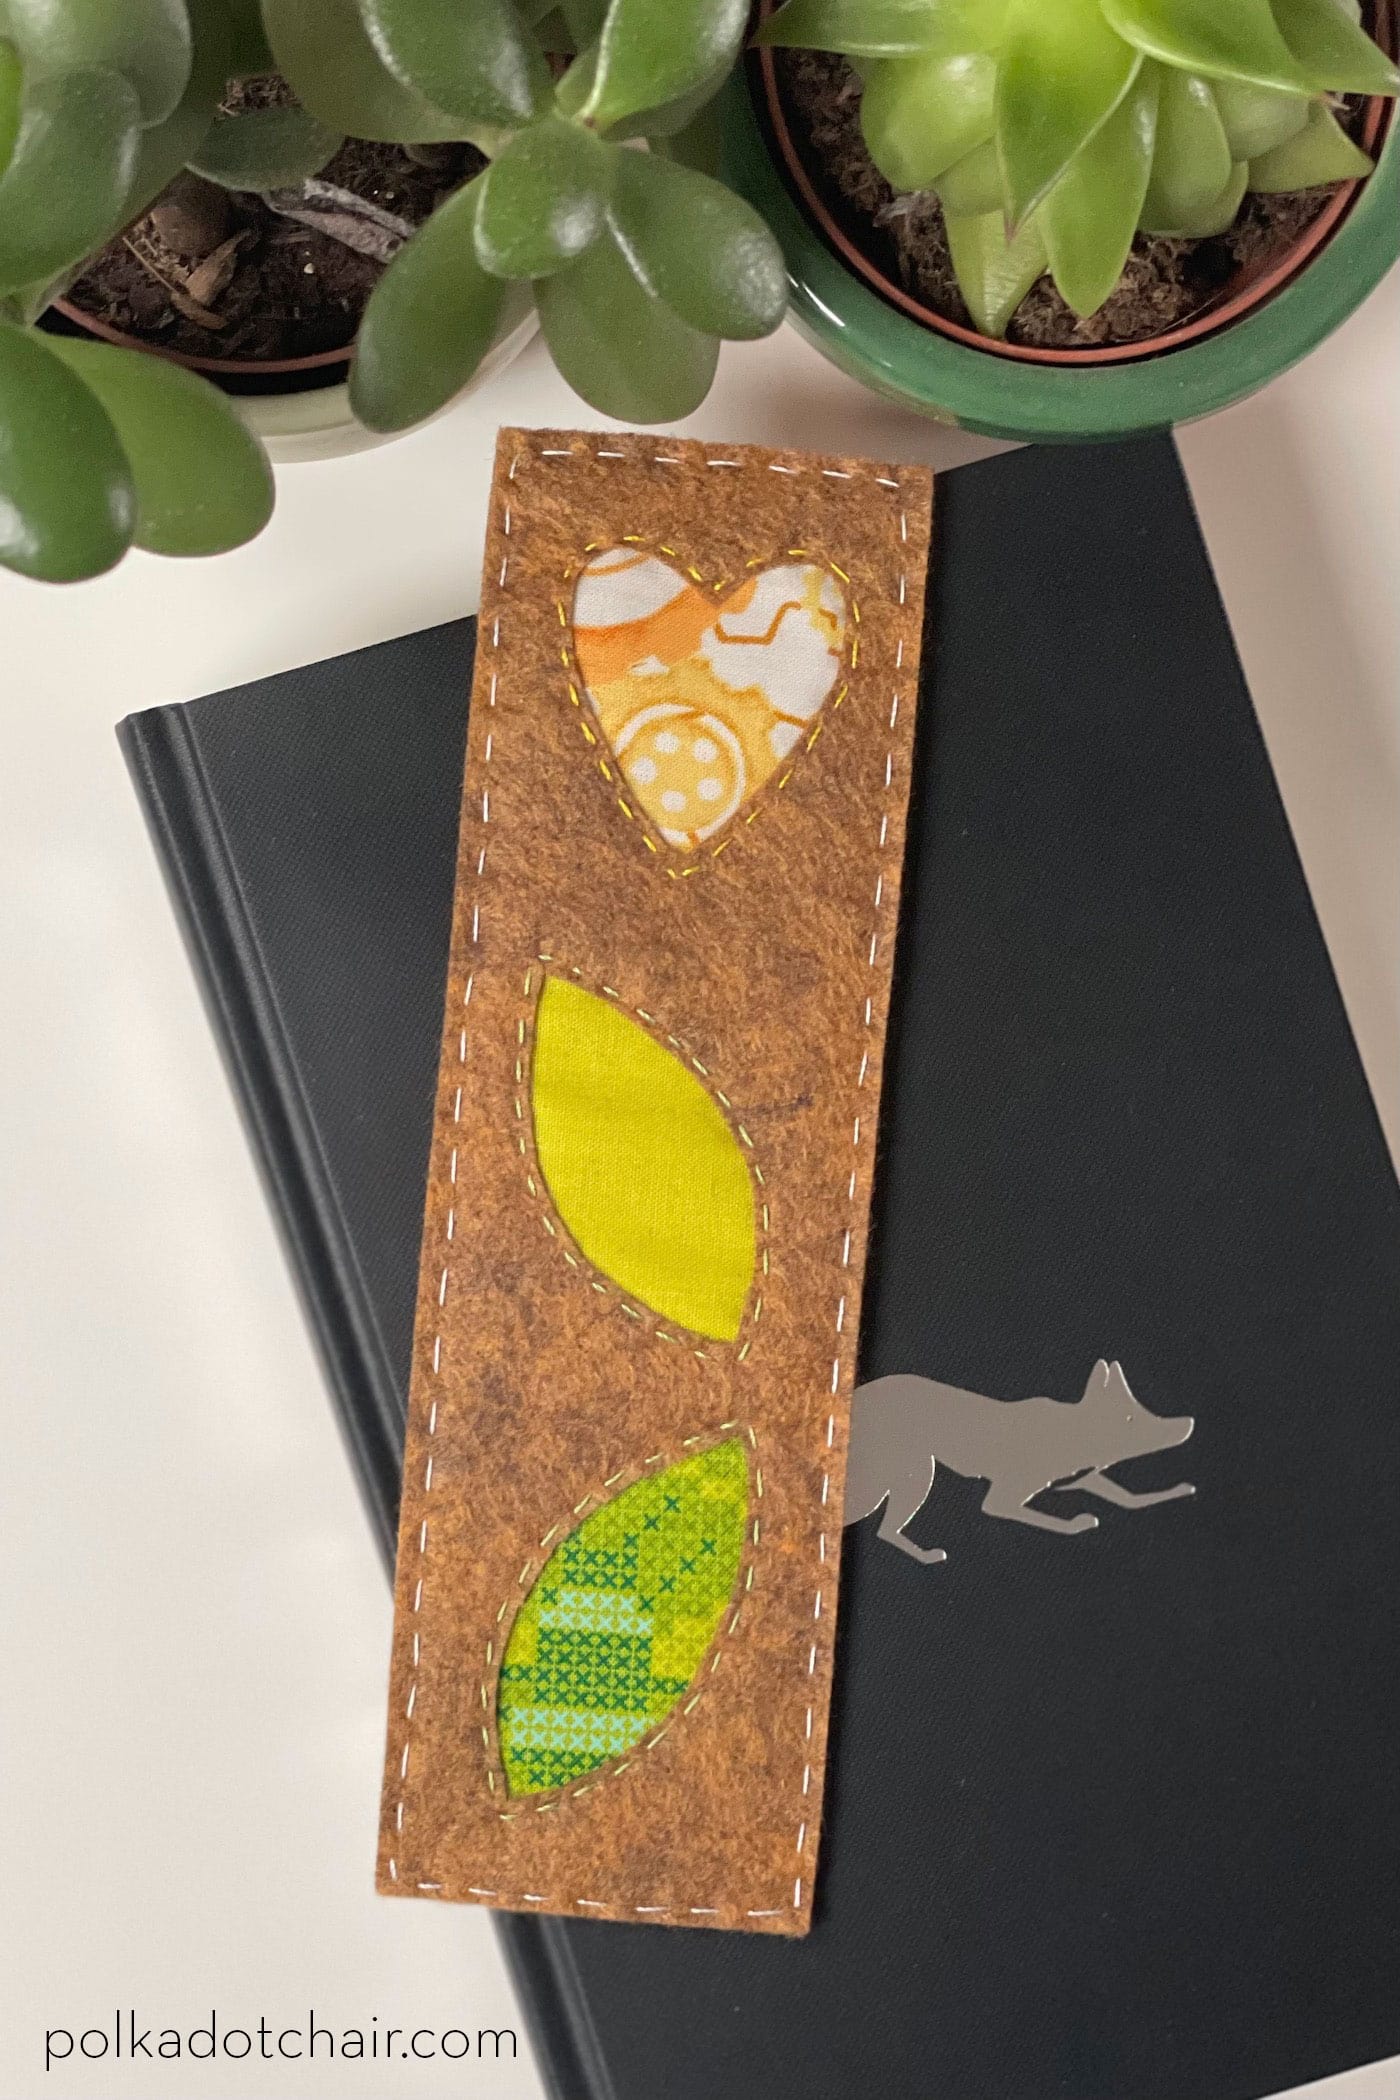
This Flower Window Bookmark design is a great way to get ready to welcome Spring and do a fun hand-stitching project simultaneously.
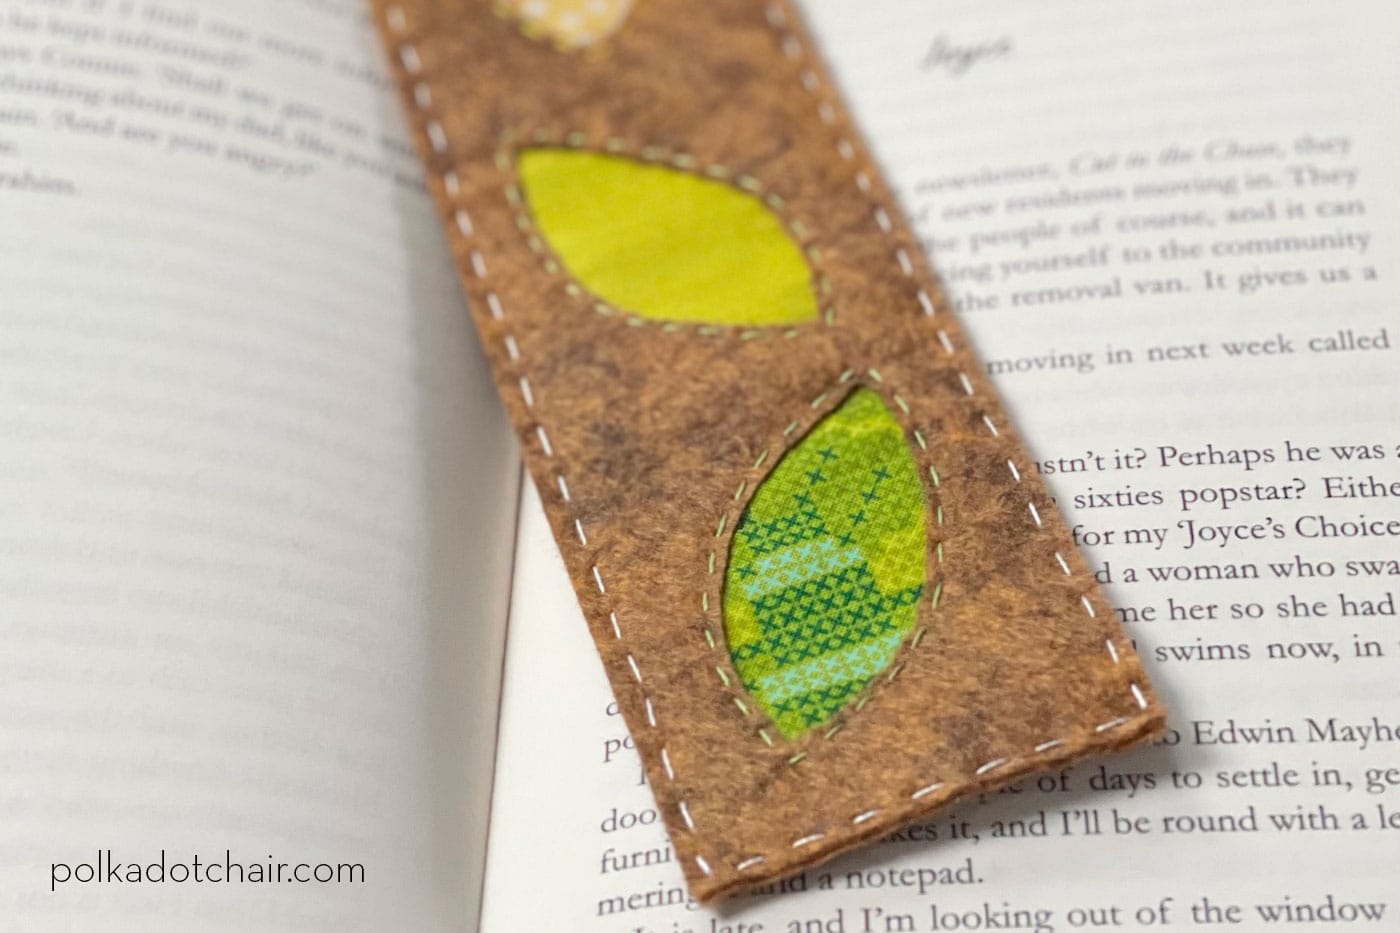
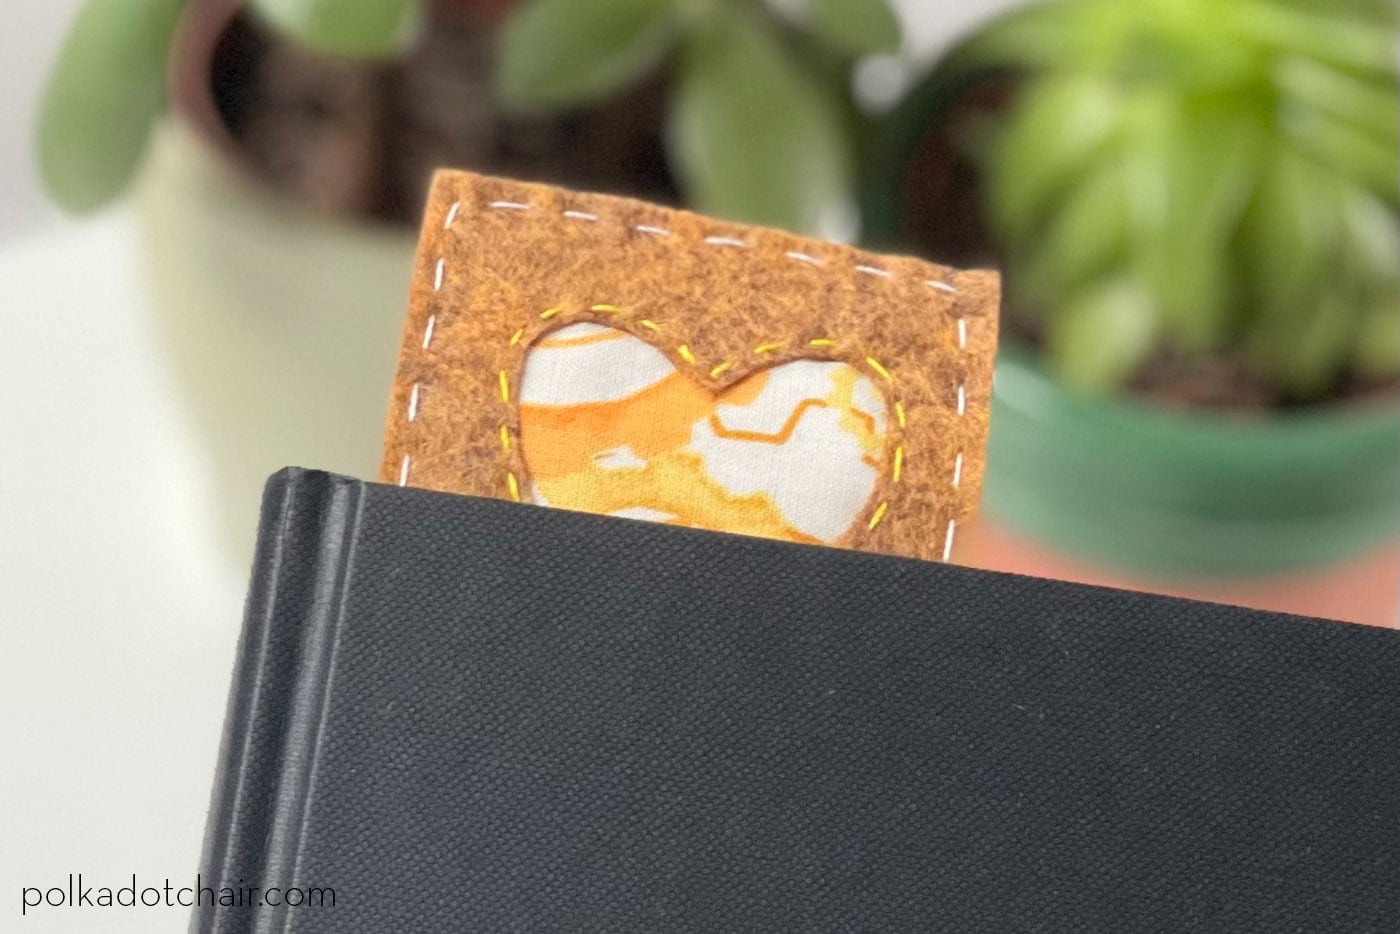
You could add some variety by changing the shapes of the “windows,” using all hearts with pink fabric prints underneath, or changing them to letters for a name or initials.
This bookmark is a great way to use up some fabric scraps; you can also use it to showcase some of your favorite fabric prints or do some fussy cutting.
This bookmark sewing pattern features a technique called Reverse Applique.
What is Reverse Applique?
Reverse appliqué is a textile technique in which a design is created by cutting away layers of fabric to reveal the layers beneath rather than adding fabric on top.
This is different from traditional raw edge appliqué, where pieces of fabric are sewn onto a background to create a design. In reverse appliqué, the design is formed by cutting shapes or patterns from the top layer of fabric to expose the layers beneath it.
Bookmark Sewing Patterns
This bookmark tutorial is part of an ongoing series offering you a variety of creative and unique bookmark tutorials. Here are all of the tutorials we’ve shared so far.
Bookmark Tutorials
Bookmark Sewing Pattern Supply List
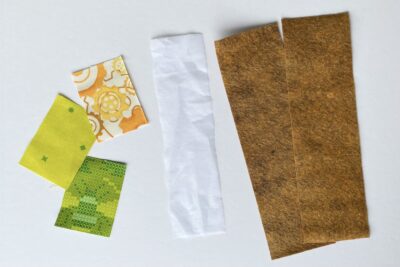
- Brown/Natural felt 8½” x 5”
- Yellow Fabric small scrap
- Green Fabric scraps
- Iron-On Interfacing 7½” x 2”
- Printed PDF template
How to Get the Bookmark Template
We are happy to email you a copy of the template used in this pattern! Simply fill out the form, and we will email it to you.
Instructions
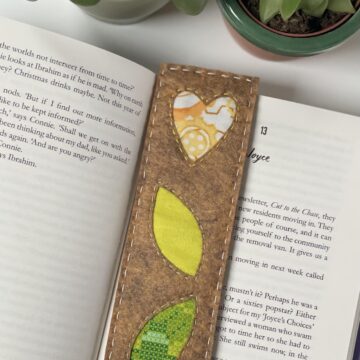
Flower Bookmark Sewing Pattern
Equipment
supplies
- 1 piece Brown/Natural felt 8½” x 5”
- 1 small scrap Yellow Fabric
- 1 scrap Green Fabric
- 1 piece Iron-On Interfacing 7½” x 2”
- 1 spool Hand Quilting thread in a contrasting color
- Printed PDF template fill out the form on this page and we will email it to you
Instructions
Cutting:
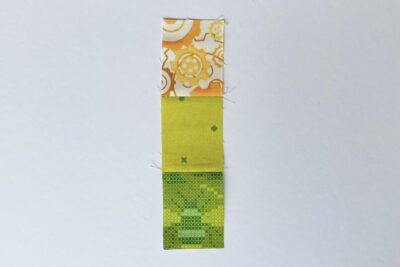
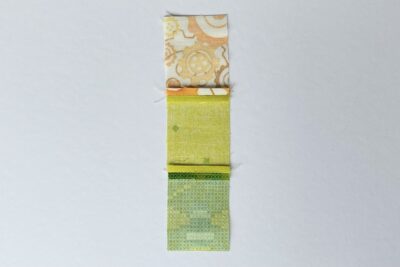
- From Brown Felt cut 8½” x 2½” (2).From Yellow Fabric cut 2¾” x 2” (1).From Green Fabric cut 2¾” x 2” (1) and 3” x 2” (1).From Interfacing cut 7½” x 2” (1).

Construction: Use a ¼” seam allowance unless stated otherwise.
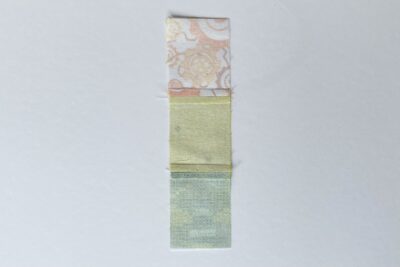
- Take the Yellow Fabric rectangle and the 3” x 2” Green Fabric rectangle. Sew together then press the seam open.
- Take the 2¾” x 2” Green Fabric rectangle and sew it to the Green Fabric rectangle from step 1. Press the seam open
- Following the manufacturing instructions, attach the interfacing to the wrong side of the pieced rectangle from step 2.
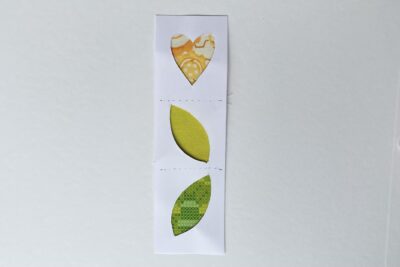
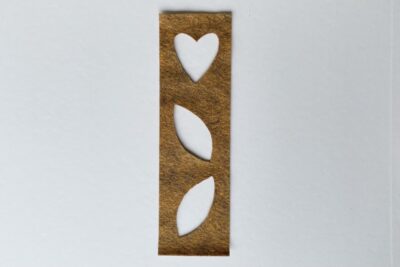
- Print out the template. Cut out the large rectangle and then cut out the three shapes running down the centre.
- Place the template onto the right side of the pieced rectangle, using the horizontal dotted lines to line up the seams, and check that the three cut out shapes fit onto the three different fabrics.
- Take one of the Brown Felt rectangles and place it wrong side facing up. Now flip over the template and pin it to the felt, with all the edges matching.
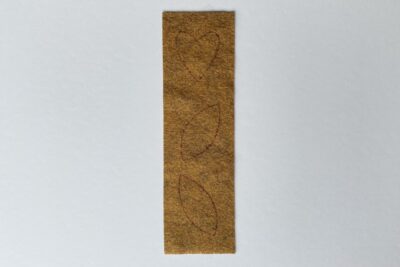
- Draw the shape outlines onto the felt using a fabric pen/pencil.
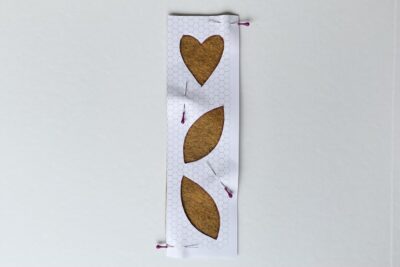
- Carefully cut out the three shapes using sharp scissors or a craft knife to create three windows in the felt rectangle.
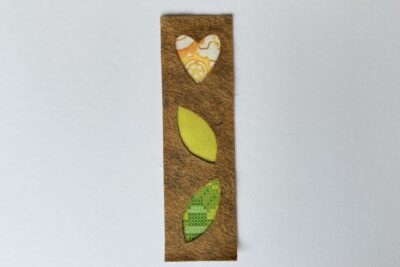
- Use dots of fabric glue to secure the pieced fabric rectangle onto the felt rectangle. The right side of the pieced fabric should be against the wrong side of the felt.
- Double-check that the three windows are sitting correctly over the three different fabrics and reposition if required.
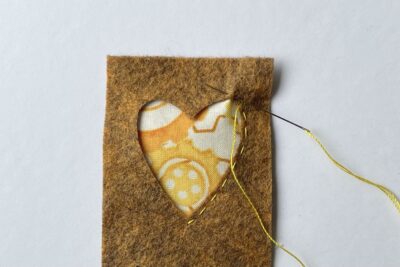
- Hand sew around the shaped windows, about ⅛” away from the cut edges, using embroidery (or hand quilting) weight thread.
- Use a chunky running stitch with yellow and green thread to match the fabrics.
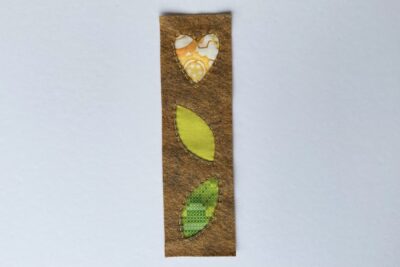
- Add the second Brown Felt rectangle to the back of the bookmark from step 10, with the wrong sides together. Use dots of fabric glue to secure it in place then hand sew around the four edges, about ⅛” away from the cut edges, using embroidery (or hand quilting) weight thread. Use a chunky running stitch with the thread colour of your choice (I have used white).


About the Designer

Amy lives in the north of England with her husband and son. When she’s not sewing and quilting, Amy can usually be found baking or reading. You can find her on Instagram @amyatthegate


I am new here but am looking forward to making this bookmark with my grandaughters who are just starting to show interest in sewing and embroidery. Looking forward to seeing what else you have.
I enjoy making bookmarks, but have not thought of doing this. I can easily tuck them in a notecard to add a special personal touch. Thank you.