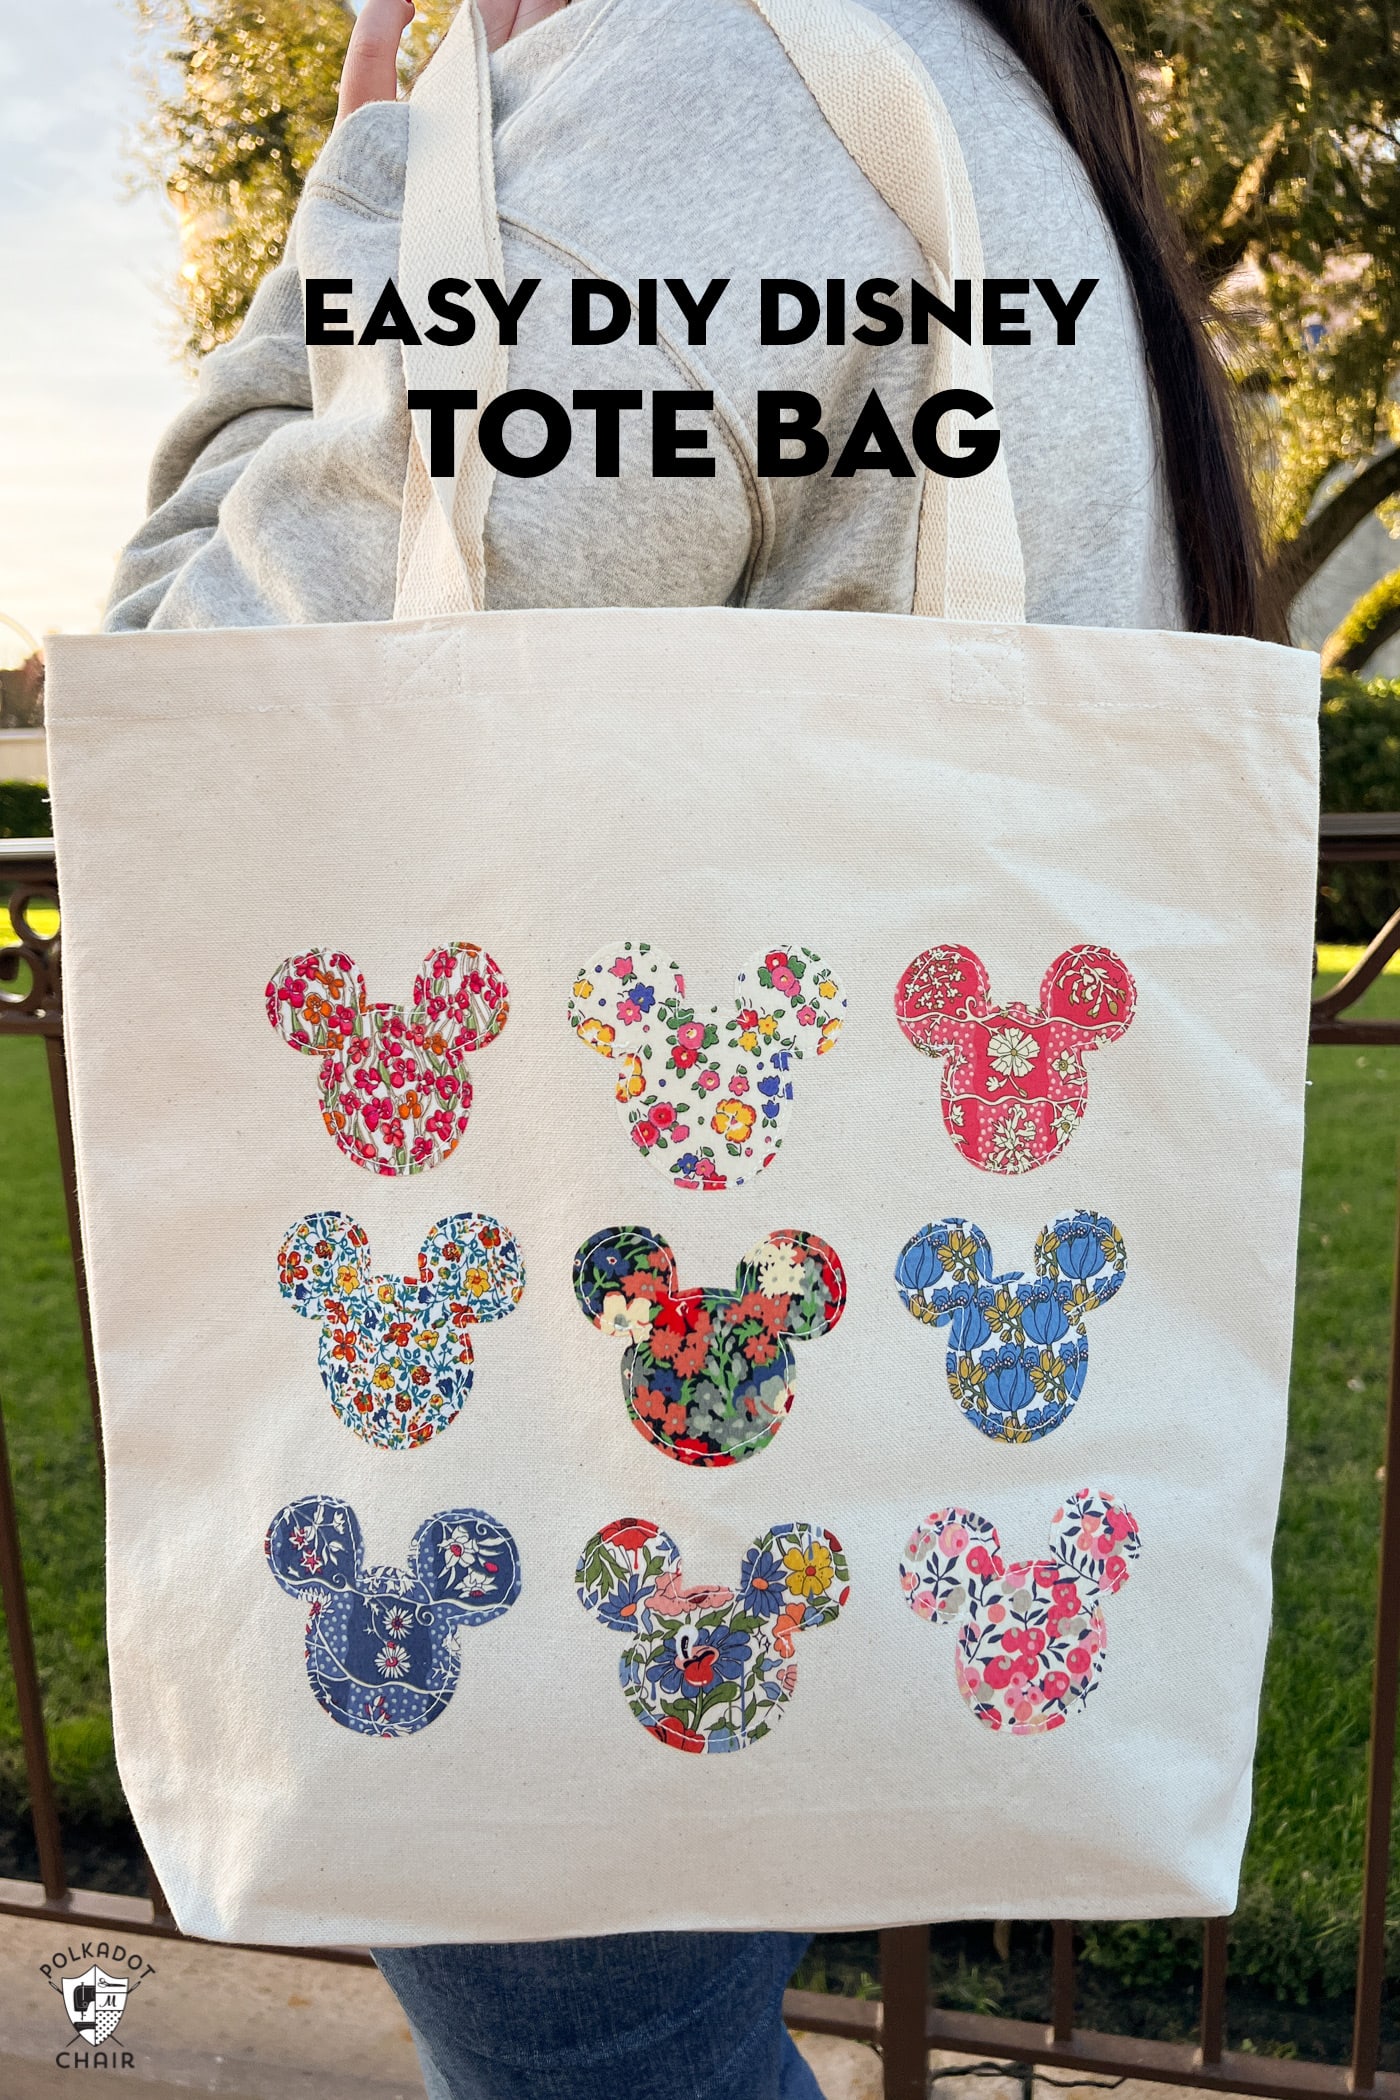
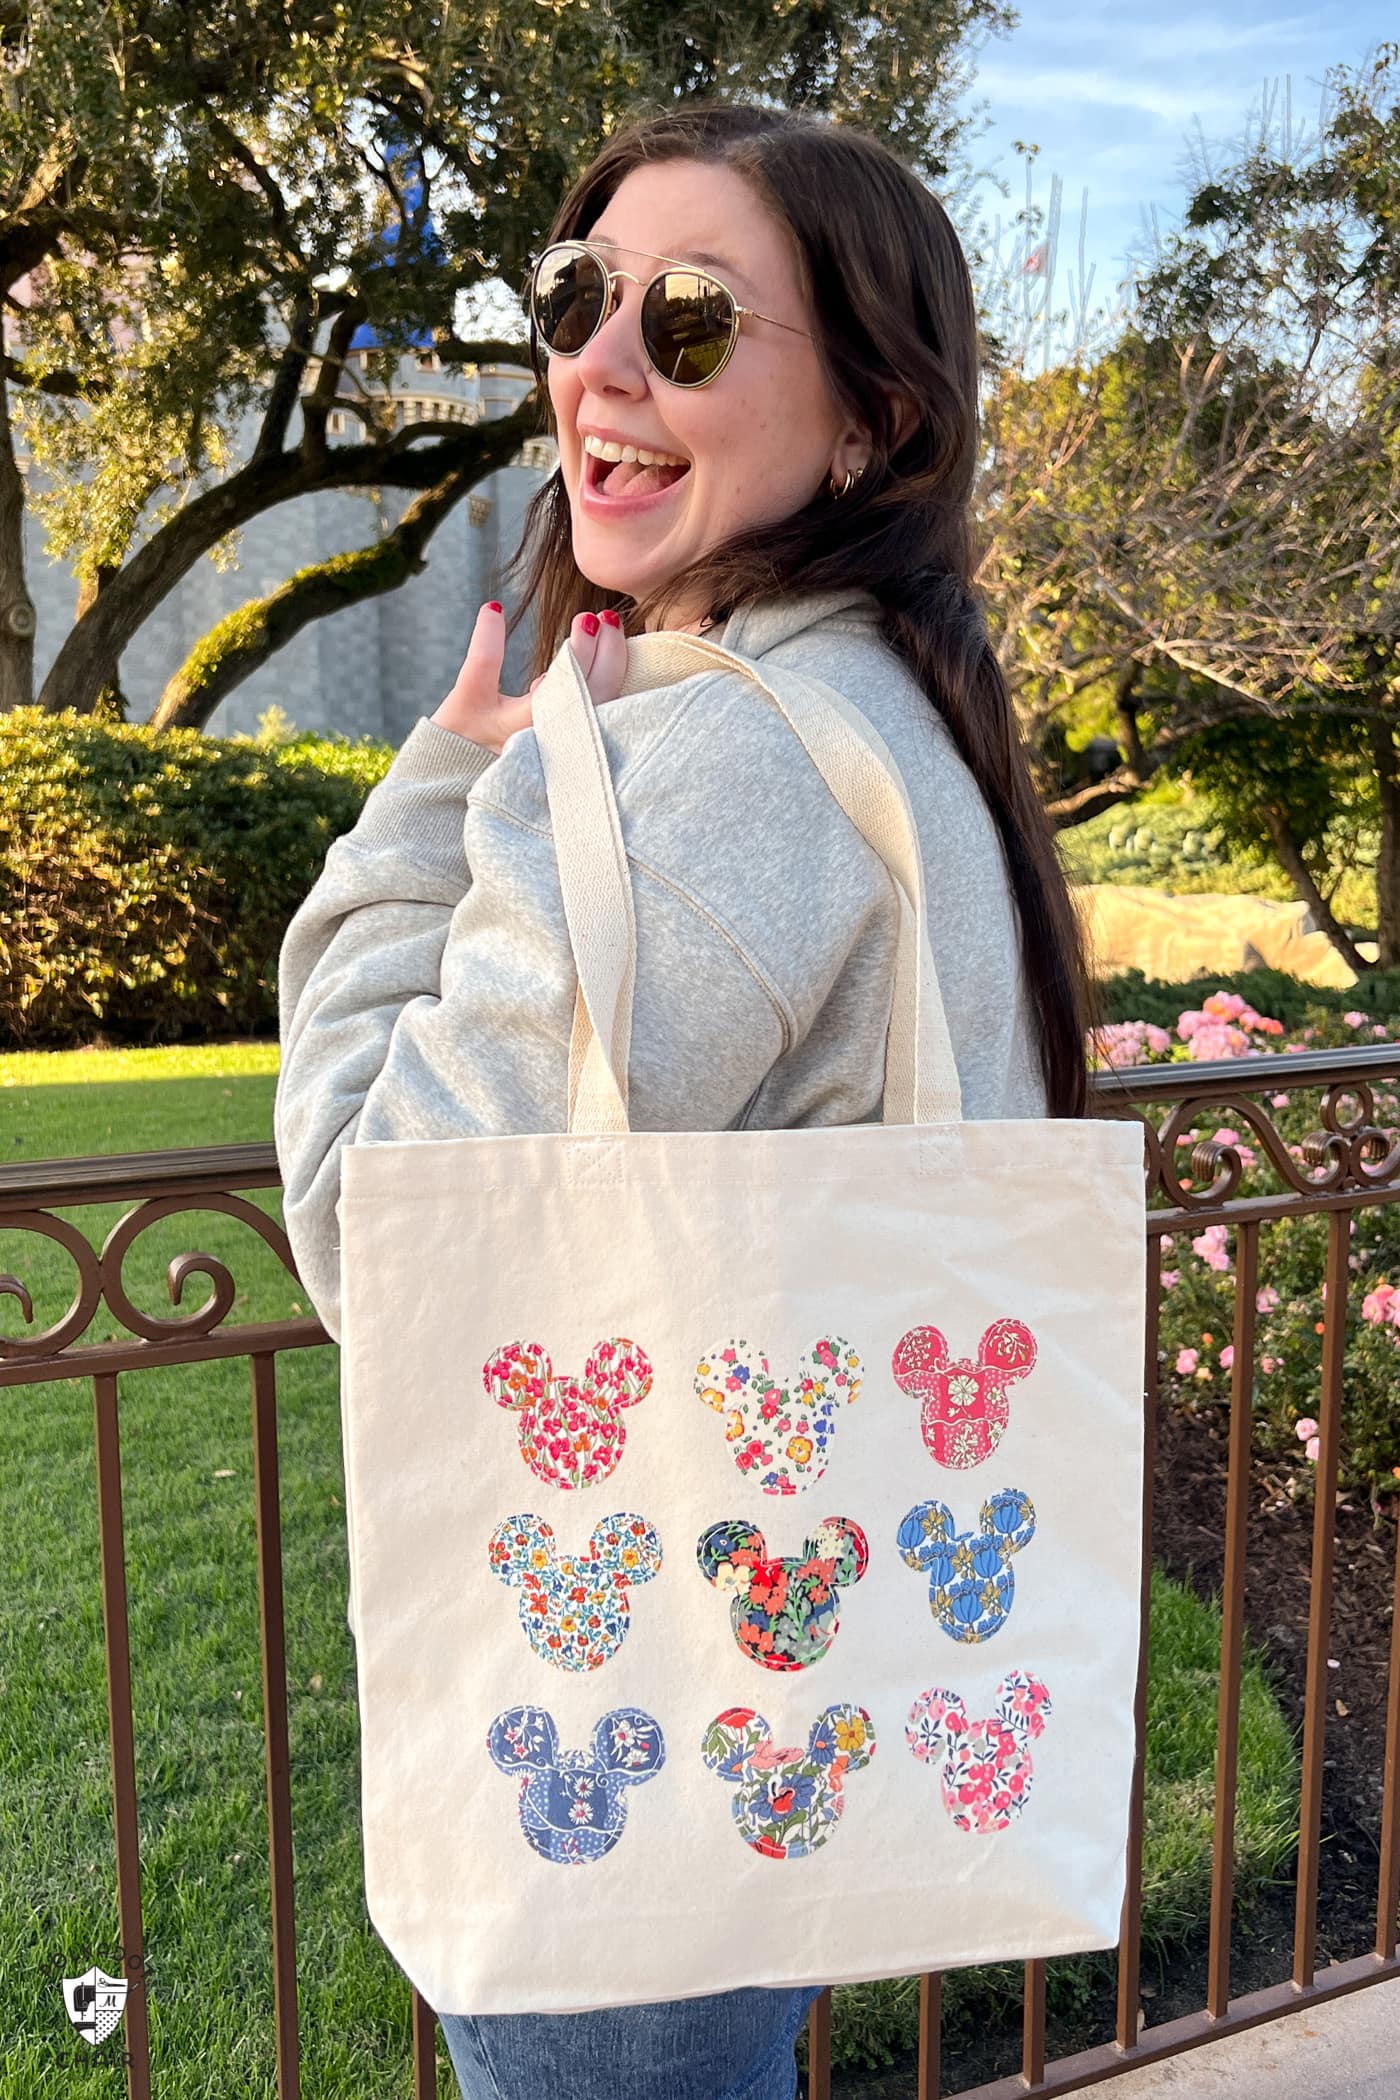
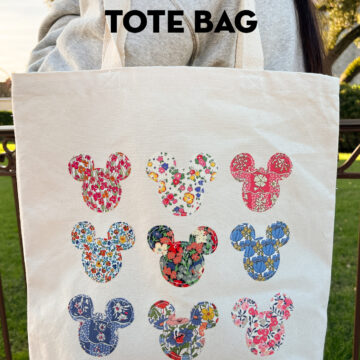
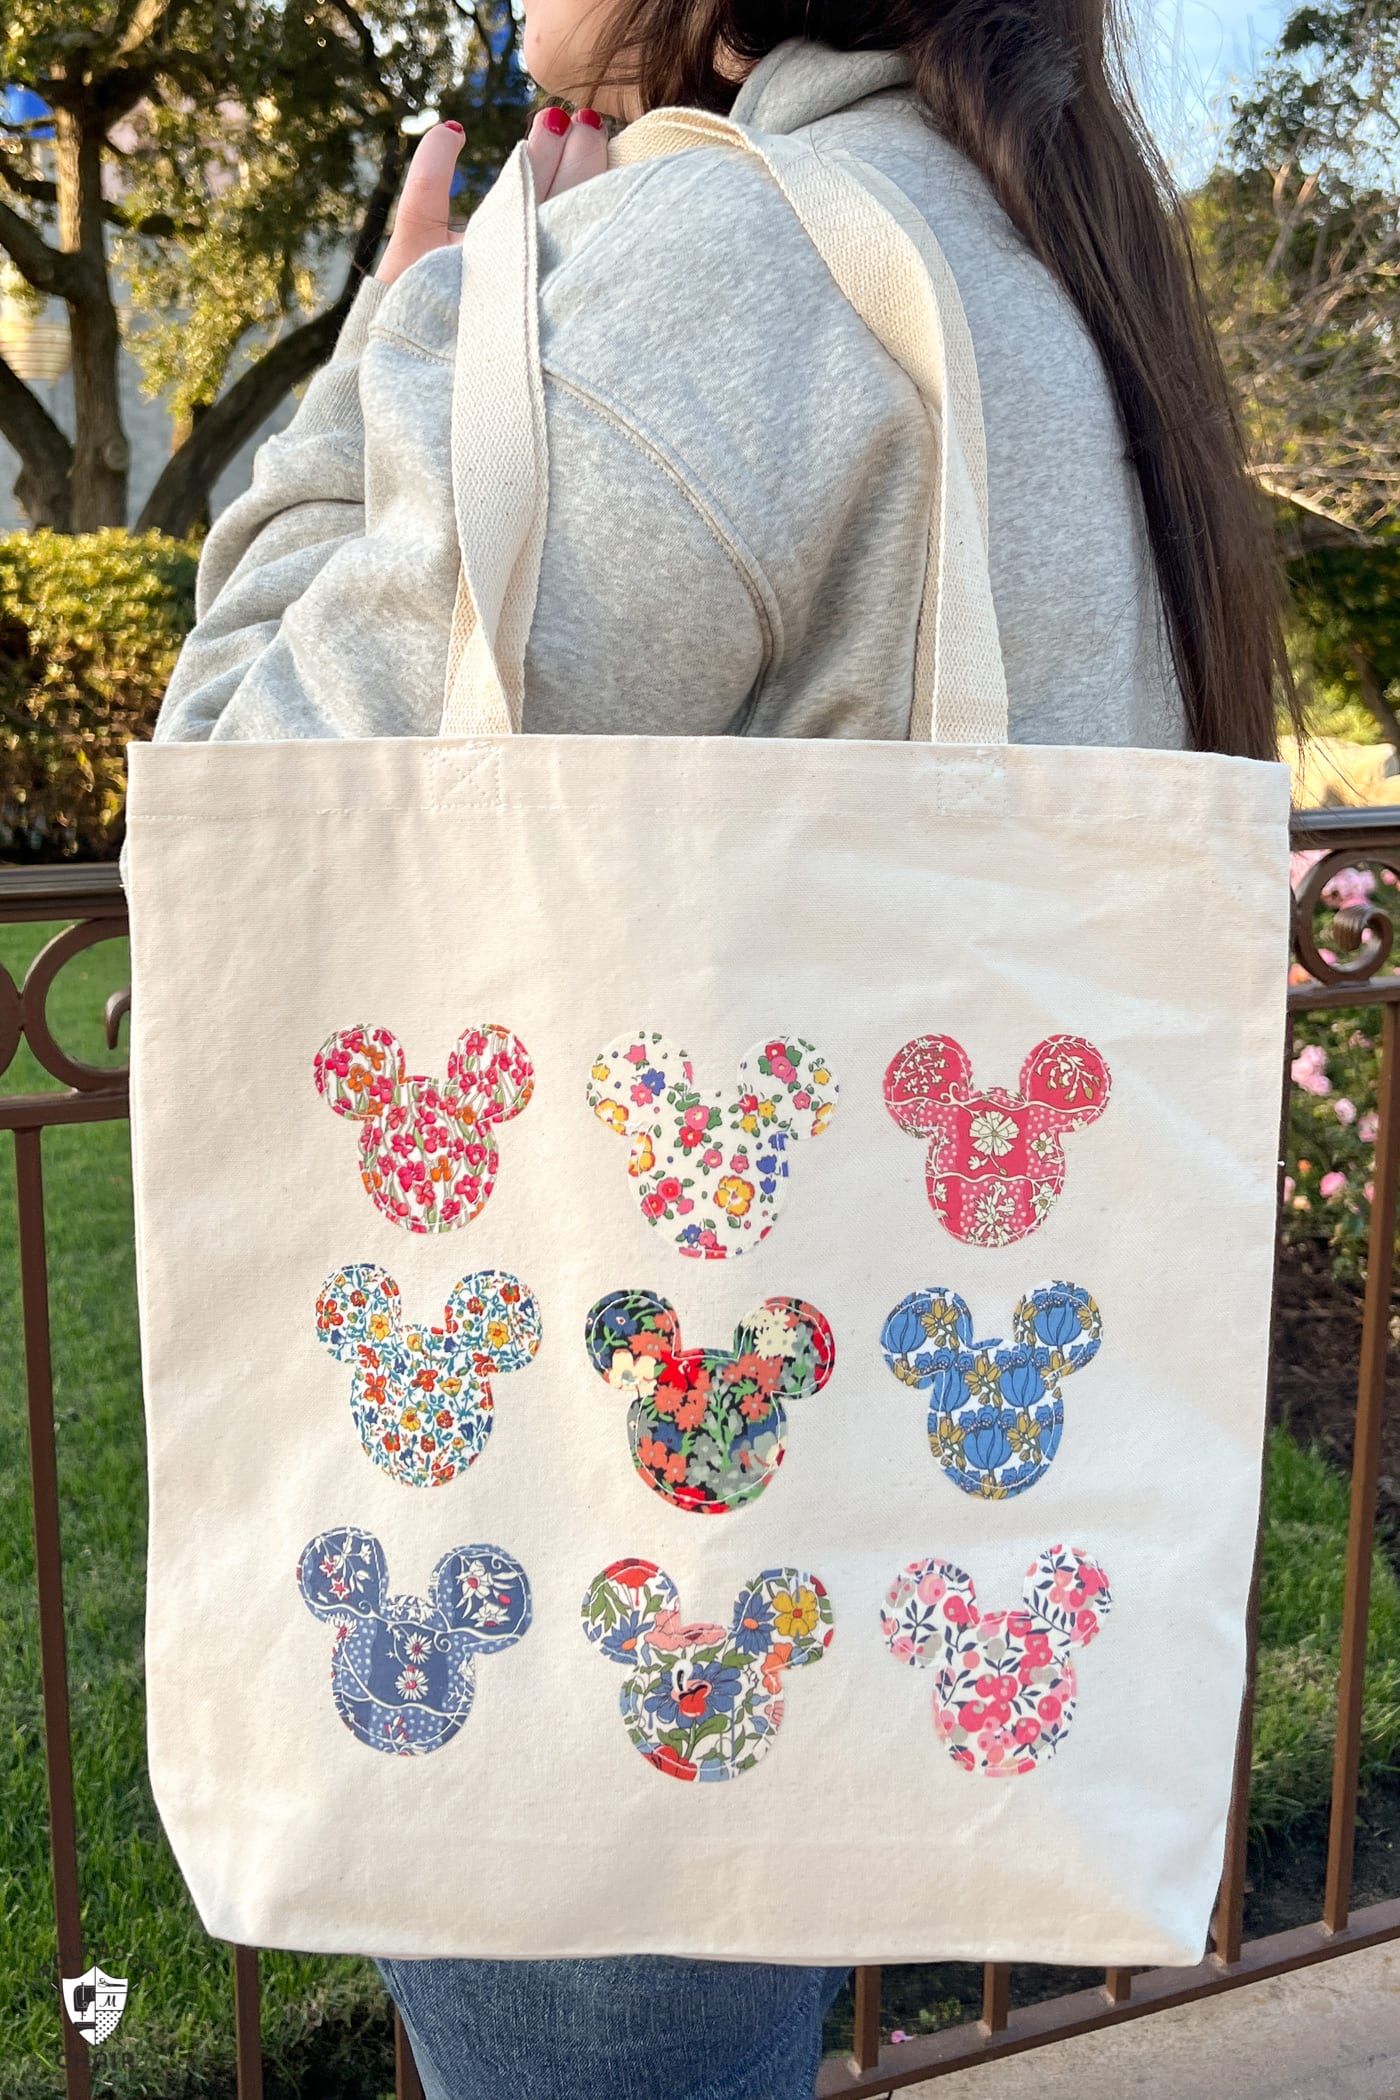
DIY Applique Disney Tote Bag
Use your favorite fabric scraps and a raw edge applique technique to create a fun Mickey Mouse-inspired DIY Disney canvas tote! Our step-by-step tutorial will show you how to make this simple DIY Disney bag.
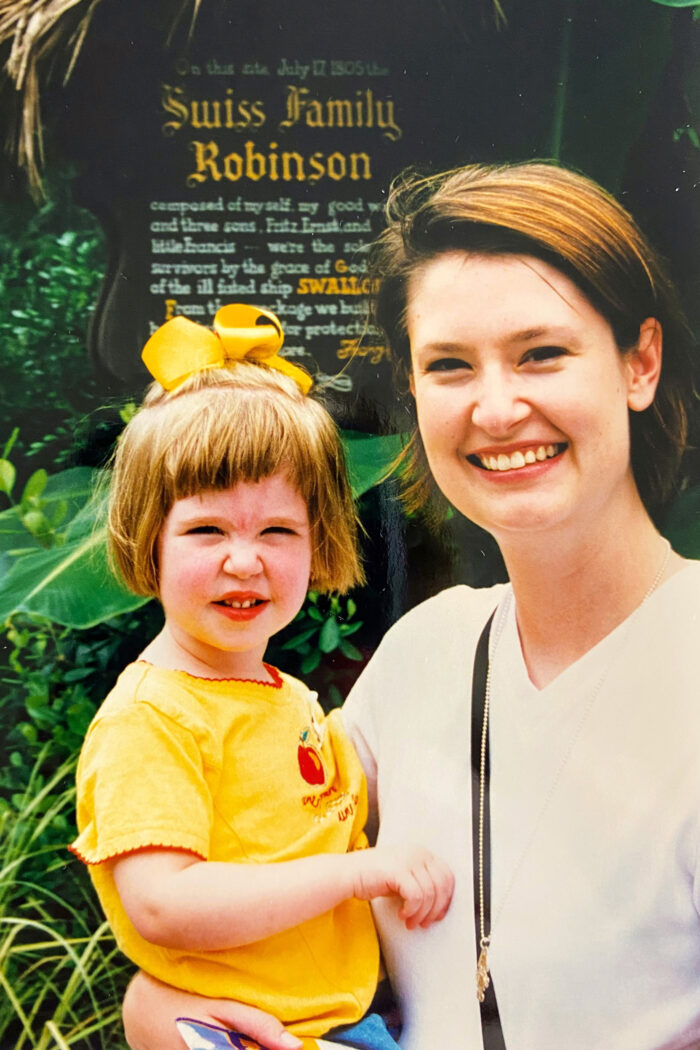
My family loves to visit Walt Disney World; we’ve been going since my children were very small. I remember my first trip in 1998 (the year Animal Kingdom opened) with my then 3-year-old daughter. After one visit, we were hooked and have visited many times.
I have a tradition of making something to take to Disney whenever I go. In the past, I’ve made family t-shirts, Mickey zip bags, purses, & even Halloween costumes.
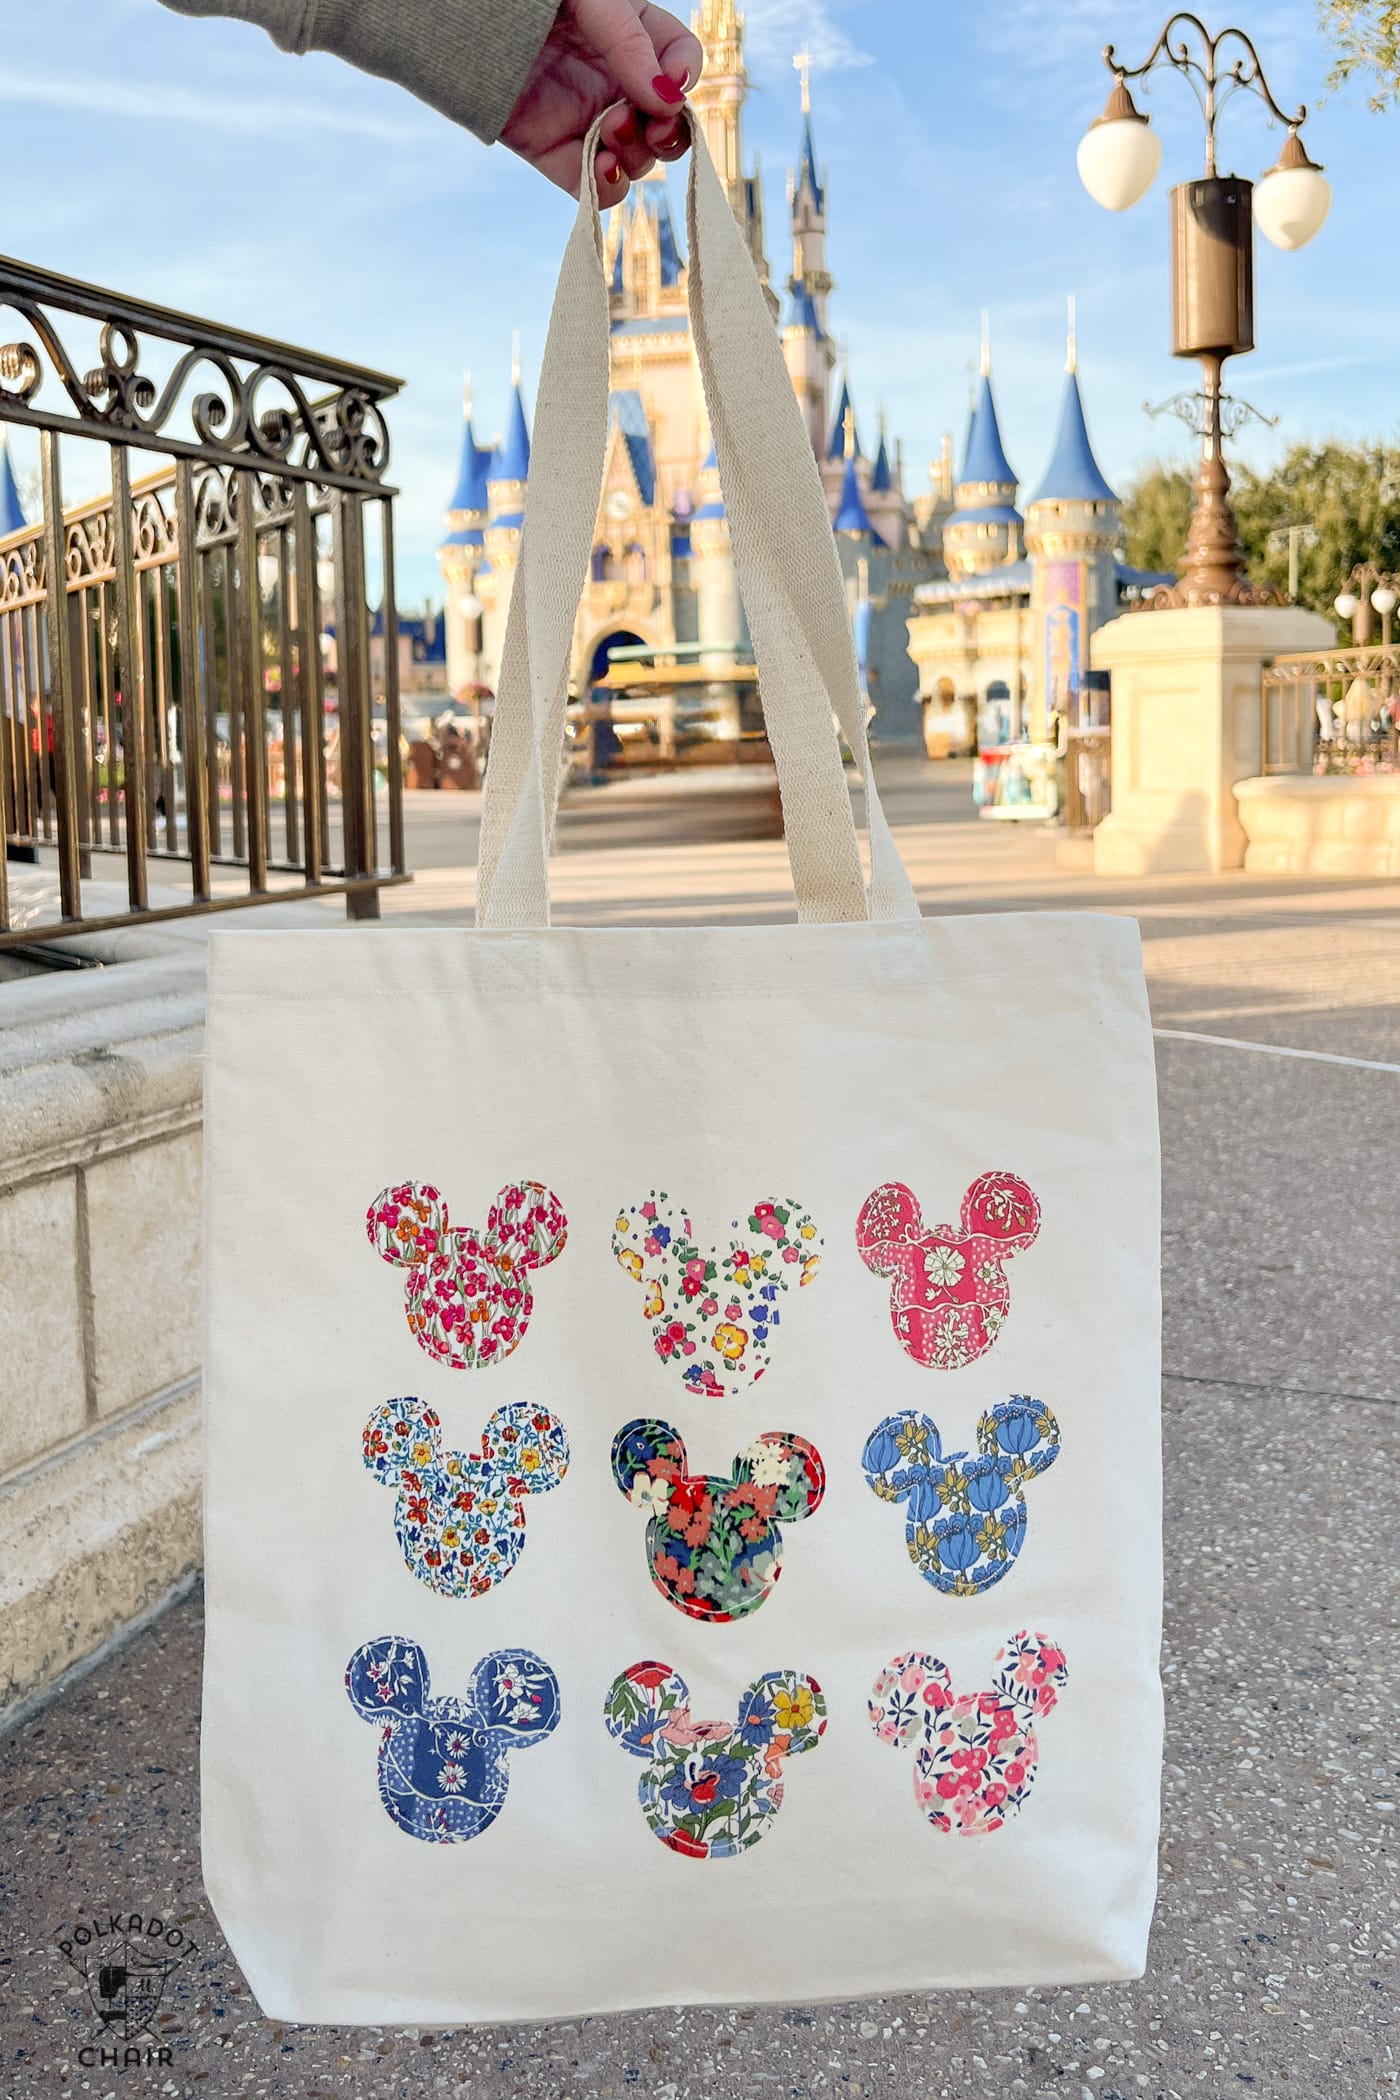
I was contemplating making another set of t-shirts (or sweatshirts since it was supposed to be cold) for this trip, so I decided to create a set of tote bags instead. We spent four days in the parks, and I thought taking a different tote bag with me each day would be fun.
This is the first of three Disney tote bag craft ideas I have to share with you.
Non-Disney Customization Tip
If Disney is not your thing, you can easily customize this tote for another occasion. Try applique bunny heads for Easter, shamrocks for St. Patrick’s Day, or stockings for Christmas!
About the Tote Bag
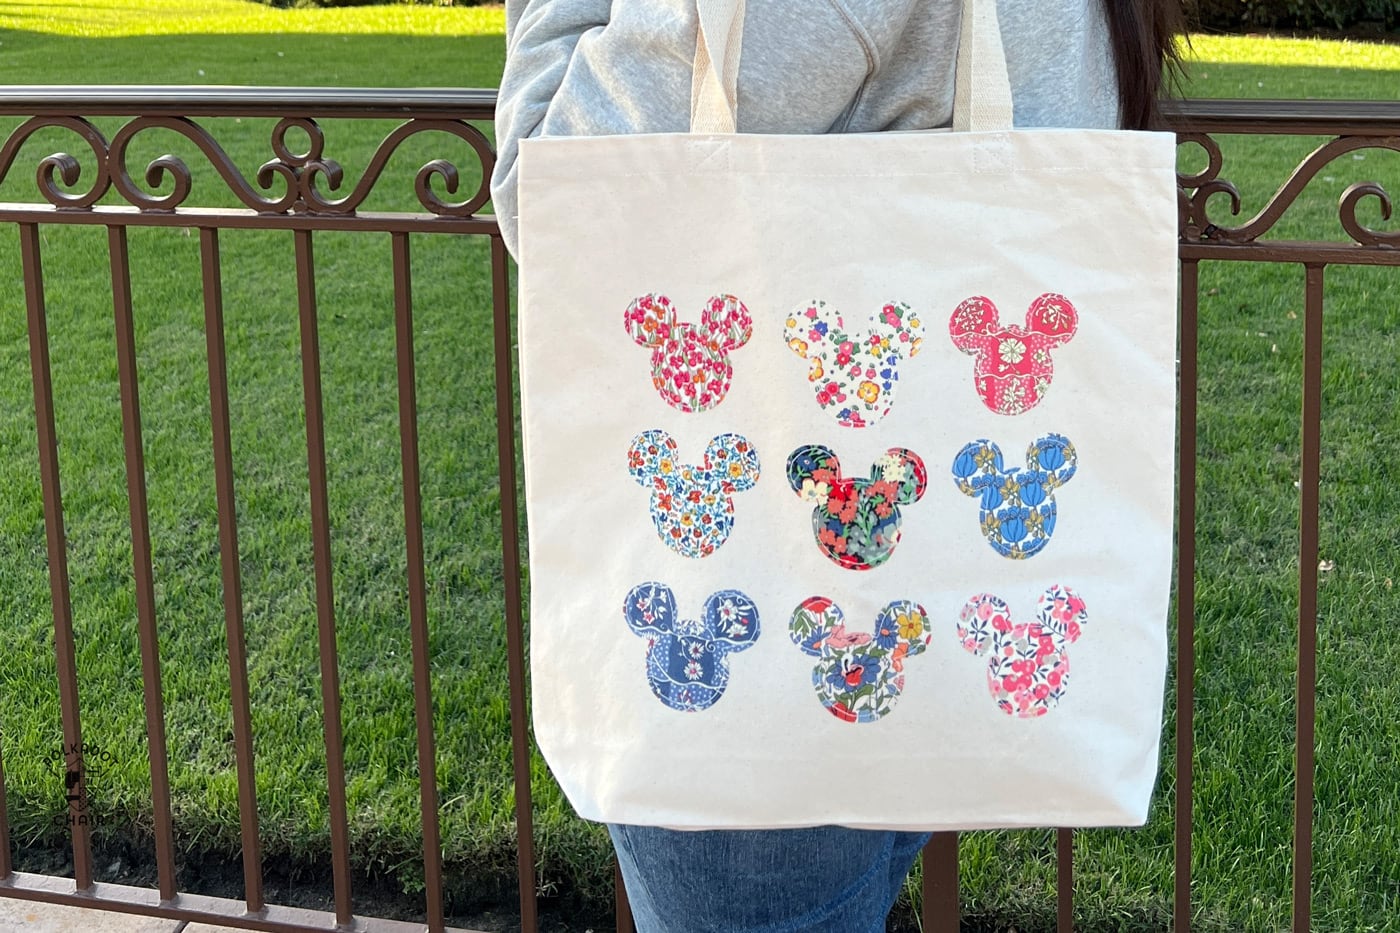
I used a technique called Raw Edge Applique to create the Mickey shapes on the tote bag. Raw edge applique is a sewing technique where you cut out a shape from fabric and then apply it with your sewing machine to another item, in this case, a tote bag. The term “raw edge” is used because the edge of the shape is not finished but left raw.

The shape is traced onto a piece of paper-backed fusible webbing, which is a product that allows you to “glue” one fabric to the other. It is backed with paper to make it easy to work with. This also allows you to cut the product into so many different shapes.
Many may wonder if the fabric will fray using this technique. The answer is it can, but I’ve never had an issue with it. If you use good quality paper-backed fusible web, it should help to minimize fraying.
Disney Travel Tip
As much as I love packing a big backpack for a day in the park, I’ve noticed we don’t have to take that much stuff each day since my kids have gotten older (or when my husband and I visit by ourselves).
Instead, I prefer to take a small cross-body purse or belt bag and a tote bag. I keep all my personal items in the belt bag and use the tote to carry a water bottle, sunscreen, and other small items. Traveling lighter makes the hours of walking in the park so much easier!
Tote Bag Supplies
- 9 Large Scraps Fabric at least 4” x 4” – all my fabrics are Liberty of London
- 1 Tote Bag (these are the ones I purchased)
- Thread
- One package of Heat N Bond
- Fabric Safe Marking Pen
- Lightbox
- Template: follow the directions below to get the template
How to Get the Template
Fill out this form, and we will email you a copy of the Mickey shape applique template. You will still need to visit this page for project instructions.
Prep
The canvas totes I purchased had a coating or sizing on them that made it difficult to attach the adhesive of the Heat N Bond. I found a better result if I first washed the tote bag in cold water and let it air dry. After it is dry, press it to remove any wrinkles.
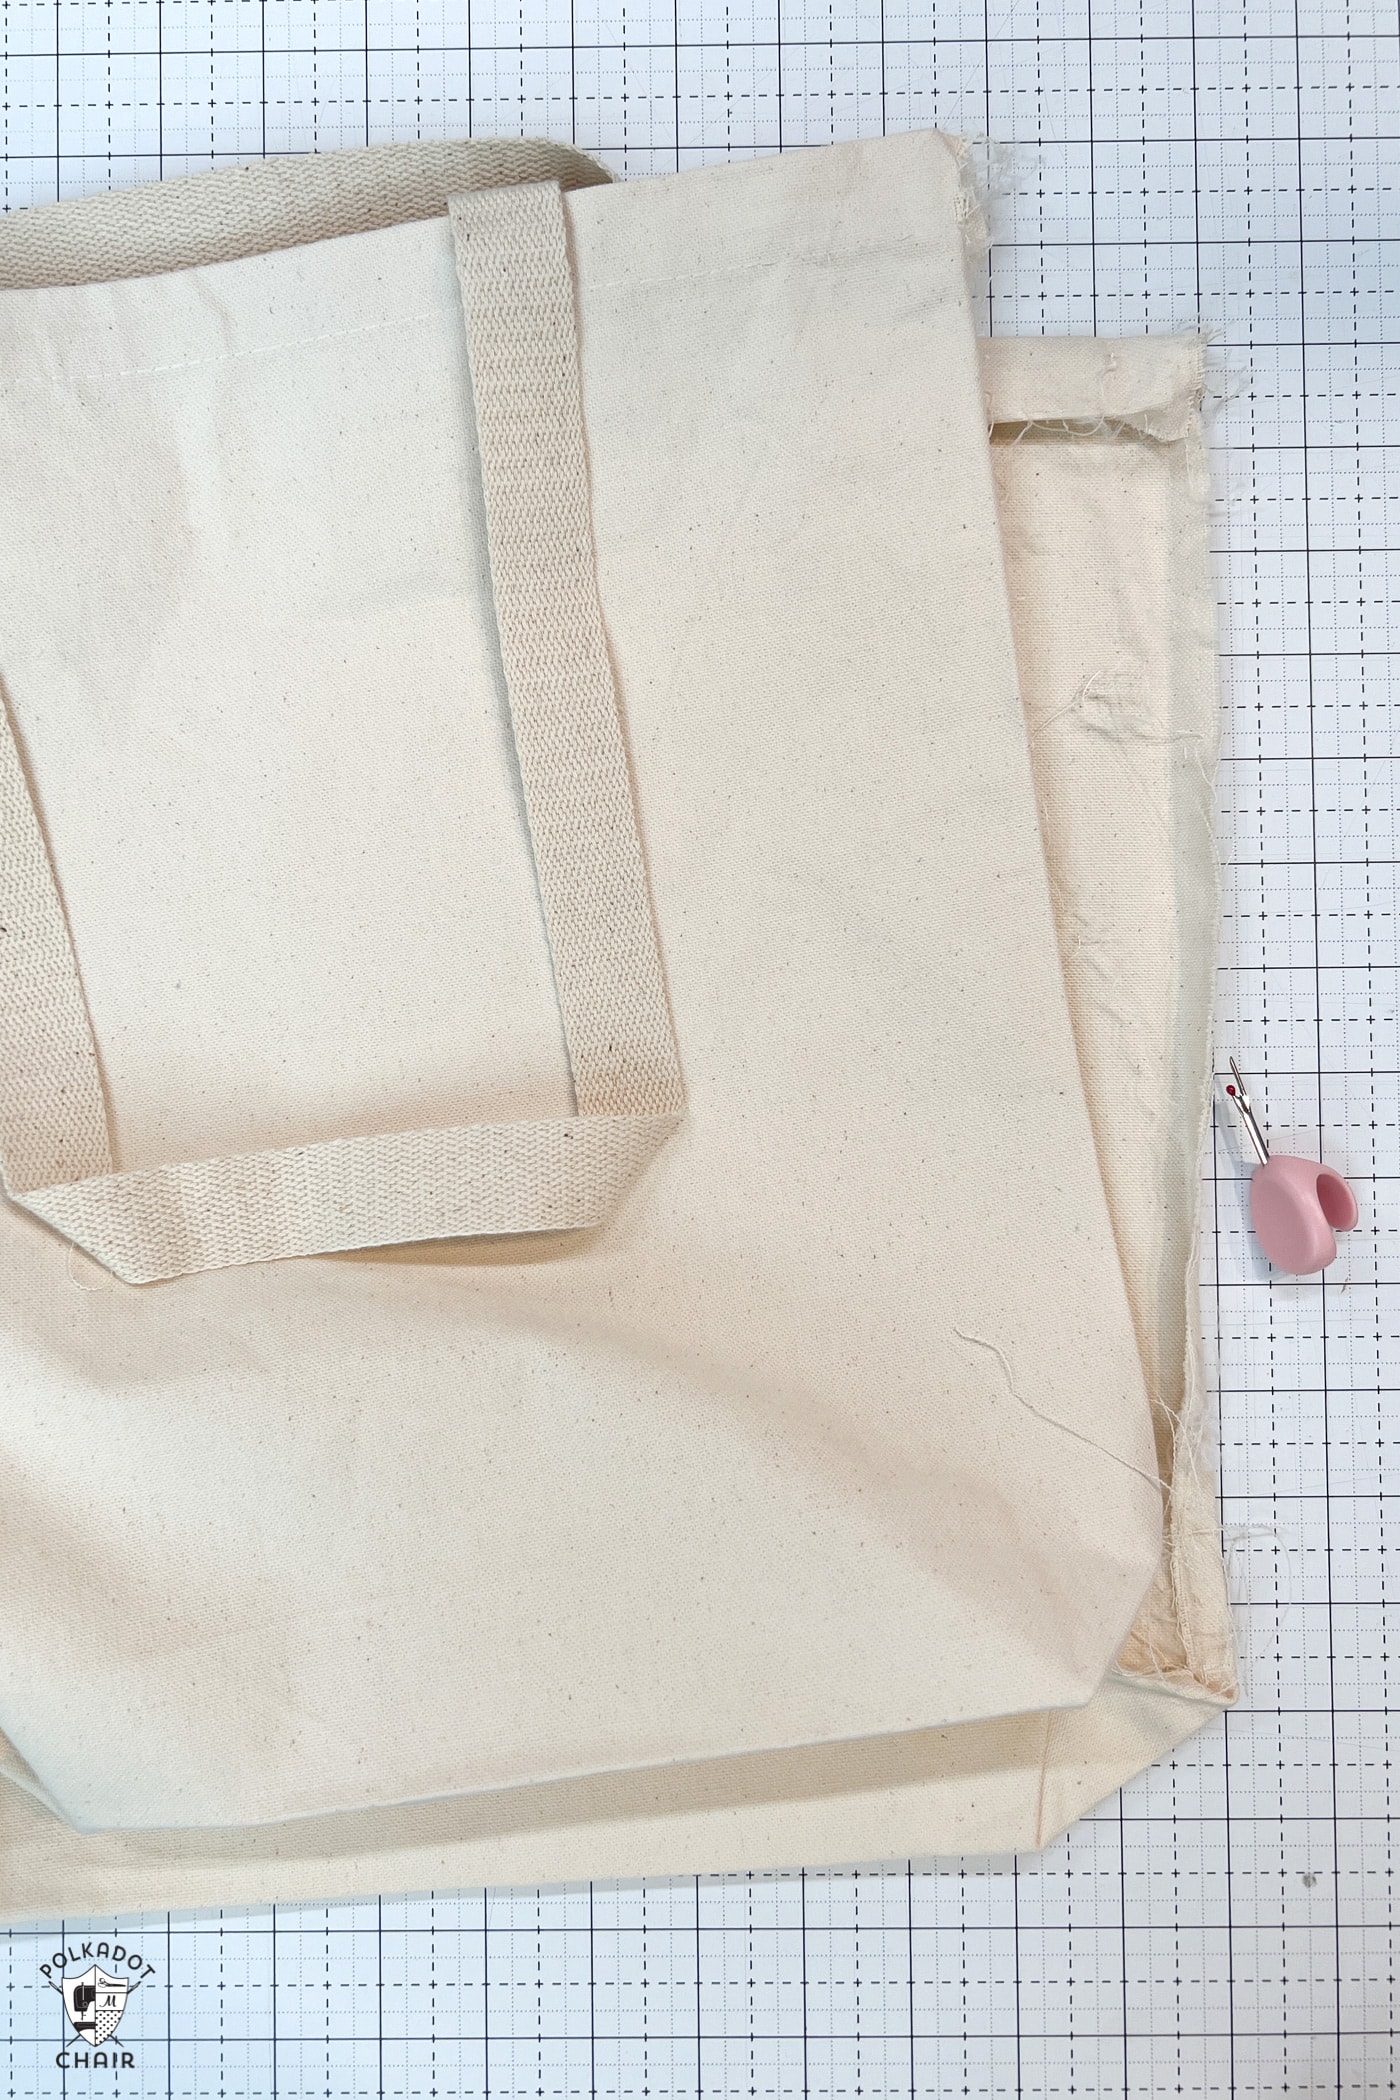
The canvas tote should have two side seams and may have a bottom seam. To make it easier to sew the Mickey icons on the bag, remove the stitching from the two side seams of the bag so that it will lay flat.
Instructions
DIY Disney Tote Bag
Equipment
- Seam Ripper
supplies
- 9 large scraps Fabric for the Mickey shapes
- 1 package Heat N Bond
- 1 Tote Bag
Instructions
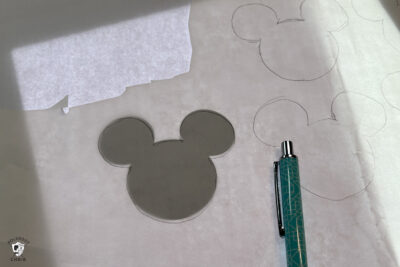
Step One: Trace the Image
- Trace the Mickey shape onto the paper side of the heat n bond lite. You will need to trace 9 shapes.

- Cut out each shape loosely.
Step Two: Iron onto Fabric
- Iron the traced shape onto the wrong side of the fabric. The “bumpy” side of the heat n bond will face the fabric’s wrong side. Follow the directions on the package for exact iron heat settings as it may vary slightly by manufacturer.

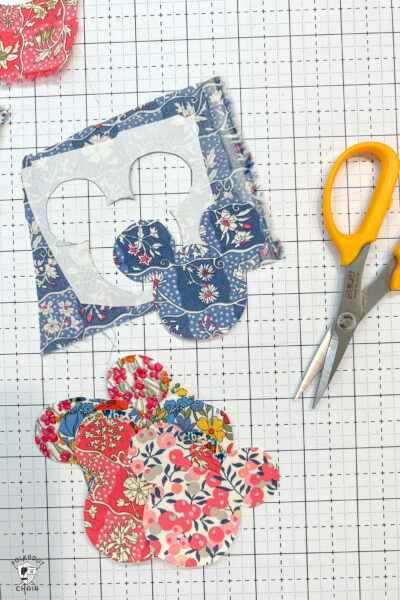
Step Three: Cut Out
- Cut out each shape precisely this time.
Step Four: Apply to Bag
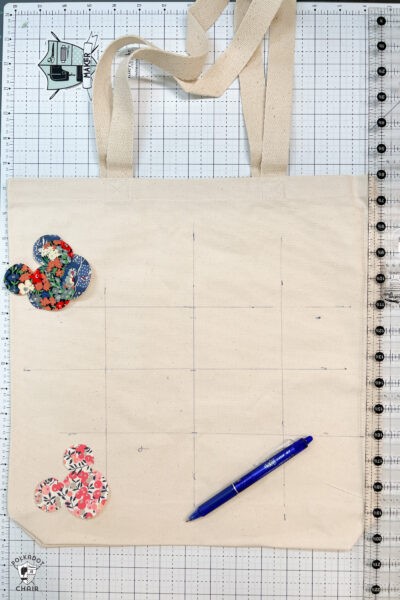
- Peel the paper from the back of the applique shapes and arrange them on the bag front.
- Use a ruler and a fabric-safe pen to draw a grid on the front of the bag to help you align the shapes evenly on the bag.
- My shapes are 3" apart from center to center.
- Iron the shapes onto the bag.
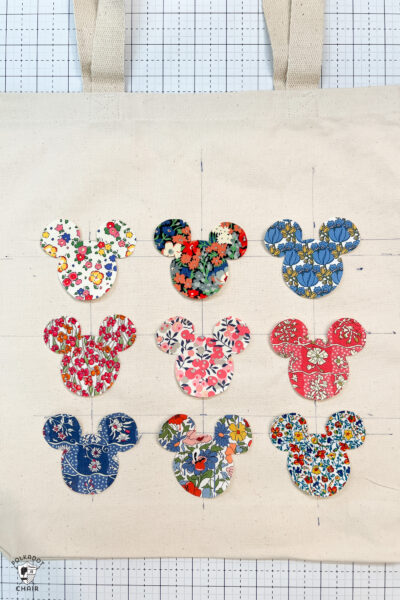
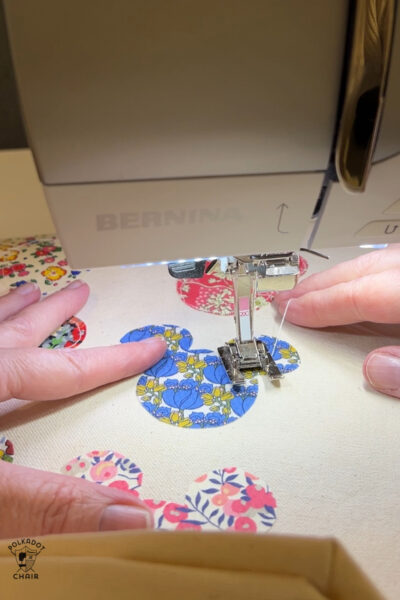
Step Five: Sew
- Using a straight stitch on your sewing machine, sew around the perimeter of each shape. Make sure to lock your stitch at the beginning and end.
Finishing
- With the bag wrong side out, sew the side seams of the bag, sewing on the same stitching line that was there originally. If you have a serger, serge the seams. If you don’t have a serger zig zag over the raw edge of the seams.
What a lovely idea to use your scraps of material.