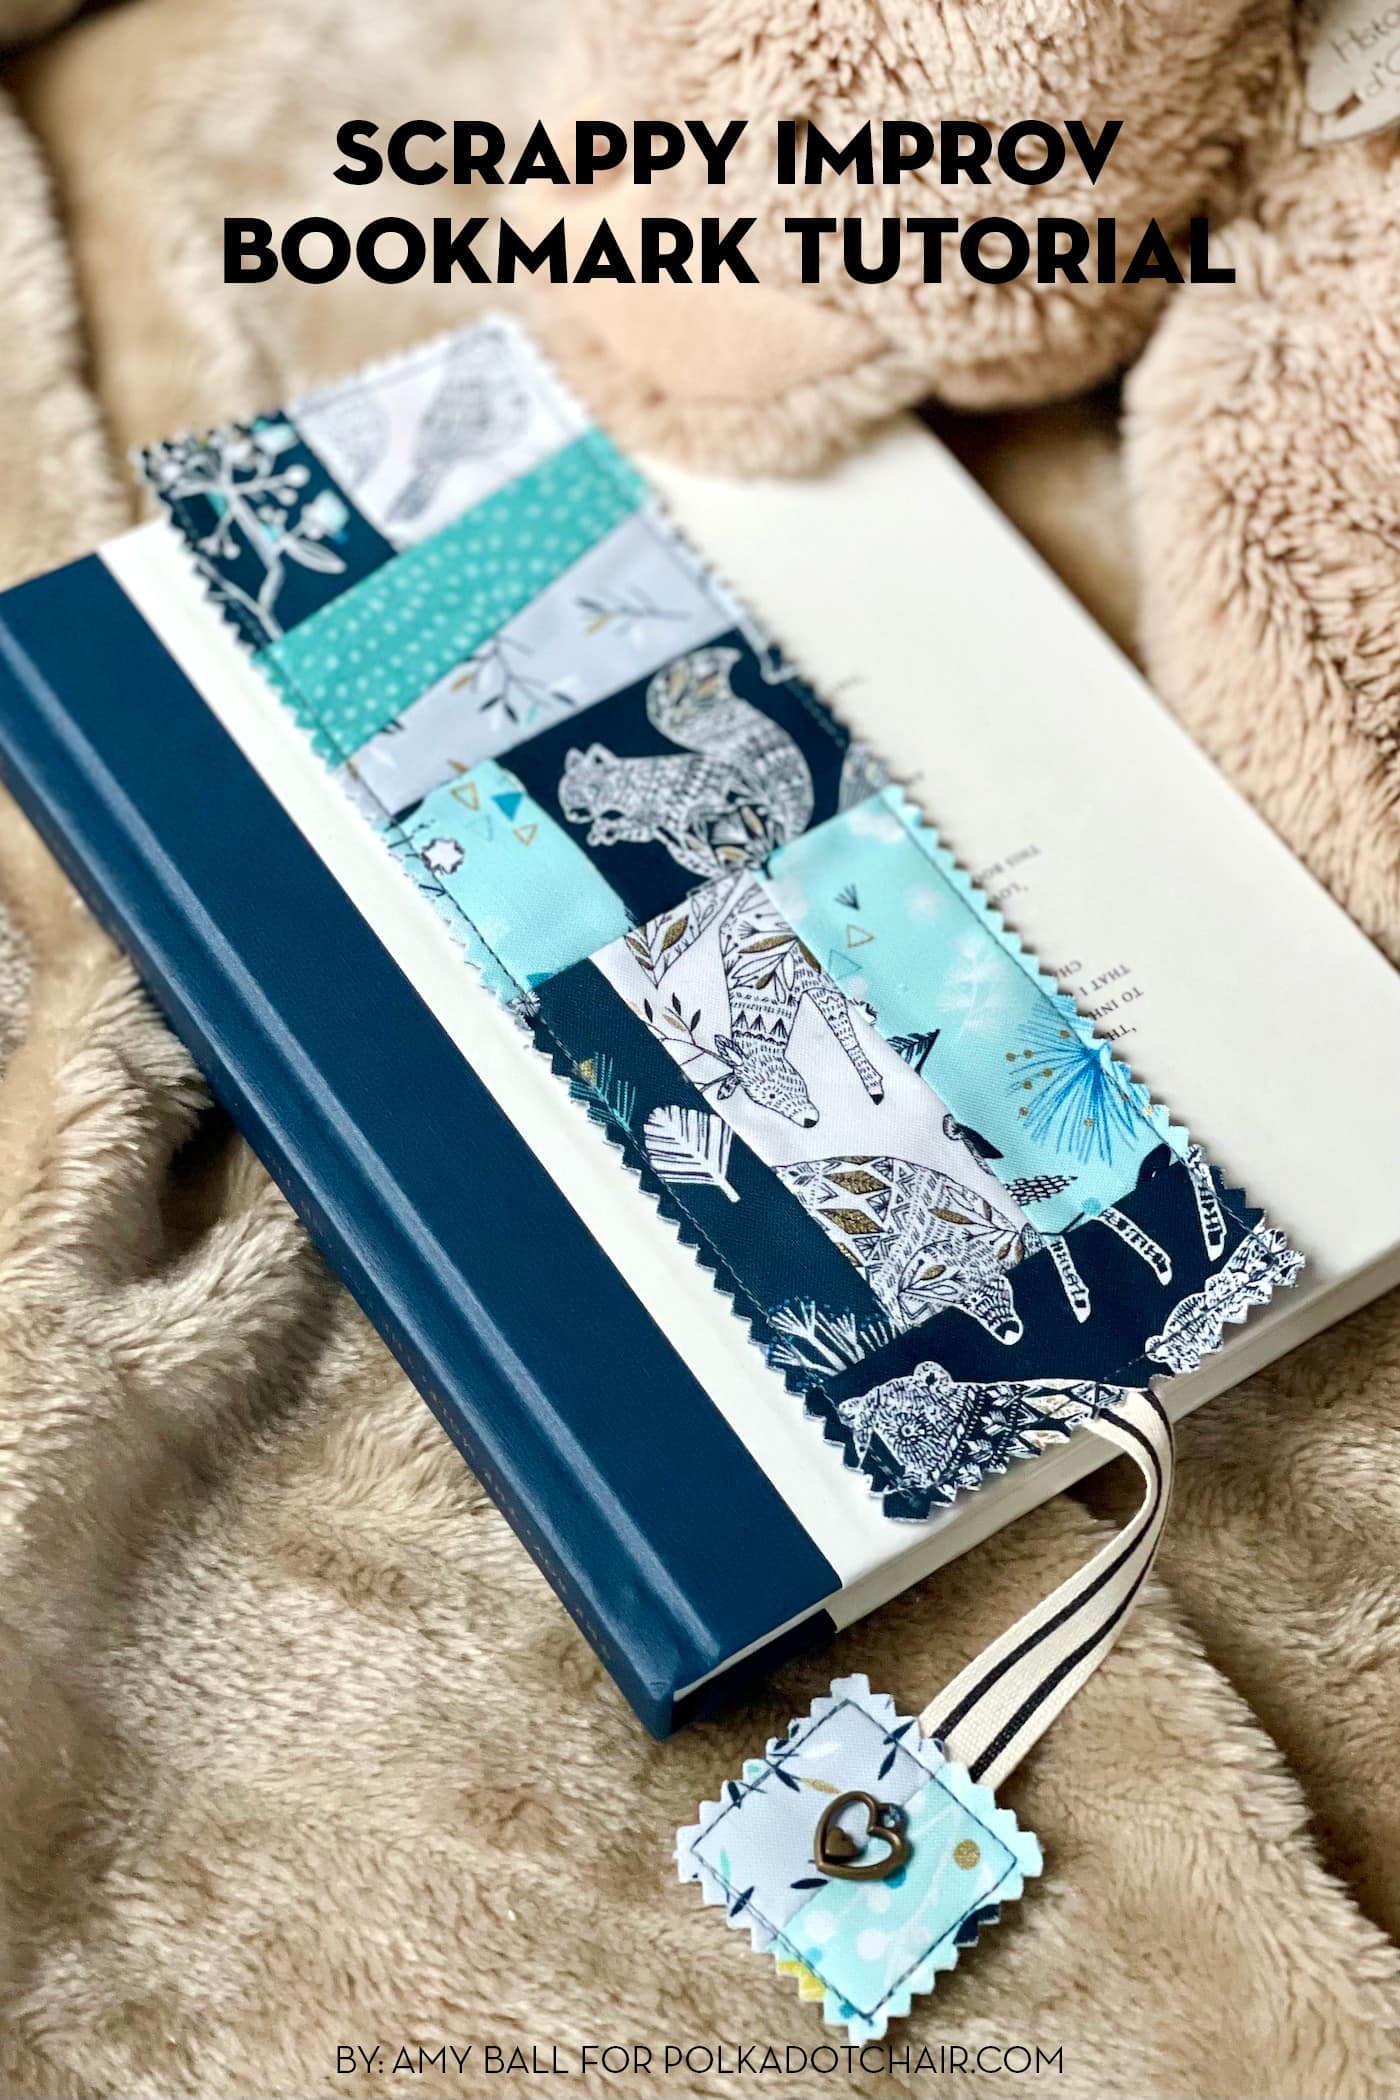
Scrappy Improv Bookmark Tutorial
Practice your improv piecing skills and use up some of your fabric scraps as you sew these adorable scrappy fabric bookmarks! Learn how to do it in this step-by-step tutorial.
Are you looking for a fun and practical way to repurpose fabric scraps? Transform those leftover pieces into delightful fabric bookmarks! This simple and enjoyable DIY project not only reduces waste but also allows you to create personalized bookmarks that add a touch of charm to your reading time!
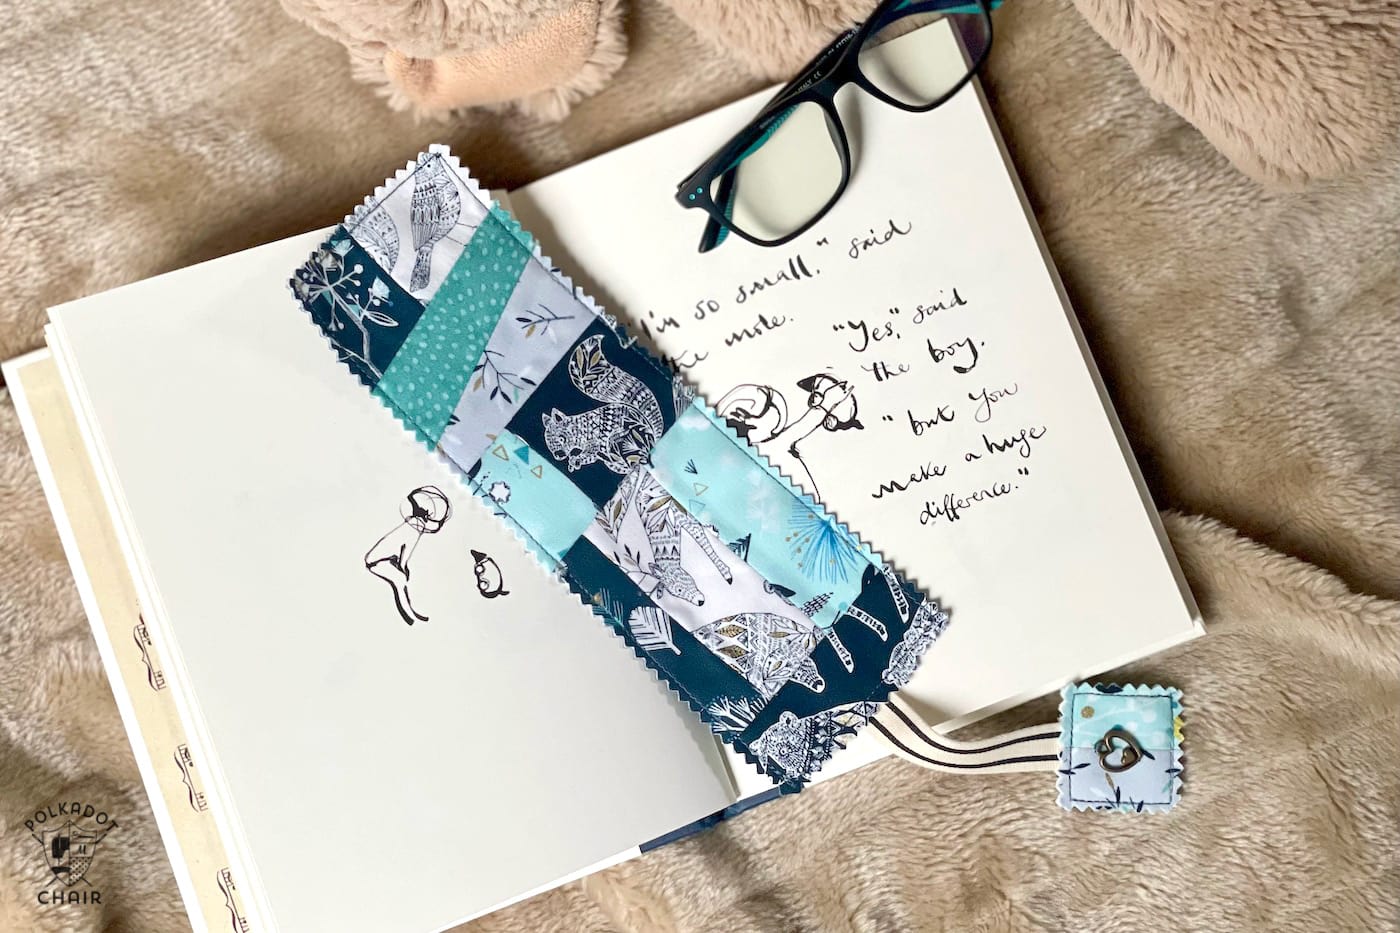
This Scrappy Improv Bookmark is a quick project and a great way to use up some favorite fabric scraps. A perfect make for a last-minute gift or a simple project for a child or teen who is keen to have a go at sewing.
Materials Needed
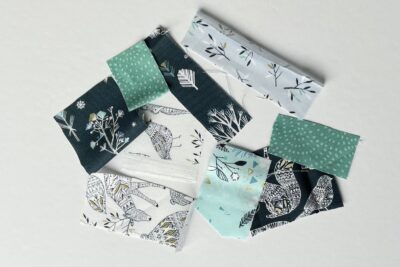
- Fabric scraps (various colors and patterns)
- Lightweight Interfacing
- Basic Quilting Supplies
- Fabric scissors
- Ruler
- Iron
- Sewing machine
- Coordinating thread
- Ribbon or twine for embellishment (optional)

Bookmark Tutorials
This project is part of a new series of tutorials on our site! Watch for more bookmark sewing tutorials this year; here are some we already have on our website!
Bookmark Tutorials
Instructions
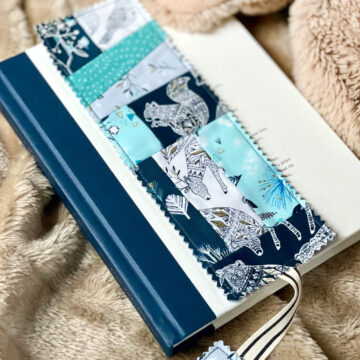
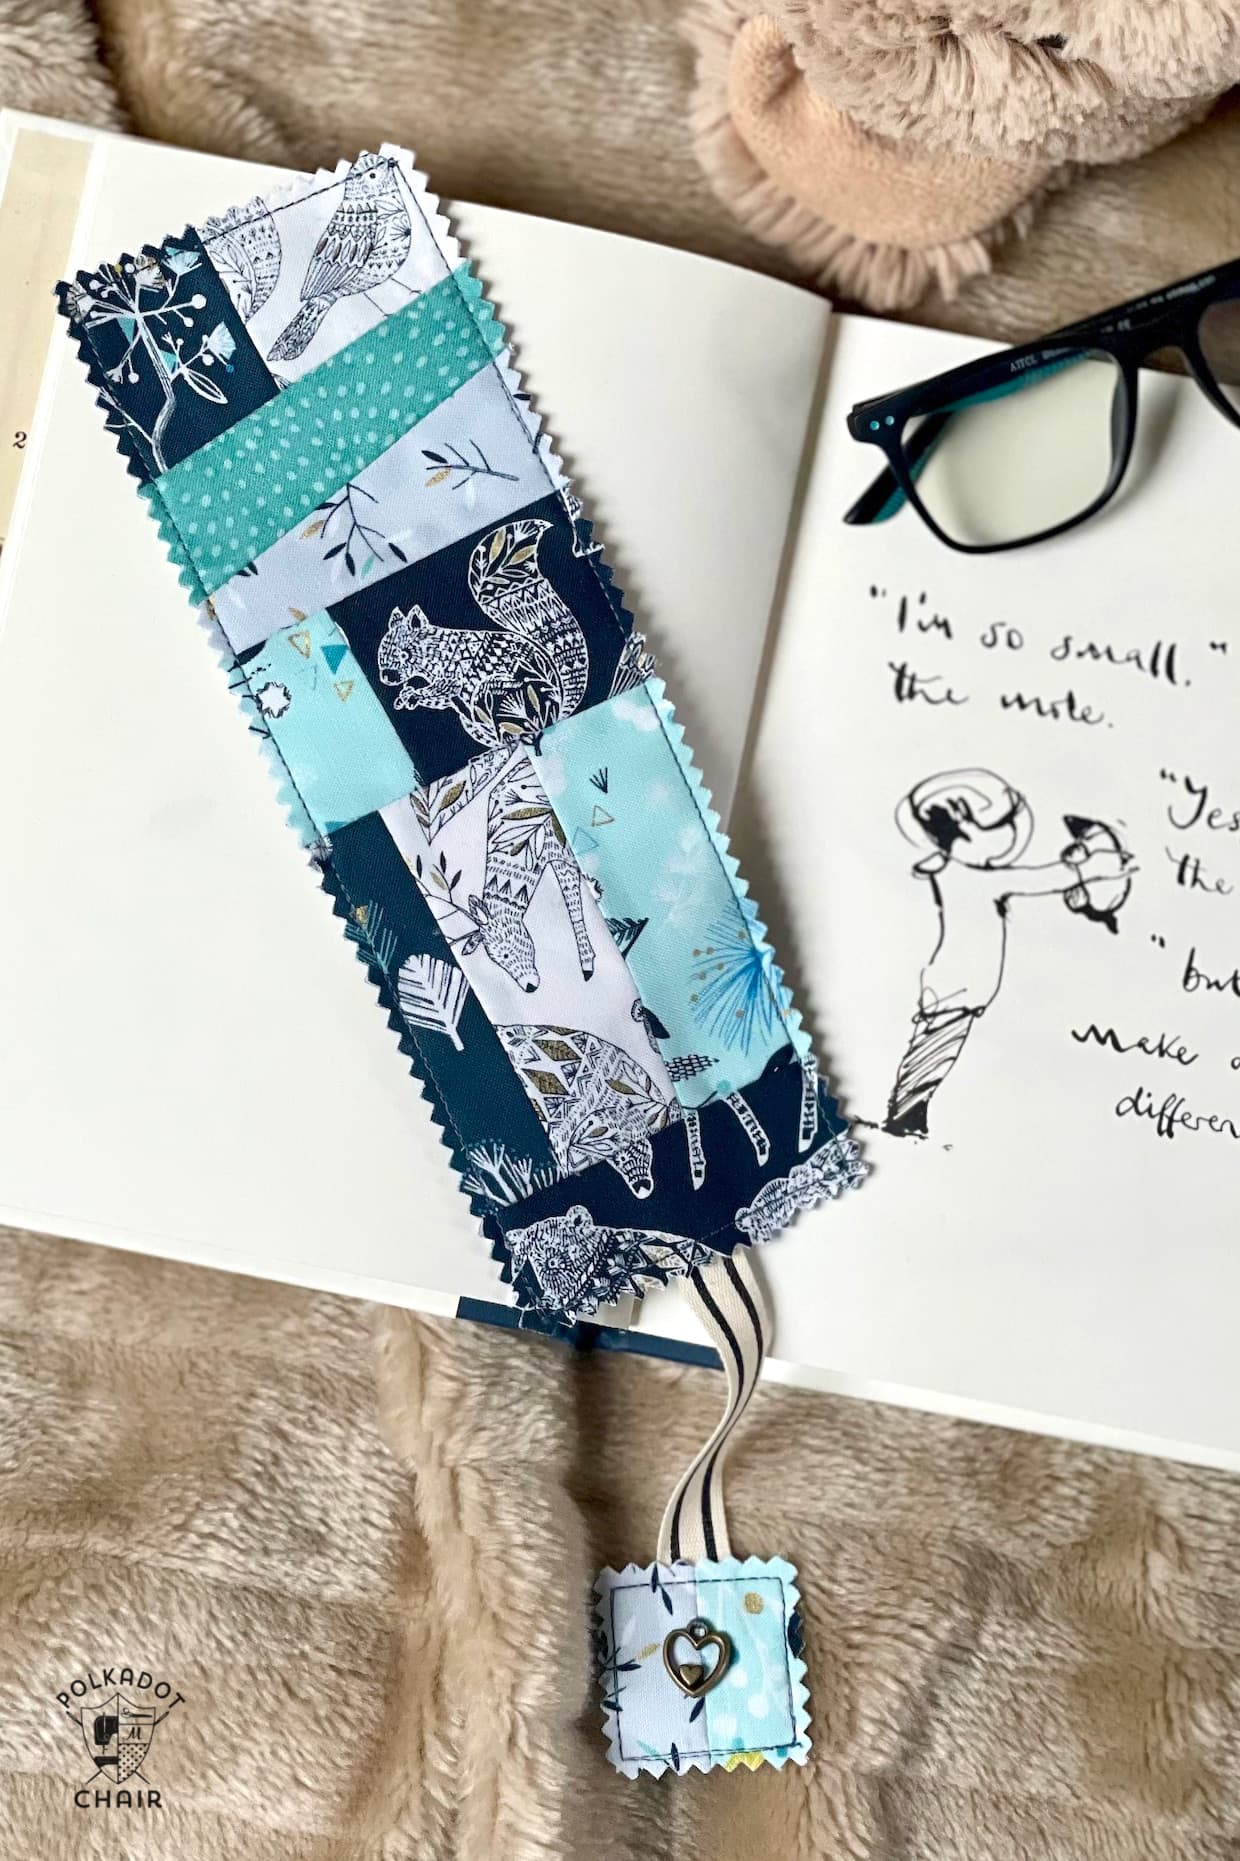
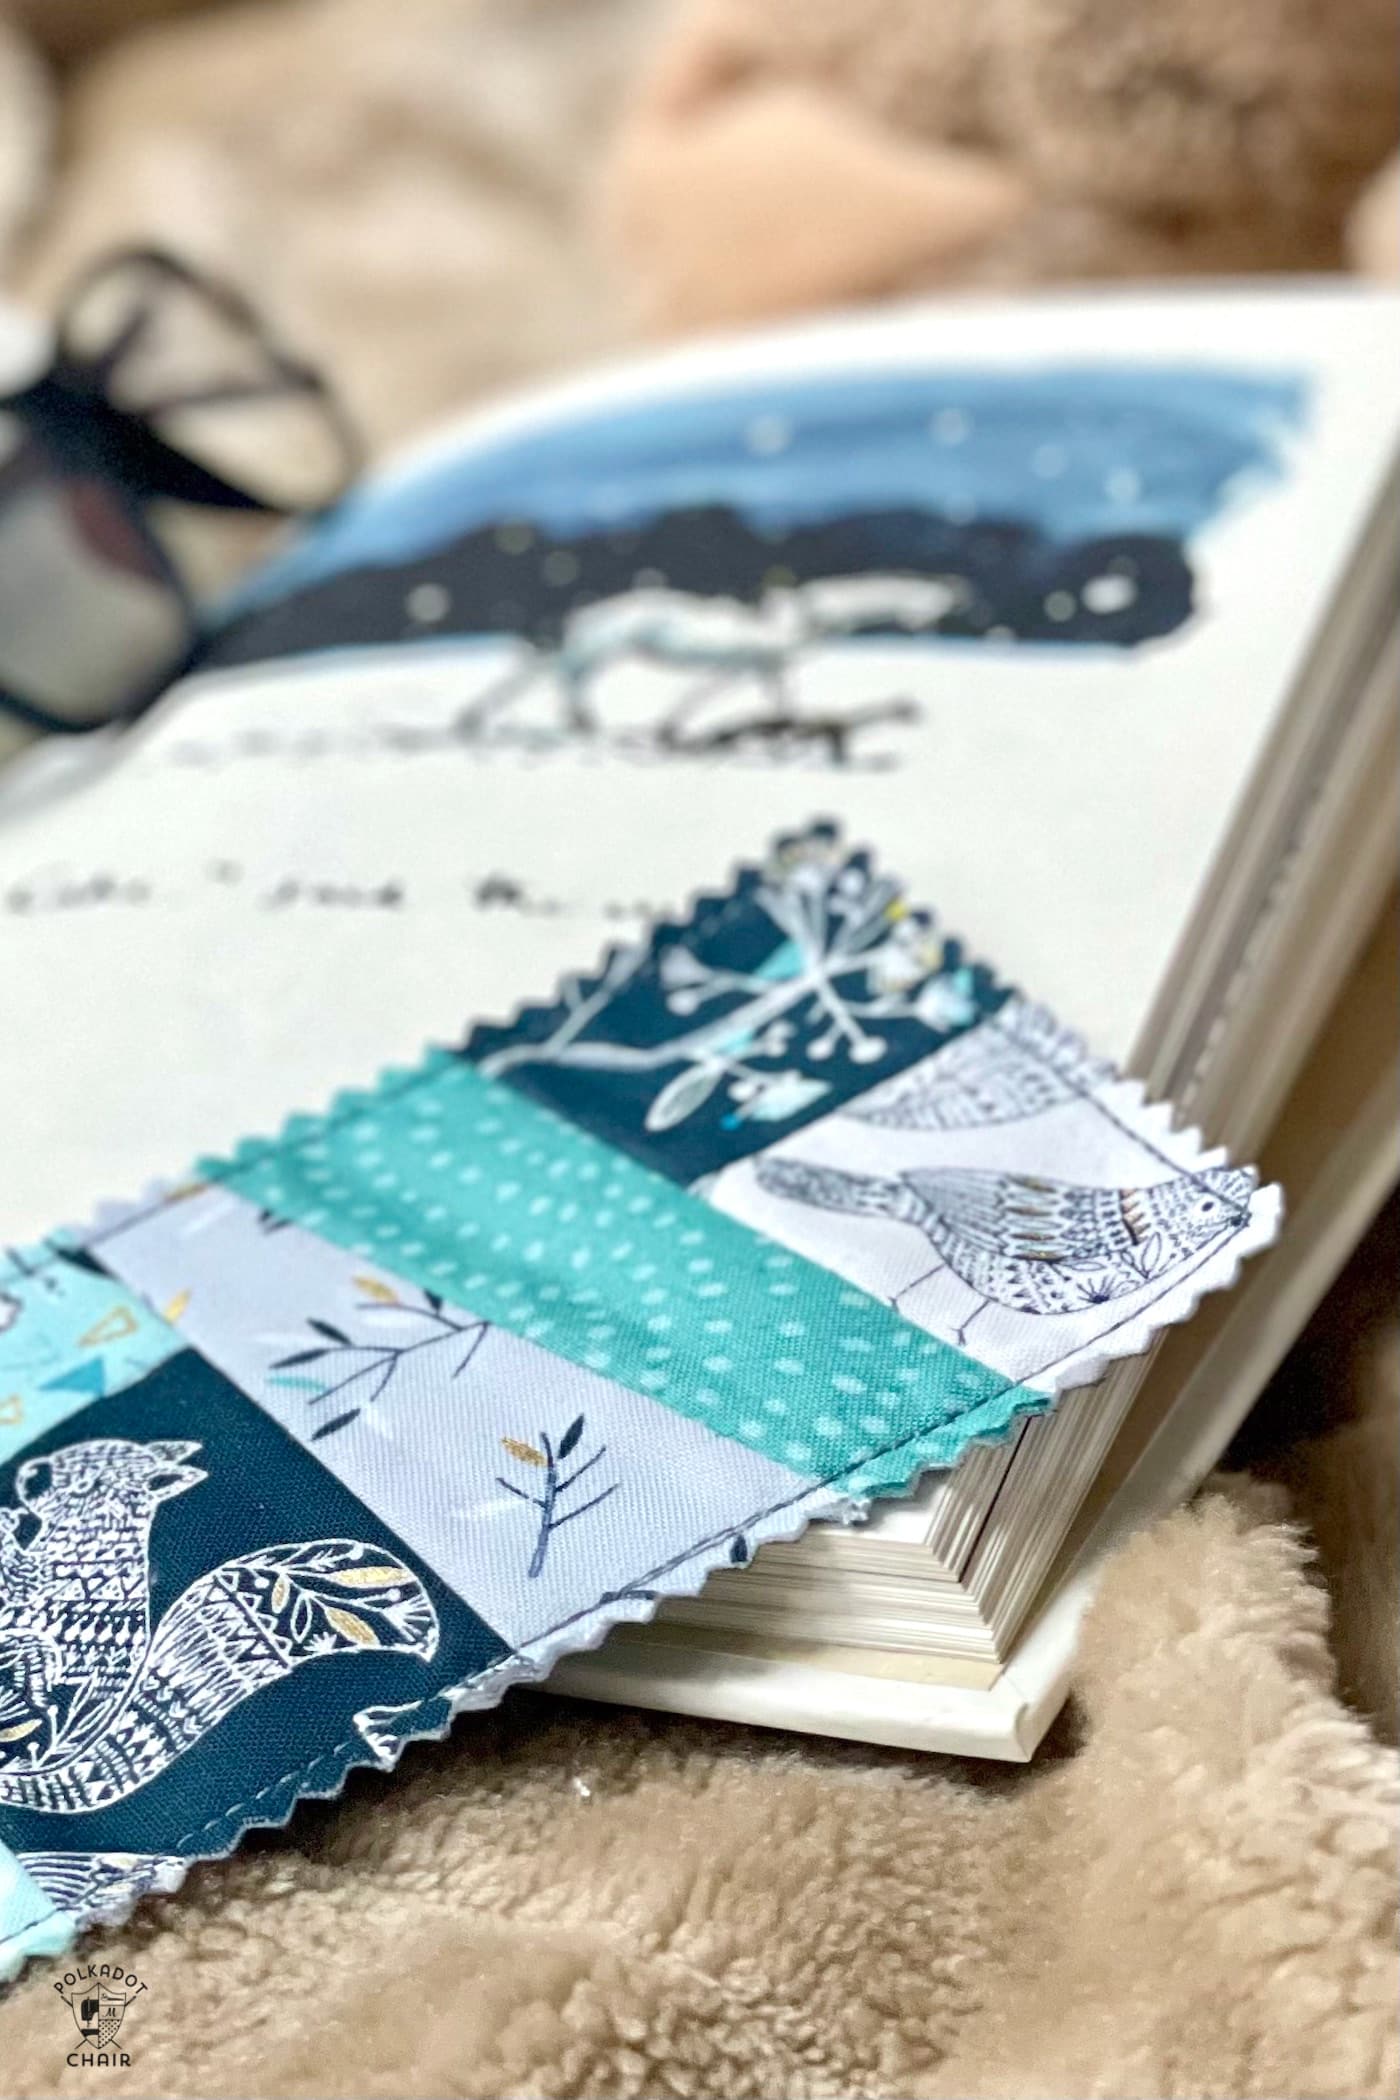
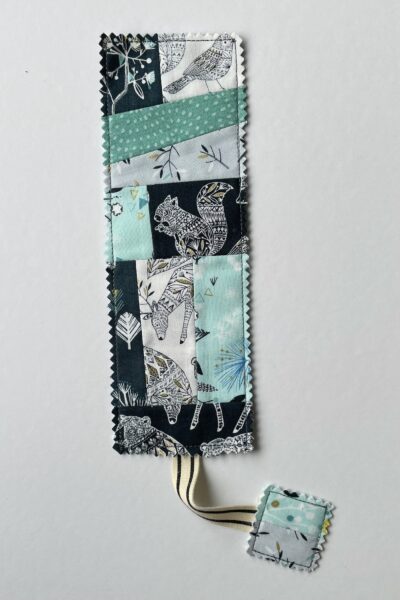
Scrappy Improv Bookmark Pattern
Equipment
- quilting ruler
supplies
- 1 large Selection of scraps or favourite fabrics
- 1 fat eighth Backing Fabric
- 1 piece Interfacing 9½” x 9”
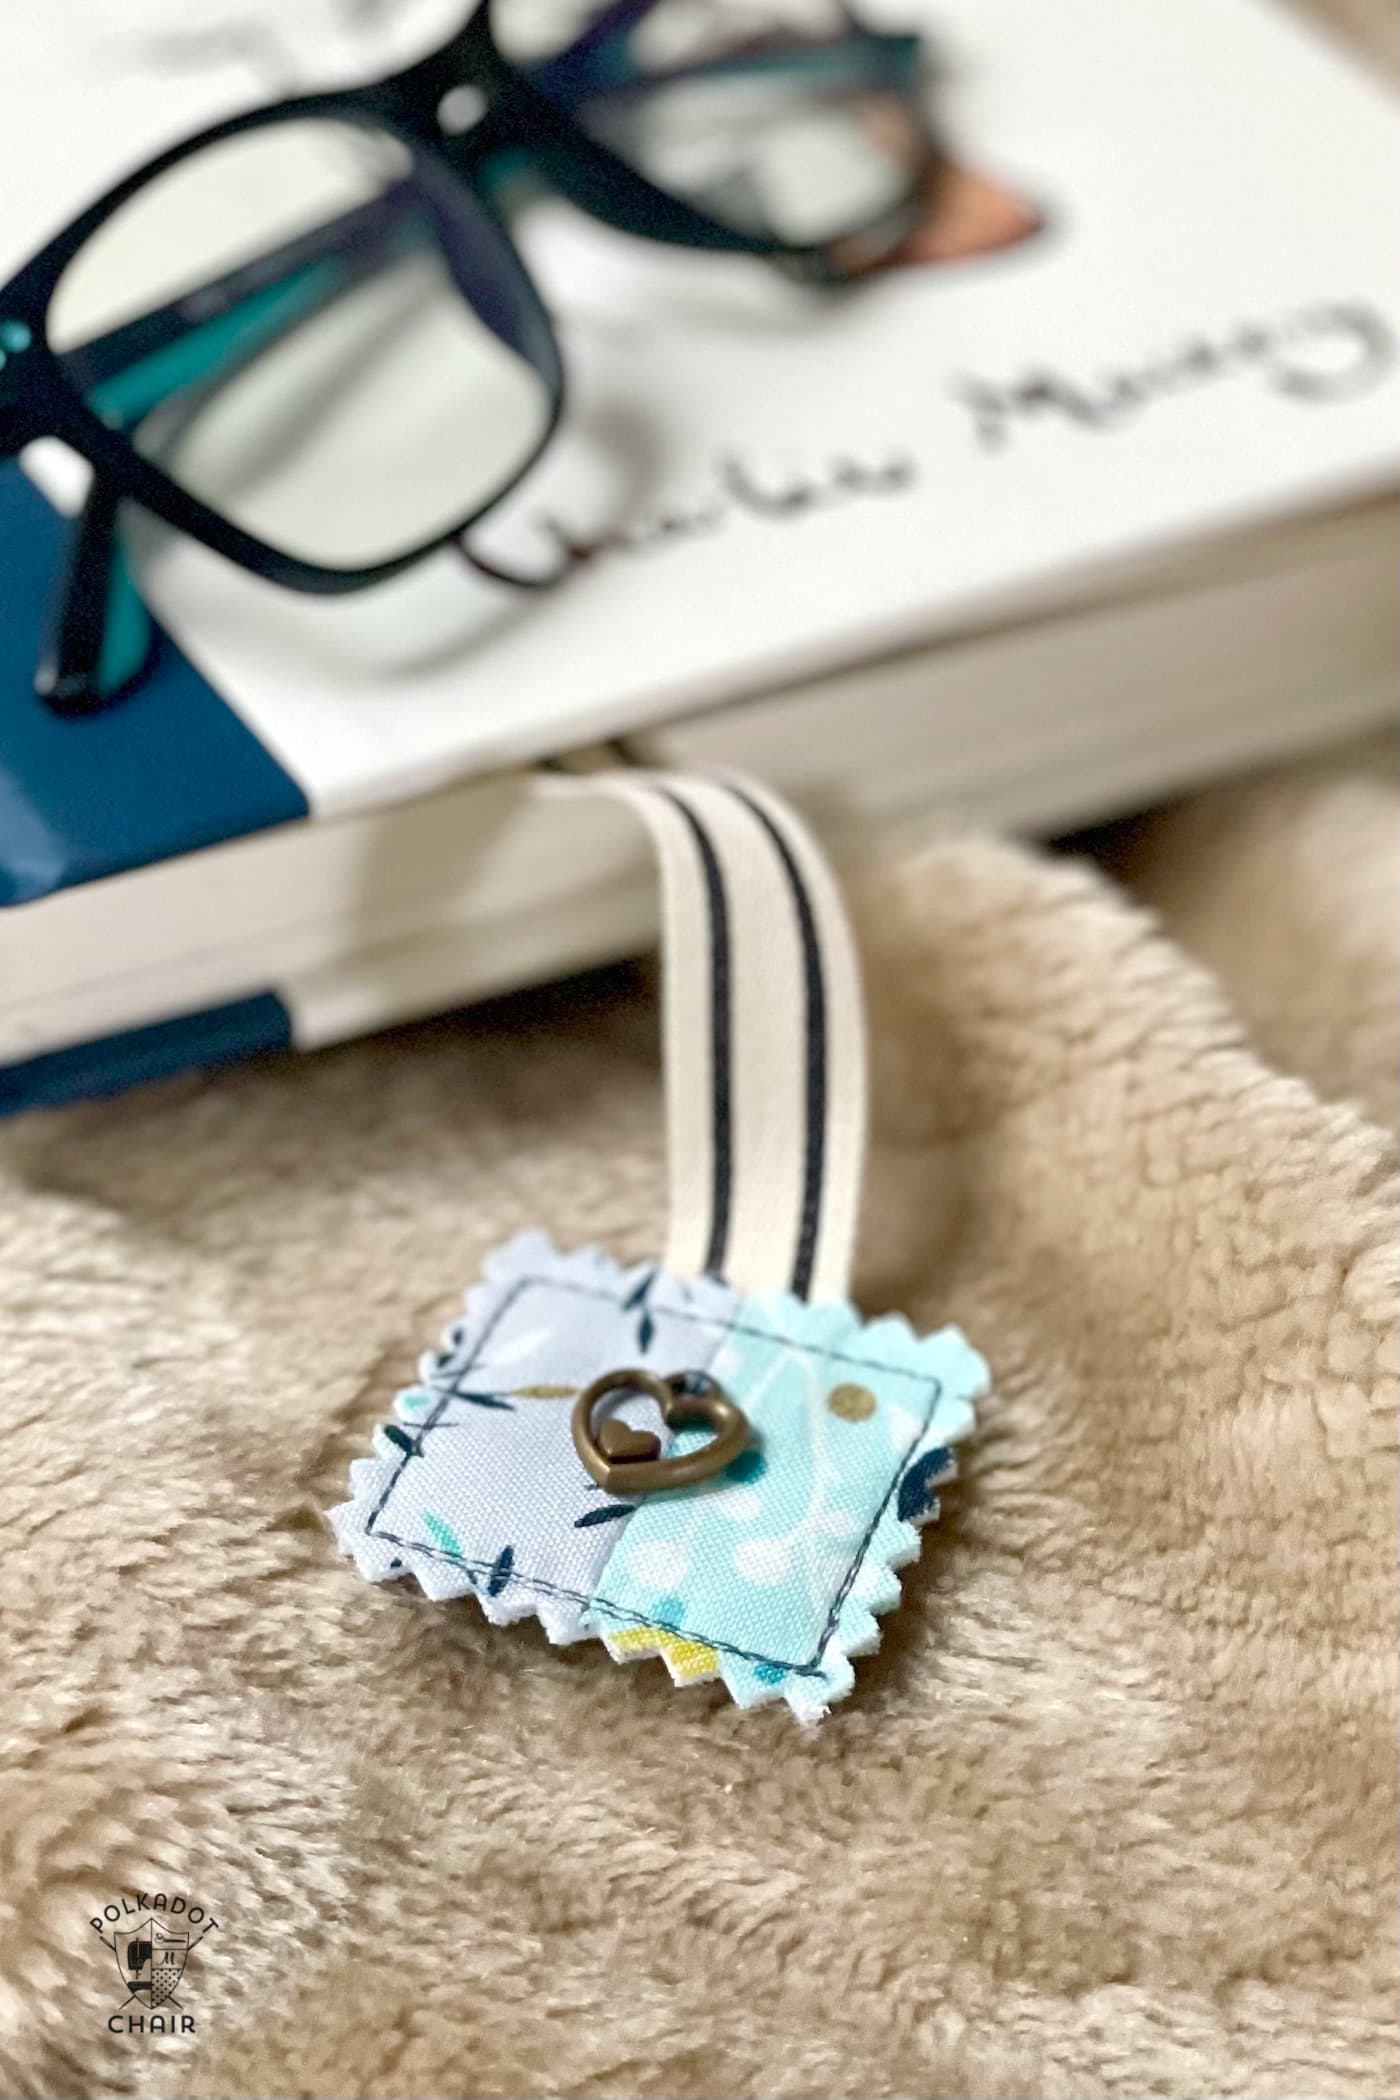
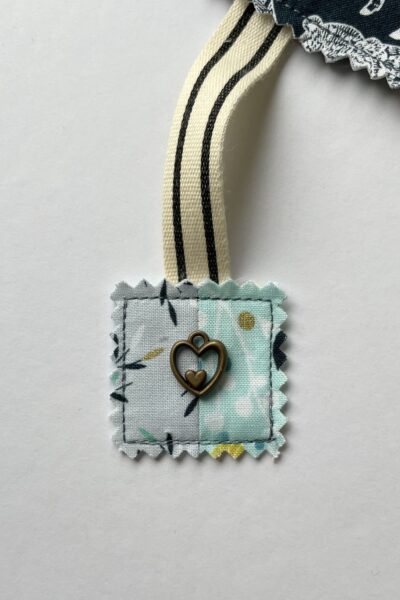
- 1 piece Ribbon 4½”
- 1 Button or charm
Instructions
Cutting:
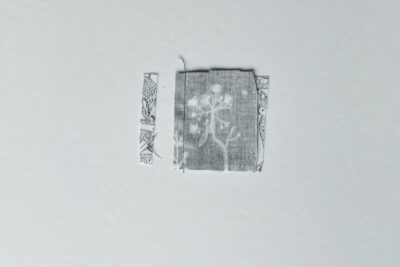
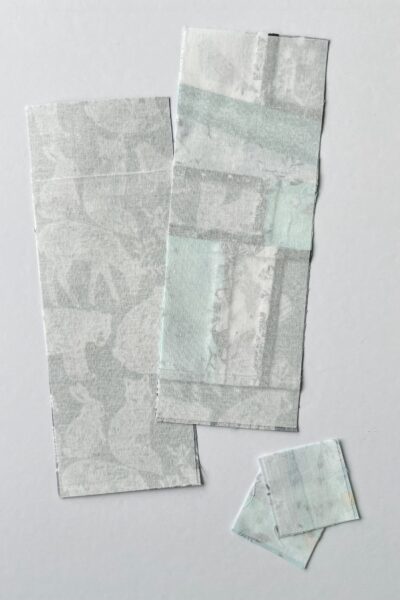
- From Scraps cut at least 12 pieces, nothing bigger than 4½” x 3½”, in a variety of squares and rectangles of varied dimensions.

- From Backing Fabric cut 9½” x 3½” (1).
- From Interfacing cut 9½” x 3½” (2) and 2” square (2).
Construction:
- Use a ¼” seam allowance unless stated otherwise.
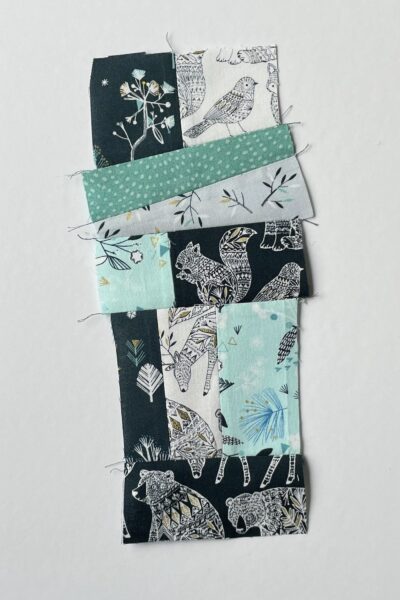
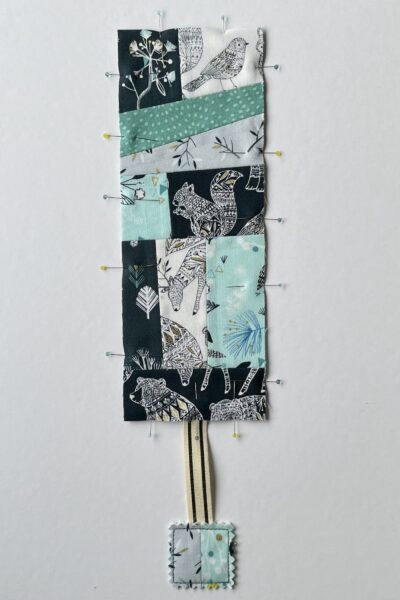
- To make the front of the bookmark, you’re going to create a pieced rectangle that is larger than 9½” x 3½”. So that you can keep track of the size of your improv piecing, you can either make a 9½” x 3½” template out of scrap paper or use a quilting ruler to measure the piecing every so often.
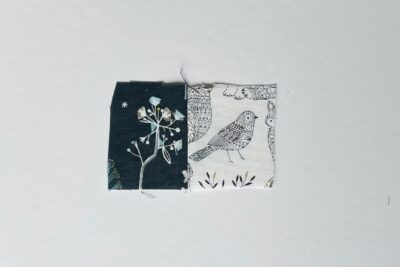
- Create the improv pieced rectangle by sewing your scraps together in a random order. Trim any excess seam allowances down to ¼” and press the seams open to reduce bulk. Follow the next few steps to get yourself started if you aren’t confident with the idea of improv piecing.
- Take two roughly 2½” squares. Sew together, right sides together, then trim any fabric excess to create a ¼” seam allowance. Press the seam open.
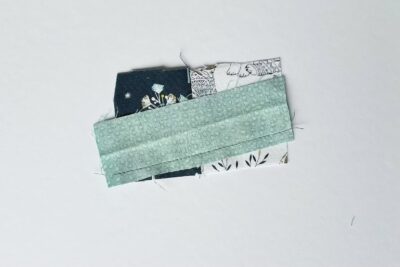
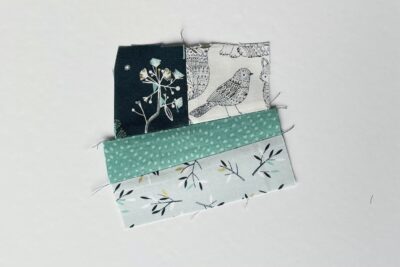
- Now take one 5” x 2” rectangle. Sew the right sides together to the unit from step 3, at a slightly diagonal angle. Trim away the excess seam allowance fabric, then press the seam open.
- Take another 5” x 2” rectangle. Sew the right sides together to the unit from step 4, again at a slightly diagonal angle. Trim the seam allowance, if required, and press the seam open.
- Continue these steps to make the improv rectangle longer than 9½”, using different shapes and sizes of scraps.

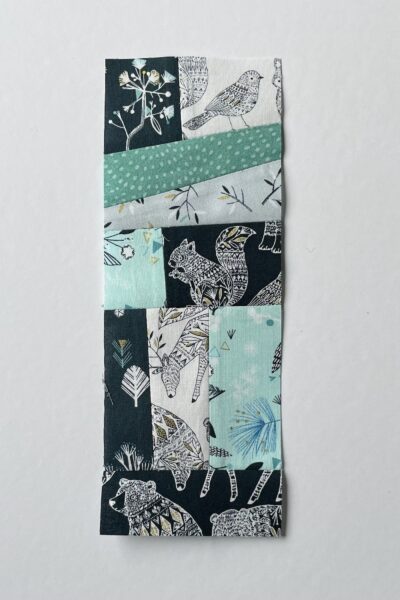
- Press well and trim down to 9½” x 3½”. Set aside.
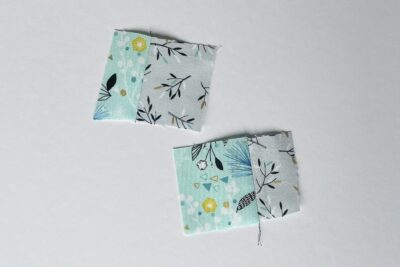
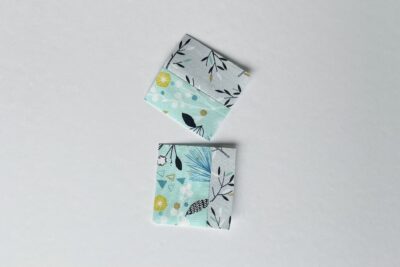
- Take four smaller scraps (roughly 2½” x 1½”) and sew together to make two squares.
- Press the seams open and then trim down to 2” square each.
- Now add the iron-on interfacing pieces to the wrong side of the pieced rectangle from step 7, the Backing Fabric rectangle, and the two squares from step 8.
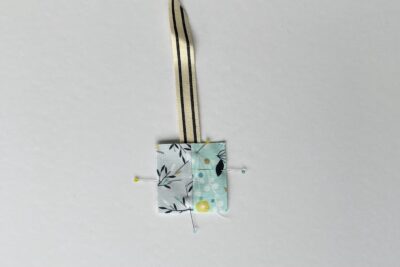
- Take the two interfaced small squares and pin them wrong sides together. Sandwich one end of the ribbon between the two squares in the centre of one edge, with about 1” of the ribbon inside.
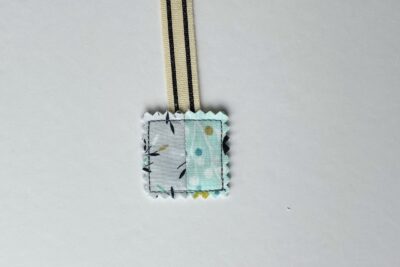
- Sew around the four sides of the squares twice (one line of stitching roughly on top of the second's line), ⅜” from the edges. Then, trim the raw edges with pinking shears. Be careful not to snip into the lines of stitching. When you get to the edge with the ribbon, you won’t be able to trim both of the fabric layers at the same time (because the ribbon is in the way!) so, fold the ribbon and one fabric layer out of the way whilst trimming the other fabric layer, then repeat for the other fabric edge.
- Take the interfaced improv rectangle and Backing Fabric rectangle and pin them wrong sides together. Sandwich the free end of the ribbon between the rectangles in the centre of the bottom edge, with about 1” of the ribbon inside.
- Sew around the four sides of the rectangles twice (one line of stitching roughly on top of the second's line), ⅜” from the edges. Then, trim the raw edges with pinking shears. Be careful not to snip into the lines of stitching. When you get to the edge with the ribbon, you won’t be able to trim both of the fabric layers at the same time (because the ribbon is in the way!), so fold the ribbon and one fabric layer out of the way whilst trimming the other fabric layer, then repeat for the other fabric edge.
Finishing:
- Hand sew a button or charm ( I have used a zipper charm) to the square tab at the end of the ribbon.
Experiment with different fabrics and embellishments to make each fabric bookmark a unique and personalized treasure. Happy crafting!