Simple Fabric Envelope Pouch Sewing Tutorial
This little envelope-style pouch is a Fat Quarter-friendly sewing tutorial from Simple Simon and Company that is perfect for gift-giving! Stitch one up, fill it with goodies, and gift it away!
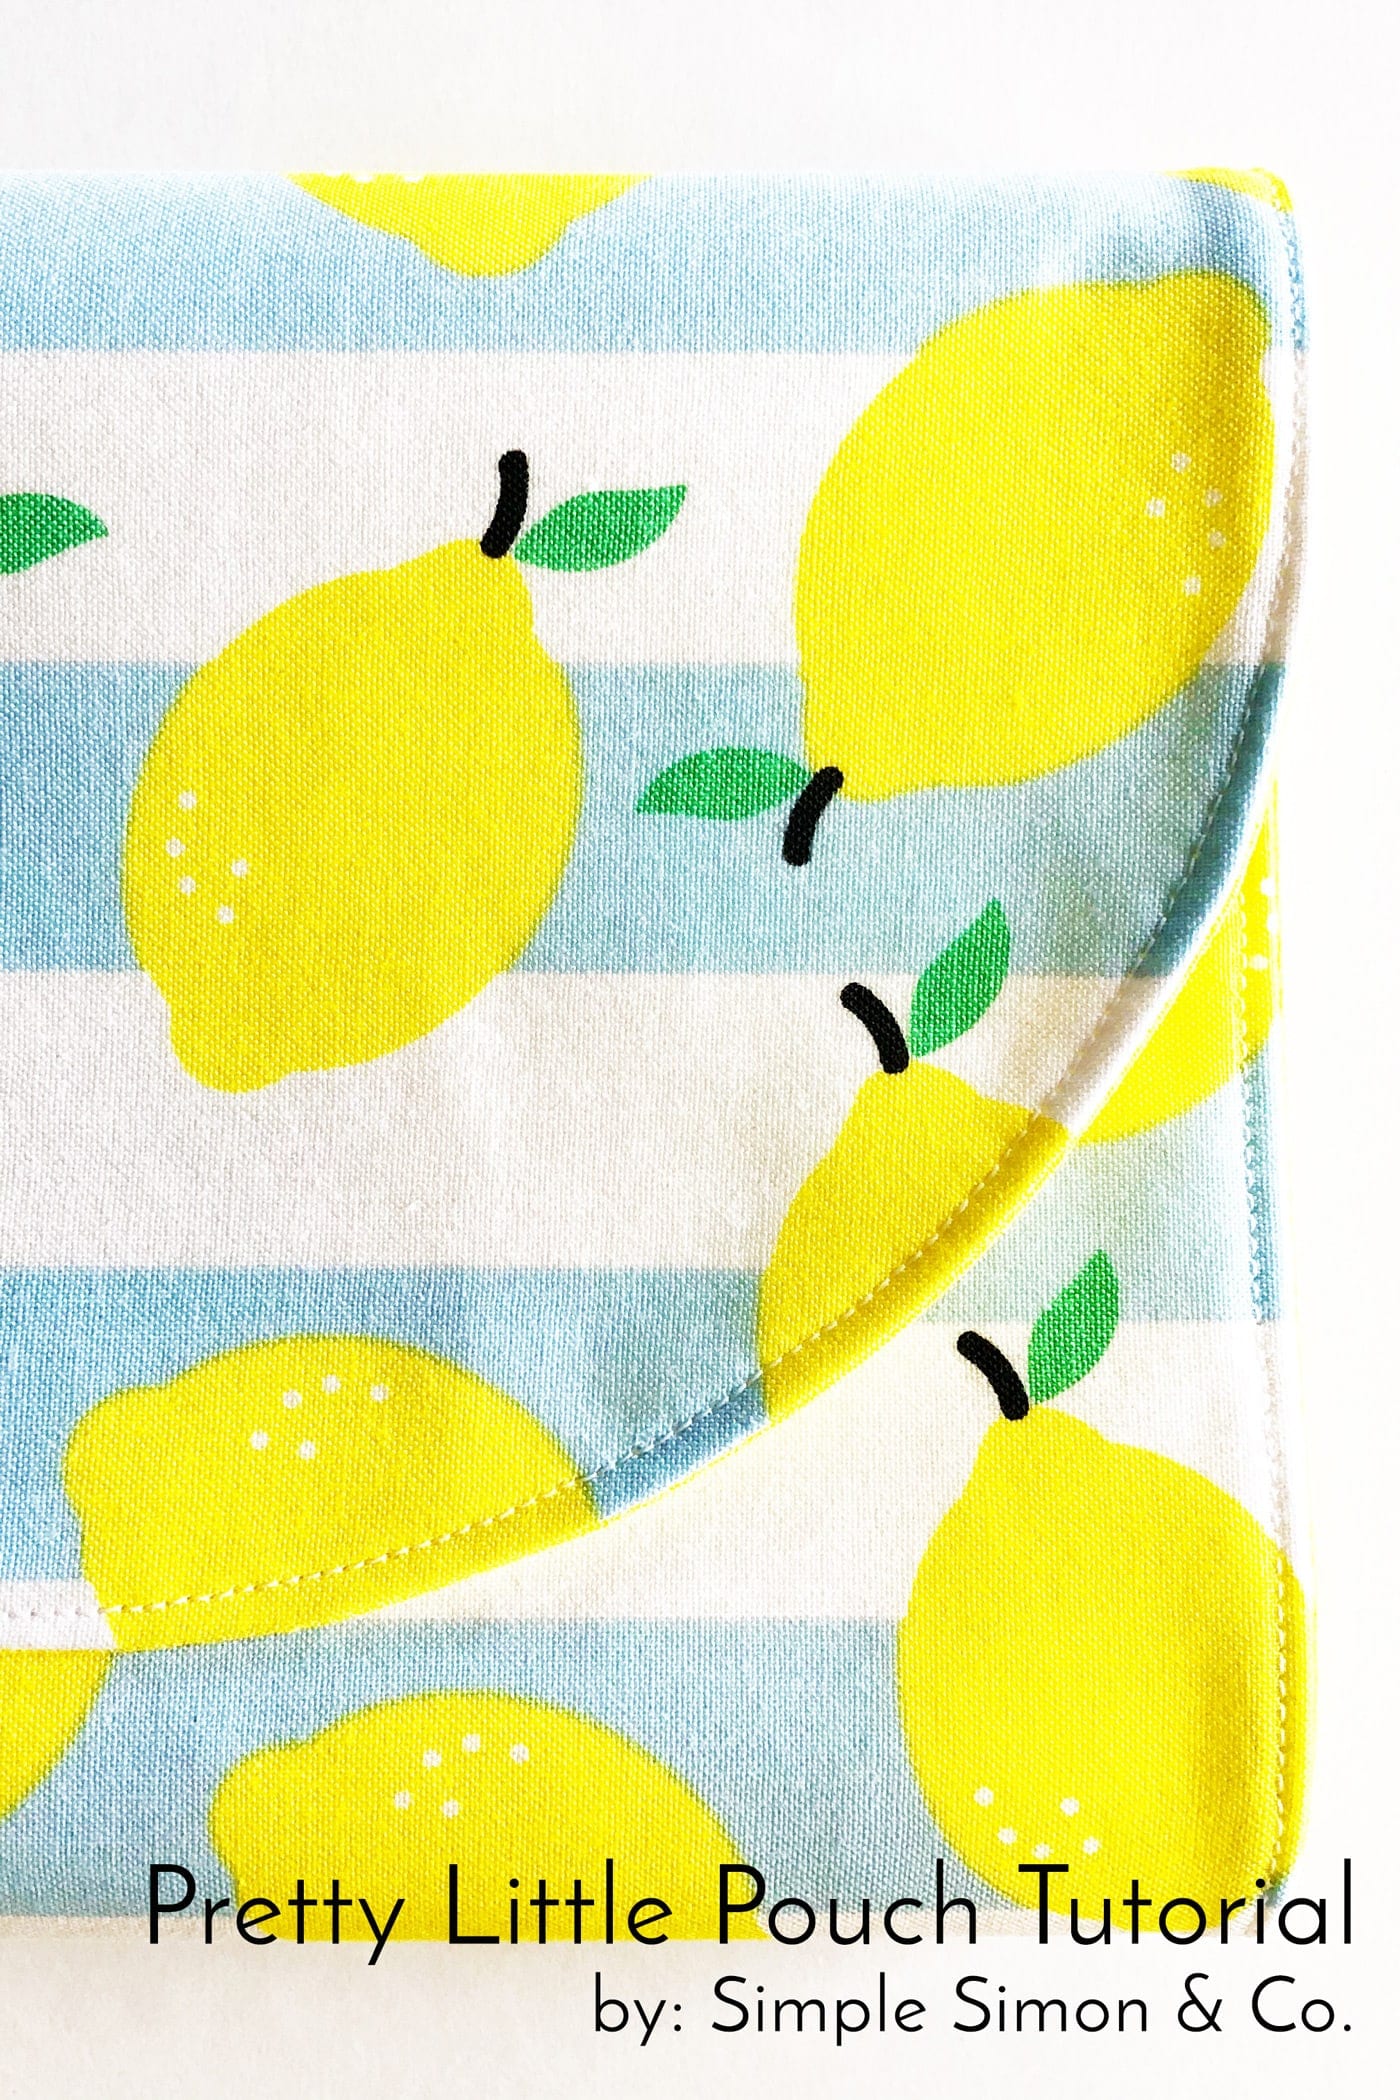
Hi! I’m Liz from Simple Simon and Company. Today, I’m excited to share a pretty envelope-style gift pouch sewing tutorial with you.


This pouch is perfect for those just starting to sew, especially teen girls who want to make handmade gifts for the holidays! (It also looks super cute, filled with a few favorite things!)
Required Supplies
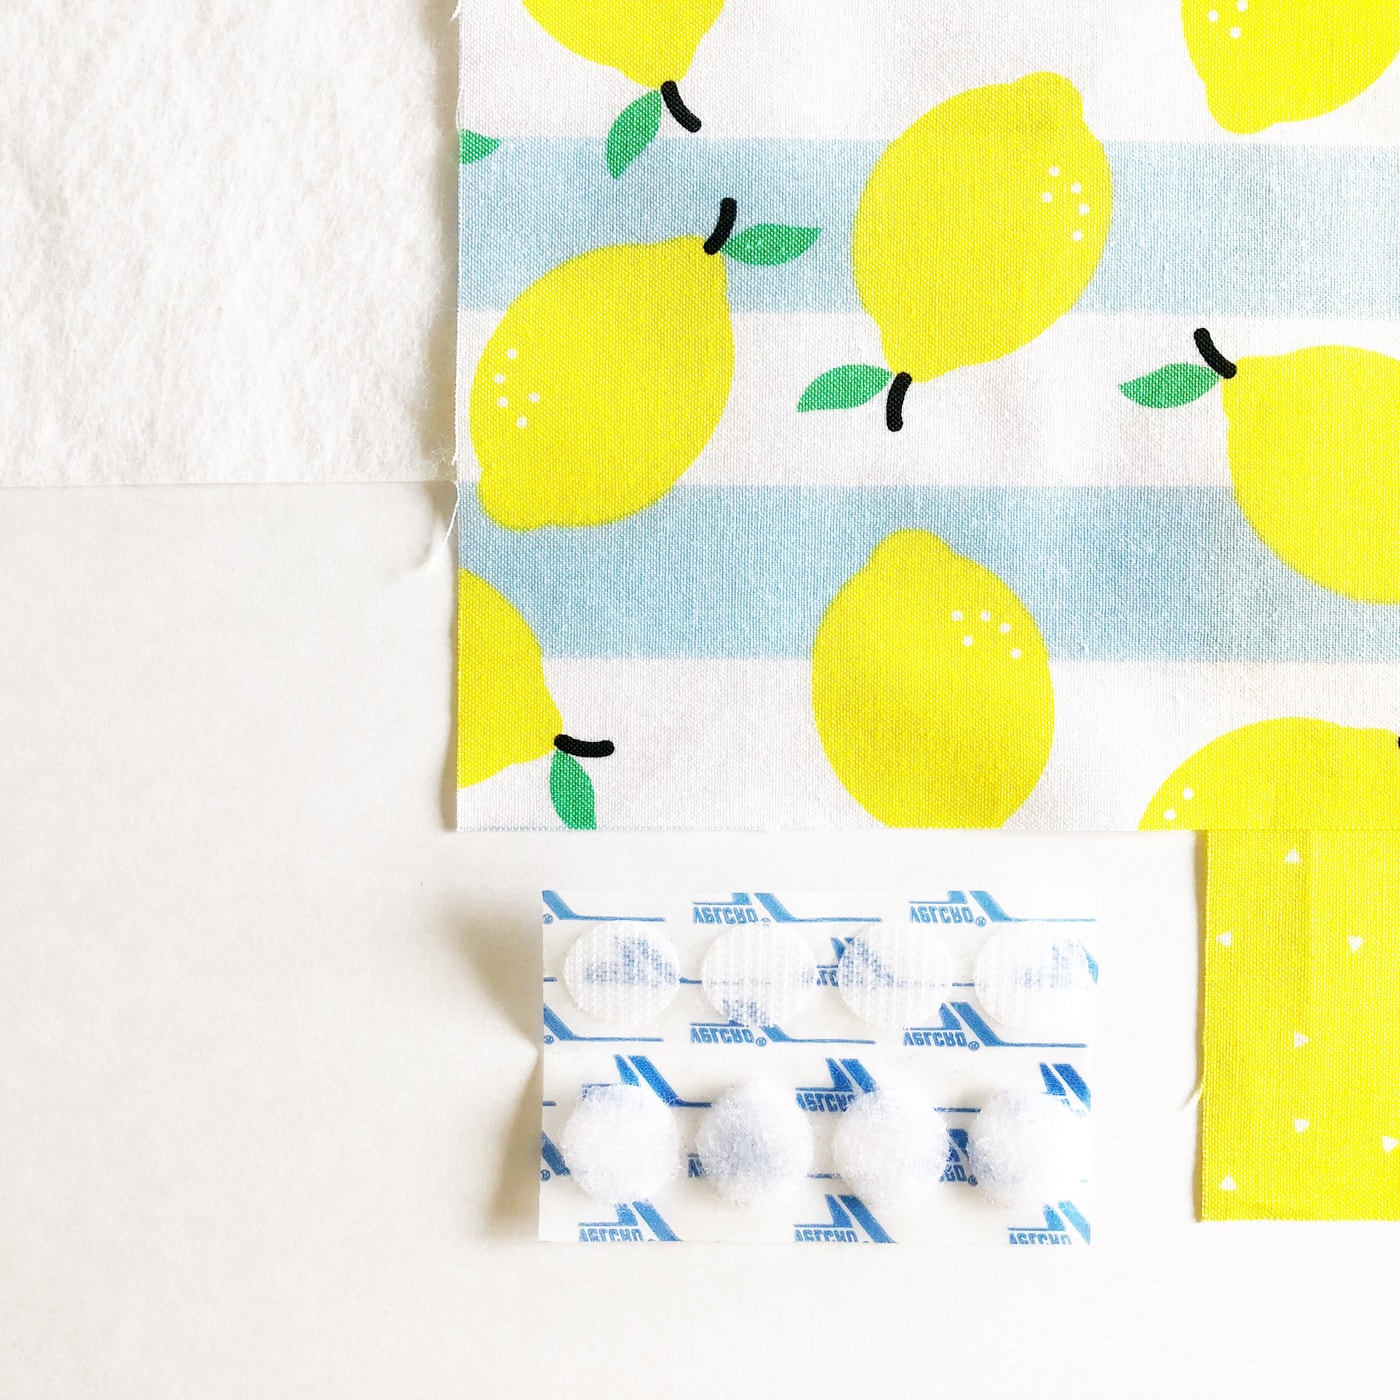
- 2 Fat Quarters Fabric
- 1 Package Velcro Dots
- Iron-On Interfacing, like Pellon Fusible Fleece

Simple Envelope Pouch Sewing Tutorial
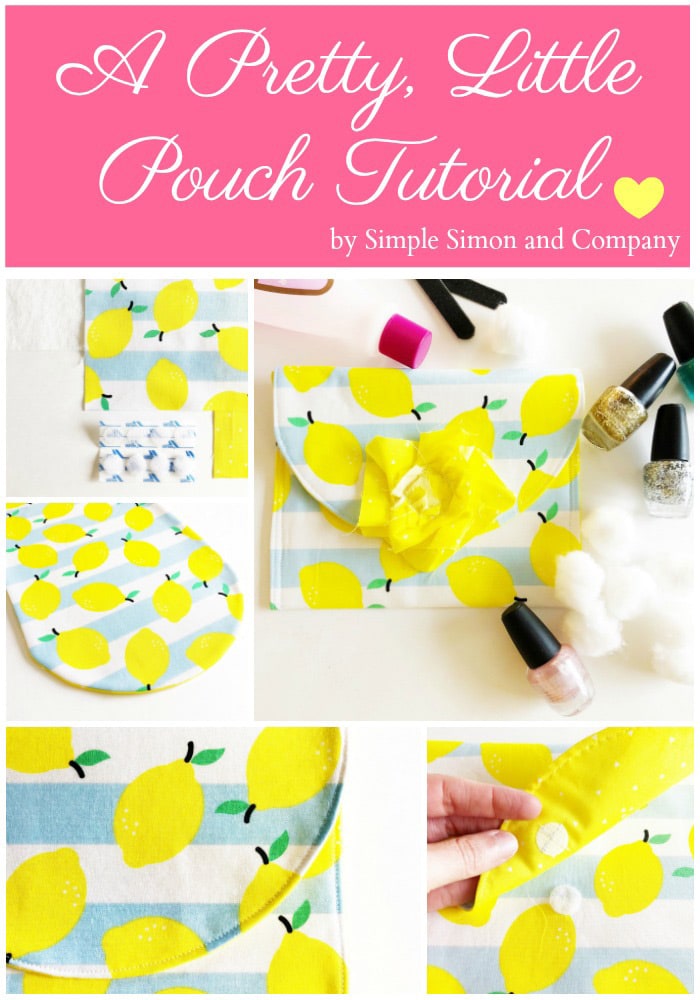
supplies
- 2 fat quarter coordinating fabrics You can make 2 of these pouches using your two fat quarters!
- 1 package Iron-On Interfacing such as Pellon Fusible Fleece
- 1 package Velcro sew on, not glue on
Instructions
Step One:
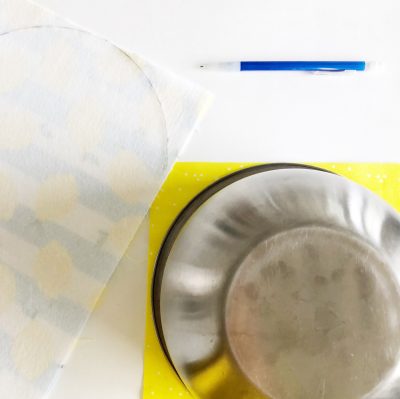
- Cut each piece of fabric and your interfacing to be 8 and 1/2 inches wide and 18″ long.
- Iron your interfacing onto the wrong (back…unprinted) side of your exterior fabric.
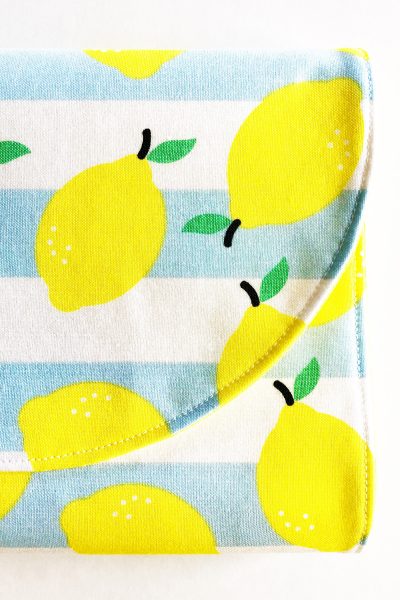
- Using something round, like a mixing bowl, round the top edge of both pieces of fabric. Do this by placing the bowl at the top of the fabric, tracing around the arch with a pencil, then cutting along the newly drawn line.

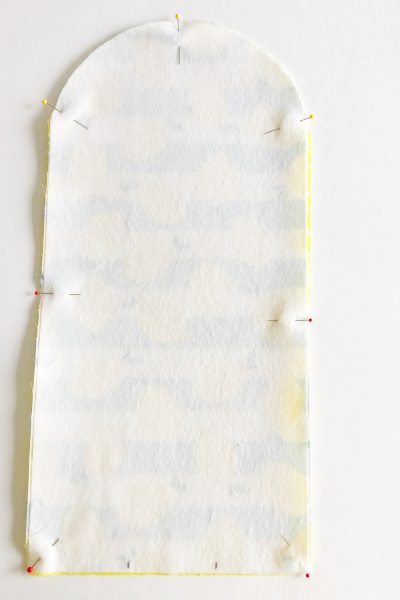
- Place your exterior and interior fabric on top of one another with the right (printed) sides together. Align the arch and the sides. Pin.

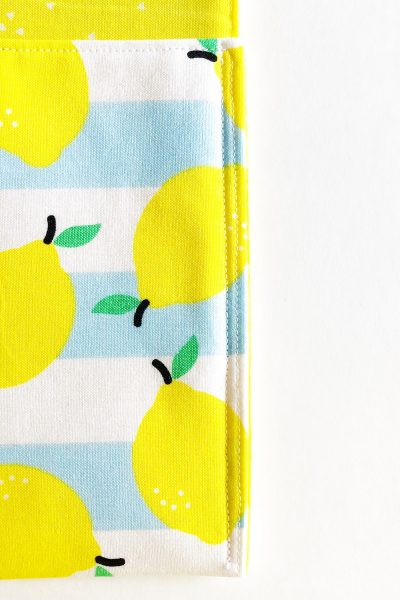
- Sew around the entire perimeter of the pouch. Begin on the short flat side and leave a two-inch opening to flip your pouch right sides out. (You can see in the photo the pins that I marked the opening on the bottom of my pouch with a pencil.)
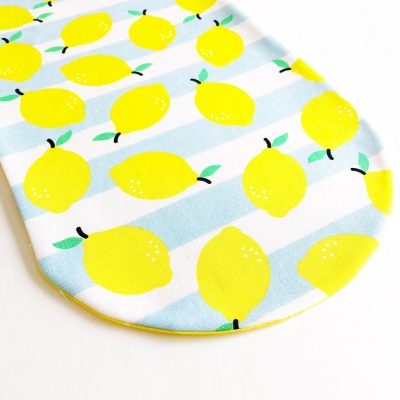
- Using the opening at the bottom of the pouch, flip the right sides out of your pouch and iron it.

- Topstitch around the entire perimeter of your pouch. (Topstitching will close that opening you used for flipping the pouch right sides out.)
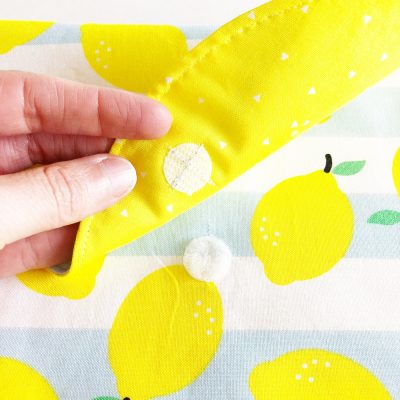
- Fold your pouch in thirds, with the rounded end overlapping the flat end. Mark where you would like to place your Velcro. Unfold. Stitch Velcro in place.
- Refold the pouch, making sure your Velcro still aligns. Then, pin the bottom flat and fold it into place. Stitch along each side to create your pouch, remembering to backstitch at the beginning and end of each side. (NOTE: Do not sew the top flat to the sides! Open the top flap up before you start sewing.)
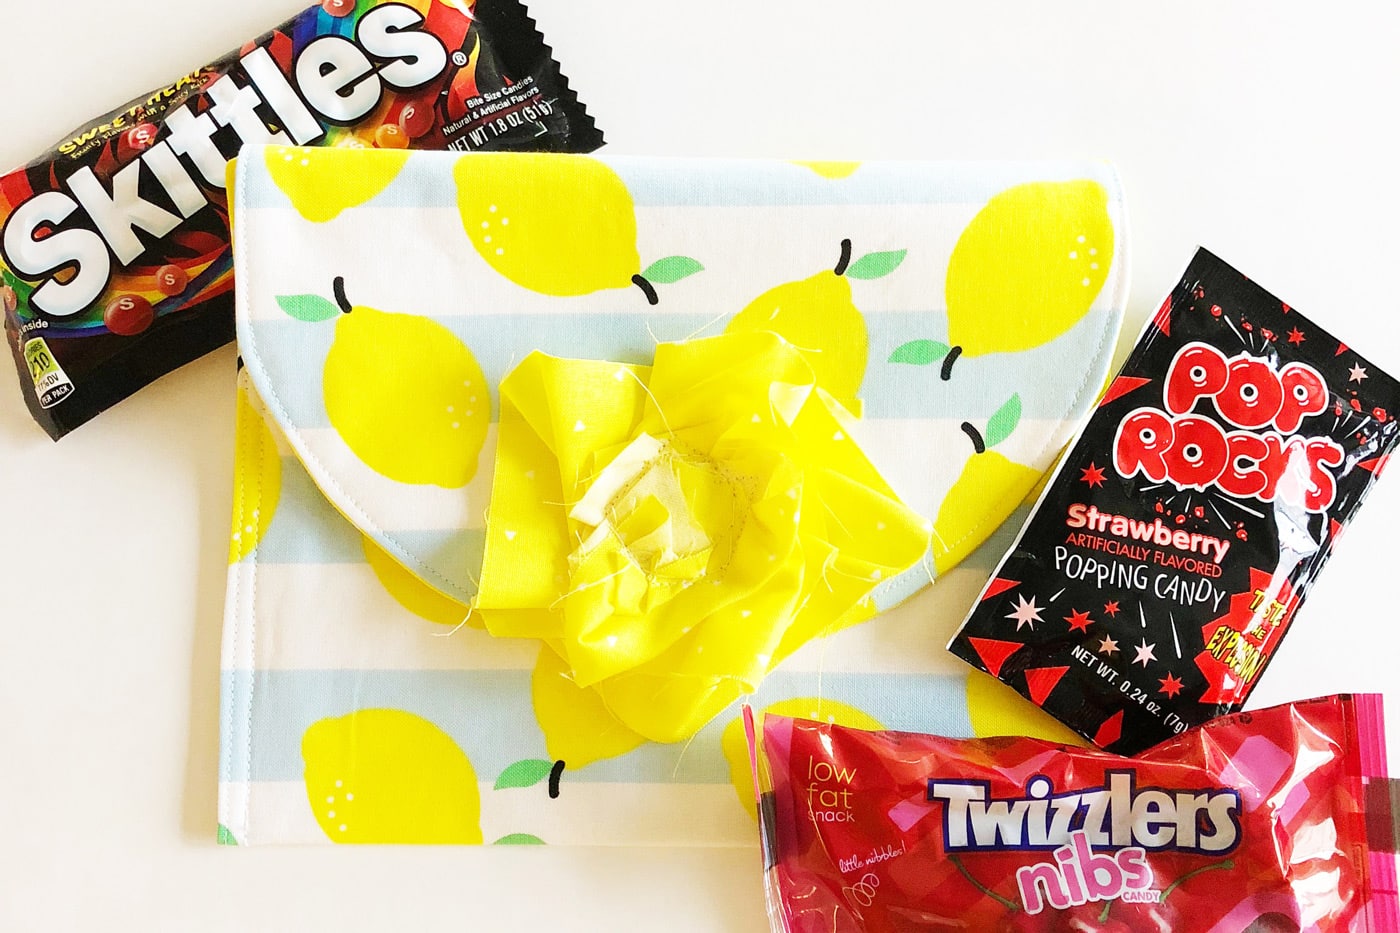
- Fold the top flap down to close your pouch using Velcro, and you are all done….unless….you want to sew a decorative piece over the top of your Velcro stitching. I added a simple fabric flower to mine, although my daughter wants to put iron-on patches on hers….
- All left to do now is to fill them with fun items and give them away!
- Happy gifting!
About the Maker:
We are Elizabeth and Elizabeth, two girls who married brothers and ended up with the same name. We are also the same age, both former school teachers, have the same number of children, live in the same county, have dogs rescued from the pound, and share a love for sewing, quilting, and the art of homemaking.
Together we blog over at Simple Simon and Company where we get the opportunity to share tips, tricks, tutorials, recipes, and thoughts with our readership.
More Fun Projects from Simple Simon & Co:
They have recently started a Podcast! It’s all about Quilting and the Stories behind the quilts! You can find out more information here
Halloween Strip Quilt Tutorial

More Gifts to Sew:
Farmhouse Style Hanging Kitchen Towel Tutorial