• Skip to primary navigation
  • Skip to main content
  • Skip to primary sidebar

The Polka Dot Chair logo

  • SEWING
    • Free Sewing Patterns
    • Bag Patterns
    • Costumes
    • Apparel
    • Learn to Sew
    • Beginner Friendly
    • Embroidery Projects
    • Tips & Techniques
    • All Sewing
  • QUILTING
    • Quilt Blocks
    • Learn to Quilt
    • Free Patterns
    • Quilt Patterns
    • All Quilting
  • CRAFTS
    • Disney
    • Cricut
    • Printables
    • All Crafts
  • HOLIDAYS
    • Seasonal Projects
    • Valentine’s Day
    • Easter
    • 4th of July
    • Halloween
    • Thanksgiving
    • Christmas
    • All Holidays
  • TUTORIALS
  • ABOUT
    • About Me
    • My Fabric Collections
    • Published Books
    • Press
    • FAQ’s
    • Contact
  • SUBSCRIBE
  • SHOP
menu icon
go to homepage
subscribe
search icon
Homepage link
  • SHOP
  • ALL PROJECTS
  • SEWING
  • QUILTING
  • CRAFTS
  • HOLIDAY PROJECTS
  • ABOUT
    • Published Books
    • My Fabric Collections
    • Facebook
    • Instagram
    • Pinterest
    • YouTube
  • ×

    Home » Holidays

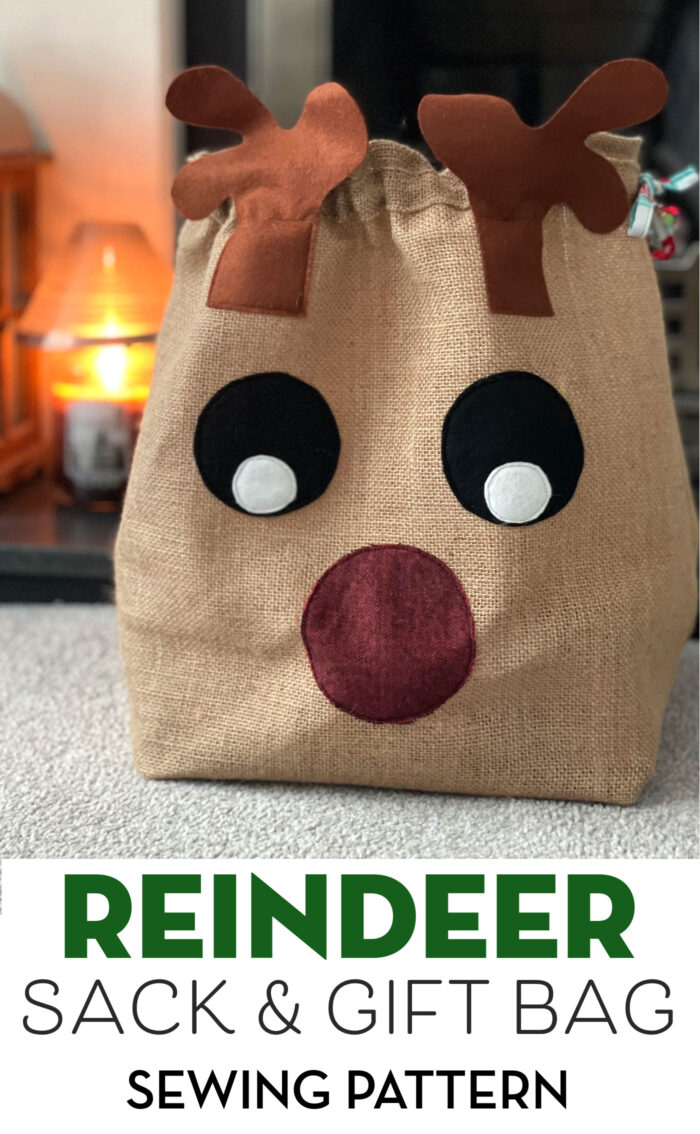
    Reindeer Sack Gift Bag Sewing Pattern

    Updated: Nov 16, 2021 by Melissa Mortenson · This post may contain affiliate links · This blog generates income via ads · 6 Comments

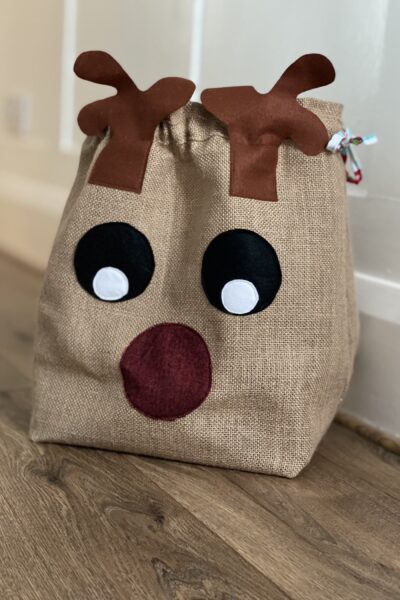
    Create a cute sack just for holding treats for Santa’s Reindeer with our free Reindeer Gift Bag Sewing Pattern! This project also makes a cute Christmas gift bag.

    Burlap reindeer sack on table in front of candle

    Gift bags are a great way to wrap unusually shaped presents or a few smaller things all into one gift to unwrap. You can add an extra personal touch, or even an extra gift, by making the gift bags!

    Table of Contents
    • Supplies Required
    • How to Get the Printable Pattern Pieces
    • How to Make a Reindeer Sack
    • Instructions
    • Penguin Quilt Pattern

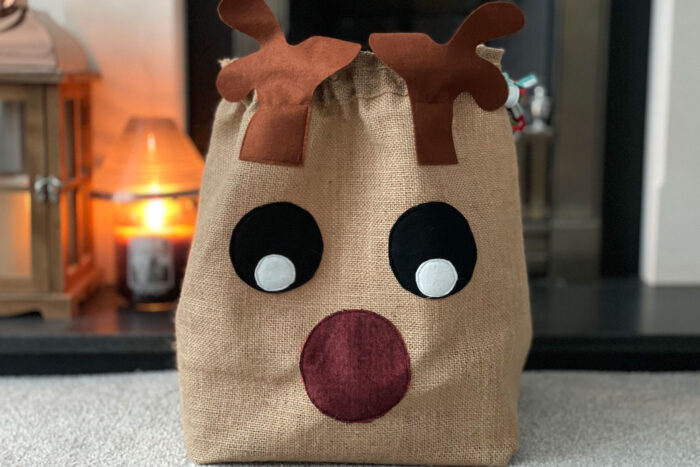
    This Reindeer Sack will be a cute addition under the tree or by the fireplace filled with gifts or you could use it just as decoration. You could even make nine and have a full reindeer family!

    This project would pair wonderfully with a Santa Sack & a Letters to Santa Pocket Pillow!

    Burlap reindeer sack on table in front of candle

    Supplies Required

    • ¾ Yard Burlap or Canvas
    • ⅜ Yard Fabric for Binding & Ribbon (you can also use purchased ribbon.
    • Scraps of felt in red, black, white & brown.
    Close up of top of reindeer sack

    How to Get the Printable Pattern Pieces

    Just fill out the form below and we will send you the pattern piece.

    How to Make a Reindeer Sack

    To complete your reindeer gift bag you’ll need to get the pattern piece (information above) and follow the directions on this post.

    Instructions

    Pin It
    Print
    5 from 1 vote

    Reindeer Sack Sewing Pattern

    Create a cute sack just for holding treats for Santa's Reindeer! Also makes a cute Christmas gift bag.
    Prep Time45 mins
    Active Time2 hrs
    Total Time2 hrs 45 mins
    Yield: 1 Bag
    Author: Amy Ball

    Tools

    • Basic Sewing Tools
    • Sewing Machine
    • Cutting Mat
    • Rotary Cutter
    • Pins
    • Fabric Safe Pen (I like to use a Frixon pen)
    • Binding Clips

    Materials

    Fabrics

    • ¾ yard Burlap or Canvas
    • ⅜ yard Binding & Ribbon Fabric
    • 1 piece Brown Felt 6" x 11"
    • 1 piece Red Felt 4" x 4"
    • 1 piece Black Felt 3 ½" x 7"
    • 1 piece White Felt 1 ½" x 3"

    Other

    • 1 Pattern Piece follow directions in blog post to get the pattern piece.

    Instructions

    Cutting:

    • From Main Fabric Cut:
      20” square (2)
      37” x 2” strip (1)

      From Binding Fabric Cut:
      15¼” x 1½” (2)
      11” x 1½” (1)
      9” x 1½” (2)
      1¼” x WOF (1)

    Construction:

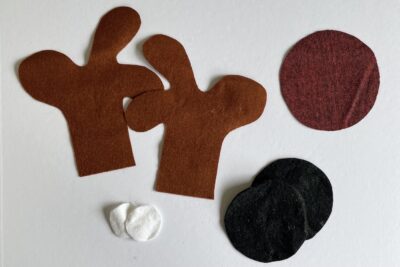
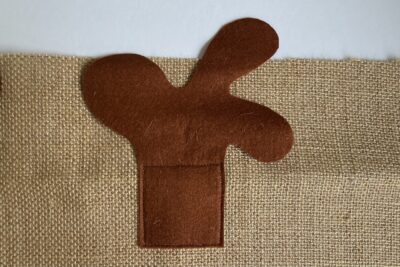
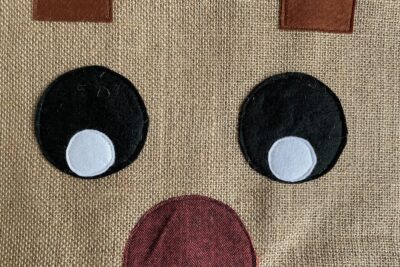
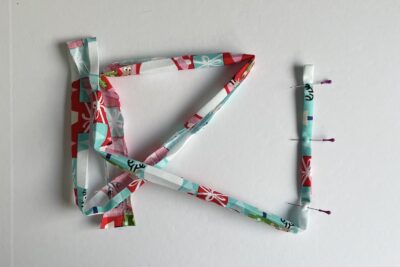
    • Using the templates as guides, cut out two antlers (mirrored) from the brown felt, one nose from the red felt, two eyes from the black felt and two eye centres from the white felt. Set aside.
      cut pieces of felt on white table
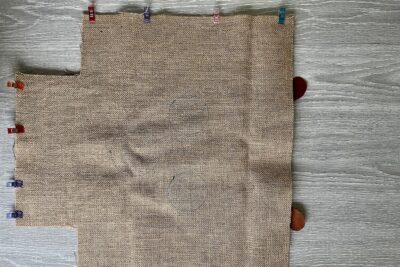
    • Take one of the Main Fabric squares and mark a 4½” square in both bottom corners, then cut out the squares. Repeat for the second Main Fabric square.
      cut burlap fabric on white table
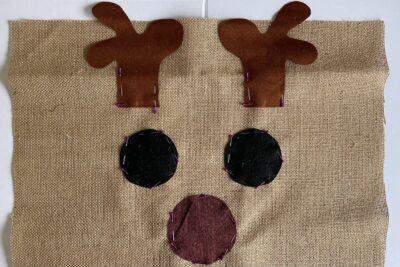
    • Now pin the reindeer features to the right side of one of the Main Fabric squares in the following positions:

      Antlers – place the outside bottom antler corner 4¾” from the top edge of the Main Fabric square and 5½” from the outside edge.
      fabric sewn to burlap in shape of reindeer eyes nose and antlers
    • 
Eyes – place the eye top edge 1¼” below each antler with the outside edge of the eyes slightly in from the outside edge of the antlers.

    • Nose – place the nose centre 10” in from the Main Fabric square side edges and 8½” up from the bottom edge
    • Sew all around the eyes and nose to secure in place. Don’t sew around all the edges of the antlers, instead sew a roughly 2” square of stitching around the bottom three edges and across the antler.
      You can use machine or hand stitching to secure the reindeer features, and chose whichever style of stitching you prefer. I have used a short straight stitch for a raw edge appliqué effect but a zigzag or blanket stitch would also be a great choice.
      fabric sewn to burlap in shape of reindeer eyes nose and antlers
    • Now pin the eye centres in place and sew around.
      fabric sewn to burlap in shape of reindeer eyes nose and antlers
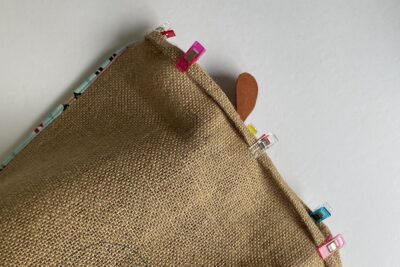
    • Place the two bag pieces, right sides together, line up, and pin/clip the two side edges and the bottom edge. Sew together with a ¼” seam allowance. Set aside.
      two pieces of burlap fabric pinned together
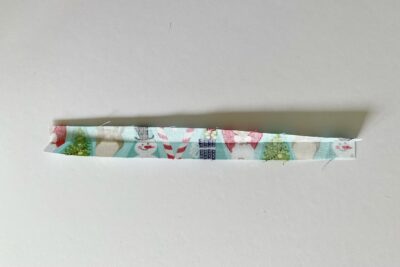
    • Take all the binding strip pieces. Press in half, wrong sides together, along the long edge and then unfold.
      long strip of fabric folded in half
    • Fold the two short edges in by ¼” and press.
      long strip of fabric folded in half
    • Fold one long raw edge in to meet the central fold and press. Repeat for the second long raw edge and then unfold.
      long strip of fabric folded in half
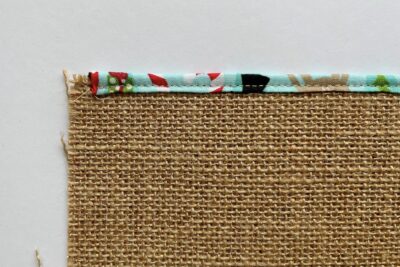
    • Take one of the 15¼” x 1½” pressed binding strips and match one of the long raw binding edges to the raw edge of the bag’s side seam.
      Line up one end of the binding with the bottom corner, you should be left with about ½” of the seam uncovered at the top edge. Sew along the first fold line.
      long strip of fabric folded in half and pinned to burlap
    • Now fold the rest of the binding strip round the bag’s side seam, making sure the remaining binding strip raw edge is folded under the binding strip.
      Sew the binding strip in place close to the folded edge.
      long strip of fabric folded in half and pinned to burlap
    • Repeat with the second 15¼” x 1½” pressed binding strip on the other side seam.
    • Follow steps 10 and 11 using the 11” x 1½” pressed binding strip on the bag’s base seam.
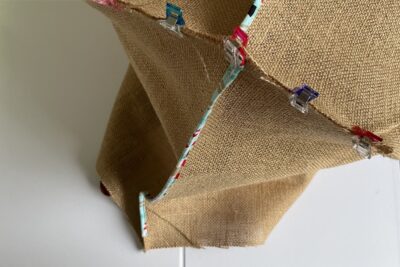
    • For the bag corners, bring the side seam to meet the base seam, right sides together and pin/clip.
      Move any excess fabric out of the way so that the pinned/clipped seam lies flat. Sew with a ¼” seam allowance. Repeat for the second corner. You’ll now have the bag shape completed.
      long strip of fabric folded in half and pinned to burlap
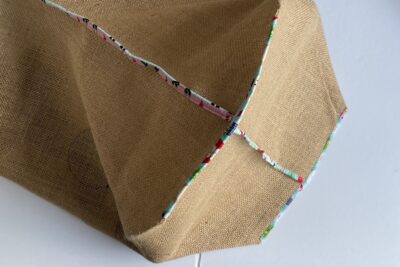
    • Follow steps 10 and 11 using the two 9” x 1½” pressed binding strips on the corner seams. All the internal seams should now be covered with binding.
      long strip of fabric folded in half and pinned to burlap
    • Hem the top of the bag by folding the top edge in by ¼”, pressing then folding in again by another ¼” and sewing in place.
    • Take the 37” x 2” Main Fabric strip. Press the two short edges (wrong sides together) in by ¼”, then press one long edge in by ½”, and then repeat for the second long edge.
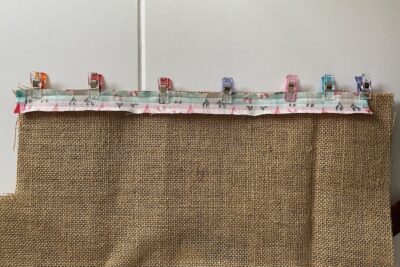
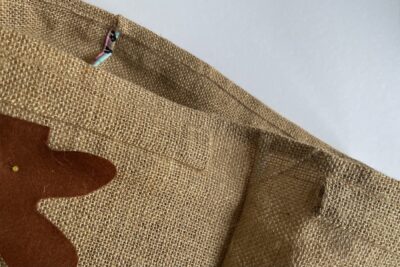
    • Find the centre of the pressed Main Fabric strip, match it to one of the side seams and pin to the outside of the bag, with the top edge of the strip ½” down from the top edge of the bag.
      Then work your way around the bag pinning the casing strip in place. There will be a gap between the two short ends of the casing strip by the opposite side seam.
      edge of burlap sack folded over and held in place with clips
    • Sew the casing strip in place close to the top and bottom edge.
      close up of top seam of bag
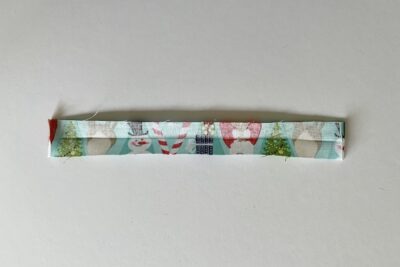
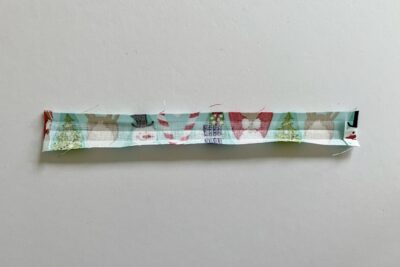
    • Make the ribbon in a similar way to the binding strips (following steps 10 and 11) using the 1¼” x WOF strip.
      Pin the pressed strip together using the folds so there are no raw edges exposed.
      I’d recommend pinning the ribbon together for the first few inches before sewing close to the open long edge and then hold the pieces together in small sections as you sew.
      If you find making your own ribbon too time consuming then you can used ready-made ribbon; choose a ribbon that is about about ⅜” wide and about 43” in length.
      folded fabric strips
    • Pin a safety pin to one end of the ribbon and thread it through the casing strip on the bag until it comes out of the other end of the casing strip.
      long strip of fabric folded in half and pinned to burlap
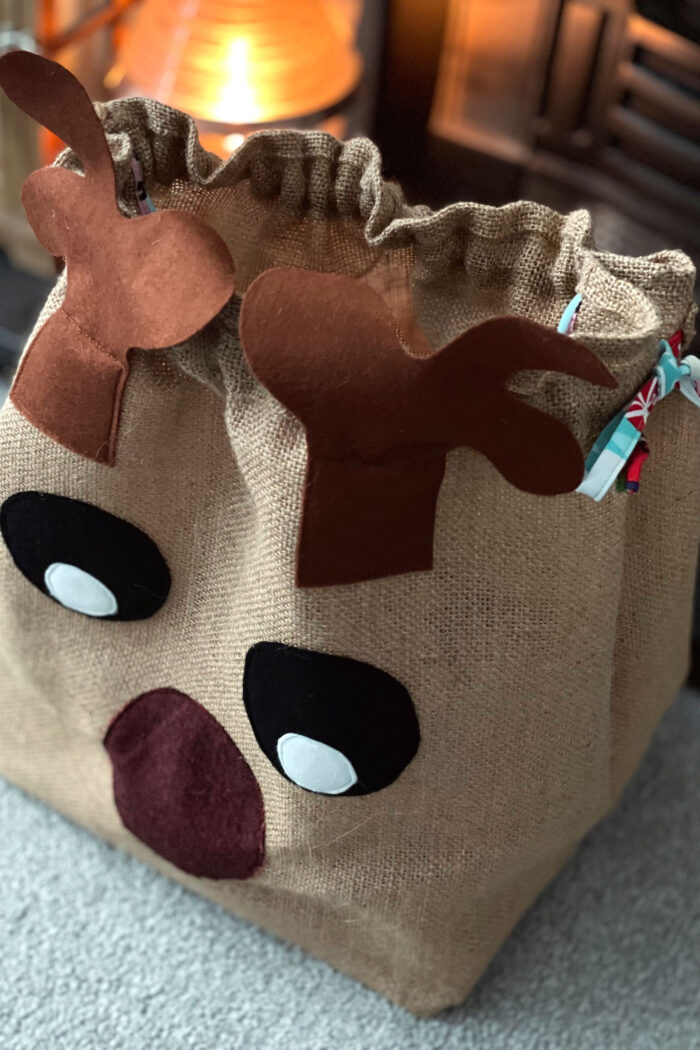
    • Pull both ends of the ribbon to draw the top of the bag closed. Take you time with this step as the burlap may be stiff.
    • Finish by tying the ribbon in a bow.

    Copyright Notice

    ©www.polkadotchair.com – This is Copyrighted Content. You may NOT copy it, distribute it, sell it or package it with a kit. You may NOT teach a for-fee class using it. All items are for personal use only. No commercial use is allowed.

    About the Designer:

    Photo of Amy Ball in front of colorful quilt

    Amy Ball is a modern quilt designer and founder of Coffee Rings Studio. Amy regularly contributes projects to magazines and creates online courses and workshops for beginner quilters. Subscribe to Amy’s newsletter to receive your free ‘Guide to (near) Perfect Patchwork’ and follow her on Instagram at @coffeeringsstudio. Also, check out Amy’s digital and paper patterns in her Etsy shop.

    Penguin Quilt Pattern

    Pixel Penguin Quilt Pattern

    You may also like:

    • Reindeer Christmas Mason Jar Gift Idea
    • How to Make a Santa Sack
    • 3 Simple and Creative Gift Wrap Ideas
    • Santa Hat Quilt Blocks Pattern

    More Projects You'll Love!

    • Free Easter Basket sewing tutorial - a cute little fabric basket perfect for Spring!
      Mini Easter Basket Sewing Pattern
    • nesting fabric baskets on white marble table
      Nesting Fabric Baskets Sewing Pattern
    • Free sewing pattern for a monogrammed travel bag. Such a great DIY gift for a guy or a Dad. -- Waxed Canvas Travel Bag Pattern
      Waxed Canvas Travel Bag Sewing Pattern
    • gray and pink fabric envelope on gray carpet
      Fabric Envelope Sewing Pattern
    • Sewing Pattern for DIY Padded storage bins, you can make them in 3 different sizes - love the outside pocket!
      Black Friday Sewing Pattern Steals and Deals!
    • padded tablet case sewing pattern
      The Busy Day Tablet Case Sewing Pattern
    « Finish it Friday; Navy Sparkler Quilt
    Free Printable Christmas Planner Pages for Handmade Gifts »

    • Share
    • Email

    About Author

    Melissa Mortenson

    Melissa Mortenson is a blogger, designer, and content creator. She is the Polka Dot Chair blog founder and has been sharing fresh and creative ideas with readers since 2008. She is the author of “Project Teen, Handmade Gifts your Teen will Actually Love.” Her work and designs have been featured on HuffPost, TODAY, Pioneer Woman, HGTV, BuzzFeed, Better Homes & Gardens, and many other established publications. Her first fabric line, “Derby Style,” debuted in January 2015 through Riley Blake Designs.  Additional fabric collections have followed it in subsequent years. A mom of 3, she considers herself lucky to be living in Kentucky.

    Reader Interactions

    Comments

    1. Danice says

      November 17, 2021 at 6:41 am

      Oh how adorable! Thank you for the pattern also.

      Reply
    2. Kim Martin says

      November 22, 2021 at 10:57 am

      So cute! Please email me the Reindeer pattern. Thanks!

      Reply
      • Melissa Mortenson says

        November 23, 2021 at 11:27 am

        Just fill out the form on the page and it will be emailed to you automatically!

        Reply
    3. Kathy Speed says

      November 23, 2021 at 11:00 am

      I am not able to download the pattern pieces for the reindeer gift bag. I have tried entering my email address 3 or 4 times this morning. Help!!!!
      Have you considered creating a gnome gift mason jar?
      Thanks for your help.
      Kathy

      Reply
      • Melissa Mortenson says

        November 23, 2021 at 11:30 am

        A Gnome mason jar is genius! Thank you for the idea!
        Make sure it’s not going to your spam folder, also, are you filling out the form on this blog page? The one with the photo of the project?

        Reply
    4. Catherine Cook says

      November 23, 2021 at 5:16 pm

      Love the reindeer bag.

      Reply

    Leave a Reply Cancel reply

    Your email address will not be published. Required fields are marked *

    This site uses Akismet to reduce spam. Learn how your comment data is processed.

    Primary Sidebar

    Hello! It’s nice to meet you.

    I’m Melissa. I like to design things, like fabric, printables, and projects.

    I’m also a Mom and a Maker. I am like most of you, just trying to do my best every day. Some days I succeed, many days I fail.  I find joy in creating, if you do too, then I hope that you find something here bring a little “happy” to your life.  Find out more about me here.

    COPYRIGHT POLICY

    All my images and text are copyrighted. You may NOT use any images from this site in any kind of Video (this includes YouTube). If you would like to feature my work, you may use ONE (1) NON-COLLAGED image and must “follow” link back to my original blog post. You may NOT edit, crop, or change my images in any way without written permission. You MAY NOT print out or copy and distribute any text, images or patterns from this site. All patterns, content, instructions, and templates are for personal use ONLY! Thank you! Violators will be reported.

    Footer

    ↑ back to top

    About

    • Privacy Policy
    • Disclaimers
    • About Melissa

    Newsletter

    • Sign Up! for emails and updates

    Contact

    • Contact
    • FAQ
    • Press
    • Fabric Collections

    Welcome to the Polka Dot Chair! Here you’ll find easy, step-by-step, sewing, quilting, and crafting projects. We design projects for Makers of all skill levels. Beginners are welcome!

    DISCLAIMER:

    While every effort has been made to ensure the accuracy of the content on this website, the information is made available without warranty of any kind. The Polka Dot Chair accepts no responsibility or liability, whether direct or indirect, as to the currency or accuracy of the information, nor any consequence of its uses. This website is not intended to substitute the advice of a professional.

    Copyright © 2020 Polka Dot Chair

    [ Placeholder content for popup link ] WordPress Download Manager - Best Download Management Plugin