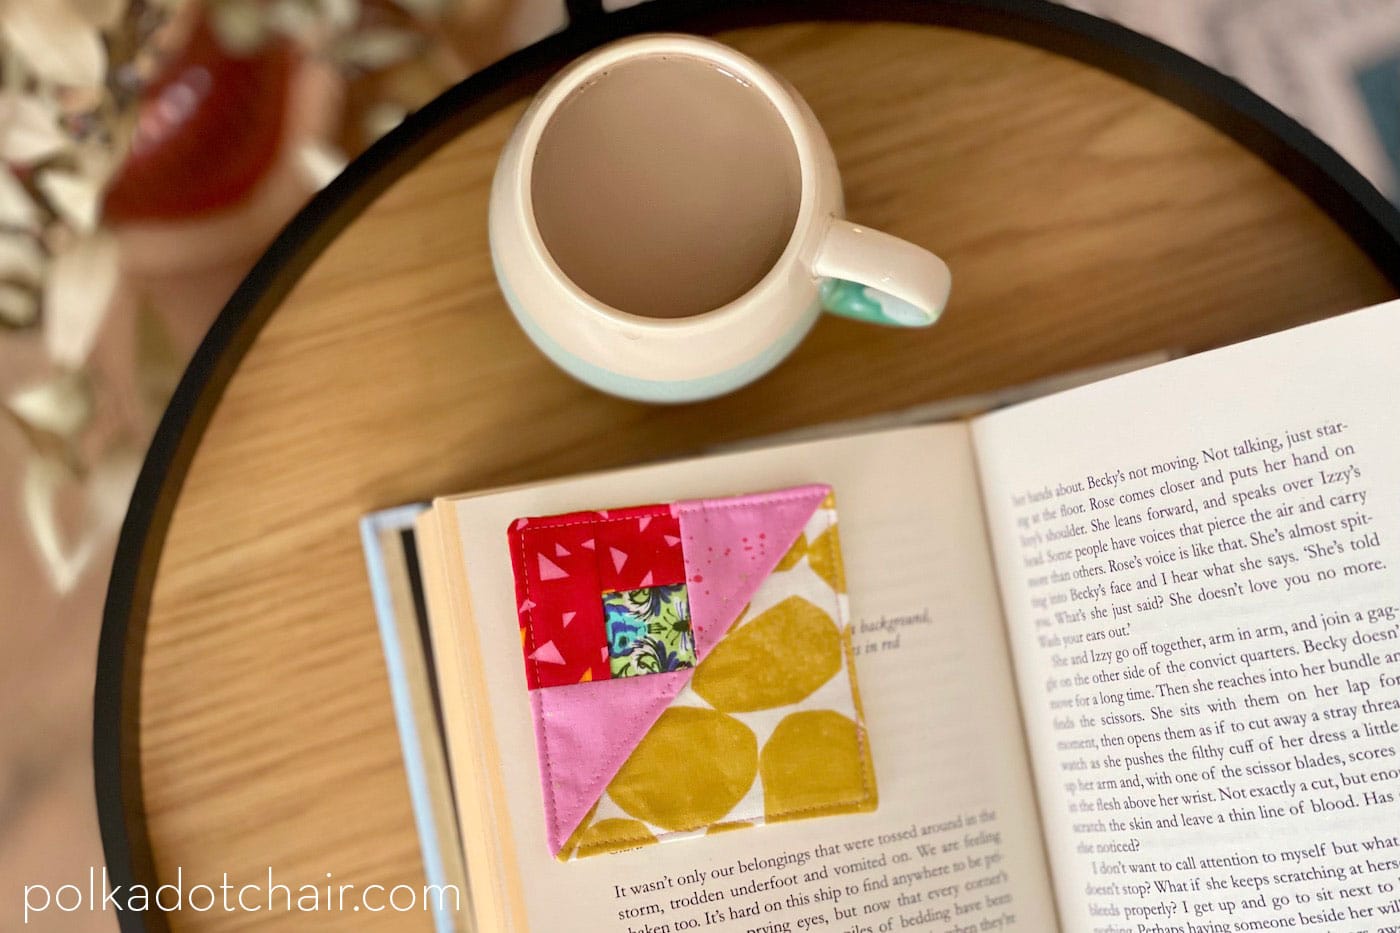
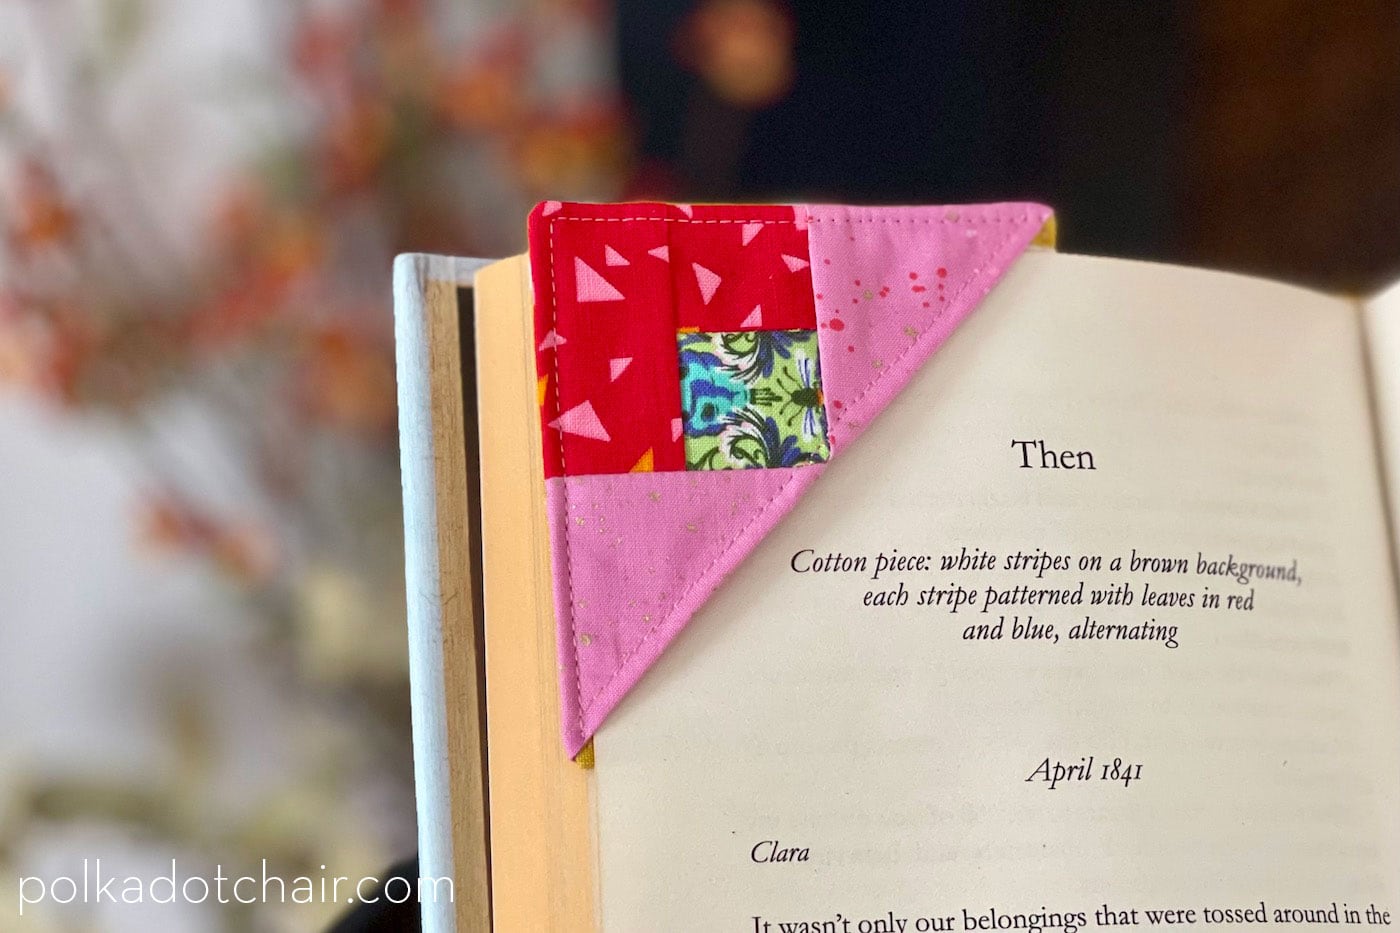
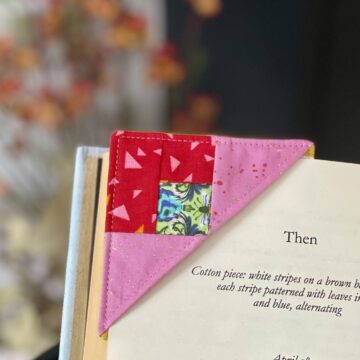
Patchwork Corner Bookmark Sewing Pattern
Learn how to make a fabric corner bookmark with charming patchwork details!
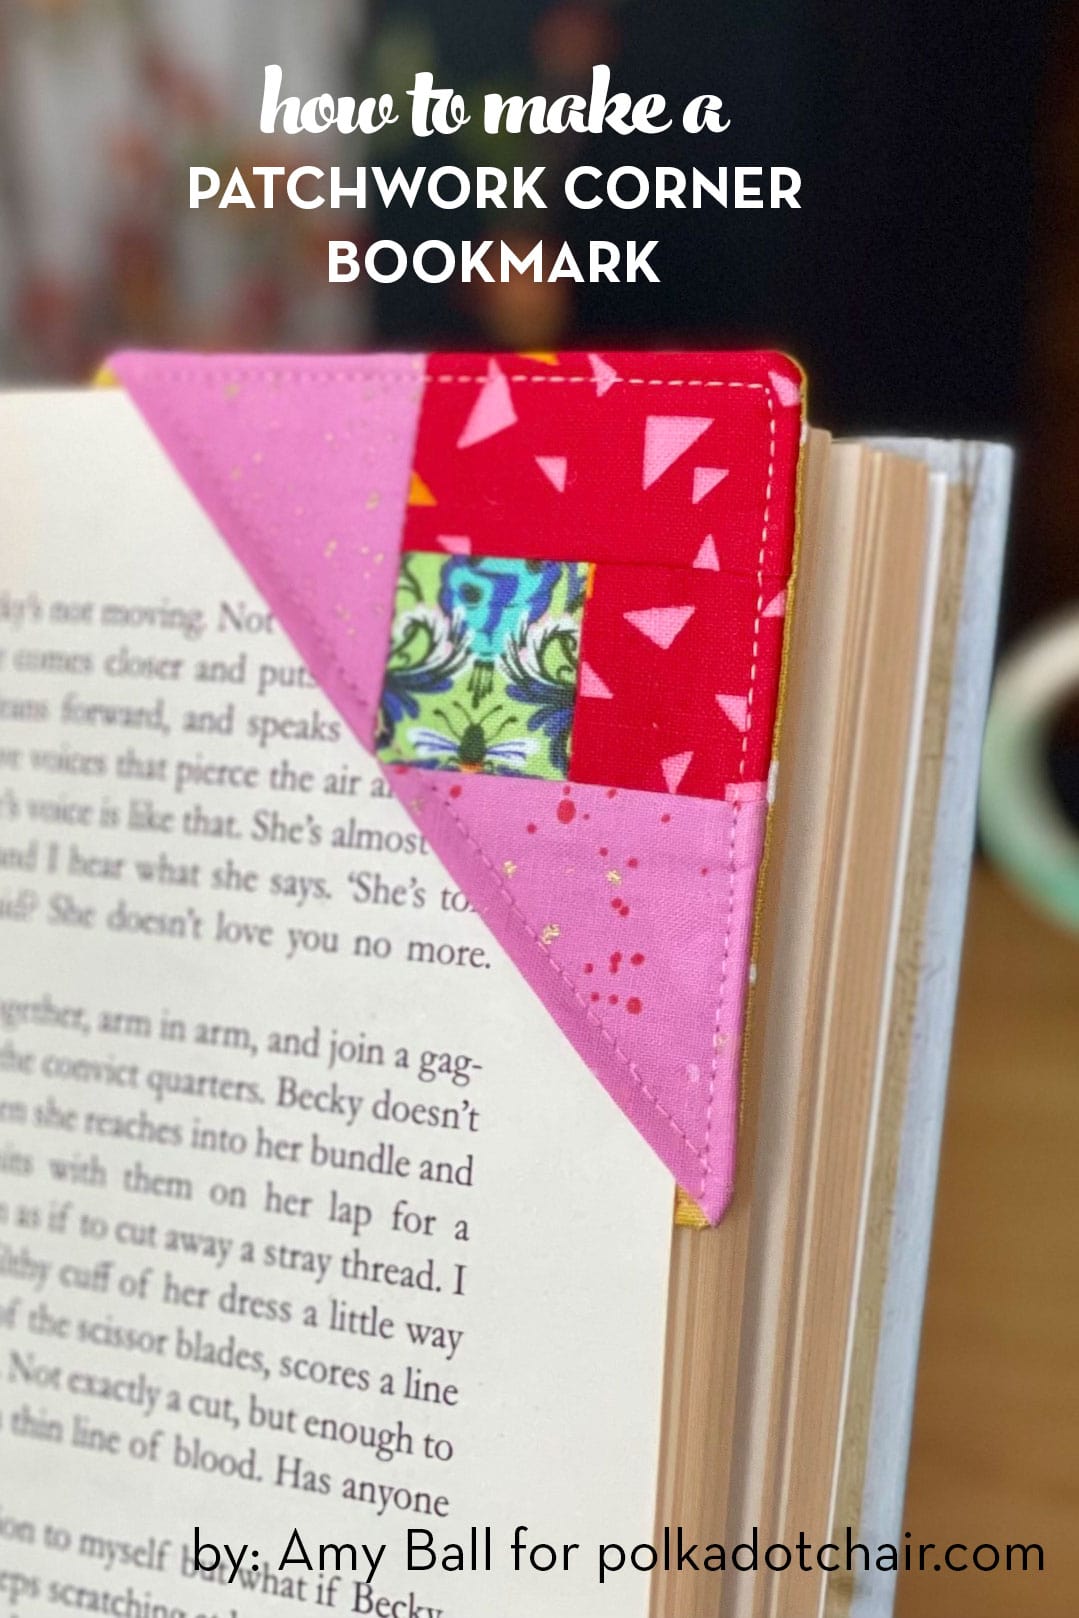
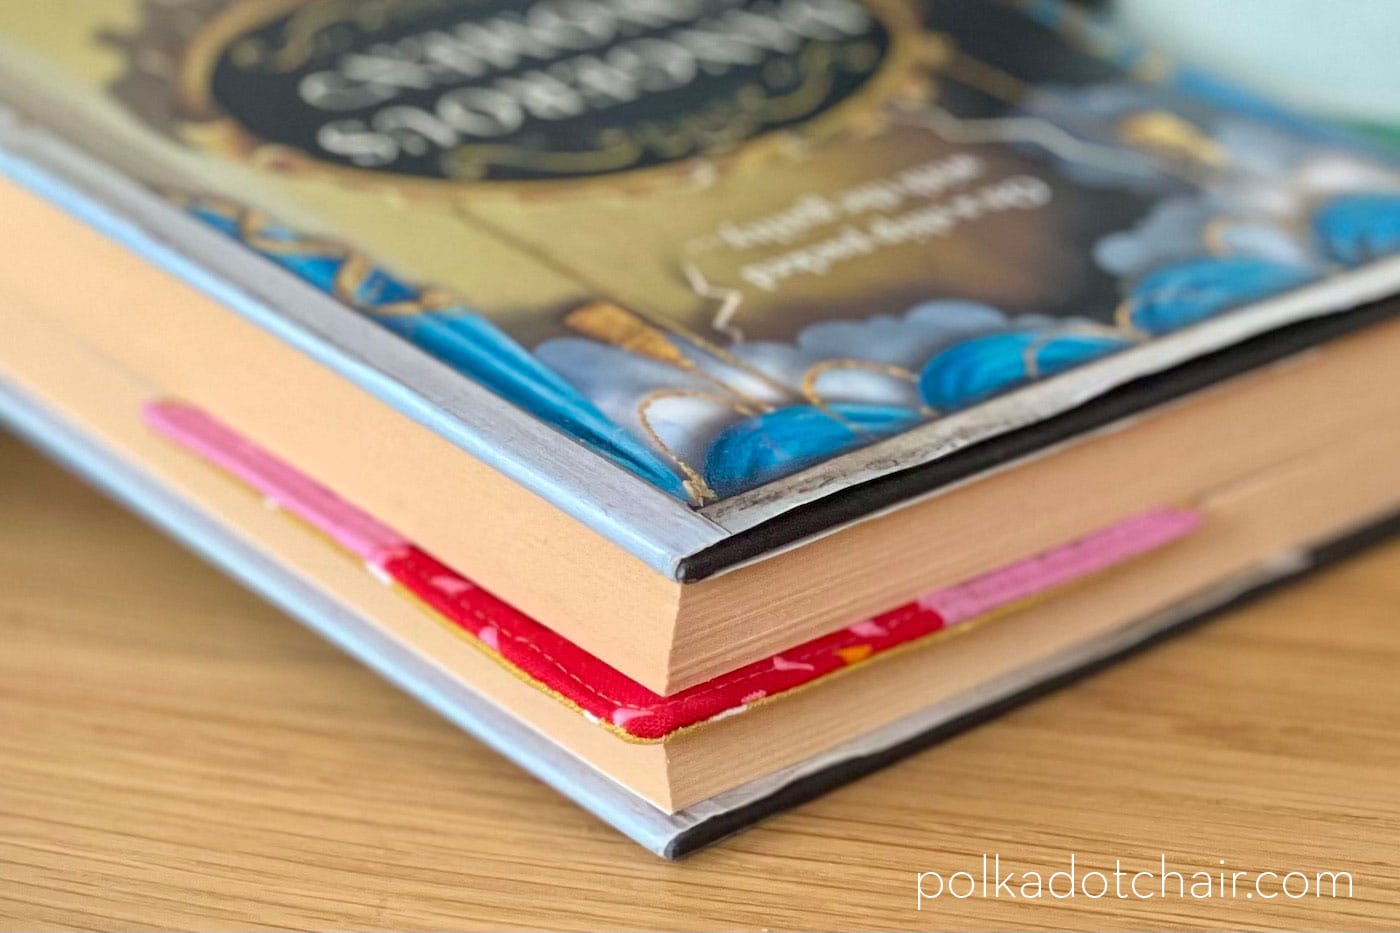
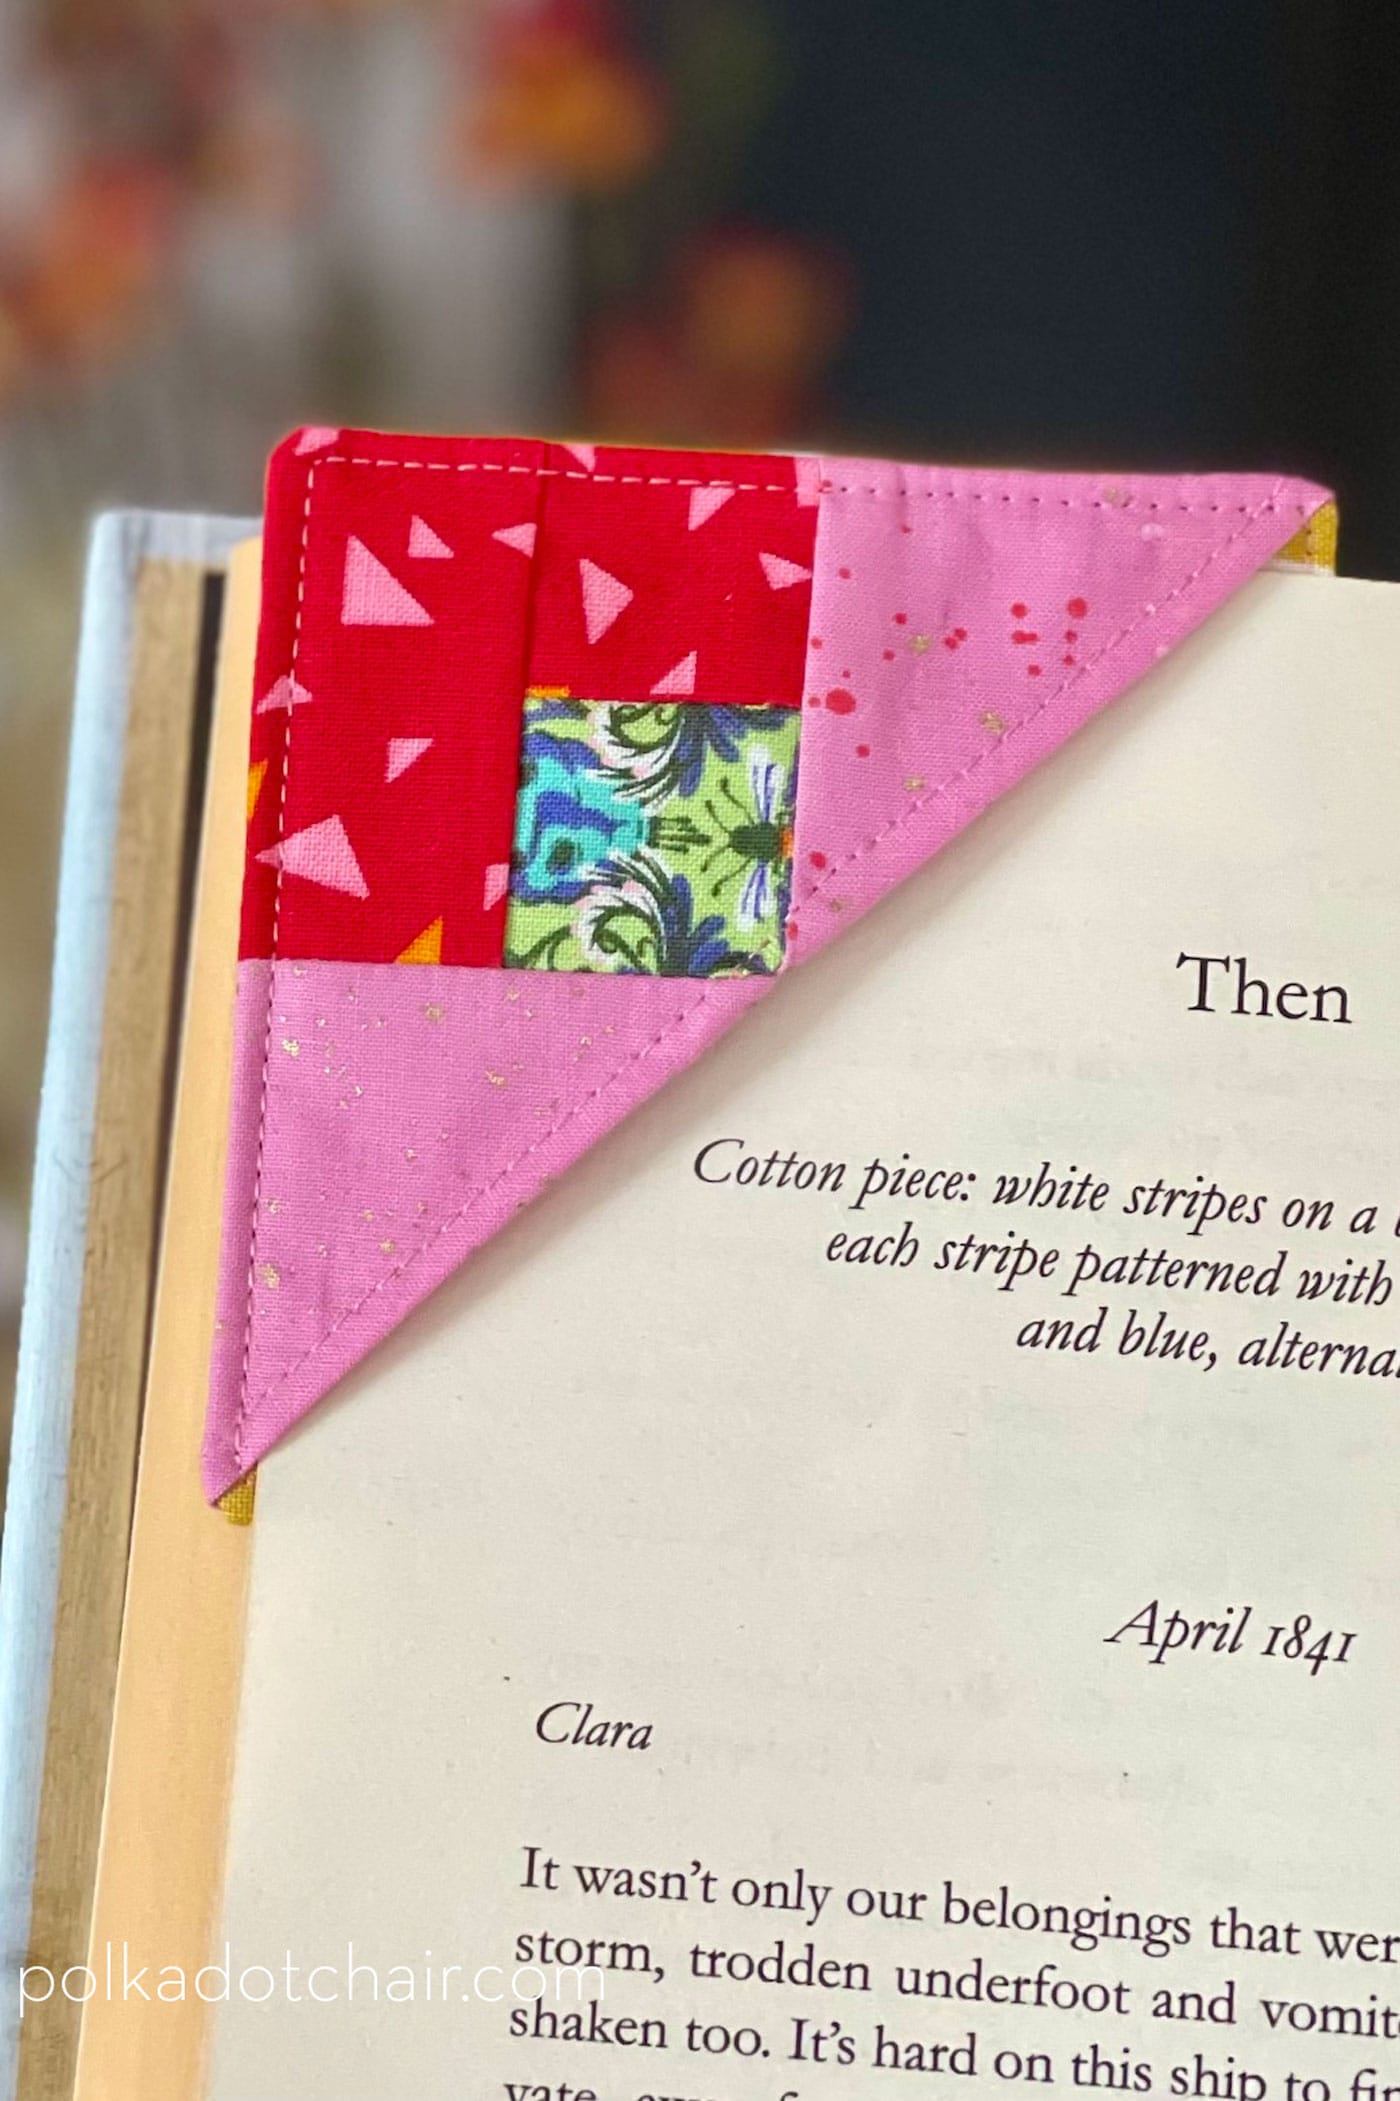
This is a little twist on the classic bookmark. Instead of putting your bookmark between the pages, why not put it on the page? It’s a great scraps buster, and the little patchwork section allows you to do a bit of fun fussy cutting, too.
Although this is already a quick make, there’s a way to make it even quicker…perfect if you want to make a big batch of these bookmarks, perhaps for something like party favors. Instead of creating the feature patchwork detail, simply cut three 4” squares (main, background, and backing fabrics) and skip ahead to step 4.
Bookmark Tutorials
This bookmark sewing pattern is part of a series of bookmark tutorials on our site. Here are all of the others we’ve shared so far.
Bookmark Tutorials
Sewing Instructions
Patchwork Corner Bookmark
Equipment
supplies
- 3 large Scraps in three different “main” colours
- 2 pieces fabric 5" x 5" for the background and backing fabrics or large scraps
- 1 piece Iron-On Interfacing 3½” square
Instructions
Cutting:
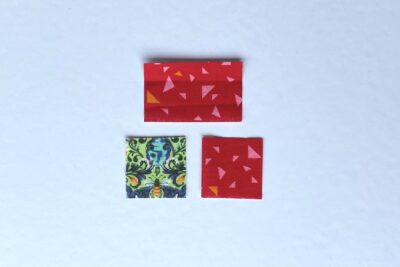
- From Main Fabric One cut 2¼” x 1⅜” (1) and 1⅜” sq (1). From Main Fabric Two cut 1⅜” sq (1). From Main Fabric Three cut 2¼” sq (3). From Background Fabric cut 4” sq (1). From Backing Fabric cut 4” sq (1).

Construction: Use a ¼” seam allowance unless stated otherwise.
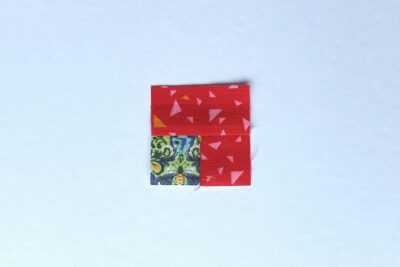
- Take the Main Fabric Two 1⅜” square and the Main Fabric One 1⅜” square. Sew together in this order and press the seam open. Then sew the Main Fabric One 2¼” x 1⅜” rectangle to the top and press the seam towards the rectangle.
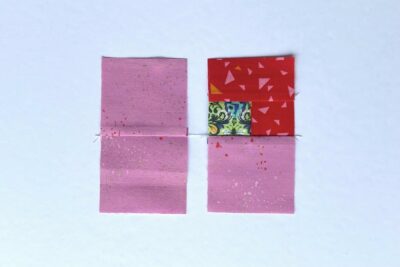
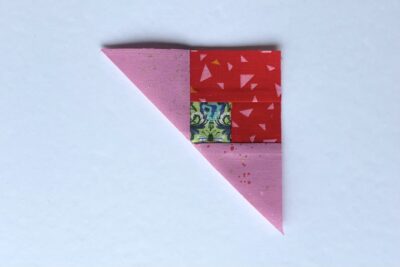
- Take one Main Fabric Three 2¼” square, sew it to the bottom edge of the unit from step 1, and press the seam towards the Fabric Three square. Then, take the remaining two Main Fabrics, Three 2¼” squares, sew them together, and press the seam towards the top square.
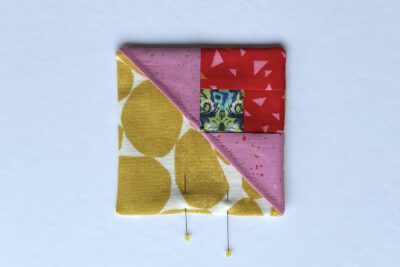
- Sew together the two units from step 2 (using the photo as a guide for placement). You will be able to nest the seams for a neater finish.
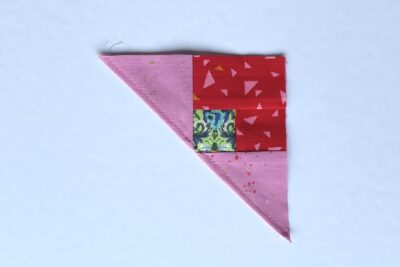
- Fold the patchwork square from step 3 in half diagonally with wrong sides together to create a right angled triangle. Align the seam lines to help get a neater triangle. Press well.
- Top stitch about ⅛” away from the folded edge.
- Take the Background Fabric 4” square and add the 3½” square of interfacing to the wrong side (following the manufacturers instructions). Position the interfacing so that it is in the centre of the Background Fabric; there should be an even ¼” gap round the edges.
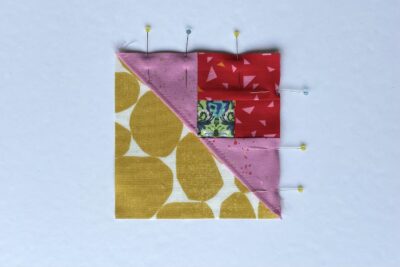
- Place the triangle unit from step 5 onto the Background Fabric square, both with the right sides facing towards you. Match the raw edges of the triangle to the top right corner of the square. Pin in place.
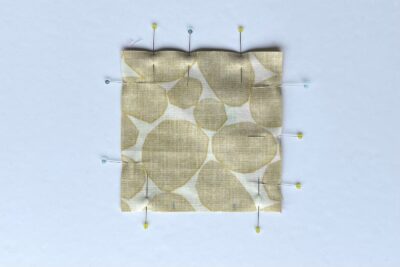
- Take the Backing Fabric 4” square and pin it, right sides together, onto the unit from step 7. Mark a 1½” gap in the center of the bottom edge.
- Sew round the four edges, leaving the gap on the bottom edge, then trim the corners.
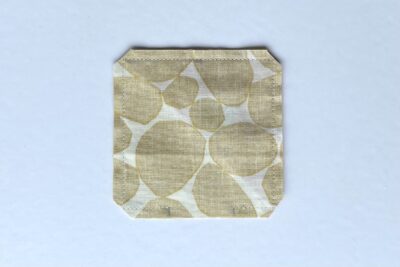
- Turn the bookmark right side out through the gap and carefully push out the corners. Press and then pin the gap.
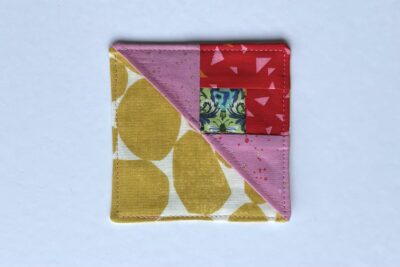
- Top stitch about ⅛” away from the edges being careful to close the gap on the bottom edge. Press well to finish.

About the Designer

Amy lives in the north of England with her husband and son. When she’s not sewing and quilting, Amy can usually be found baking or reading. You can find her on Instagram @amyatthegate


What a beautiful bookmark! Thank you for the clear instructions and photos which will make this easy to create. All I have to do now is open that tote full of scraps and decide on colours. That will be the biggest challenge! (LOL). I know that I will have to make more than one because it will be so much fun.
What cute book marks!! I’m certainly going to make some of these. Thank you.