DIY Stenciled Spooky Burlap Table Runner
Use a bit of paint, burlap, and freezer paper to DIY a cute Pottery Barn-inspired Halloween table runner with our free tutorial!
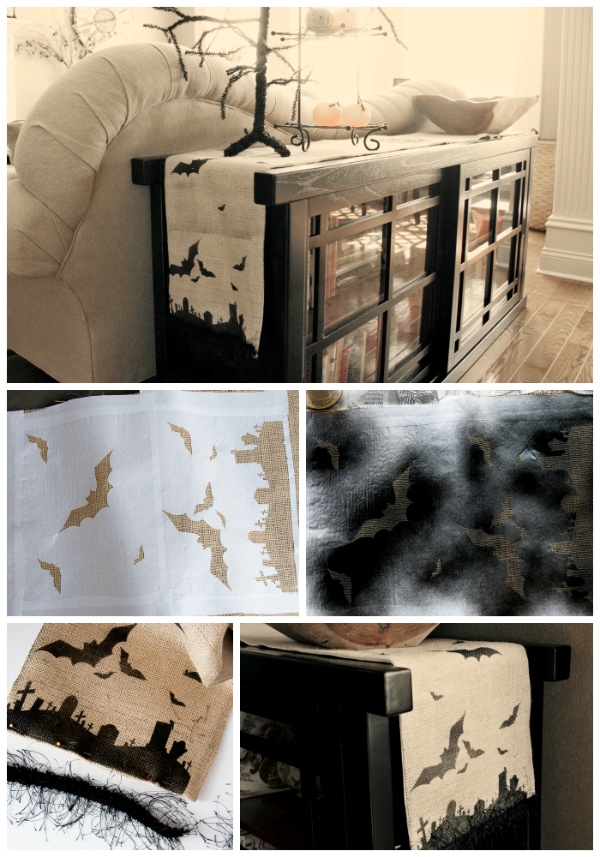
I’m a big fan of Pottery Barn’s Halloween decorations! A few years ago they had a burlap table runner for sale as soon as I saw it I thought “hey, I can make that”. Using some burlap, paint, and a Cricut Machine, I was able to quickly DIY my own Halloween Table runner.
Let me show you how I did it!
I’m excited to share this super simple Spooky table runner with you today!
The runner is made from burlap and goes together very quickly!
Supplies
- Burlap
- Unbleached cotton or muslin (some cheap fabric to line the runner with)
- Freezer paper
- Spray Paint
- Some type of e-cutter (i.e. Cricut) or an Exacto knife.
Prep
The first thing you want to do is decide what size to make your runner. I decided to make the finished size mine 11″x88″ (I have a long table).
The great thing about this project is that you can make it any size you need! You can also save some time and purchase an already made burlap table runner.
Step One: Sew the Burlap
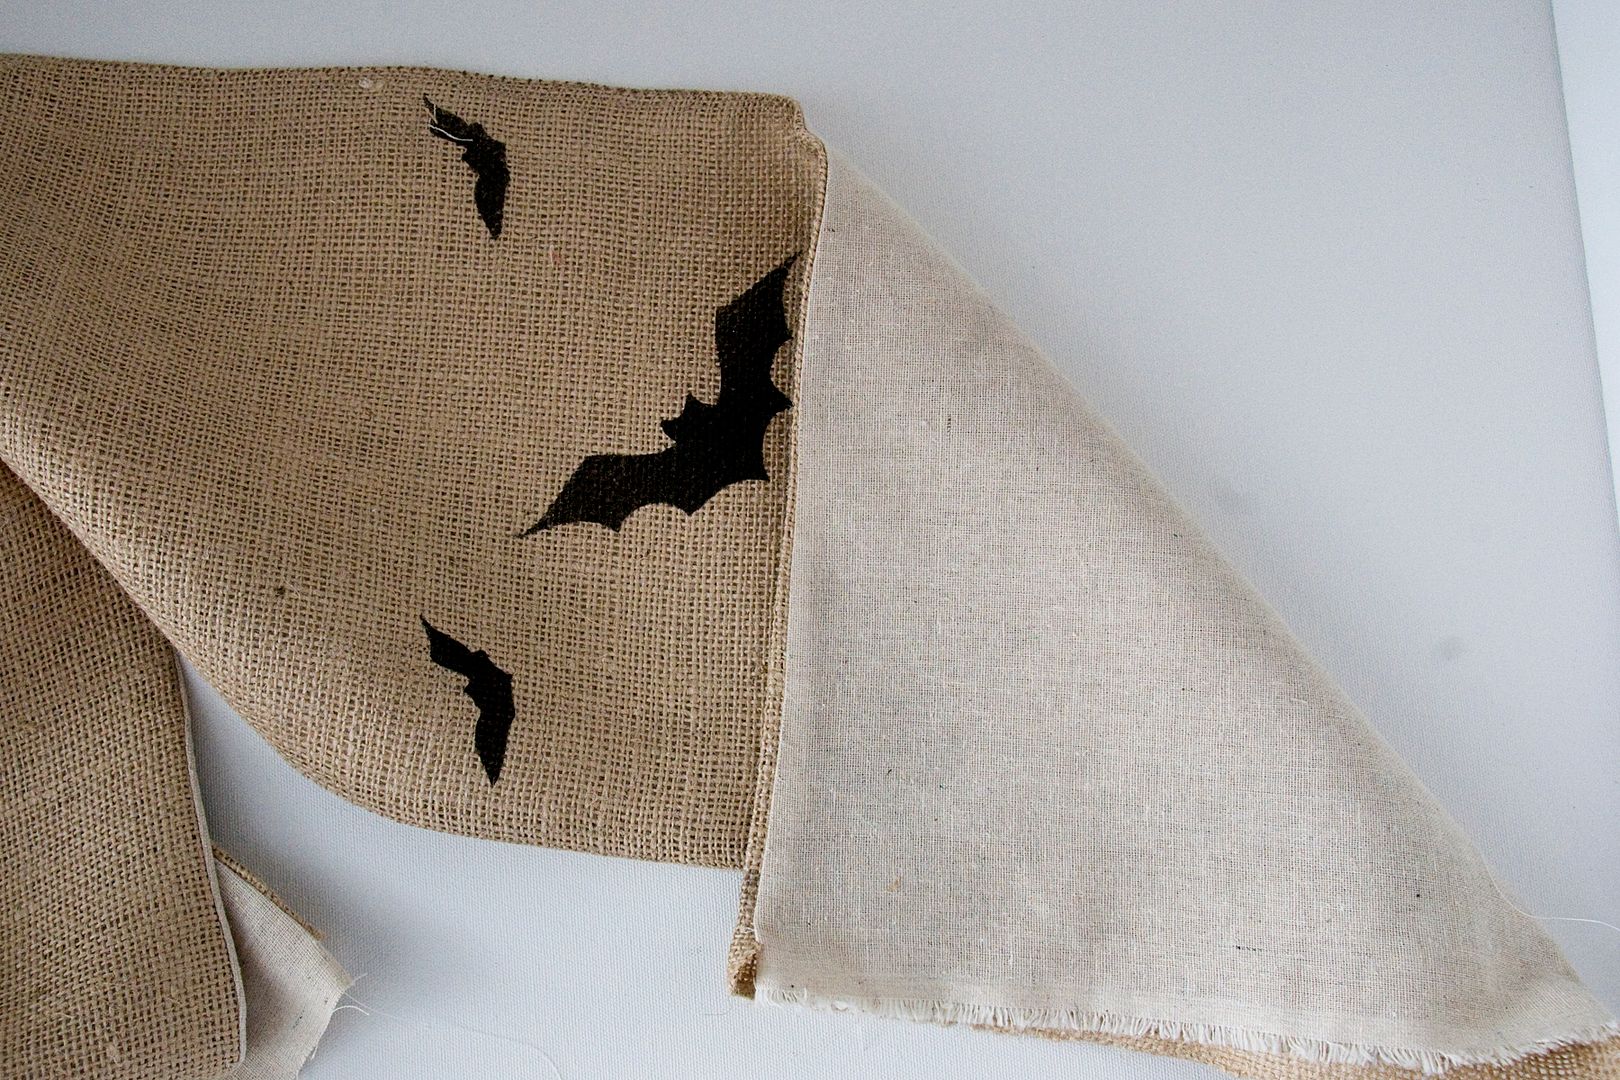
Cut your burlap WIDER than you want it. For example, since I wanted my runner to be 11″ wide, I cut the burlap 12.5″ wide. Burlap is very tricky to work with and can easily fray- so if you cut it wider, it will give you some wiggle room with the finished project.
Then cut your lining material 1″ wider than your finished runner.
Step Two: Cut Out Freezer Paper Stencil
We are going to use a technique known as Freezer Paper Stenciling to create this project.
Next, with the shiny side of the freezer paper facing down, cut out your design. I used a Cricut on a regular paper setting, and it worked fine. If you don’t have an e-cutter, you can easily cut freezer paper with an Exacto knife.
Remove the design- discard- for this project you want the negative of the design.
Step Three: Apply Freezer Paper to Burlap
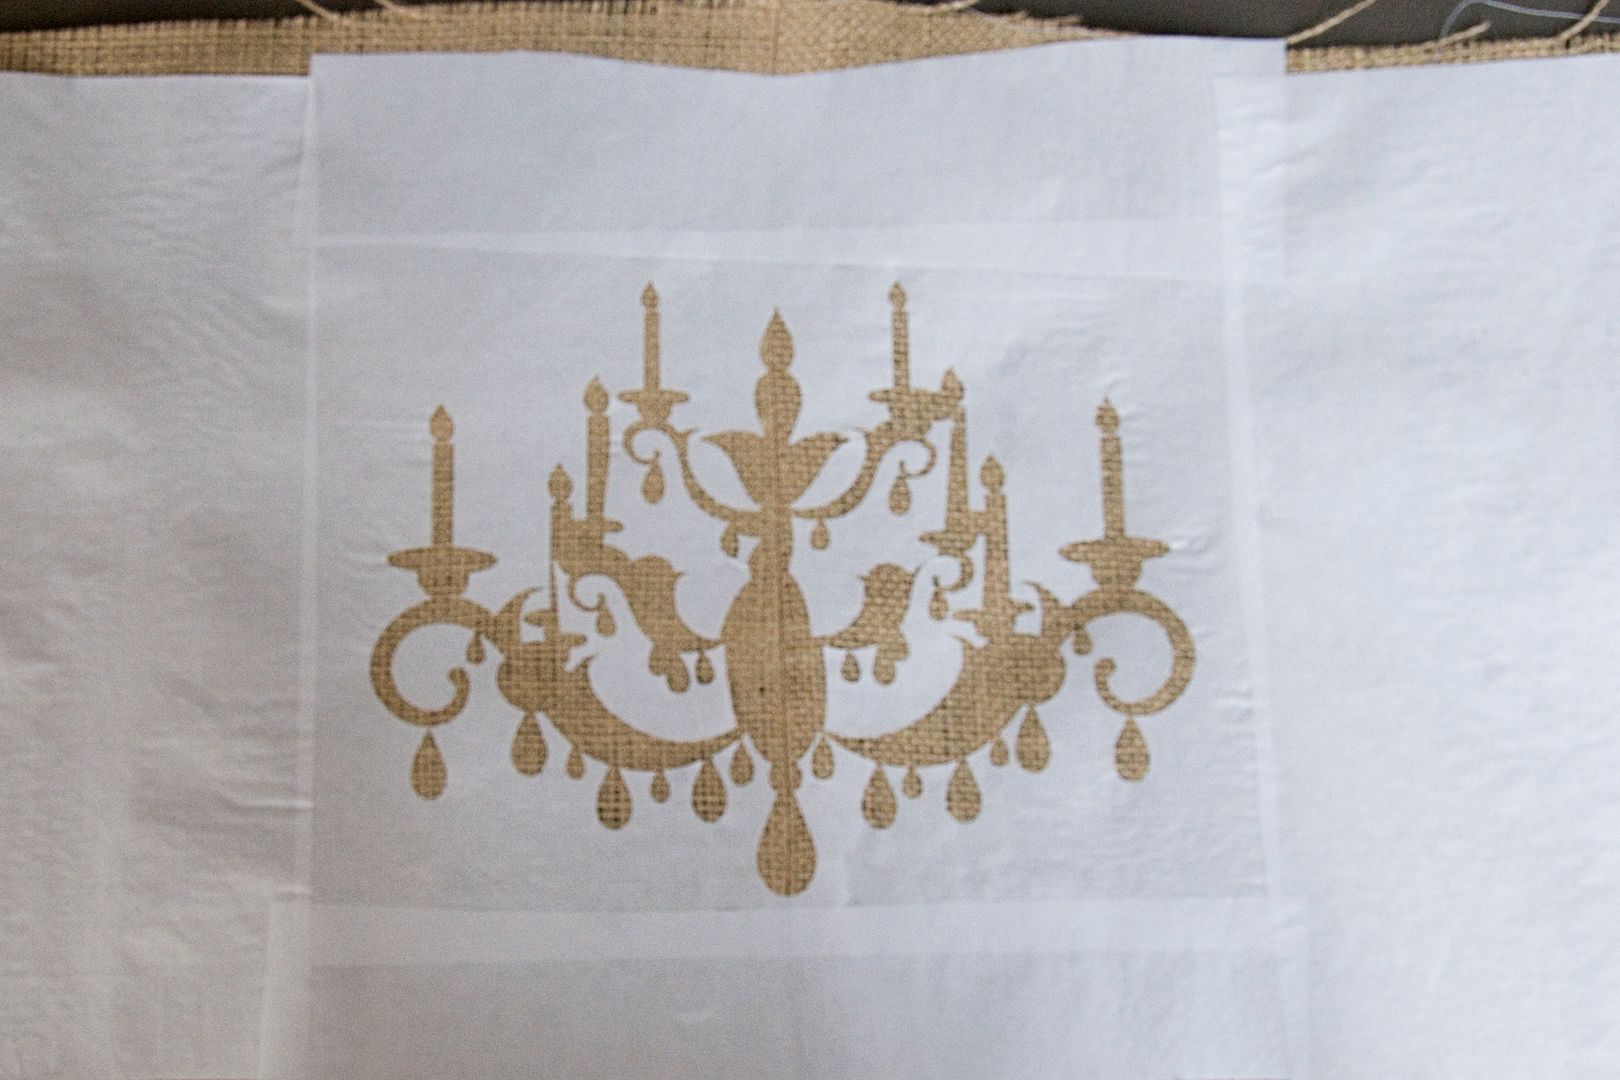
Iron the design onto your burlap where you want it. The shiny side of the freezer paper melts and sticks to the fabric.
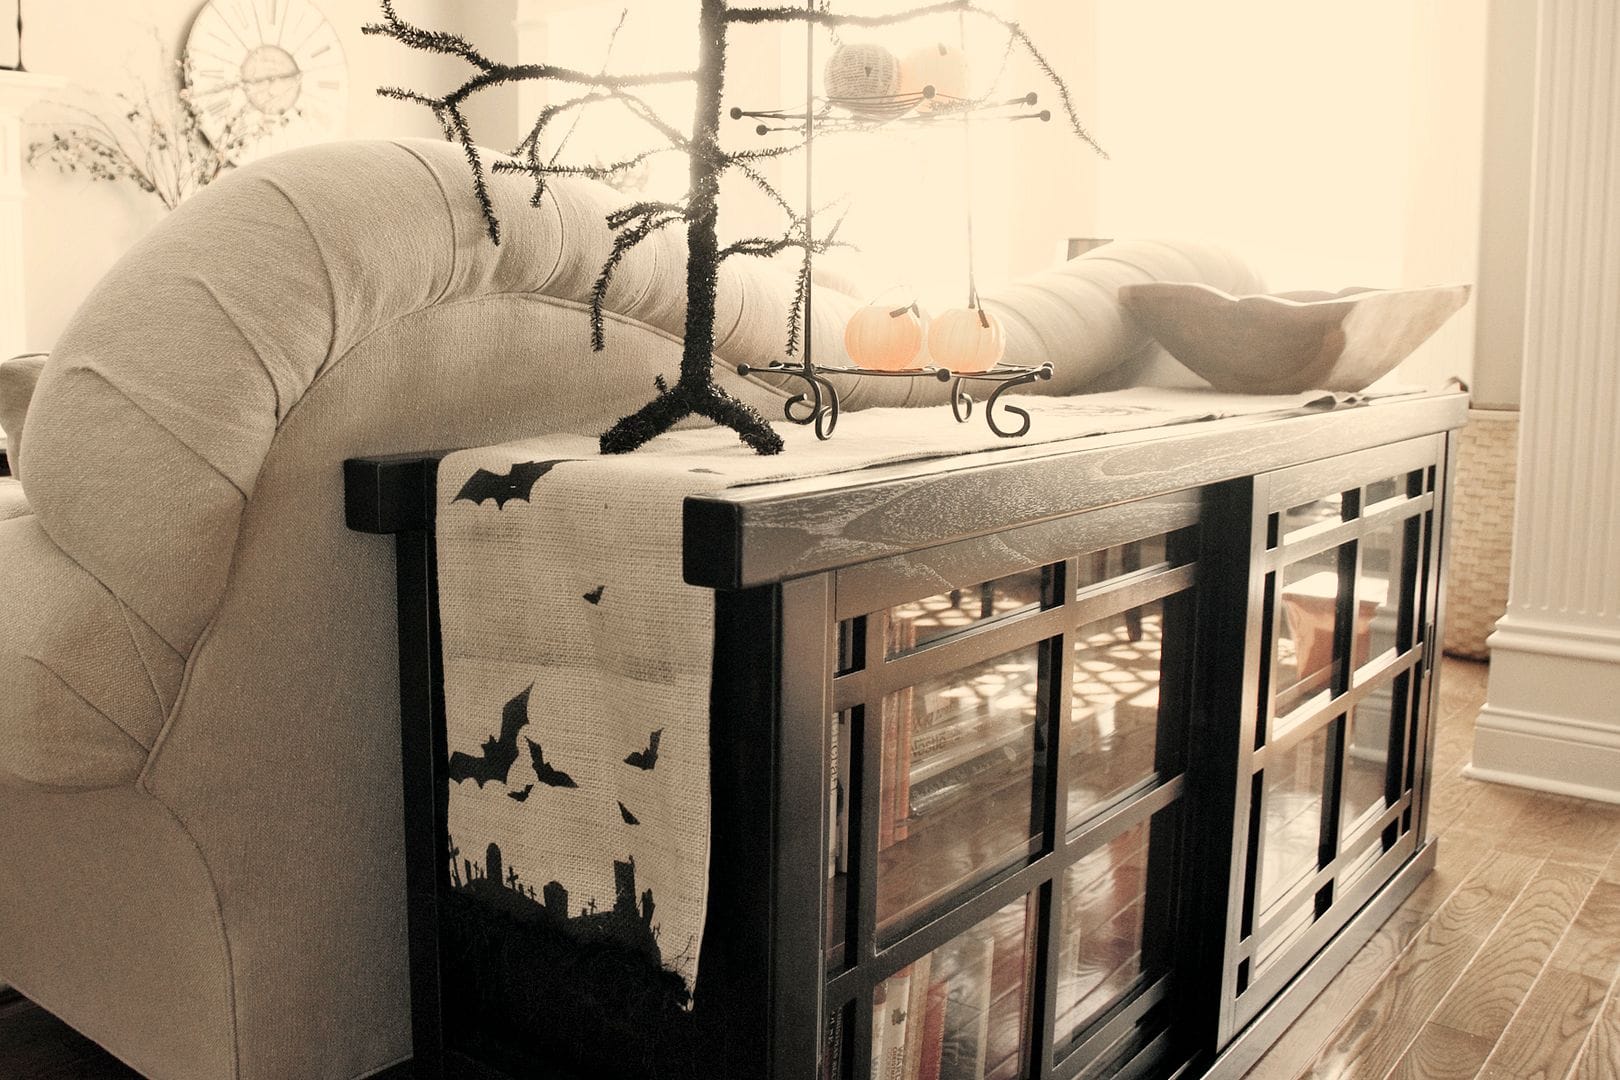
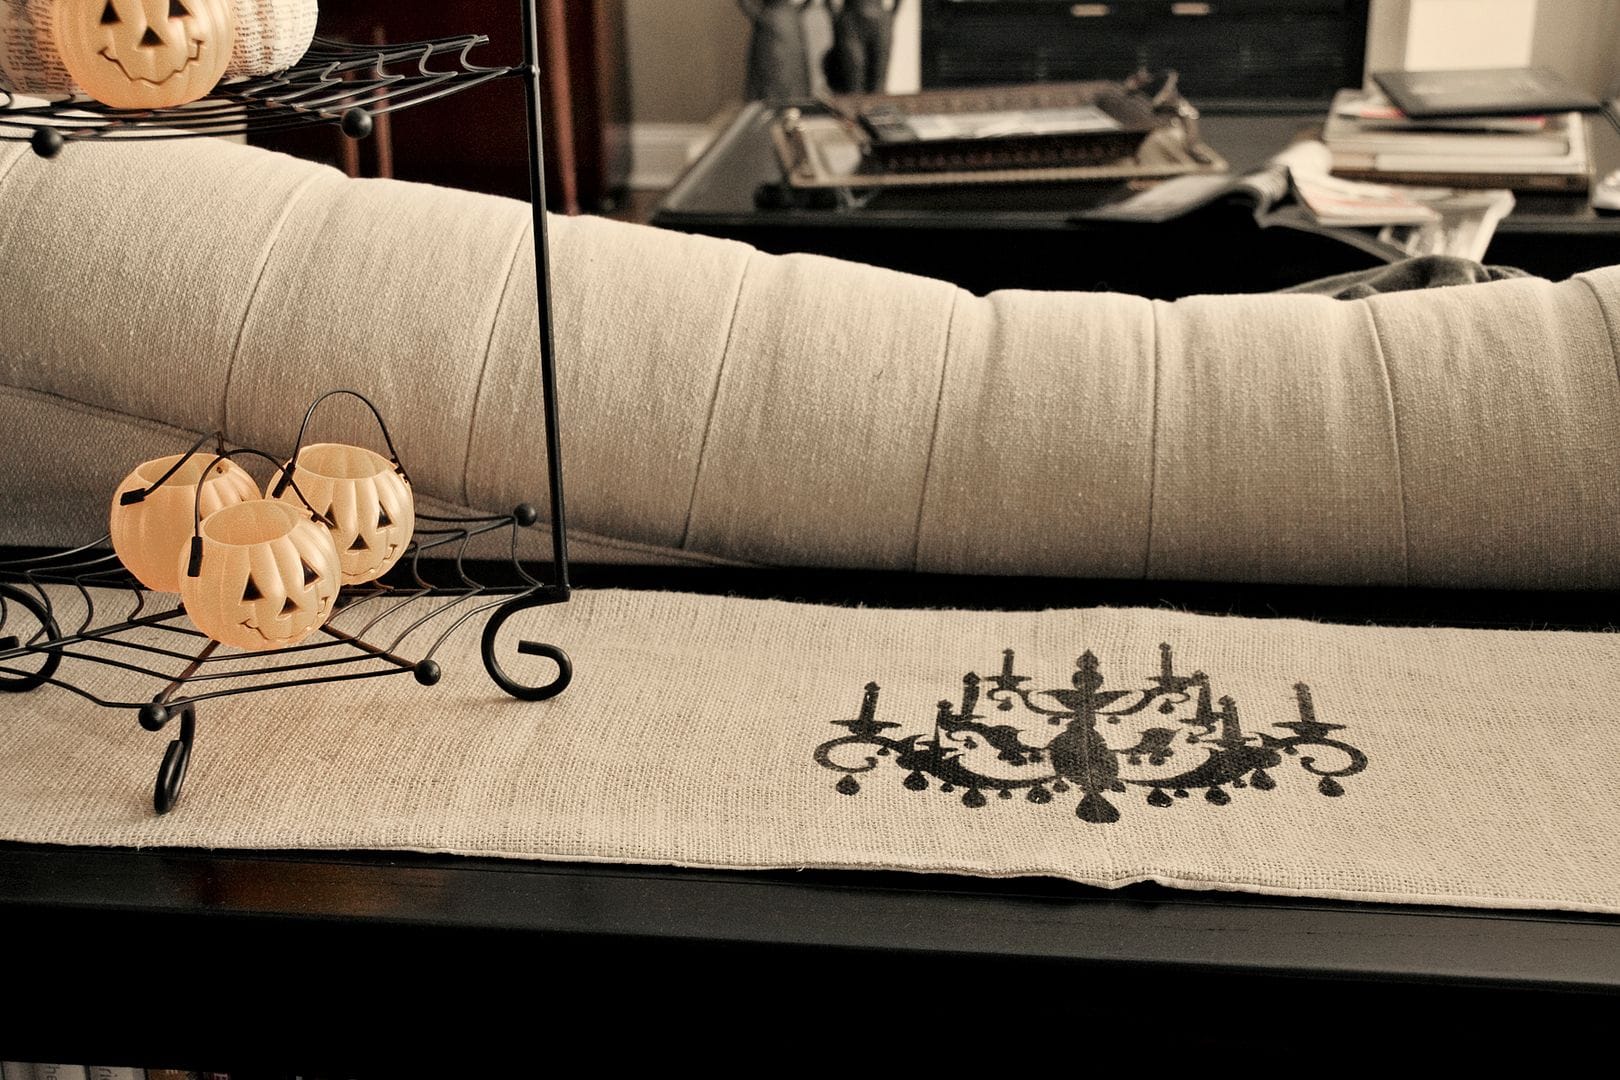
For my design, I put one design in the center and then one design on each end.
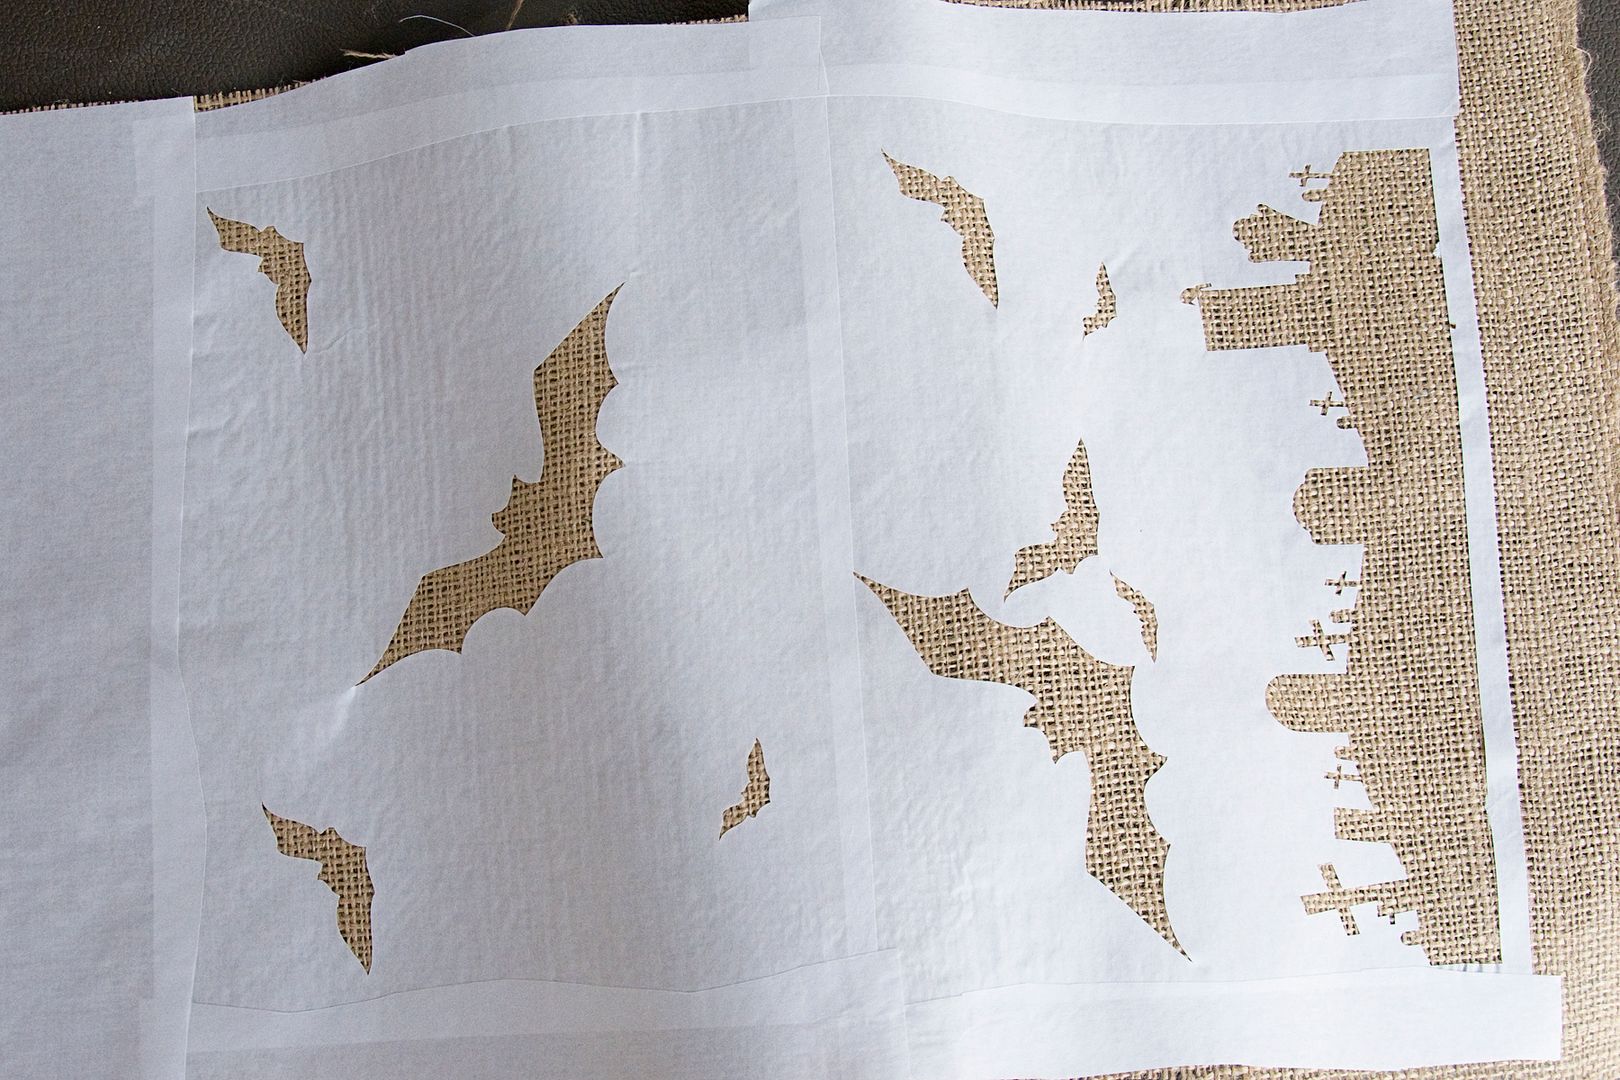
Make sure you cover the rest of the burlap with extra freezer paper. The spray paint has quite a bit of overspray. Don’t skip this step!!
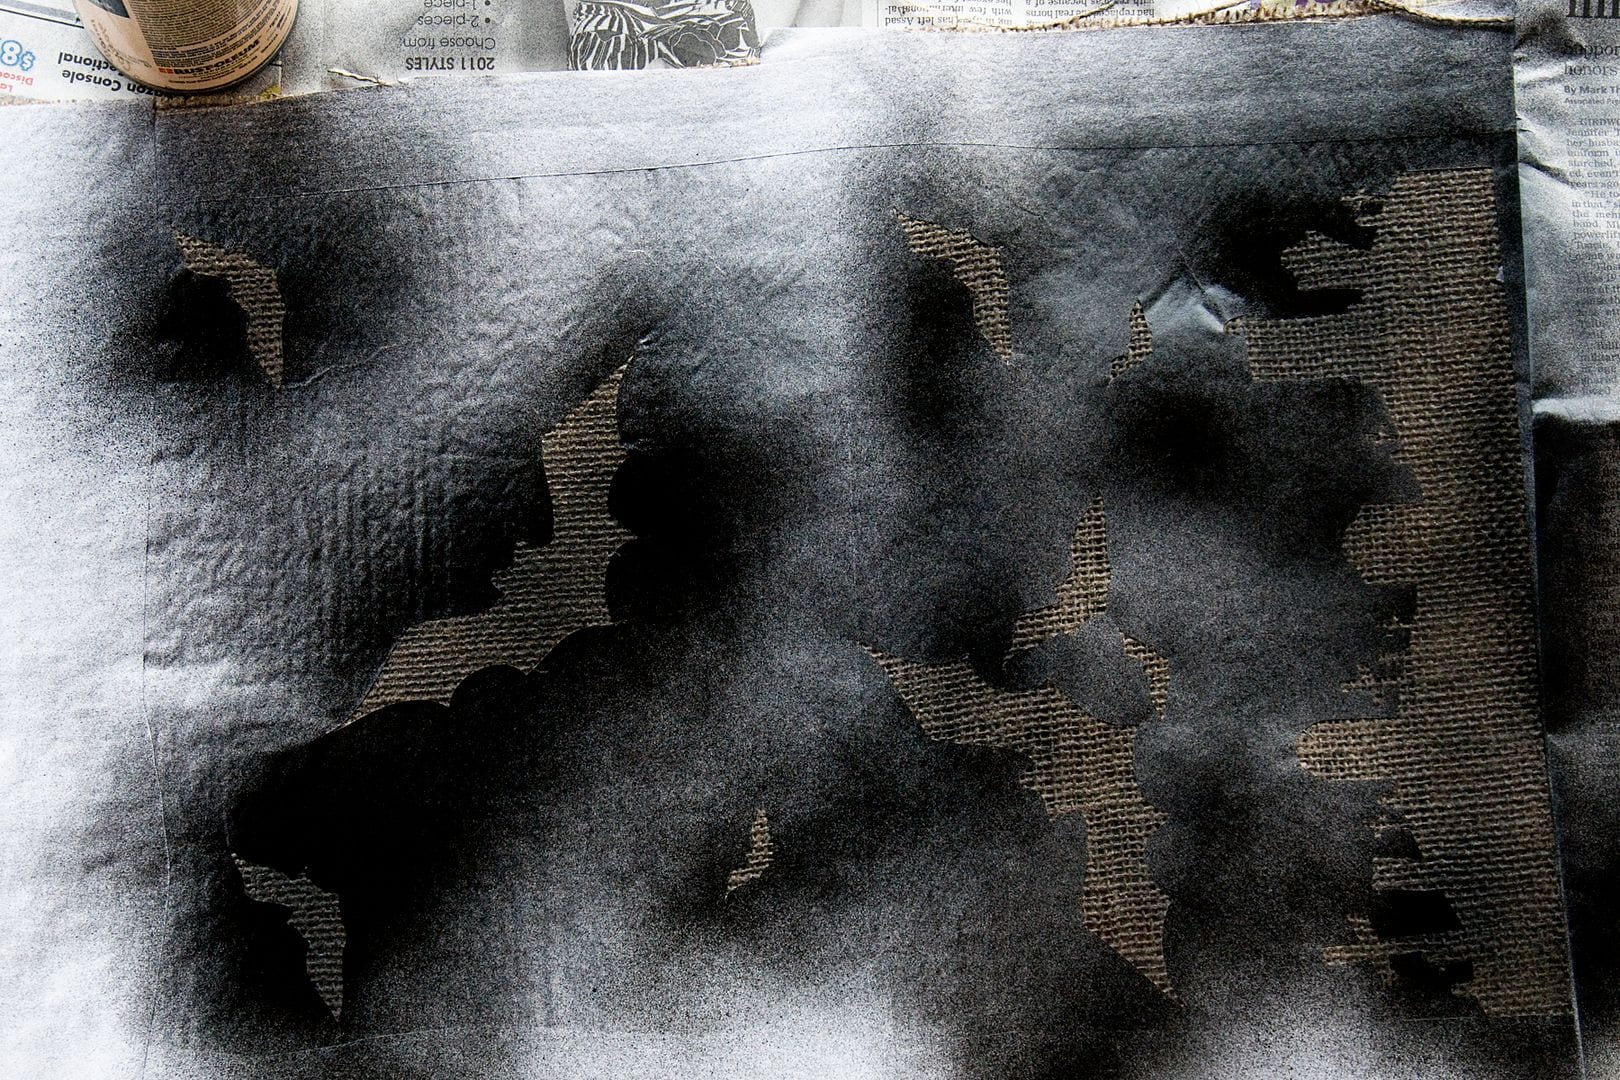
Step Four: Spray
Using a can of black spray paint, cover the table runner with paint. Some paint will seep through the burlap onto your surface, so be sure to use a drop cloth. Make sure to spray evenly.
Wait for it to dry, then peel off the freezer paper.
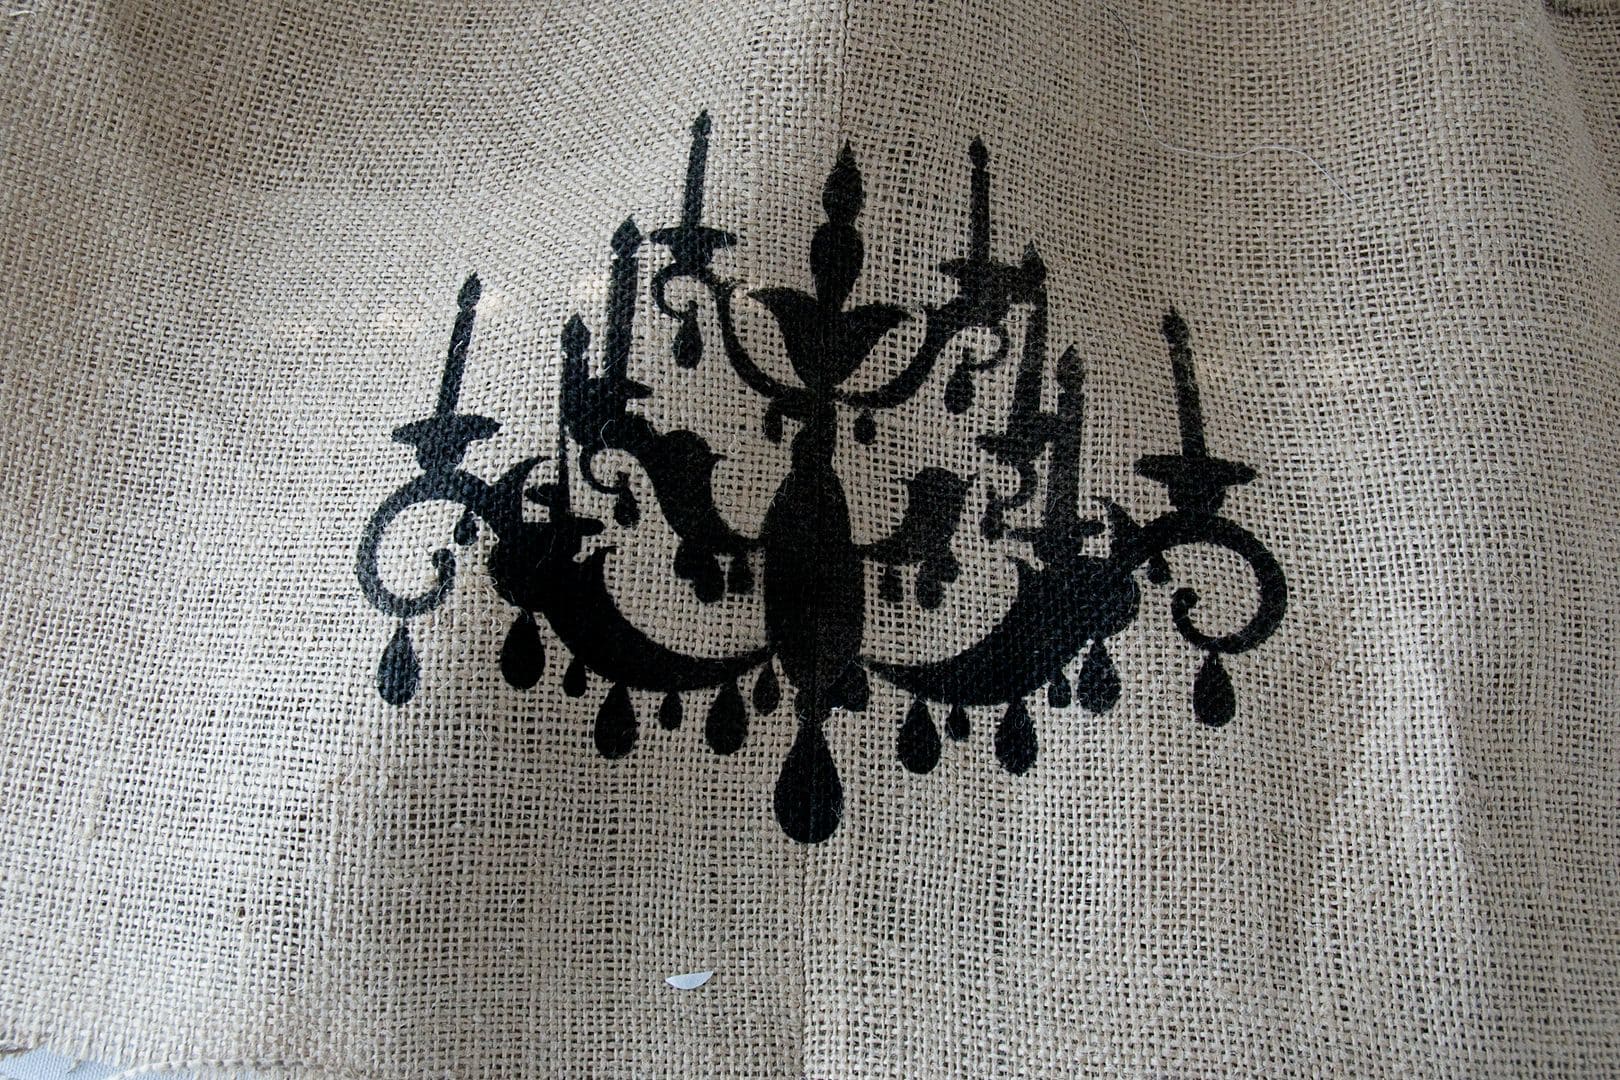
You are left with your design!
Step Five: Sew the Runner
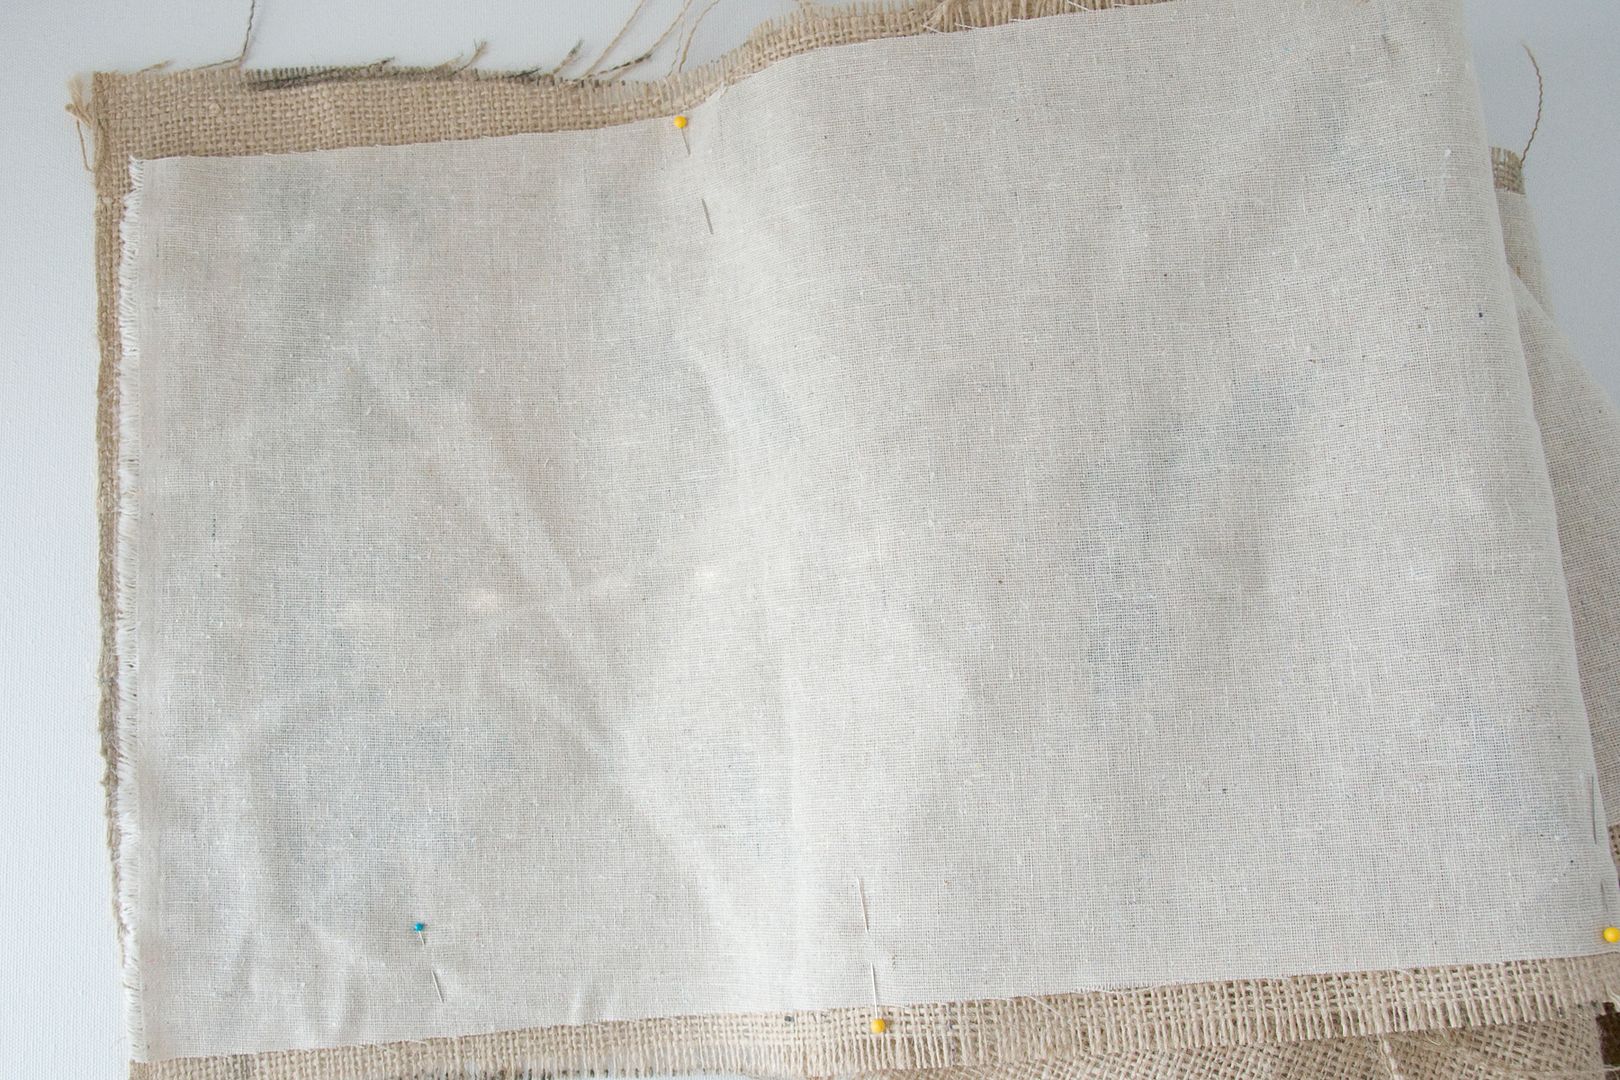
Next, place the runner and the runner lining together, right sides together and pin. The burlap will be bigger than the lining but that’s OKAY; it’s supposed to be.
Stitch 1/2″ seam down both long sides of the runner, leaving the ends open.
Then trim excess burlap off so that your seam allowance is even.
Turn the runner right side out, and iron, design side down (the spray paint may stick to your iron) use an extra cloth on top of your ironing board to protect your iron.
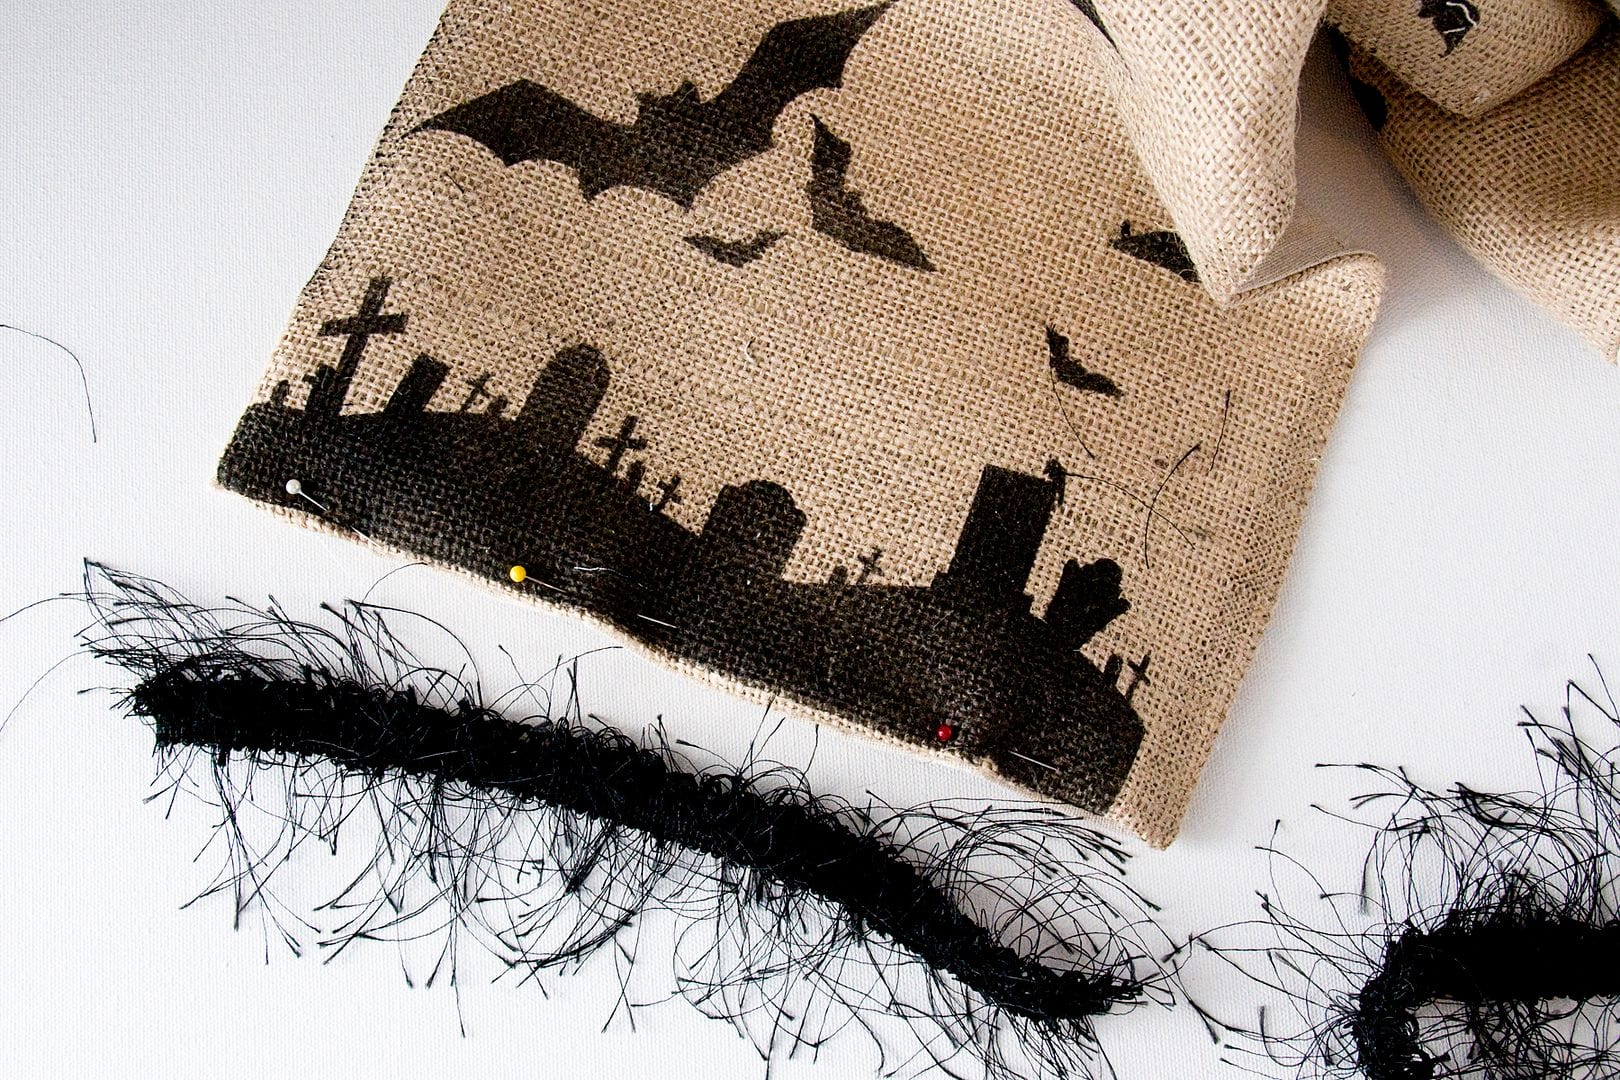
Fold under the ends of the runner so that the raw edges are tucked in. Pin in place. Cut a piece of trim to fit the runner ends and pin it in place.
Stitch trim in place so that it goes through the trim and all layers of the runner. Repeat for the other side. If necessary, put some fray check on the ends of your trim.
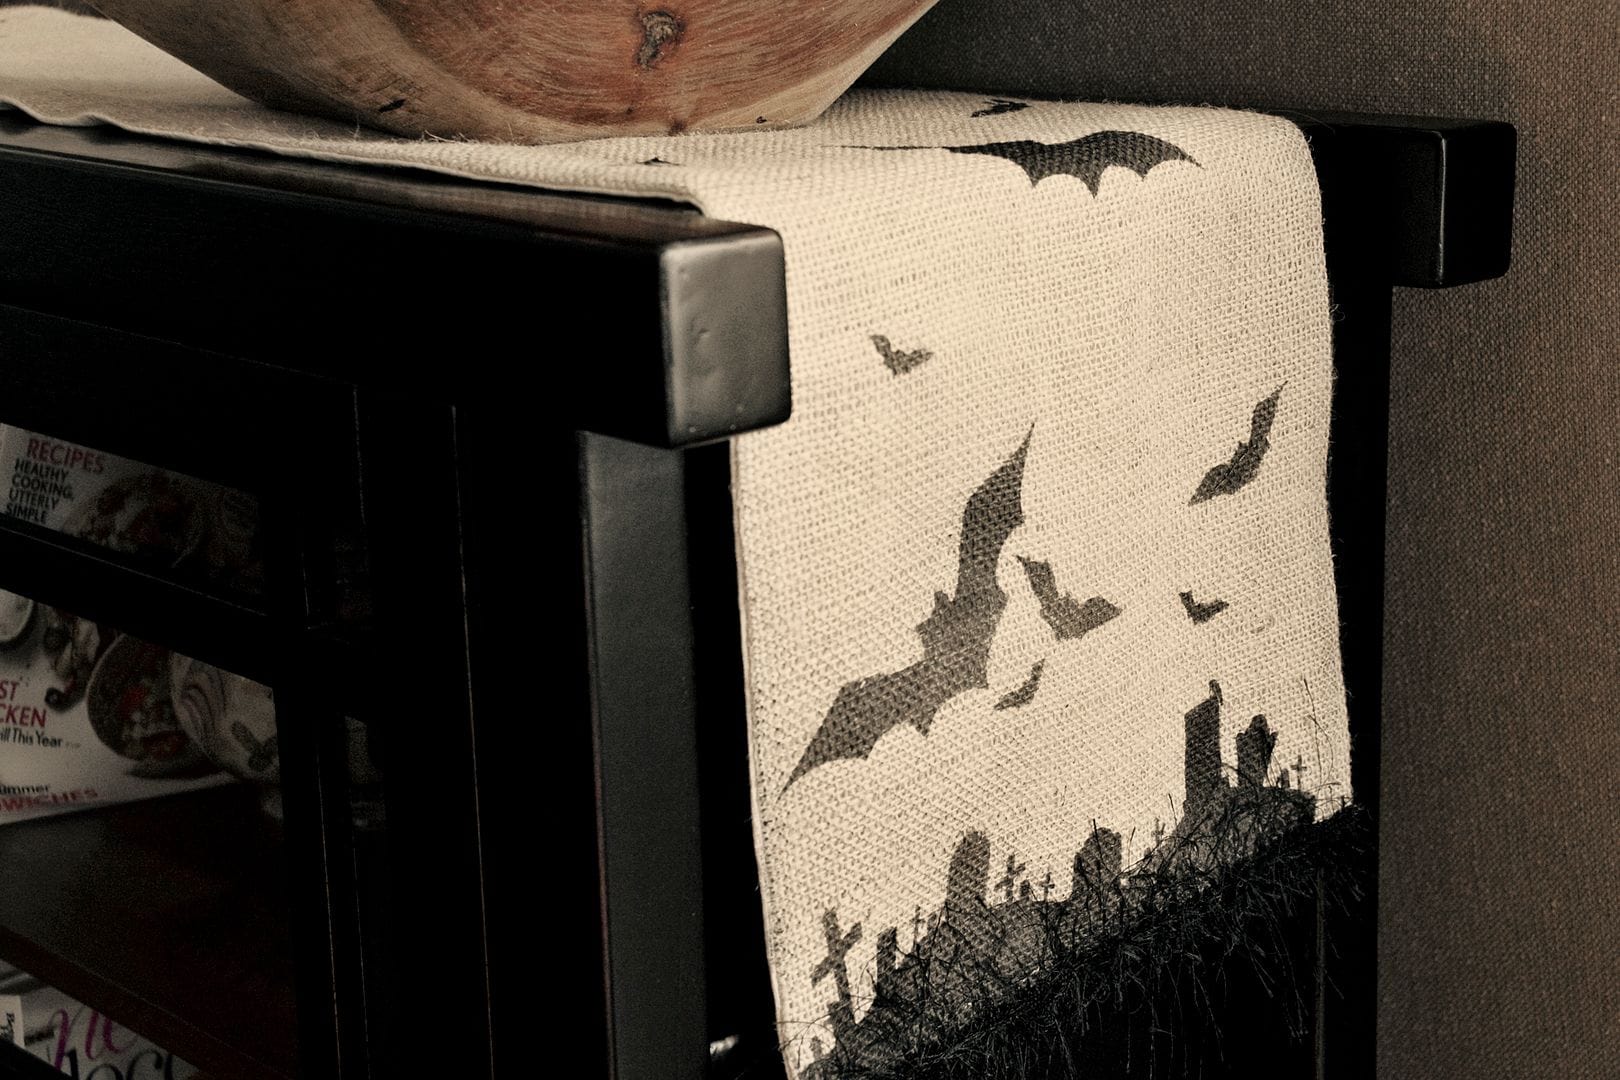
That’s it.. Enjoy!!

Just saw this post! So cute and great for the “adults” at Halloween! Would you please share where we could find/purchase the design?
Thank you
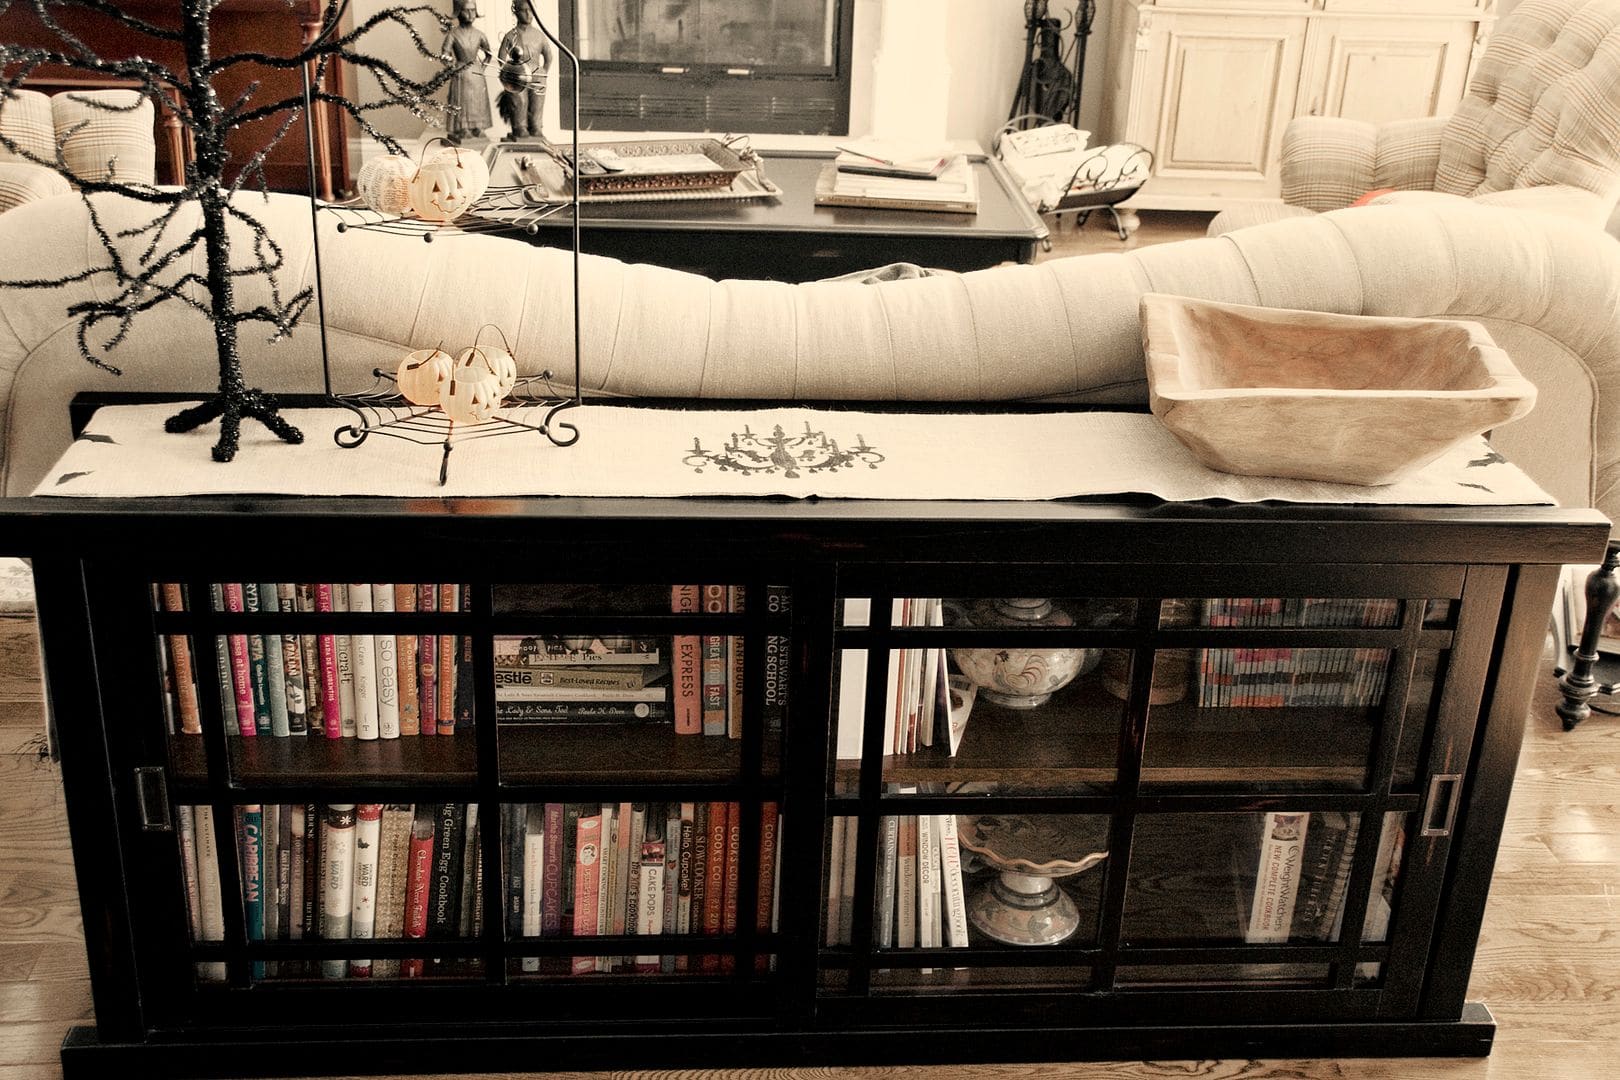
This is silly, but I was looking at table runners and found your sight–I have been looking for a sofa table forever and I love your black bookshelf one–where did you get it?
Thanks, Amanda
It’s from Arhaus Furniture!
Love this!
What kind of paint did you use? Is the runner washable?
Thanks. 🙂
I just used standard spray paint, I’m sure it’s not washable.
Love this! Definitely need to try. Also love your bookcase. Where did you ever find it? Very cool!
It’s from Arhaus Furniture, still love it!
Really easy to do but looks so effective! What a great idea.
I LOVE this and am definitely making one for next Halloween. I’m adding it to my Halloween board on pinterest!
Scary beautiful!
Love, LOVE this
Sharing this on my Blog
Hugs
Anne
Where did you get the cute silhouette from? I’ve been online trying to find a graveyard scene as cute as yours. Do you mind sharing where you found yours??