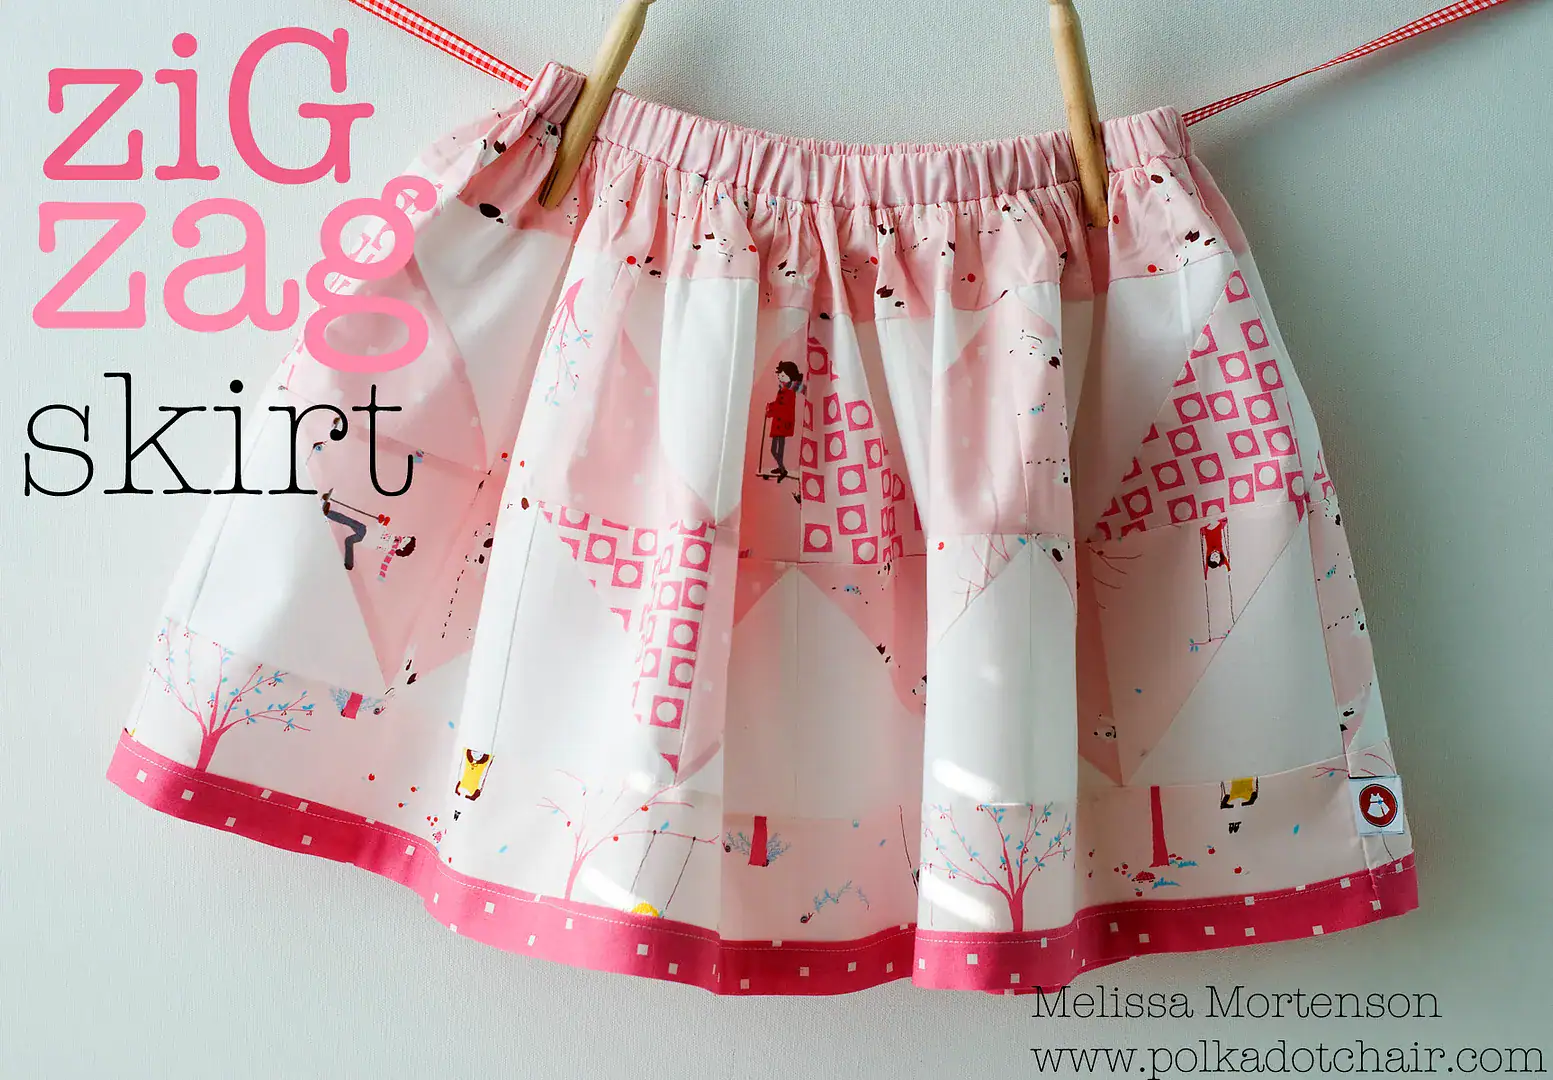
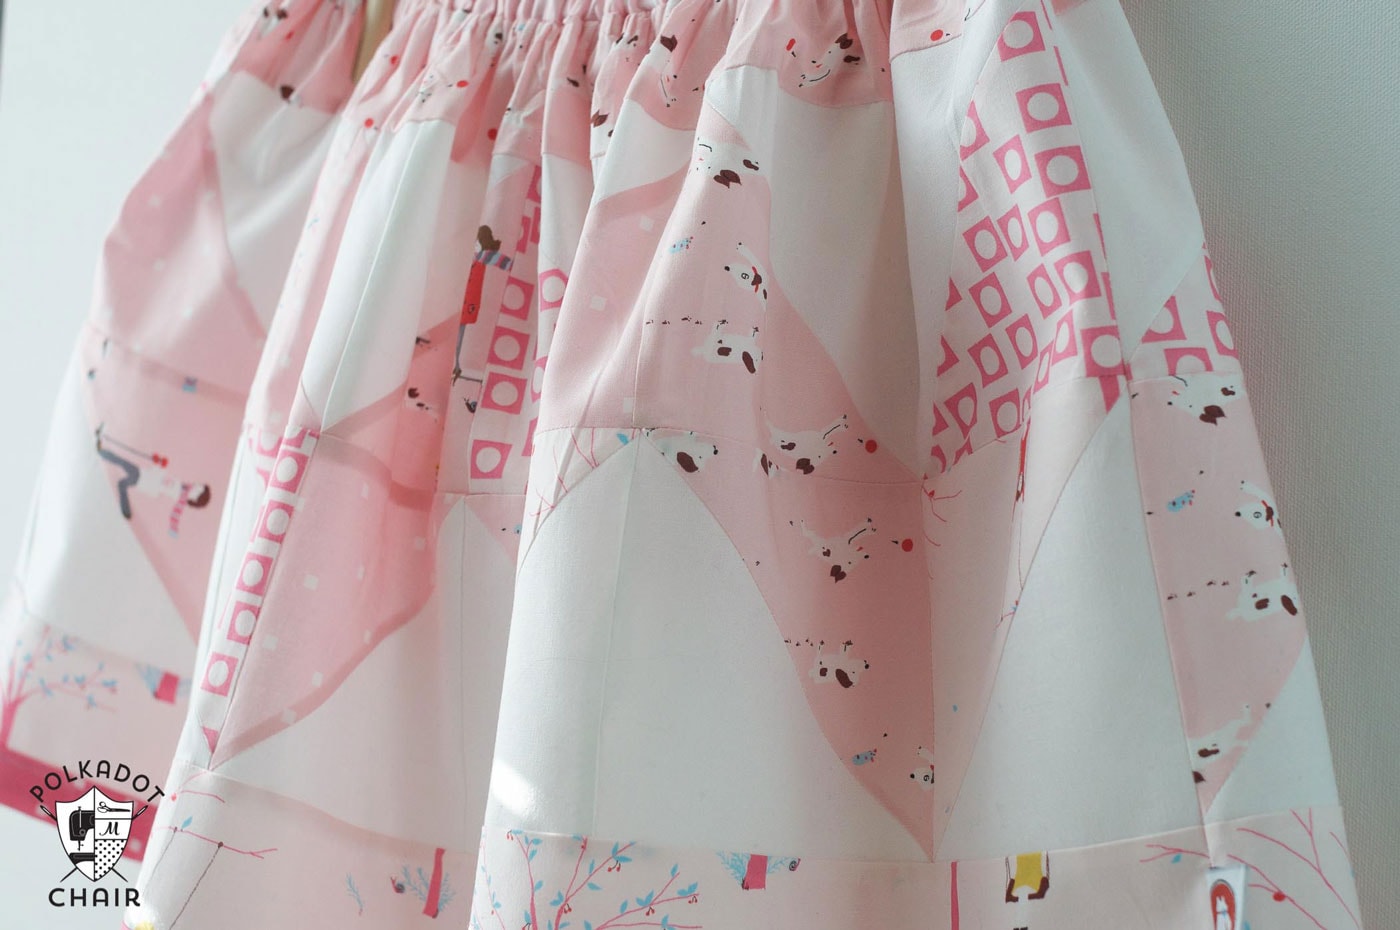
Zig Zag Skirt Sewing Tutorial (Free Charm Pack Chevron Skirt Pattern)
Learn how to sew an adorable patchwork Zig Zag Skirt with this free sewing tutorial from Polka Dot Chair! This chevron-style skirt is made using charm squares sewn into a fun zig-zag pattern; a perfect project for sewing lovers who enjoy working with pre-cut fabrics like charm packs.
Originally featured on the Moda Bake Shop, this kids’ skirt pattern includes step-by-step instructions from sorting your charms to sewing rows and adding elastic for a comfortable, twirl-worthy finish.
Whether you’re sewing for a little girl or adapting the technique for other sizes or fabric collections, this charming skirt is a delightful way to showcase colorful prints and build your sewing skills
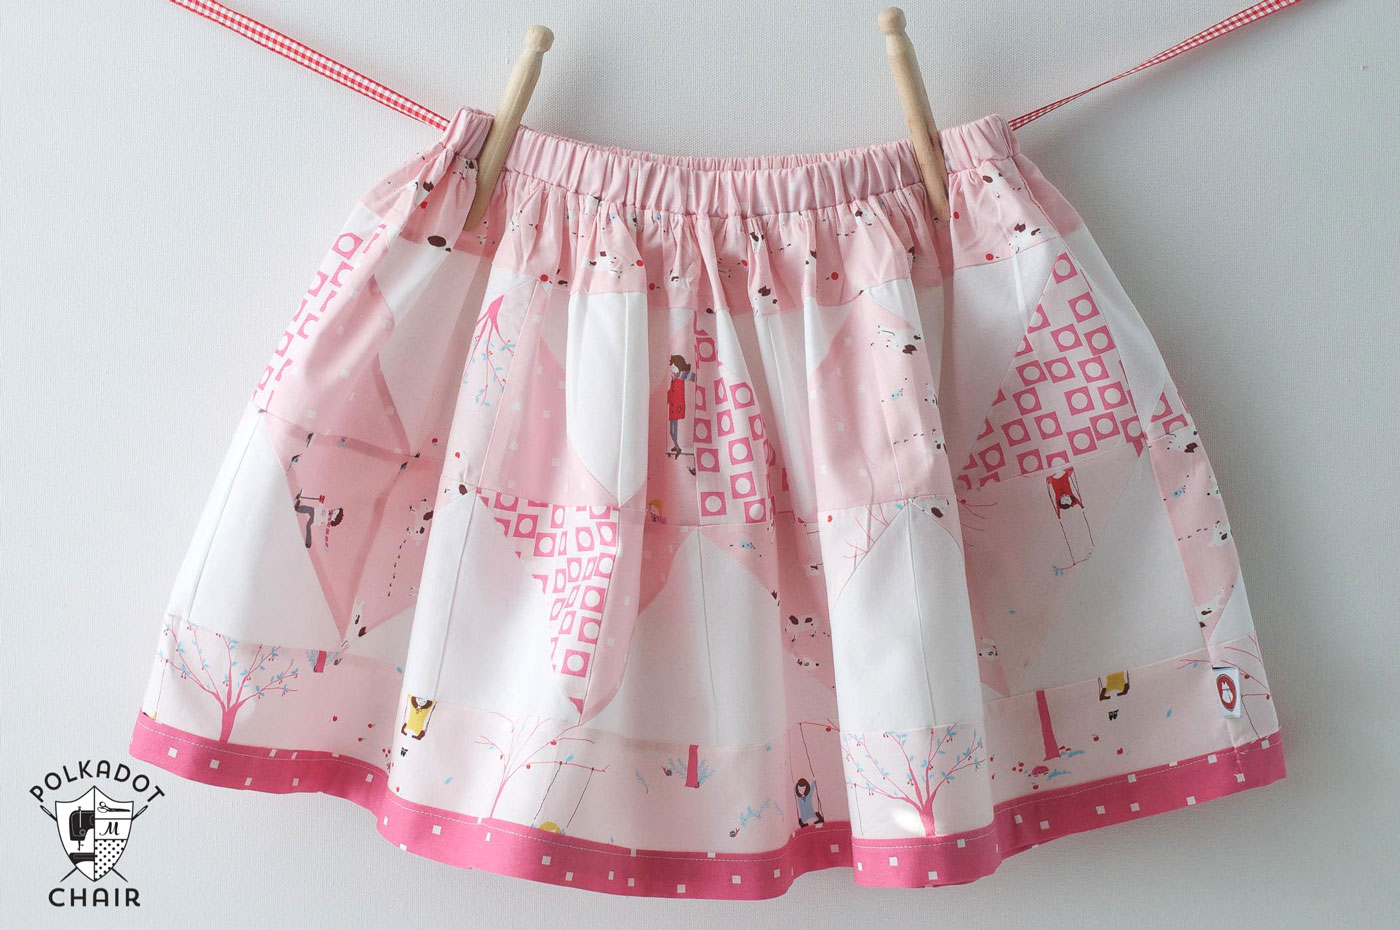
I always love finding new ways to sew with pre-cut fabric. This patchwork zig-zag skirt tutorial is made using charm squares that are sewn into a chevron or “zig-zag” pattern. It’s the perfect skirt to sew for a little girl! If you like this project, you may also like this skirt tutorial & pattern, especially designed for a tween.
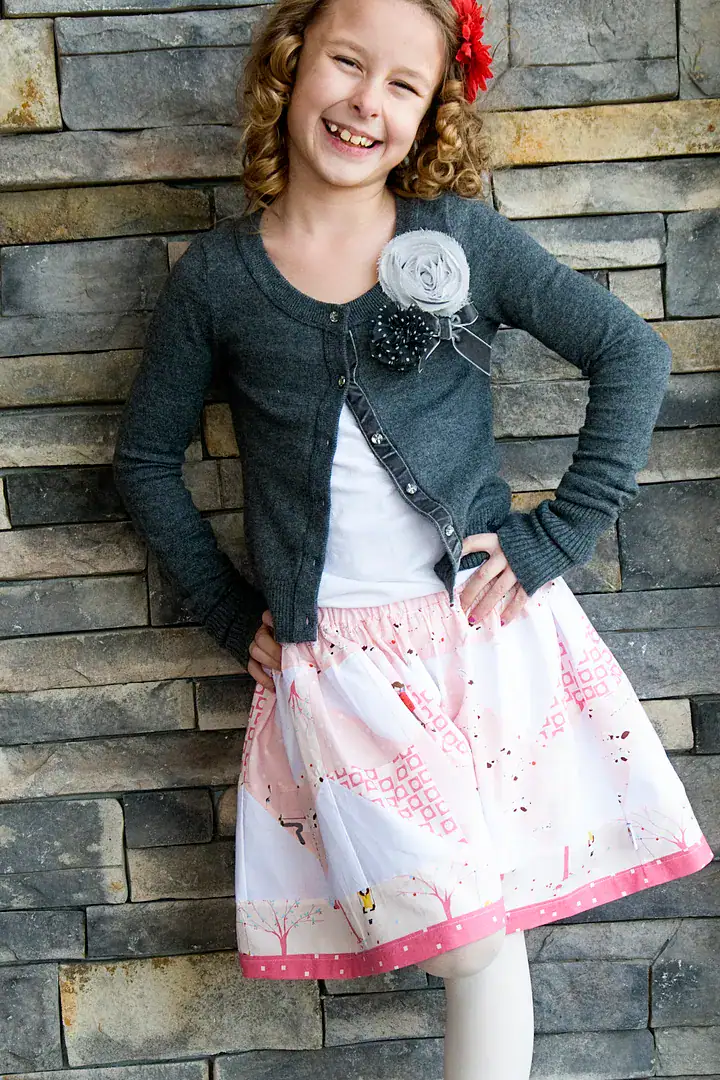
How to Sew a Skirt for a Little Girl: tutorial for a Patchwork Zig Zag Skirt
Equipment
supplies
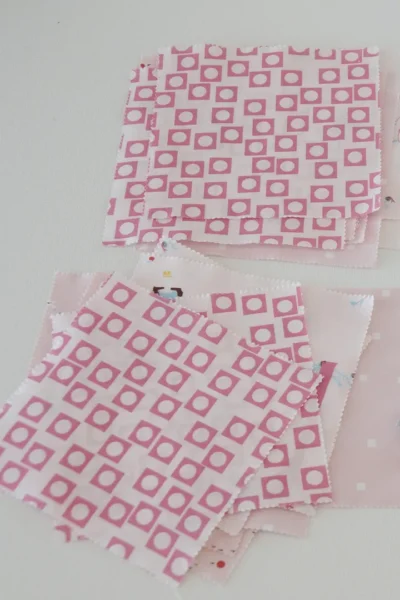
- 1 Solids charm pack
- 2 Charm packs (or 5" precut stacks) I recommend getting two charm packs. You only need 18 five-inch squares but they must all be in the same color family. Depending on the charm pack you choose, you may not have enough of the correct color in a single pack. The good news is that you can make additional skirts in the other colors as well. The fabric I used is called Pips and is not longer in print.
- 1 Jelly Roll or Seven 2 1/2" x WOF strips you will need seven strips total
- 1/2″ wide elastic
- Fabric
Instructions
- I find it easiest to sort my fabrics into “front” and “back” piles. This prevents the skirt from having identical prints on either the front or the back and helps keep the design evenly distributed.
- You will need 18 squares of similar color, arranged in two piles of 9. As you work, keep the skirt front and back separate—this will help during construction.

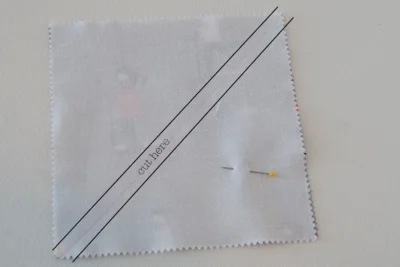
- Take 18 white charm pack squares and draw a diagonal line down the center of each one.
- Place the 18 white squares on top of the 18 pink squares, right sides together, and pin.
- Stitch 1/4″ away from each side of the drawn center line.

- (The stitching lines run parallel to the drawn diagonal.)
- Cut the square in half along the pencil line. Press open.
- You will now have two half-square triangles (HSTs).
- Measure each HST to ensure it is perfectly square, and trim to 4 1/2″ x 4 1/2″ if necessary.
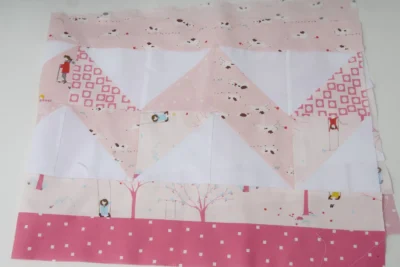
- Arrange your blocks according to the diagram.

- Sew the first row together and press all seams to one side.
- Sew the second row together and press seams to the opposite side.
- Sew Row 1 and Row 2 together.
- Set aside and repeat for the other side of the skirt.
- Each side of the skirt will measure nine blocks wide by two rows tall.
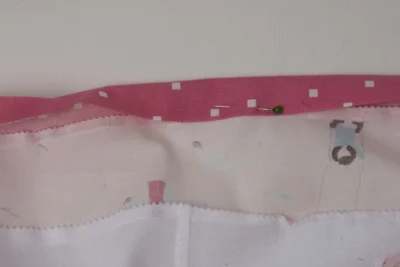
- Place one jelly roll strip along the bottom edge of the skirt, right sides together. Stitch in place and trim off any excess.
- Stitch one more jelly roll strip to the bottom of the skirt and one jelly roll strip to the top of the skirt.
- Repeat these steps for the skirt back.
- You should now have two finished pieces: a skirt front and a skirt back.
- Stitch the front and back of the skirt together. Press these seams open so you can clearly see the side seams.
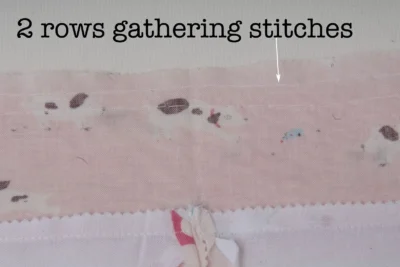
- Run two rows of gathering stitches across the top of the skirt, stopping and starting at the side seams.

To Make the Waistband:
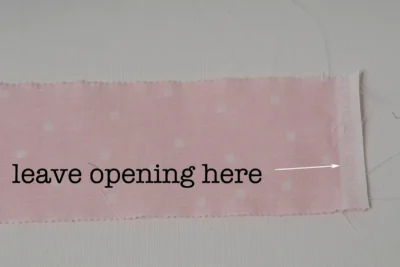
- Take one jelly roll strip and fold it in half lengthwise. Stitch it closed, leaving a 3/4″ opening to feed the elastic through.
- Fold the waistband piece in half again, wrong sides together.
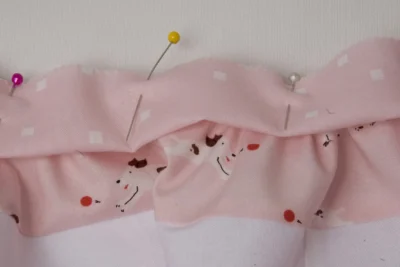
- Pin the waistband to the skirt, right sides together, matching side seams and the center of the waistband. Pull the gathering stitches until the skirt and waistband are the same size.
- Stitch the waistband in place.
- Cut the elastic to the correct size by measuring the waist.
- Using the opening left in the waistband, feed the elastic through. Hand-stitch the opening closed.
To Finish the Skirt:
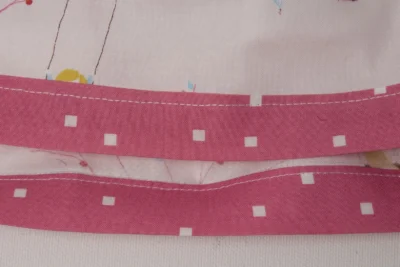
- At the bottom of the skirt, press under 1/4″.
- Fold the bottom edge up until the fold meets the seam. Pin very well in place.
- From the right side of the skirt, topstitch the band in place.
- Press well.
- Clip threads and enjoy!
i am happy to see this it is beautiful and i will try it,is cute,i can not wait to start sew this skirt
SO cute!! My daughter would LOVE this!!
I fell in love with this skirt immediately when I saw it in Moda Bake shop! I can’t wait for my “A walk in the woods” to arrive so I can start making it!! Thank you so much for sharing!
THis is SO cute! Loved it when I first saw it in the Moda Bake Shop and still love it. Too bad I only have boys to sew for … but I wonder how this idea would translate for women by using layer cake sized squares… hmmm….
I featured you today! 🙂 Hooray! I’d love if you stopped by!
Amanda
http://www.todaystoptwenty.blogspot.com
How darling is the whole outfit?! Your model is super cute.
Darling skirt! Look how big she is! I can’t believe they’ll be 10 next month! Where has the time gone? I’ll never forget meeting you at church and sitting next to you in RS with our two pregnant twin tummies. Can’t believe that was over a decade ago. How time flies!
so cute! I definitely want to try this. 🙂
What a darling darling skirt! I LOVE it!
very cute! love the skirt paired with the cute grey sweater too!
I just love that Pips fabric! It is totally my new favorite! And I love the little flowers you made for the grey sweater, sweet.
Adorable! What a creative use of precuts!
Melissa, this is fabulous!
That is really cute, I had noticed it in your banner. Thanks for sharing!
it is adorable!
I love it! I’ve seen it on your blog banner for a few weeks and wondered about it. I just need to get some Sherbet Pips.