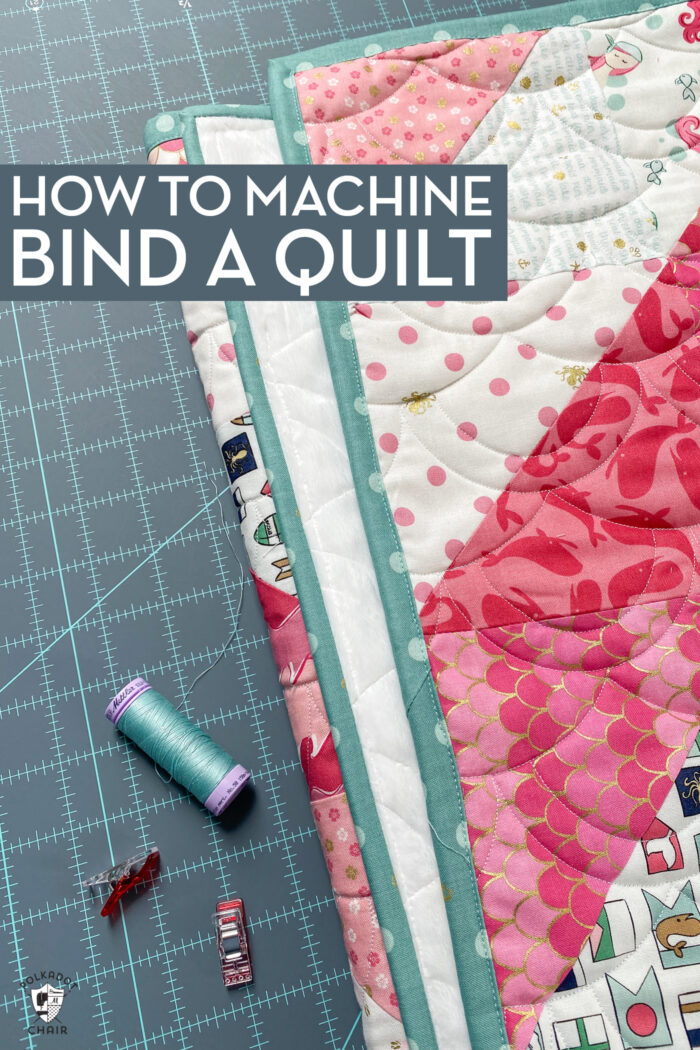
How to Machine Bind a Quilt; A Step-by-Step Guide
Machine binding a quilt can save you a lot of time and possibly allow a quilt to hold up better with repeated washings. Today I’ll teach you how to bind a quilt with a sewing machine using a unique trick that will yield great-looking binding and straight stitches every time!
First, I’ll say this technique is not for everyone. If you prefer hand-stitched quilt binding, that’s ok. However, if you need to sew the binding of a quilt by machine, then I think this post will help you a lot.
Most of the time, quilters prefer to bind their quilts using a combination and machine and hand stitching. The binding strips are cut and sewn together, then machine sewn to the front of the quilt top. The binding is then folded to the back of the quilt, where it is hand-stitched down.
I prefer to bind my quilts using a sewing machine for various reasons. I’ll go into my explanation later in this post, but mostly it’s because binding a quilt by hand is too tiring for me due to arthritis.
I’ve bound MANY quilts by machine over the years. Many times it was because I was always pressed with a deadline. I’ve tried many different methods but find myself coming back to this one over and over again.
It involves sewing the binding to the back of the quilt instead of the front and using an edgestitch foot to give you a perfect finish!
Why Would you machine Bind a Quilt?
You might want to bind a quilt by machine instead of by hand for several reasons. First, if the quilt is for a baby or small child and will be washed frequently, I feel that machine binding holds up better with frequent washings.
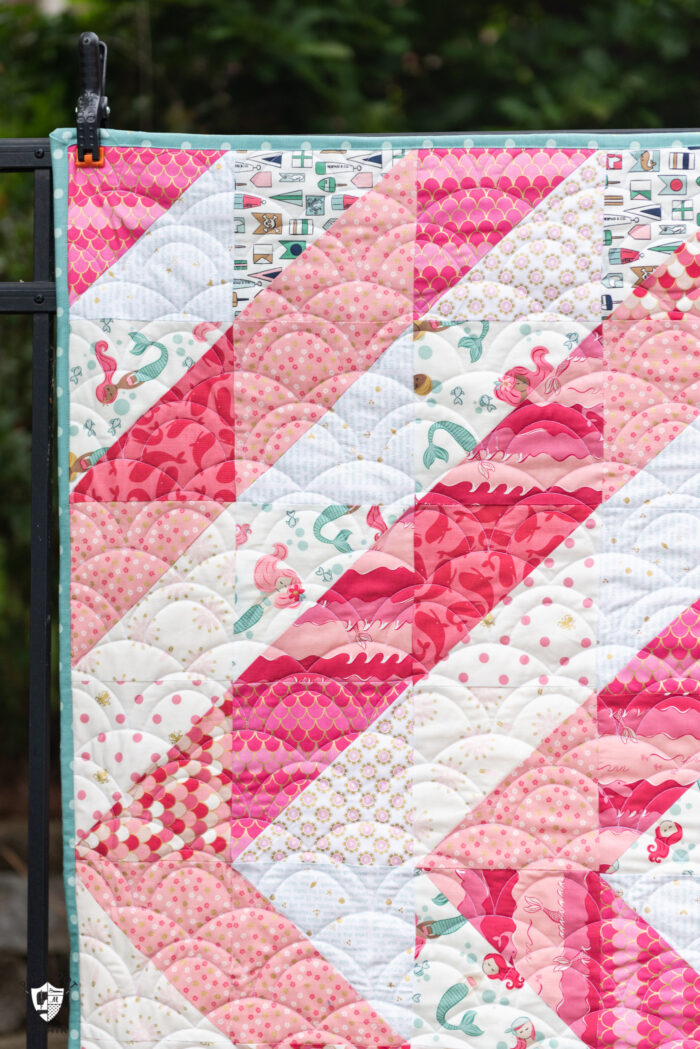

(free pattern for the pictured quilt)
Another reason is that hand quilting is hard for people with arthritis. I have arthritis and find that I’ve bound a quilt by hand that sometimes my fingers hurt for days. I can’t do it. I’ve found that machine binding is much easier on my hands.
What do You Mean by Machine Binding?
There are two methods to bind a quilt. One is to sew the folded quilt binding to the quilt with a sewing machine. Then, you hand-stitch the binding down around the perimeter of your quilt with a blind stitch. This method yields the “prettiest” results since you can easily hide your hand stitches in the binding.
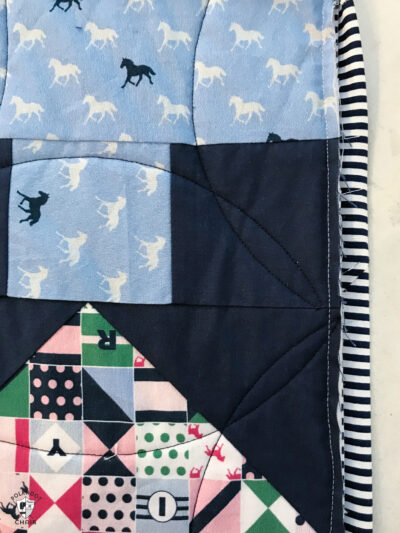
Machine binding a quilt involves sewing the binding to the quilt by machine and using a machine to sew the binding in place. Some do not prefer this method since you have visible stitches on your quilt when you are done. However, I will show you a technique today that makes those visible stitches look pretty good.
Do I Need to Cut the Fabric on the Bias?
No. The only time you need to cut fabric on a bias when binding a quilt is when you are binding curves. You will want to bind your quilt using bias binding if it has curved corners.
Tools Required
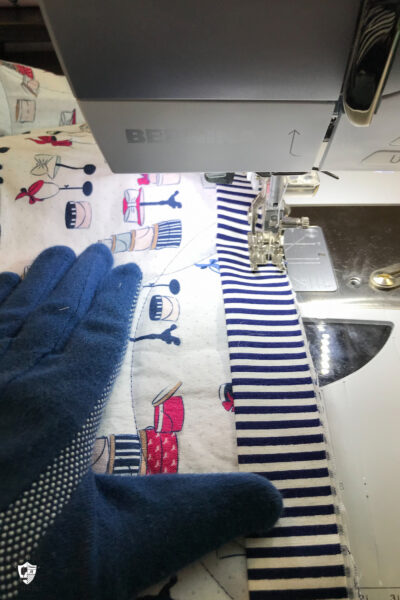
Binding a quilt with a sewing machine does require a few unique tools. You’ll need a Walking Foot with an edge stitching sole plate. My walking foot is made by BERNINA and comes with three different foot sole options. I can easily swap out the foot soles on the foot. Walking Feet are specific to machines, so you’ll need to check with your sewing machine manufacturer to see which one you need.
You will also need a thread matching your quilt binding and or quilt back (we’ll discuss that later).
I also recommend that you use the following:
- Binding Clips
- Machine Quilting Gloves (these will allow you to grip better and feed the quilt as you sew).
What Size Should I Cut my Binding?
I prefer to work with quilt bindings that are 2 1/2″ wide. I know that many people love 2 1/4″, but I think that extra 1/4″ gives you a bit more wiggle room when you are binding. It also gives you a wide enough binding if your quilt is backed in a thicker fabric like Minky.
Step One: Calculate and Cut the Binding Strips
The length of your binding will depend on the size of your quilt. I use this binding calculator to determine how many binding strips I need to cut.
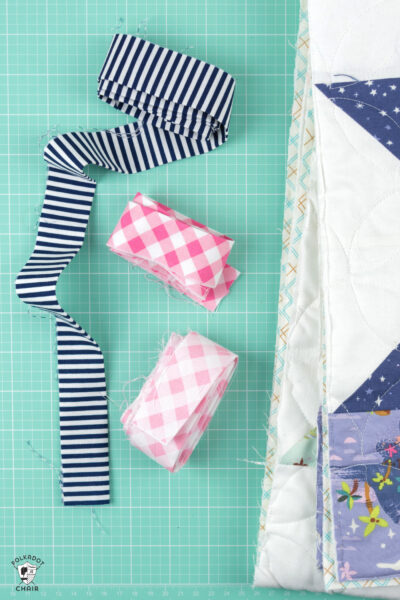
Cut binding strips 2 1/2″ wide by the width of your fabric from the fabric using a quilt ruler and rotary cutter. I keep my fabric folded (like it comes off the bolt) with the selvage edges together.
Then cut off the selvage edge from all of your strips.
Step Two: Sew the Strips into a Continuous Strip
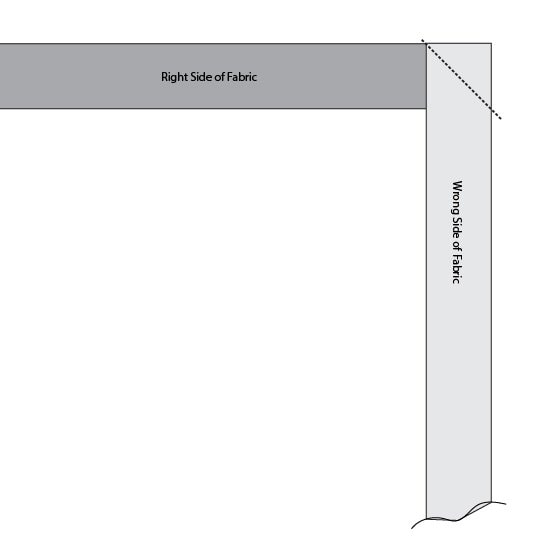
After cutting your binding strips, you’ll need to sew them together to make one large binding strip. Sew the strips together at a 90-degree angle from each other and stitch on the diagonal. This will allow you to have a diagonal seam in your binding, which will have a lot less bulk in your binding. Trim off the excess seam allowance between each strip.
After it’s sewn into a continuous strip, fold the strip in half lengthwise, with the wrong sides of the fabric facing, and press.
What Color Thread Should I Use?
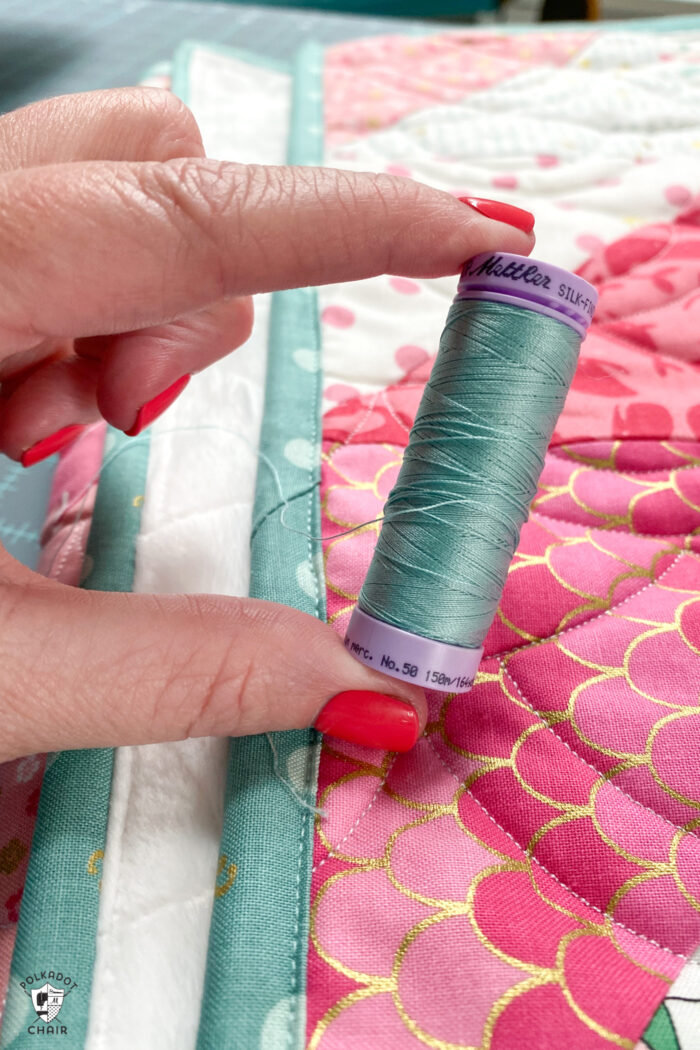
There are a few different ways to approach this issue. One is to match the thread on your binding to the thread your quilt has been quilted with. This method works especially well if your quilt is densely quilted. You’ll hardly notice the binding stitches on the back.
Since the binding stitches show on the back of the quilt, I recommend always using thread the same color as your machine quilting thread in your bobbin.
You can match the machine quilting color for the top thread, or you can match the binding. I prefer to match the binding fabric since I feel like it blends better. It is ok to use a different thread color on the top of your machine then your bobbin thread.
Step Three: Sew the Binding to the Complete Quilt Top
I’ve outlined this step in more detail in the card below (which is printable, so you can refer back to it as often as you need).
How to Machine Bind a Quilt
Equipment
- Walking Foot with Edgestitch Plate
supplies
- 2 1/2" wide Binding Strip long enough for your quilt top.
Instructions
Prepare Binding
- After you have sewn your binding strips together, fold the binding in half lengthwise and press. Roll the binding up to keep it out of your way as you sew.

Sew the Binding to the Quilt Back
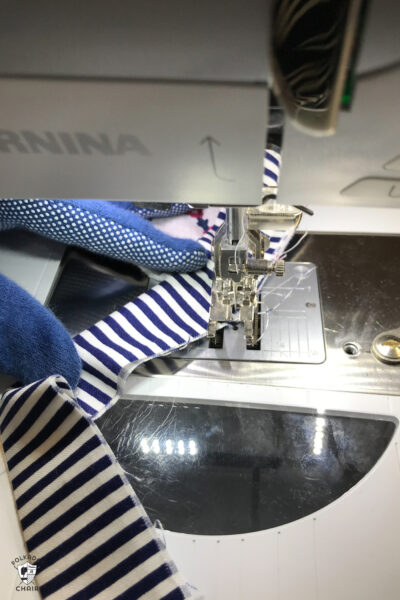
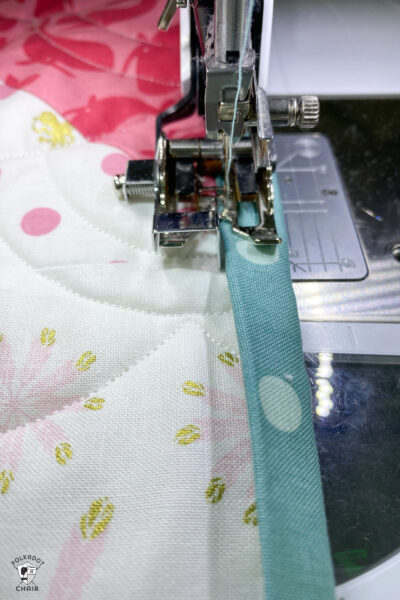
- Beginning at the bottom of the quilt, stitch the binding to the quilt top on the BACK of the quilt. The raw edge of the folded binding strip should be flush with the raw edge of the quilt.Use a ¼” seam allowance. Leave about 8” of binding unstitched as you begin. I recommend using a walking foot or dual feed foot for this step (in my photos, I’m using a dual-feed foot).
- Sew the binding until you get close to a corner. When you are about ¼” away from the corner, put your needle down and rotate the quilt under the needle. Stitch a short diagonal line towards the corner of the quilt. Cut thread.
- Rotate the quilt 90 degrees and flip the binding straight up so that it is at a 90-degree angle from the binding you just stitched down.
- Fold the binding so that it is flush with the unsewn section of the quilt top. This will create a mitered corner on your quilt.
- Starting at the top edge, keep stitching until you get to your next corner and repeat.

Stitch Binding in Place
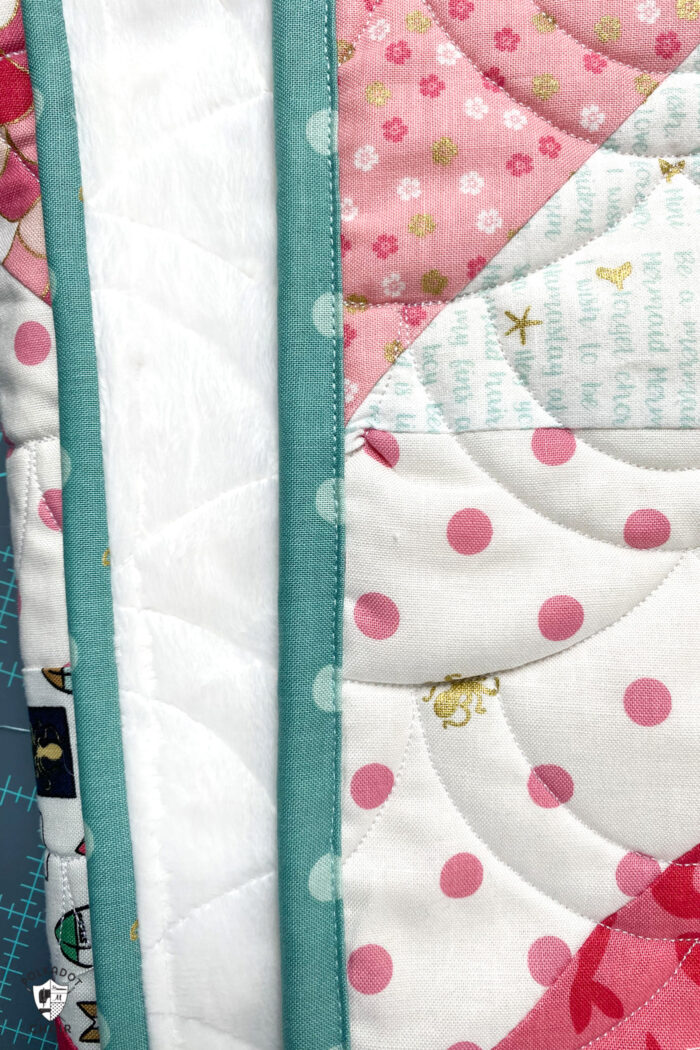
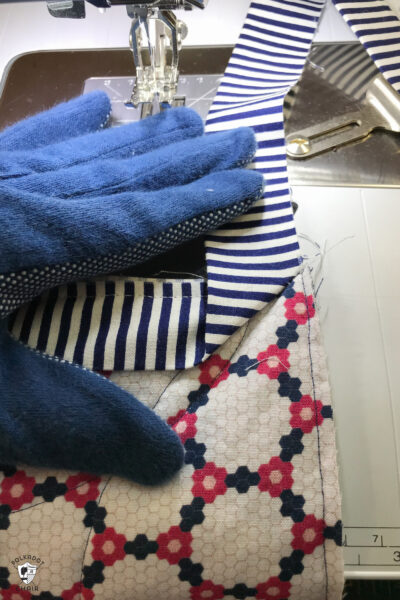
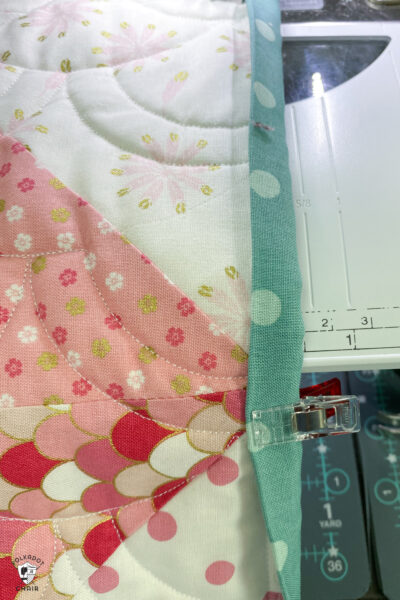
- Flip the quilt so that it’s right side up and fold the binding over the raw edge of the quilt. Hold it in place with binding clips. I usually work on one small section at a time and only clip that section.
- Put the walking foot with the edgestitch sole on your machine. Adjust your needle right/left settings so that the needle goes into the fabric and catches the folded edge of the binding. The “edge” portion of the machine foot should be flush up against the binding fold.
- Begin stitching, taking care to keep the edge foot in place as you sew.
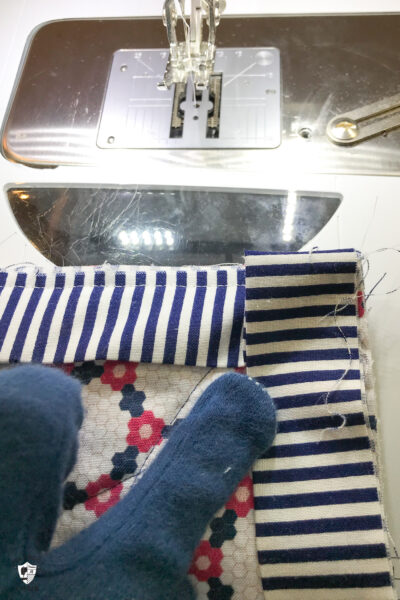
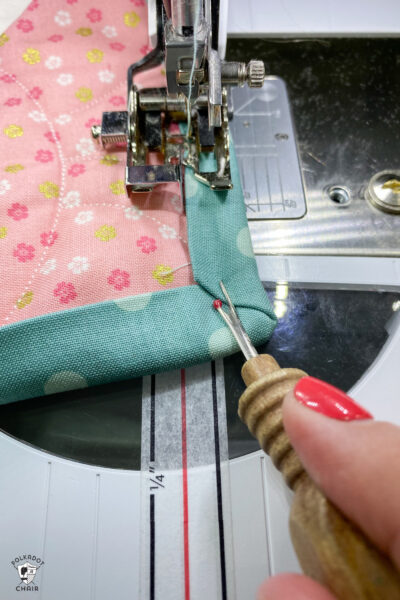
- When you get to a corner, fold the corner over and use a seam ripper to hold the corner in place as you sew. Stitch up into the corner, put the needle down, rotate the quilt 90 degrees, and keep sewing.
- When you get to a corner, fold the corner over and use a seam ripper to hold the corner in place as you sew. Stitch up into the corner, put the needle down, rotate the quilt 90 degrees, and keep sewing.
- When you get to a corner, fold the corner over and use a seam ripper to hold the corner in place as you sew. Stitch up into the corner, put the needle down, rotate the quilt 90 degrees, and keep sewing.Repeat until your quilt is completely bound.


I would also like to see the back of the quilt after binding is sewn down! Also, the link to AQS for the “proper” way does not work. Thanks!!
I love the way the binding looks on the front when you machine bind it but would like to see what it looks like on the back side. Thank you for all the good information.
Me too!!
Can you please explain the walking foot with the edge foot plate? Is this a special foot, is it the fancy walking foot that’s a hundred dollars or is there some way I can get this foot with my Babylock Allegro? I have a normal walking foot.
My walking foot came with three different feet, and you just snap them on and off. It’s a BERNINA, you can check to see if the Babylock ones come with switchable feet. I only bought one walking foot.
What do you do with the 8 inch tail to finish off the binding?
Thank you for your tutorial on binding. I tried using the walking foot and it made a great difference. Elaine Rasmussen
I’d like to know the kind of thread and weight you use for machine binding. I only saw a reference to color. Thanks!
Just 💖 your tutorials. So easy to follow. Thank you.
Thank you Melissa! What a great way to machine bind. I too struggle when machine binding & I usually end up doing the cheater method. Your method looks like a way easier method! I will definitely be giving this method a try on my next quilt project. Love reading your newsletters & blogs, and have enjoyed sewing many of your patterns & tutorials……plus I love your beautiful Riley Blake fabric lines. ❤️
I sew my binding on with fusible thread in the bobbin, And then when it fold it over the raw edge, I I press it and it sticks to the bobbin thread and it is really easy to top stitch.
Melissa, what an amazing blog! Stumbled into your page and am overwhelmed with your generosity in posting so many designs, instructions, inspirations. Thank you for sharing your wealth of creativity. Now I have to get off the internet and get busy putting the many ideas into a plan!! Thank you for the motivation.
Oh you are so sweet. Thank you!
I too, use this method to sew on binding. However, I always struggle to match the two ends with a bias seam. Do you have any suggestions?
UGH. Me too. I normally don’t match them on the bias, just a straight seam then trim the seam allowance down to 1/8″.
Hi Melissa
Thank you for another great tutorial. I so wanted someone to explain machine binding of a quilt. Was so excited when I saw this. I also wanted to know how much of binding to cut off at the end since you mentioned starting to bind leaving about 8 inch. Wanted to know how much I needed to leave at the end and how to cut n stitch them together before binding it to the other aside of the quilt. Am I missing something here or is it just general knowledge how to do that part? I’m really new to quilting and was looking forward to that part as well.
Hope you can help and thank you and congratulations on all your great work 🙂
I’ll just say that I don’t do it the “right way”. This is how I do it.I leave an 8″ tail of unsewn binding when I begin. I then sew all of the binding on until I get within about 5 inches of where I started. I then overlap the binding pieces and mark the point where they overlap. I then measure out 1/4″ from EACH side of the binding strip and cut.
Then I sew the two ends together with a 1/4″ seam and trim it down to a 1/8″ and press. I then sew the rest of the binding on.
If you want to do it the “proper” way, here’s a great tutorial: http://www.aqsblog.com/quilter-needs-know-joining-ends-binding
Thank you! I learned a new technique! You don’t know how much I dislike hand stitching a binding. This worked perfectly and it looks nice.