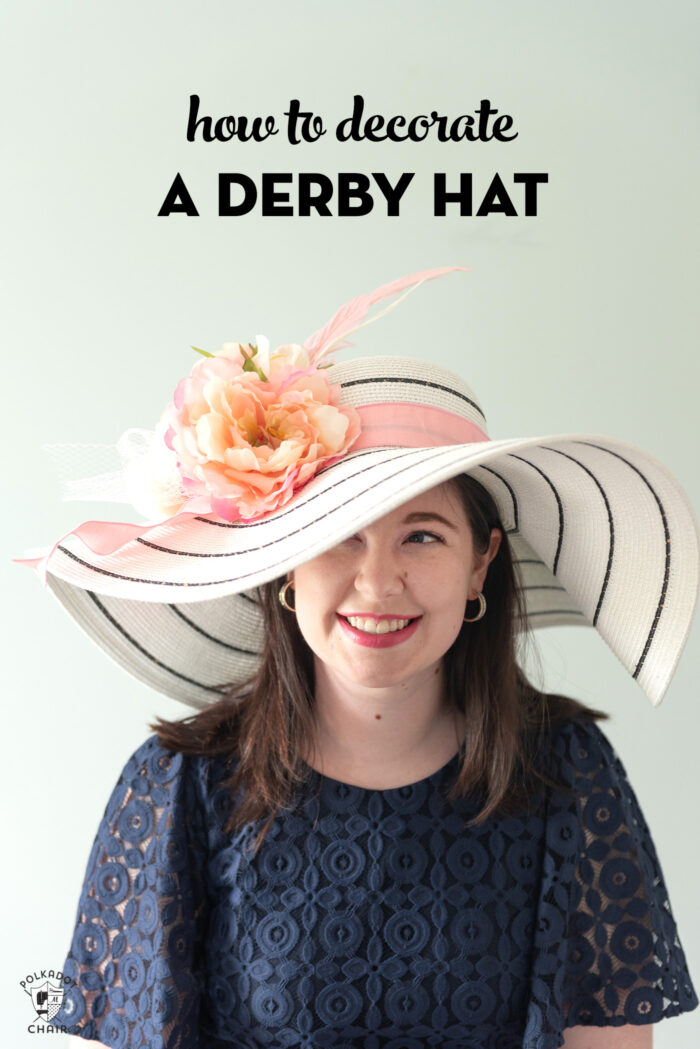
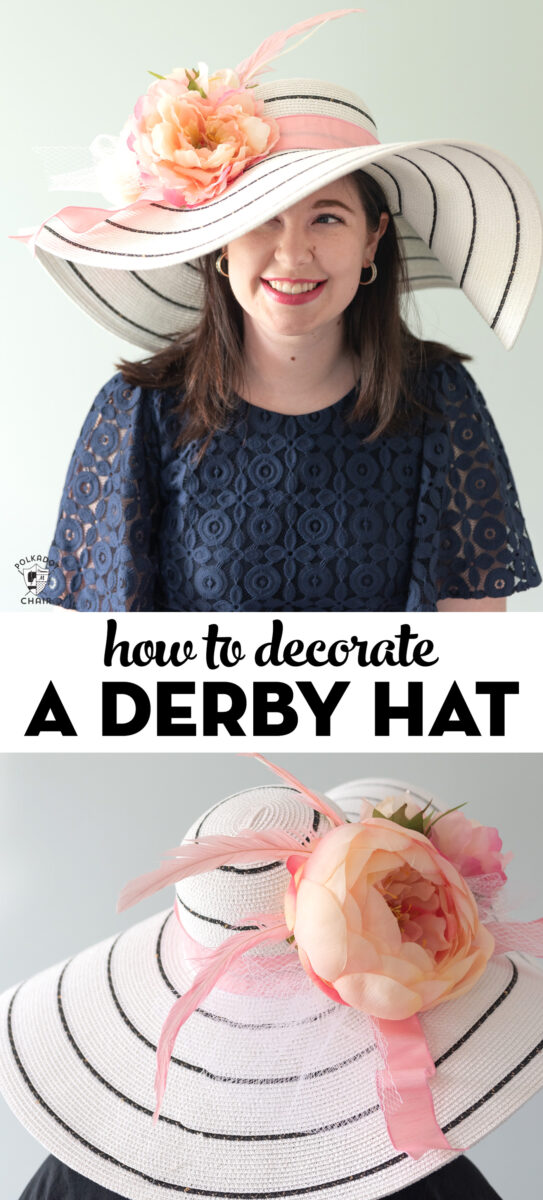
How to Make Your Own Derby Hat
Whether you’re attending the Kentucky Derby or just a Derby party at home, no Derby outfit is complete without a fabulous hat! Learn how to make your own Derby hat with our easy-to-follow step-by-step tutorial.
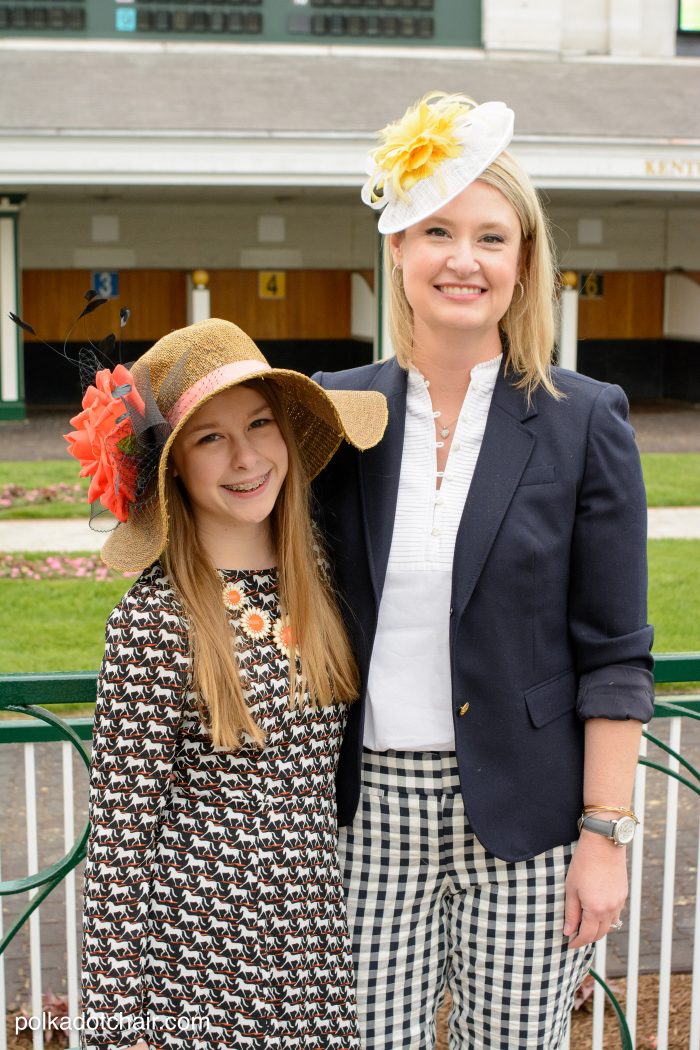
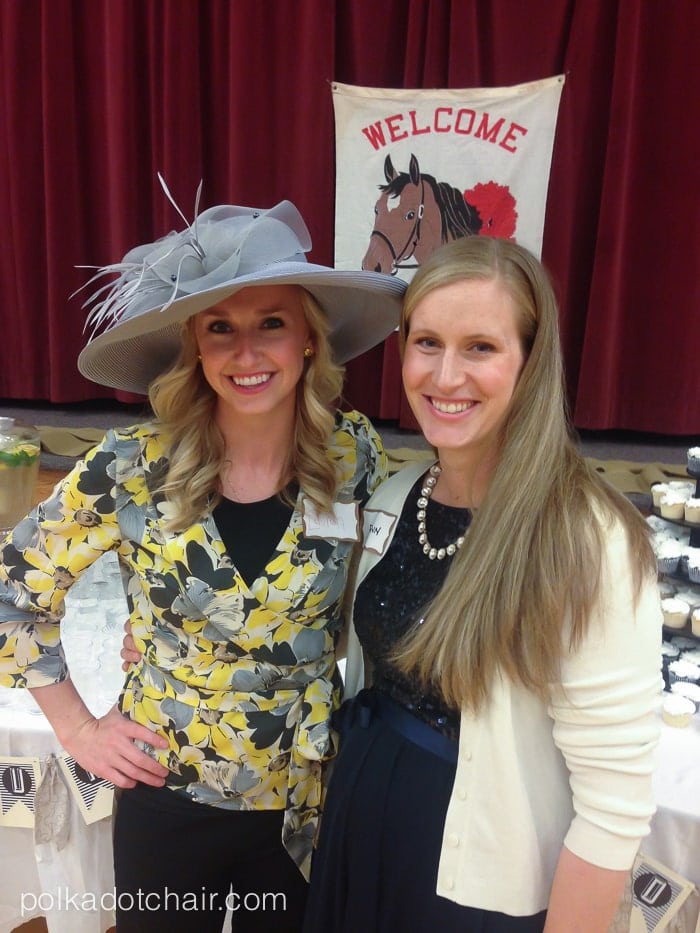
The first time I attended the Kentucky Oaks (the race the day before the Derby, the one that most “locals” attend), I think I was more excited to pick out a hat to wear than actually to GO to the race. Most people attending the Derby and wearing a GIANT hat seem to be high on their bucket list.
If you’re Derby bound or headed to a fun party for Derby watching and want to make your own hat, I’m going to walk you through the steps to decorate a hat perfect for the Derby.
Just a note: This will walk you through the basics of creating a Kentucky Derby Hat. Many talented people do this for a living, and Millenary is a true art form! I’ve worn a combination of purchased and DIY’d hats over the years and think there is room for both.
How to Decorate a Hat for the Derby
Derby Hat Supplies
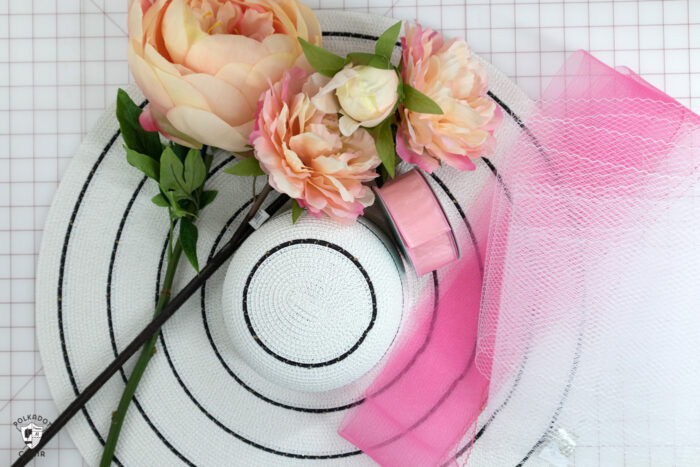
Pick and choose from the following supplies to decorate your hat. How you customize it is up to you. After attending the races for years, I can tell you that really ANYTHING goes when it comes to hats at the track.
- Hat (check the straw sun hat section of a store if yours does not carry hats specifically for Derby)
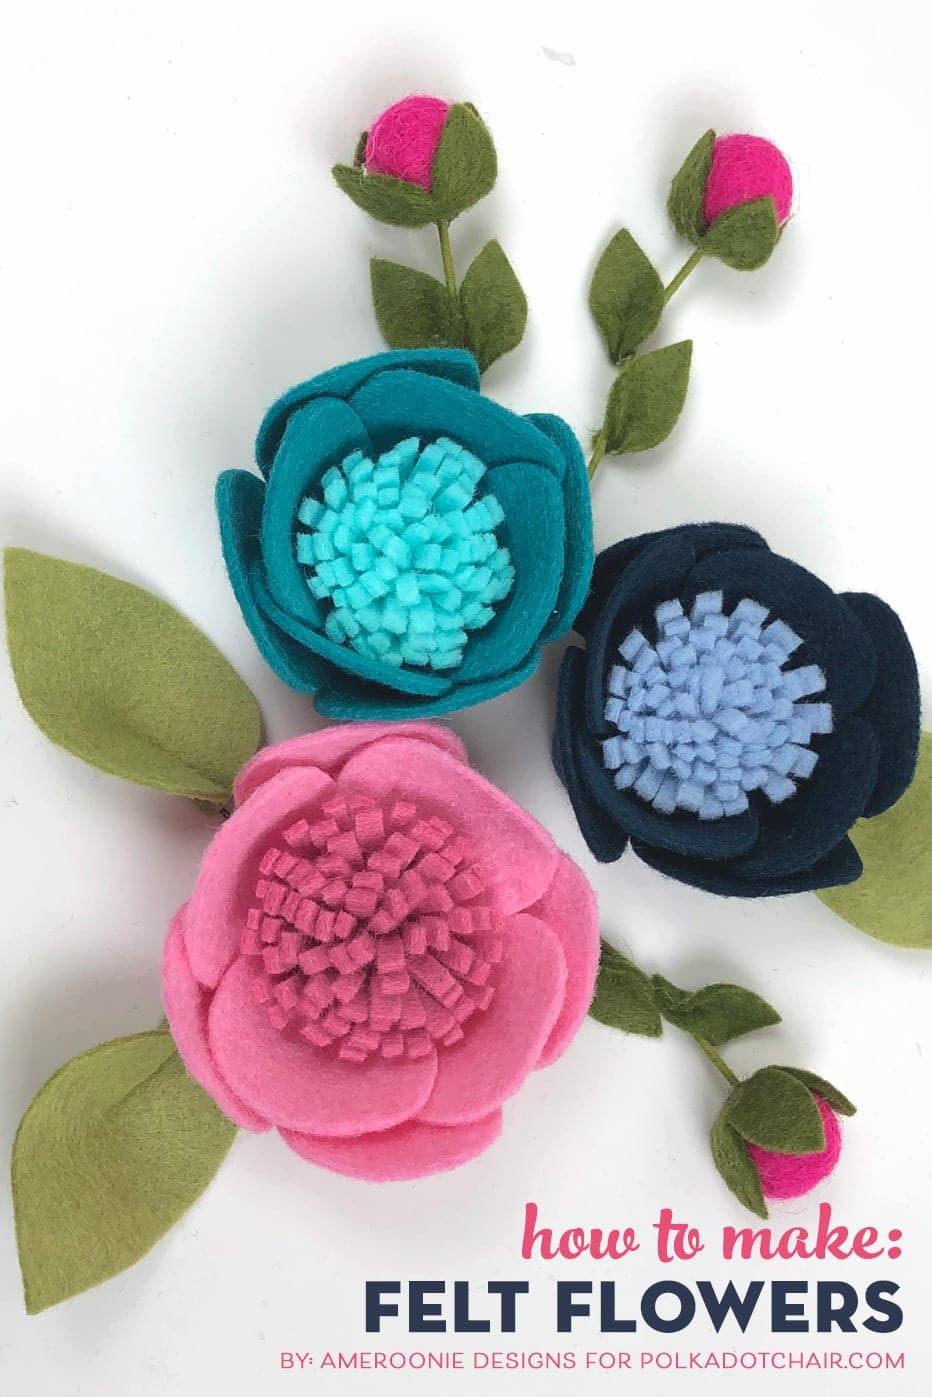
- Large Silk Flowers (you can usually find nice silk flowers to purchase at your local craft store)
- Ribbon (I recommend using wire ribbon)
- Feathers
- Bridal Netting
- Horsehair Braid
- Other fun embellishments
- Hot Glue Gun & Glue Sticks
- Wire Cutters
- Large Needle & Thread
Tips for DIY Kentucky Derby Hats
1- Think in Layers
As you decorate your hat, think in layers. The bottom layer is usually ribbon, then flowers, then netting, feathers, and other embellishments. If you think about building up the hat in layers, it will be easier for you to visualize the completed hat.
2- Pick a Color Scheme
Pick 2-3 colors for your hat. Usually, I start with the dress I’m wearing, then plan the hat decorations after that. You can go crazy with color, but if you’re feeling overwhelmed, stick to 2-3 colors at most. If you’re unsure, a bright pop of color is always nice on a hat (or a fascinator).
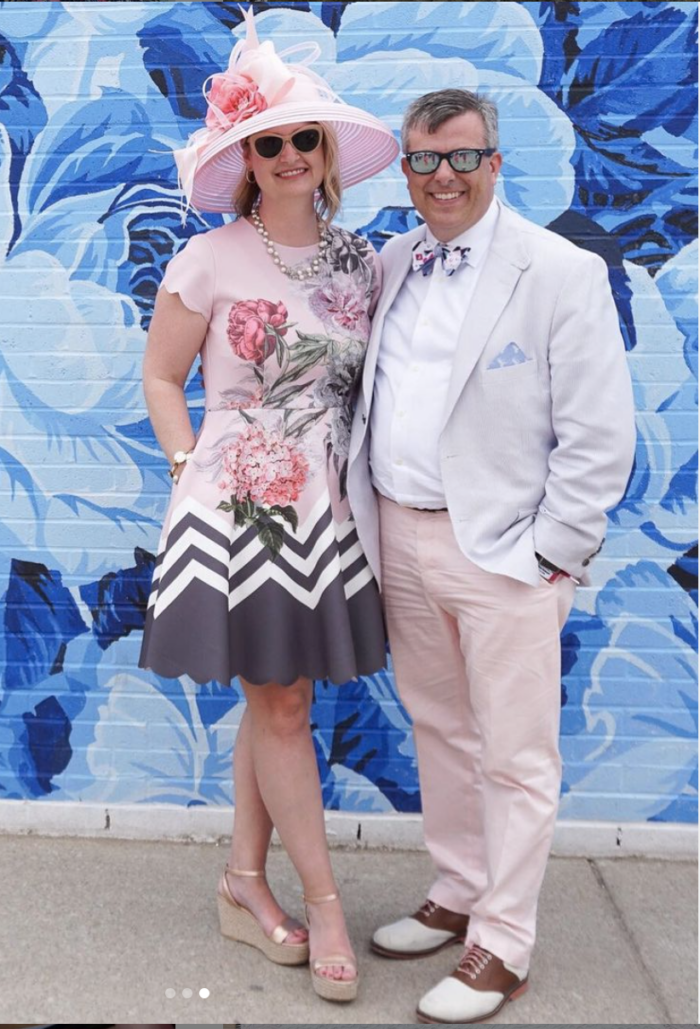
(Oaks 2018 – I did not make that hat, it’s purchased, I did make the bow tie)
3- Make sure it’s Secure
If you’re going to be wearing the hat at the track all day, you’ll want to make sure all the layers are securely glued or sewn into the hat. Use a big needle and heavy-duty thread to secure large flowers or ribbons.
Instructions
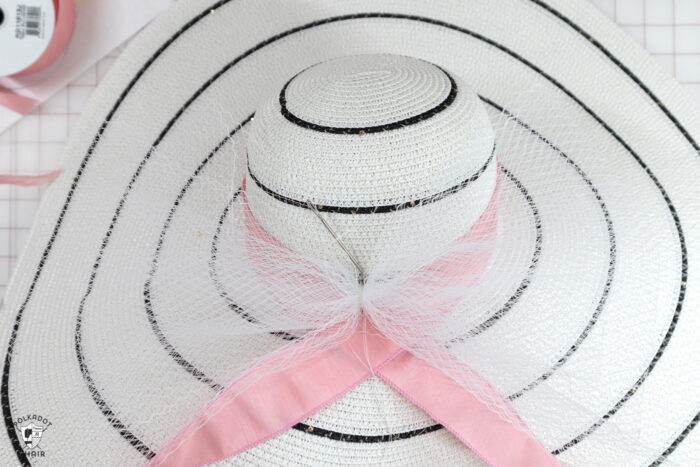
Step 1: Ribbon
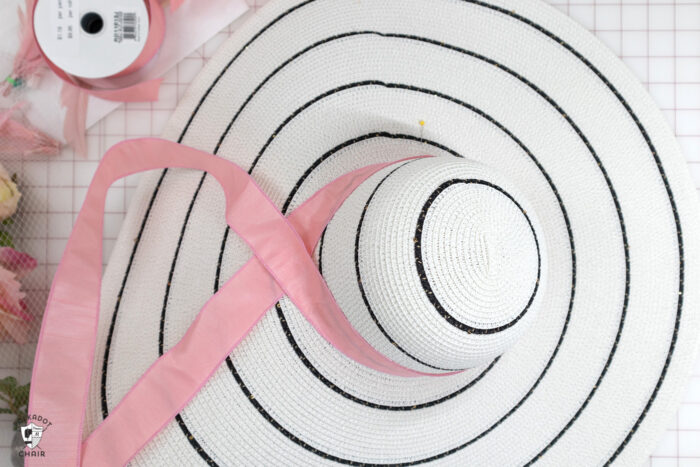
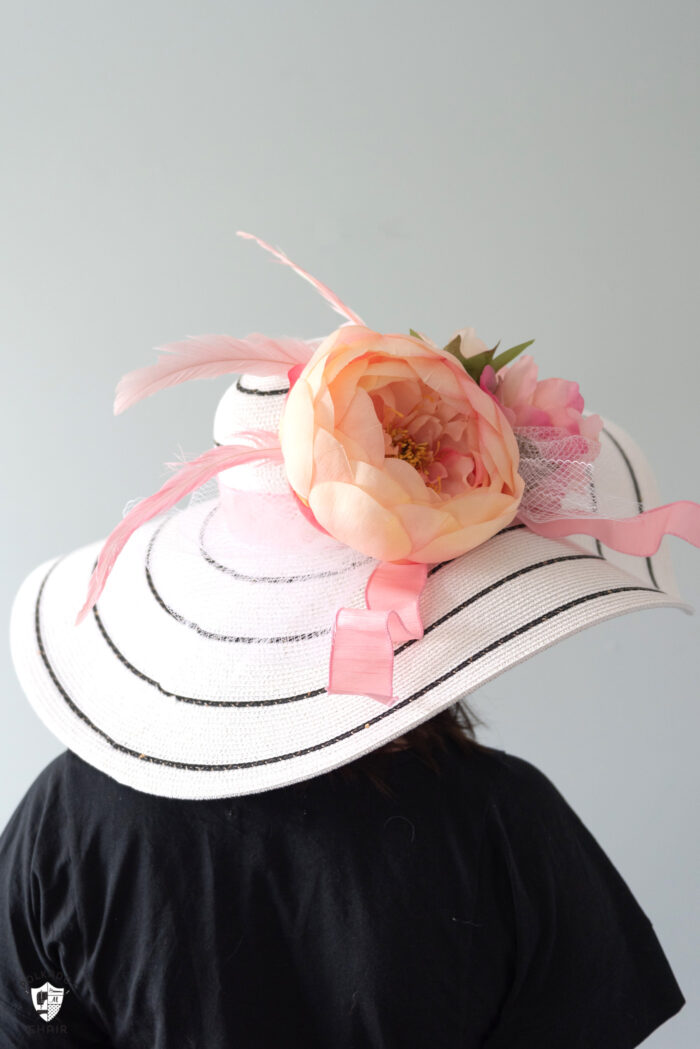
Decide if you want the decorations on your hat to be on the side, the front, or the back. Most Derby hats have flowers on the side of the hat. I have also seen large flowers on the front of the hat with the brim pinned up and it’s very cute.
If you want to add ribbon to your hat, begin there. Using your glue gun, glue the ribbon to the hat. Use a dab of glue every few inches. Don’t overdo the glue, as it might show through your hat.
I left 8″ of ribbon at each end of my hat as a decoration.
Step 2: Netting
If you want to add netting to your hat, you can add it now or after the flowers. Take the netting and fold it end over end 4 times. Pinch it at the center and hold it in place with a clip (you can use a paper clip too).
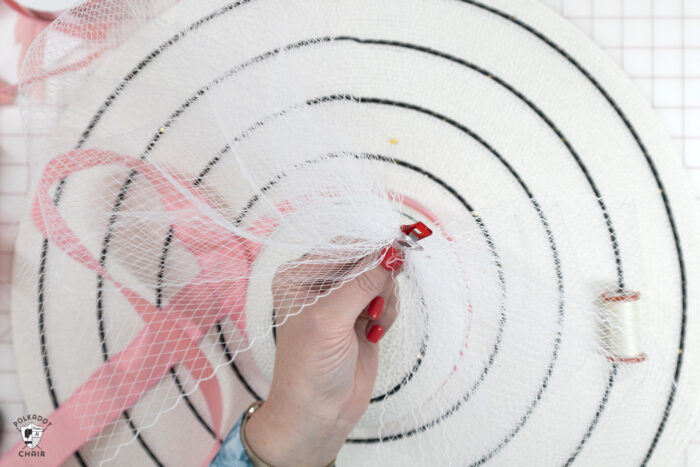
Using some heavy duty thread, tie a knot around the center of the netting.
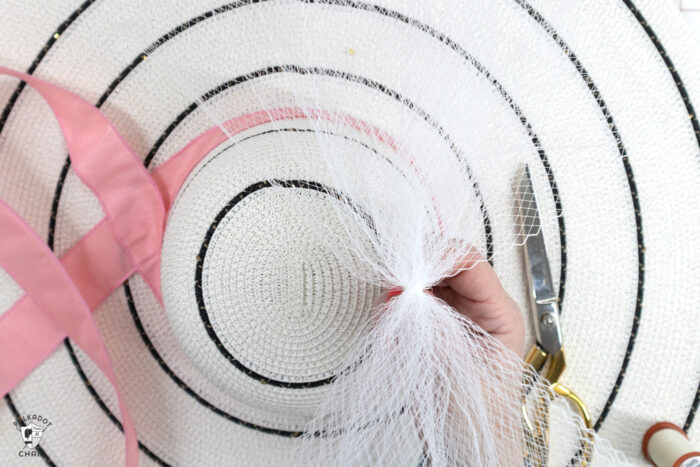
Stitch it to the hat at your desired location.
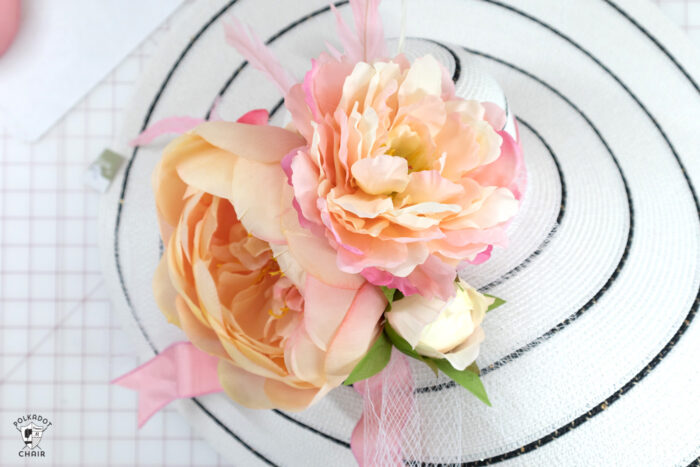
Step 3: Flowers
Remove the flowers from their stems. Use wire cutters and clip the stems as close as you can to the base of the flower. Be careful not to clip the flower apart, though.
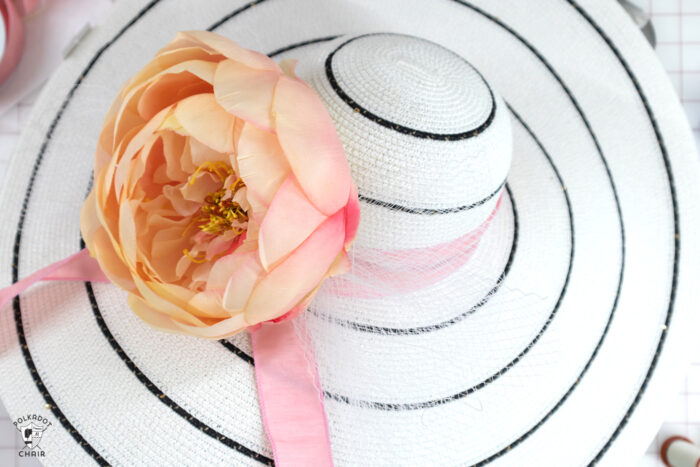
If your flower is large, run some thread through a heavy-duty needle and stitch the flower to the hat with one large stitch. I feed the needle through the hat, bring it back to the front then tie the thread in a knot.
Secure the flower in place with hot glue.
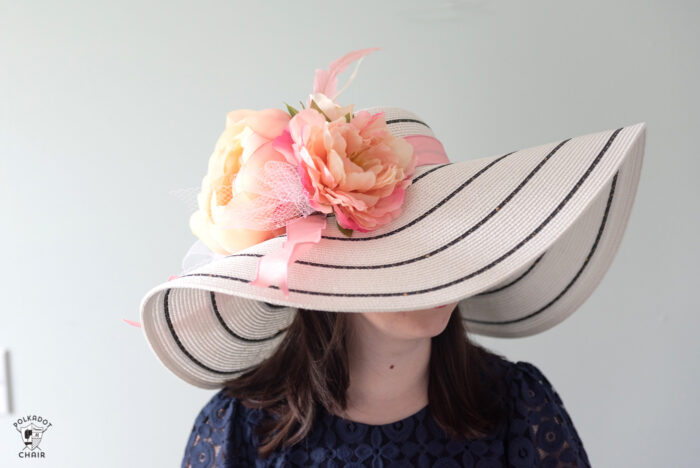
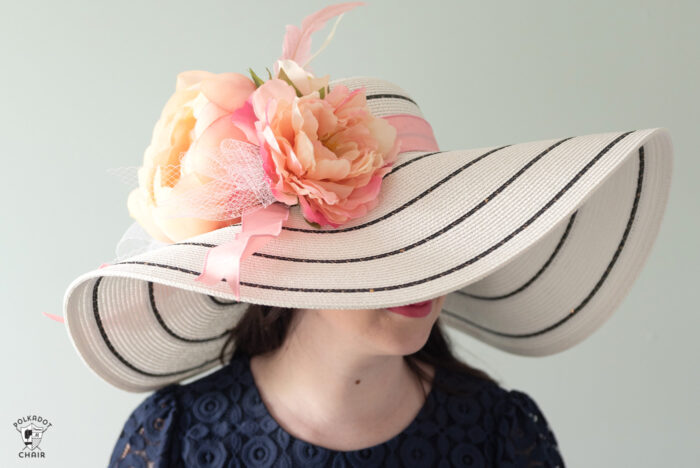
Add more flowers if you like. My hat in the example has 3 flowers, one very large flower and 2-3 smaller flowers.
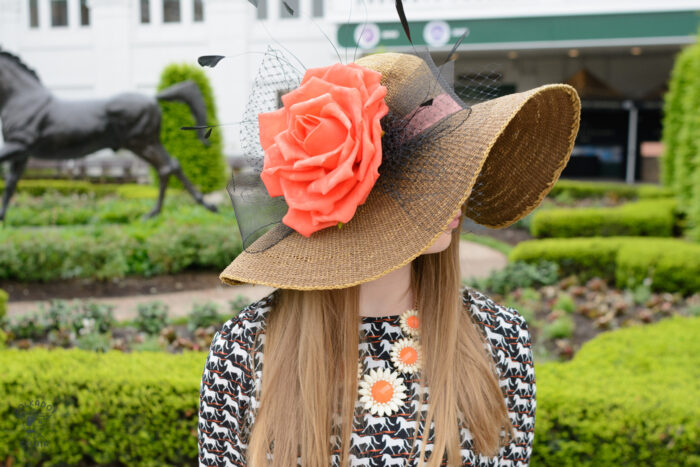
You can also just use one flower like the large orange one in the example below.
Step 4: Embellish
The last step is to embellish. Add feathers, extra tulle or ribbon, or other elements to fill out the hat. Just use a dab of hot glue to adhere the feathers to the hat.
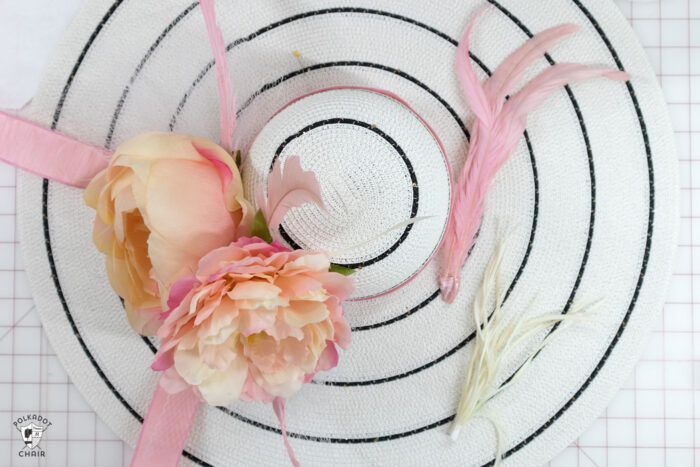
You want the hat to have a nice balance of elements. Some elements should be lower and some higher. Also, take a minute and put the hat on your head (or someone else’s) to check the placement of the elements. A lot of times, when you decorate a hat on the table, it sits differently when it’s actually on someone’s head.
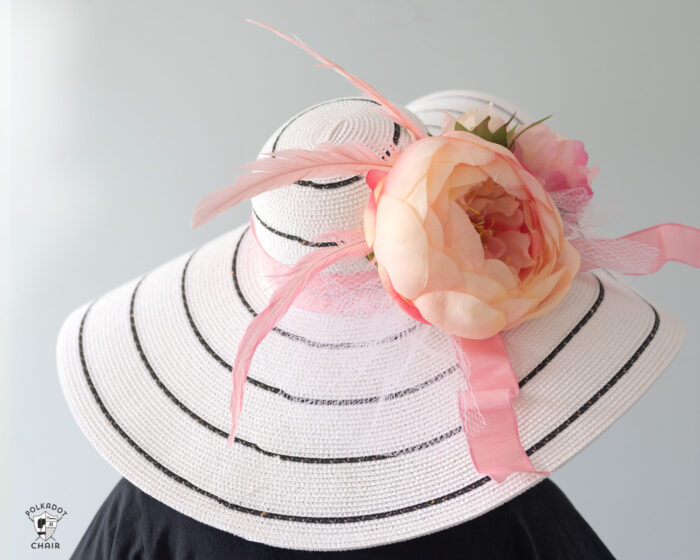
Make sure the hat looks good from the front, back, and sides. Ensure that all layers are glued down well.
That’s it! Enjoy your hat!
More DIY Derby Projects
Black, White & Red Kentucky Derby Party Ideas and Free Printables
DIY Derby T-shirts, Aprons & Pillows
Thank you so much for your great instructions with pictures! I was able to make one and it turned out beautiful. In fact it took me longer to choose all the decor than it did to actually make the hat! Wish there was a way to post a picture in the comments on your page. ❤️
Glad you liked it! Picking out all the fun stuff is always the best part of a project!
Pretty hats ,good day !
All pretty hats. In college, I did some millinery. Not many are hand-made nowadays. Thank you for the tutorial and photos.