Cricut EasyPress Guide & EasyPress Mini Review
Check out our guide to the Cricut EasyPress, a heat press that is great for use with iron-on vinyl. We have also added a review of the EasyPress Mini, a new, mini version that doesn’t have all the features of the EasyPress 2, but is oh so cute and useful!
There’s a new member of the Cricut EasyPress family, the mini! It’s not only adorable but oh so useful! Today I’ll be sharing with you my review of the new EasyPress Mini along with showing you how to use it to add a monogram to a baseball hat. I work as a brand ambassador for Cricut, this is sponsored content.
What is the Cricut Easy Press?
The Cricut EasyPress is a Cricut machine that features a ceramic heat plate that distributes even heat. This even distribution of heat makes the EasyPress 2 perfect for Iron Ons. If you’ve had iron-on’s fail or come loose in the past, it was most likely due to an uneven heat source.
Most of us do not have space for a bulky heat press in our craft rooms. A large heat press machine is what most clothing manufacturers use to apply heat transfer materials to t-shirts, wood, and fabric other items. If you’re a hobby crafter like myself, you probably don’t really want a HUGE machine that gives off a lot of heat in your room. That’s why Cricut has designed EasyPress.
What can I make with the Cricut Easy Press?
The most obvious use for the EasyPress crafting tool is to create custom t-shirts. This is what I have used my machine for the most. Personally, I have used my EasyPress to adhere htv (heat transfer vinyl) to wood for decorative signs, to canvas shoes, tote bags, and for easily applying fusible interfacing to the fabric.
Do I Need the Cricut Easy Press or Can I use an Iron?
The biggest difference between an iron (even a professional iron) and the EasyPress is the distribution of heat. An iron is designed with multiple heat settings to be used on a variety of fabrics. It also has a pointy end to allow you to get into small spaces and corners. Irons don’t really need an even heat distribution across the plate since you move the iron as you work.
Since the EasyPress was designed JUST for applying htv, it features a large flat base plate with less temperature variation and precise temperature control thanks to its ceramic-coated heat plate. This allows you to place the heat press in one spot and leave it there.
To answer the question, yes, you can use an iron to adhere to heat transfer vinyl. However, you will need to make several passes with the iron and your iron-on may not adhere evenly to your project.
Things to consider when purchasing a Cricut EasyPress 2
First, you should consider what size you want to buy. We will talk a bit more bout that below. Also, make sure that you are ok with working with a large very HOT item. The heat plate gets very very hot and you need to make sure you’re ok using it. There are safety features to help protect the user from the high heat of the EasyPress including an insulated safety base and auto-shutoff feature.
Are you going to be using it for personal projects or for professional purposes? Are you making items to purchase? If you are making a lot of items to purchase you may want to consider a heat press. However, most of the time a large EasyPress 2 is a good size for most small business owners.
Also if you plan to travel with your EasyPress 2 (to craft fairs for example) many Makers prefer the medium size since it’s less heavy and easy to travel with.
If you are making items with infusible ink transfers, you have to cover your entire project all at once. You can’t make multiple passes. For that reason, I recommend the large for infusible ink users.
Cricut EasyPress 2 Sizes
- Large: 12″ x 10″
- Medium: 9″ x 9″
- Small: 6″ x 7″
- Mini
What Size Should I Get?
It depends on what type of crafting you are going to be doing. If you are mostly going to be creating small projects (like the baseball hat in today’s post) the mini or small is perfect. If you are going to be making a lot of t-shirts or tote bags, I recommend the large. Personally, I use my Mini & Large the most (I have all 4 sizes).
If you are not going to be making a lot of larger projects, the large size can seem cumbersome. So take a few minutes to consider what type of projects you will be making with your Cricut cutting machine and EasyPress.
How do I know what settings to use?
Cricut has created an easy FREE guide for you to use. It takes all the guesswork out of iron-on for you. Simply choose the type of material you are applying and what you are applying it to and the Cricut Heat Guide will tell you the exact settings and buttons to use on your EasyPress machine.
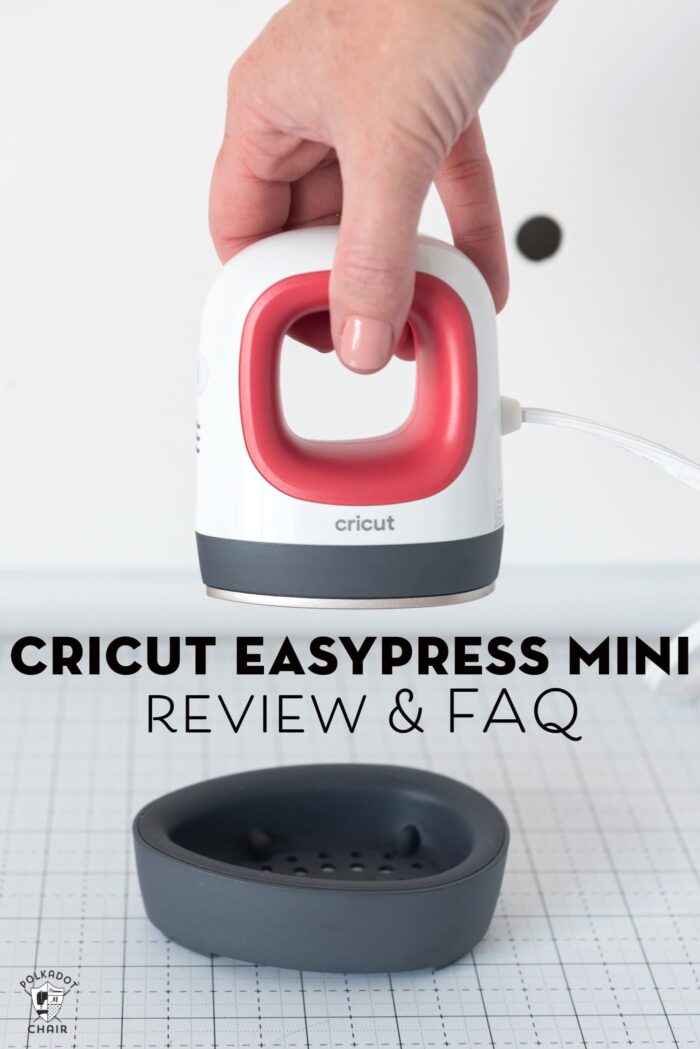
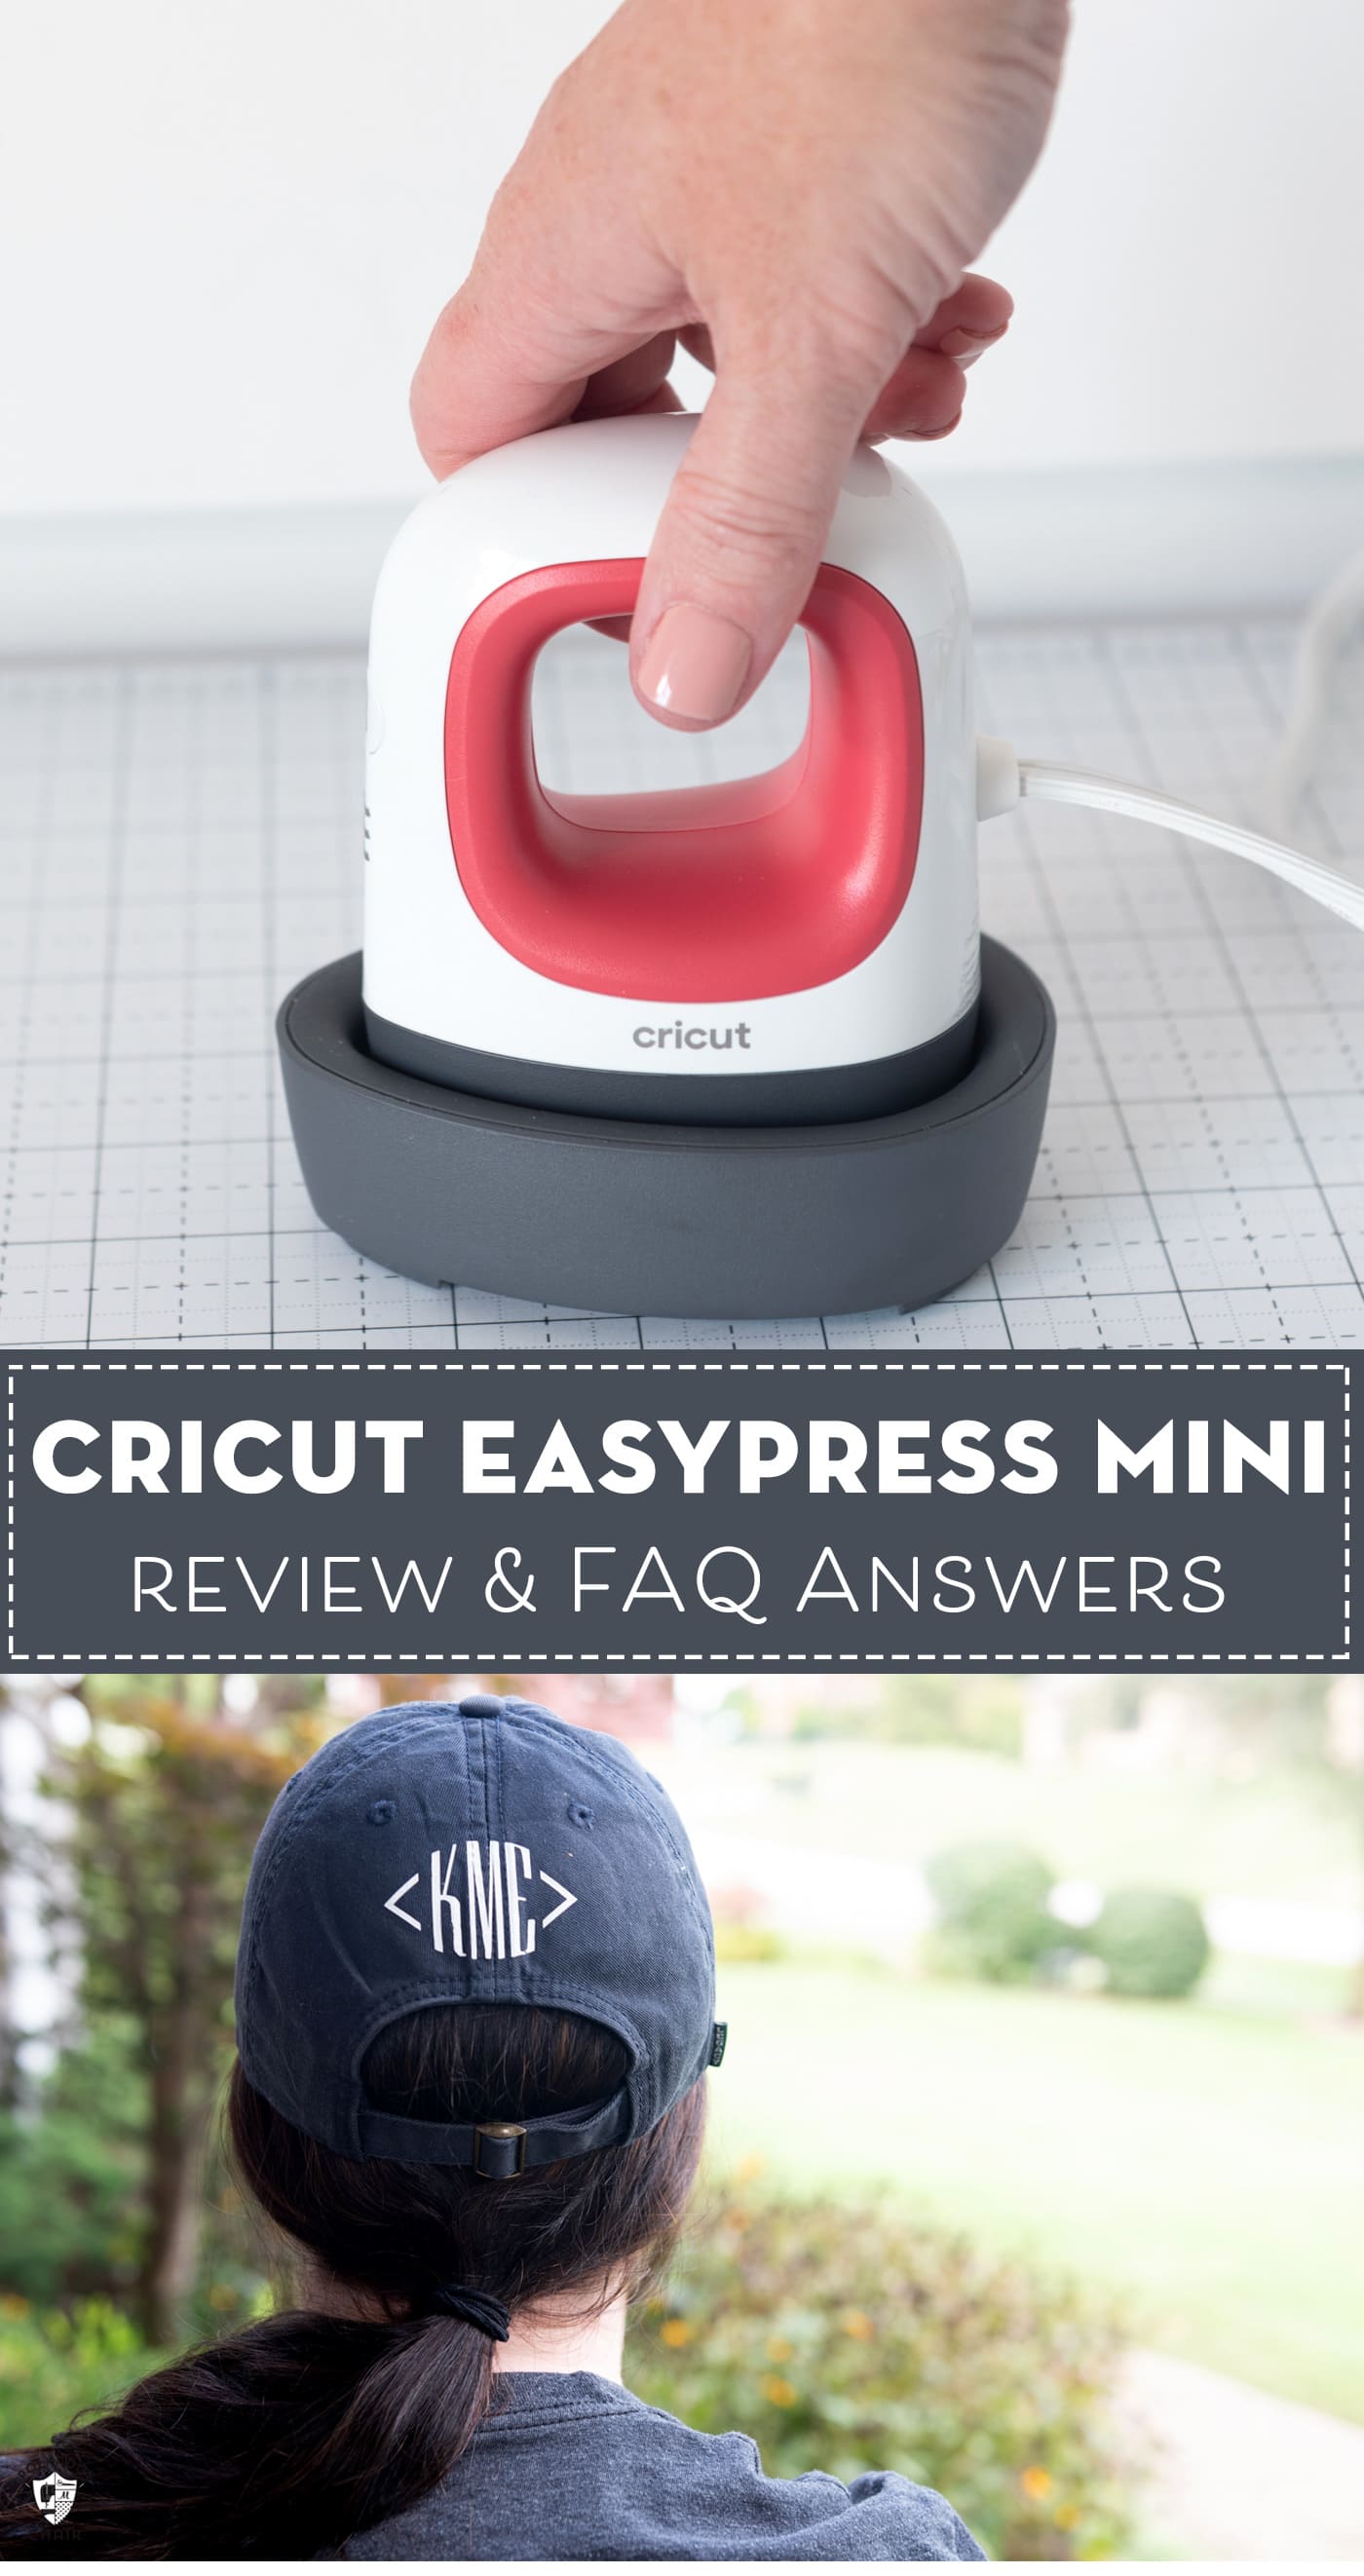
What is the EasyPress Mini?
Cricut has introduced a new product in its EasyPress family, the EasyPress mini and they sent me one to test! Last year when they released the original EasyPress it completely changed how I work with Iron-On. I had previously avoided creating projects using Iron-on Vinyl because it never seemed to “stick” or would not hold up well to repeated washings. Allowing you to achieve professional heat-transfer results at home.
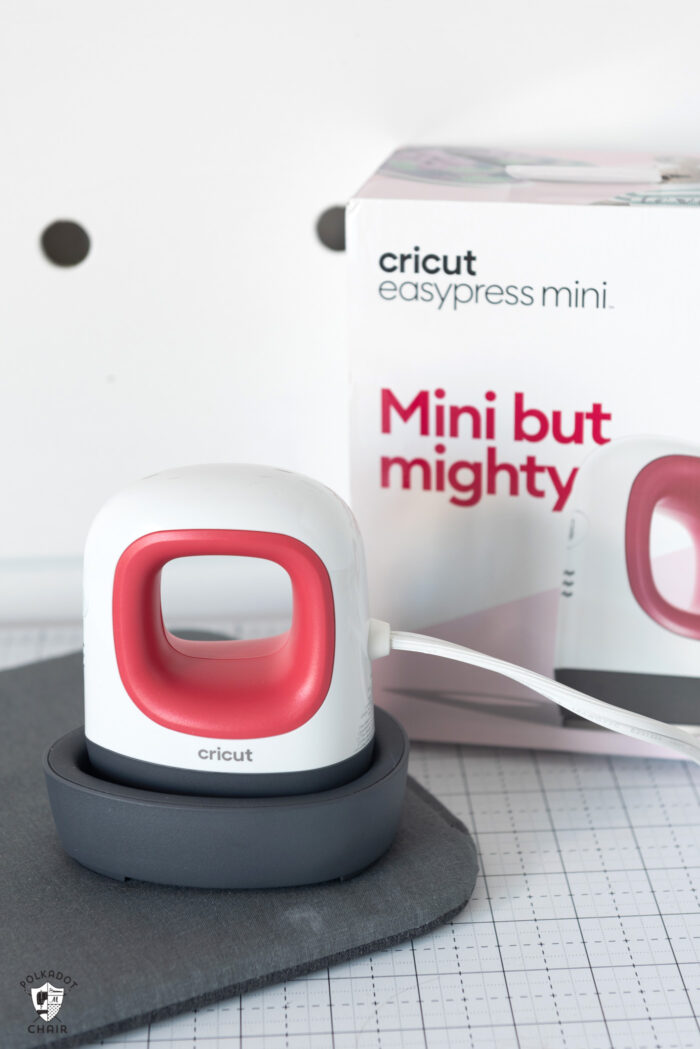
The Cricut EasyPress Mini is the smallest size of the EasyPress family. It may look like a mini iron but it’s really so much more than that. It has more even heat than an iron and gets to higher temperatures making it perfect for any heat-transfer project.
How is it different than the larger EasyPress?
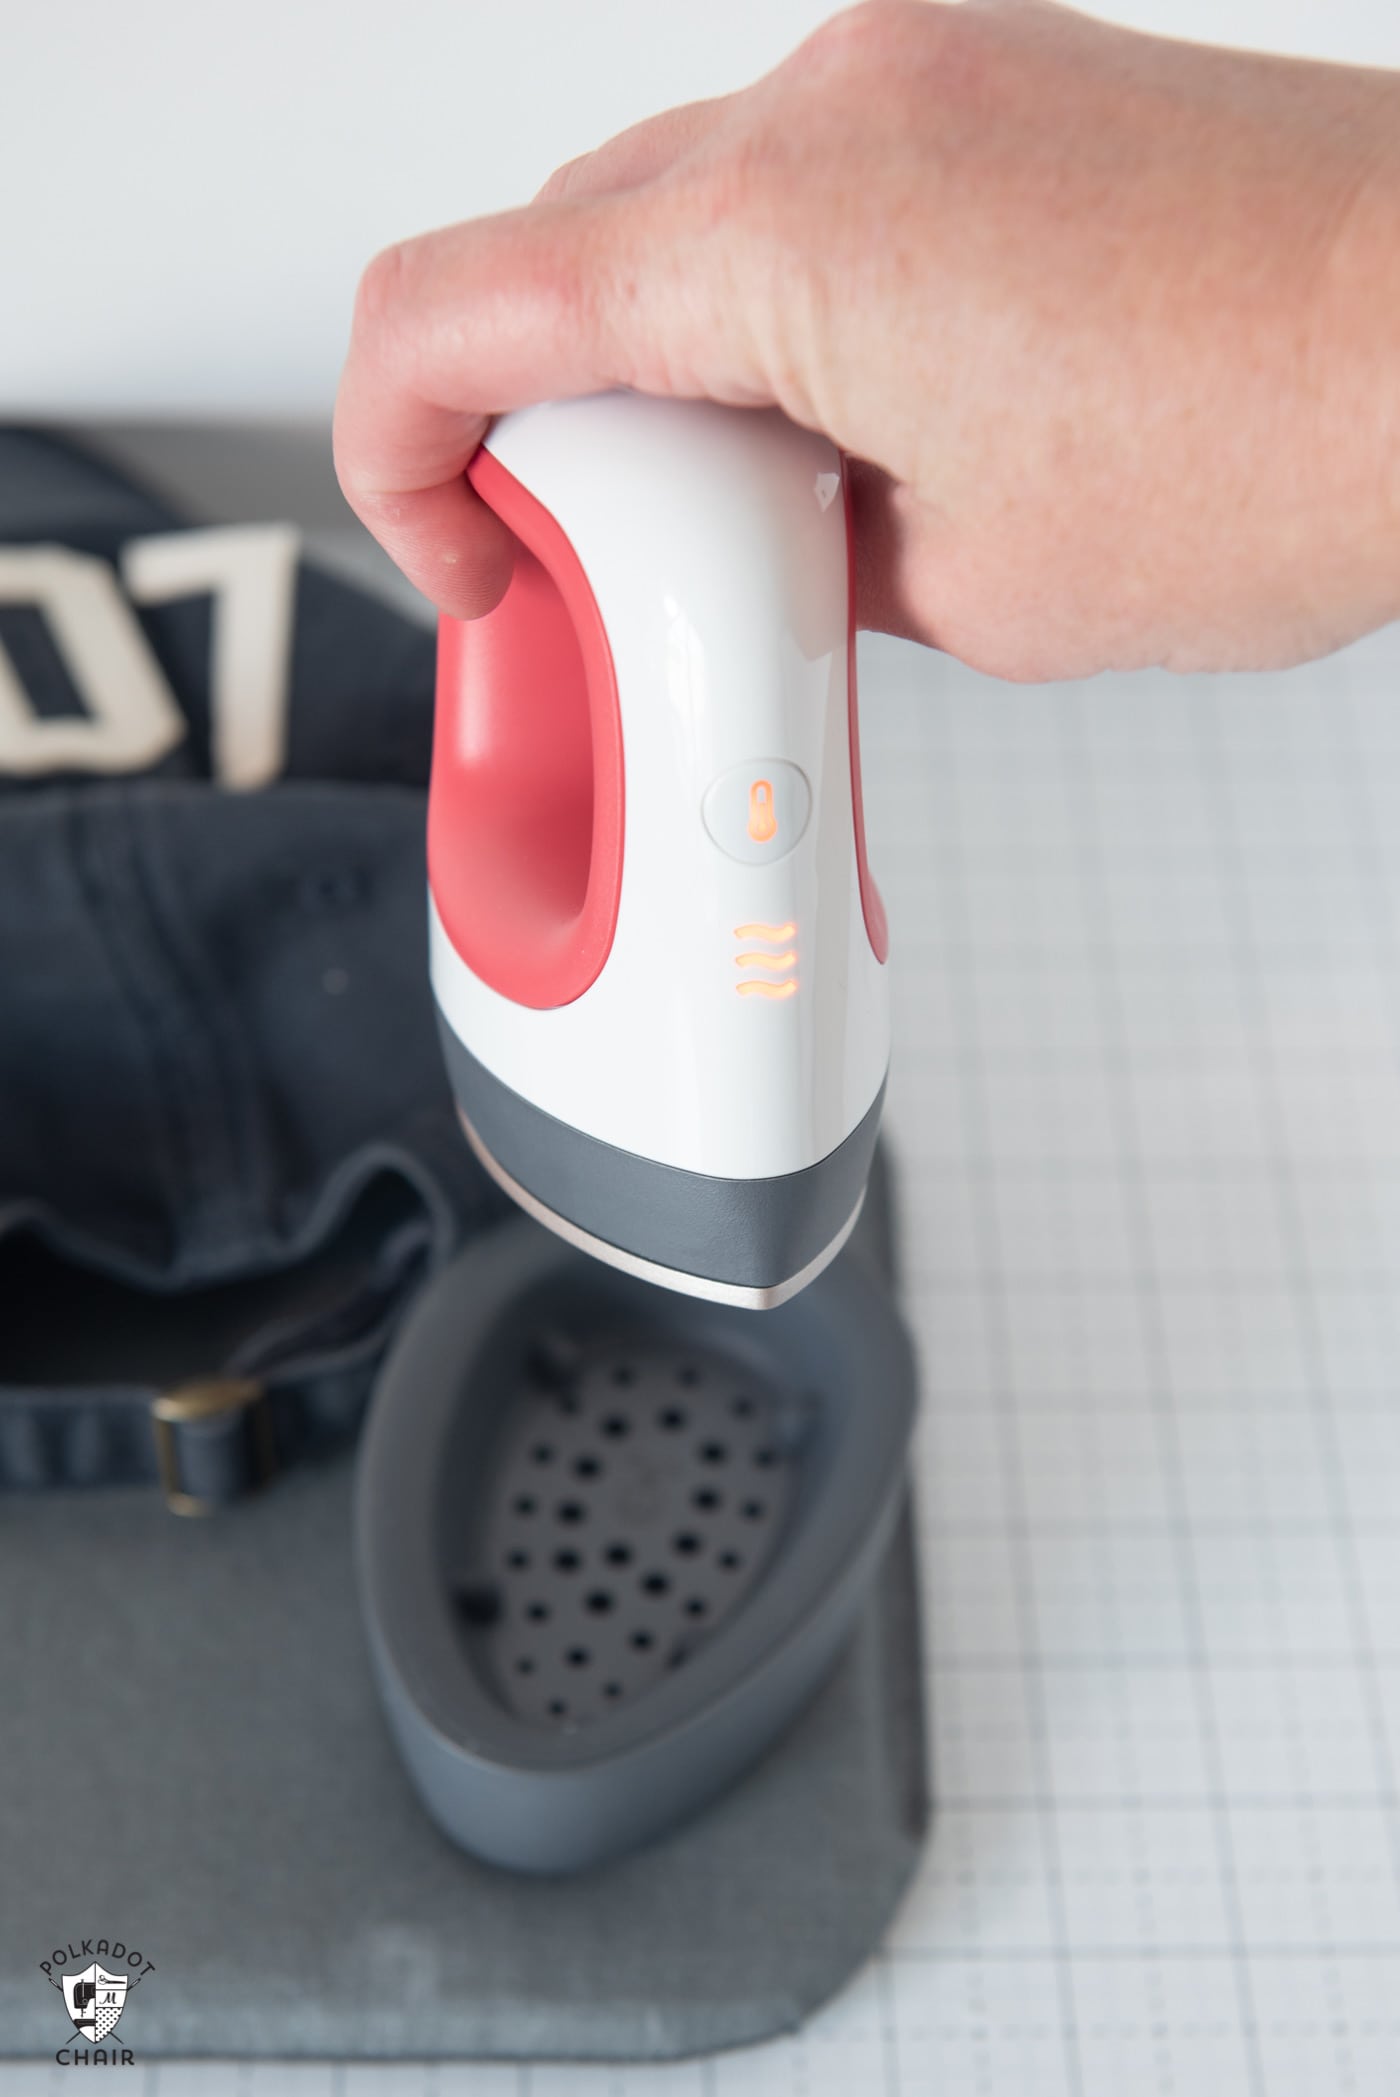
- It has 3 temperature settings. Unlike the larger EasyPress machines which have specific temperature controls, the Mini features a low, medium, and high setting.
- It does not have a countdown timer. When I used my mini for iron-on I simply used the timer on my phone to know when the project was done.
- It’s MUCH smaller. The EasyPress Mini is lightweight and about the size of your palm, making its compact size ideal for unusual projects.
- It features a tapered end. The tapered end makes it great for getting into tight spaces. It is also a great feature to have for quilting (as it helps you to push a seam open).
What Can you use an EasyPress Mini For?
One: Adding Iron-on Vinyl to Smaller Items
- Hats (my favorite hats for projects)
- Shoes (these are fun and easy to customize)
- Baby Shoes
- Backpacks (great for htv)
- Bags (zipper pouch or tote bag)
- Sleeves (my favorite sweatshirts to DIY)
- Pockets (my favorite Tshirts to DIY)
- Hair Bows
- Coozies
- Perler Beads
- Applying Iron-On to smaller wood items
The Cricut easy press mini’s precision tip allows for successful heat transfer on the contours of shapely objects. You can also use it to “Touch-up” bits of iron-on that may have been missed when using the larger EasyPress machines.
Two: As a small “tableside” iron to use for quilting projects
One of the things I am most excited to use the EasyPress Mini for is quilting. I shared a few weeks ago some of my tips for Foundation Paper Piecing.
One of my tips was to set up a “station” close to your sewing machine with an iron and with a cutting mat. That way as you are piecing your quilt blocks (for foundation paper piecing or for other quilting) you don’t have to keep standing up to use your iron. Having everything within arm’s reach makes it so much easier (and faster). It is the perfect complement to my sewing table.
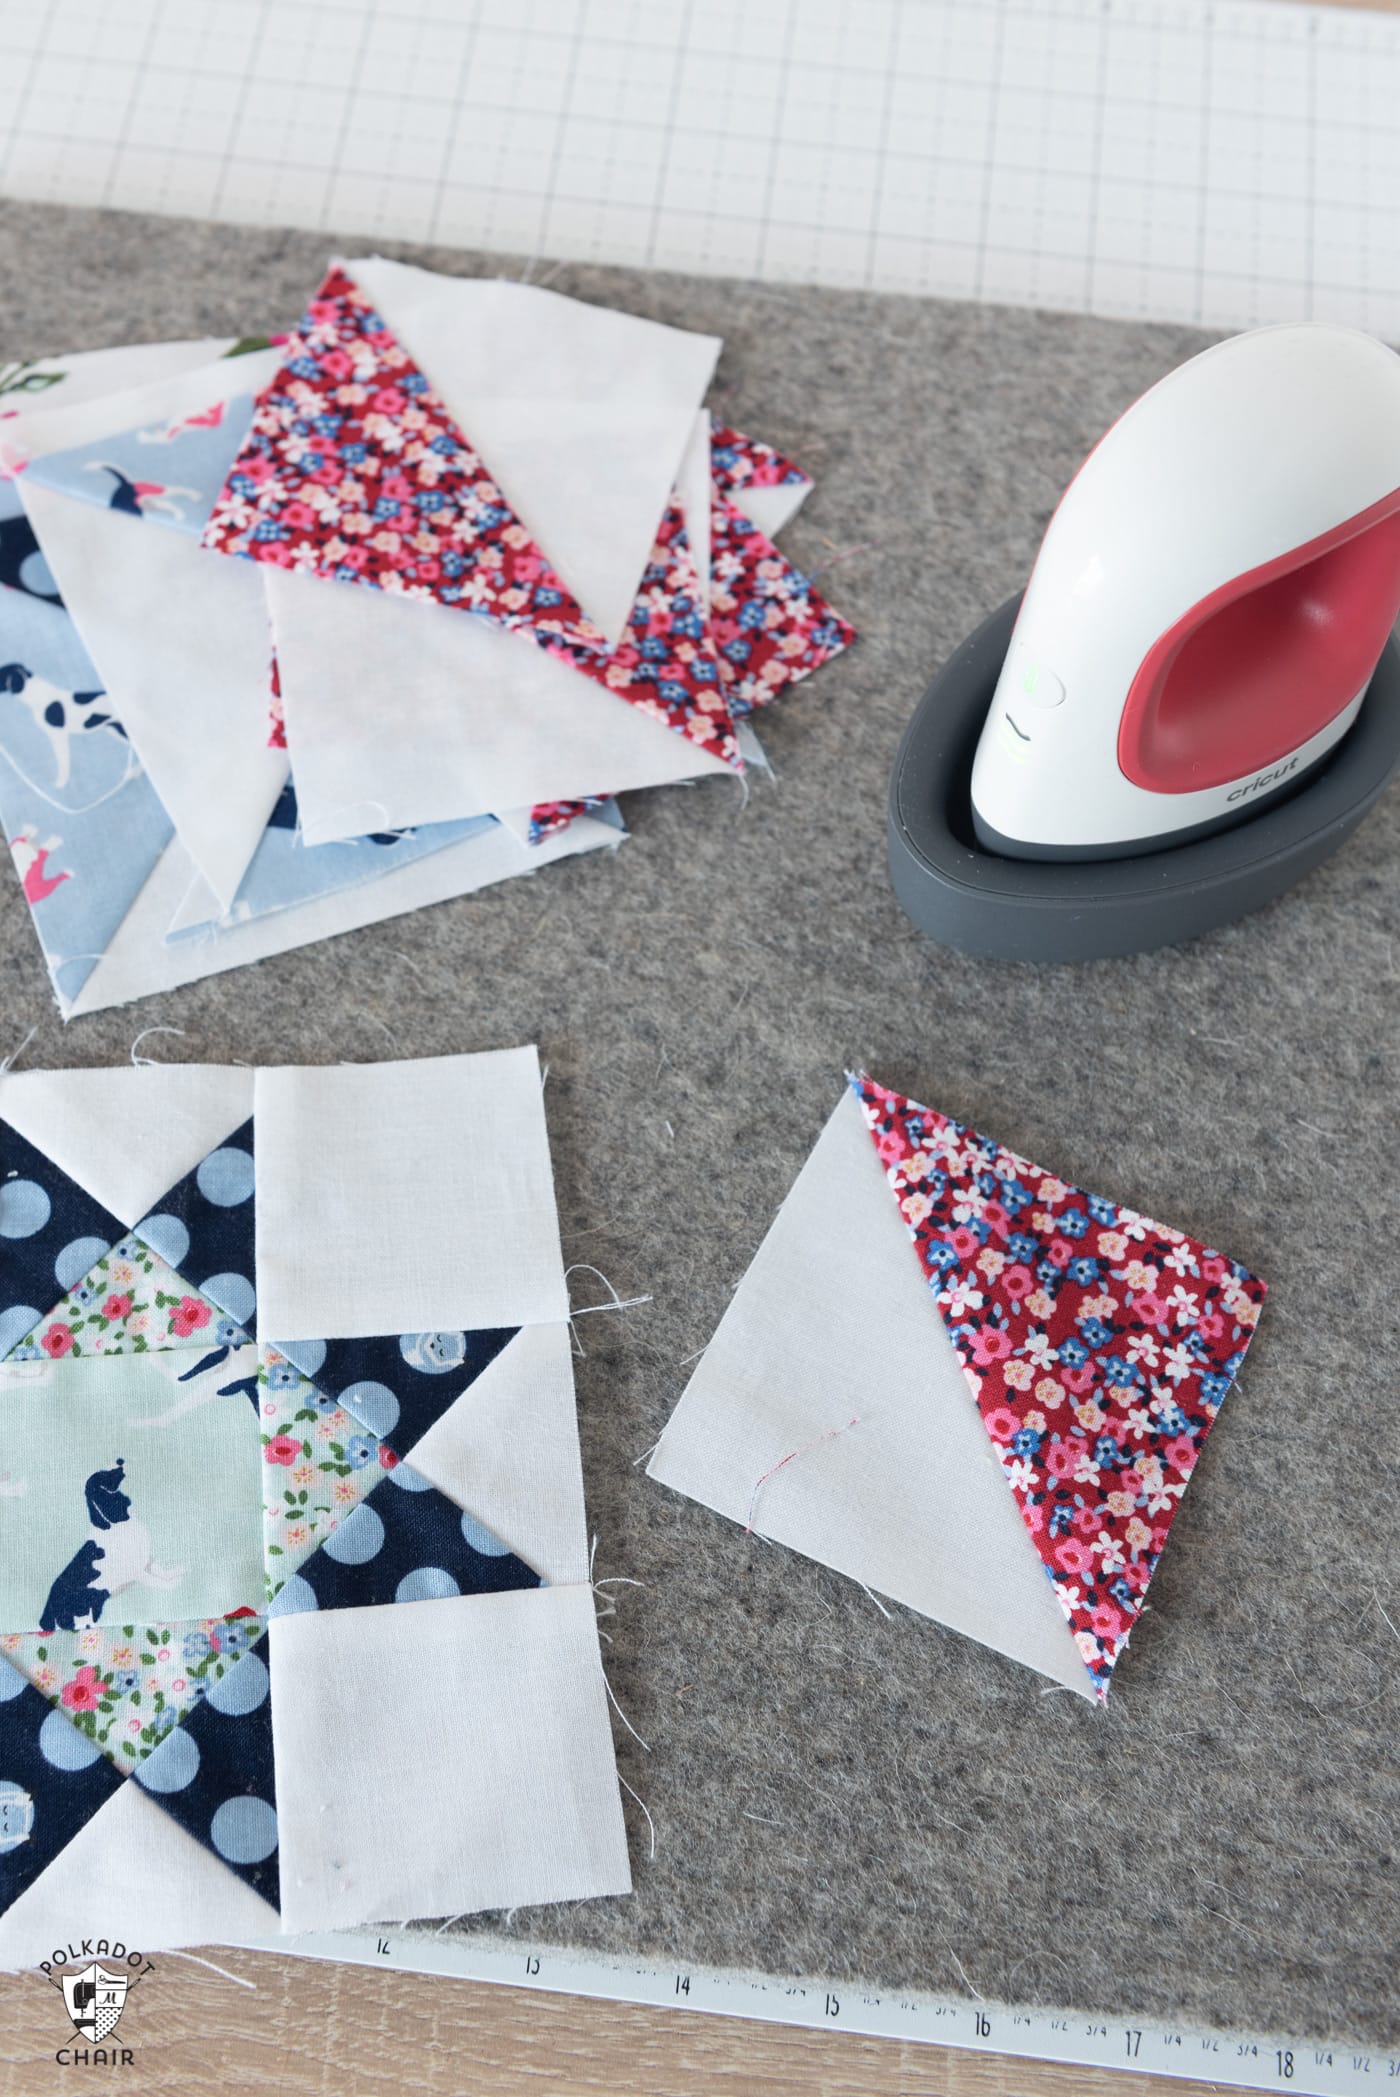
I tested out using my EasyPress mini with my wool pressing mat and I LOVE it. It heats up faster than the small iron I was using previously, and it has an auto-off feature. Which is something that I desperately need LOL! (forgetful much??)
How Hot Does the EasyPress Mini Get?
At its highest setting, it gets up to 400 degrees. That is HOT. Great for infusible ink projects but if you’re using it for sewing, I recommend starting with the low setting, then upping it to medium if you need a bit more heat. Unlike many other mini-irons, this one gets HOT!
My Review of the EasyPress Mini
As much as I love using the EasyPress for iron-on this one is going on my sewing table. I’m going to use it in place of my previous mini iron (which did not have an auto-off feature and took longer to heat up). When I’m piecing quilts I don’t like to stand up every few minutes to press seams. This item is just the right size to keep on my pressing mat right next to my sewing machine.
I mentioned before that I’m a big fan of using the EasyPress for Iron-Ons. Since this one has the same great features as the larger machines it works with iron-on vinyl perfectly. If you only have the largest size EasyPress this one would be a great second machine to get as a supplement. It’s great for touch-ups on larger items and creating more detailed unique heat transfer projects.
How much does it cost?
The EasyPress Mini will retail for $69.99 you can grab it HERE starting TODAY!
How to use the EasyPress Mini
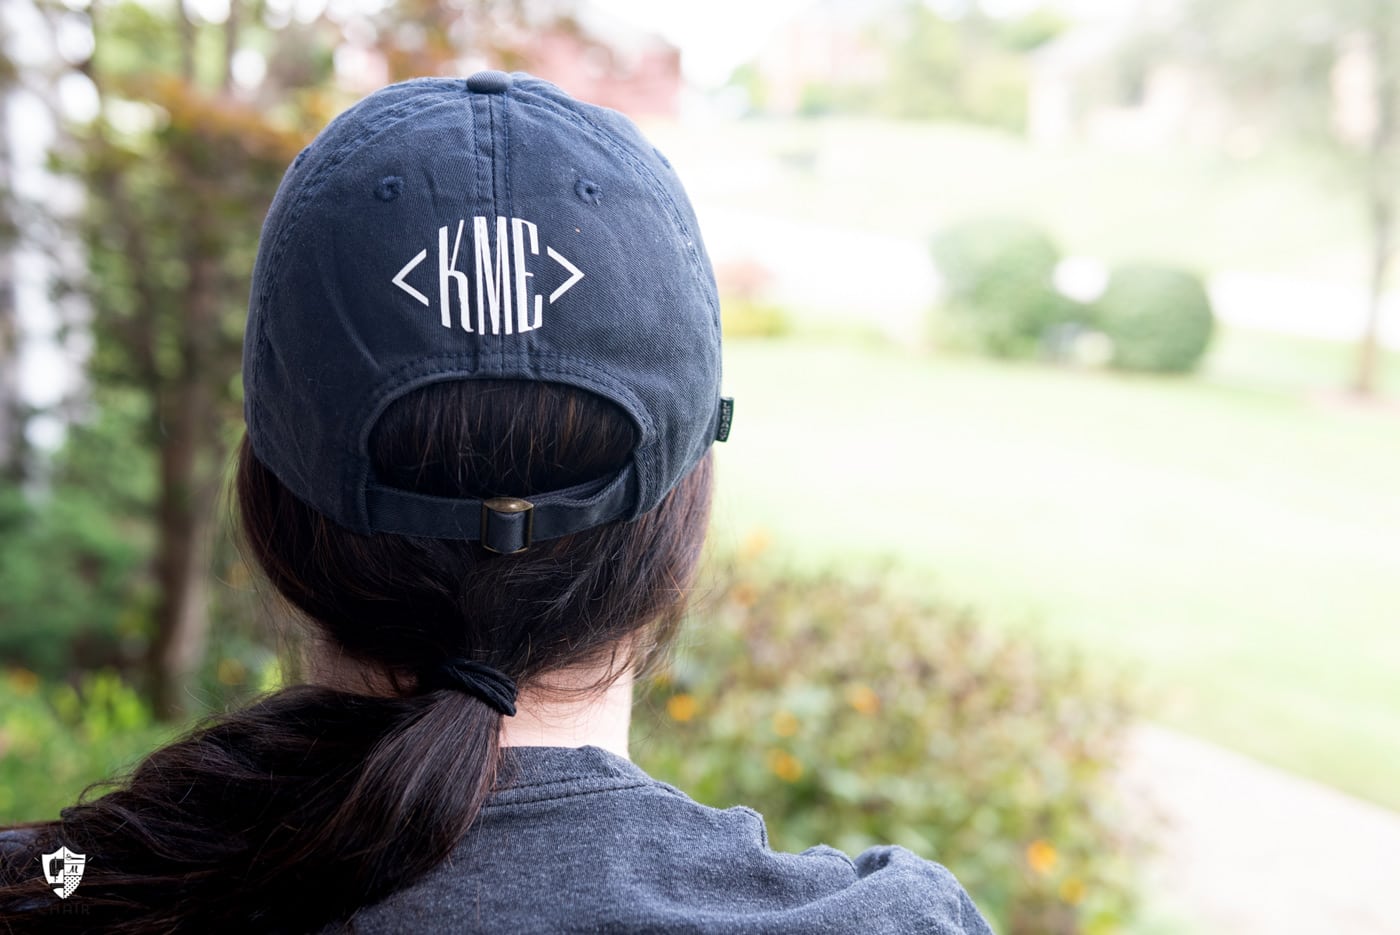
Cricut EasyPress mini Project: Monogrammed Baseball Cap
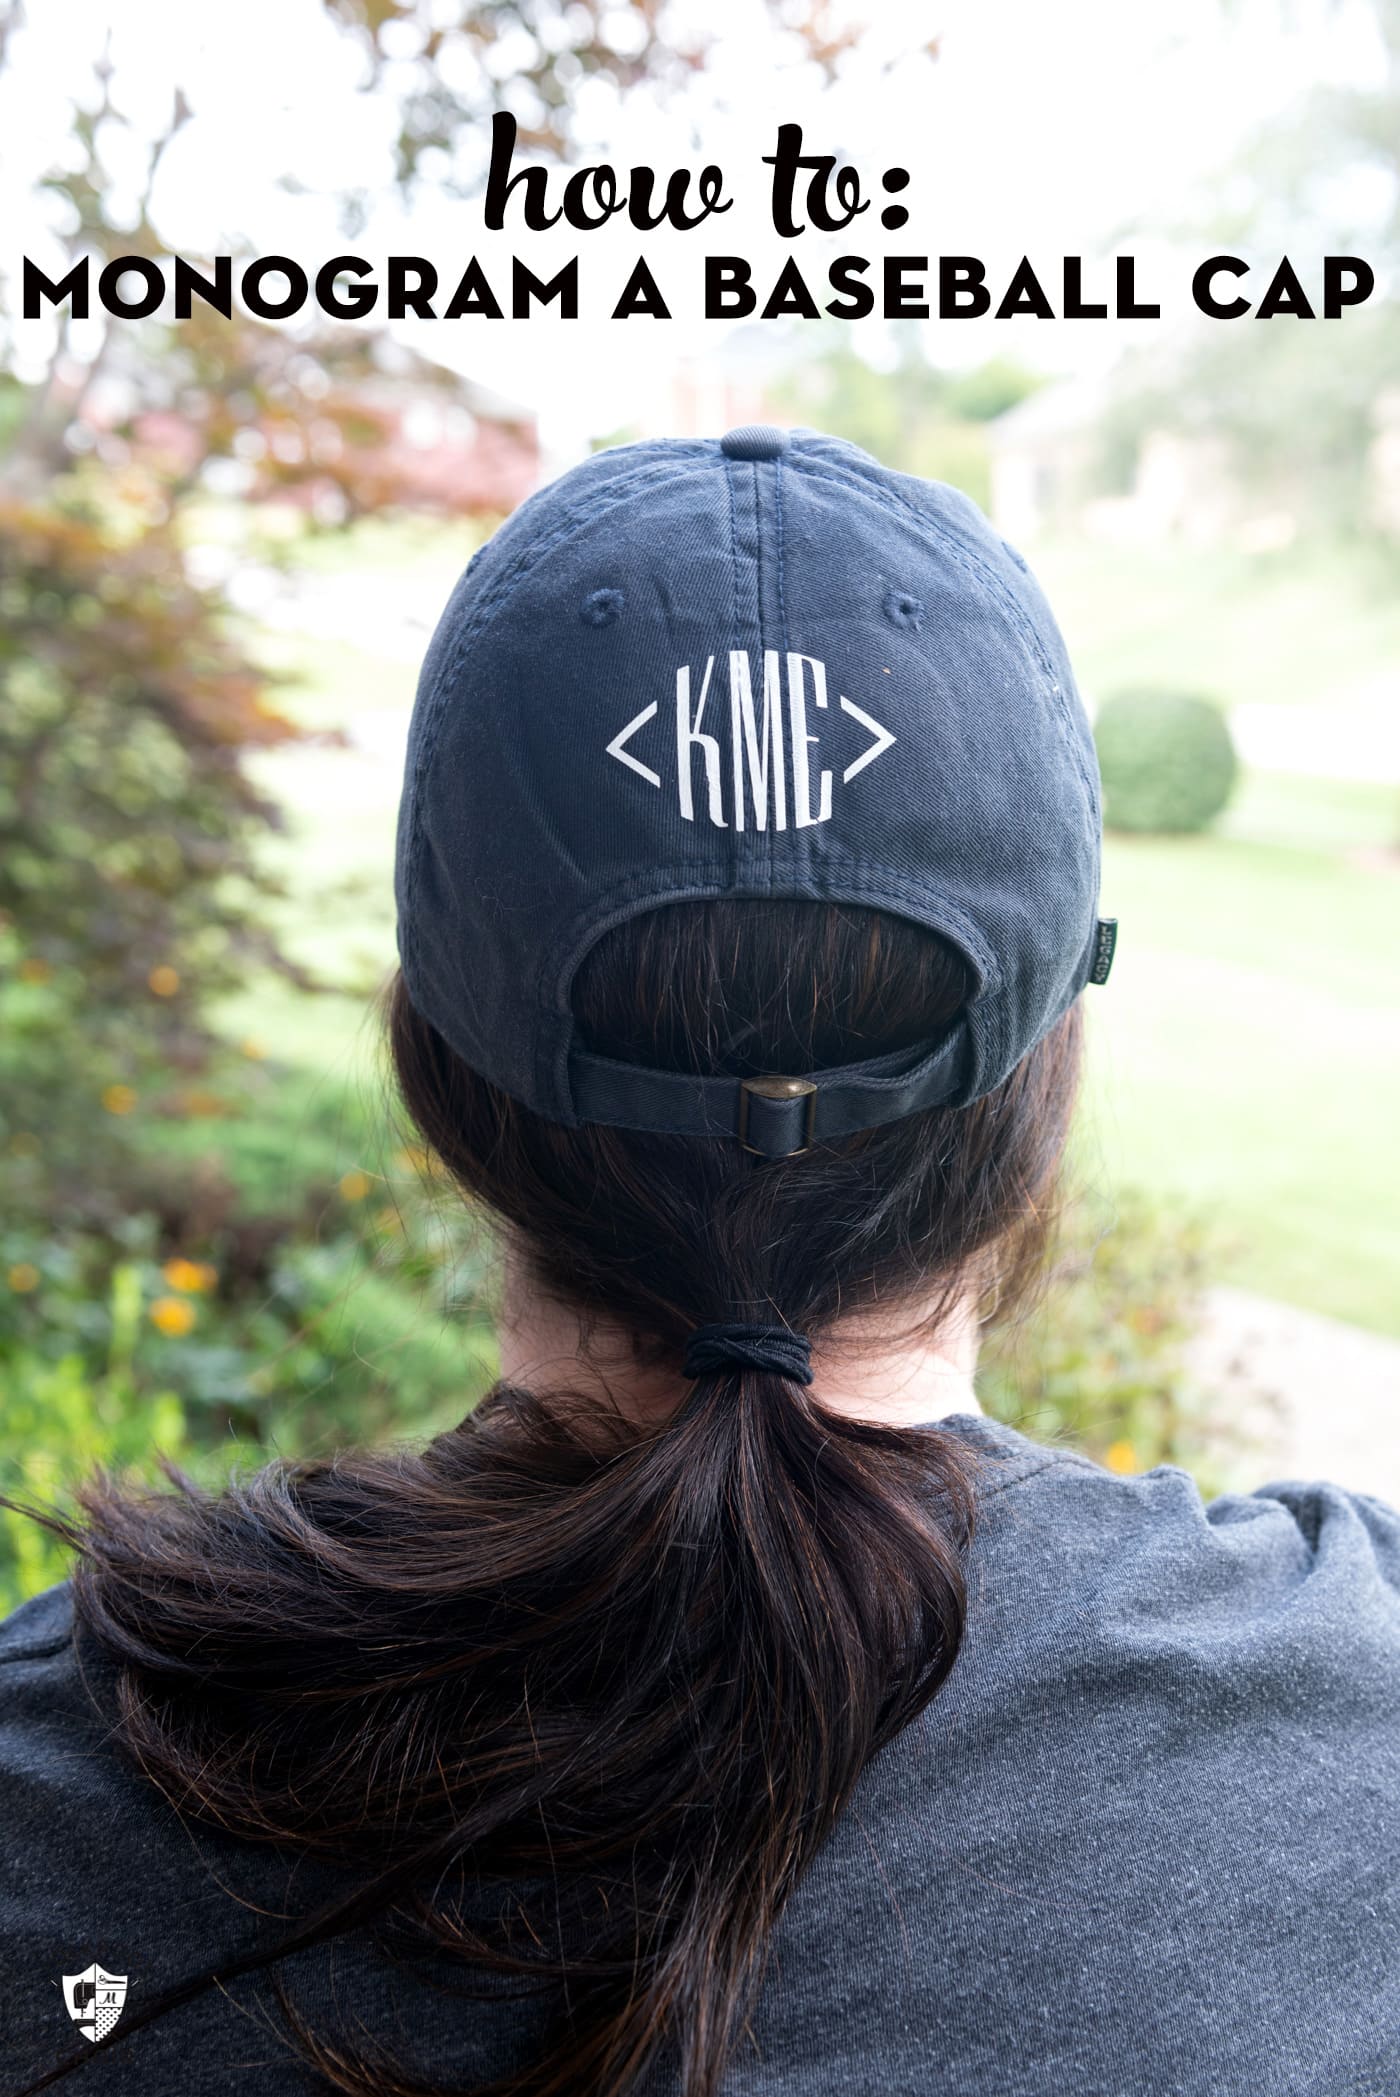
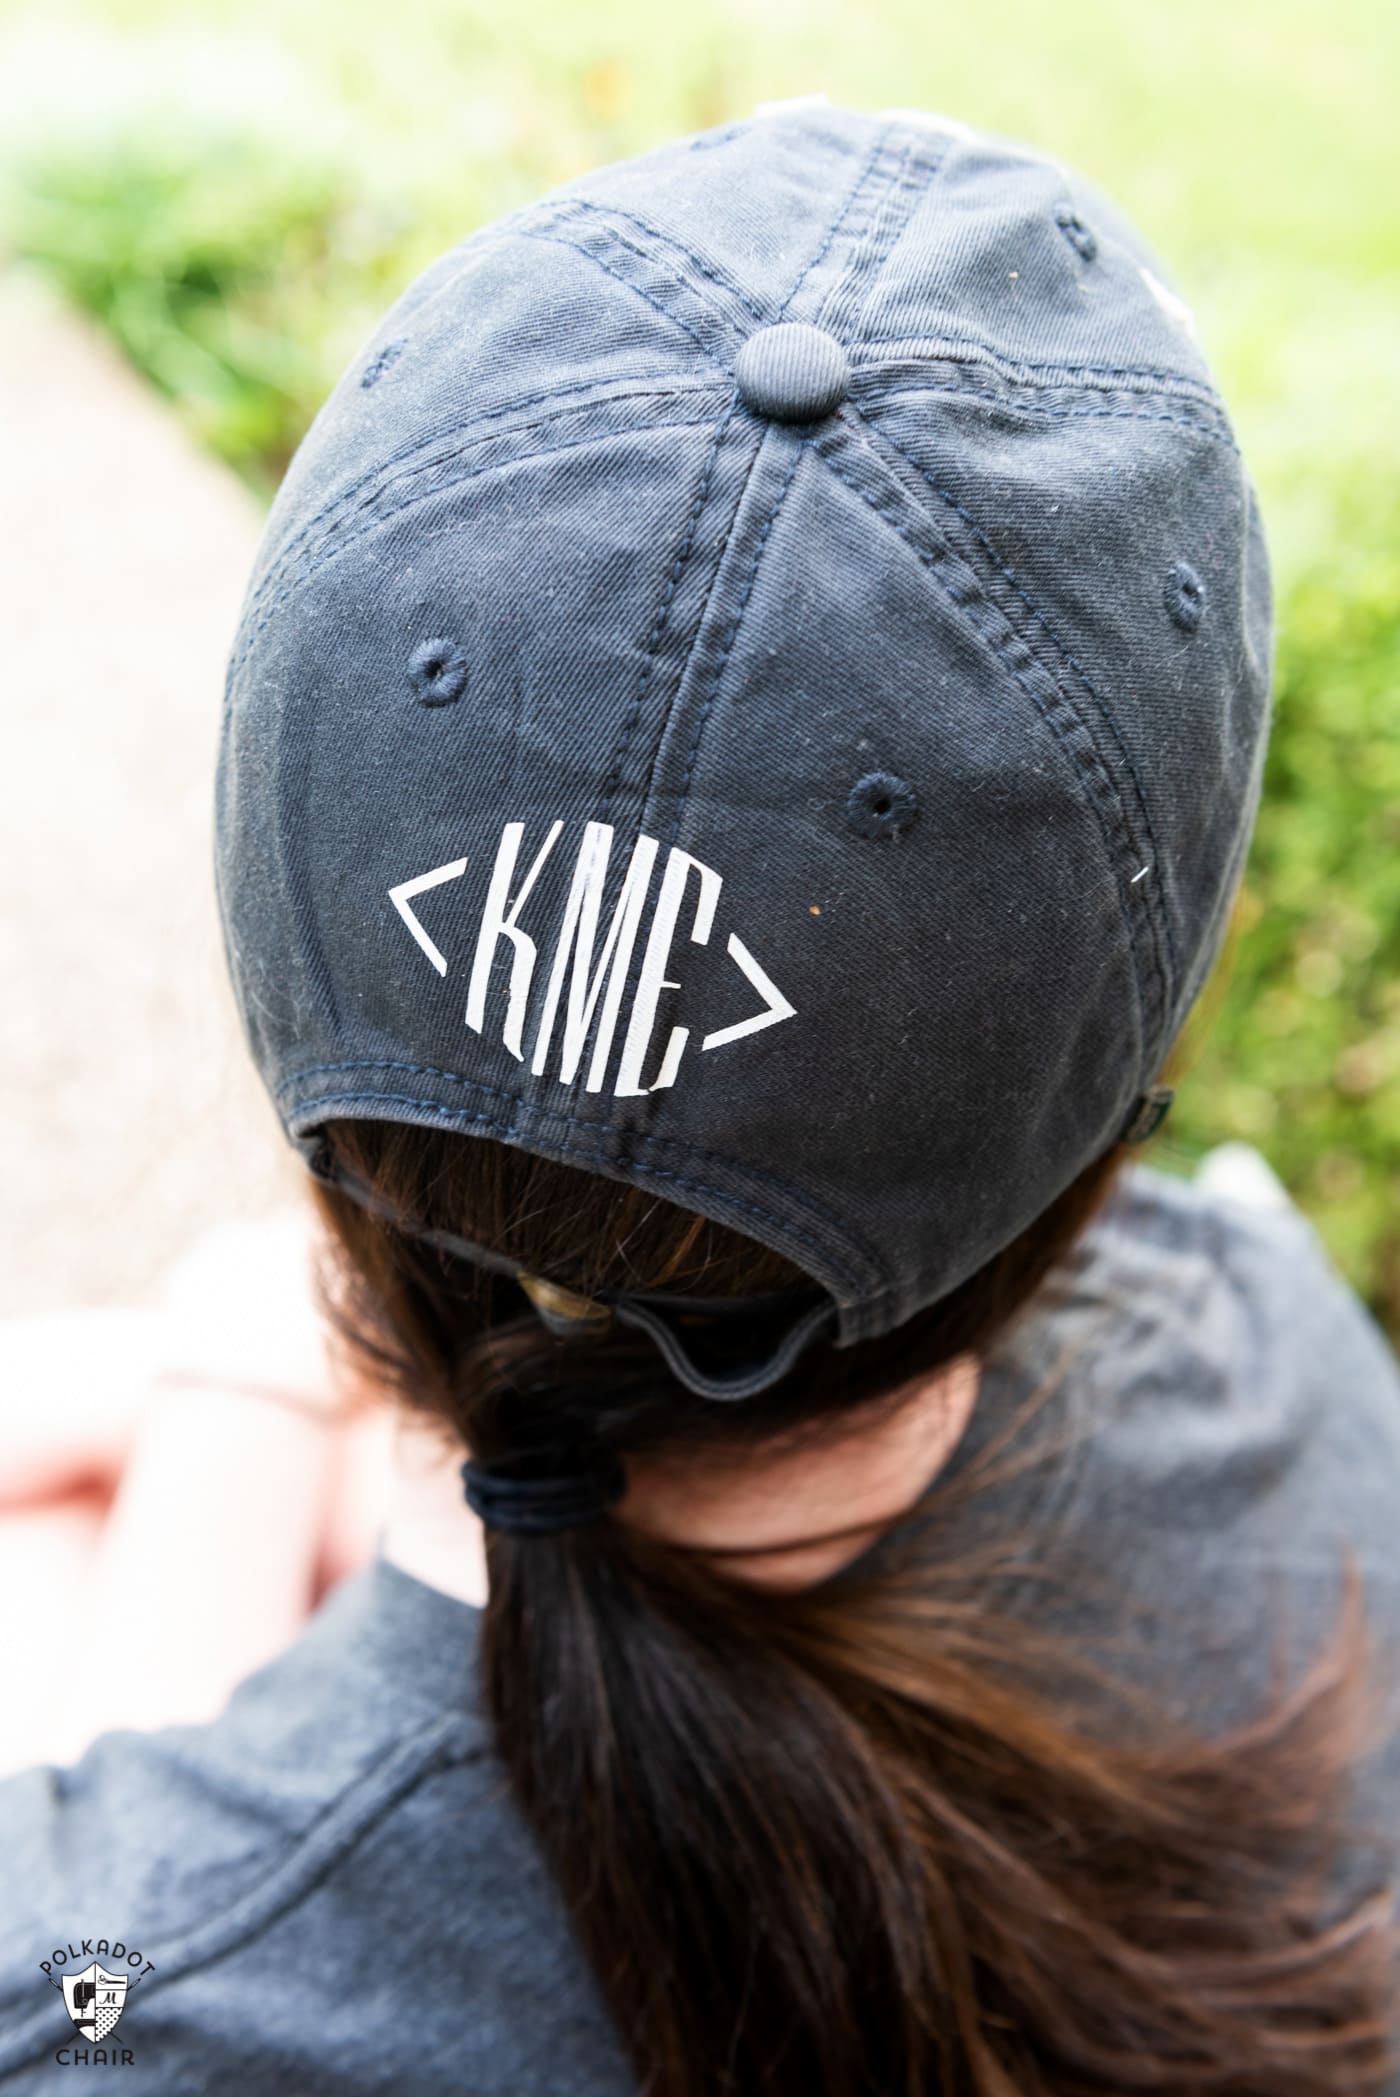
My daughter has been asking me to add a monogram to her baseball cap for a while now and I figured this project would be perfect to test the mini.
How to Add a Monogram to a Baseball Hat:
Supplies:
- Baseball Hat (Cotton)
- Cricut Machine, I use a Cricut Maker
- White Every Day Iron-On Vinyl
- Cricut EasyPress Mini
- Cricut EasyPress Mat
Step One: Cut out Iron-On as you normally would. I used the Monogram letters found in Cricut Design Space to create my letters.

Step Two: Position the weeded iron-on on the hat in the desired location. Place the hat on top of an EasyPress mat.
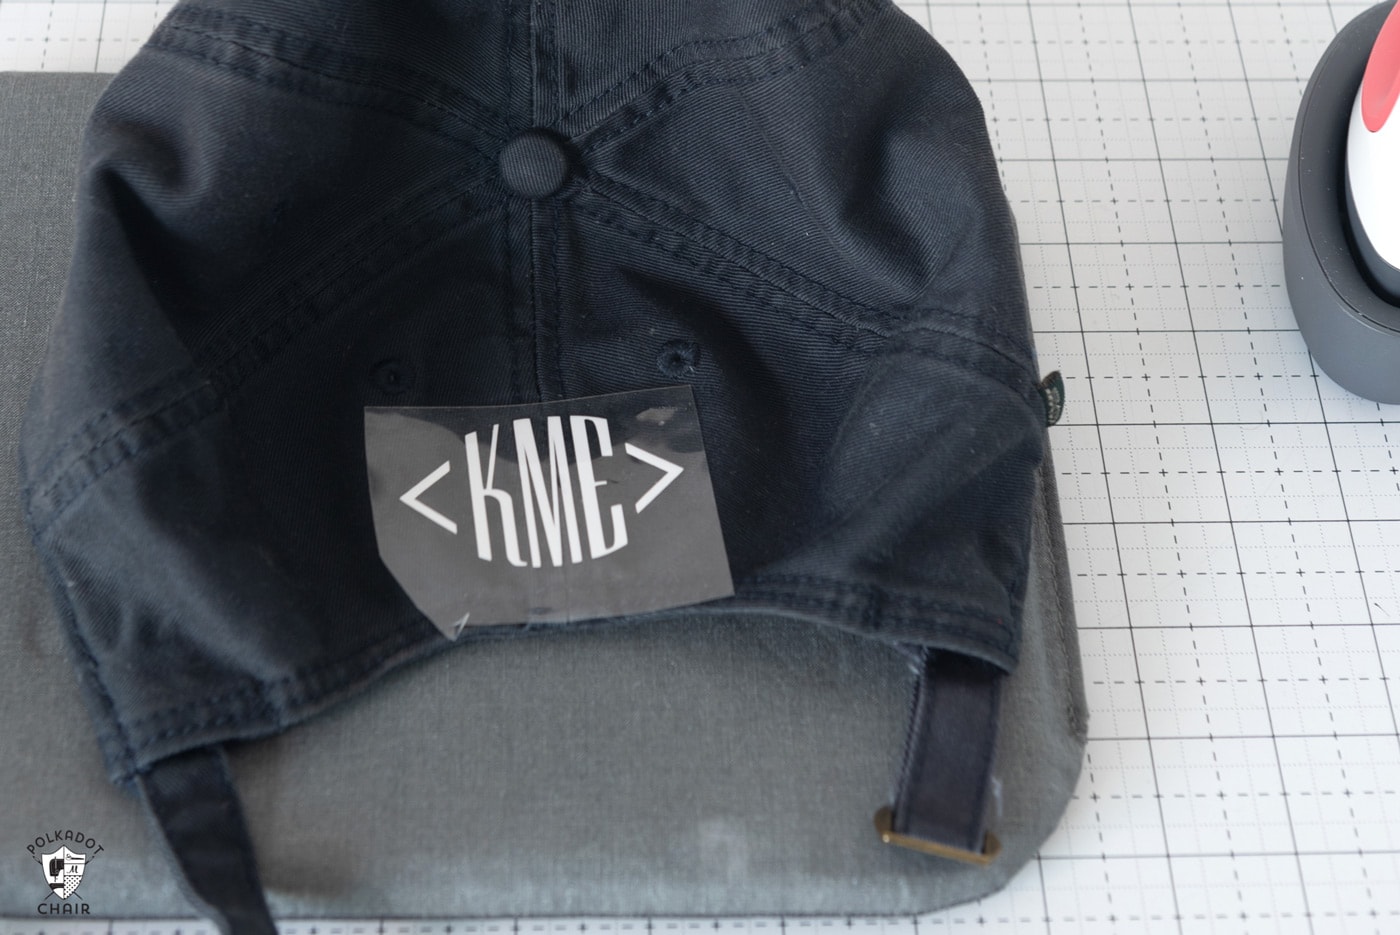
Step Three: Refer to the Cricut Heat Guide for the exact setting time and temperature setting specific to your material. You can find the guide HERE.
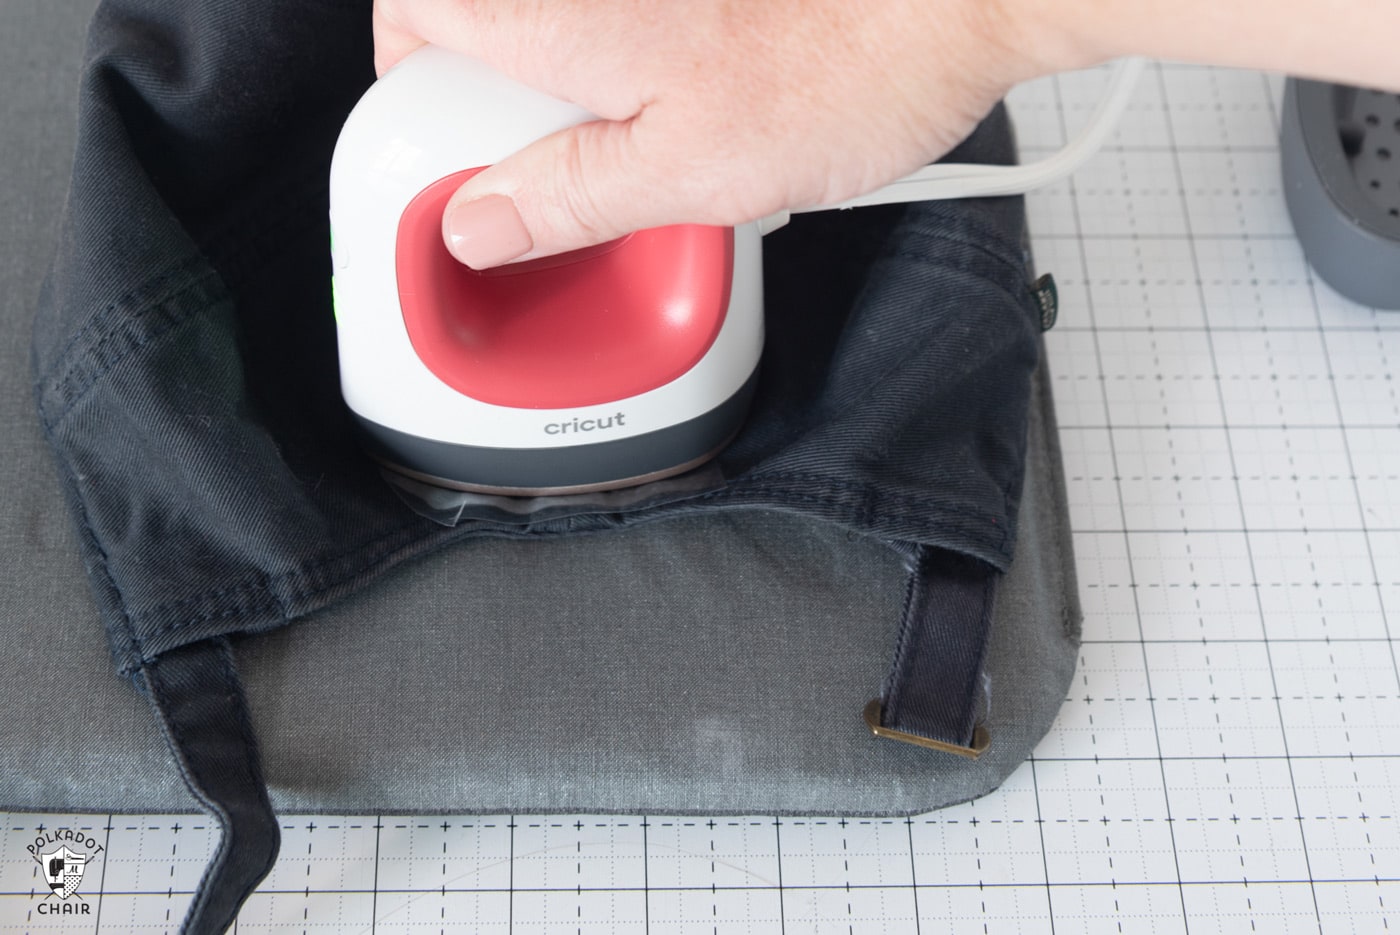
Step Four: Place the EasyPress Mini on the hat and hold it in place. Remove when the time is up. Allow it to cool slightly and remove the backing sheet.
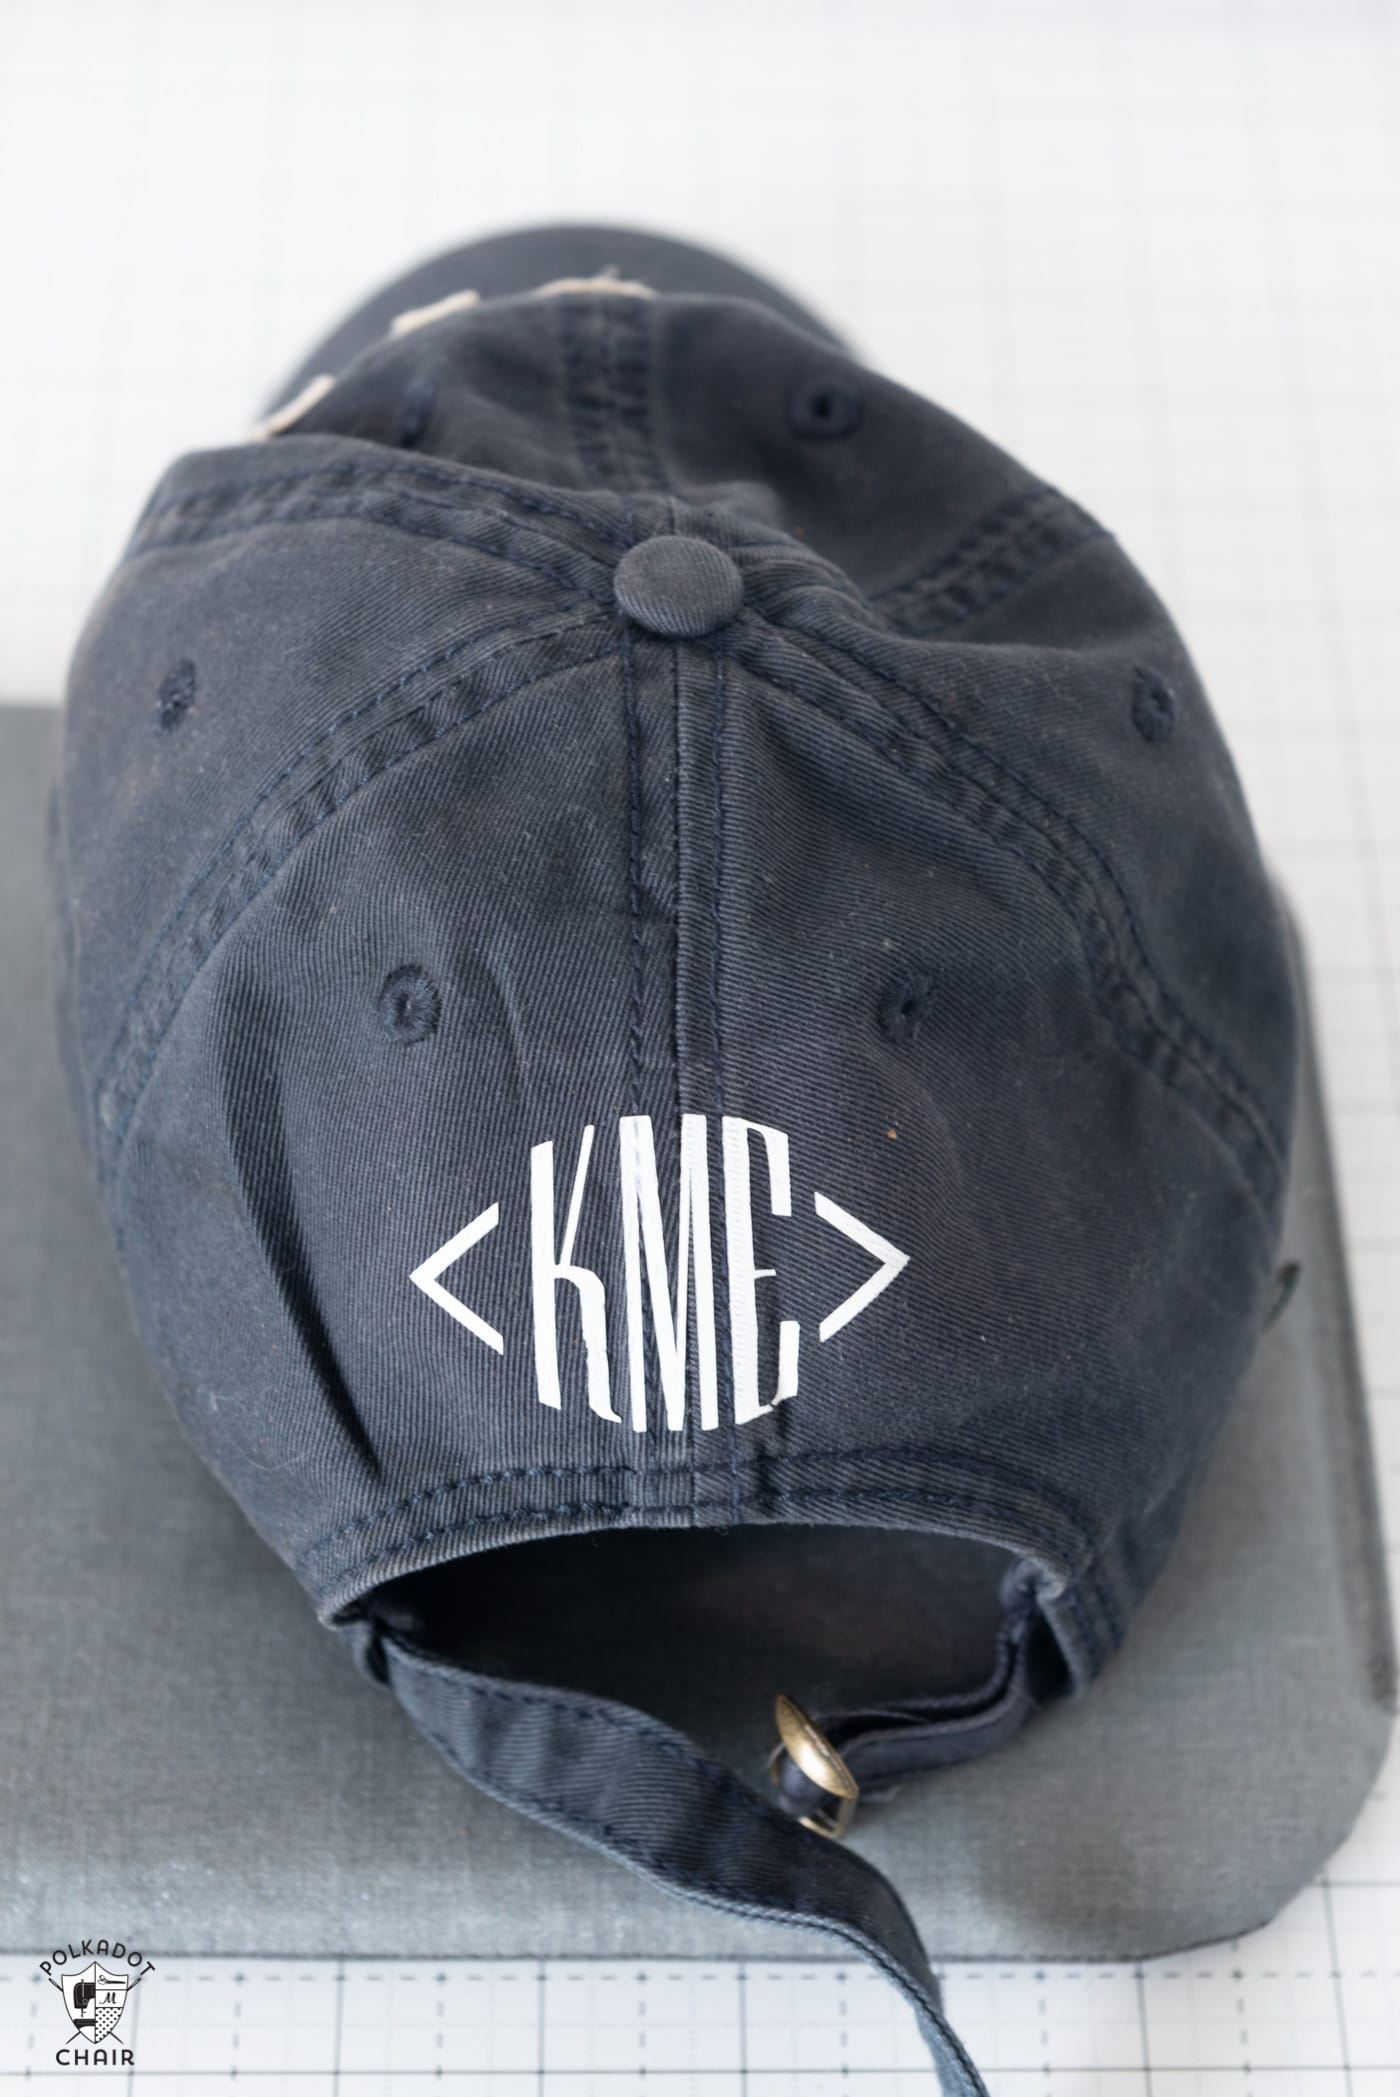
That’s it!
Cricut EasyPress Settings
There is a free tool available on the Cricut site that lists the settings for the Easy Press based on the Cricut product you are using and what you are adhering it to. It’s really easy to use.
Common Settings for the Easy Press Mini
Every Day Iron-On adhered to 100% Cotton or Polyester:
Medium – 25 seconds. Flip and press for 15 seconds. Warm Peel
Every Day Iron-On adhered to Wood:
Medium – 40 seconds. Constant Movement, Firm Pressure. Warm Peel
A few Other EasyPress Projects you may enjoy:
How to add Iron On to a Backpack
How to Use Cricut Infusible Ink
DIY Halloween T-Shirts and EasyPress Review
This is a sponsored conversation written by me on behalf of Cricut. The opinions and text are all mine.


Would you mind sharing where the hat could be purchased online?
Would this be appropriate to use with larger items by moving it around? I am looking to only buy one and don’t know if I should get a larger one or if I could use the small one for all my projects.
I think it would be a pain to keep moving it around. If you don’t think you’ll do much “tiny” iron on I’d just get the standard size one.
What is the actual size of the heat plate and how long is the electrical cord?
Looks like it has marked the hat with the iron shape. Does that actually go away or has the fabric been ‘burned’ a bit? Was interested until I saw that mark on the hat.
No, the fabric was not burned. I took the photos literally 5 minutes after we made the hat ( we were on the way out of town) the mark is because part of the hat is “ironed” and part is wrinkled … you can’t see any mark on the hat now.
Look great, except you can see the imprint of the iron on the hat. It’s visible in all pictures.
See reply above